

Page 1

CH-9101 Herisau/Switzerland
Internet www.metrohm.com
E-Mail info@metrohm.com
TiNet 2.5 Compliant
6.6012.X50
Metrodata
8.110.8353 Instructions for Use
08.08.2003 / dö
Page 2

What's new in TiNet 2.5 SR1?
General
- TiNet 2.5 can be installed in one of the two following versions:
• TiNet 2.5
Basic version of TiNet. Except for some new devices (see below), this version is
identical to TiNet 2.4 and will be described in the 8.110.8243 "TiNet 2.4/2.5"
Instructions for Use.
• TiNet 2.5 Compliant
Extended version of TiNet, which can be configured and run in order to comply
with 21 CFR Part 11. In this program version, password protection, user
administration, electronic signatures, Audit Trail, and method and determination
administration in a database are integrated. The new and different features of this
version compared to TiNet 2.5 are described in these Instructions for Use.
- You can always use methods and data created by older TiNet versions.
Devices
- The 794, 795, 798, and 799 Titrinos can be fully controlled by TiNet.
- The 831 KF Coulometer can be fully controlled by TiNet.
- The 778, 789 and 824 Sample Changers can be fully controlled by TiNet (details see
Online-Help).
All Rights Reserved.
Printed in Switzerland by Metrohm AG, CH-9101 Herisau ©2003
Page 3

Contents
1. Overview .......................................................................5
1.1 Overview of TiNet 2.5 Compliant........................................................5
1.1.1 Purpose of program..........................................................................5
1.1.2 Program parts...................................................................................6
1.1.3 Program sub-directories...................................................................6
1.1.4 General information ..........................................................................7
1.2 Program installation............................................................................ 8
1.2.1 System requirements........................................................................8
1.2.2 Installation of TiNet 2.5 Compliant....................................................8
1.2.3 Installation of the Dongle ................................................................10
1.2.4 Deinstallation of TiNet.....................................................................10
2. Connection of devices and configuration..................11
2.1 Connection of devices ...................................................................... 11
2.2 Configuration.....................................................................................11
2.3 Special settings.................................................................................11
3. Program settings ........................................................13
3.1 Security policies................................................................................ 13
3.1.1 Options for Login/Password protection..........................................13
3.1.2 Audit Trail settings...........................................................................15
3.1.3 Define default strings......................................................................15
3.2 User administration........................................................................... 16
3.2.1 User groups ....................................................................................16
3.2.2 Access policies...............................................................................17
3.2.3 Electronic signatures ......................................................................18
3.2.4 Users............................................................................................... 18
3.3 Login/Logout .....................................................................................19
3.3.1 Login ...............................................................................................19
3.3.2 Logout.............................................................................................20
3.4 Options .............................................................................................. 21
3.4.1 Curve settings.................................................................................21
3.4.2 Print options....................................................................................22
3.4.3 Export settings ................................................................................23
3.4.4 System name.................................................................................. 24
3.4.5 Database options............................................................................25
TiNet 2.5 Compliant Contents • i
Page 4

4. Methods ......................................................................27
4.1 General information on methods......................................................27
4.1.1 Draft methods................................................................................. 27
4.1.2 Database methods......................................................................... 27
4.2 Draft methods....................................................................................28
4.2.1 Create new method........................................................................ 28
4.2.2 Edit existing methods..................................................................... 28
4.2.3 Set method directory...................................................................... 28
4.3 Database methods.............................................................................29
4.3.1 Method administration.................................................................... 29
4.3.2 Save method in database .............................................................. 31
4.3.3 Sign method ................................................................................... 32
4.3.4 Export method................................................................................ 32
4.3.5 Method report................................................................................. 33
4.3.6 Delete method................................................................................ 33
4.3.7 Use signed methods only ..............................................................34
5. Titrations.....................................................................35
5.1 Main window......................................................................................35
5.1.1 Overview......................................................................................... 35
5.1.2 Menu items..................................................................................... 36
5.2 Sample data.......................................................................................38
5.2.1 Sample data entry .......................................................................... 38
5.2.2 View for sample data...................................................................... 40
5.3 Silo memory.......................................................................................41
5.3.1 Display silo memory ....................................................................... 41
5.3.2 Edit silo memory............................................................................. 42
5.3.3 Load, save, and delete silo ............................................................ 44
5.3.4 View results..................................................................................... 44
5.4 Performing titrations .........................................................................46
5.4.1 Preparing single determinations ....................................................46
5.4.2 Preparing sample series................................................................. 46
5.4.3 Buttons for titrations .......................................................................46
5.4.4 Working with connected balance................................................... 47
5.4.5 Karl Fischer titrations...................................................................... 47
5.4.6 Live titration curves......................................................................... 49
5.4.7 Emergency stop ............................................................................. 49
5.5 Parallel titrations ...............................................................................50
5.5.1 Add parallel titration........................................................................ 50
5.5.2 Remove parallel titration................................................................. 50
5.5.3 Rename parallel titration................................................................. 50
ii • Contents TiNet 2.5 Compliant
Page 5

6. Results ........................................................................51
6.1 General information on determination data.....................................51
6.2 TiNet database .................................................................................. 51
6.3 Results overview...............................................................................52
6.3.1 Display of results.............................................................................52
6.3.2 Columns of the results overview table............................................54
6.3.3 Show PDF report.............................................................................55
6.3.4 Print result report.............................................................................56
6.3.5 Sign result .......................................................................................57
6.3.6 Export result.................................................................................... 58
6.3.7 Delete result....................................................................................58
6.3.8 Column view for results overview ...................................................59
6.3.9 Edit filter for results .........................................................................60
6.3.10 Apply filter for results.....................................................................60
7. Working according to 21 CFR 11................................61
7.1 Program settings............................................................................... 61
7.1.1 First login.........................................................................................61
7.1.2 Security policies..............................................................................61
7.1.3 Addition of new administrators.......................................................62
7.1.4 Addition of user groups and users .................................................63
7.1.5 Print options....................................................................................63
7.2 Configuration of devices...................................................................64
7.3 Methods.............................................................................................64
7.3.1 Create new draft methods ..............................................................64
7.3.2 Save methods in the method database .........................................64
7.3.3 Sign methods..................................................................................65
7.3.4 Restrict method selection ...............................................................66
7.4 Results...............................................................................................66
7.4.1 Sign results .....................................................................................66
7.4.2 Show and print result reports..........................................................67
7.5 Audit Trail ..........................................................................................68
7.5.1 Display Audit Trail ........................................................................... 68
7.5.2 Export Audit Trail............................................................................. 69
7.5.3 Delete Audit Trail............................................................................. 70
7.5.4 Column view for Audit Trail .............................................................70
TiNet 2.5 Compliant Contents • iii
Page 6

8. Appendix .....................................................................73
8.1 Software license ................................................................................73
8.2 Declaration of conformity – Software validation..............................74
8.3 Accessories .......................................................................................75
8.3.1 Standard equipment....................................................................... 75
8.3.2 Options ........................................................................................... 75
9. Index ...........................................................................76
iv • Contents TiNet 2.5 Compliant
Page 7

1. Overview
1.1 Overview of TiNet 2.5 Compliant
1.1.1 Purpose of program
The name "TiNet" is derived from Titration Network. TiNet 2.5 Compliant is
a comprehensive program package for titrations. It offers the following
possibilities:
• Several Titrinos, KF Coulometers, Sample Changers, Dosimats and
Conductometers can be used in a single method.
• IF conditions, messages and requests can be incorporated in the
method sequence.
• The layout of reports can be designed.
For the performance of the determinations, you use the main window.
Here, you control and monitor all important data.
• You can enter sample data manually or via a connected balance.
• Sample data can also be entered for future use in (different) sample
data memories (silos).
• You are shown the status of the sample processing.
• Live Titration curves are displayed.
• You can also perform several determinations at different wet work-
stations simultaneously (parallel titrations).
TiNet 2.5 Compliant can be installed, configured and used in order to
comply to the requirements for using electronic documentation and signatures according to 21 CFR Part 11. For this purpose, the program contains
password protection, user administration, electronic signatures, Audit Trail
and administration of methods and results in databases.
TiNet 2.5 Compliant Overview • 5
Page 8

1.1.2 Program parts
Instead of the TiNet panel of previous program versions, TiNet 2.5 Compliant comprises a new main window for performance of determinations.
From this main window, the other independent program parts can be
called up:
TiNet 2.5 Compliant
Main window of TiNet. Here you handle your daily work: You start titrations and enter sample data (see section 5.1).
TiNet 2.5 – Configuration
Here you register the connected devices, as well as manage common variables and calibration data (see section 2).
TiNet 2.5 – Methods
Here you edit new or existing draft methods (see section 4).
Method administration
Here you organize method versions in the method database according to 21 CFR 11 (see section 4.3).
Results
Here you can view and print the original results stored in the result
database according to 21 CFR 11 (see section 6.3).
TiNet 2.5 – Results
The titration results are also stored (not according to 21 CFR 11) in
the so-called "TiNet database". Here, you can display, sort, view and
recalculate your data (see section 6.2).
1.1.3 Program sub-directories
The installation program copies the files from the installation CD to the
drive and directory you specify and creates the following sub-directories:
..\Bin Includes all files needed for the program package.
..\Data Default directory for method, result and Audit Trail data-
bases.
..\Database Default directory for the TiNet database of the program
part "Results".
..\Doc
..\Export Default directory for data exported.
..\Methods
Includes several PDF documents concerning TiNet.
Default directory for draft methods.
..\Methods\Standard
Includes the TiNet standard methods.
..\Results
Default directory for the raw results generated during the
course of the methods.
..\Silo
..\Tmp
Default directory for silo memories.
Default directory for PDF report files.
6 • Overview TiNet 2.5 Compliant
Page 9
1.1.4 General information
Help
You can use the <F1> key to request context-sensitive help for the current topic anywhere in the program.
Magenta texts always identify the dialog point in the corresponding win-
dow. In some cases, the color is also used to highlight
important information.
Green texts You can click on these texts to branch to other Help top-
ics.
You will always find these two buttons in the toolbar of the
program parts. If you press <?>, the list of contents of
Help appears for the corresponding program part. With
<Ñ?> you obtain direct help on the individual (menu)
items. Click the button. The pointer is now shown as a ?.
Move this pointer to the point on which you require help.
Backup
You should back up your data at regular intervals using a long time archiving system.
Select the following sub-directories for backup:
Data (method, result and Audit Trail databases)
•
Database (TiNet database)
•
Methods (draft methods)
•
Results (raw results which have not yet been read into the database)
•
Silo (sample data memories)
•
Tmp (PDF files)
•
TiNet 2.5 Compliant Overview • 7
Page 10
1.2 Program installation
1.2.1 System requirements
Computer recommended Pentium processor
Operating system Windows 98/Me, Windows NT 4.0,
Windows 2000 (recommended), Windows XP
Disk space Program: min. 30 MB on hard disk
Data: min. 150 MB
RAM recommended 32 MB
ComPorts 1 free COM port per connected device
LPT 1 free LPT per connected Sample Changer with 664
Control Unit
1.2.2 Installation of TiNet 2.5 Compliant
Note: Start directly with Step 5, if you do not want to generate and print
PDF reports.
1. If the Adobe Acrobat Reader program is not already installed on the
computer, open the Acro5/English directory for Adobe Acrobat Reader
installation on the installation CD and start the
2. After completion of the installation, open Acrobat Reader, accept the
contract, open a PDF file, print it, and close Acrobat Reader.
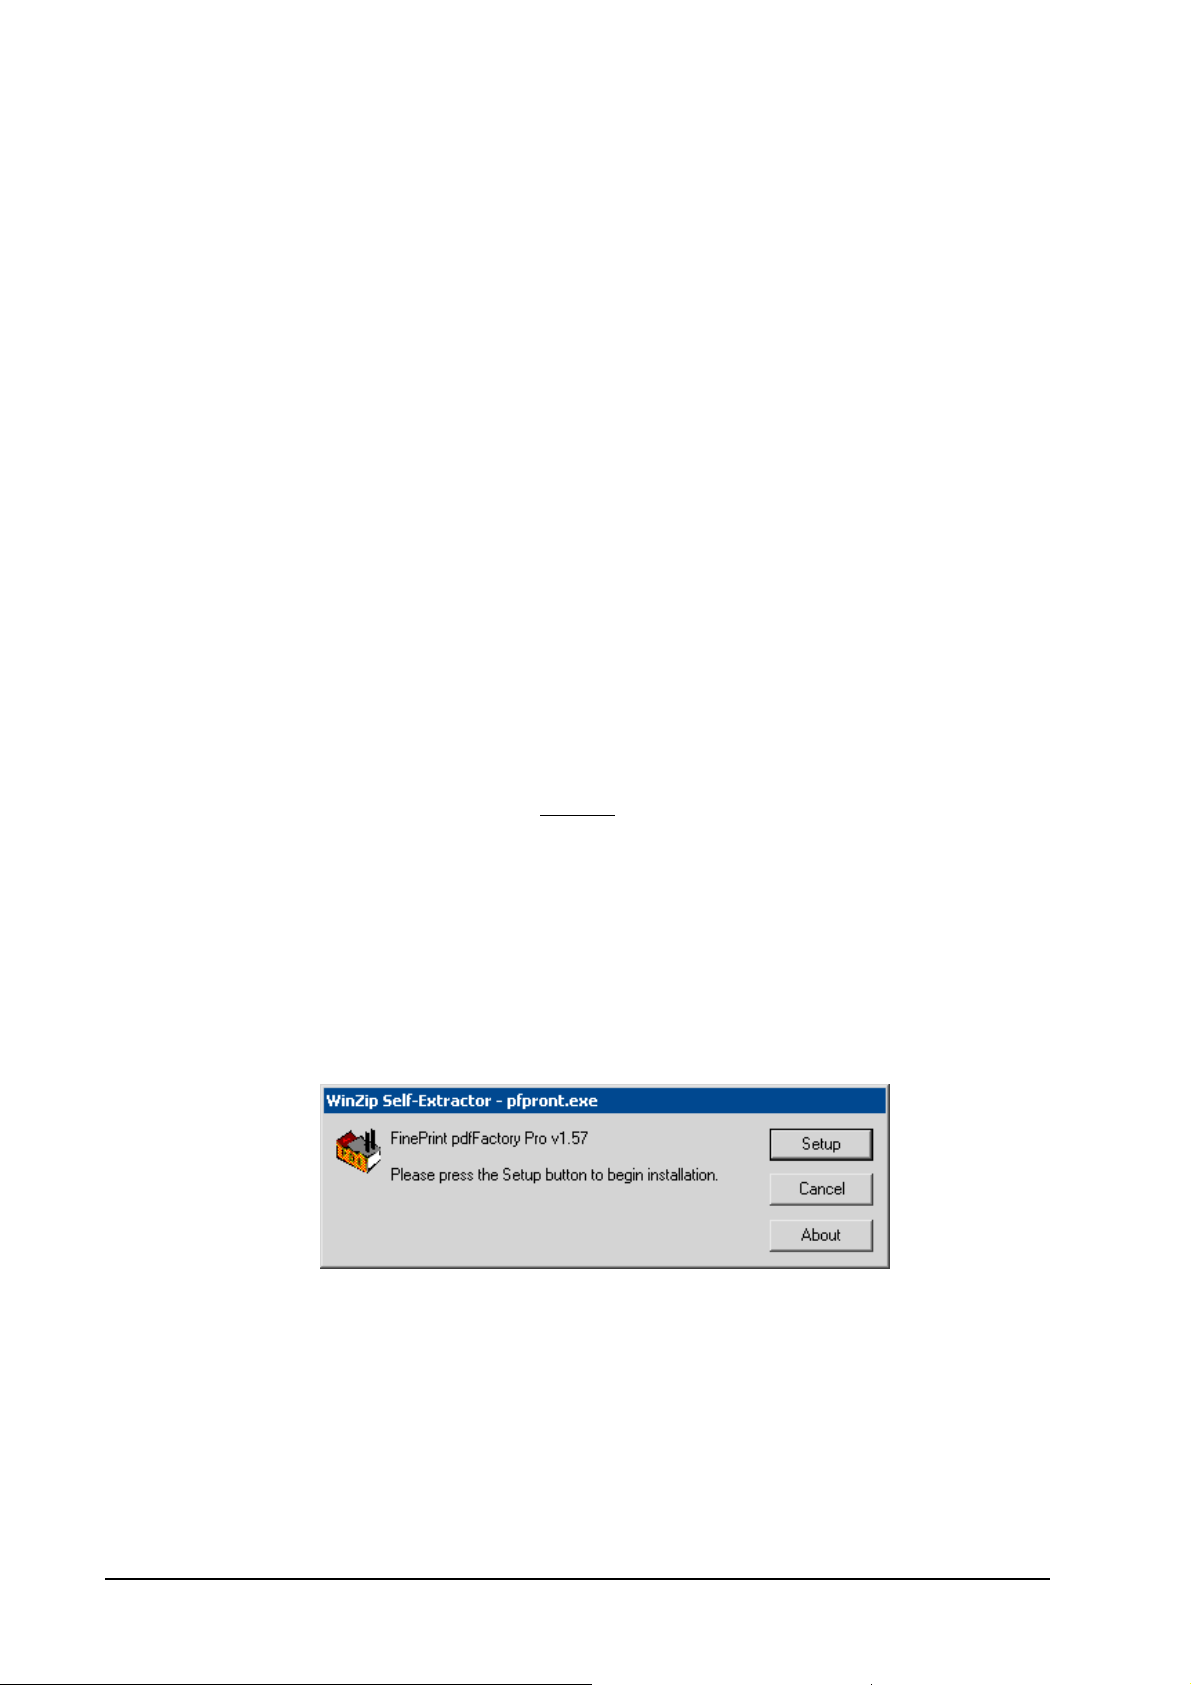
3. Open the
printer driver installation on the installation CD. According to your operating system, open the
*.exe file.
4. Click on <Setup> and confirm the installation procedure with <Yes>.
Important: The installed printer driver "FinePrint pdfFactory Pro" is a
shareware version with all functions, which creates a message on
each report. If you like to print reports without this message, the full
version of "PDF Factory Pro" must be purchased. You will find ordering
information on www.fineprint.com/company/resellers.html.
PDFFact/English directory for Fineprint PDFFactory Pro
95_98_ME or NT2000XP directory and start the
*.exe file.
5. Install TiNet 2.5 from the installation CD and proceed according to the
installation wizard until the window Installation versions appears.
8 • Overview TiNet 2.5 Compliant
Page 11
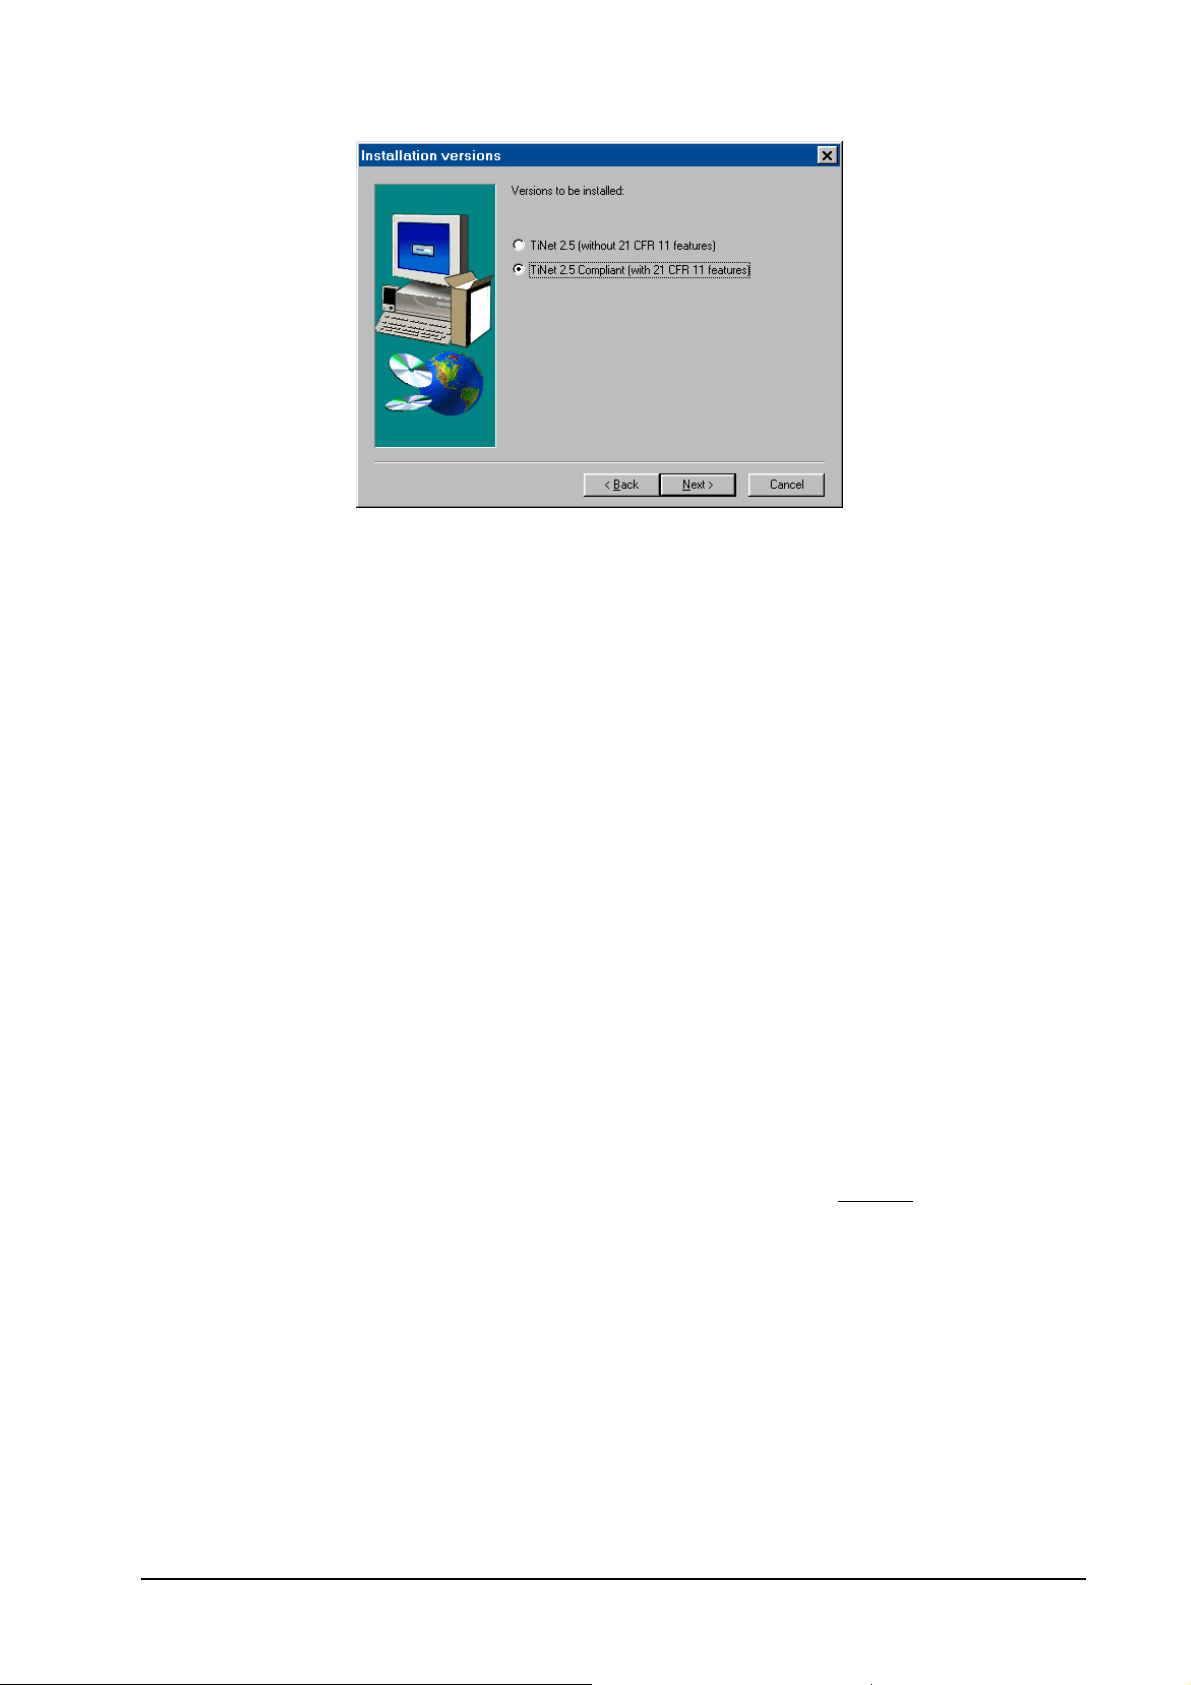
6. Select the option
on
Next>.
7. Select the installation directory and click on
TiNet 2.5 Compliant (with 21 CFR 11 features) and click
Next>. The "TiNet 2.5
Compliant" program will be installed.
8. Click on
9. Open the TiNet 2.5 Compliant program. The
Finish> to complete the installation.
Login window appears
(see section 7.1.1).
10. Enter "
Admin" for User name and "TiNet2" for Password. Click on <OK>.
11. Select Extra/Options/Print options to open the Print options window (see
section 3.4.2).
12. In the
tion and select the
Print options for TiNet reports box, enable the Special printer op-
FinePrint pdfFactory Pro printer driver.
13. Select the directory to which PDF reports will be saved. There must be
no ‘.’ (dot) in the whole path!
14. Select a
Delay for the PDF creation. It is not recommended to select
shorter times than 45 sec. Note that this is the minimum method duration time (add a WAIT block to the method if the duration time is
shorter than this delay)!
15. Enable or disable the option for immediate printing of PDF reports.
This requires the installation of Adobe Acrobat Reader (see Step 1).
16. Click on
<OK> to close the Print options window and close the pro-
gram.
17. Create a new method containing a WAIT block (waiting time 60 s), a
CALC block (with a calculation formula "RS = SmplSize") and a
REPORT block (text field, "Print immediately" activated).
18. Start the method.
19. If you are working with a NTFS file system, make sure that all Windows
users have read and write privileges for all subdirectories of the program directory, for the method directory, for all export directories defined in the program and for C:\ and the two files
TINET2.INI in the Windows directory.
WIN.INI and
TiNet 2.5 Compliant Overview • 9
Page 12

20. Make sure that all Windows users have read and write privileges for
the following registry keys and subkeys (use
and modify the permissions):
a. HKEY_CURRENT_USER\Software\FinePrint Software\pdfFactory
b. HKEY_LOCAL_MACHINE\Software\Classes\Tinet2
c. HKEY_LOCAL_MACHINE\Software\Metrohm\TiNetCom
d.
HKEY_LOCAL_MACHINE\Software\Adobe
f.
HKEY_LOCAL_MACHINE\Software\PDFReport (only displayed after
first PDF printout)
HKEY_CLASSES_ROOT (write privileges)
g.
21. Restart the computer.
22. Please send us your registration card as soon as possible so that we
can register you as an official user of TiNet. Only registered users will
get updated program versions at a special price.
1.2.3 Installation of the Dongle
The 6.2145.000 or 6.2145.060 Dongle is part of the scope of delivery of
the full program versions. Set this Dongle on LPT-Port 1 or 2 (if possible
on the LPT Port where you connected the printer, not on the Sample
Changer Port). The printer cable is set onto the Dongle. Starting TiNet, the
Dongle will be checked.
REGEDT32.EXE to view
If you set the dongle onto a different LPT after installing TiNet, proceed as
follows:
• Close TiNet.
• Start the
• Select the
iniedit.exe program in the Bin directory of TiNet.
Miscellaneous tab and click on <Apply>.
If you make an update of an older version of TiNet, first set the dongle
on the LPT (see above) before you start TiNet. Do not
"4COM card" during the installation.
A demonstration version can be used for 100 days. After this 100 days
you may continue to use the program, but you cannot start any determination. You can upgrade your demonstration version at any time if you set a
6.2145.000 or 6.2145.060 Dongle on the LPT Port of your computer.
Note: The use of TiNet 2.5 Compliant without dongle as demo version
is not recommended.
1.2.4 Deinstallation of TiNet
click the option
After uninstalling TiNet you will get a dialog with the button <Detail>. Here
you will find a list of directories which could not be deleted.
10 • Overview TiNet 2.5 Compliant
Page 13

2. Connection of devices and configuration
2.1 Connection of devices
You will find detailed information on connecting devices and adding additional interfaces in the 8.110.8243 Instructions for Use "TiNet 2.4/2.5",
section 2.
2.2 Configuration
You will find detailed information on the lists of devices, calibration data
and common variables in the 8.110.8243 Instructions for Use "TiNet
2.4/2.5", section 5.
2.3 Special settings
You will find detailed information on the special settings which can be set
by the INIEDIT.EXE program in the 8.110.8243 Instructions for Use "Ti-
Net 2.4/2.5", section 9.
TiNet 2.5 Compliant Connection of devices and configuration • 11
Page 14

12 • Connection of devices and configuration TiNet 2.5 Compliant
Page 15
3. Program settings
3.1 Security policies
TiNet 2.5 Compliant, Extra, Security policies
This menu item opens the Security policies window for definition of login
options, password protection, Audit Trail, electronic signatures and default
strings.
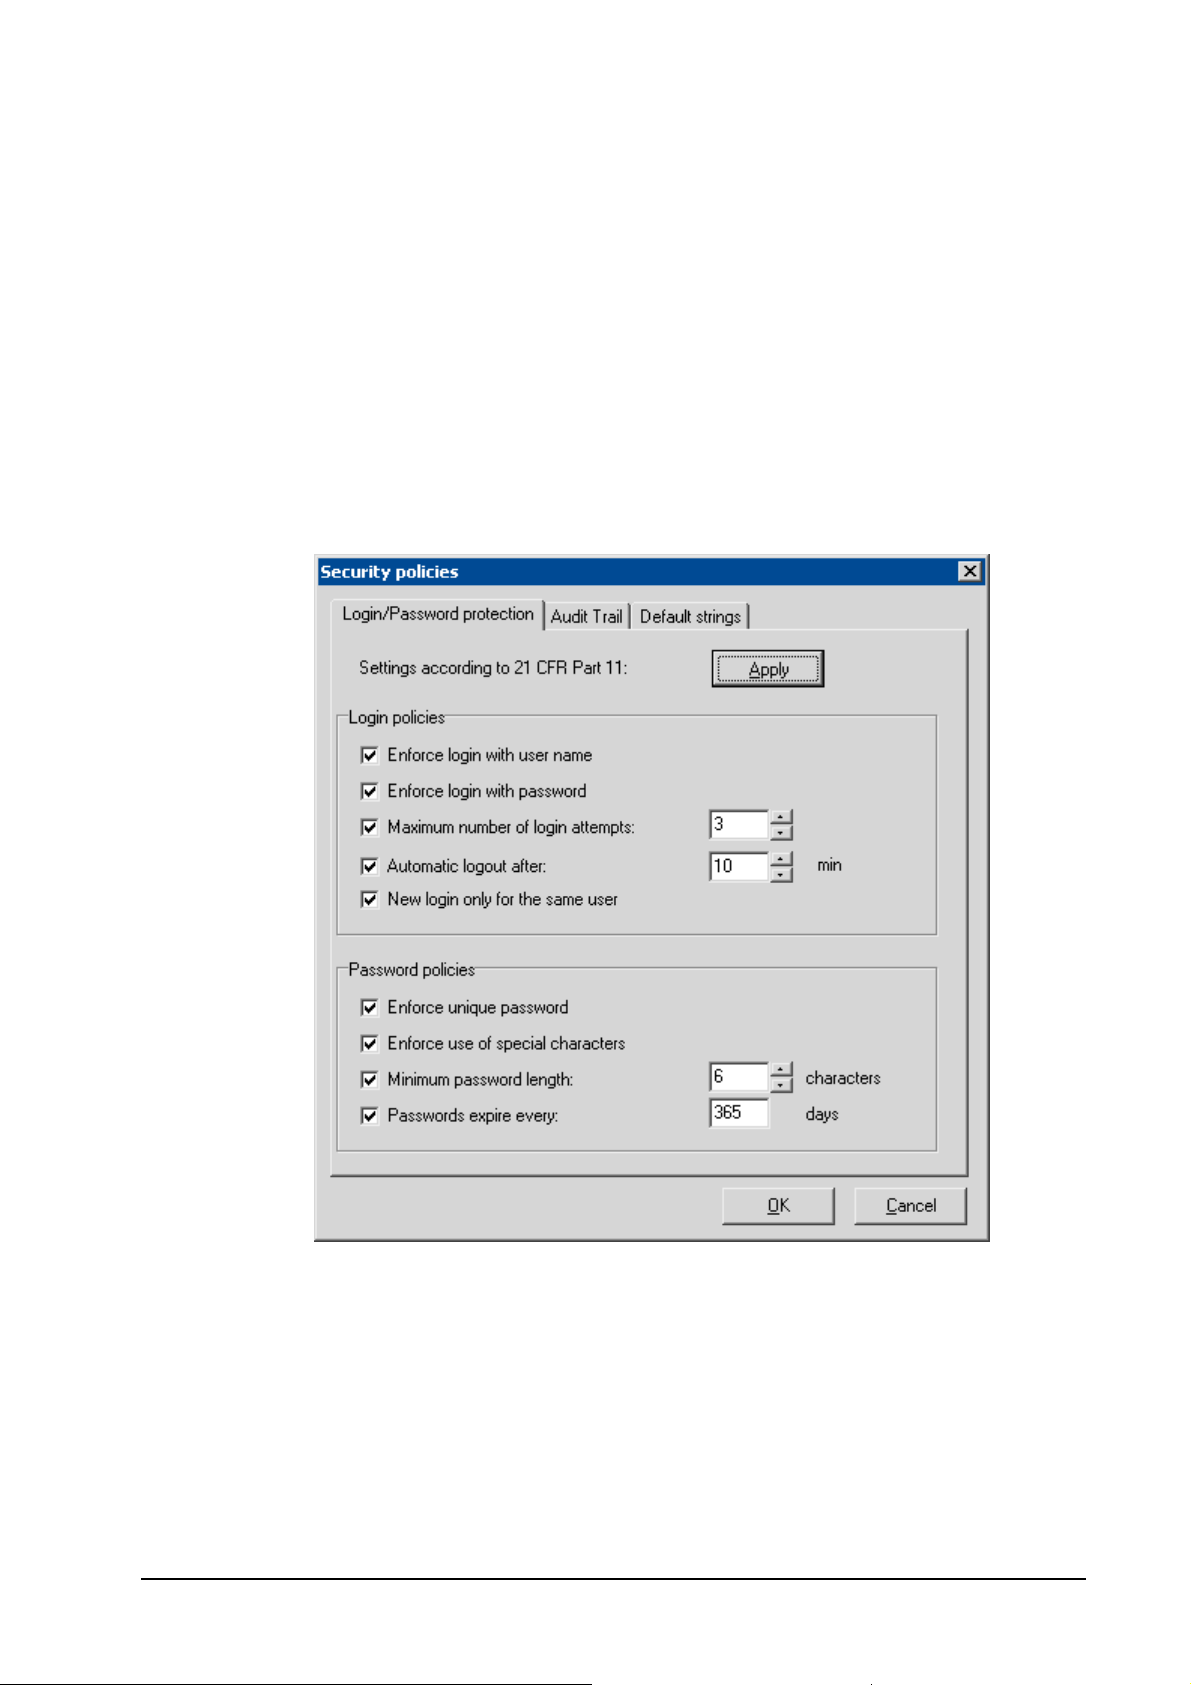
3.1.1 Options for Login/Password protection
Settings according to 21 CFR 11:
<Apply> sets all login and password options to default settings
according to 21 CFR Part 11.
Login policies
Enforce login with user name ([on], off)
If this option is enabled, every user must enter her/his user
name in the Login window at every program start. If this option
is disabled, no login is required. The following login and password policies are meaningless and will be set to inactive (gray).
TiNet 2.5 Compliant Program settings • 13
Page 16

Enforce login with password ([on], off)
If this option is enabled, every user must enter user name and
password in the Login window at every program start. If this option is disabled, no login is required. The following login and
password policies are meaningless and will be set to inactive
(gray).
Maximum number of login attempts ([on], off); 2...[3]...6)
If this option is enabled, a user is set to "inactive" as soon as the
maximum number of login attempts is exceeded. The counter
for login attempts is set to zero for all users at every new start
of the program.
Automatic logout after ([on], off); 1...[10]...60 min)
If this option is enabled, the user is logged out automatically if
no operating function via mouse or keyboard is done during
the defined delay time.
New login only for the same user ([on], off)
If this option is enabled, only the same user can login after
automatic logout. In any case, user with administrator privileges can always login.
Password
Enforce unique password ([on], off)
If this option is enabled, passwords must be unique. Expired
passwords are treated like active passwords, so every password can only be used once.
Enforce use of special characters ([on], off)
If this option is enabled, a password must contain at least one
special character.
Minimum password length ([on], off; 1...[6]...40 characters)
If this option is enabled, the password must have the set number of characters.
Passwords expire every ([on], off; 1...[365]...999 days)
If this option is enabled, a new password must be entered after
the expiration time.
14 • Program settings TiNet 2.5 Compliant
Page 17
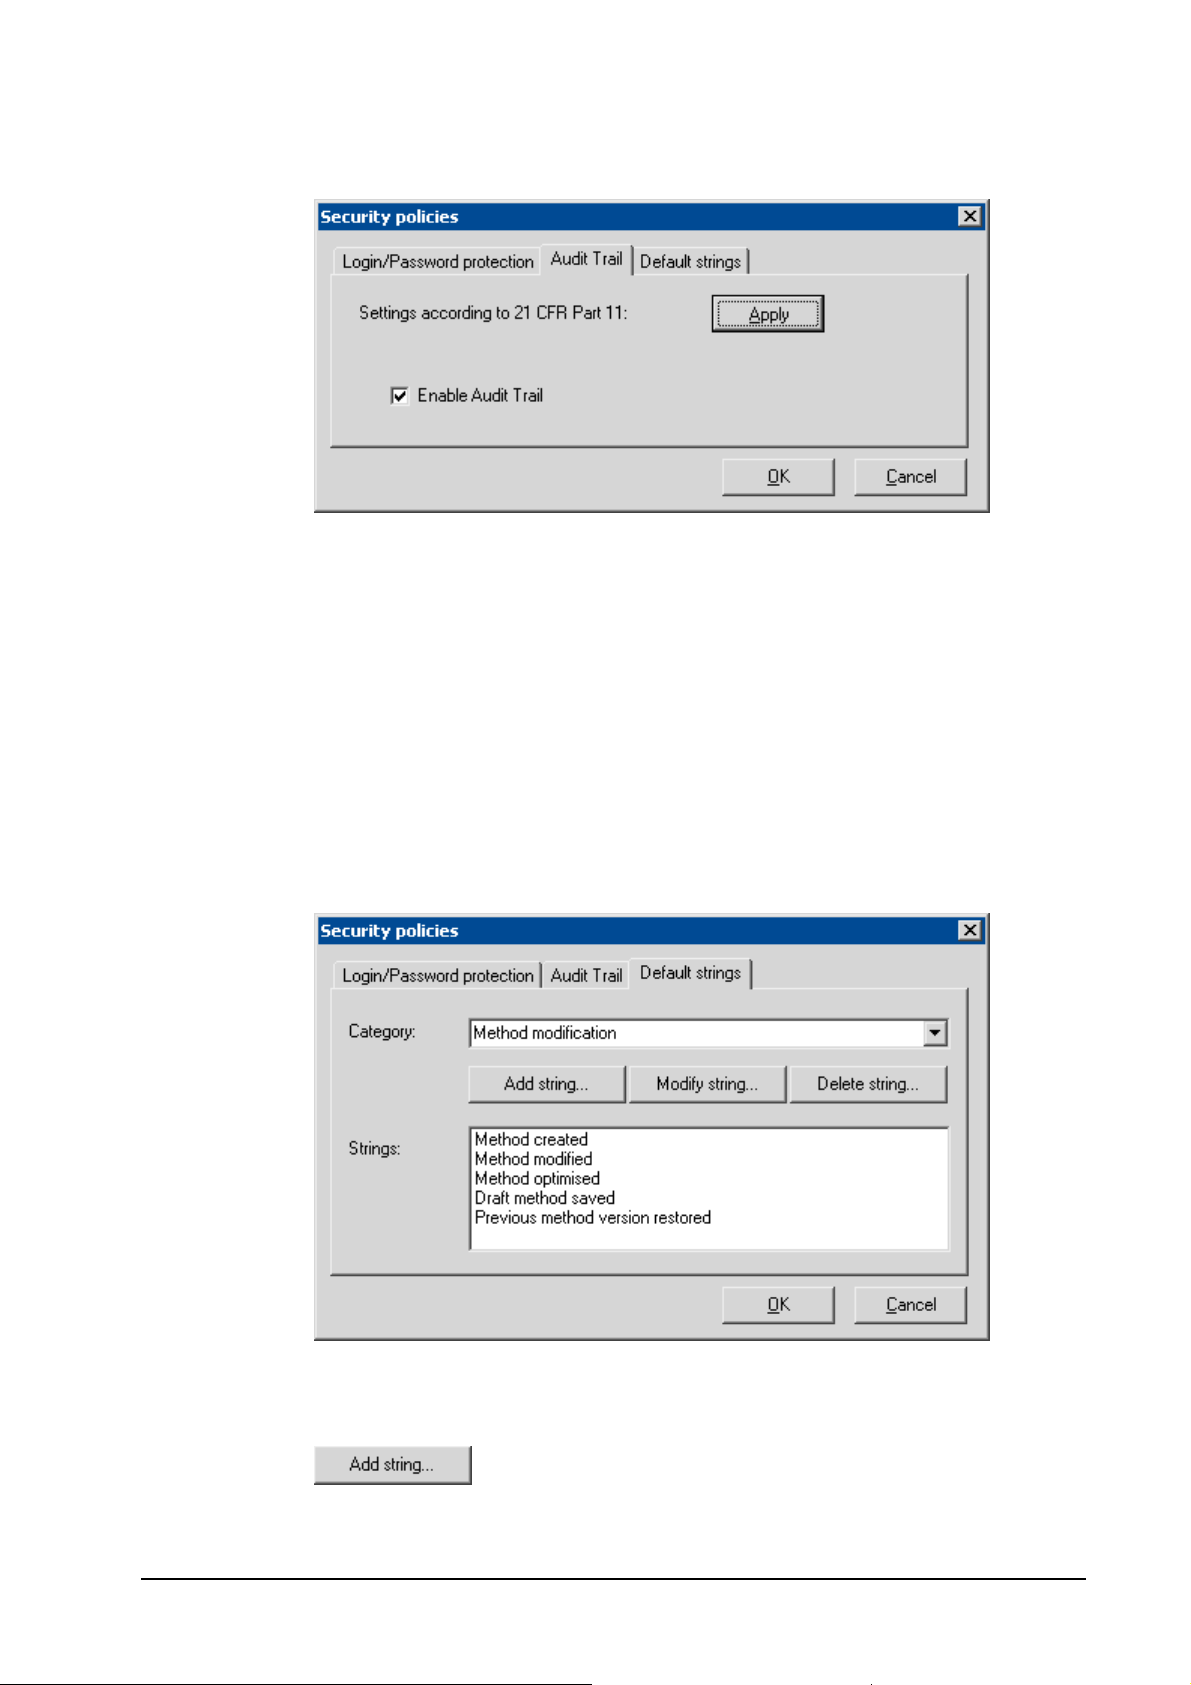
3.1.2 Audit Trail settings
Settings according to 21 CFR Part 11:
<Apply> sets all Audit Trail options to default settings accord-
ing to 21 CFR Part 11.
Enable Audit Trail ([on], off)
If this option is enabled, all program actions defined as Audit
Trail actions are registered automatically in the Audit Trail database.
3.1.3 Define default strings
Category: Selection of the category, for which default strings can be de-
fined.
Add new default string. The window for entering default strings
is opened.
TiNet 2.5 Compliant Program settings • 15
Page 18
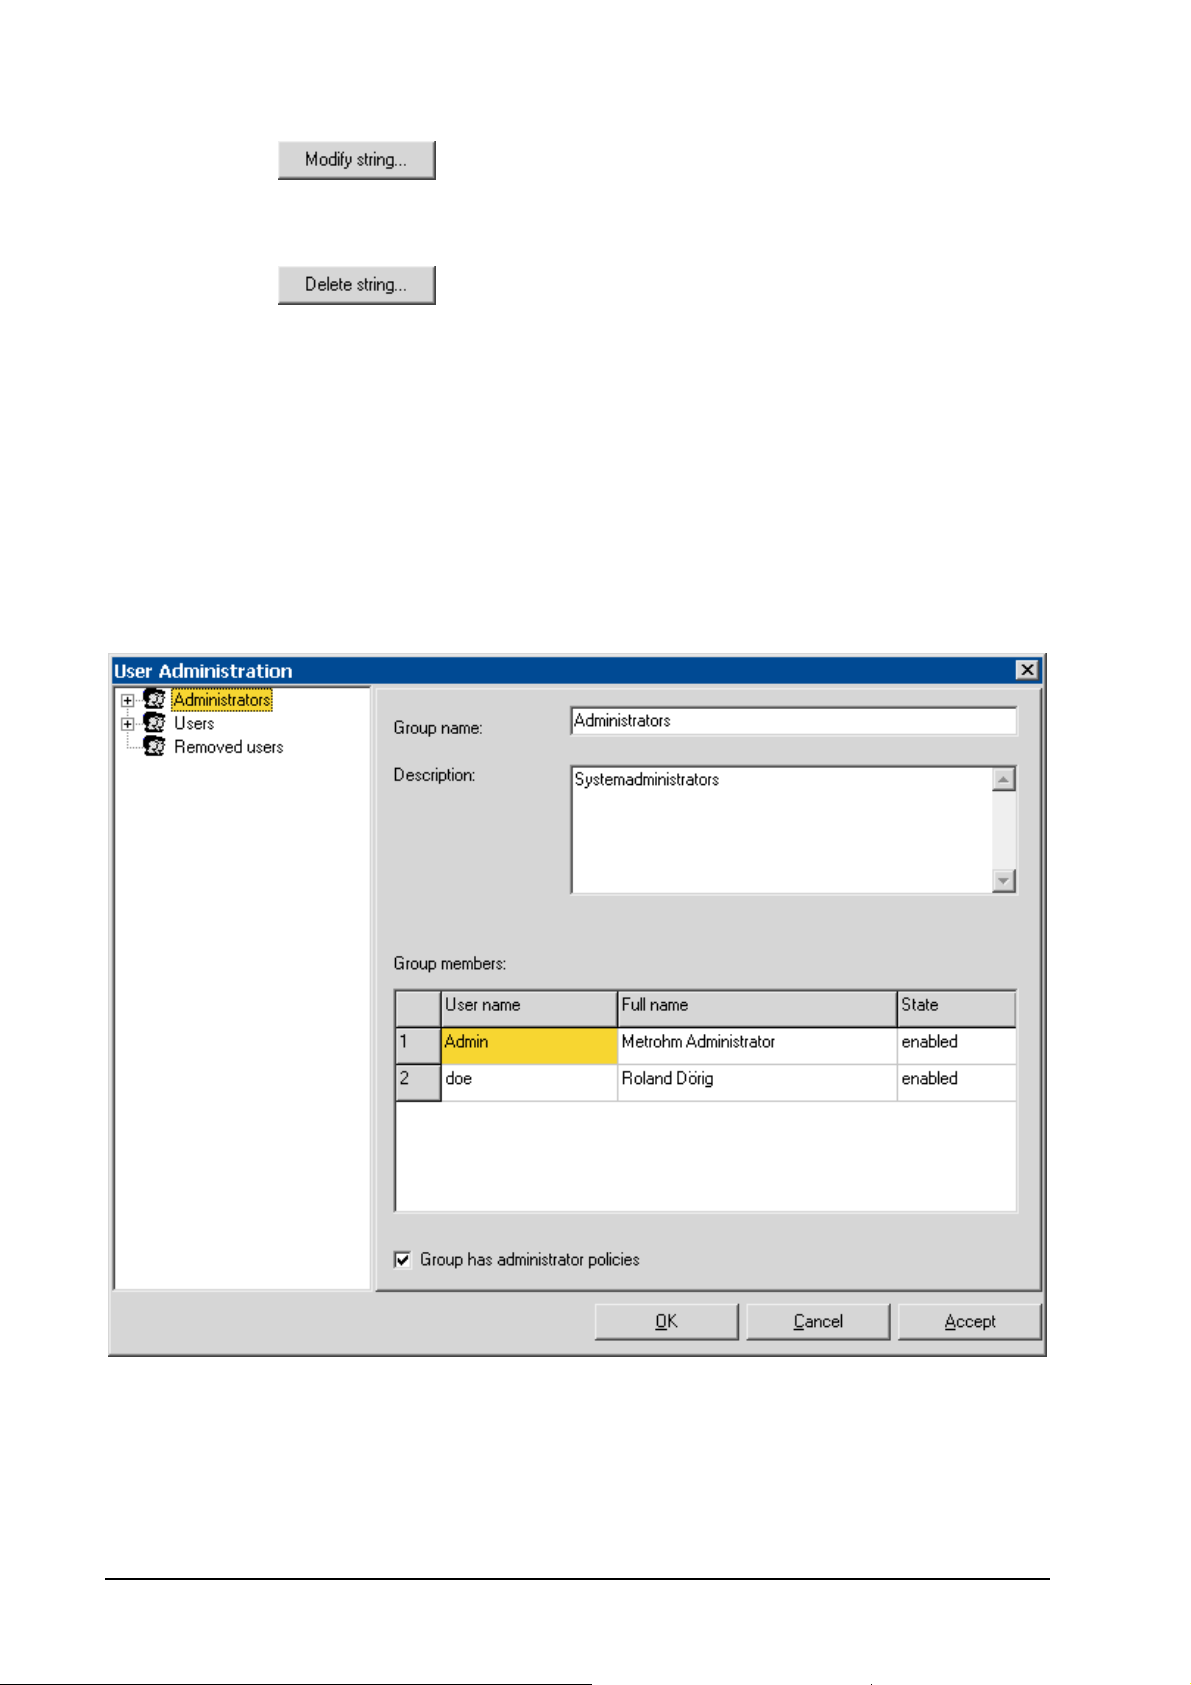
Modify selected string. The window for edition of default strings
is opened.
Delete selected string.
3.2 User administration
TiNet 2.5 Compliant, Extra, User administration
This menu item opens the User administration window for administration of
user groups and users and their access rights and signature policies.
3.2.1 User groups
If a user group is selected in the left part of the User administration window,
details on this user group and a table with all group members (User name,
Full name und State) are shown in the right part.
Group name:
Name of the user group. This name must be unique. The name
16 • Program settings TiNet 2.5 Compliant
Page 19
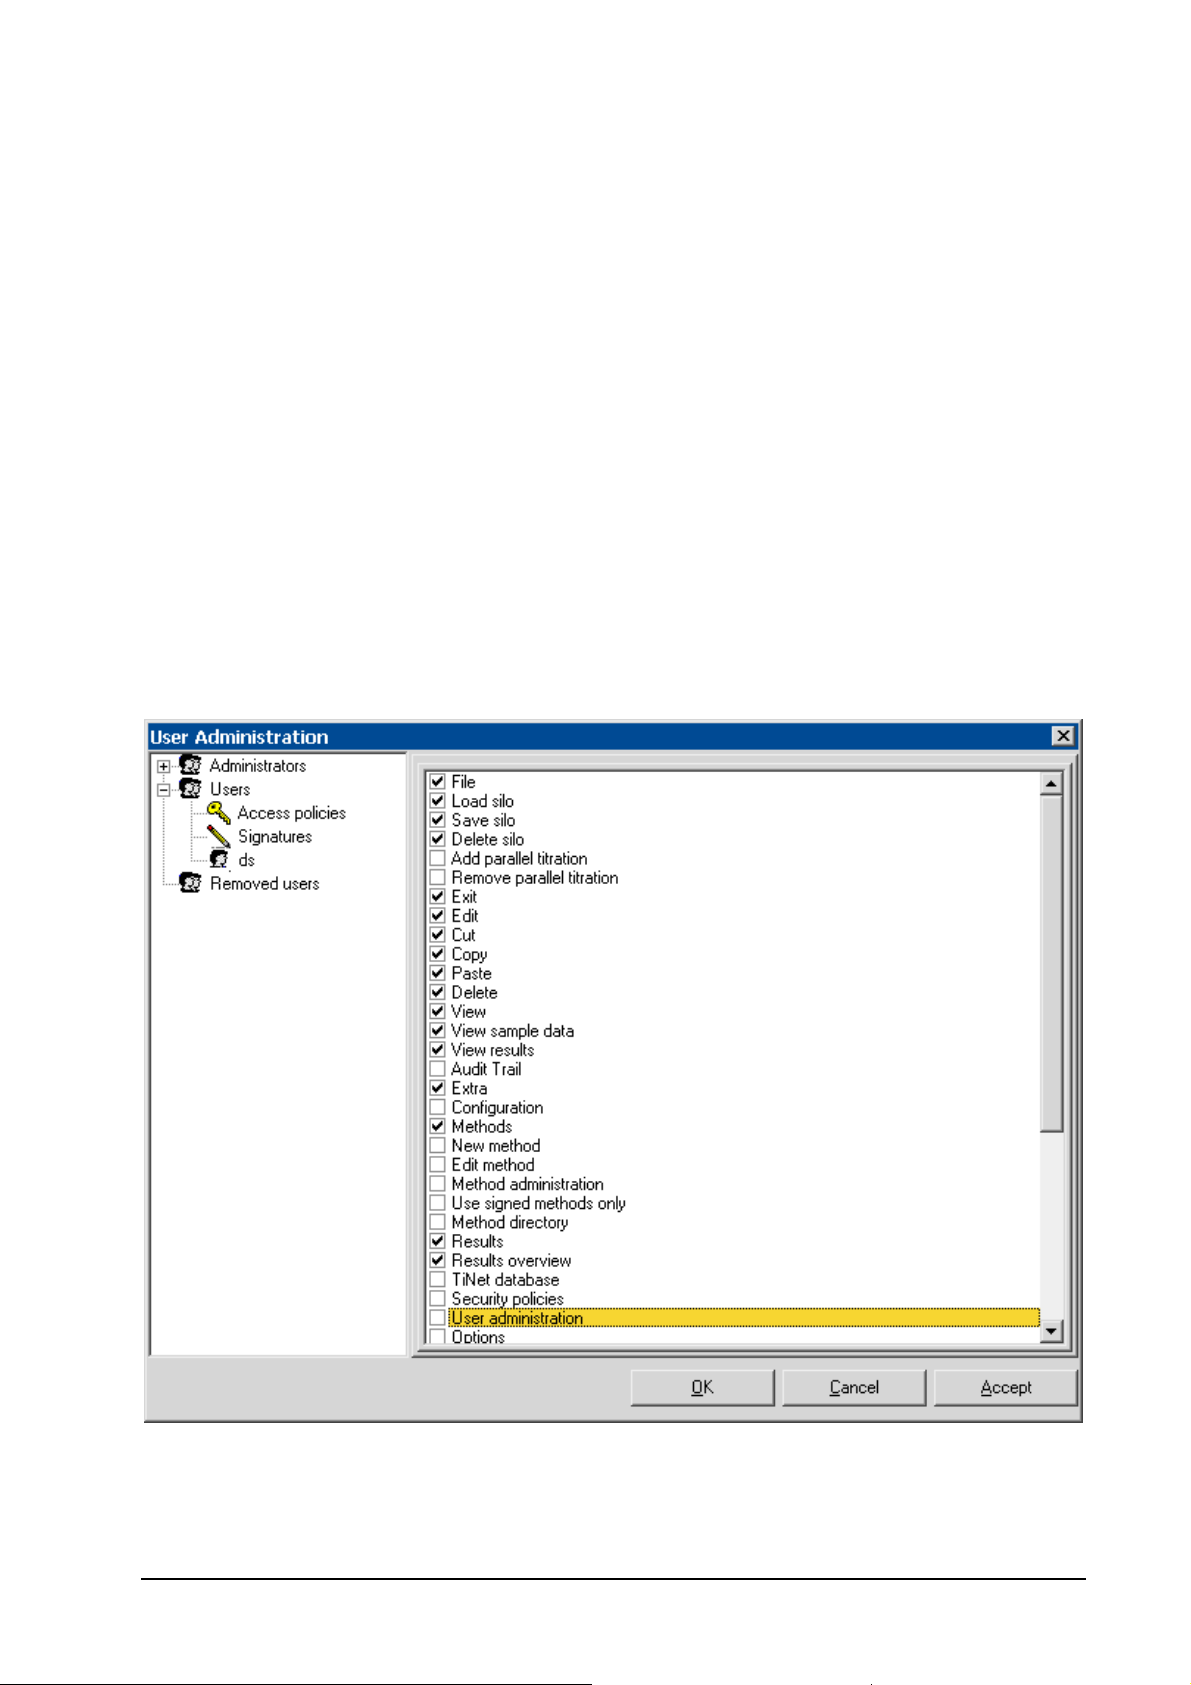
can also be edited by clicking the group name field in the explorer part.
Description:
Description of the user group.
Group has administrator policies
If this option is enabled, the user group has administrator policies. This option must be enabled for at least one group.
After clicking the group name field in the explorer part with the right mouse
key, user groups can be created and deleted:
New group
Create new user group.
Delete group
Delete selected user group. The group can only be deleted if it
has no users any more.
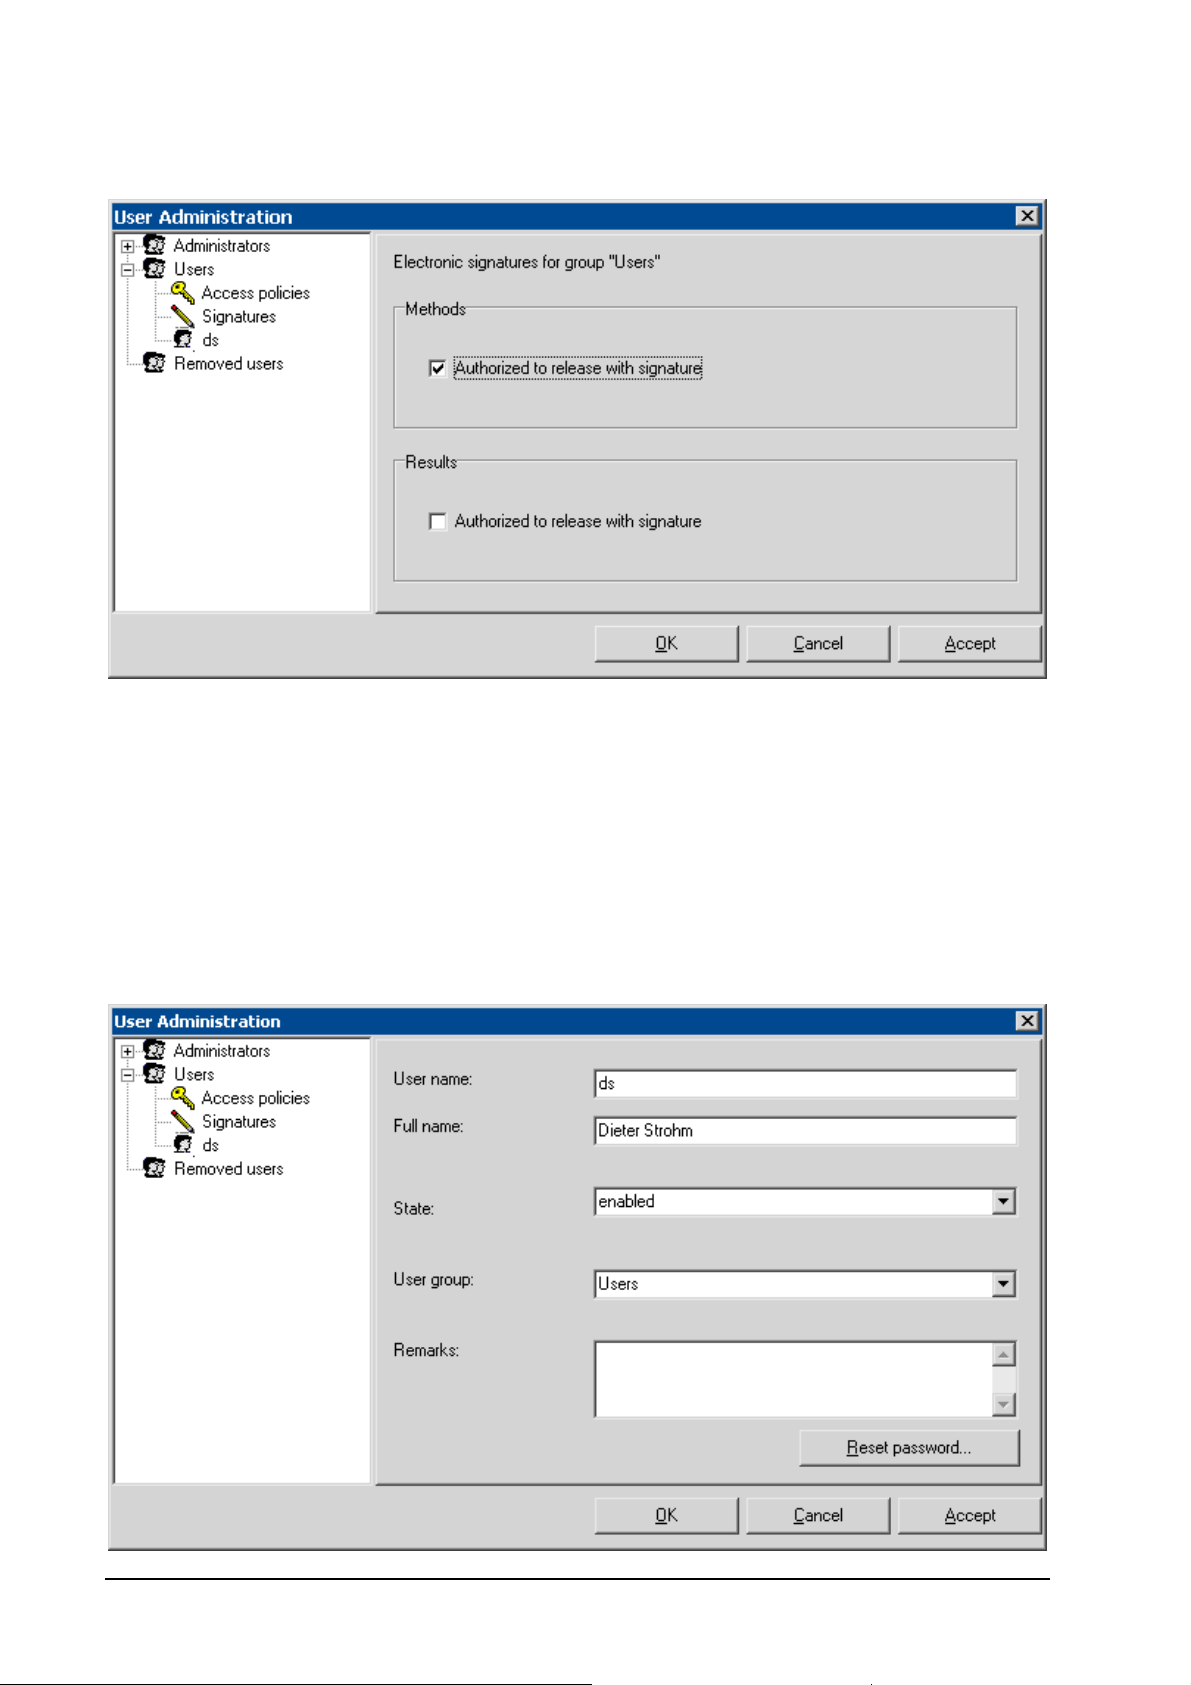
3.2.2 Access policies
If the
Access policies element is selected in the left part of the User admini-
stration
window, access policies for this user group are shown in the right
part and can be modified. Every menu item of the TiNet 2.5 Compliant
main window can be enabled or disabled.
TiNet 2.5 Compliant Program settings • 17
Page 20
3.2.3 Electronic signatures
If the Signatures element is selected in the left part of the User administra-
tion
window, the authorization for signature of methods and results for this
user group are shown in the right part and can be modified.
Authorized to release with signature
If this option is enabled, user of this user group are allowed to
sign methods or results.
3.2.4 Users
18 • Program settings TiNet 2.5 Compliant
Page 21
If a user from a user group is selected in the left part of the User administra-
tion
window, details on this user are shown in the right part.
User name:
Short name of the user which must be entered for
Login window. This name will be enclosed in the report.
the
Full name: Full name of the user with possibility for additional information
User name in
(e.g. title, address, etc.).
State: Current user state (active, inactive, removed). The administrator
is allowed to change the user state.
User group:
Current user group. The administrator is allowed to change the
group for the user. If this is done, the user icons are automatically transferred to the new group.
Remarks: Possibility to enter additional user information.
<Reset password>
Possibility to reset the password for the user to the original start
password (identical to the User name), which must be changed
immediately at first login.
After clicking into the explorer part with the right mouse key, users can be
created and deleted:
New user Add new user to user group.
Delete user
Delete selected user from the user group and transfer to the
Removed users group.
3.3 Login/Logout
3.3.1 Login
TiNet 2.5 Compliant Program settings • 19
Page 22
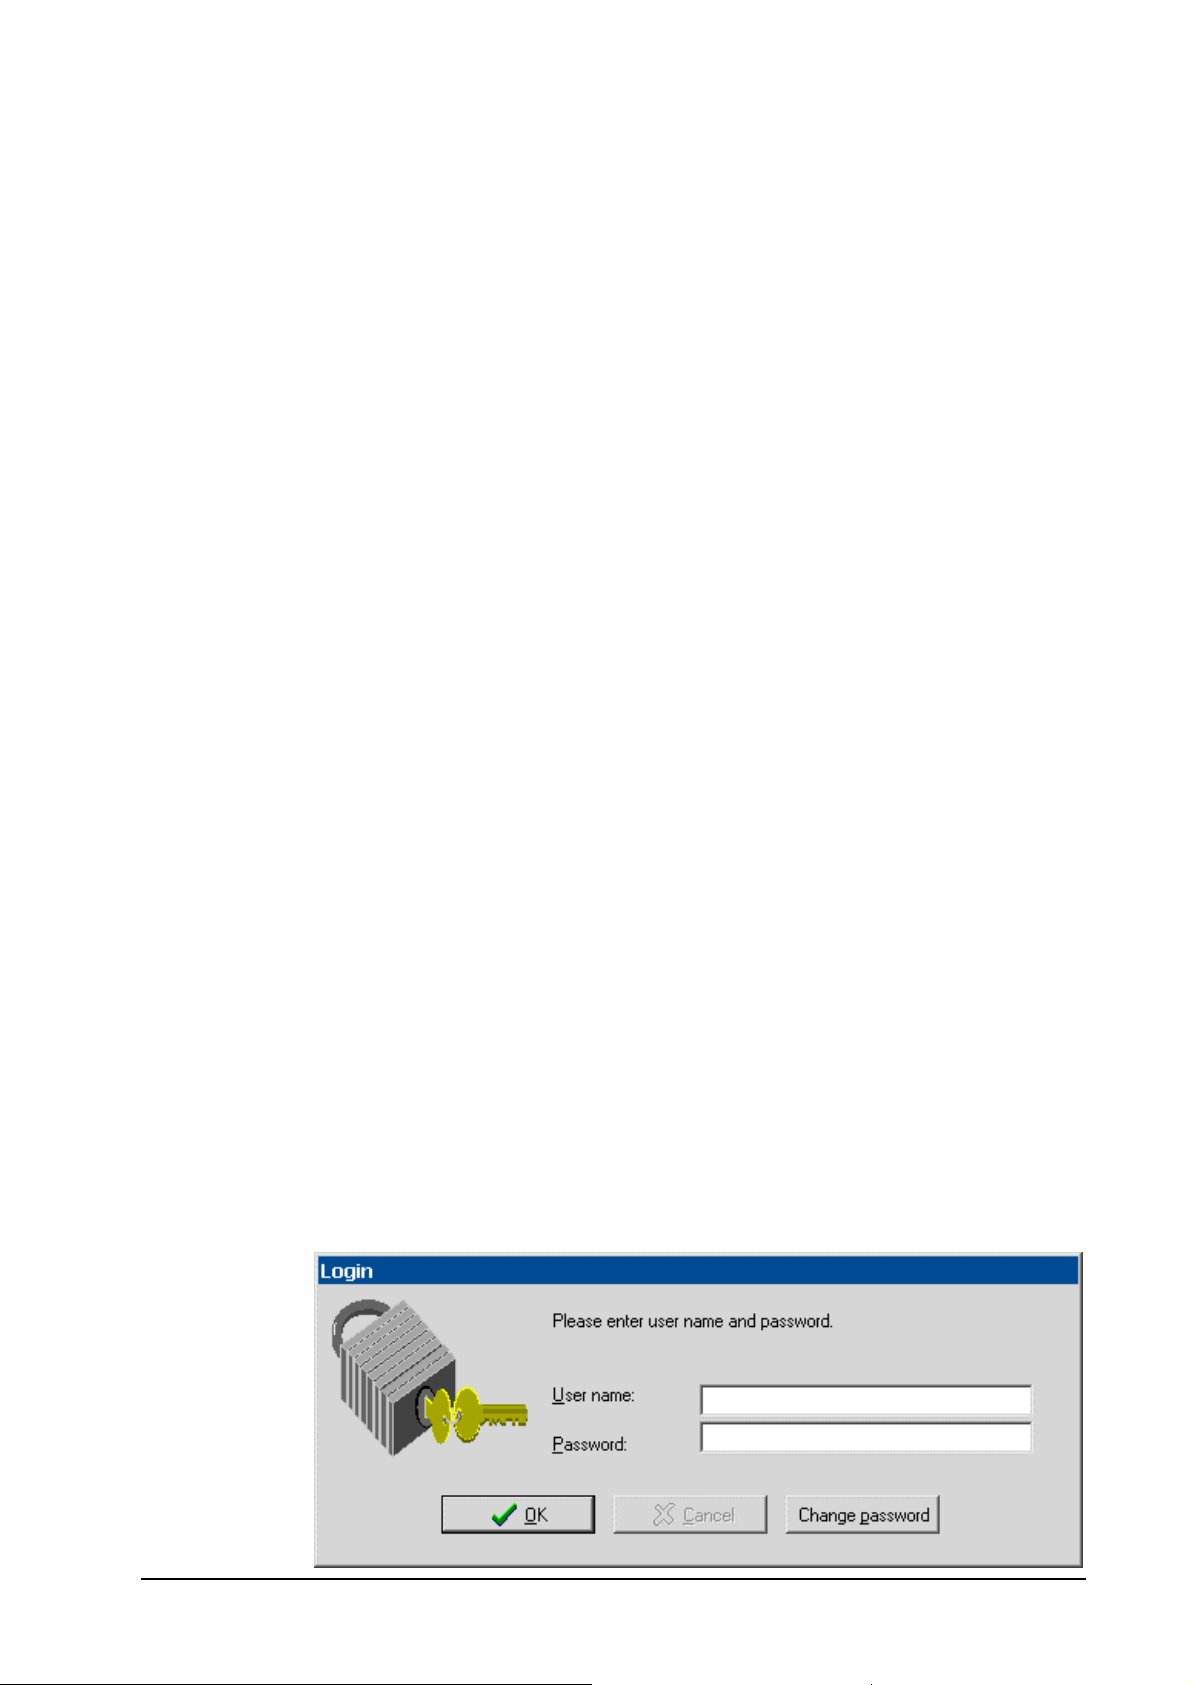
If password protection is enabled on the Security policies tab, the Login
window appears at every new start of TiNet or after Logout. In this window,
you have to login by entering user name and password.
User name
Enter your user name (capitals are ignored).
Password Enter your password (capitals must be identical!). At first login,
Password is identical to the User name, but it must be
the
changed immediately.
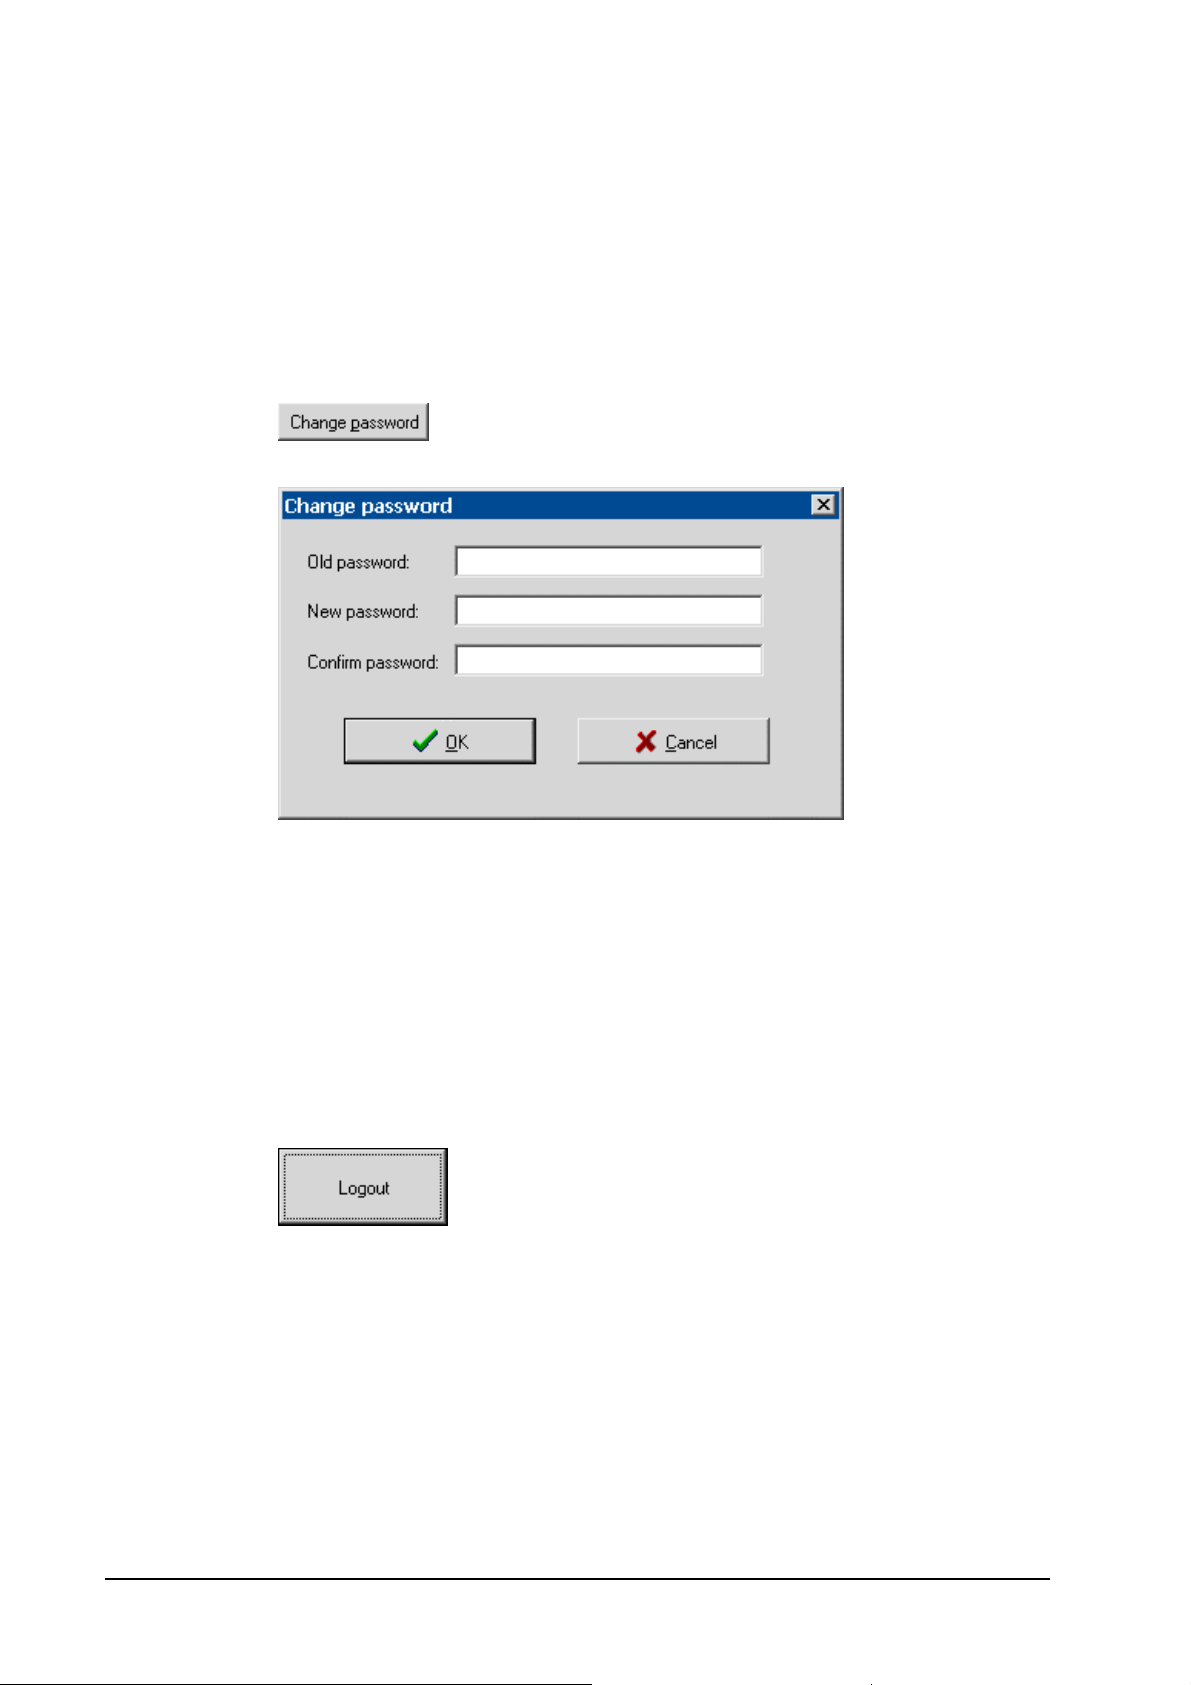
Click this button to change your password.
Old password:
Enter your old password.
New password:
Enter the new password.
Confirm password:
Confirm the new password.
3.3.2 Logout
By clicking this button the current user is logged out. At the same time, the
Login window for login of a new user appears on the screen.
20 • Program settings TiNet 2.5 Compliant
Page 23
3.4 Options
3.4.1 Curve settings
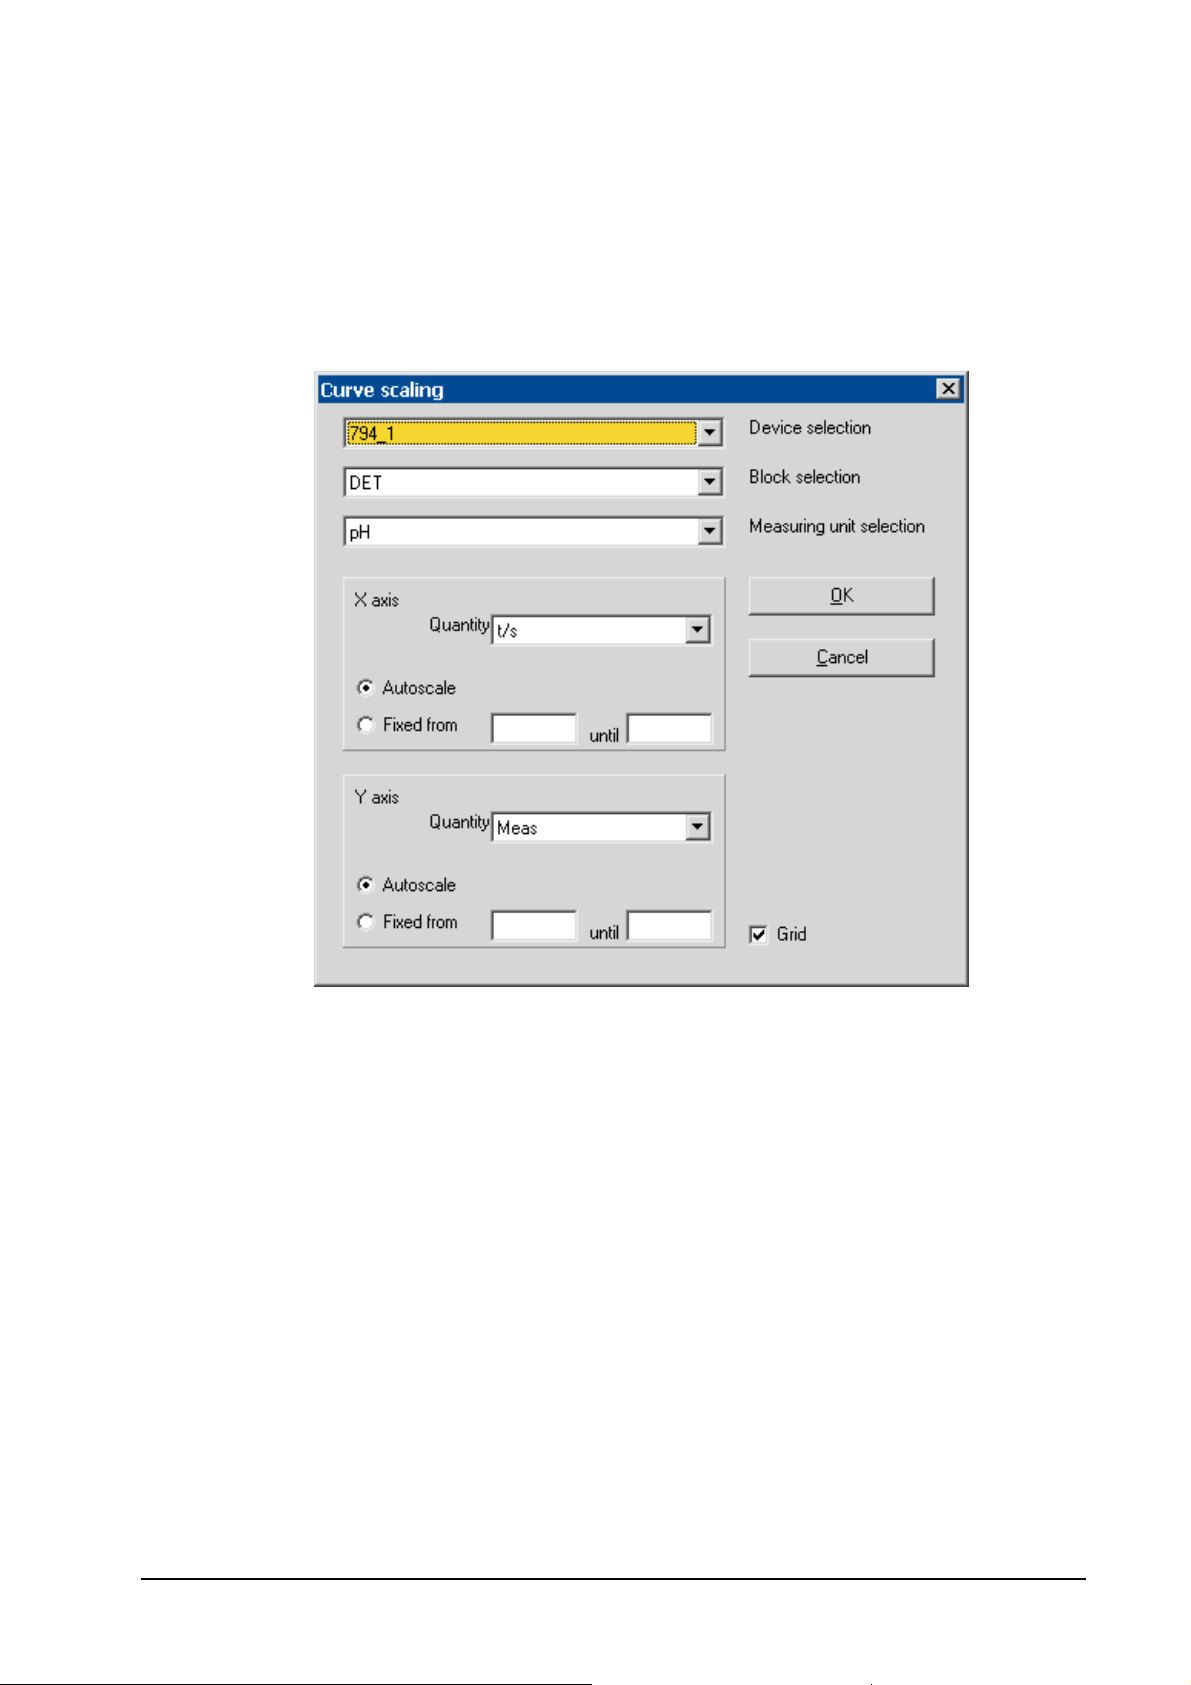
TiNet 2.5 Compliant, Extra, Options, Curve settings
This menu item opens the Curve settings window. You can define here how
to display live titration curves on the device tabs in the main window.
Device selection
Selection of the device for which the curve settings will apply.
Block selection
Selection of the block (e.g.
will apply.
Measuring unit selection
Selection of the measuring unit (e.g. pH, U) for which the curve
settings will apply.
X axis
Quantity
Selection of the quantity which will be displayed on the X axis:
Volume (V/ml), Time (t/s), Measured value (Meas), ERC (only for
DET titrations; first derivative multiplied with a logarithmic factor), Meas & ERC (both curves), Temp (Temperature in °C).
Autoscale
Automatic scaling.
Fixed from...until
Fixed scaling.
MET, DET) which the curve settings
TiNet 2.5 Compliant Program settings • 21
Page 24
Y axis identical to X axis.
Grid Display of grid lines.
3.4.2 Print options
TiNet 2.5 Compliant, Extra, Options, Print options
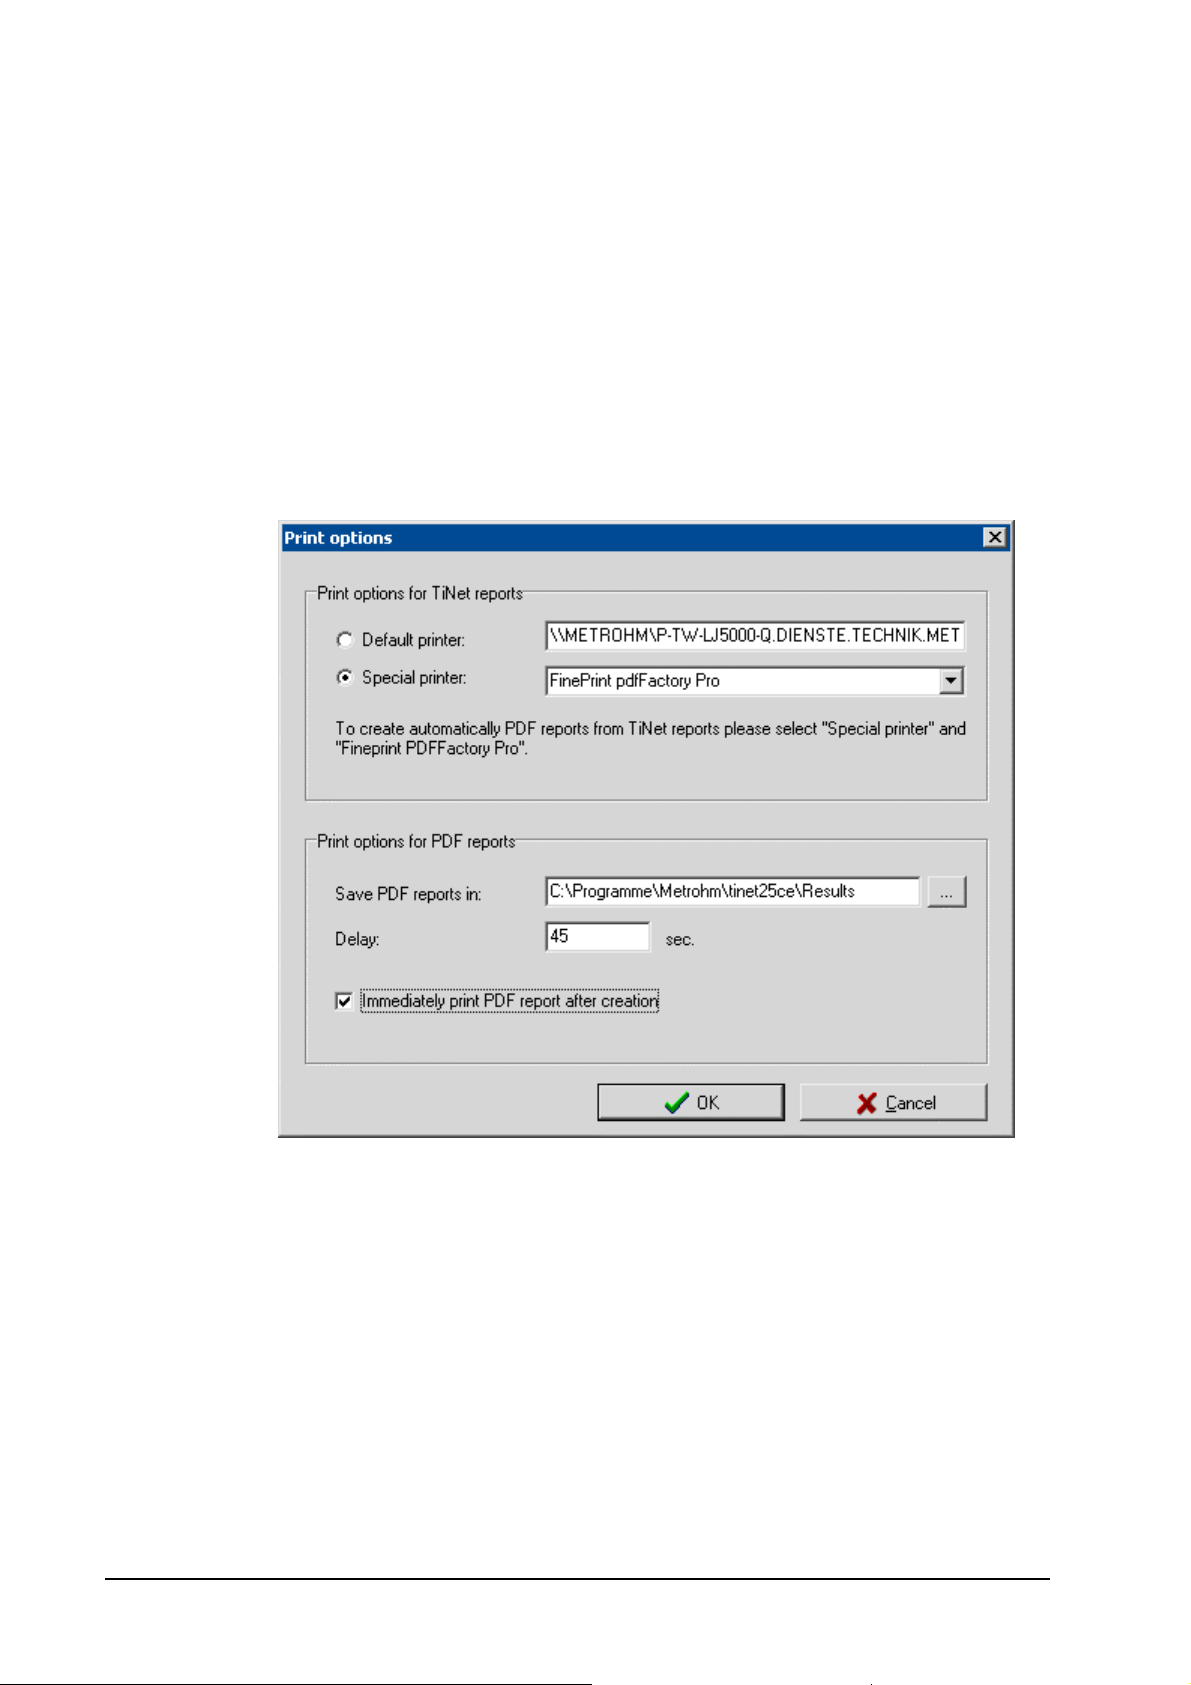
This menu item opens the Print options window for report output settings.
Note: Reports are only created automatically in the method sequence if
the
Print immediately option in the Report block is enabled.
Print options for TiNet reports
Printer selection für TiNet report printing:
Default printer
Windows default printer (display only).
Special printer
Selection of a printer configured for Windows. In order to create
automatically PDF reports from TiNet reports, the "FinePrint
pdfFactory Pro
Print options for PDF reports
Save PDF reports in
" printer must be selected.
Selection of the directory to save the automatically generated
PDF reports.
Note: No point (.) is allowed in the whole directory path.
22 • Program settings TiNet 2.5 Compliant
Page 25

Delay Delay time for PDF report generation. It is recommended to set
a minimum delay of 45 s.
Immediately print PDF reports after creation
If this option is enabled, the PDF reports are printed on the selected printer. If this option is disabled, the PDF reports are
only saved.
3.4.3 Export settings
TiNet 2.5 Compliant, Extra, Options, Export settings
This menu item opens the Export settings window. You can define here
how to export data from the result database.
Export directory
Directory
Selection of the directory to which data will be exported.
Export file name
Definitions for export file name.
File extension
File extension for export file.
TiNet 2.5 Compliant Program settings • 23
Page 26

Fixed file name (data records are appended)
If this option is enabled, the data of the selected determinations
will be appended in one file. The name for this file can be entered in the field on the right side.
Automatic file name (made of date and time)
If this option is enabled, a separate file is created for each determination selected. The name for these files are generated
automatically from date and time of the determination.
Example
Display of an example name with set parameters.
More settings
Separator
Selection of character for separation of field contents. Available
characters: " ; " , ", "
Field selection
Click on
lect here the fields of the result overview table which will be exported.
Automatic export
If this option is enabled, the data will be exported automatically
at the time the determination data are saved in the result database.
Export raw data (*.dta)
If this option is enabled, the raw data of the selected determination will be saved in a *.dta file. The name of this file will be
generated automatically from date and time of the determination.
Export method (*.mth)
If this option is enabled, the method used for the selected determination will be saved in a
TAB " and " SPACE".
to open the Field selection window. You can se-
'Method name'.mth file.
3.4.4 System name
TiNet 2.5 Compliant, Extra, Options, System name
This menu item opens the System name window where the name to be entered as System name in the Audit Trail (see section 7.5.1) can be defined.
24 • Program settings TiNet 2.5 Compliant
Page 27

3.4.5 Database options
TiNet 2.5 Compliant, Extra, Options, Database options
This menu item opens the More options window. You can define here
where to save method, result and Audit Trail database. It is also used to
pack databases.
Database directory
Save databases in
Selection of the directory for saving method, result and Audit
Trail databases.
Note: Make sure that every user has permanent read/write
privileges for this directory!
Packing databases
Select database
Selection of the database to be packed.
<Pack database>
Start packing.
Process progress
Display of packing progress.
TiNet 2.5 Compliant Program settings • 25
Page 28

26 • Methods TiNet 2.5 Compliant
Page 29

4. Methods
4.1 General information on methods
Two different types of methods are used in TiNet 2.5 Compliant: Draft
methods and Database methods.
4.1.1 Draft methods
Draft methods are stored as files in the Methods directory. Only these
methods can be edited in the
signed methods only
perform determinations. In this case, the requirements for working according to 21 CFR Part 11 are not met.
You will find detailed information on edition of draft methods in the
8.110.8243 Instructions for Use "TiNet 2.4/2.5", section 6.
option is disabled, draft methods can also be used to
TiNet 2.5 – Methods program part. If the Use
Note:
Start and end sequences are ignored with TiNet 2.5 Compliant.
4.1.2 Database methods
Draft methods can be saved in the method database as Database methods. At every saving procedure, a new method version is created. The
user must enter a comment for each method version. In order to use database methods they must be signed electronically and given a signature
comment. In addition to this, the Use signed methods only option must be
enabled. If you use database methods, the requirements for working according to 21 CFR Part 11 are met
A method version of the method database must be copied as draft
method before it can be edited. If already present, an existing draft
method with the same name is overwritten. Once the method has been
modified, it must be saved again in the method database as a new
method version.
You will find detailed information on edition of draft methods in the
8.110.8243 Instructions for Use "TiNet 2.4/2.5", section 6.
.
TiNet 2.5 Compliant Methods • 27
Page 30

4.2 Draft methods
4.2.1 Create new method
TiNet 2.5 Compliant, Extra, Methods, New method
This menu item opens the TiNet 2.5 / Methods program part, where a new
method can be created.
You will find detailed information on edition of draft methods in the
8.110.8243 Instructions for Use "TiNet 2.4/2.5", section 6.
4.2.2 Edit existing methods
TiNet 2.5 Compliant, Extra, Methods, Edit method
This menu item opens one of the draft methods available in the current
method directory in the TiNet 2.5 - Methods program part.
Method administration, Draft methods, Edit method
This context-sensitive menu item opens the selected draft method in the
TiNet 2.5 - Methods program part.
You will find detailed information on edition of draft methods in the
8.110.8243 Instructions for Use "TiNet 2.4/2.5", section 6.
4.2.3 Set method directory
TiNet 2.5 Compliant, Extra, Methods, Method directory
This menu item opens the Select directory window for selection of the directory for draft methods. You will find existing default methods in the
..\Methods\Standard directory.
28 • Methods TiNet 2.5 Compliant
Page 31

4.3 Database methods
4.3.1 Method administration
TiNet 2.5 Compliant, Extra, Methods, Method administration
This menu item opens the Method administration window for display of all
draft methods and database methods with its versions.
Current method directory
Display of the current directory for draft methods. TiNet has
more than 40 prepared default draft methods in the
..\Methods\Standard directory.
Draft methods
Display of the draft methods available in the current methods
directory. By clicking a draft method with the right mouse key
the following functions can be triggered:
Save method in database (see section 4.3.2)
New method (see section 4.2.1)
Edit method
Database methods
(see section 4.2.2)
Display of the methods in the method database. By clicking a
database method with the right mouse key the following functions can be triggered:
Copy method to editor
The database method is copied as draft method into the
method directory.
Show method
The database method is opened as draft method but cannot
be edited.
Sign method (see section 4.3.3)
TiNet 2.5 Compliant Methods • 29
Page 32

Export method (see section 4.3.4)
Method report
Delete method
Current versions
On this tab, the current versions of the available database
methods are shown. The table on this tab has the following
columns:
Method name
Name of database method.
Version
Version number of database method (stored as Id8 for determinations).
Creator
User name of the user who saved the database method.
Creator name
Full name of the user who saved the database method.
Creation date
Date and time when the database method was saved.
Signer
User name of the last user who signed the database method.
(see section 4.3.5)
(see section 4.3.6)
Signer name
Full name of the last user who signed the database method.
Sign date
Date and time when the database method was signed.
Sign comment
Comment entered at signing the database method.
Former versions
On this tab, the former versions of the available database
methods are shown. With the exception of the method name,
which is shown above the table, the table has the same columns as the
version to the current version, it must be copied first as draft
method with Copy method to editor and then saved again as a
new version in the method database with Save method in data-
base
.
Modification comment
On this tab, the comment entered at saving of the database
method is shown.
Current versions tab. In order to convert a former
30 • Methods TiNet 2.5 Compliant
Page 33

4.3.2 Save method in database
Method administration, Draft methods, Save method in database
Using this context-sensitive menu item, a draft method can be saved in
the method database. Before the method is saved, the
method modification
window appears:
Comment on
Method:
Method name (display only)
Version:
Automatically set version number (display only)
Description:
Selection of a default string or entry of a user-specific text.
Comment:
User-specific comment for description of method modifications.
Afterwards, the method can be signed.
TiNet 2.5 Compliant Methods • 31
Page 34

4.3.3 Sign method
Method administration, Database methods, Sign method
Using this context-sensitive menu item, a database method can be signed
electronically. The
Sign-off window appears, containing the following fields:
User name
Name of the user who wants to sign the method.
Password
Password of the user who wants to sign the method.
Meaning
User-specific comment to the signature.
By clicking on
<Sign-off>, these data are saved in the method database.
Signature data already present is always overwritten by the new signature
data.
4.3.4 Export method
Method administration, Database methods, Export method
Using this context-sensitive menu item, a database method can be exported. The Select directory window appears for selection of the export directory. With <OK>, the method is saved as method file (*.mth) and the
application note as text file (*.txt) in this directory.
Exported methods can be imported into a method database using the
Save method in database menu item.
32 • Methods TiNet 2.5 Compliant
Page 35

4.3.5 Method report
Method administration, Database methods, Method report
Using this context-sensitive menu item, a report of the selected database
method is printed on the default printer. This report contains the following
entries:
Method name:
Method name
Method version:
Version number of the method
Saved by:
Full name of the user who saved the method in the method database.
Saved on:
Date and time of saving the method.
Signed by:
Full name of the user who signed the database method.
Signed on:
Date and time of signing the method.
Sign comment:
Comment to signature.
Report printed on:
Date and time of printing the report.
4.3.6 Delete method
Method administration, Database methods, Delete method
Using this context-sensitive menu item, the selected database method
can be deleted.
After confirmation of the deleting action, the Delete method window opens,
where two administrators must confirm the deletion by entering user name
and password.
TiNet 2.5 Compliant Methods • 33
Page 36

4.3.7 Use signed methods only
TiNet 2.5 Compliant, Extra, Methods, Use signed methods only
This option ensures that only signed database methods can be used to
perform determinations. It must be enabled to to be compliant according
to 21 CFR 11.
34 • Methods TiNet 2.5 Compliant
Page 37

5. Titrations
5.1 Main window
5.1.1 Overview
The main window "TiNet 2.5 Compliant" is the working window where you
can make the necessary entries for your determinations, enter sample
data for single determinations and sample series, start and stop your
methods, and show live titration curves using the following elements:
• Menu items (see section 5.1.2)
• Tab for sample data entry
• Tab for silo memory
• Buttons for titrations
• Display of application note
• Tabs for parallel titrations (see section 5.2)
• Tabs for live curves (see section 5.X)
TiNet 2.5 Compliant Titrations • 35
Page 38

5.1.2 Menu items
File
Load silo Opens an existing file with silo data (see section 5.3.3).
Save silo Saves an open silo file under the same or a new name (see
section 5.3.3).
Delete silo Deletes a silo file (see section 5.3.3).
Add parallel titration Adds a new tab with a parallel titration (see section 5.5.1).
Remove parallel titration Removes the tab with the parallel titration added last (see
section 5.5.1).
Exit Exits the "TiNet 2.5 Compliant" program.
Edit
Cut Deletes data and transfers this data to the clipboard.
Copy Copies data to the clipboard.
Paste Inserts data from the clipboard.
Delete Deletes data.
View
View sample data Define view of identifications Id1...Id7 on the Sample data and
Silo tabs (see section 5.2.2).
View results Define view of results on the Silo tab (see section 5.3.4).
Audit Trail Opens Audit Trail table (see section 7.3.1).
Extra
Configuration Opens the TiNet 2.5 - Configuration window (see section 2.2).
Methods
New method Opens a new empty method in the TiNet 2.5 - Configuration
window (see section 4.2.1).
Edit method Opens the selected method in the TiNet 2.5 - Configuration
window (see section 4.2.2).
Method administration Opens the Method administration window (see section 4.3.1).
Use signed methods
only
Enable/Disable restricted use of signed database methods
(see section 4.3.7).
Method directory Select the directory of the methods for the method select
lists (see section 4.2.3).
Results
Results overview Opens the Results overview window for display of determina-
tion data stored in the result database (see section 6.3.1).
36 • Titrations TiNet 2.5 Compliant
Page 39

TiNet database Opens the TiNet 2.5 - Results program window for display and
recalculation of determination data stored in the TiNet database (see section 6.2).
Security policies Settings for login, password protection, Audit Trail, and de-
fault strings (see section 3.1).
User administration Administration of user groups and users and their access
policies (see section 3.2).
Options
Curve settings Options for display of live curves (see section 3.4.1).
Print options Options for report printout (see section 3.4.2).
Export settings Options for export of results (see section 3.4.3).
System name Definition of the system name for Audit Trail (see section
3.4.4).
Database options Options for method, result and Audit Trail databases (see
section 3.4.5).
Commands
Start Starts the method (see section 5.4.3).
Stopp Stops the method (see section 5.4.3).
Continue Continue with the method after hold by
"Wait/Message/Request" block (see section 5.4.3).
Conditioning Starts conditioning (see section 5.4.3).
Clear statistics Clears the current value of the statistics counter.
Clear autostart Clears the current value of the auto start counter (see section
5.2.2).
Initialise devices Initializes the connected devices.
Help
Help contents Shows the contents of the Help texts.
About Shows the program version.
TiNet 2.5 Compliant Titrations • 37
Page 40

5.2 Sample data
5.2.1 Sample data entry
Every parallel titration has its own Sample data # tab in the main window for
display and entry of sample data.
User Display of the logged-in user. The name will be printed out with
the titration data and stored in the determination.
Remark Enter the remark regarding, e.g. the sample series. It will be
printed out with the titration data and stored in the determination.
State Display of TiNet state.
Autostart Number of automatic, internal starts. Select this option for se-
ries determinations with a sample changer. The number on the
left counts the starts already performed (current value counter),
the total number of starts which must be performed is on the
right (set counter). Enter the number of samples on the sample
changer in the right counter.
The current value counter can be zeroed with the menu item
Commands, Clear autostart. The counter is also set to 0 if you
answer yes to the question New series?.
Auto start is interrupted when the option is disabled.
Silo Open silo memory for sample data (see section 5.2.2). If the
Silo option is enabled, the sample data are transferred for each
determination from the silo and displayed under Sample data.
This option must be enabled in order to edit the silo memory.
38 • Titrations TiNet 2.5 Compliant
Page 41

Sample data
Here, you can enter sample data for single determinations and
multiple determinations with autostart. These date will be
printed out with the titration data and stored in the determination. If the Silo option is enabled, the fields can not be edited.
During the method sequence, the current data from the silo
memory are displayed in these fields.
Method
Selection of the method used to process the sample. The
method is reloaded on every start.
Version
Display of method version number.
Id1...7 Identifications of the sample (up to 30 characters each).
You can define in the
View sample data window (see section
5.2.2) the identifications which should be displayed. The identi-
fications can be used in the method sequence as variables
(e.g. for calculations or IF decisions).
Note:
Modifications of the identifications ID1...7 made after the start of
a determination are ignored for this determination.
used for saving the version number of the database method.
ID8 is always
Sample size
Sample size (mass).
The sample size is available for calculations in the method as a
variable.
Note:
If the
Sample size is modified and confirmed with <Enter> after
the start of a determination, the modified value will be used for
this determination.
Unit Unit of the sample size.
Application note
The application not of the current method loaded is displayed
in the green field (if present). The application note can be created in the program part "Methods" (see section 4.2.2). It can
be exported as a text file (
*.txt) and printed.
TiNet 2.5 Compliant Titrations • 39
Page 42

5.2.2 View for sample data
TiNet 2.5 Compliant, View, View sample data
This menu item opens the View sample data window. You can define here
which identifications with which names will be displayed on the
data
and Silo tabs in the main window.
Sample
Id1...Id7
Identifications which can be displayed (display only) .
(Designation)
User-defined designations for identifications.
Visible Selection of the identifications to be displayed in the main win-
dow.
40 • Titrations TiNet 2.5 Compliant
Page 43

5.3 Silo memory
5.3.1 Display silo memory
Every parallel titration has its own silo memory, which is shown on the Silo
#
tab in the main window. The silo memory is used on one side for the
display of the finished determinations and their results, and on the other
side for entering sample data "for future use" (e.g. for sample series with a
sample changer).
The silo memory contains the Status column and the columns defined under View sample data (see section 5.2.2) and View results (see section
5.3.4).
Status Display of the determination status:
ready The sample data are used for the next
determinations.
running The determination is running.
finished The determination is finished, results have
been entered.
aborted The determination has been aborted.
For automatic processing of sample data from the silo memory for series
determination, the Silo option on the Sample data tab must be enabled and
the number of automatic starts must be entered in the Autostart field. In
this case, the sample data are transferred from the silo memory at each
new method start. The weighing data from a connected balance are written to the silo memory. The silo memory operates on the FIFO (first in, first
out) principle: The lines are entered and processed in ascending order.
If the silo memory is enabled, the sample data can be edited using context-sensitive menu items (see section 5.3.2). The content of the silo memory can be saved, loaded or deleted (see section 5.3.3).
TiNet 2.5 Compliant Titrations • 41
Page 44

5.3.2 Edit silo memory
Edit silo row
(Silo memory), Edit silo row
To edit data of the silo memory, click into the silo memory using the right
mouse key and select the
is opened. If an empty silo row has been selected, the previously entered
data are shown in this window.
Edit silo row menu item. The Edit silo row window
Method Selection of the method to process the sample. The method is
reloaded at every new start.
Version Display of method version.
Id1...7 Identifications of the sample (up to 30 characters each).
You can define in the
View sample data window the identifica-
tions which should be displayed. In addition to this, identifications can be renamed.
The identifications can be used in the method sequence as
Variables (e.g. for calculations or IF decisions).
Sample size
Sample size (mass).
The
sample size is available for calculations in the method as a
variable.
Unit Unit of the sample size..
<Apply> Use this button to transfer the sample data into the selected ex-
isting silo row or into a new empty silo row.
<Close> Use this button to close the Edit silo row window.
This context-sensitive menu item is only active if the Silo option is enabled
on the Sample data tab.
42 • Titrations TiNet 2.5 Compliant
Page 45

Insert silo row
(Silo memory), Insert silo row
To insert a new silo row into the silo memory, select the desired row by
clicking it using the left mouse key. Then click into this row using the right
mouse key and select the Insert silo row menu item. The Edit silo row window is opened for entering data for the new row. With
<Apply>, a new silo
row containing these data is created above the selected silo row.
This context-sensitive menu item is only active if the Silo option is enabled
on the
Sample data tab.
Delete silo row
(Silo memory), Delete silo row
To delete a single silo row in the silo memory, select the desired row by
clicking it using the left mouse key. Then click into this row using the right
mouse key and select the Delete silo row menu item.
This context-sensitive menu item is only active if the Silo option is enabled
on the Sample data tab.
Delete all silo rows
(Silo memory), Delete all silo rows
To delete all silo rows in the silo memory, click into the silo memory table
using the right mouse key and select the
Delete all silo rows menu item.
Enter new silo data
To enter data into a new, empty row of the silo memory, select the desired
empty row by clicking it using the left mouse key. Then click into this row
using the right mouse key and select the
silo row
ply>
silo row
every click on
window is opened for entering the desired sample data. With <Ap-
, these data are filled into the first empty silo row. Afterwards, the Edit
window remains open for the entry of additional silo rows. With
<Apply>, a new silo row is filled.
Edit silo row menu item. The Edit
Modify existing silo data
To modify data in an existing row of the silo memory, select the desired
row by clicking it using the left mouse key. Then click into this row using
the right mouse key and select the
row
window is opened for modifying the desired sample data. With <Ap-
ply>
, these modified data are filled into the selected silo row. Afterwards,
Edit silo row menu item. The Edit silo
the Edit silo row window shows the data of the next silo row.
TiNet 2.5 Compliant Titrations • 43
Page 46

5.3.3 Load, save, and delete silo
Load silo
TiNet 2.5 Compliant, File, Load silo
This menu item opens the Open window for selection of the desired silo file
*.tso to be loaded into the silo memory.
Save silo
TiNet 2.5 Compliant, File, Save silo
This menu item opens the Save file as window for saving the current silo
memory with the desired file name.
Delete silo
TiNet 2.5 Compliant, File, Delete silo
This menu item opens the Delete silo file window for selection of the desired silo file to be deleted.
5.3.4 View results
TiNet 2.5 Compliant, View, View results
This menu item opens the View results window. You can define here which
results with which names will be displayed on the Silo tab in the main window.
44 • Titrations TiNet 2.5 Compliant
Page 47

RS1...10 Name
Result names which can be displayed (display only).
RS1...10 Value
Result values which can be displayed (display only).
RS1...10 Unit
Result units which can be displayed (display only).
Designation
User-defined designations for results.
Visible Selection of the results to be displayed in the silo.
TiNet 2.5 Compliant Titrations • 45
Page 48

5.4 Performing titrations
5.4.1 Preparing single determinations
Before starting single determinations, proceed as follows:
• Connect, switch on and initialize devices (see section 2.1).
• Start TiNet 2.5 Compliant.
• Disable the
5.2.1).
• Enter method and sample data on the
5.2.1), or
• Enable the
sample data in the silo memory (see section 5.3.1)
Autostart option on the Sample data tab (see section
Silo option on the Sample data tab and enter method and
5.4.2 Preparing sample series
Before starting single determinations, proceed as follows:
• Connect and initialize devices (see section 2.1).
• Enable the
of samples (see section 5.2.1).
• Enter method and sample data on the
5.2.1), or
• Enable the
sample data in the silo memory (see section 5.3.1)
Autostart option on the Sample data and enter the number
Silo option on the Sample data tab and enter method and
Sample data tab (see section
Sample data tab (see section
5.4.3 Buttons for titrations
The individual buttons in the main window have the following meaning:
Starts the determination. The button is shown gray
when it is not active.
Stops the determination. The button is shown gray
when it is not active. Can also be used as an emergency stop. If a Titrino stops, TiNet must be
stopped manually.
Continues with the determination after hold by
"Wait/Message/Request" block. The button is shown
gray when it is not active.
Start conditioning. The button is shown gray when it
is not active.
46 • Titrations TiNet 2.5 Compliant
Page 49

5.4.4 Working with connected balance
Weighing data of a connected balance can be transferred.
The receipt of weighing data is confirmed by the PC with a beep.
Important: Depending on the work load of your PC, you should wait a few
seconds between transmissions of the individual weighing data.
The balance is always assigned to the active parallel titration. If the
option is disabled, the weighing data are sent directly to the current sample data row. If the Silo option is enabled, they are sent to the silo.
5.4.5 Karl Fischer titrations
Start/Stop
Start conditioning with button <Conditioning>.
Wait for a stable drift and start the titration. The titration can only be started if "conditioning is ok". The
titration start stops the conditioning; it is therefore
important that there is not a great delay between the
start and the beginning of the titration. After the PC
method is terminated, the titration vessel is again
conditioned.
Silo
This key stops the titration as well as the conditioning.
Prerequisites in the method
Conditioning has to be activated in the titration blocks of the method.
Conditioning is possible for the following blocks:
• KFC (conditioning is always active)
• KFT
• SET
• Titrino method (conditioning is active in the Titrino method)
TiNet 2.5 Compliant Titrations • 47
Page 50

Notes
• Autostart starts only the titration. If you wish to condition, start conditioning (
<Conditioning>) first.
• If the method contains an IF, the parameters used for conditioning
are in the left (TRUE) branch.
• If the method contains several blocks with conditioning, the parameter of the first block are valid for conditioning.
Working with the 774 Oven Sample Processor
• After heating up the system, the first determination should always be
discarded. You should therefore prepare one "blank" vial more than
necessary.
• Start the series with key
<Start> in TiNet: If the option conditioning
for the Oven Sample Processor is active in the corresponding
method, the sample changer goes to the conditioning vial, switches
the gas flow on and waits until the temperature is reached. The titrator is conditioned at the same time.
• If the Oven and the titrator are conditioned, the titration series will be
started with autostart.
• The stirrer is controlled by TiNet if you work with the 756/831 KF Coulometer or 751, 758, 784, 785 Titrino. For other titrators, please
switch stirrer on manually.
• If you work off several series at different temperatures, we recommend to have an empty dummy method which sets the temperature
between the series. This method should change the temperature and
wait for its equilibration.
• If a method contains different temperatures for conditioning of the
Oven Sample Processor, only the first is valid.
• If a method contains an IF block, the parameters of the left branch
(TRUE) are used for conditioning.
48 • Titrations TiNet 2.5 Compliant
Page 51

5.4.6 Live titration curves
For every connected titration device, a tab with the name of this device is
displayed in the main window. On these tabs, the live curves of running
determinations will be displayed. The view of this curves can be defined
TiNet 2.5 Compliant, Extra, Options, Curve settings (see section 3.4.1).
with
5.4.7 Emergency stop
<Stop> immediately stops the run. Any calculations and report instruc-
tions after this sop point will not be carried out.
If you wish to stop only one titration, one measurement or any single device procedure, you can do this with the
<STOP> key on the device itself.
TiNet 2.5 Compliant Titrations • 49
Page 52

5.5 Parallel titrations
5.5.1 Add parallel titration
File, Add parallel titration
Use this command if you wish to perform several titrations at the same
time.
A new tab for the added parallel titration is opened. For a better overview,
it is advisable to use the connected devices only in one parallel titration at
the same time, e.g. Titrino 1 and Sample Changer are used in parallel titration 1; Titrino 2 in parallel titration 2.
The parallel titrations are independent of each other. The buttons
<Stop>, <Continue> are always effective for the visible parallel titration. All
other commands under the menu item
lel titration.
Each parallel titration has an own silo memory. The commands under
menu item
File apply to the active silo memory.
Note:
If you are working with parallel titrations, you should not use methods
generating PDF reports.
5.5.2 Remove parallel titration
File, Remove parallel titration
Use this command if you wish to remove the parallel titration added last.
The tab with the opened parallel titration is removed from the main window.
<Start>,
Commands also apply to this paral-
5.5.3 Rename parallel titration
Use the context-sensitive command Rename to change the default name
Titration No. # on the tab. The Name window is displayed where the desired
name can be entered and confirmed with <OK>.
50 • Titrations TiNet 2.5 Compliant
Page 53

6. Results
6.1 General information on determination data
TiNet 2.5 Compliant saves determination data in two different databases
which are called TiNet database and Result database.
TiNet database
In the TiNet database, determination data are stored non-compliant to 21
CFR Part 11. Data can be displayed, sorted, and recalculated (see section
6.2).
Result database
In the Result database, determination data (including raw data file and
method file) are stored in compliance to 21 CFR Part 11 and shown in the
Results overview table (see section 6.3). Results can be electronically
signed and PDF reports and result reports can be printed.
6.2 TiNet database
TiNet 2.5 Compliant, Extra, Results, TiNet database
This menu item opens the TiNet 2.5 – Results window. Here, data of the TiNet database can be displayed, sorted, and recalculated. You will find detailed information on the TiNet database in the 8.110.8243 Instructions
for Use "TiNet 2.4/2.5", section 8.
TiNet 2.5 Compliant Results • 51
Page 54

6.3 Results overview
6.3.1 Display of results
TiNet 2.5 Compliant, Extra, Results, Results overview
This menu item opens the Results overview window for display of the determination data stored in the result database in a tabular form.
Each row of the results overview table contains data of a single determination. The determinations are sorted chronologically in descending order,
e.g. the last determination performed is in the first row.
The columns of the results overview table are described in section 6.3.2.
Select determinations
A single determination can be selected by clicking into any field of the row
using the left mouse key. The selected row is marked with the
the first column.
The navigation keys below the table can be used to select another determination:
Select first determination.
Select previous determination.
Select next determination.
Select last determination.
icon in
52 • Results TiNet 2.5 Compliant
Page 55

Menu items
The
Results overview table contains the following menu items:
File
Show PDF report Show PDF report of the selected determina-
tion in the Adobe Acrobat Reader program
(see section 6.3.3).
Print result report Print result report of the selected determina-
tion (see section 6.3.4).
Sign result Electronically sign the results of the selected
determination (see section 6.3.5).
Export result Export the results of the selected determina-
tion (see section 6.3.6).
Delete result Delete the results of the selected determina-
tion (see section 6.3.7).
Close Close Results overview window.
View
Column view Define column view for the results overview
table (see section 6.3.8).
Edit filter Edit filter options for the Results overview table
(see section 6.3.9).
Apply filter Apply filter for the Results overview table (see
section 6.3.10).
TiNet 2.5 Compliant Results • 53
Page 56

6.3.2 Columns of the results overview table
The following columns can be displayed in the results overview table (see
also section 6.3.6):
Record Automatically generated, consecutive number for data sets.
Date Date when determination was started.
Time Time when determination was started.
User Name of the user who has started the determination.
Remark Remark entered on the Sample data tab.
Method Name of the method used to process the determination.
Version Version number of the method used.
Id1...Id7 Sample identifications.
Sample size
Sample size (mass).
Unit Unit of the sample size.
RS1...15 Name
Name for result 1...15
RS1...15 Value
Value for result 1...15
RS1...15 Unit
Unit for result 1...15
Signer User name of the last user who signed the determination.
Signer name
Full name of the last user who signed the determination.
Sign date
Date and time when the determination was signed.
Sign comment
Comment entered at signing the determination.
54 • Results TiNet 2.5 Compliant
Page 57

6.3.3 Show PDF report
Results overview, File, Show PDF report
This menu item opens the PDF report of the selected determination with
the Adobe Acrobat Reader, from which it can be printed to the desired
printer.
Note: PDF reports can only be displayed if they have been generated
automatically at the end of the determinations. This happens only if the
method contains a report block with the Print immediately option enabled,
and if the
Print options are set in order to create PDF reports (see sections
1.1.2 and 3.4.2).
TiNet 2.5 Compliant Results • 55
Page 58

6.3.4 Print result report
Results overview, File, Print result report
With this menu item, a result report of the selected determination is printed
on the default printer.
56 • Results TiNet 2.5 Compliant
Page 59

This report contains the following entries (independent of the set column
view):
Date: Date when determination was started.
Time: Time when determination was started.
User: Name of the user who has started the determination.
Remark: Remark entered on the Sample data tab.
Method: Method name.
Version: Version number of the method
Id1...Id7 Sample identifications (all identifications which are not empty
are printed).
Sample size
Sample size (mass).
Unit Unit of the sample size.
Results Results (all results which are not empty are displayed)
Report printed on:
Date and time when the result report was printed.
Signed by:
Full name of the user who signed the results.
Signed on:
Date and time when the results were signed.
Sign comment:
Comment for the signature.
6.3.5 Sign result
Results overview, File, Sign result
With this menu item, the Sign-off window appears for applying electronic
signatures on results of the selected determination (the old signature data
is overwritten).
TiNet 2.5 Compliant Results • 57
Page 60

User name
Name of the user who wants to sign the results.
Password
Password of the user who wants to sign the results.
Meaning User-specific comment to the signature.
6.3.6 Export result
Results overview, File, Export result
With this menu item, the results of the selected determination are exported
according to the set
Export settings (see section 3.4.3).
Import of results into the results database is impossible.
6.3.7 Delete result
Results overview, File, Delete result
With this menu item, the results of the selected determination can be deleted.
After confirmation of the deleting action, the Delete result window opens,
where two administrators must confirm the deletion by entering user name
and password.
58 • Results TiNet 2.5 Compliant
Page 61

6.3.8 Column view for results overview
Results overview, View, Column view
This menu item opens the Column view window for definition of the columns (display, name, width) to be displayed in the results overview.
Column Name of the parameter to be displayed as column (display
only, meaning see section 6.3.2).
Designation
User-specific designations for columns.
Width Column width in pixel. The column width can also be set in the
results overview table by drag and drop of the column border
using the left mouse key.
Visible Selection of columns to be displayed in the results overview ta-
ble.
TiNet 2.5 Compliant Results • 59
Page 62

6.3.9 Edit filter for results
Results overview, View, Edit filter
This menu item opens the Edit filter window for definition of filter conditions
to filter the results overview table.
Field name
Selection of the desired column for the filter condition.
Operator Selection of the operator for the filter condition (=, <>, <, >).
Value Value for the filter condition.
The two filter conditions can be combined either with And or with Or.
The filter is applied to the results overview table with
Apply filter
.
6.3.10 Apply filter for results
Results overview, View, Apply filter
Apply the filter set with Results overview, View, Edit filter to the results overview table.
Results overview, View,
60 • Results TiNet 2.5 Compliant
Page 63

7. Working according to 21 CFR 11
In this section, you will find a detailed description how to work with "TiNet
2.5 Compliant" according to 21 CFR 11. In order to do this, the program
must have been installed according to section 1.2.2.
7.1 Program settings
7.1.1 First login
1. Open the TiNet 2.5 Compliant program. The Login window appears.
2. Enter "
for
Admin" for User name and "TiNet2" (pay attention to capitalization)
Password. Click on <OK>.
7.1.2 Security policies
1. Select Extra/Security policies to open the Security policies window (see
section 3.1).
2. On the Login/Password protection tab, click on <Apply> to set the pa-
rameters according to 21 CFR 11 (see section 3.1.1). If desired, modify the maximum number of login attempts, the automatic logoff time,
the minimum password length and the password expiration time.
3. On the
ing to 21 CFR 11 (see section 3.1.2).
4. On the
strings for comments on method modifications and signatures.
Audit Trail tab, click on <Apply> to set the parameters accord-
Default strings tab, add, modify and delete the desired default
5. Click on <OK> to close the Security policies window.
TiNet 2.5 Compliant Working according to 21 CFR 11 • 61
Page 64

7.1.3 Addition of new administrators
1. Select Extra/User administration to open the User administration window
(see section 3.2).
2. Using the right mouse key, click on the selected Administrator group
and select the
New user menu item.
3. Enter
click on
User name, Full name and Remarks for the new administrator and
<Accept>.
4. Repeat this procedure (steps 2 and 3) to enter a second new user
with administrator policies.
5. If desired, repeat this procedure (steps 2 and 3) to enter more users
with administrator policies.
6. Click on <OK> to close the User administration window.
7. Click on
<Logout>. The Login window opens (see section 3.3.1).
8. Enter the user name of one of the new administrator users into the
User name field and the same user name into the Password field. Click
on
<OK>.
9. Confirm the message appearing in the Information window with <OK>.
The Change password window appears.
10. Enter the user name into the Old password field and a new password
into the New password field. Confirm this password by reentering it in
the
Confirm password field and click on <OK>.
11. Enter the new password in the Login window and click on <OK>.
12. Select Extra/User administration to open the User administration window.
13. Expand the
Administrator branch in the left field of the window and se-
lect the Admin user.
14. Using the right mouse key, click on the selected
the
Remove user menu item.
Admin user and select
15. Confirm the appearing message with <OK>. The Admin user will be
removed from the Administrator group.
62 • Working according to 21 CFR 11 TiNet 2.5 Compliant
Page 65

7.1.4 Addition of user groups and users
1. Using the right mouse key, click into the left field of the User administra-
tion
window (see section 3.2) and select the New group menu item.
2. Enter the desired
Group name and Description and click on <Accept>
(see section 3.2.1).
3. Expand the new user group branch and click on
Access policies (see
section 3.2.2).
4. Disable the desired menu items, which should not be accessed by
this user group, and click on
5. Click on
Signatures (see section 3.2.3).
<Accept>.
6. Enable or disable the electronic signature policy for methods and results for this group and click on
<Accept>.
7. Using the right mouse key, click on the new user branch and select
the
New user menu item.
8. Enter
User name, Full name and Remarks for the new user and click on
<Accept>.
9. Repeat this procedure to enter all the desired user groups and users.
10. Click on <OK> to close the User administration window
7.1.5 Print options
1. Select Extra/Options/Print options to open the Print options window (see
section 3.4.2).
2. In the
Print options for TiNet reports box, enable the Special printer op-
tion and select the FinePrint pdfFactory Pro printer driver.
3. In the
Print options for PDF reports box, select the printer to which PDF
reports will be printed.
4. Select the directory to which PDF reports will be saved.
5. Enable or disable the option for immediate printing of PDF reports
(Adobe Acrobat Reader must be installed).
6. Click on <OK> to close the Print options window.
TiNet 2.5 Compliant Working according to 21 CFR 11 • 63
Page 66

7.2 Configuration of devices
1. Select Extra/Configuration to open the TiNet 2.5 Configuration window.
2. Configure all devices connected to the PC (see 8.110.8243 Instruc-
tions for Use "TiNet 2.4/2.5", section 2).
3. Close the
TiNet 2.5 Configuration window.
7.3 Methods
7.3.1 Create new draft methods
1. Select Extra/Methods/New method to open the TiNet 2.5 Methods win-
dow.
2. Create the new draft method (see 8.110.8243 Instructions "TiNet
2.4/2.5", section 2).
3. In order to generate automatically a PDF report, make sure that the
Print immediately option is enabled in the report block. This report gen-
eration only works with one report block per method (others are ignored).
4. Save the new method in the desired directory.
5. Close the TiNet 2.5 Methods window.
7.3.2 Save methods in the method database
1. Select Extra/Methods/Method administration to open the Method admini-
stration
2. Select the Current method directory from which you would copy draft
methods into the method database.
3. Select the desired draft method, which should be saved as database
method.
4. Using the right mouse key, select the
item. The
window (see section 4.3.1).
Save method in database menu
Comment on method modification window appears.
64 • Working according to 21 CFR 11 TiNet 2.5 Compliant
Page 67

5. Select a method description and enter a comment for the method.
Click on
<OK>.
6. You are asked if you want to sign the method. Click on <Yes> (details
see section 7.3.3) or <No>.
7. Repeat this procedure for all draft methods you want to save in the
method database.
8. Close the Method administration window.
7.3.3 Sign methods
1. Select Extra/Methods/Method administration to open the Method admini-
stration
2. Select the desired database method, which should be signed.
window (see section 4.3.1).
3. Using the right mouse key, select the
Sign-off window appears.
Sign method menu item. The
4. Enter your user name and password and select or enter a sign comment. Click on <Sign-off> to sign the method. Afterwards, click on
<Sign-off>.
TiNet 2.5 Compliant Working according to 21 CFR 11 • 65
Page 68

5. If desired, print a method report including all method data stored in
the method database by selecting the
the right mouse key.
6. Close the Method administration window.
7.3.4 Restrict method selection
1. Enable the Extra/Methods/Use signed methods only option to make sure
that only signed database methods can be selected in the
field of the
Sample data tab and for the silo.
Method report menu item using
Method
2. To make sure that users cannot disable the
option, disable this menu item for the user group under
stration/'Group'/Access policies/Menu items
7.4 Results
7.4.1 Sign results
1. Select Extra/Results/Results overview to open the Results overview win-
dow (see section 6.3).
2. Select the desired result, which should be signed.
3. Using the right mouse key, select the
Sign-off window appears.
Use signed methods only
User admini-
(see section 3.2.2).
Sign-off result menu item. The
4. Enter your user name and password and select or enter a sign comment. Click on <Sign-off> to sign the result. Afterwards, click on
<Sign-off>.
5. If desired, print a result report including all determination data stored
in the result database by selecting the Result report menu item using
the right mouse key.
6. Close the Results overview window.
66 • Working according to 21 CFR 11 TiNet 2.5 Compliant
Page 69

7.4.2 Show and print result reports
1. Select Extra/Results/Results overview to open the Results overview win-
dow (see section 6.3).
2. Select the desired result whose PDF report should be shown. Using
the right mouse key, select the
Acrobat Reader program opens showing the PDF report of the selected determination. This report can be printed or copied to the desired directory.
3. Select the desired result whose result report should be printed. Using
the right mouse key, select the Print result report menu item. The result
report including all relevant data of the determination (including
method name, method version and signature data) is printed on the
selected printer. Using the Adobe Acrobat program (full version), it is
possible to generate a PDF file of this report and save it in the desired
directory.
Show PDF report menu item. The Adobe
TiNet 2.5 Compliant Working according to 21 CFR 11 • 67
Page 70

7.5 Audit Trail
7.5.1 Display Audit Trail
TiNet 2.5 Compliant, View, Audit Trail
This menu item opens the
Audit Trail window where all program actions
defined as Audit Trail actions are displayed. The Audit Trail table contains
the following columns:
Type Icon for characterization of the Audit Trail action:
Information for correct action.
Warning for special action.
Error or malfunction.
Date Date and time of the Audit Trail action.
Time zone
Time zone of the Audit Trail action.
Source Display of the source program part of the Audit Trail action.
User Short name of the logged-in user.
User name
Full name of the logged-in user.
Action Details of the Audit Trail action.
System name
System name defined with Extra, Options, System name.
68 • Working according to 21 CFR 11 TiNet 2.5 Compliant
Page 71

Exported Display, if the Audit Trail action has already been exported or
not.
The
Audit Trail window contains the following menu items:
Audit Trail, File, Find date…
In the
Date window, the desired date can be selected.
Audit Trail, File, Export
Export Audit Trail actions.
Audit Trail, File, Delete
Delete Audit Trail actions.
Audit Trail, View, Column view
Define the column view of the Audit Trail table.
7.5.2 Export Audit Trail
Audit Trail, File, Export
This menu item opens the Export Audit Trail window for selection of the
range for export of Audit Trail actions. Afterwards, file name and directory
for saving the export file (
*.txt) must be entered.
TiNet 2.5 Compliant Working according to 21 CFR 11 • 69
Page 72

7.5.3 Delete Audit Trail
Audit Trail, File, Delete
With this menu item, the Delete Audit Trail window opens, where two administrators must confirm the deletion by entering user name and password. Afterwards, the Export Audit Trail window for selection of the range
for export of the Audit Trail actions, which are exported prior to the deletion.
7.5.4 Column view for Audit Trail
Audit Trail, View, Column view
70 • Working according to 21 CFR 11 TiNet 2.5 Compliant
Page 73

This menu item opens the Column view window for definition of the columns (display, name, width) to be displayed in the Audit Trail table. The
following columns can be edited:
Column Name of the parameter to be displayed as column (display
only).
Designation
User-specific designations for columns.
Width Column width in pixel. The column width can also be set in the
Audit Trail table by drag and drop of the column border using
the left mouse key.
Visible Selection of columns to be displayed in the Audit Trail table.
TiNet 2.5 Compliant Working according to 21 CFR 11 • 71
Page 74

72 • Appendix TiNet 2.5 Compliant
Page 75

8. Appendix
8.1 Software license
The use of the Software is subject to this License Agreement between you
and Metrohm AG. With the offer, you have received this License Agreement and taken note of it. You have already accepted this License Agreement upon the placement of your order with Metrohm AG or one of its distributors or upon confirmation of the order by Metrohm or one of its distributors. At the very latest, you agree to be bound by the terms of this License Agreement when you start using the Software.
1. Metrohm grants you the non-transferable and non-exclusive right to
use this Software in connection with Metrohm analysis devices.
2. The copyright to the Software is retained by Metrohm or a licensor of
Metrohm. You are not permitted to alter or remove any notes regarding confidential handling, indications of title or indications of copyright.
You are not permitted to sell the Software, lease it to or otherwise pass
it on to third parties, except in conjunction with its use with analysis
devices of the Metrohm Group and if the third party expressly agrees
to the terms of this License Agreement. It is not permitted to change
or copy the Software in its entirety or in part. It is only permissible to
make one copy for backup purposes.
3. The license fee for the above use is included in the sales price of the
analysis device. If the software is supplied separately, the fee is billed
along with the Software. If for any reason the sales price or the license
fee is not paid in full by the due date, the right to use the Software
lapses and Metrohm is entitled to demand the return of the Software
or its deletion from your system.
4. Metrohm warrants that the Software is suitable for the indicated use
with analysis devices of the Metrohm Group if properly operated and
that the Software is properly stored on the data carrier. If this is not the
case, you are entitled to demand that Metrohm and/or its distributor
provide you with a new flawless Software in exchange for handing in
the Software you have complained about. This warranty applies to initial operators of the Software only.
5. Metrohm and its distributor disclaim all other warranties and liability. In
particular, Metrohm and its distributor assume no liability for thirdparty damage or consequential damage, loss of data, lost profits, interruption of business, etc.
6. This Agreement applies until it is terminated. You can terminate this
Agreement by destroying the Software and every copy of it. The
Agreement is also deemed terminated if you violate any of its terms, in
which case you are also obligated to destroy the Software and every
TiNet 2.5 Compliant Appendix • 73
Page 76

copy of it, whereby Metrohm is also entitled to explicitly demand this
of you.
7. Any changes and amendments to this Agreement must be rendered
in writing to attain validity. This stipulation requiring written form also
applies to a change in this provision. If parts of this Agreement prove
to be null and void or legally ineffective now or in the future, the remainder of the Agreement continues to apply. The Agreement must
then be interpreted and applied so that the intended purpose of the
ineffective section is nevertheless achieved to the greatest extent possible.
8. Venue: Any disputes arising from this Agreement shall be decided by
the courts at the location of the registered office of Metrohm AG.
Metrohm is also entitled to demand that the venue be the location of
the defendant's registered office.
8.2 Declaration of conformity – Software validation
The software "Metrodata TiNet 2.5 Compliant" was developed in accordance with the requirements of the ISO 9001 quality system regarding the
design, testing and servicing of Metrodata software. The relevant procedures are described in the document "Project procedure for creating Metrodata software" which is available at your Metrohm agency on request.
The software was validated with respect to functionality, analytical performance and accuracy of results. The technical specifications and software functions are described in the Instructions for Use.
Herisau, July 1, 2003
Dr. J. Frank Ch. Buchmann
Vice President Vice President
Head of R&D Head of Production
Responsible for Quality Assurance
74 • Appendix TiNet 2.5 Compliant
Page 77

8.3 Accessories
8.3.1 Standard equipment
TiNet 2.5 for n devices ...................................................... 6.6012.140
including
Dongle ........................................................................................6.2145.000
TiNet 2.5 for 2 devices ...................................................... 6.6012.540
including
Dongle ........................................................................................6.2145.060
Both versions are supplied with the following documents:
Registration card ........................................................................8.110.8167
Compliance White Paper for TiNet 2.5 Compliant (English) ...... 8.110.8343
Instructions for Use TiNet 2.4/2.5 (German)...............................8.110.8241
Instructions for Use TiNet 2.4/2.5 (English)................................8.110.8243
Instructions for Use TiNet 2.5 Compliant (German)...................8.110.8351
Instructions for Use TiNet 2.5 Compliant (English) ....................8.110.8353
8.3.2 Options
Cables and adapters
Cable Metrohm device - PC:
Metrohm device 25-pin – PC 25-pin .................................... 6.2125.060
Metrohm device 9-pin – PC 25-pin ...................................... 6.2125.110
Metrohm device 25-pin – PC 9-pin ...................................... 6.2125.110
Metrohm device 9-pin – PC 9-pin ........................................ 6.2134.040
Adapter for 25-pin ⇒ 9-pin plug................................................. 6.2125.010
Cable PC-Balance
Sartorius-PC, 25-pin............................................................. 6.2125.070
Sartorius-PC, 9-pin............................................................... 6.2134.060
Mettler AM, PM, AT - PC, 25-pin .......................................... 6.2146.020
Mettler AM, PM, AT - PC, 9-pin .......................6.2146.020+6.2125.010
Mettler AE (Opt.011) - PC, 25-pin ........................................ 6.2125.020
Mettler AE (Opt.011) - PC, 9-pin .....................6.2125.020+6.2125.010
Mettler PG - PC, 25-pin ........................................................6.2125.130
Mettler PG - PC, 9-pin ..........................................................6.2134.110
Mettler AB, AG, PR - PC, 25-pin .................. Mettler Interface LC-RS25
Mettler AB, AG, PR - PC, 9-pin ...................... Mettler Interface LC-RS9
AND - PC, 25-pin .................................................................6.2125.020
AND - PC, 9-pin ..............................................6.2125.020+6.2125.010
Precisa - PC, 25-pin ............................................................. 6.2125.080
Precisa - PC, 25-pin ........................................6.2125.080+6.2125.010
Cable PC (25-pin)-Dosimat ........................................................6.2124.050
Adapter for the connection of one
electrode to 2 Titrinos.......... 6.2103.100
Interfaces for PC
USB Port Server (4 serial interfaces, 9-pin)................................ 2.145.0320
Multiport DIGI PCI (8 serial interfaces, 25-pin) ...........................2.145.0230
TiNet 2.5 Compliant Appendix • 75
Page 78

9. Index
21 CFR 11 ................................13, 15, 61
Access policies ....................................17
Accessories..........................................75
Adapters...............................................75
Administrator policies...........................17
Appendix ..............................................73
Application note .............................32, 39
Apply filter.............................................60
Audit Trail
Column view......................................70
Delete ................................................70
Export................................................69
Settings .............................................15
Show .................................................68
Autostart ...............................................38
Backup ...................................................7
Balance ................................................47
Buttons for titrations .............................46
Cables ..................................................75
Change password................................20
Conditioning...................................46, 47
Configuration........................................11
Conformity............................................74
Connection of devices .........................11
Continue...............................................46
Create new method..............................28
Curve settings ......................................21
Database methods
Delete ................................................33
Display ..............................................29
Export................................................32
General information ..........................27
Report ...............................................33
Save ..................................................31
Use....................................................34
Database options................................. 25
Datenbankoptionen .............................24
Declaration of conformity.....................74
Default strings ................................15, 31
Deinstallation........................................10
Delete
Audit Trail actions..............................70
Methods ............................................33
Results ..............................................58
Determinations
Delete ............................................... 58
Display.............................................. 52
Export ............................................... 58
Export settings.................................. 23
General information.......................... 51
Result report ..................................... 56
Select................................................ 52
Sign................................................... 57
Dongle ........................................... 10, 75
Draft methods
Create ............................................... 28
Directory ........................................... 28
Display.............................................. 29
Edit.................................................... 28
General information.......................... 27
Drying titration vessel .......................... 47
Edit filter ............................................... 60
Electronic signature
Authorization..................................... 18
Comment.................................... 32, 58
Method ............................................. 32
Result................................................ 57
Emergency stop ............................ 46, 49
Entries for titrations........................ 38, 42
Export
Audit Trail.......................................... 69
Determinations ................................. 24
Methods............................................ 32
Results.............................................. 58
Settings............................................. 23
Filter ..................................................... 60
General information
Determination data........................... 51
Methods............................................ 27
Result database................................ 51
Results.............................................. 51
TiNet database ................................. 51
Working with TiNet.............................. 7
Help ....................................................... 7
Identifications............... 39, 40, 42, 54, 57
Installation
PDF Printer driver ............................... 8
TiNet 2.5 Compliant............................ 8
76 • Index TiNet 2.5 Compliant
Page 79

Interfaces ............................................. 75
KF titrations.......................................... 47
License ................................................ 73
Live titration curves........................ 21, 49
Login
First login.......................................... 61
Login window ................................... 20
Options............................................. 13
Logout ................................................. 20
Main window.................................... 6, 35
Menu items.......................................... 36
Method directory ................................. 28
Methods
Administration .................................. 29
Create new method.......................... 28
Database methods........................... 27
Delete ............................................... 33
Directory ..................................... 28, 29
Draft methods................................... 27
Edit ................................................... 28
Export ............................................... 32
General information.......................... 27
Modification comment ..................... 30
Report............................................... 33
Save in database.............................. 31
Select method ............................ 39, 42
Settings according to 21 CFR 11..... 64
Sign .................................................. 32
Version.................................. 27, 30, 31
Modification comment......................... 30
Operating system .................................. 8
Ordering designations......................... 75
Oven Sample Processor ..................... 48
Overview ................................................ 5
Overview of TiNet .................................. 6
Parallel titrations .................................. 50
Password options................................ 14
Password protection ..................... 13, 20
PDF Factory Pro .................................... 8
PDF report
Print .................................................. 55
Print options ..................................... 22
Show................................................. 55
Performing titrations ............................ 46
Pre-titration .......................................... 47
Print
Options....................................... 22, 63
PDF report ........................................ 55
Printer selection................................ 22
Result report................................56, 57
Program description ..............................5
Program installation ............................... 8
Program parts ........................................ 6
Program settings.................................. 13
Program settings for 21 CFR 11 .......... 61
Program sub-directories ........................ 6
Purpose of program............................... 5
Remark................................................. 38
Rename parallel titration ...................... 50
Report
Database methods ...........................33
PDF report.........................................55
Print options...................................... 22
Result database
Database options .............................25
Delete results .................................... 58
Directory selection ............................25
Export results .................................... 58
General information ..........................51
Pack ..................................................25
PDF report.........................................55
Result report......................................56
Sign results ....................................... 57
Result report......................................... 56
Resultatdatenbank
Datenbankoptionen ..........................24
Results
Delete................................................ 58
Display ..............................................52
Export................................................ 58
General information ..........................51
Overview ...........................................52
Result database................................ 51
Result report......................................56
Settings according to 21 CFR 11 .....66
Sign ...................................................57
View................................................... 44
Results overview
Apply filter ......................................... 60
Column view .....................................59
Columns............................................ 54
Edit filter ............................................60
Menu items .......................................53
Open .................................................52
Sample data
Data transfer from balance ...............47
Entries ............................................... 38
Entry ..................................................42
TiNet 2. 5 Compliant Index • 77
Page 80

View...................................................40
Sample identifications..39, 40, 42, 54, 57
Sample series ................................41, 46
Sample size..................39, 42, 47, 54, 57
Security policies .............................13, 61
Series ...................................................41
Signature
Authorization .....................................18
Comment ....................................32, 58
Method..............................................32
Result ................................................57
Silo
Delete all silo rows ............................43
Delete silo .........................................44
Delete silo row...................................43
Display ..............................................41
Edit silo row.......................................42
Enter new silo data ...........................43
Insert silo row ....................................43
Load silo............................................44
Modify existing silo data ...................43
Save silo............................................44
Set active...........................................38
Silo memory ......................................41
View results .......................................44
View sample data..............................40
Simultaneous titrations.........................50
Single determinations ..........................46
Size.......................................................39
Software
license............................................... 73
Software validation .............................. 74
Special character................................. 14
Special settings ................................... 11
Standard equipment............................ 75
Start...................................................... 46
State..................................................... 38
Status................................................... 41
Stop ............................................... 46, 49
System requirements............................. 8
TiNet database
General information.......................... 51
Open................................................. 51
TiNet report
Print options...................................... 22
Titration curves .............................. 21, 49
Titration stop ........................................ 49
Titrations .............................................. 35
User ......................................... 19, 38, 63
User administration.............................. 16
User groups............................. 16, 19, 63
User name ......................... 13, 19, 20, 38
View results.......................................... 44
View sample data ................................ 40
Weighing data...................................... 47
Working according to 21 CFR 11 ........ 61
Working with TiNet................................. 7
78 • Index TiNet 2. 5 Compliant
 Loading...