

Page 1
In-Wall Loudspeaker Systems
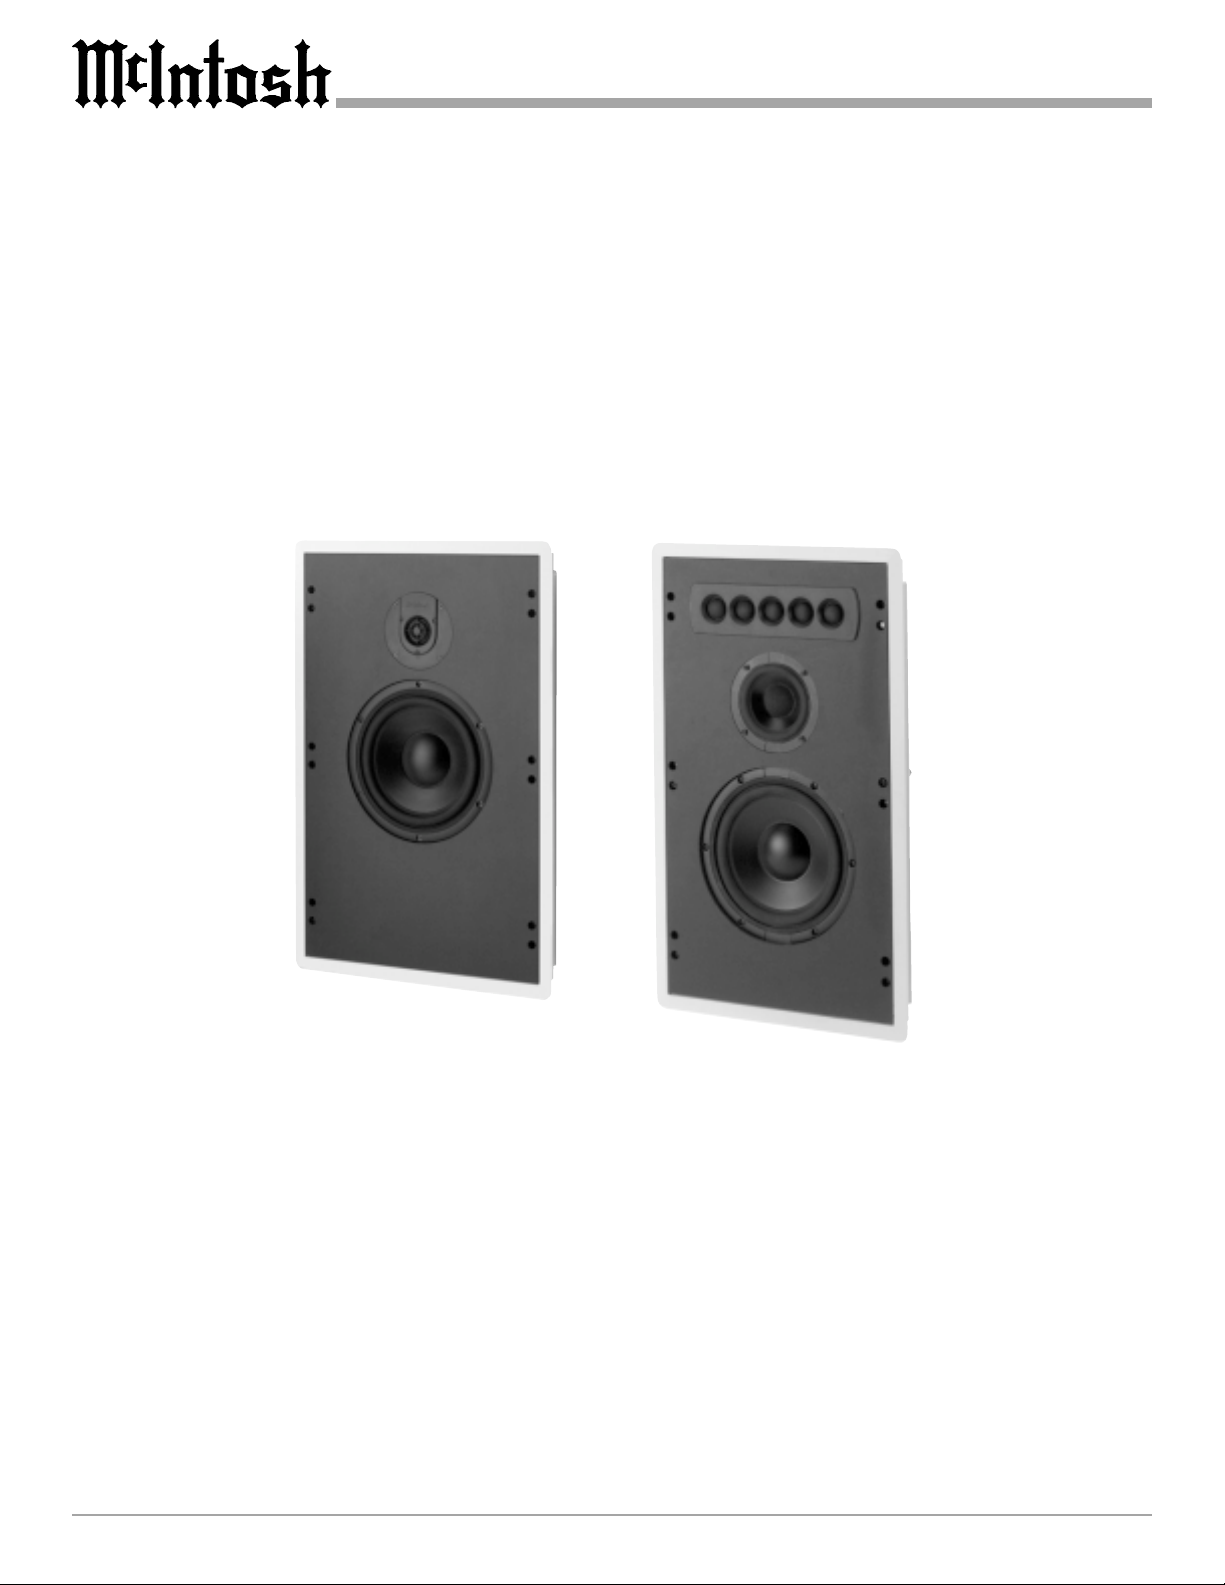
WS320 WS350
Installation
Guide
WS320
WS350
McIntosh Laboratory, Inc. 2 Chambers Street Binghamton, New York 13903-2699 Phone: 607-723-3512 FAX: 607-724-0549
Page 2

Installing the Loudspeaker
The WS320 and WS350 In-Wall Loudspeaker Systems require at least 3-3/4 inch of wall depth, including the wallboard. They can be mounted into a wall surface with a
thickness between 3/8 inch and 1 inch.
Tools and Fasteners Required:
Phillips Screwdriver Tape Measure
Drywall Saw or Knife Stud Finder
Pencil Bubble Level
Cable Ties
Parts Included:
Loudspeaker Baffle (1) Baffle Box (1)
Frame (1) Frame Gaskets (2)
Grille (1) Grille Fasteners (10)
Cutout Template (1) Painting Mask (1)
Clamping Pieces (2) Baffle Washers #8 (6)
Airtight Electrical Connector (1)
Frame Screws #10-24 x 3 inch (6)
Baffle Screws #10-24x 1-1/2 inch (6)
Optional Part:
RK320 Rough-In Bracket (designed to provide a cutout
and mounting frame for installation during new construction).
Use of Paint Mask
Set the Paint Mask between the baffle and grille to paint
the grille and frame without getting paint on the baffle and
Loudspeaker Elements.
Installing the Frame
The Frame Assembly consists of the frame and two clamping pieces, held together with six 3 inch screws. These
screws are fully extended to allow pushing the clamping
pieces toward each other so the whole assembly fits into
the cutout.
Note: If the optional RK320 Rough-In Bracket has already
been installed, go directly to step 3.
1. Hold the supplied cutout template against the wall and
align it using the bubble level. Tape the aligned template to the wall and trace the opening on the wall.
2. Cut out and remove the piece of wallboard. Pull
enough Loudspeaker Cable to be able to connect it to
the Loudspeaker Baffle while the baffle is still out of
the wall.
3. Install the two L Shaped self adhesive Frame Gaskets to the rear of the frame so that it will be between
the frame and the wall. Insert the right side of the assembly into the hole and push it to the right. This will
give enough room to insert the left side of the assembly
into the wall. Center the assembly in the opening.
4. Push the right side Clamping Piece up against the
backside of the wallboard. Tighten the now protruding
center screw enough to gently hold the frame in place.
Repeat on the other side of the frame.
5. Use the bubble level to assure the frame is correctly
positioned, and then tighten all the screws until the
frame is securely attached to the wallboard.
Note: To avoid crushing the wallboard, do not over tighten the
screws. If the mounting position places the frame near a
stud, remove the clamping piece and secure the frame
directly to the stud, through the provided holes.
Installing the Baffle Box
Before setting the Baffle Box into the frame, run the Loudspeaker Wire through the supplied Airtight Electrical Connector and tighten the connector onto the Loudspeaker
Cable. Be sure to pull enough wire through the connector
to allow connection to the crossover network on the back
of the Loudspeaker Baffle while it is still out of the wall.
Set the Baffle Box into the frame.
Note: The Baffle Box may be positioned with the Airtight
Electrical Connector either at the top or bottom.
Connecting the Loudspeaker
The McIntosh WS320 and WS350 In-Wall Loudspeaker
Systems utilize Binding Posts for Loudspeaker Cable Connections.
1. Connect a Loudspeaker Cable from the black or negative Loudspeaker Binding Post on the back of the
Loudspeaker Baffle to the negative or common output
terminal of one channel of the amplifier.
2. Connect a Loudspeaker Cable from the red or positive
Loudspeaker Binding Post on the back of the Loudspeaker Baffle to the positive or 4 ohm output terminal
of the same channel of the amplifier.
Note: Be sure to tighten the Loudspeaker and Amplifier
Binding Posts after connecting.
Installing the Loudspeaker Baffle
Place the Loudspeaker Baffle into the frame/box assembly
and screw it into place using the six supplied screws. Hold
the baffle in place until at least two screws are properly secured.
Note: Secure excess Loudspeaker Cable away from woofer
cone with cable ties.
Installing the Grille
Press onto each Loudspeaker Grille the supplied Rubber
Grille Fasteners, with three per side, two on the top and
bottom edges of the grille. Press the perforated metal grille
into the gap between the baffle and frame. Press all around
the edge until the grille sits flush with the frame.
2
Page 3

Installing the Loudspeaker
Rear View
Baffle Screws
Bottom (or Top)View
Airtight Electrical Connector
3
Page 4

Please Take A Moment
The serial number, purchase date and McIntosh dealer
name are important to you for possible insurance claim or
future service. The spaces below have been provided for
you to record that information:
Serial Number:
Purchase Date:
Dealer Name:
Technical Assistance
If at any time you have questions about your McIntosh
product, contact your McIntosh dealer who is familiar with
your McIntosh equipment and any other brands that may
be part of your system. If you or your dealer wish additional help concerning a suspected problem, you can receive technical assistance for all McIntosh products at:
McIntosh Laboratory, Inc.
2 Chambers Street
Binghamton, New York 13903
Phone: 607-723-1545
Fax: 607-723-3636
WS320 Performance Specifications
Driver Complement
8 inch Woofer
1 inch Dome Tweeter
Impedance
4 ohm Nominal
Frequency Response
60Hz - 20kHz
Sensitivity
86dB (2.8V/1m)
Crossover Frequency
1.5kHz
Power Handling
200 Watts Maximum
Dimensions
23.5 inches (59.7cm) Height, 14 inches (35.5cm) Width,
3.65 inches (9.3cm) Depth
+ 2dB (Anechoic Response)
WS350 Performance Specifications
Driver Complement
8 inch Woofer
4 inch Midrange
Five 1 inch Dome Tweeters
Impedance
4 ohm Nominal
Frequency Response
60Hz - 20kHz
Sensitivity
85dB (2.8V/1m)
Crossover Frequencys
300Hz and 1.5kHz
Power Handling
200 Watts Maximum
Dimensions
23.5 inches (59.7cm) Height, 14 inches (35.5cm) Width,
3.65 inches (9.3cm) Depth
+ 2dB (Anechoic Response)
Finish
White Primer Coat
Weight (each)
22 pounds (10kg) net, 29 pounds (13.2kg) in shipping carton
McIntosh Laboratory, Inc.
2 Chambers Street
Binghamton, NY 13903
Copyright 2001 ã by McIntosh Laboratory, Inc.
Finish
White Primer Coat
Weight (each)
25 pounds (11.3kg) net, 32 pounds (14.5kg) in shipping
carton
McIntosh Part No. 040783
 Loading...