


YMED8630HC1

W11204389A
W11204390A-SP
If you have any problems or questions, visit us at www.maytag.com
Pour tout problème ou question, consulter www.maytag.ca
Use and Care Guide
Guide d’utilisation et d’entretien
ELECTRONIC DRYER
SÉCHEUSE ÉLECTRONIQUE
Para obtener acceso
al Manual de uso y
cuidado en español, o para
obtener información adicional
acerca de su producto, visite:
www.maytag.com.
2
DRYER SAFETY
TABLE OF CONTENTS
DRYER SAFETY ....................................................................................... 2
ACCESSORIES .......................................................................................4
CHECK YOUR VENT SYSTEM FOR GOOD AIRFLOW .............5
CONTROL PANEL AND FEATURES .................................................6
CYCLE GUIDE .........................................................................................8
USING YOUR DRYER .........................................................................10
ADDITIONAL FEATURES .................................................................. 12
DRYER CARE ........................................................................................ 12
TROUBLESHOOTING — CONNECTIVITY .................................. 15
TROUBLESHOOTING ........................................................................ 16
CONNECTED APPLIANCE REGULATORY NOTICES .............19
WARRANTY ........................................................................................... 21
ASSISTANCE OR SERVICE ............................................ Back Cover
TABLE DES MATIÈRES
SÉCURITÉ DE LA SÉCHEUSE ........................................................22
ACCESSOIRES ....................................................................................24
VÉRIFICATION D’UNE CIRCULATION D’AIR ADÉQUATE
POUR LE SYSTÈME D’ÉVACUATION ............................................ 25
TABLEAU DE COMMANDE ET CARACTÉRISTIQUES ............ 26
GUIDE DES PROGRAMMES .......................................................... 28
UTILISATION DE LA SÉCHEUSE .................................................... 31
CARACTÉRISTIQUES SUPPLÉMENTAIRES .............................. 33
ENTRETIEN DE LA SÉCHEUSE ...................................................... 33
DÉPANNAGE – CONNECTIVITÉ ....................................................36
DÉPANNAGE ......................................................................................... 37
AVIS D’APPLICATION DE LA RÉGLEMENTATION
DE LA CONNEXION DES ÉLECTROMÉNAGERS ................... 41
GARANTIE .............................................................................................. 43
ASSISTANCE OU SERVICE .................................Couverture arrière
3
In the State of Massachusetts, the following installation instructions apply:
■ Installations and repairs must be performed by a qualified or licensed contractor, plumber, or gas fitter qualified or licensed by
the State of Massachusetts.
■ Acceptable Shut-off Devices: Gas Cocks and Ball Valves installed for use shall be listed.
■ A flexible gas connector, when used, must not exceed 4 feet (121.9 cm).
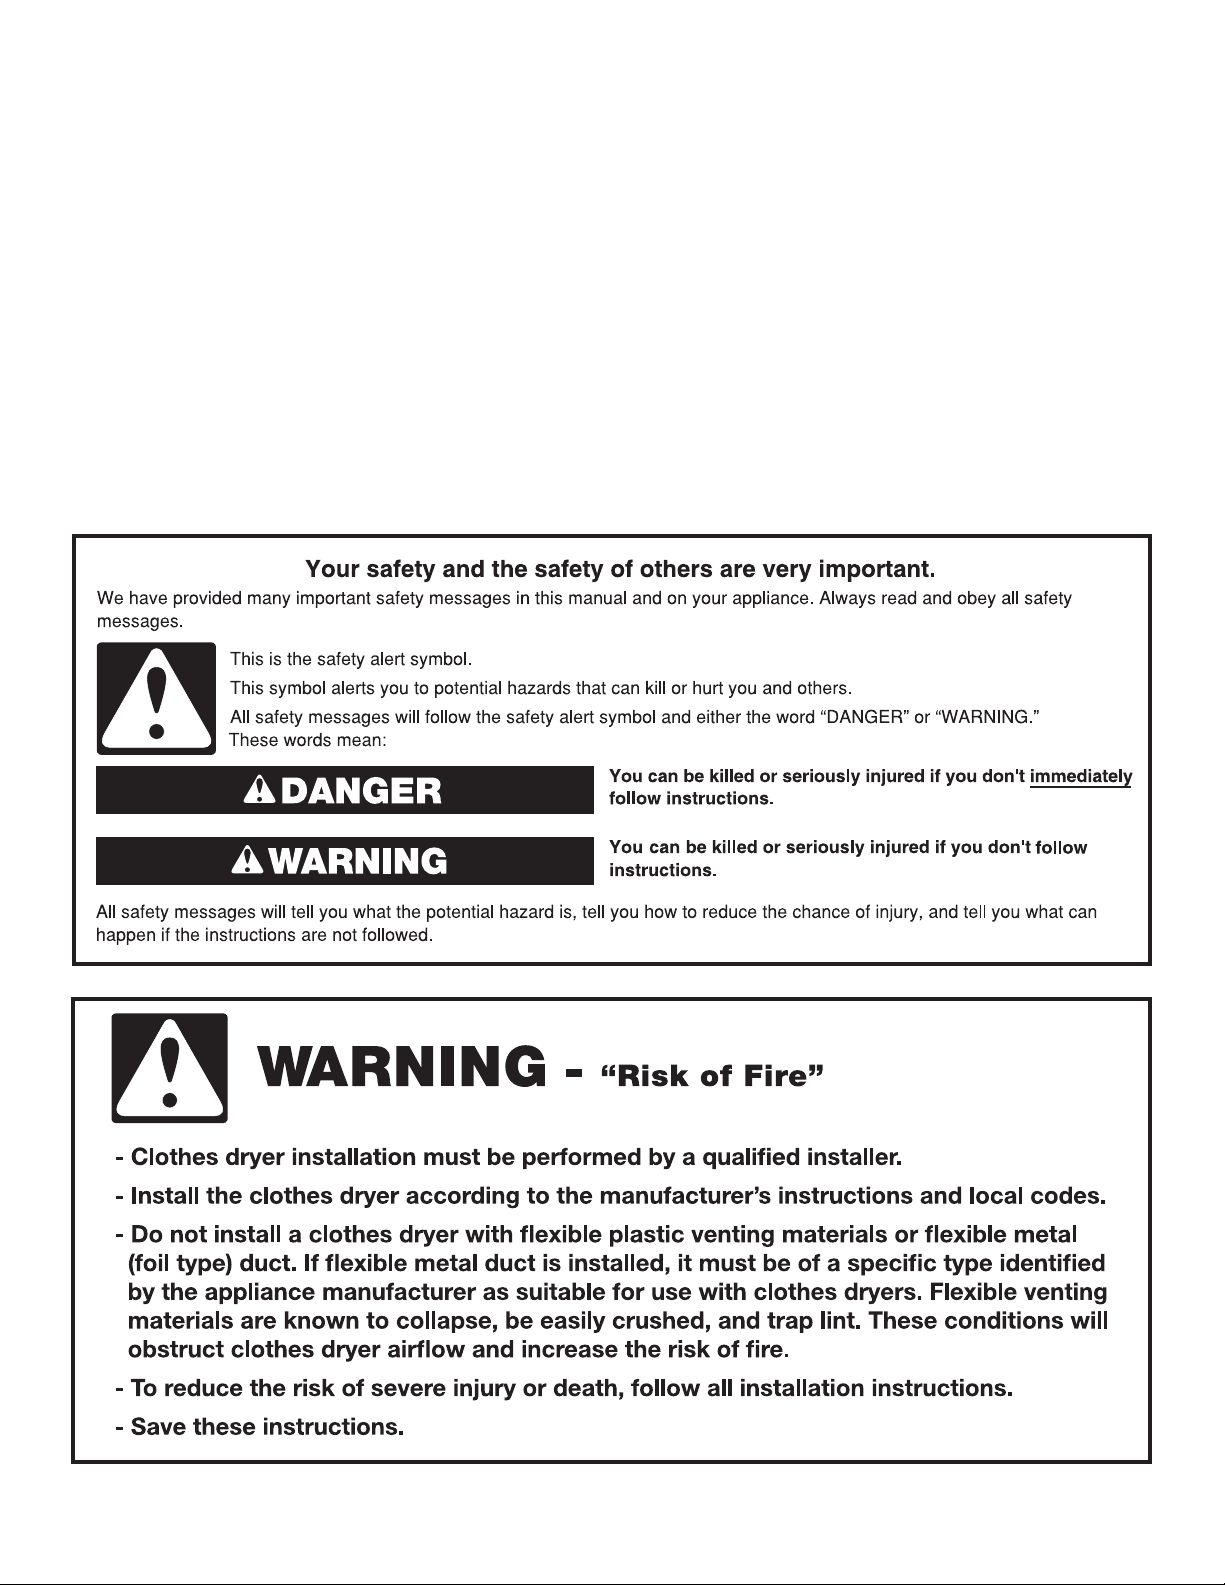
WARNING:
FIRE OR EXPLOSION HAZARD
Failure to follow safety warnings exactly could result in serious injury, death, or property
damage.
Do not store or use gasoline or other ammable vapors and liquids in the vicinity of this
or any other appliance.
–
–
WHAT TO DO IF YOU SMELL GAS:
•
Do not try to light any appliance.
•
Do not touch any electrical switch; do not use any phone in your building.
•
Immediately call your gas supplier from a neighbor’s phone. Follow the gas supplier’s
instructions.
•
If you cannot reach your gas supplier, call the re department.
–
Installation and service must be performed by a qualied installer, service agency, or
the gas supplier.
•
Clear the room, building, or area of all occupants.
4
ACCESSORIES
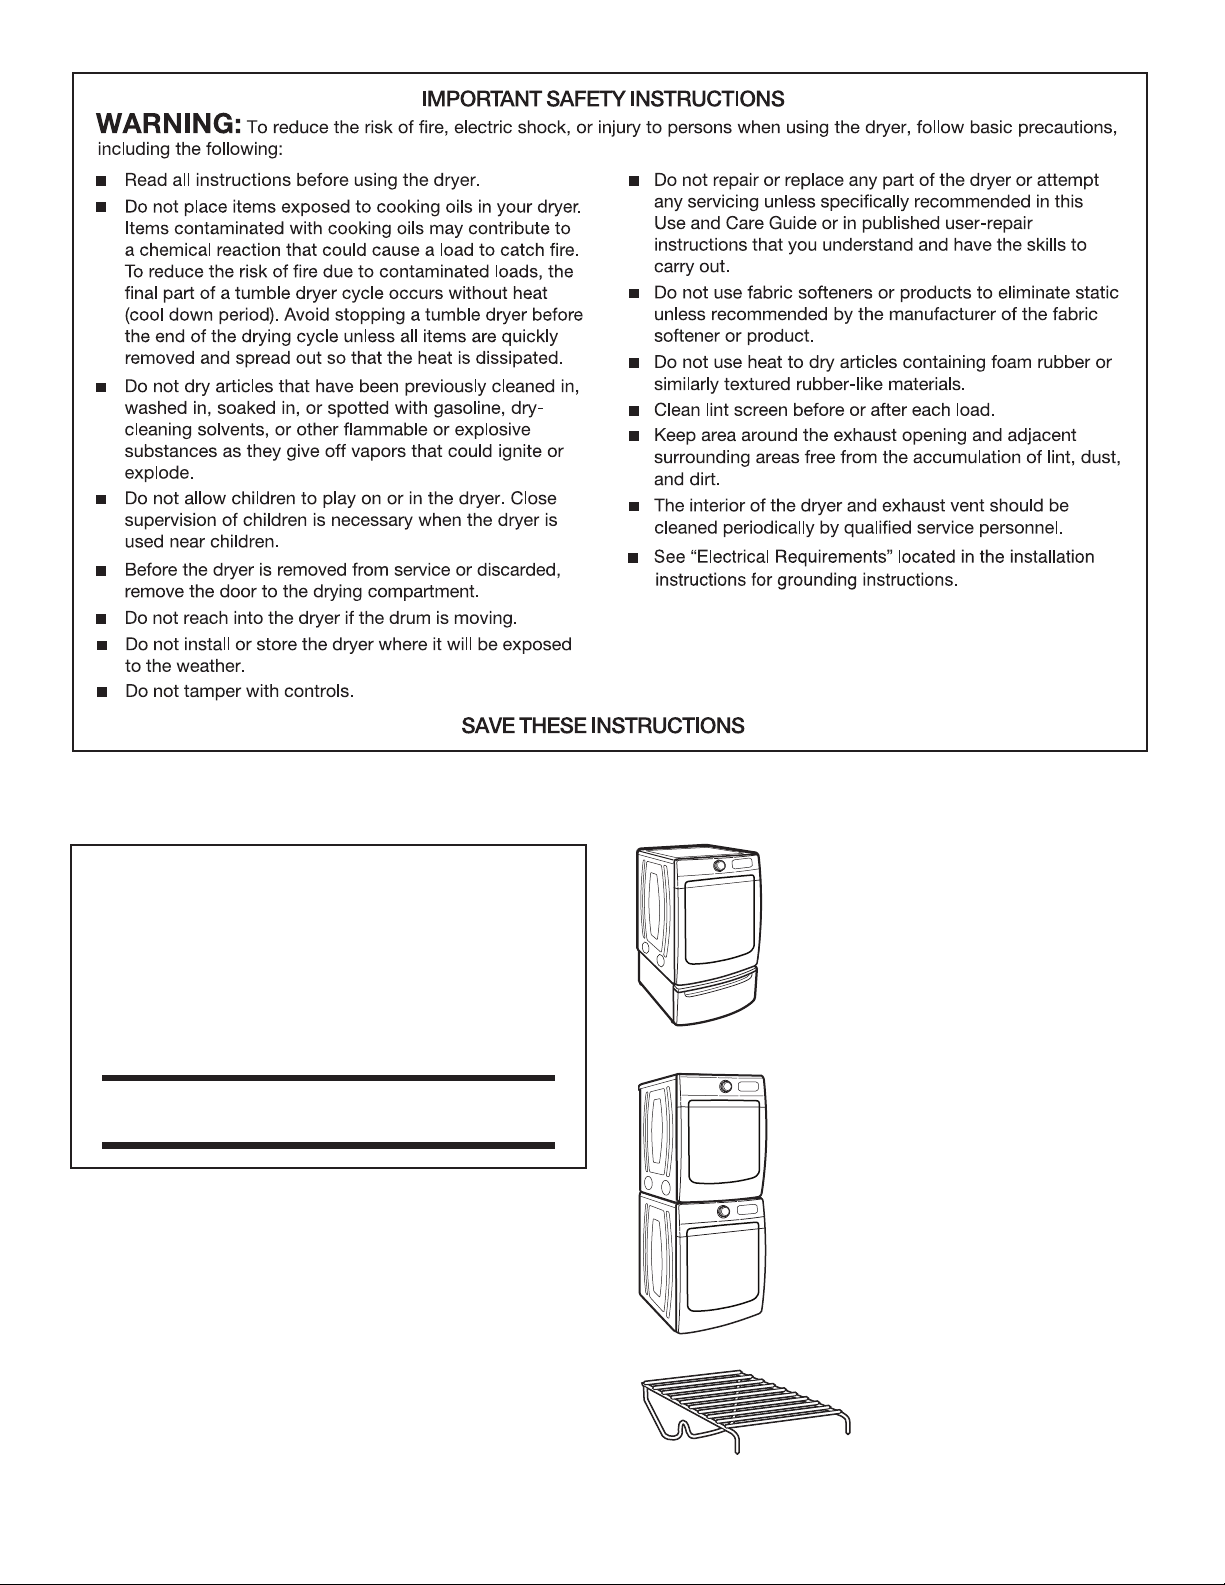
15" Pedestal
Color-matched pedestal raises the dryer to
a more comfortable working height. The large
drawer provides convenient storage.
Stack Kit
If space is at a premium, the stack kit allows
the dryer to be installed on top of the washer.
Drying Rack
The Drying Rack provides a
stationary drying surface for items
such as sweaters and tennis shoes.
See the “Additional Features”
section for more information.
Customize your new dryer with the following genuine
Maytag accessories. For more information on options and
ordering, contact your dealer, call us at 1-800-344-1274,
or visit: www.maytag.com/accessories.
In Canada, call 1-800-688-2002 or visit: www.maytag.ca
INSTALLATION & MAINTENANCE
ACCESSORIES
FACTORY CERTIFIED PARTS – these three
words represent quality parts and accessories
designed specically for your appliance.
Time tested engineering that meets
our strict quality specications.
FACTORY CERTIFIED PARTS
Accessories designed for your appliance:

5
CHECK YOUR VENT SYSTEM FOR GOOD AIRFLOW
Good airflow
Along with heat, dryers require good airflow to efficiently
dry laundry. Proper venting will reduce your drying times and
improve your energy savings. See Installation Instructions.
The venting system attached to the dryer plays a big role
in good airflow.
Service calls caused by improper venting are not covered by
the warranty and will be paid by the customer, regardless of
who installed the dryer.
Maintain good airflow by:
n
Cleaning your lint screen before each load.
n
Replacing plastic or foil vent material
with 4" (102 mm) diameter heavy, rigid
vent material.
Good
Better
n
Using the shortest length of vent possible.
n
Using no more than four 90° elbows in a vent system.
Each bend and curve reduces airflow.
n
Removing lint and debris from the exhaust hood.
n
Removing lint from the entire length of the vent system
at least every 2 years. When cleaning is complete, be
sure to follow the Installation Instructions supplied with
your dryer for final product check.
n
Clearing away items from the front of the dryer.
Use Sensor Cycles for optimal fabric care and energy savings
Use the Sensor Cycles to provide the optimal fabric care from the dryer. During Sensor Cycles, drying air temperature and moisture
level are sensed in the load. This sensing occurs throughout the drying cycle and the dryer shuts off when the load reaches the selected
dryness. You can also use the Extra Power option with Sensor Cycles for harder-to-dry or mixed loads.
With Timed Dry, the dryer runs the amount of time set and, if set for too long, can result in shrinkage, wrinkling, and static due to overdrying.
Use Timed Dry for the occasional damp load that needs a little more drying time or when using the drying rack.
Tips for getting the best performance from your steam dryer (on some models)
n
Results may vary depending on fabric. 100% cotton
garments with wrinkle-free finish may yield better results than
those without. 100% cotton items may require additional
touching up after cycles that use steam.
n
Use of a fabric softener sheet is not recommended with cycles
that use steam. It may cause temporary staining on clothes.
n
Cycles that use steam are not recommended for items that
have been starched. Wash any starched or new garments
prior to using cycles that use steam.
n
The Steam Refresh cycle is best for smoothing out wrinkles
and reducing odors from loads consisting of dry items of
wrinkle-free cotton, cotton-polyester blend, common knits,
and synthetics.
6
:
AirDry
High
Less
More
Off
+Steam
Sensing
Cool Down
Check Vent
Wet
Damp
EXTRA POW ER
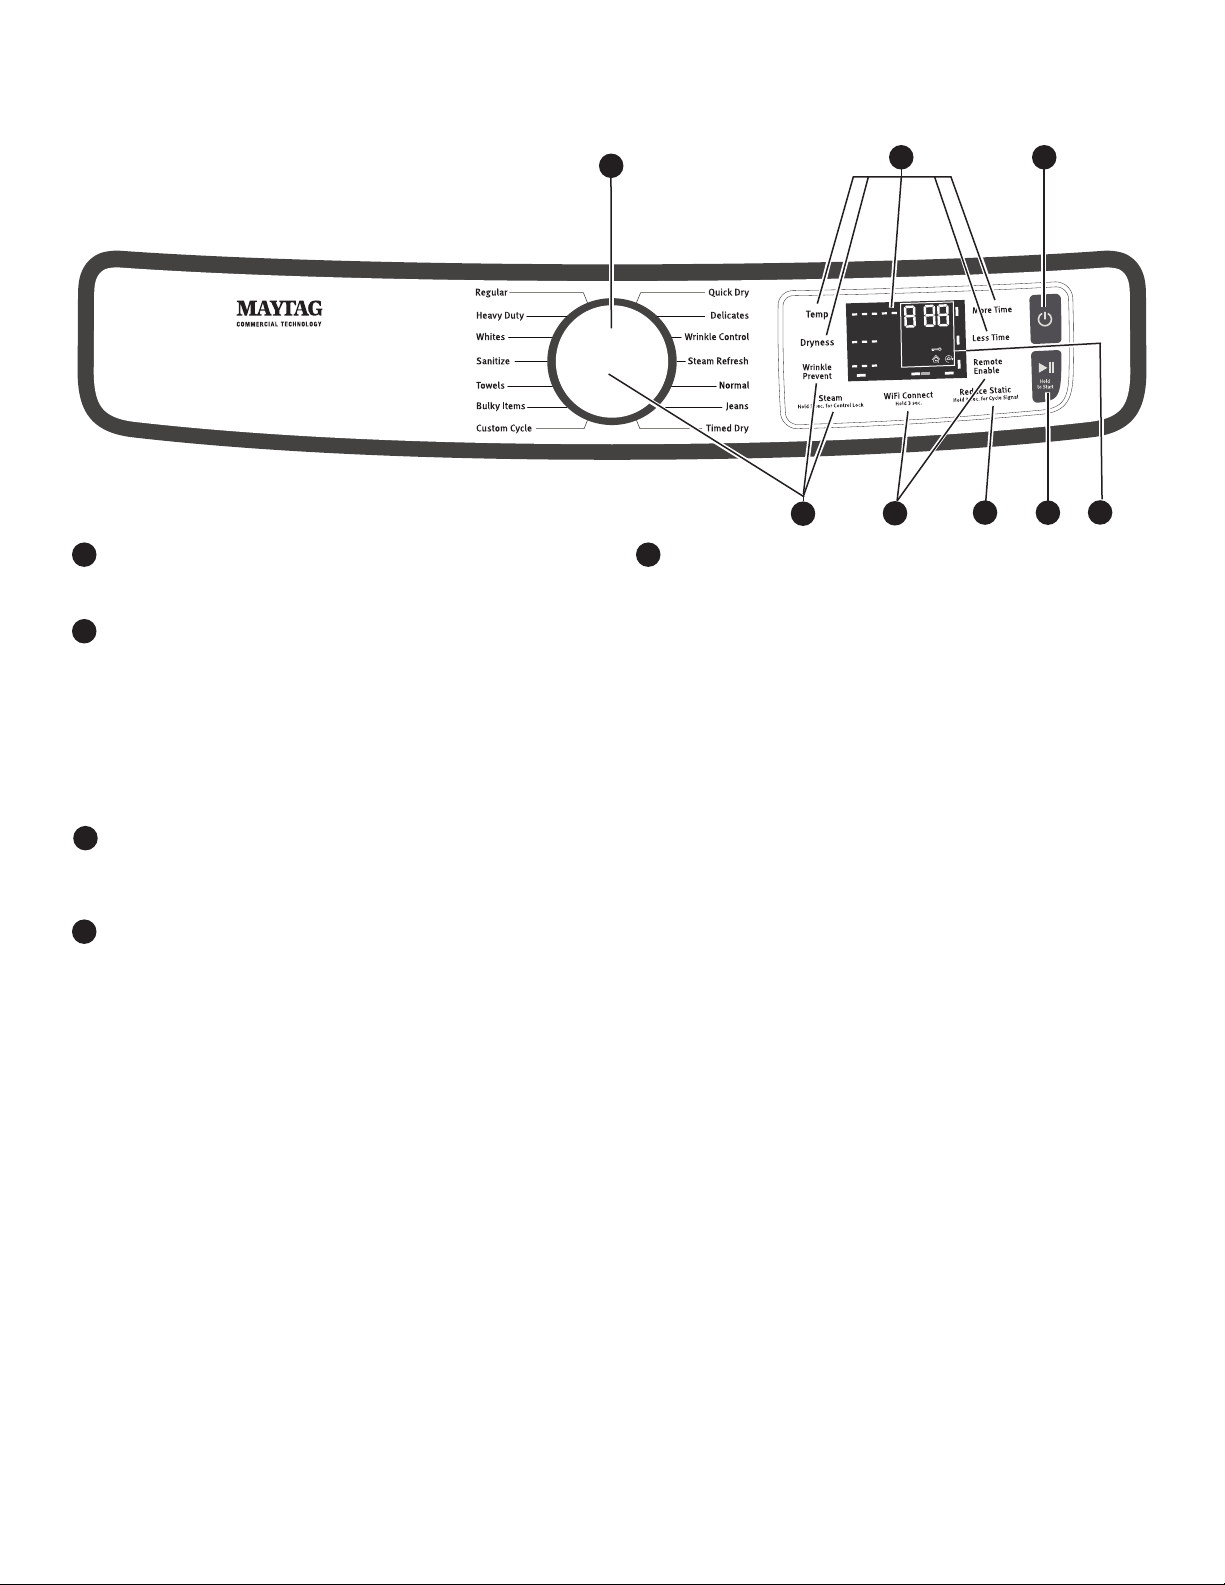
CONTROL PANEL AND FEATURES
Not all features and cycles are available on all models.
NOTE: The control panel features a sensitive surface that
responds to a light touch of your finger. To ensure your
selections are registered, touch the control panel with your
fingertip, not your fingernail. When selecting a setting or
option, simply touch its name.
POWER/CANCEL
Touch to turn the dryer on and off. Touch to stop/cancel
a cycle at any time.
CYCLE CONTROL KNOB
Turn the knob to select a cycle for your laundry load. Sensor
Cycles are Custom Cycle, Bulky Items, Towels, Sanitize,
Whites, Heavy Duty, Regular, Delicates, Wrinkle Control,
Normal, and Jeans. Timed Cycles are Timed Dry and Quick
Dry. The Steam Cycle (on some models) is Steam Refresh.
See “Cycle Guide” for detailed descriptions of cycles.
The Cycle Control Knob can also be pressed to activate the
Extra Power option for harder-to-dry loads. See the “Options”
section for more information.
START/PAUSE
Touch and hold until the LED counts down “3-2-1” and the
dryer starts, or touch once while a cycle is in process to
pause it.
LED DISPLAY AND SETTINGS
When you select a cycle, its settings will light up and the
Estimated Cycle Time (for Sensor Cycles) or actual time
remaining (for Timed Cycles) will be displayed.
See “Cycle Guide” for available settings on each cycle.
Not all settings are available with all cycles.
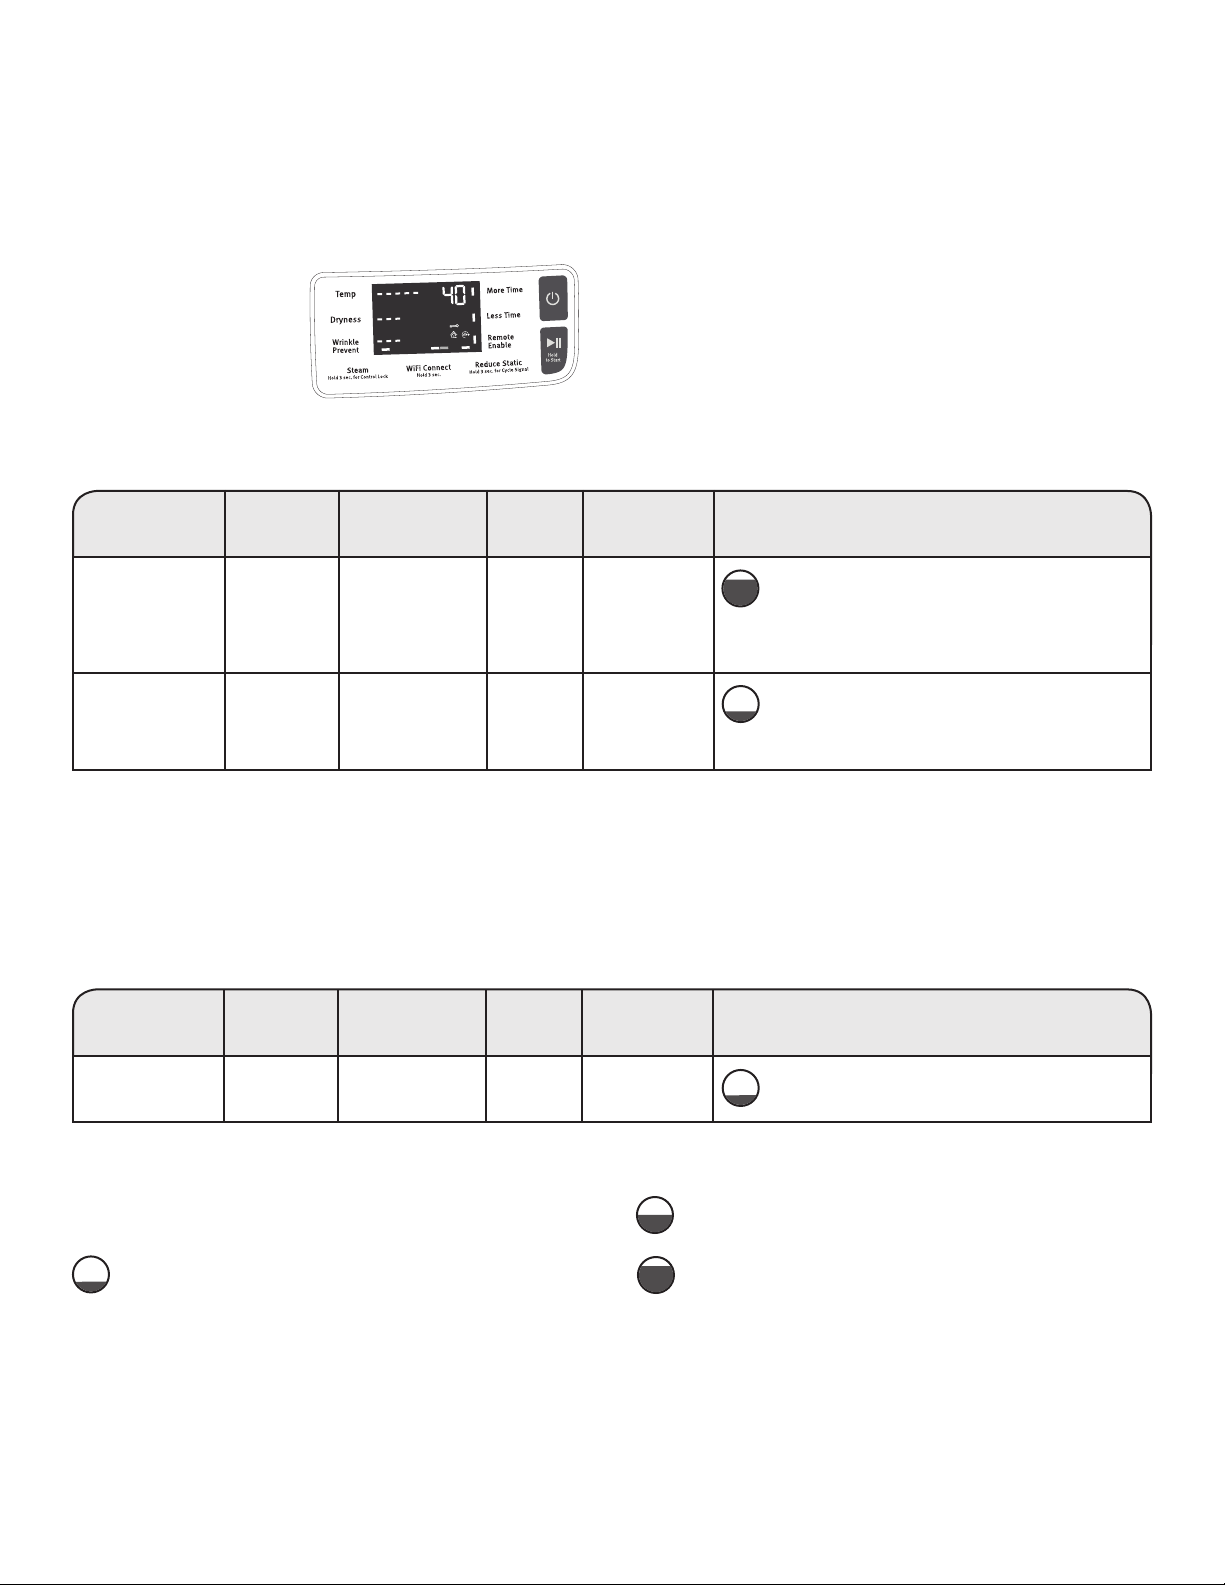
More Time/Less Time
Touch MORE TIME or LESS TIME with Timed Cycles
to increase or decrease the length of a Timed Dry
or Quick Dry cycle.
Temp
When using any cycle except Sanitize, you may select
a dry temperature based on the type of load you are
drying. Use the warmest setting safe for the garments
in the load. Follow garment label instructions.
Dryness
When using Sensor Cycles (except for the Sanitize
cycle), you may select a Dryness level based on the
type of load you are drying.
NOTE: Dryness is for use with Sensor Cycles only.
1
2
3
4
3
2
OPTIONS
Use to select available options for your dryer. Not all cycles
and options are available on all models.
Wrinkle Prevent
If you will be unable to remove a load immediately,
touch WRINKLE PREVENT to add up to 150 minutes
of periodic tumbling to help reduce wrinkling. On steam
models, on some cycles, you may select the “+Steam”
setting to add a short steam cycle after 60 minutes
to help smooth out wrinkles.
Reduce Static
Touch to add the Reduce Static option to selected
Sensor Cycles (see “Cycle Guide”). The dryer will
automatically tumble, pause, and introduce a small amount
of moisture into the load to help reduce static. This option
adds approximately 3 minutes to the total cycle time.
Steam
Steam adds steam to the end of certain Sensor Cycles
to help smooth wrinkles. It is not available on Sanitize,
Delicates, Steam Refresh, or Timed Cycles (Timed Dry,
Quick Dry). Steam can be used with High, Medium High,
or Medium heat settings. This option adds approximately
15 minutes to the total cycle time.
Cycle Signal
Use this to turn the signal indicating the end of a drying
cycle on or off. Touch and hold REDUCE STATIC for
3 seconds to turn sounds on or off.
Control Lock
Use to lock the controls of the dryer and avoid
an accidental change in cycle options or preferences
during a drying cycle. Touch and hold STEAM for
3 seconds to lock or unlock the controls of the dryer.
During this time, the LED Display will count down “3-2-1.”
Once the controls are locked, the Control Lock icon
will illuminate.
NOTE: The Control Lock function may be enabled when
recovering from a power failure. To unlock the control,
touch and hold STEAM for at least 3 seconds.
Extra Power
The Extra Power option can be used with both Sensor
and Timed Dry Cycles. Press the Cycle Control Knob
to activate the Extra Power option, which provides an
additional 10 minutes of cycle time (including additional
heat and tumbling, where applicable). When Extra Power
is activated, the Cycle Control Knob will illuminate and
the estimated time remaining on the display will show an
additional 10 minutes.
1
4
5
5
6
7
5
7
Check Vent
This indicator will show the status of airflow through the dryer
and the dryer vent system for the dryer’s life. This feature is
available during Sensor and Steam Cycles only. During the
sensing phase at the beginning of the cycle, the Check Vent
light will come on if a blocked vent or low airflow issue is
detected. This light will stay on for the entire cycle. Should
the Check Vent light illuminate, refer to the “Troubleshooting”
section for potential solutions to the issue.
The light will be cleared when selecting a new cycle,
touching Power/Cancel, or opening the door after the cycle
has completed. Although the light will be cleared at the
beginning of a cycle, it will continue to illuminate during the
cycle unless the root cause is resolved.
NOTE: The dryer will continue to operate even while the
indicator is lit, but poor airflow can impact dry times and overall
performance. For more information on maintaining good airflow,
see “Check Your Vent System for Good Airflow.” If there are
other error issues during a cycle, the Check Vent indicator will
not light up. See the “Troubleshooting” section.
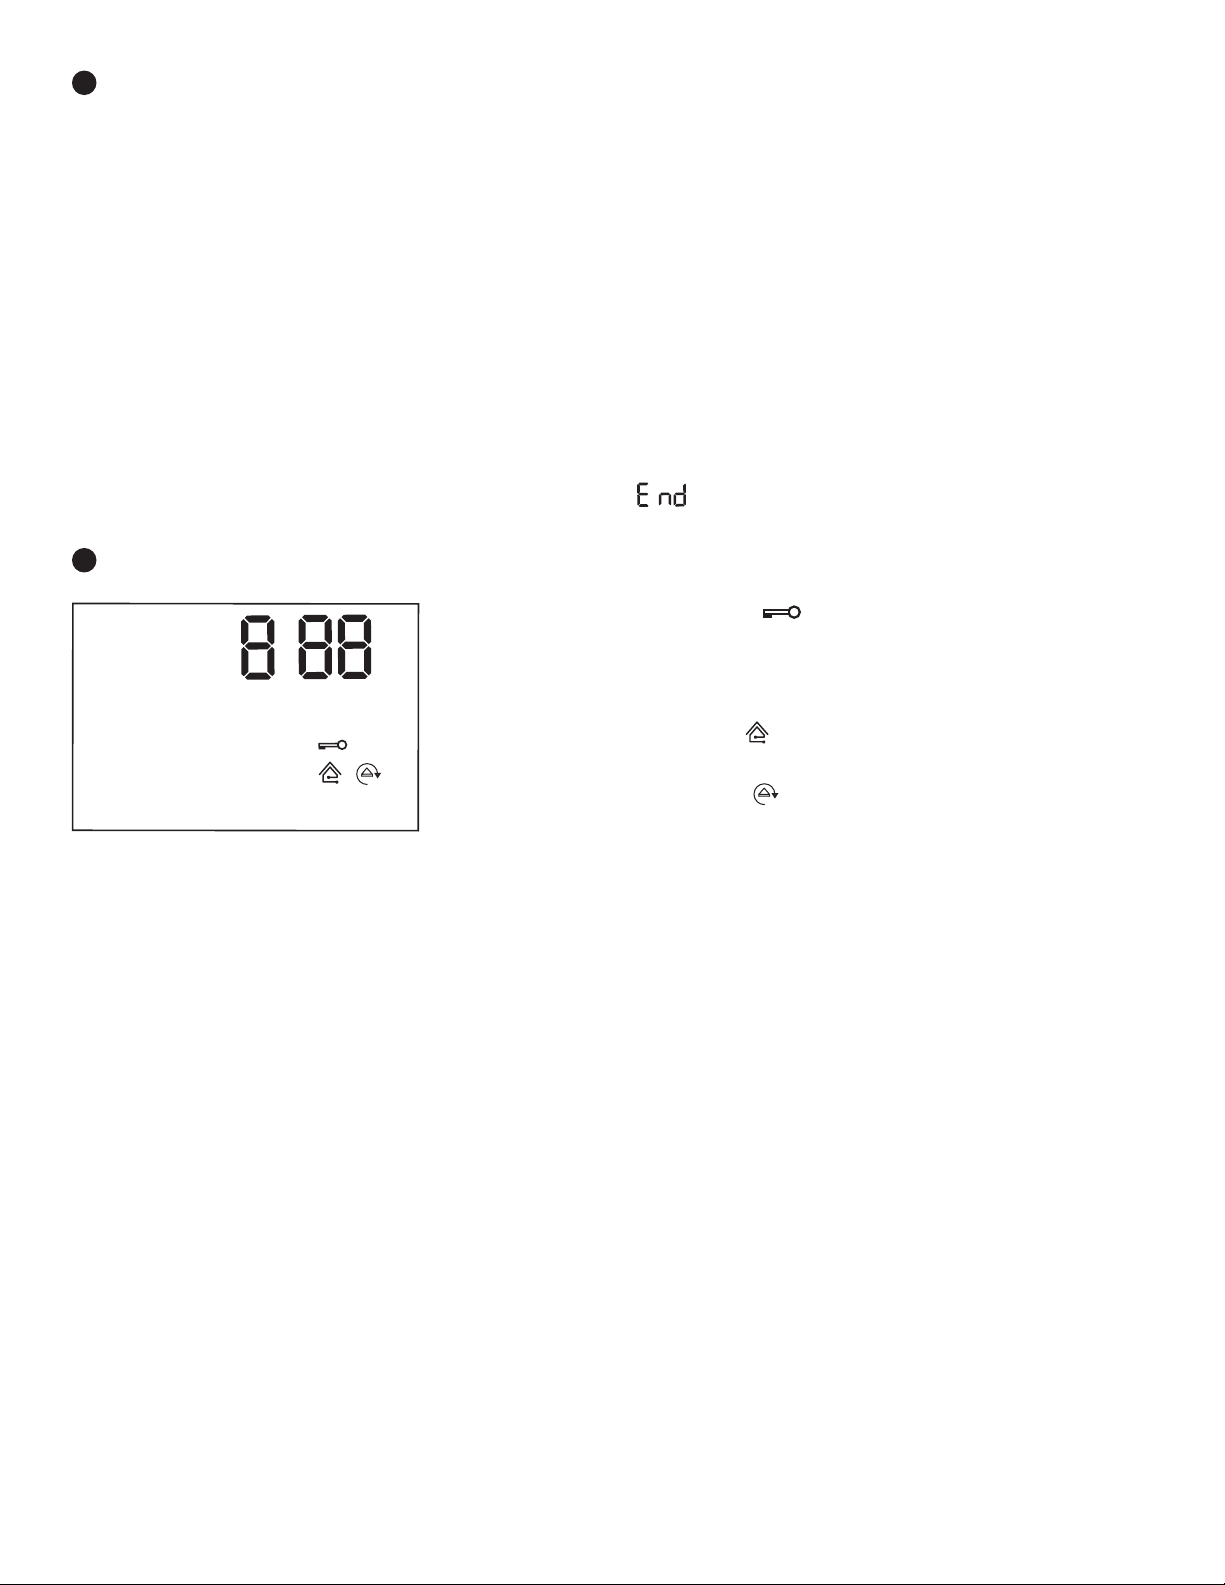
This will indicate that the selected cycle has ended and the
load may be removed from the dryer. If Wrinkle Prevent has
been selected, the dryer may continue to tumble the load,
even if “End” is showing in the display.
Control Lock
This will illuminate when the controls are locked.
NOTE: The Control Lock function may be enabled when
recovering from a power failure. To unlock the control, touch
and hold STEAM for at least 3 seconds.
Connected
This will illuminate when the dryer is connected to the internet.
Smart Delay
This will illuminate when a smart delay is in effect: the operation
of the dryer has been delayed to a time when lower utility rates
are in effect.
CONNECTIVITY
Use to select available connectivity options for your dryer.
Not all cycles and options are available on all models.
Download the Whirlpool
®
app and follow the instructions
to connect your dryer to your home Wi-Fi network. You may
also visit www.whirlpool.com/connect.
WiFi Connect
Touch and hold WIFI CONNECT for 3 seconds during
the initial connection of the dryer to your home Wi-Fi
network. If the dryer is in a Smart Delay, touch WIFI
CONNECT to override the delay and begin a dry cycle
immediately.
Remote Enable
To start a dryer cycle remotely from the Whirlpool
®
app,
touch REMOTE ENABLE. The Remote Enable status
indicator will begin blinking. Select the desired cycle,
cycle settings, and options. Touch and hold START/
PAUSE to set the Remote Enable. The Remote Enable
status indicator will be solidly lit.
NOTE: Any interaction with the dryer once a Remote
Enable has been set will cause the Remote Enable
to cancel.
6
CYCLE AND CONNECTED
STATUS INDICATORS
The Cycle Status Indicators show the progress of a cycle.
The Connected Status Indicators show the connected status.
Not all indicators are available on all models.
Sensing
The Sensing indicator will light during Sensor Cycles to
indicate that the moisture sensor on the dryer is operating.
This indicator will not light during Timed Cycles or options
such as Wrinkle Prevent.
Wet
The load is still wet and/or the cycle just started.
Damp
The load still has moisture remaining, a good point
in the cycle to remove a garment to air dry or iron.
Cool Down
The dryer has finished drying with heat and is now tumbling
the load without heat to cool it down and reduce wrinkling.
7
:
Sensing
Cool Down
Check Vent
Wet
Damp
Appearance may vary.

8
CYCLE GUIDE — SENSOR CYCLES
Settings and options shown in bold are default settings for that cycle.
If settings are changed, the new settings will be remembered. If there is a power failure, settings will return to the default.
Not all features and cycles are available on all models.
Not all settings and options are available on each cycle.
Heavyweight items Heavy Duty High More 1:06 Wrinkle Prevent
†
Offers stepped drying starting
such as towels or Medium High Normal Reduce Static* with Medium High heat followed
heavy work clothes Medium Less Steam* by Medium heat for enhanced fabric
Low Cycle Signal care and energy savings.
Extra Power
Work clothes, casual Normal High More 1:27 Wrinkle Prevent
†
Uses Medium High heat to dry large
wear, mixed cottons, Medium High Normal Reduce Static* loads of mixed fabrics and items.
sheets, corduroys Medium Less Steam* Use Normal cycle to increase energy
Low Cycle Signal savings versus Regular cycle by
Extra Power using a slightly lower heat level.
Shirts, blouses, Wrinkle Control High More 0:47 Wrinkle Prevent
†
Uses a stepped drying temperature
permanent press, Medium High Normal Reduce Static* from Medium to Low for improved
synthetics, Medium Less Steam* moisture removal and enhanced
lightweight items Low Cycle Signal fabric care.
Extra Power
Undergarments, Delicates High More 0:35 Wrinkle Prevent Uses Low heat to gently dry
blouses, lingerie, Medium High Normal Reduce Static* delicate items.
performance wear Medium Less Cycle Signal
Low Extra Power
Large loads Sanitize High More 1:42 Wrinkle Prevent
†
This is a long cycle with High heat,
of heavyweight Extra Power which has been proven to reduce
items household bacteria. This cycle is not
recommended for all fabrics. Use for
large loads of heavyweight fabrics.
Jackets, comforters, Bulky Items High More 0:59 Wrinkle Prevent
†
Use for drying large, bulky items;
pillows Medium High Normal Reduce Static* do not overfi ll dryer drum. Partway
Medium Less Steam* through the cycle, the signal will
Low Cycle Signal sound for 2 minutes to indicate
Extra Power when it is time to rearrange items
for optimal drying.
Shirts, blouses, Regular High More 0:57 Wrinkle Prevent
†
Uses Medium High heat to dry large
permanent press, Medium High Normal Reduce Static* loads of mixed fabrics and items.
synthetics, Medium Less Steam* When choosing between Regular
lightweight items Low Cycle Signal and Normal cycle, for optimal energy
Extra Power savings, use Normal. For optimal time
savings, use Regular.
White, sturdy fabrics Whites High More 0:52 Wrinkle Prevent
†
Uses High heat to dry large loads
Medium High Normal Reduce Static* of white, sturdy fabrics and items.
Medium Less Steam*
Low Cycle Signal
Extra Power
Jeans and denims Jeans High More 0:59 Wrinkle Prevent
†
Stepped drying uses Medium High
Medium High Normal Reduce Static* heat initially, followed by Medium
Medium Less Steam* heat to drive moisture from jeans
Low Cycle Signal and denim.
Extra Power
Large loads Towels High More 1:07 Wrinkle Prevent
†
This is a long cycle with High heat.
of cotton towels, Medium High Normal Reduce Static* This cycle is not recommended for
heavyweight items Medium Less Steam* all fabrics. Use for large loads of
Low Cycle Signal heavyweight fabrics.
Extra Power
Items to dry: Cycle:
Drying
Temperature:
Dryness
Level:
Default
Time:
Available
Options:
Cycle Details:
Load Size Recommendations
For best results, follow the wet load size recommendations noted
for each cycle.
Small load: Fill the dryer drum with 3–4 items, not more
than 1/4 full.
Medium load: Fill the dryer drum up to about 1/2 full.
Large load: Fill the dryer drum up to about 3/4 full.
Do not tightly pack. Items need to tumble freely.
Use Sensor Cycles for better fabric care and energy savings
The dryer senses moisture in the load or air temperature and shuts off when the load reaches the selected dryness level.
The default times mentioned below are for reference only. The exact cycle times will vary, depending on the load size and type.
†
On steam models, you may select the “+Steam” setting to add a short steam cycle after 60 minutes. This is available only with High, Medium High, and
Medium drying temperature settings.
*On steam models only.
9
CYCLE GUIDE — TIMED CYCLES
Settings and options shown in bold are default settings for that cycle.
If settings are changed, the new settings will be remembered (except on Quick Dry). If there is a power failure, settings will return
to the default.
Not all features and cycles are available on all models.
Not all settings and options are available on each cycle.
Any load Timed Dry High 0:40 Wrinkle Prevent
†
Use to dry items to a damp level for items that do
NOTE: Select Medium High Extra Power not require an entire drying cycle. Select a drying
AirDry to dry foam, Medium temperature based on the type of fabrics in your
rubber, plastic, Low load. If you are unsure of the temperature to select
or heat-sensitive AirDry for a load, select the lower setting rather than the
fabrics. higher setting.
Small loads Quick Dry High 0:15 Wrinkle Prevent
†
For small loads of 3–4 items.
and sportswear Medium High
Medium
Low
AirDry
Items to dry:
Cycle:
Drying
Temperature:
Default
Time:
Available
Options:
Cycle Details:
CYCLE GUIDE — STEAM CYCLE (on some models)
Settings and options shown in bold are default settings for that cycle.
Not all settings and options are available on each cycle.
Steam cycles are designed for use with dry loads to loosen wrinkles, reduce odors, and refresh fabrics.
Load Size Recommendations
For best results, follow the load size recommendations noted
for each cycle.
Small load: Fill the dryer drum with 3–4 items, not more
than 1/4 full.
Medium load: Fill the dryer drum up to about 1/2 full.
Large load: Fill the dryer drum up to about 3/4 full.
Do not overload. Items need to tumble freely.
Shirts, blouses, Steam Refresh High 0:20 Wrinkle Prevent Use to reduce light wrinkles from loads left in the
and slacks Medium High dryer too long. Do not add dryer sheets.
Items
to refresh:
Cycle:
Drying
Temperature:
Default
Time:
Available
Options:
Cycle Details:
Adjusting drying time on Timed Cycles
When you select a Timed
Cycle, the time appears in
the display. Use More Time
and Less Time to increase
or decrease the time
in 5-minute increments.
The maximum dry time
is 150 minutes.
Selecting the Drying Temperature
A High heat setting may be used for drying heavyweight items
such as towels and work clothes.
A Low to Medium heat setting may be used for drying
mediumweight items such as sheets, blouses, dresses,
underwear, permanent press fabrics, and some knits.
Use a no heat (AirDry) setting for foam, rubber, plastic,
or heat-sensitive fabrics.
Line dry bonded or laminated fabrics.
NOTE: If you have questions about drying temperatures
for various loads, refer to the care label directions.
†
On steam models, you may select the “+Steam” setting to add a short steam cycle after 60 minutes. This is available only with High, Medium High, and
Medium drying temperature settings.
AirDry
High
Less
More
Off
+Steam
Sensing
Cool Down
Check Vent
Wet
Damp
NOTE: Government energy certifi cations for this model were based on the Normal Cycle, Highest Temperature Setting, Normal Dryness
Level. The as-shipped defaults were the same as the Government Energy Certifi cation Settings except the Default Temperature Setting
of Medium High was adjusted to the Highest Temperature Setting.
10
USING YOUR DRYER
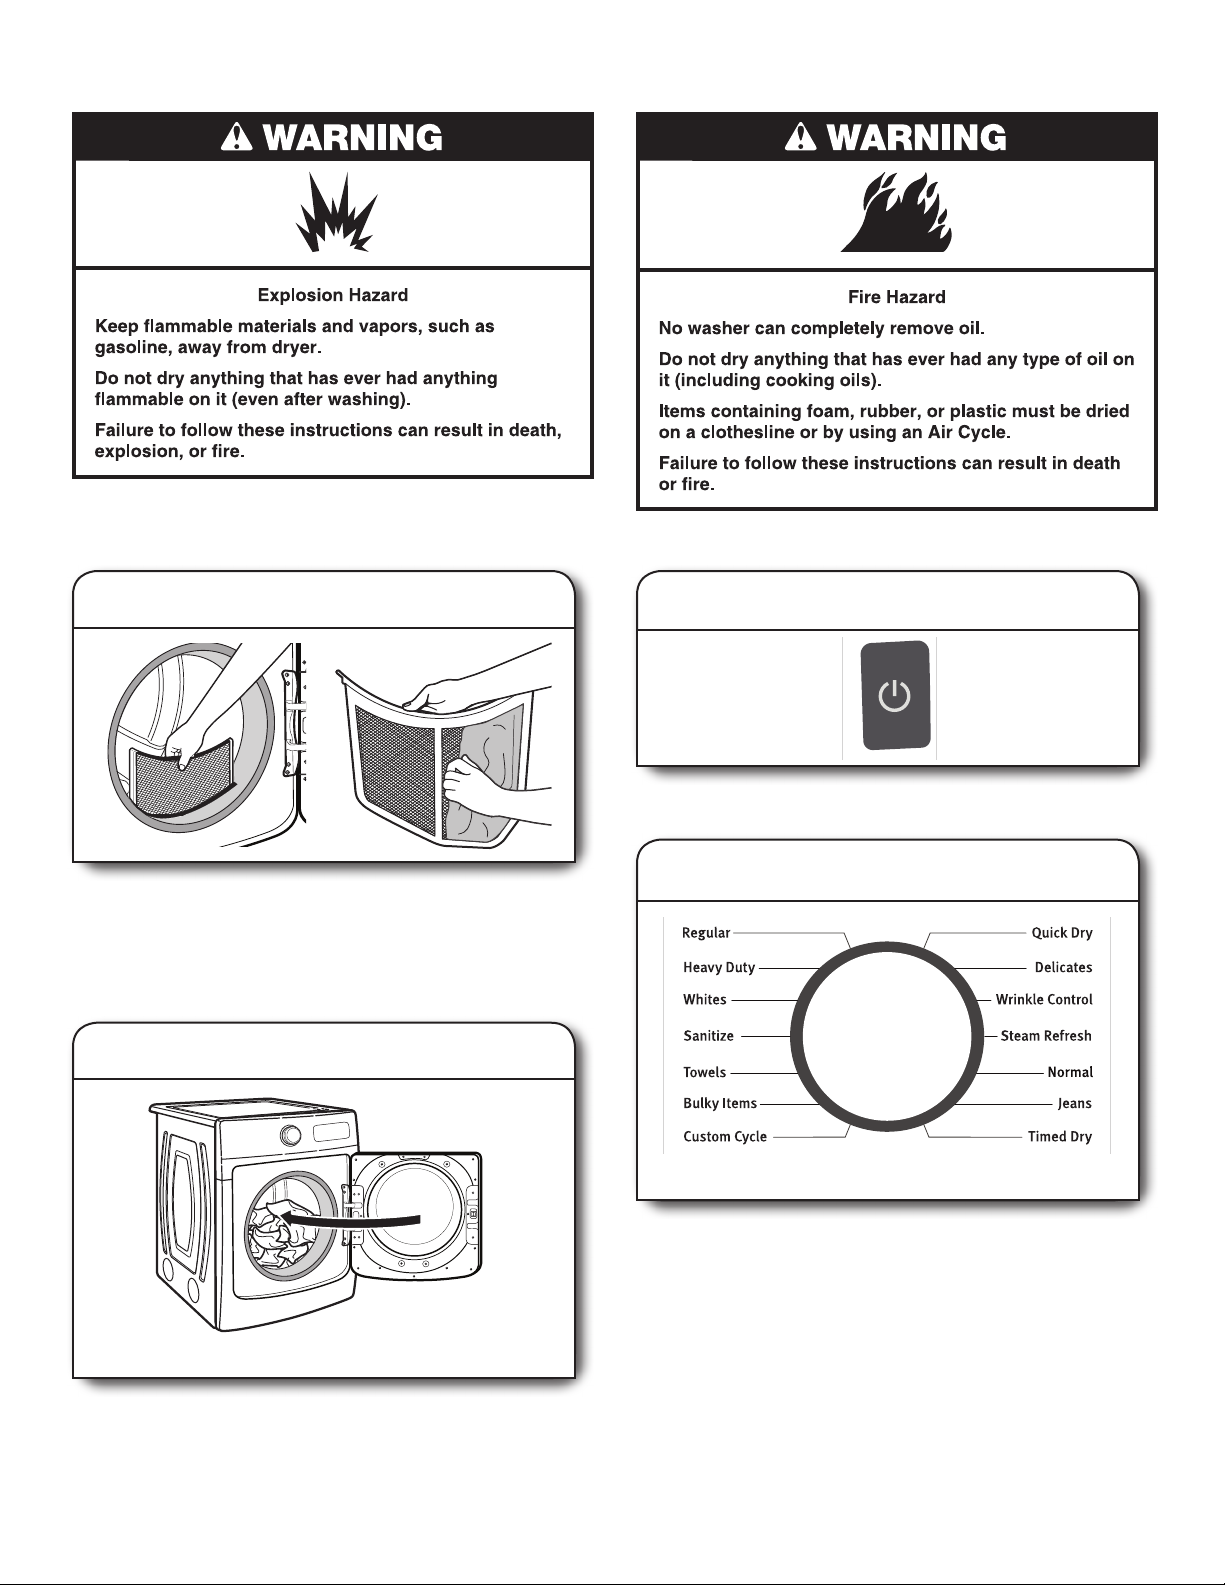
1. Clean the lint screen
Clean the lint screen before each load. Pull the lint screen straight
up. Roll lint off the screen with your fi ngers. Do not rinse or wash
screen to remove lint. Wet lint is hard to remove. Push the lint
screen fi rmly back into place.
For additional cleaning information, see “Dryer Care.”
2. Load the dryer
Open the door by pulling on the handle. Place laundry in the dryer.
Add a dryer sheet to wet load if desired. Close the door.
IMPORTANT: Do not tightly pack the dryer. Items need to tumble
freely. Tightly packing can lead to poor drying performance and may
increase wrinkling and tangling.
WARNING: To reduce the risk of fi re, electric shock, or injury to
persons, read the Important Safety Instructions before operating
this appliance.
3. Touch POWER/CANCEL
Touch POWER/CANCEL to turn on the dryer.
4. Select the desired cycle
Select the desired cycle for your load. See the “Cycle Guide”
for more information about each cycle. Not all cycles are on
all models. Press the Cycle Control Knob to activate the Extra
Power option, which provides an additional 10 minutes of cycle
time (including additional heat and tumbling, where applicable).
Appearance may vary.
Appearance may vary.
:
AirDry
High
Less
More
Off
+Steam
Sensing
Cool Down
Check Vent
Wet
Damp
EXTRA POWER
11
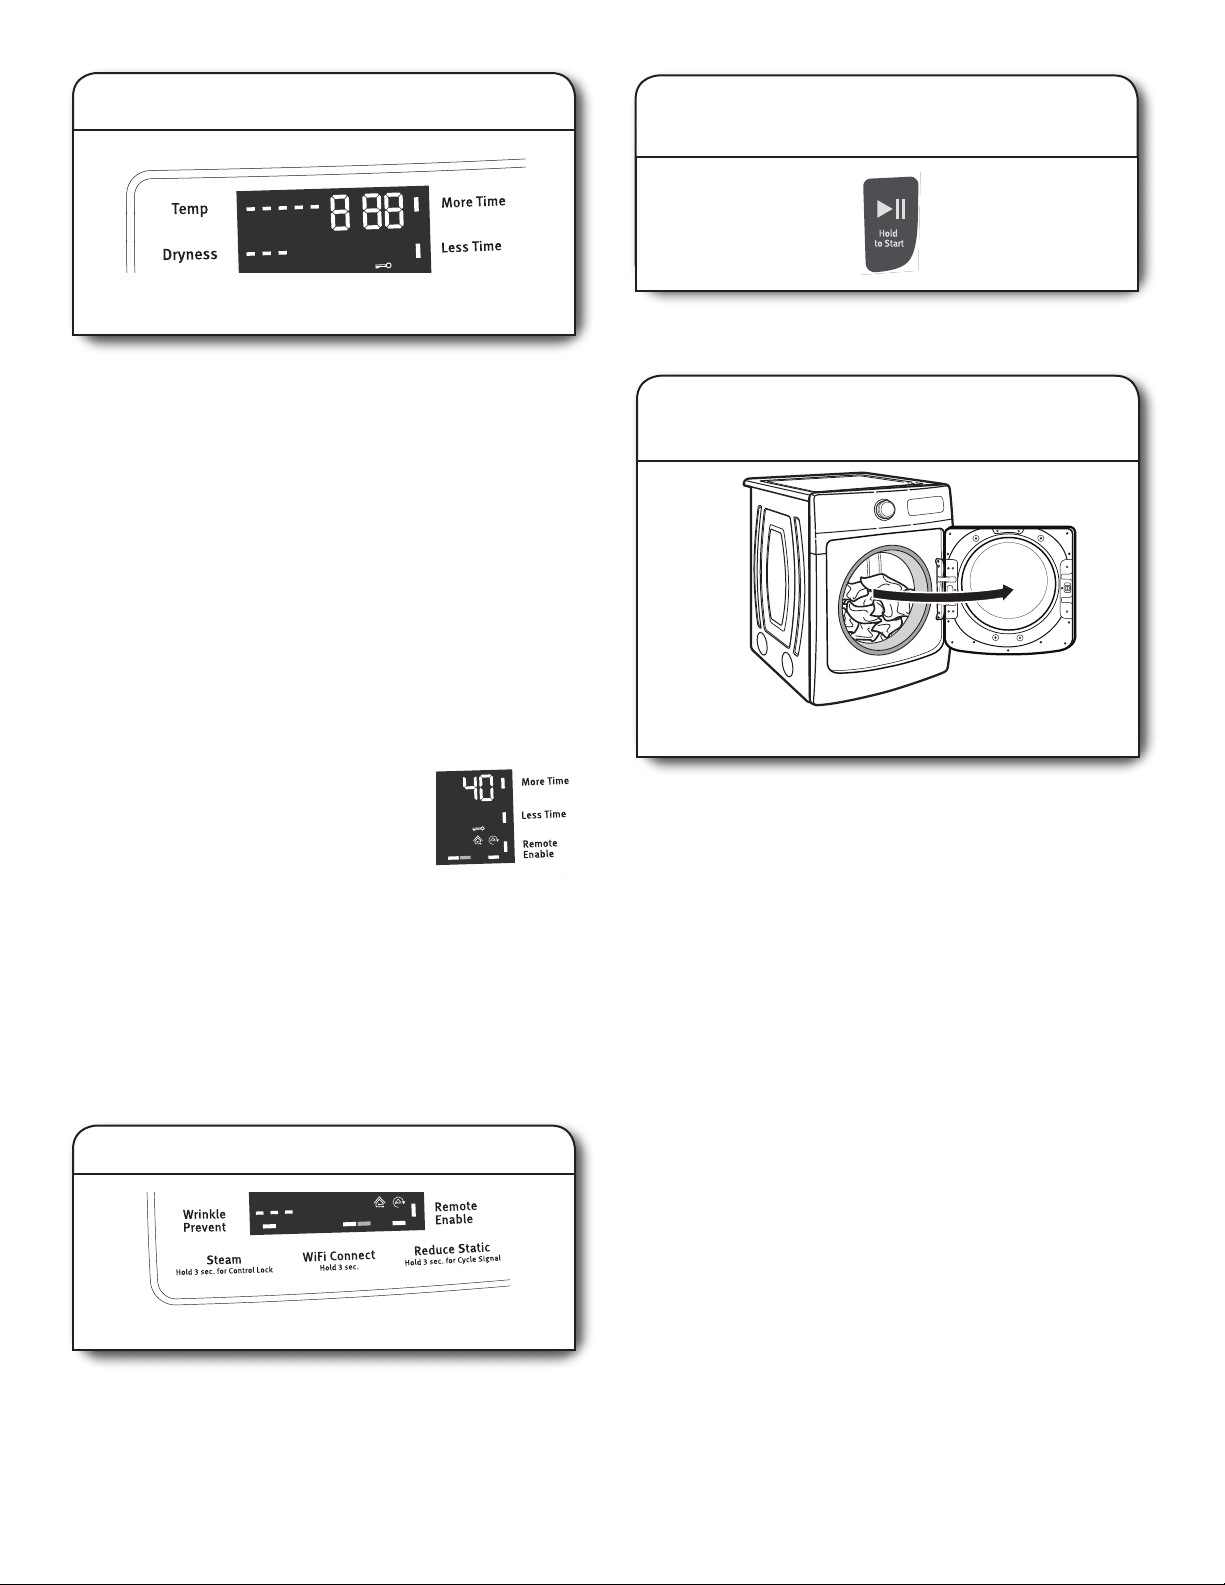
Promptly remove garments after cycle has completed to
reduce wrinkling. If you will be unable to remove the load
promptly, select the Wrinkle Prevent option.
7. Touch and hold START/PAUSE
to begin cycle
Touch and hold START/PAUSE until the display counts down
“3-2-1” and the dryer starts.
8. Remove garments promptly
after cycle is fi nished
5. Adjust cycle settings, if desired
You may adjust different settings, depending on whether you have
selected a Sensor Cycle, Timed Cycle, or Steam Cycle (on some
models). See the “Cycle Guide” for detailed information.
NOTE: Not all options and settings are available with all cycles.
Not all cycles are on all models.
Sensor Cycles:
The temperature may be changed by touching Temp until the
desired dry temperature is lit. Once a cycle has started, the
temperature can be changed within the fi rst 5–8 minutes.
You can select a different dryness level, depending on your load.
Touch DRYNESS to scroll from Less to More to automatically adjust
the dryness level at which the dryer will shut off. Once a dryness
level is set, it cannot be changed without stopping the cycle.
Sensor Cycles give the best drying in the shortest time. Drying
time varies based on fabric type, load size, and dryness setting.
Drying time is estimated and may change throughout the cycle.
Drying time cannot be changed on Sensor Cycles.
Timed Cycles:
When you select a Timed Cycle, the time
appears in the display. Touch MORE TIME
or LESS TIME to increase or decrease the
time in 5-minute increments.
The temperature may be changed by touching
Temp until the desired dry temperature is lit. Once a cycle has
started, the temperature can be changed at any time unless
AirDry is selected; if AirDry is selected, touch POWER/CANCEL
to cancel the cycle, reselect the desired cycle settings, and touch
START/PAUSE.
Steam Cycles (on some models):
Select Steam Refresh to reduce odors and light wrinkles in dry
loads. Do not add dryer sheets. Cycle time is estimated and may
change throughout the cycle. Cycle time cannot be changed on
Steam Cycles.
6. Select any additional options
Add additional options by touching that option. If you will be
unable to remove the load promptly, select the Wrinkle Prevent
option before touching Start/Pause.
NOTE: Not all options and settings are available with all cycles.
Appearance may vary.
Appearance may vary.
Appearance may vary.
Sensing
Cool Down
Check Vent
Wet
Damp
:
AirDry
High
Less
More
Off
+Steam
Sensing
Cool Down
Check Vent
Wet
Damp
:
AirDry
High
Less
More
Sensing
Cool Down
Wet
Damp
12
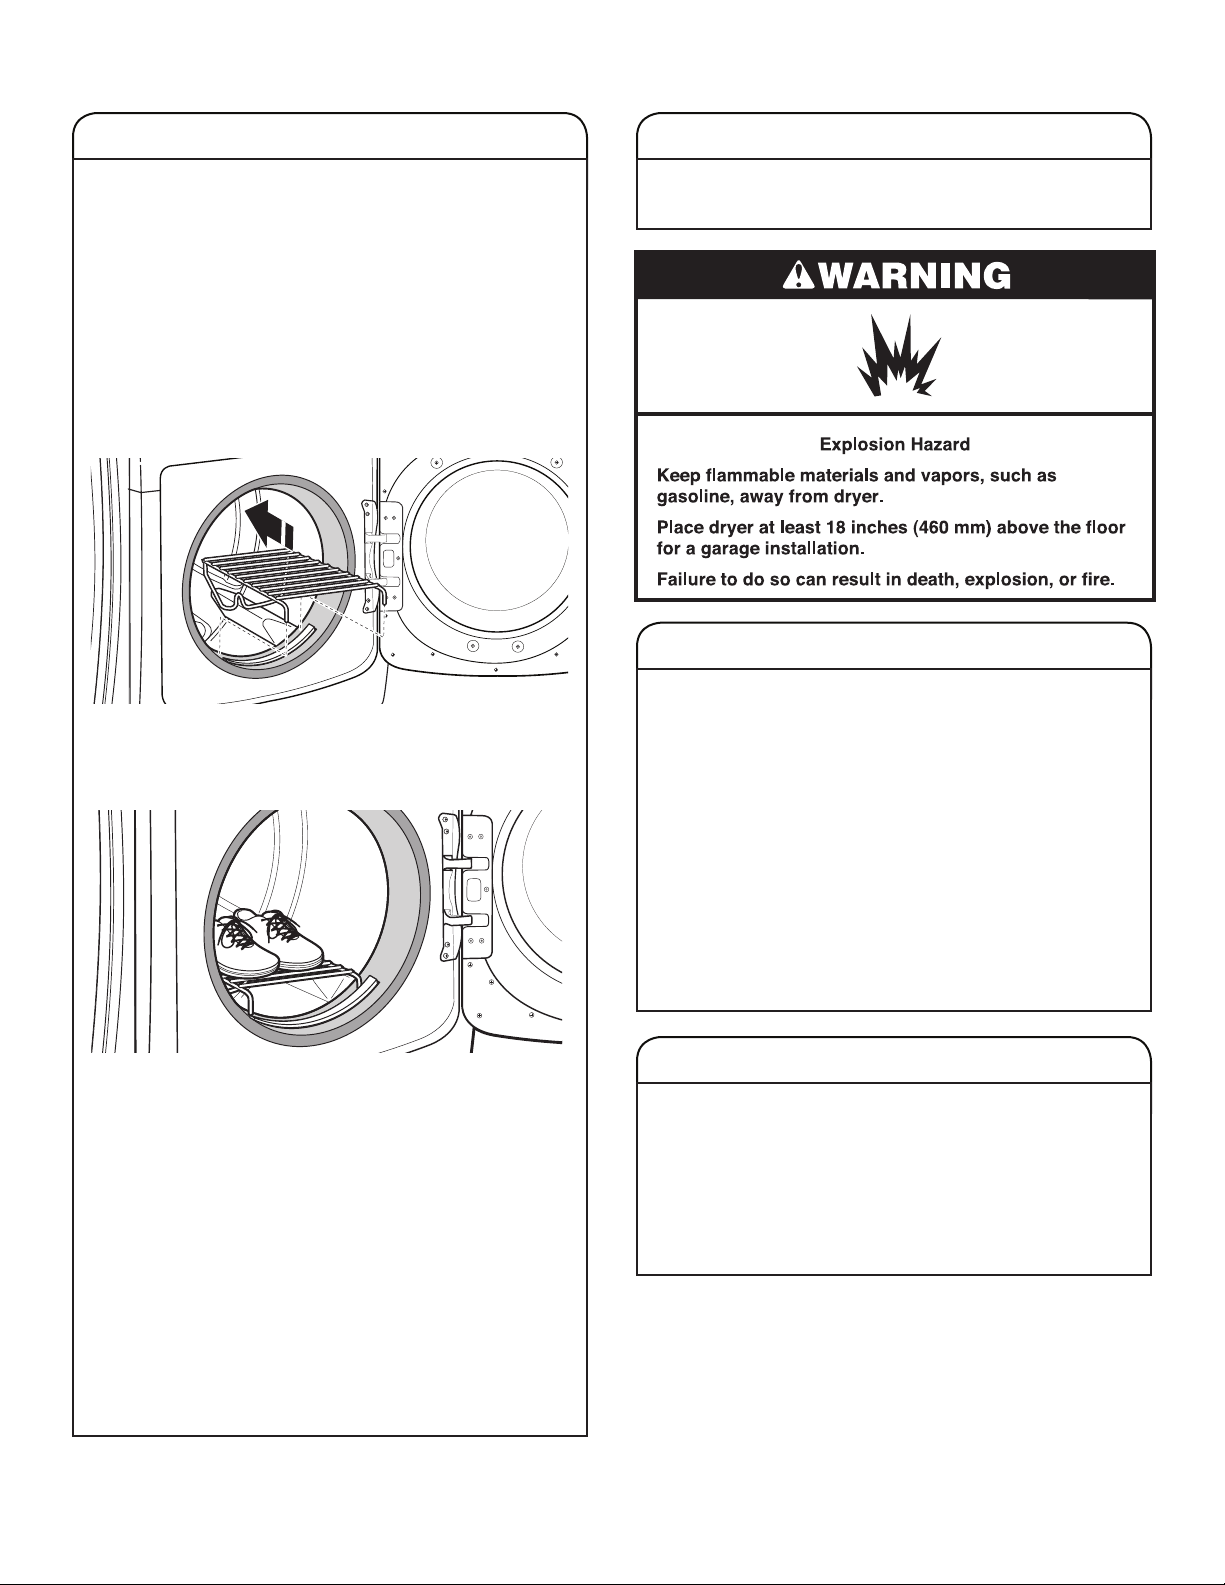
ADDITIONAL FEATURES
2. Align the two hooks on the front of the drying rack with the
holes in the dryer door opening and press down fully into
holes. Rest the rear support on the dryer back ledge.
USING THE DRYING RACK
To purchase a drying rack for your dryer, see “Accessories” for
more information. You will need your model and serial number
and the purchase date. Remove and discard any packing
material before use.
Use the drying rack for items that you do not want to tumble dry,
such as sweaters and tennis shoes. When you use the drying
rack, the drum continues to turn, but the rack remains stationary.
The drying rack is intended for use with the Timed Dry cycle
only. The drying rack cannot be used with Sensor Cycles.
To use the drying rack:
IMPORTANT: Do not remove the lint screen.
1. Open dryer door.
3. Place wet items on top of the drying rack. Allow space
around items for air to circulate. The drying rack does not
move, but the drum will rotate; be sure to leave adequate
clearance between items and the inside of the dryer drum.
Make sure items do not hang over the edges or between
drying rack grille.
4. Close the door.
5. Select a Timed Dry cycle. Items containing foam, rubber,
or plastic must be dried on a clothesline or by using the
Air Only setting or AirDry cycle, depending on model.
6. When the cycle is selected, the display shows the
default time. You can change the actual time in the cycle
by increasing or decreasing the cycle time.
7. Start the dryer.
NOTE: Check the lint screen and remove any lint accumulated
from items dried on the drying rack after the cycle is fi nished.
DRYER CARE
CLEANING THE DRYER LOCATION
Keep dryer area clear and free from items that would block the
airfl ow for proper dryer operation. This includes clearing piles
of laundry in front of the dryer.
CLEANING THE DRYER INTERIOR
To clean dryer drum:
1. Use a mild hand dish detergent mixed at a low
concentration with very warm water, and rub with
a soft cloth.
2. Rinse well with a wet sponge or towel.
3. Tumble a load of clean clothes or towels to dry drum
OR
Use a microfi ber cloth and hot water in a spray bottle
to clean the drum and a second microfi ber towel to dry.
NOTE: Garments that contain unstable dyes, such as denim
blue jeans or brightly colored cotton items, may discolor the
rear of the dryer interior. These stains are not harmful to your
dryer and will not stain future loads of clothes. Dry unstable
dye items inside out to avoid transfer of dye.
REMOVING ACCUMULATED LINT
From inside the dryer cabinet
Lint should be removed every 2 years, or more often,
depending on dryer usage. Cleaning should be done
by a qualifi ed appliance servicer.
From the exhaust vent
Lint should be removed every 2 years, or more often,
depending on dryer usage.
13
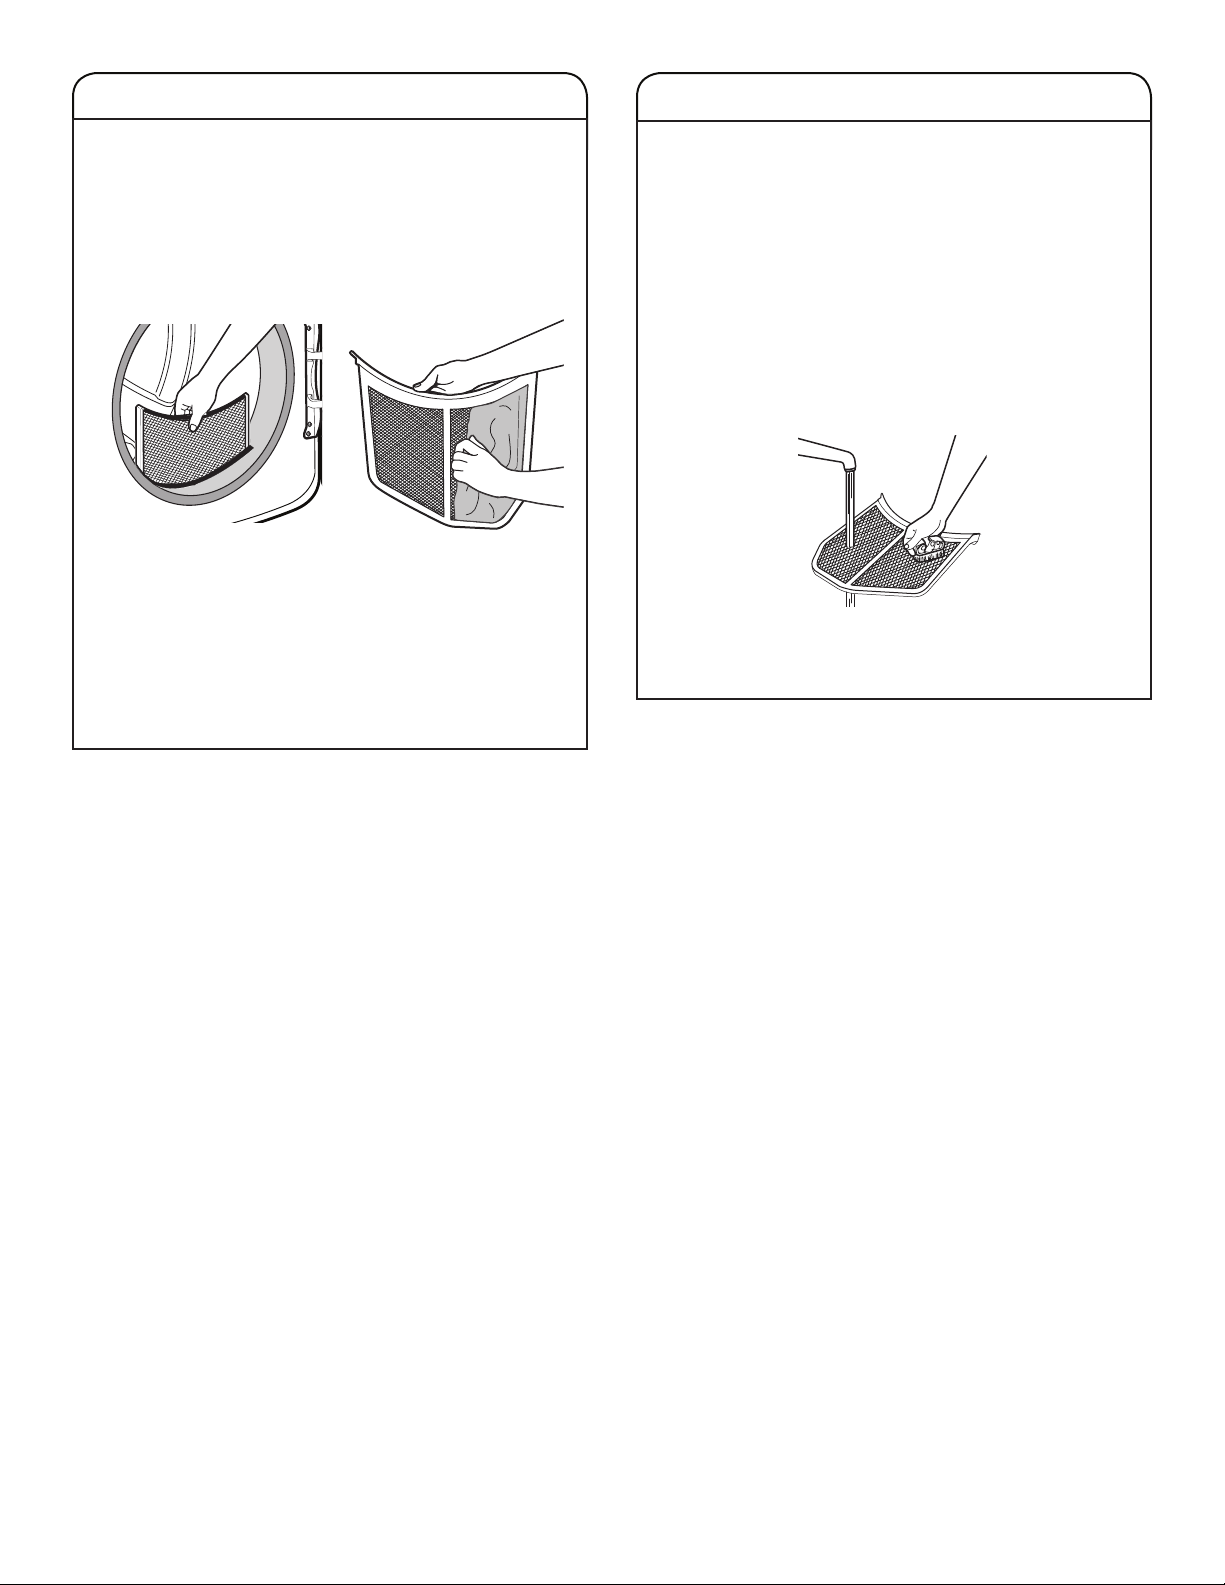
CLEANING THE LINT SCREEN
Every-load cleaning
The lint screen is located in the door opening of the dryer.
Clean the lint screen before each load. A screen blocked
by lint can increase drying time.
To clean:
1. Pull the lint screen straight up. Roll lint off the screen with
your fi ngers. Do not rinse or wash screen to remove lint.
Wet lint is hard to remove.
2. Push the lint screen fi rmly back into place.
IMPORTANT:
n
Do not run the dryer with the lint screen loose, damaged,
blocked, or missing. Doing so can cause overheating and
damage to both the dryer and fabrics.
n
If lint falls off the screen into the dryer during removal,
check the exhaust hood and remove the lint. See “Venting
Requirements” in the Installation Instructions.
Laundry detergent and fabric softener residue can build up
on the lint screen. This buildup can cause longer drying times
for your clothes, or cause the dryer to stop before your load is
completely dry. The screen is probably clogged if lint falls off
while the screen is in the dryer.
Clean the lint screen with a nylon brush every 6 months,
or more frequently, if it becomes clogged due to a residue
buildup.
To wash:
1. Roll lint off the screen with your fi ngers.
2. Wet both sides of lint screen with hot water.
3. Wet a nylon brush with hot water and liquid detergent.
Scrub lint screen with the brush to remove residue buildup.
4. Rinse screen with hot water.
5. Thoroughly dry lint screen with a clean towel.
Reinstall screen in dryer.
AS NEEDED CLEANING
14
SPECIAL INSTRUCTIONS
FOR STEAM MODELS
Water Inlet Hose
Replace inlet hose and hose screen after 5 years of use to
reduce the risk of hose failure. Periodically inspect and replace
inlet hose if bulges, kinks, cuts, wear, or leaks are found.
When replacing your inlet hose, record the date of
replacement.
To Winterize the Dryer:
1. Unplug dryer or disconnect power.
2. Shut off water faucet.
3. Disconnect water inlet hose from faucet and drain.
To Use the Dryer Again:
1. Flush water pipes. Reconnect water inlet hose to faucet.
Turn on water faucet.
2. Plug in dryer or reconnect power as described in the
Installation Instructions.
NON-USE, STORAGE, AND MOVING CARE
Install and store your dryer where it will not freeze. Because
some water may stay in the hose, freezing can damage your
dryer. If storing or moving your dryer during freezing weather,
winterize it.
Non-Use or Storage Care
If you will be on vacation or not using your dryer
for an extended period of time, you should:
1. Unplug dryer or disconnect power.
2. Clean lint screen. See “Cleaning the Lint Screen.”
3. Turn off the water supply to the dryer. This helps to avoid
unintended fl ooding (due to a water pressure surge) while
you are away.
Moving Care
For power supply cord-connected dryers:
1. Unplug the power supply cord.
2. Gas models only: Close shut-off valve in gas supply line.
3. Gas models only: Disconnect gas supply line pipe and
remove fi ttings attached to dryer pipe.
4. Gas models only: Cap the open gas supply line.
5. Steam models only: Shut off water faucet.
6. Disconnect the water inlet hose from faucet, then drain the
hose. Transport hose separately.
7. Make sure leveling legs are secure in dryer base.
8. Use tape to secure dryer door.
For direct-wired dryers:
1. Disconnect power.
2. Disconnect wiring.
3. Steam models only: Shut off water faucet.
4. Steam models only: Disconnect the water inlet hose from
faucet; then drain the hose. Transport hose separately.
5. Make sure leveling legs are secure in dryer base.
6. Use tape to secure dryer door.
Reinstalling the Dryer
Follow the Installation Instructions to locate, level, and connect
the dryer.
15
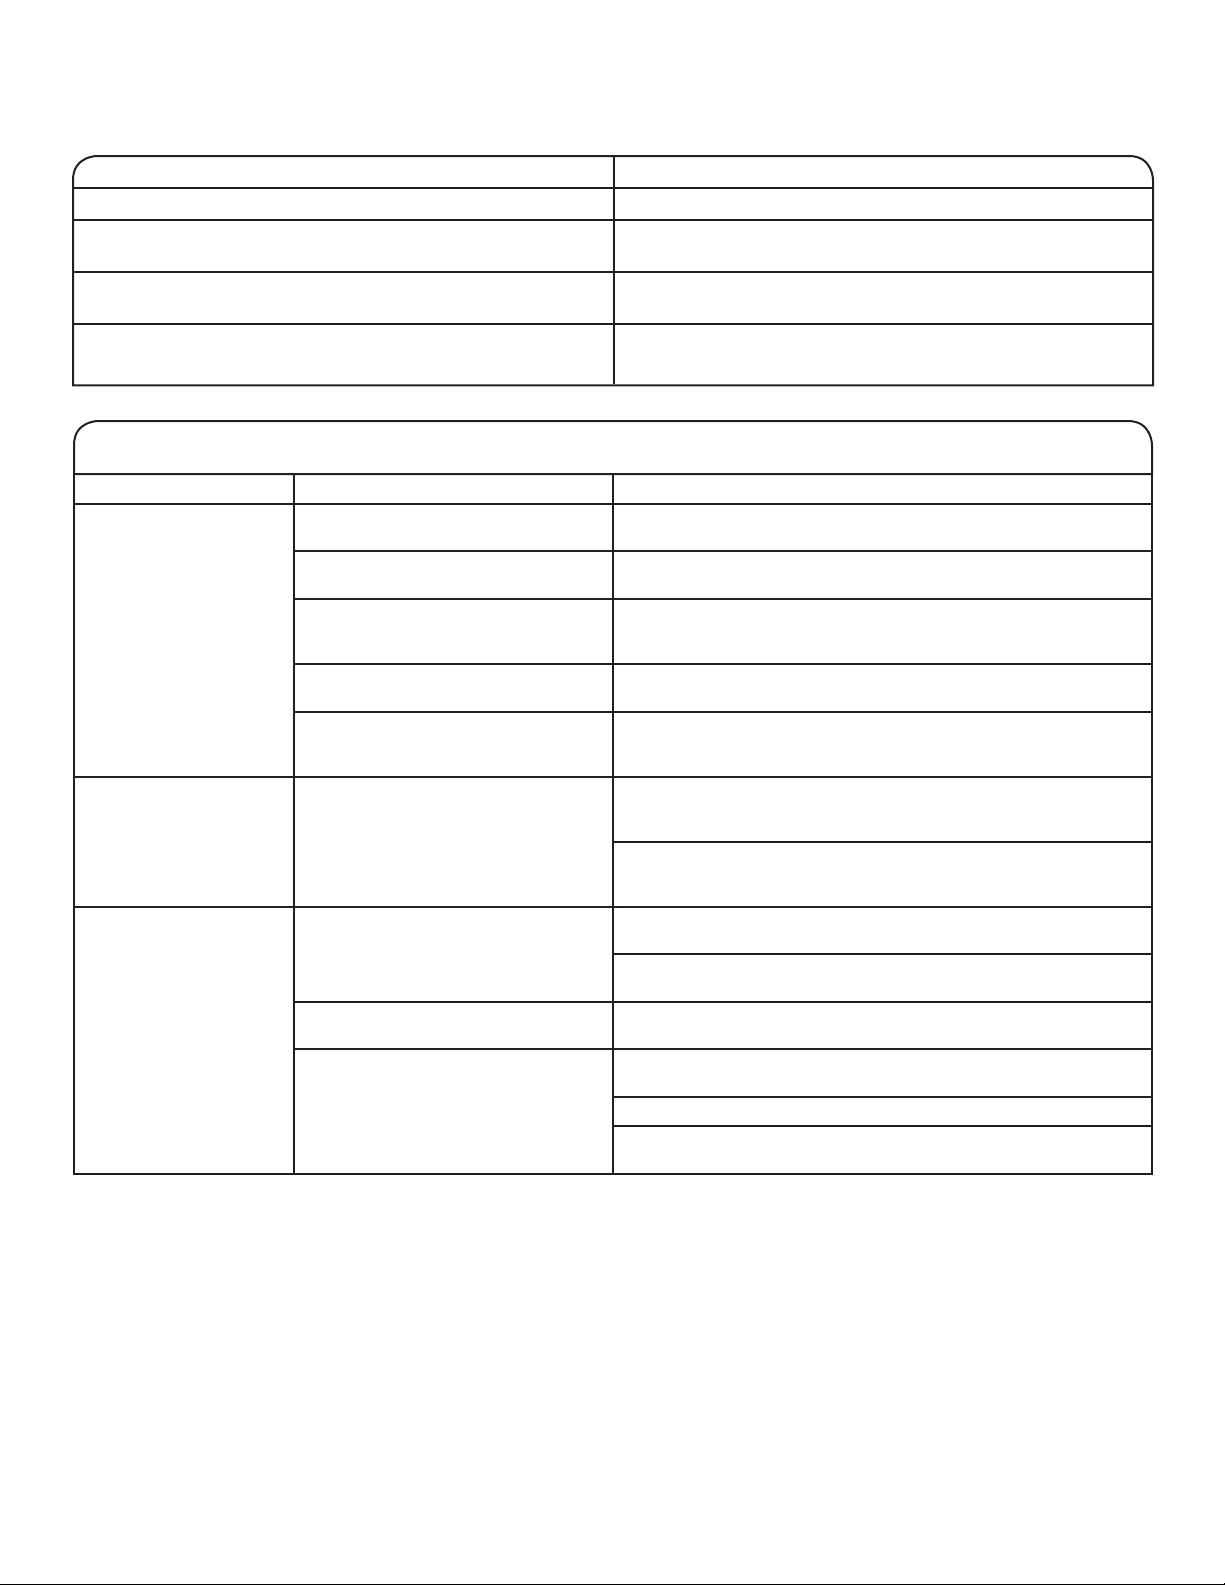
TROUBLESHOOTING — CONNECTIVITY
First try the solutions suggested here or visit our website at www.whirlpool.com/owners (in Canada www.whirlpool.ca).
If you experience Possible Causes Solution
Dryer is not connected
to home Wi-Fi router:
Smart Grid (Connected)
status indicator is off
The dryer may be in standby mode. Touch the POWER/CANCEL button on the dryer and observe
indicators. All indicator lights are off when in standby mode.
The dryer has never been connected
to the home Wi-Fi router.
See the Whirlpool
®
app.
The dryer has been connected to
the home Wi-Fi router, but dryer
Wi-Fi is off.
Touch and hold WIFI CONNECT for 3 seconds. The Smart Grid
(Connected) status indicator should blink while connecting (this may
take up to 2 minutes).
Lost connection to home Wi-Fi router. Check whether the router is on and working with other computers
or devices in the home (able to access the internet).
Weak signal strength or signal
interference between the dryer
and router.
Try to place the wireless router closer to the dryer. It may be
necessary to install a Wi-Fi range extender.
Smart Grid (Connected)
status indicator does not
light at all after pressing
the WiFi Connect button
Something may be wrong
with the dryer.
Unplug or disconnect dryer power for 30 seconds. Return power.
Repeat Wi-Fi connect process.
Verify that the dryer operates correctly except for not being able
to connect. Call for service.
Dryer is connected to
home Wi-Fi router, but
Whirlpool
®
app or
Smart Grid functions
do not work
Smart Grid features on the dryer may
be off.
Check whether the Smart Grid (Connected) status indicator is
on continuously.
Touch and hold WIFI CONNECT for 3 seconds to turn Smart Grid
feature on.
Connection to the Whirlpool
®
app and
Smart Grid service may be unavailable.
Check if the Smart Grid (Connected) status indicator is blinking.
User account has not been properly set
up, or the dryer has not been registered
in an account.
See the Whirlpool
®
app for account setup and dryer registration
instructions.
Verify that the dryer is paired with your account in the app.
Verify correct e-mail address, mobile number, and notification
preferences.
Connection Status Control Panel Indicator Lights
Dryer is not connected • Smart Grid (Connected) status indicator is OFF
Dryer is attempting to connect to home Wi-Fi router • Smart Grid (Connected) status indicator is
blinking slowly
Dryer is connected to home Wi-Fi router, but • Smart Grid (Connected) status indicator is blinking
Whirlpool
®
app or Smart Grid functions do not work
Dryer is connected to home Wi-Fi router, and the • Smart Grid (Connected) status indicator is ON
Whirlpool
®
app works
 Loading...