


 Loading...
Contents
Getting Started . . . . . . . . . . . . . . . . . . . . . . . . . . . . . . . . . . . . . . . . . . . . . . . . . . . . .1
Using the Formatting Tool . . . . . . . . . . . . . . . . . . . . . . . . . . . . . . . . . . . . . . . .1
Preparing the Software Manually . . . . . . . . . . . . . . . . . . . . . . . . . . . . . . . . . .4
Installing the Software . . . . . . . . . . . . . . . . . . . . . . . . . . . . . . . . . . . . . . . . . . .9
Managing Your Drives . . . . . . . . . . . . . . . . . . . . . . . . . . . . . . . . . . . . . . . . . . . . .15
Customizing the OneTouch Button . . . . . . . . . . . . . . . . . . . . . . . . . . . . . . . .15
Running Diagnostics . . . . . . . . . . . . . . . . . . . . . . . . . . . . . . . . . . . . . . . . . . .18
Updating Your Software . . . . . . . . . . . . . . . . . . . . . . . . . . . . . . . . . . . . . . . .19
Backing Up & Restoring Folders . . . . . . . . . . . . . . . . . . . . . . . . . . . . . . . . . . .22
Creating Backup Plans . . . . . . . . . . . . . . . . . . . . . . . . . . . . . . . . . . . . . . . . .22
Using Simple Backup . . . . . . . . . . . . . . . . . . . . . . . . . . . . . . . . . . . . .22
Creating a Custom Backup Plan . . . . . . . . . . . . . . . . . . . . . . . . . . . . .26
Managing Backup Plans . . . . . . . . . . . . . . . . . . . . . . . . . . . . . . . . . . . . . . . .33
Editing Backup Settings . . . . . . . . . . . . . . . . . . . . . . . . . . . . . . . . . . .33
Deleting Backup Plans . . . . . . . . . . . . . . . . . . . . . . . . . . . . . . . . . . . .36
Backing Up Manually . . . . . . . . . . . . . . . . . . . . . . . . . . . . . . . . . . . . . . . . . .37
Restoring Files . . . . . . . . . . . . . . . . . . . . . . . . . . . . . . . . . . . . . . . . . . . . . . .39
OneTouch II and III Users . . . . . . . . . . . . . . . . . . . . . . . . . . . . . . . . . . . . . . . . . .42
Managing Security . . . . . . . . . . . . . . . . . . . . . . . . . . . . . . . . . . . . . . . . . . . .42
Using DrivePass . . . . . . . . . . . . . . . . . . . . . . . . . . . . . . . . . . . . . . . . .42
Enabling DrivePass . . . . . . . . . . . . . . . . . . . . . . . . . . . . . . . . . . 42
Unlocking Your OneTouch Drive . . . . . . . . . . . . . . . . . . . . . . . . 45
Removing DrivePass . . . . . . . . . . . . . . . . . . . . . . . . . . . . . . . . . 50
Changing Your DrivePass Password . . . . . . . . . . . . . . . . . . . . . 52
If You Forget Your Password... . . . . . . . . . . . . . . . . . . . . . . . . . . . . . .55
Synchronizing Folders . . . . . . . . . . . . . . . . . . . . . . . . . . . . . . . . . . . . . . . . .60
Using Pre-configured Sync . . . . . . . . . . . . . . . . . . . . . . . . . . . . . . . . .61
Using Custom Sync . . . . . . . . . . . . . . . . . . . . . . . . . . . . . . . . . . . . . . .61
Completing the Sync . . . . . . . . . . . . . . . . . . . . . . . . . . . . . . . . . . . . . . . . . . .64
Maxtor OneTouch IV |
i |

Removing Folders from Sync . . . . . . . . . . . . . . . . . . . . . . . . . . . . . . .65 Checking Sync Status . . . . . . . . . . . . . . . . . . . . . . . . . . . . . . . . . . . . .65 Synchronizing Manually . . . . . . . . . . . . . . . . . . . . . . . . . . . . . . . . . . .66
Using the Maxtor Synchronization Window . . . . . . . . . . . . . . . . . . . .66
Using Automatic Overwrite . . . . . . . . . . . . . . . . . . . . . . . . . . . . . 68 Using RAID . . . . . . . . . . . . . . . . . . . . . . . . . . . . . . . . . . . . . . . . . . . . . . . . . .68 Frequently Asked Questions . . . . . . . . . . . . . . . . . . . . . . . . . . . . . . . . . . . . . . .76 Index . . . . . . . . . . . . . . . . . . . . . . . . . . . . . . . . . . . . . . . . . . . . . . . . . . . . . . . . . . . . . . . i
072407
Maxtor OneTouch IV |
ii |

Getting Started
The Maxtor OneTouch 4 drive offers these features:
•Backup & Restore to protect your data
•A customized OneTouch button to quickly open a frequently-used program
If you are a OneTouch II or III user, you also have access to features available on that drive:
•Sync to synchronize one or more folders between two or more computers
•Security settings to password-protect your drive
The Maxtor OneTouch software is loaded on your OneTouch drive. Because the software is configured for a Windows operating system, the software must be prepared for installation on your Macintosh.
Using the Formatting Tool
The Mac OneTouch 4 Formatting tool automatically prepares the Maxtor Manager software for installation on your Macintosh,
To use the Mac OneTouch 4 Formatting Tool,
Step 1: Connect your OneTouch 4 drive to your computer.
A New Volume icon appears on your desktop:
Step 2: Double-click the New Volume icon.
The New Volume Finder window opens:
Maxtor OneTouch IV |
1 |
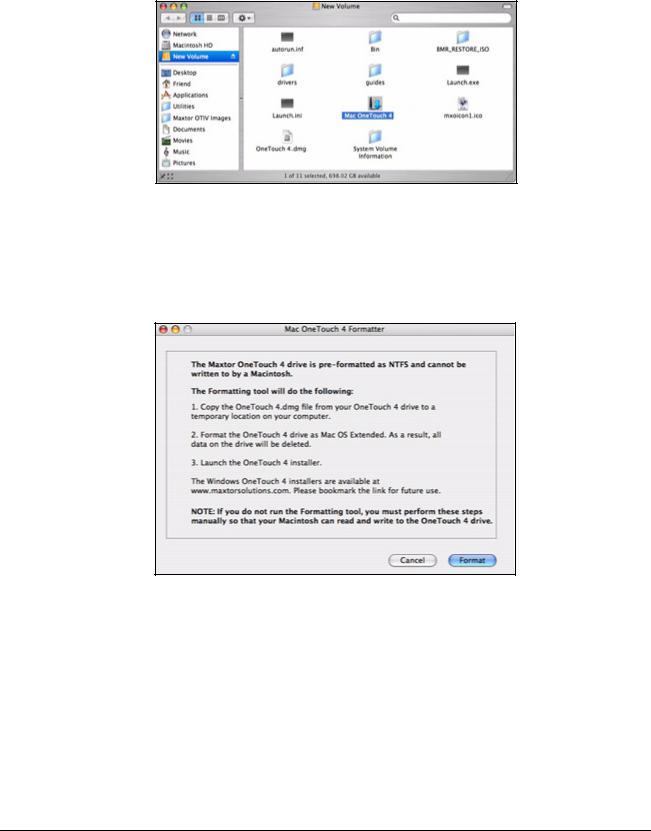
Figure 1: New Volume
The New Volume Finder window contains the Mac OneTouch 4 Formatting Tool. Step 3: Double-click the Mac OneTouch 4 Plus icon.
The Mac OneTouch 4 Formatter window opens:
Figure 2: Mac OneTouch 4 Formatter
Step 4: After you’ve read the description of what the Formatting tool does, click Format to format your OneTouch 4 Plus drive for a Macintosh.
The remainder of the software preparation is automatic. Here’s what you see:
• The New Volume drive is dismounted and reformatted:
Maxtor OneTouch IV |
2 |
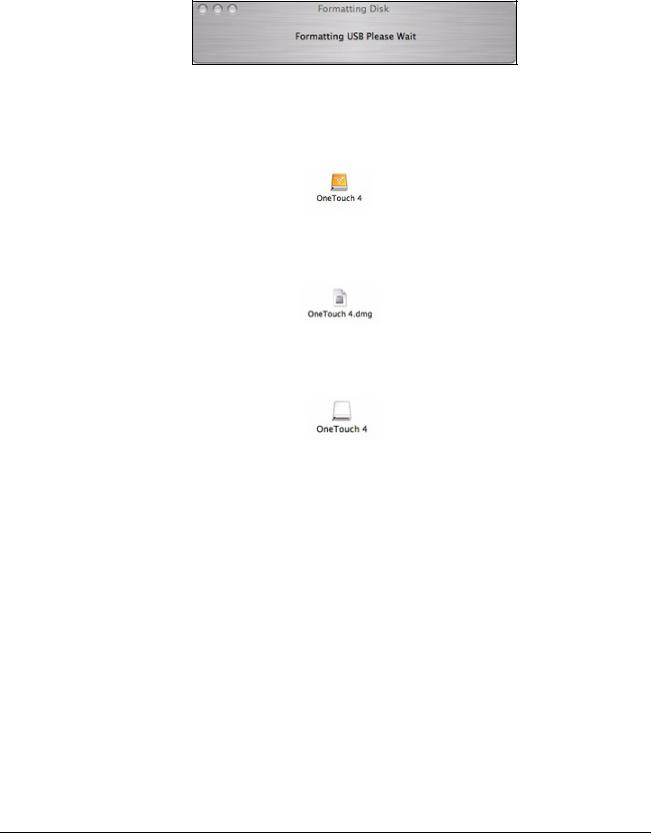
Figure 3: Formatting In Progress
•When formatting is complete, the OneTouch icon refreshes to display the name of the drive:
•The OneTouch 4.dmg file appears on your desktop:
•The dmg file automatically creates a OneTouch 4 installer:
•The OneTouch 4 Installer Welcome window opens
Maxtor OneTouch IV |
3 |
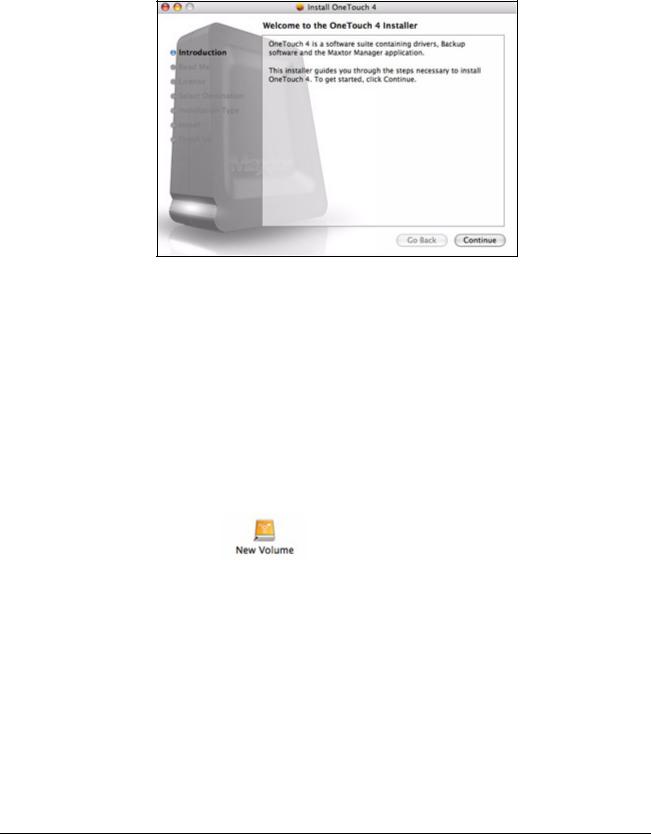
Figure 4: Welcome
Preparing the Software Manually
If you don’t want to use the Formatting Tool, you must manually prepare the Maxtor Manager software for installation on your Macintosh.
To manually prepare the software,
Step 1: Connect your OneTouch 4 drive to your computer.
A New Volume icon appears on your desktop:
Step 2: Double-click the New Volume icon.
The New Volume Finder window opens:
Maxtor OneTouch IV |
4 |
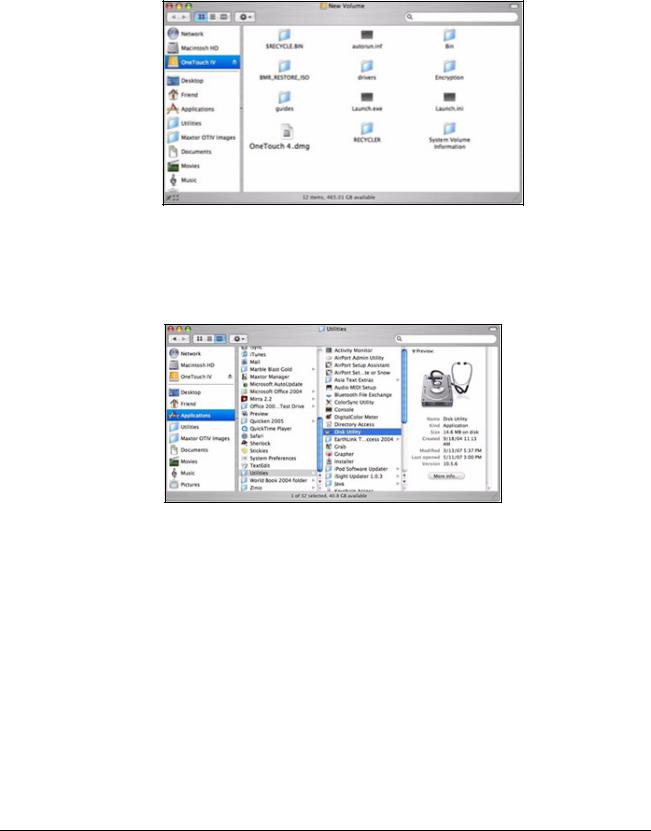
Figure 5: New Volume
Step 3: Drag the Maxtor Manager.dmg file to your desktop.
Step 4: Go to Applications > Utilities> Disk Utility:
Figure 6: Disk Utility
The Disk Utility window opens:
Maxtor OneTouch IV |
5 |
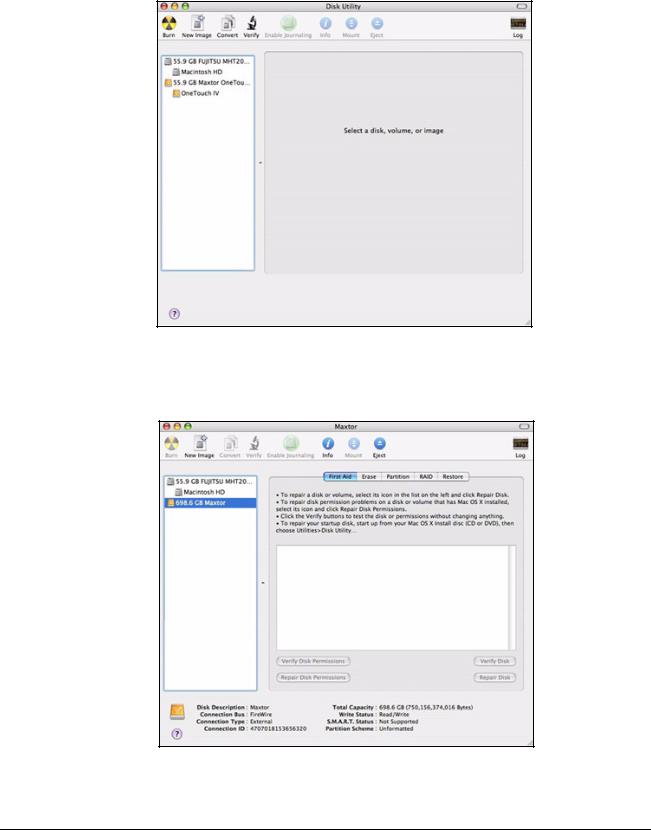
Figure 7: Disk Utility Erase
Step 5: Select OneTouch 4 in the list:
Figure 8: Disk Utility Erase
Maxtor OneTouch IV |
6 |
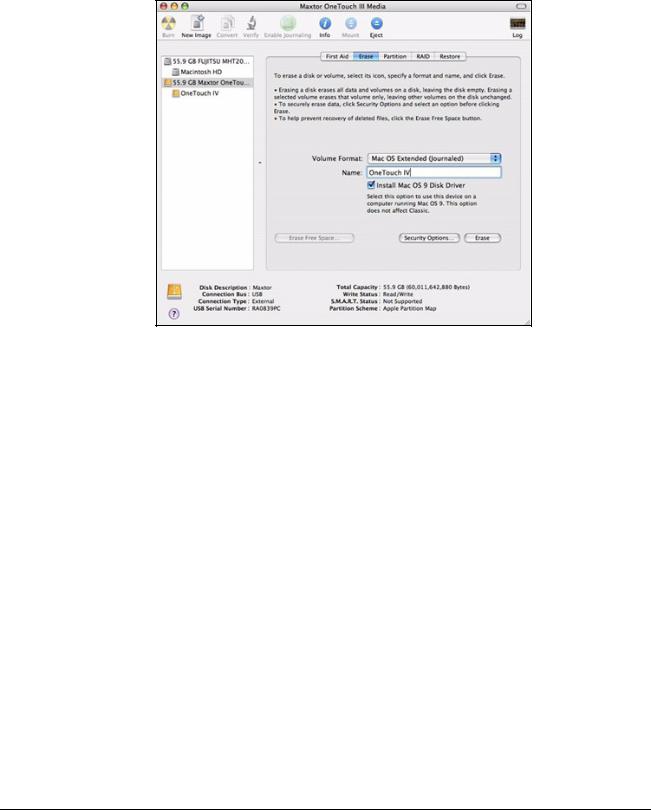
Step 6: Click the Erase tab:
Figure 9: Disk Utility Erase
Step 7: Enter this information:
•For Volume Format, select Mac OS Extended...
Any of the Mac OS Extended options will work.
•For Name, enter the name you want to give your OneTouch 4 drive.
•Deselect Install Mac OS 9 Disk Driver.
Step 8: Click Erase.
An Erase Disk warning sheet is displayed:
Maxtor OneTouch IV |
7 |
Figure 10: Erase Disk Warning
Step 9: Click Erase in the warning sheet.
Your OneTouch 4 drive is dismounted and then remounts with the name you entered.
Step 10: Close the Disk Utility.
The dmg file you dragged to your desktop automatically creates a OneTouch 4 mounted volume:
Step 11: Double-click the OneTouch 4 icon.
The OneTouch 4 Finder window opens:
Maxtor OneTouch IV |
8 |
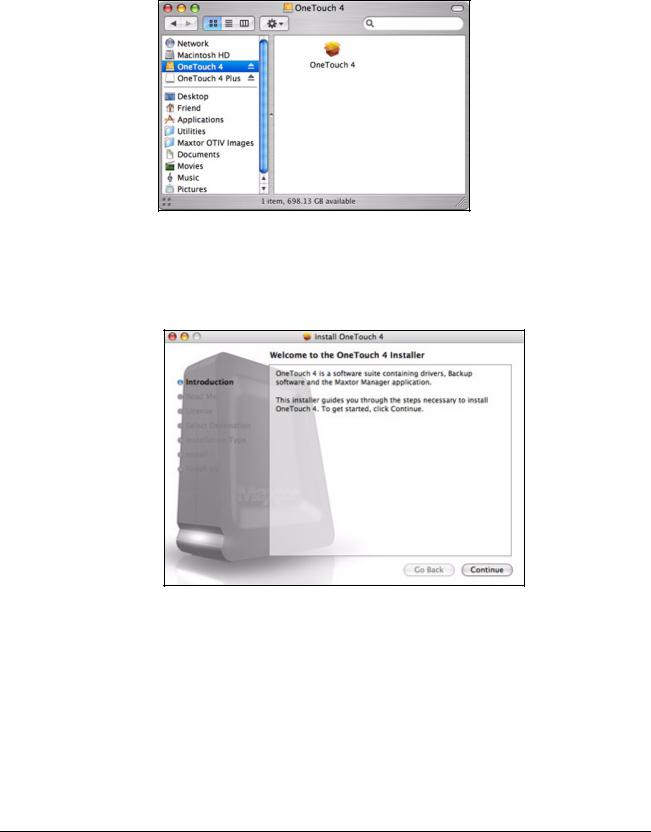
Figure 11: OneTouch 4
Step 12: Click the OneTouch 4 icon.
The OneTouch 4 Installer Welcome window opens
Figure 12: Welcome
Installing the Software
To install the OneTouch software,
Step 1: In the Welcome window, click Continue. The Read Me window opens:
Maxtor OneTouch IV |
9 |

Figure 13: Read Me
Step 2: When you’ve read the information, click Continue. The Software License Agreement window opens:
Figure 14: Software License Agreement
Step 3: Click Continue.
A sheet requires your agreement to continue the installation:
Maxtor OneTouch IV |
10 |

Figure 15: License Agreement sheet
Step 4: Click Agree in the sheet to continue the installation.
The Select a Destination window opens:
Figure 16: Select a Destination
Step 5: If it’s not already selected, select your Macintosh hard drive and click Continue.
Note: The OneTouch 4 software can be installed only on the boot volume.
The Installation Type window opens:
Maxtor OneTouch IV |
11 |

Figure 17: Installation Type
Step 6: Click Install.
A sheet warns that you’ll have to restart your computer:
Figure 18: Restart Warning
Step 7: Click Continue Installation in the sheet.
A progress window keeps you informed as the installation proceeds:
Maxtor OneTouch IV |
12 |
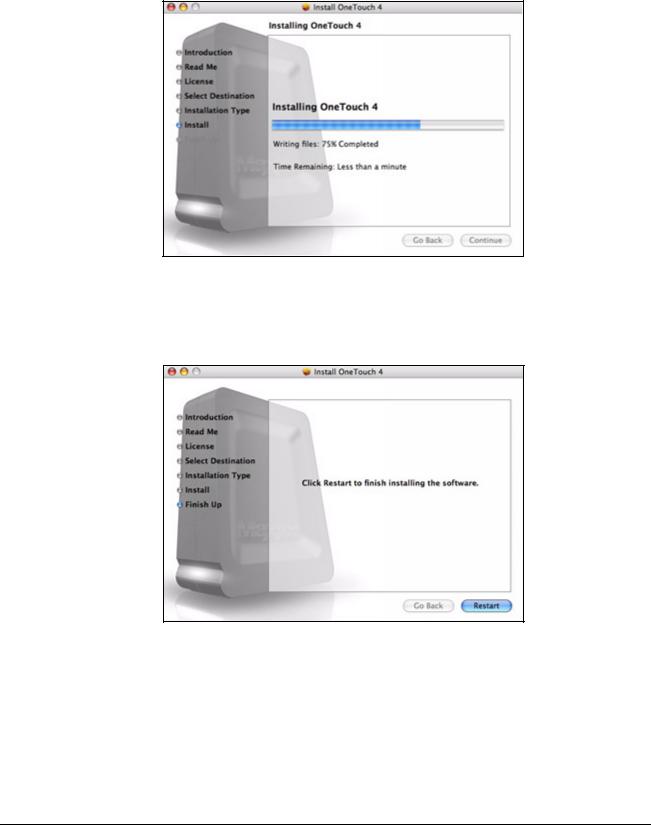
Figure 19: Installing OneTouch 4
When the installation is complete, a Restart window opens:
Figure 20: Restart
Step 8: Click Restart to restart your computer and complete the installation.
When your computer has restarted, a Maxtor Manager icon appears on your desktop:
Maxtor OneTouch IV |
13 |
Step 9: Double-click the Maxtor Manager icon to open the Maxtor Manager application:
Figure 21: Maxtor Manager Application
You’re ready to use your Maxtor OneTouch 4 drive.
072407
Maxtor OneTouch IV |
14 |
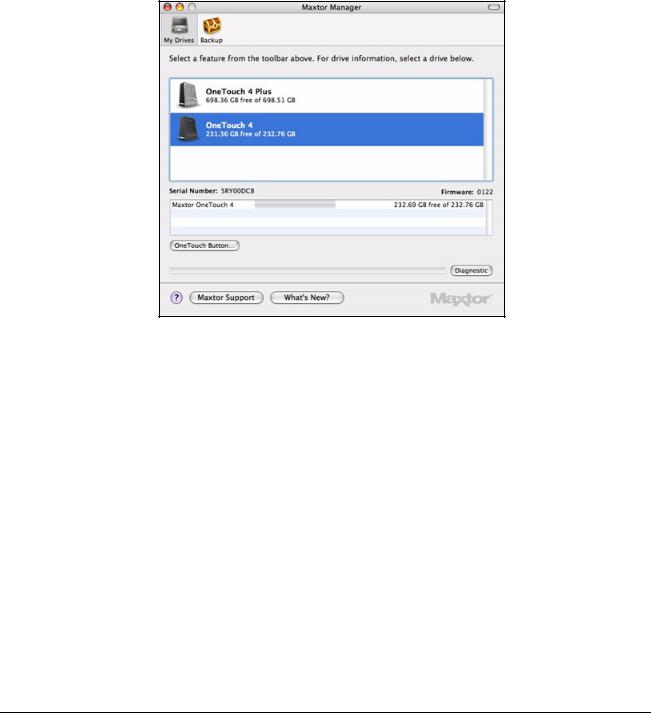
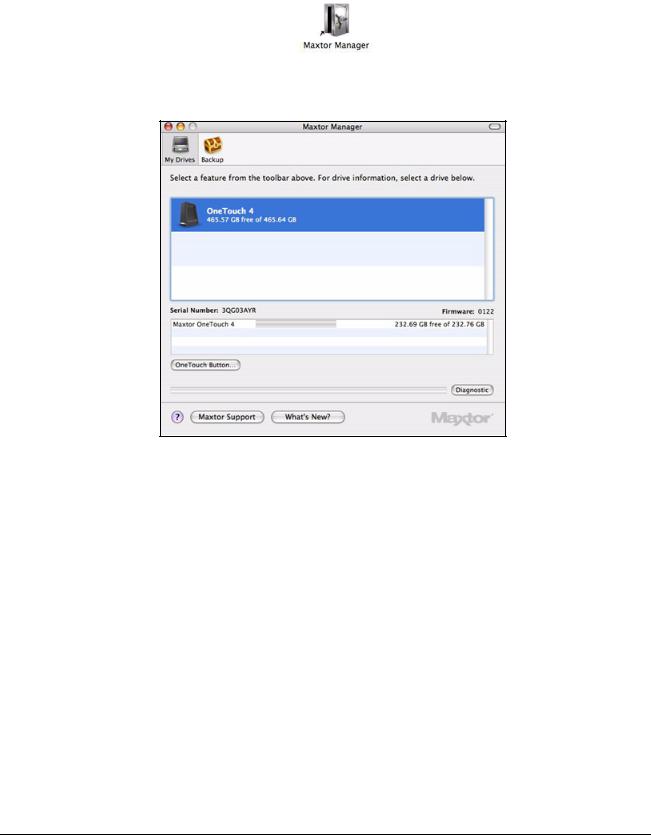
Managing Your Drives
The My Drives view provides a central point from which to manage your Maxtor OneTouch™ devices. It displays all Maxtor devices connected to your computer:
Figure 1: My Drives
The toolbar across the top of the window allows you to access your drive features and manage drive utilities.
Note: External drives are automatically detected and listed in the My Drives window. It can take several seconds for the Maxtor Manager software to detect your device. If your device doesn’t appear, make sure it’s properly connected and turned on.
Customizing the OneTouch Button
You can customize your OneTouch button, located on the front of your drive, so that your OneTouch drive automatically performs the action of your choice when you click the OneTouch button.
You can set the OneTouch button to
•Back up folders now
•Open the application of your choice
Maxtor OneTouch IV |
15 |
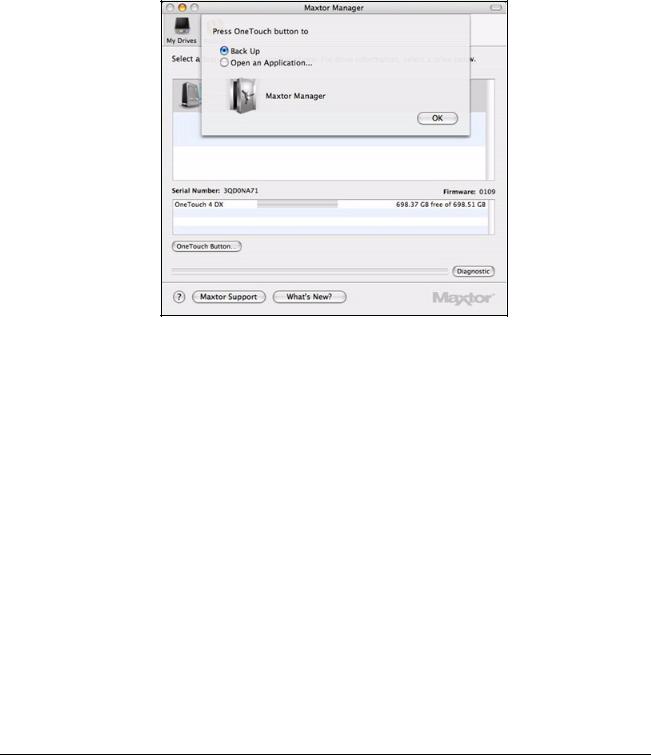
To customize your OneTouch button,
Step 1: In the My Drives window, click OneTouch Button.
A sheet is displayed:
Figure 2: Customize OneTouch Button
Step 2: Select Backup to link that action to the OneTouch button.
— OR —
Select Open an Application to choose an application to open when you press the OneTouch button.
An Open panel appears:
Maxtor OneTouch IV |
16 |
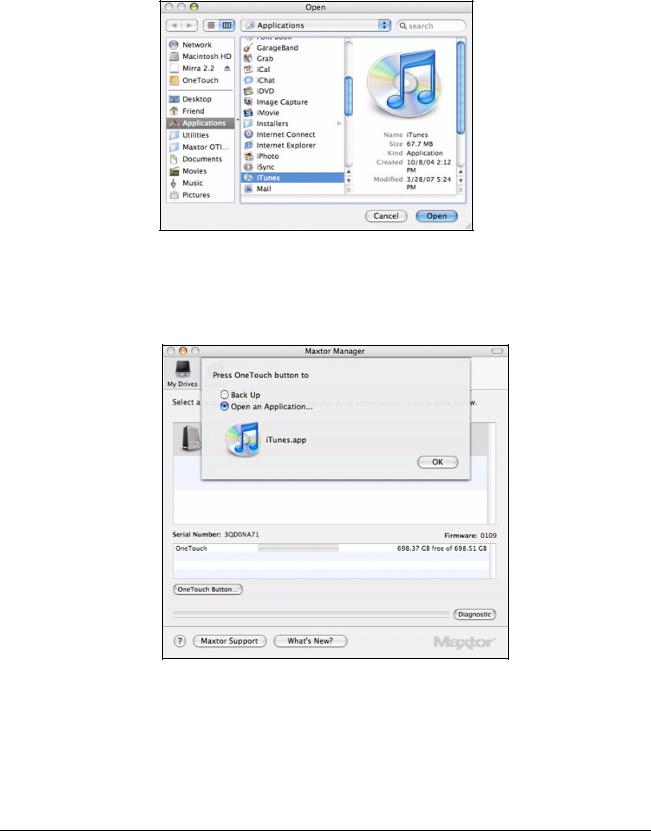
Figure 3: Applications Menu
Step 3: Select the application to be associated with the OneTouch button and click Open. The application you’ve chosen now appears in the sheet:
Figure 4: Customize OneTouch Button - Application Selected
Step 4: Click OK.
You can now open the selected application by pressing the OneTouch button.
Maxtor OneTouch IV |
17 |
Running Diagnostics
Use Diagnostics to check the health of your OneTouch drives. The diagnostic utility performs its tests without affecting the data on your drive.
To run Diagnostics,
•In the My Drives view, click Diagnostic.
A progress bar indicates the progress of the diagnostic:
Figure 5: Diagnostics in Progress
When the test is complete, the results are displayed in the My Drives view:
Maxtor OneTouch IV |
18 |

Figure 6: Diagnostics Complete
The drive pictured above is functioning normally. If the diagnostic encounters an error during testing, the serial number of the bad device is displayed with instructions to contact Seagate for service and support.
Updating Your Software
The Software Update feature automatically informs you each month of whether your software is up to date. However, you can manually check to see if an update is available or you can turn off the Software Update feature.
Note: You can check manually for software updates or turn off Software Update from any view.
To manually check for updates or turn off Software Update,
Step 1: In the menu bar, go to Help > Software Update.
Maxtor OneTouch IV |
19 |
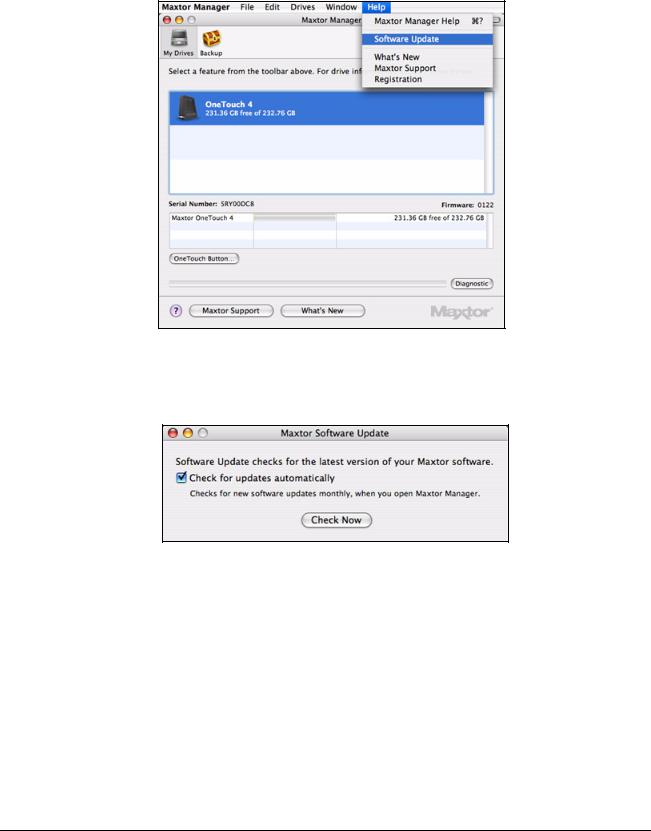
Figure 7: Software Update
The Software Update window opens:
Figure 8: Software Update
Software Update is selected by default.
Step 2: To turn off Software Update, unselect Check for updates automatically. Step 3: To check for updates now, click Check Now.
A window informs you of whether your software is up to date:
Maxtor OneTouch IV |
20 |

Figure 9: Software Update
Step 4: Click OK.
Maxtor OneTouch IV |
21 |

Backing Up & Restoring Folders
The Maxtor OneTouch Backup feature allows you to
•Create and manage multiple Backup Plans
•Schedule the backup of selected folders
•Edit backup settings
•Launch an immediate backup
•Restore backed up files
After the initial backup, the OneTouch software backs up changed files in backed up folders on a schedule you set or when you click Back Up Now in the Backup view.
You can create one Backup Plan to back up all your folders or you can create multiple Backup Plans for different sets of folders.
You can use either of two types of Backup Plan:
•Simple Backup: Pre-configured to back up your home folder daily at 10:00 p.m.
—OR —
•Custom Backup: You select the folders to be backed up and set up a backup destination and schedule.
Creating Backup Plans
Using Simple Backup
Use Simple Backup to back up your home folder daily at 10 p.m.
To use Simple Backup,
Step 1: Click Backup in the toolbar.
The Backup Plans view is displayed:
Maxtor OneTouch IV |
22 |

Figure 1: Backup Schedule
Simple Backup appears in the Backup Plans list.
If this is your first time opening the Backup Plans view, a sheet describes Simple Backup:
Figure 2: Simple Backup Welcome
Maxtor OneTouch IV |
23 |
Loading...