

Page 1
®
Magellan
®
RoadMate
®
RV9490T-LM
User Manual
Page 2

This page is not used.
ii
www.magellangps.com RV9490T-LMB User Manual
Page 3

Safety Notice
IMPORTANT SAFETY WARNINGS
The Magellan RoadMate receiver is a vehicle-navigation aid designed to assist you in arriving at
your selected destinations. When using the Magellan RoadMate receiver, these safety rules must
be followed to prevent accidents that can result in injury or death to yourself or others:
Please check the applicable regulations in your state regarding windshield mounting. Certain
states prohibit the mounting of any items on your windshield. Go to www.magellanGPS.com for
alternative mounting solutions.
When driving, the need to view the display is minimal. Voice prompts will guide you to your
destination. The driver should enter data or program the Magellan RoadMate receiver only when
the vehicle is stationary. Only a vehicle passenger should enter data or program the Magellan
RoadMate receiver while the vehicle is moving. Do not become distracted by the receiver while
driving, and always be fully aware of all driving conditions.
It is your responsibility to comply with all traffic laws and to use the Magellan RoadMate and
mounting options in such a manner that the user is in compliance with applicable laws.
Roads, points of interest (POIs), business and service locations may change over time. As a result
the database may contain inaccuracies.
The database does not include, analyze, process, consider, or reflect any of the following:
population density; neighborhood quality or safety; availability or proximity of police, emergency
rescue, medical or other assistance; construction work zones or hazards; road or lane closures;
pavement characteristics or conditions; special events. Roads, points of interest (POIs), business
and service locations may change over time. As a result the database may contain inaccuracies.
Certain Magellan devices (such as GPS for trucks and RVs) analyze and process certain legal
restrictions (such as vehicular type, weight, height, width, load and speed restrictions; road slope
or grade; bridge height, width, weight, or other limits). If your device offers this option, you must
make sure that you correctly configure your vehicle profile. When available on your device, these
legal restrictions are provided for your convenience only and it remains your responsibility to
disregard any unsafe, hazardous or illegal route suggestions.
Keep the Magellan RoadMate receiver safe from extreme temperature conditions. For example,
do not leave it exposed to direct sunlight for an extended period of time.
Take care when mounting the Magellan RoadMate receiver in your vehicle, whether using
the windshield mount or other mounts, that it does not obstruct the driver’s view of the road,
interfere with the operation of the vehicle’s safety devices such as air bags, or present a hazard to
occupants of the vehicle should the receiver be dislodged while driving. It is your responsibility to
assess the risks associated with damage to your vehicle or vehicle occupants as the result of your
choices in mounting the Magellan RoadMate receiver.
Temperature
The maximum operating temperature is 140°F (60°C).
Battery
The battery in the Magellan RoadMate receiver is rechargeable and should not be removed. In
the event that it should need to be replaced, please contact Magellan Technical Support.
RV9490T-LMB User Manual www.magellangps.com
iii
Page 4

Charging the Magellan RoadMate
An optional AC adapter is available as an accessory for your Magellan RoadMate . Use of
another type of AC adapter can result in malfunction and/or possible fire hazard due to battery
overheating.
Only use the car charger approved for/supplied with your Magellan RoadMate receiver. Use of
another type of car charger may result in fire or electric shock.
For safety reasons, the battery in your Magellan RoadMate receiver will stop charging when the
ambient temperature is less than 32°F (0°C) or more than 113°F (45°C).
It will take approximately 4 hours of charging the Magellan RoadMate receiver through the
vehicle power adapter or optional AC adapter to obtain a full battery charge. It is recommended
that you charge the battery initially for at least 2 hours.
Use only the charger approved for your Magellan RoadMate receiver.
Estimated usage of the Magellan RoadMate on battery power is approximately 30 minutes.
Federal Communication Commission Interference Statement
This equipment has been tested and found to comply with the limits for class B digital devices,
in accordance with part 15 of the FCC Rules. These limits are designed to provide reasonable
protection against harmful interference in a residential installation. This equipment generates,
uses and can radiate radio frequency energy and, if not installed and used in accordance with
the instructions, may cause harmful interference to radio communications. However, there is
no guarantee that interference will not occur in a particular installation. If this equipment does
cause harmful interference to radio or television reception, which can be determined by turning
the equipment off and on, the user is encouraged to try to correct the interference by one of the
following measures:
Reorient or relocate the receiving antenna.
Increase the separation between the equipment and receiver.
Connect the equipment into an outlet on a circuit different from that to which the receiver is
connected.
Consult the dealer or an experienced radio/TV technician for help.
This device complies with Part 15 of the FCC Rules. Operation is subject to the following two
conditions: (1) This device may not cause harmful interference, and (2) this device must accept
any interference received, including interference that may cause undesired operation.
FCC Caution: Any changes or modifications not expressly approved by the party responsible for
compliance could void the user’s authority to operate this equipment.
IMPORTANT NOTE:
FCC Radiation Exposure Statement:
This equipment complies with FCC radiation exposure limits set forth for an uncontrolled
environment. End users must follow the specific operating instructions for satisfying RF exposure
compliance.
This transmitter must not be co-located or operating in conjunction with any other antenna or
transmitter.
iv
www.magellangps.com RV9490T-LMB User Manual
Page 5

In order to maintain compliance with FCC regulations, shielded cables must be used with this
equipment. Operation with non-approved equipment or unshielded cables is likely to result in
interference to radio and TV reception. The user is cautioned that changes and modifications
made to the equipment without the approval of manufacturer could void the user’s authority to
operate this equipment.
The Magellan RoadMate receiver must be installed and operated at a distance no closer than 8
inches (20 cm) from the user.
For body-worn operation, this device has been tested and meets FCC RF exposure guidelines that
positions the EUT a minimum of 0 CM from the body.
SAR Information: 0.009 W/kg (1g)
This Class B digital apparatus meets all requirements of the Canadian Interference-Causing
Equipment Regulations.
IC statement
Operation is subject to the following two conditions:
1. This device may not cause interference and
2. This device must accept any interference, including interference that may cause undesired
operation of the device.
IMPORTANT NOTE:
IC Radiation Exposure Statement:
This equipment complies with IC radiation exposure limits established for an uncontrolled
environment. End users must follow the specific operating instructions for satisfying RF exposure
compliance.
This transmitter must not be co-located or operated in conjunction with any other antenna or
transmitter.
Lifetime Traffic is for the lifetime of the GPS Device or until Magellan no longer receives relevant
traffic data whichever is shorter. Lifetime Traffic may not be transferred to another Magellan device
and may not be available in certain areas.
Lifetime Map Updates entitles you to receive up to four map updates per year for the lifetime of the
GPS Device or until Magellan no longer received relevant map data whichever is shorter. Lifetime
Map Update may not be transferred to another Magellan device. Internet connection required.
The information provided in this document is subject to change without notice. Improvements
and enhancements to the product may occur without any formal notification. Check the Magellan
website (www.magellanGPS.com/support) for product updates and additional information.
RV9490T-LMB User Manual www.magellangps.com
v
Page 6

© 2014 MiTAC International Corporation. The Magellan logo, Magellan, RoadMate and
Quickspell are registered trademarks of MiTAC International Corporation. SmartDetour and
OneTouch are trademarks of MiTAC International Corporation and are used under license by
MiTAC International Corporation. All rights reserved.
The Good Sam logo is a trademark of Good Sam Enterprises, LLC. Copyright © Good Sam 2014.
All other trademarks and registered trademarks are property of their respective owners.
All other products and brand names are trademarks of their respective holders.
No part of this user manual may be reproduced or transmitted in any form or by any means,
electronic or mechanical, including photocopying and recording, for any purpose other than
the purchaser’s personal use, without the prior written permission of MiTAC International
Corporation.
MiTAC International Corporation assumes no responsibility or liability for any errors or
inaccuracies that may appear in the contents of this User Manual.
112-0073-001 A
vi
www.magellangps.com RV9490T-LMB User Manual
Page 7

Table of Contents
Safety Notice
IMPORTANT SAFETY WARNINGS iii
Table of Contents
Fundamentals
Magellan RoadMate Receiver 1
Map Screen 2
Elements of the Map Screen 2
Map Screen Header Bar 2
Map Screen Map Area 4
Map Screen Content Squares 6
Arranging content squares 6
Dashboard Screen 7
Map Screen Footer Bar 8
Starting Up 8
Power On, Suspend, Power Off 8
Turning the Magellan RoadMate Receiver On 8
Turning the Magellan RoadMate Receiver Off (Suspend Mode) 8
Turning the Magellan RoadMate Receiver Off (Shutdown) 9
Adjustments 9
Adjusting the Volume 9
Muting the Volume 9
Changing the Data Field 9
Types of Data Available 9
Changing Zoom Levels 10
Changing the Map Style 10
Viewing Current Location Details 11
Saving Current Location 11
RV9490T-LMB User Manual www.magellangps.com
vii
Page 8

Keyboard
Keyboard Basics 13
Using the Keyboard to Enter an Address 13
About street names: 14
About City Names: 14
Searching for POIs 14
Searching near a location 15
Magellan SmartRV Content
Types of Content 17
Syncing Content from SmartGPSEco 18
Selecting and Managing Content 19
Content Manager 19
Store tab 19
Installing available content 19
Synchronizing Content 19
Syncing to SmartGPSEco with Wi-Fi 20
Connecting to a Wi-Fi Network 20
Connecting to a Non-Broadcasting Wi-Fi Network 20
Forgetting a Network Connection 20
Refreshing the Network List 21
Syncing to SmartGPSEco with Magellan Content Manager 21
Syncing Content from Magellan Content Manager 21
Connecting to SmartGPSEco with Smartphone 21
Installing the Magellan App on Android Phones 21
Installing the Magellan App on iPhone 22
Pairing Your Smartphone 22
Setting Your Smartphone to Sync SmartGPSEco Content 22
User-Entered Content 23
Adding Places or Contacts 23
Adding Content Through Magellan Content Manager 23
Customizing Content 23
viii
www.magellangps.com RV9490T-LMB User Manual
Page 9

Fuel Squares 23
Customizing the Fuel Square 24
PhantomALERT 24
Customizing the Alerts 24
Points of Interest Visibility 25
Setting POI Visibility on Map 25
Setting POI Visibility on Squares 25
Weather 25
Setting Weather Units 25
Selecting Cities for Weather 25
Browser 26
Setting Browser Options 26
My Places
My Places 27
Address Book 27
Accessing the Address Book 28
Adding a Place to the Address Book 28
Editing a Place Name in the Address Book 28
Deleting a Place from the Address Book 29
Adding a Contact to the Address Book 29
Editing a Contact Name 29
Editing Contact information 30
Deleting a Contact in the Address Book 31
Adding a Trip to the Address Book 31
Editing the Trip’s Name in the Address Book 32
Deleting a Trip in the Address Book 32
Wish List 32
Accessing the Wish List 32
Deleting a Location from the Wish List 32
Recent 33
Deleting Recent Destinations 33
RV9490T-LMB User Manual www.magellangps.com
ix
Page 10

OneTouch 33
Adding a OneTouch Button - Location 33
Deleting a OneTouch Button 33
Editing the Name of a OneTouch Button 34
Rearranging the OneTouch Buttons 34
Setting the Home Button 34
Routing
Map Screen While Routing 35
Maneuver Information 36
Maneuver Icons 36
Traffic Information 36
GO Screen 37
My Route 38
Creating and Revising Routes 39
Creating a Route from the Wish List 39
Creating a Route from Recent Places 39
Creating a Route from the OneTouch Menu 39
Creating a Route to a User-Entered Address 40
Creating a Route to a City Center 40
Creating a Route to an Intersection 40
Creating a Route to a POI (Point of Interest) 41
Creating a Multi Destination Route 41
Adding a Destination to a Route 42
Removing a Destination from a Multi Destination Route 42
Routing 42
Selecting the Data Field on the Map Screen 42
Canceling a Route 42
Pause/Resume a Route 42
Detouring Around Traffic 43
Detouring Around a Maneuver 43
x
www.magellangps.com RV9490T-LMB User Manual
Page 11

Bluetooth
Using Bluetooth on the Magellan RoadMate 45
Pairing Your Phone 45
When Answering a Call 45
When Making a Call 45
Instructions 46
Answering a Call 46
Hanging Up 47
Creating a Call with the Dial Pad. 47
Redialing 47
Making an Emergency 911 Call 47
Making an Call using Speed Dial 47
Adding to the Speed Dial list 48
Deleting a Number from the Speed Dial list 48
Changing the Order of the Names in the Speed Dial list 48
Making an Call using the Phone Book 48
Managing the Contacts Phone Book 49
Setting Bluetooth to Auto-connect to Smartphone 49
Setting Audible Maneuver Warning 49
Syncing Content using Bluetooth 50
Vehicle Profile
Accessing Vehicle Profile 51
Set Vehicle Mode 51
Units of Measure 51
Set Vehicle Height 51
Set Vehicle Width 51
Set Vehicle Weight 51
Set Vehicle Total Length 51
Set Vehicle Type 51
Set Hazmat Type 51
RV9490T-LMB User Manual www.magellangps.com
xi
Page 12

Settings
Settings Menu 53
General Settings 54
Software Update 54
Language 54
Units 54
Auto Power Off 54
Screen Brightness 54
Dim on Battery Power 55
Storage Information 55
Product Information 55
Register SmartGPS 55
End-User License Agreement 55
Acknowledgments 55
Navigation and Maps 55
PhantomALERT 55
Points of Interest Visibility 56
Enable Live Traffic 56
Auto-Zoom on Turns 56
Enable U-Turns 56
Avoid Toll Roads 56
Avoid Unpaved Roads 56
Night Mode 56
Visible Speed Warning 56
Speed Limit Warning Threshold 56
Location 57
Region 57
Set GPS Position 57
Sounds 57
Volume 57
Smart Volume 57
xii
www.magellangps.com RV9490T-LMB User Manual
Page 13

Turn Warnings 57
Spoken Street Names 58
Audible Speed Warnings 58
Wi-Fi 58
Wi-Fi 58
Wi-Fi Networks 58
Bluetooth 59
Device Name 59
Auto-connect 59
Audible Maneuver Warning 59
Sync to SmartGPS Eco via Phone 59
Paired Phones 59
To Pair your Phone 59
RV9490T-LMB User Manual www.magellangps.com
xiii
Page 14
Chapter
Fundamentals
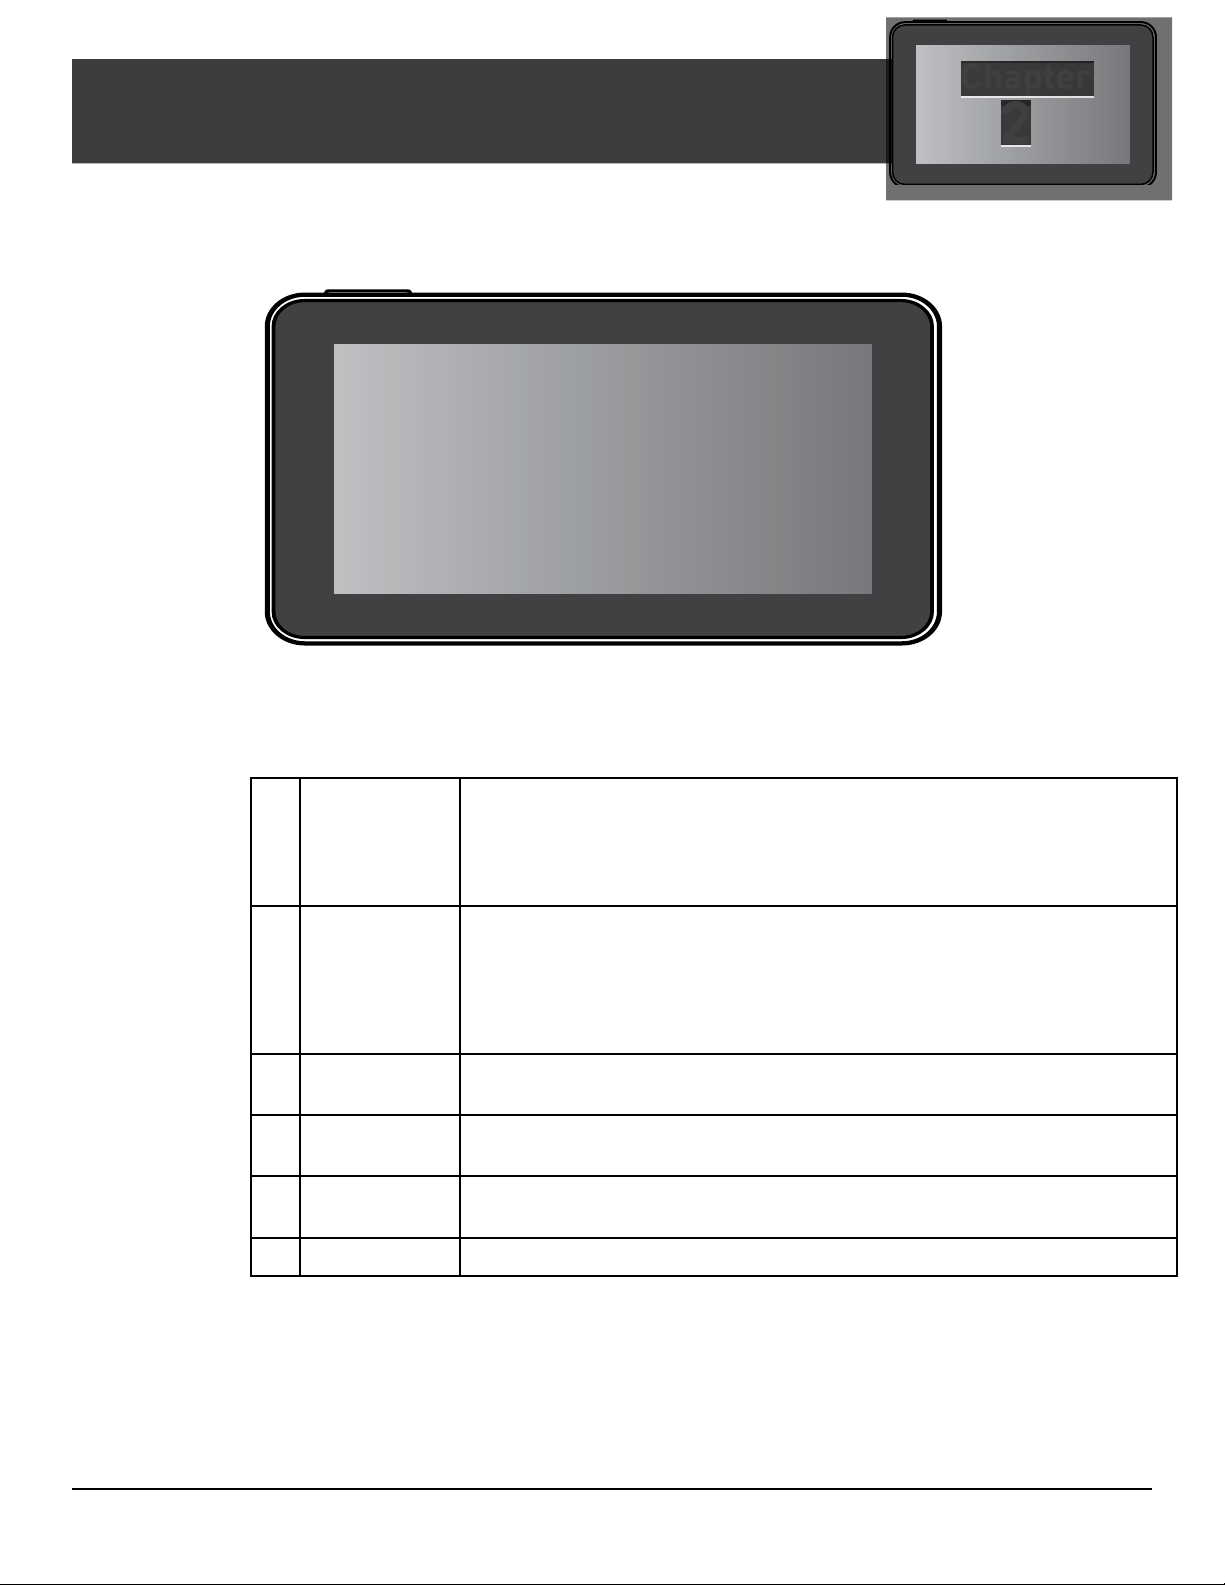
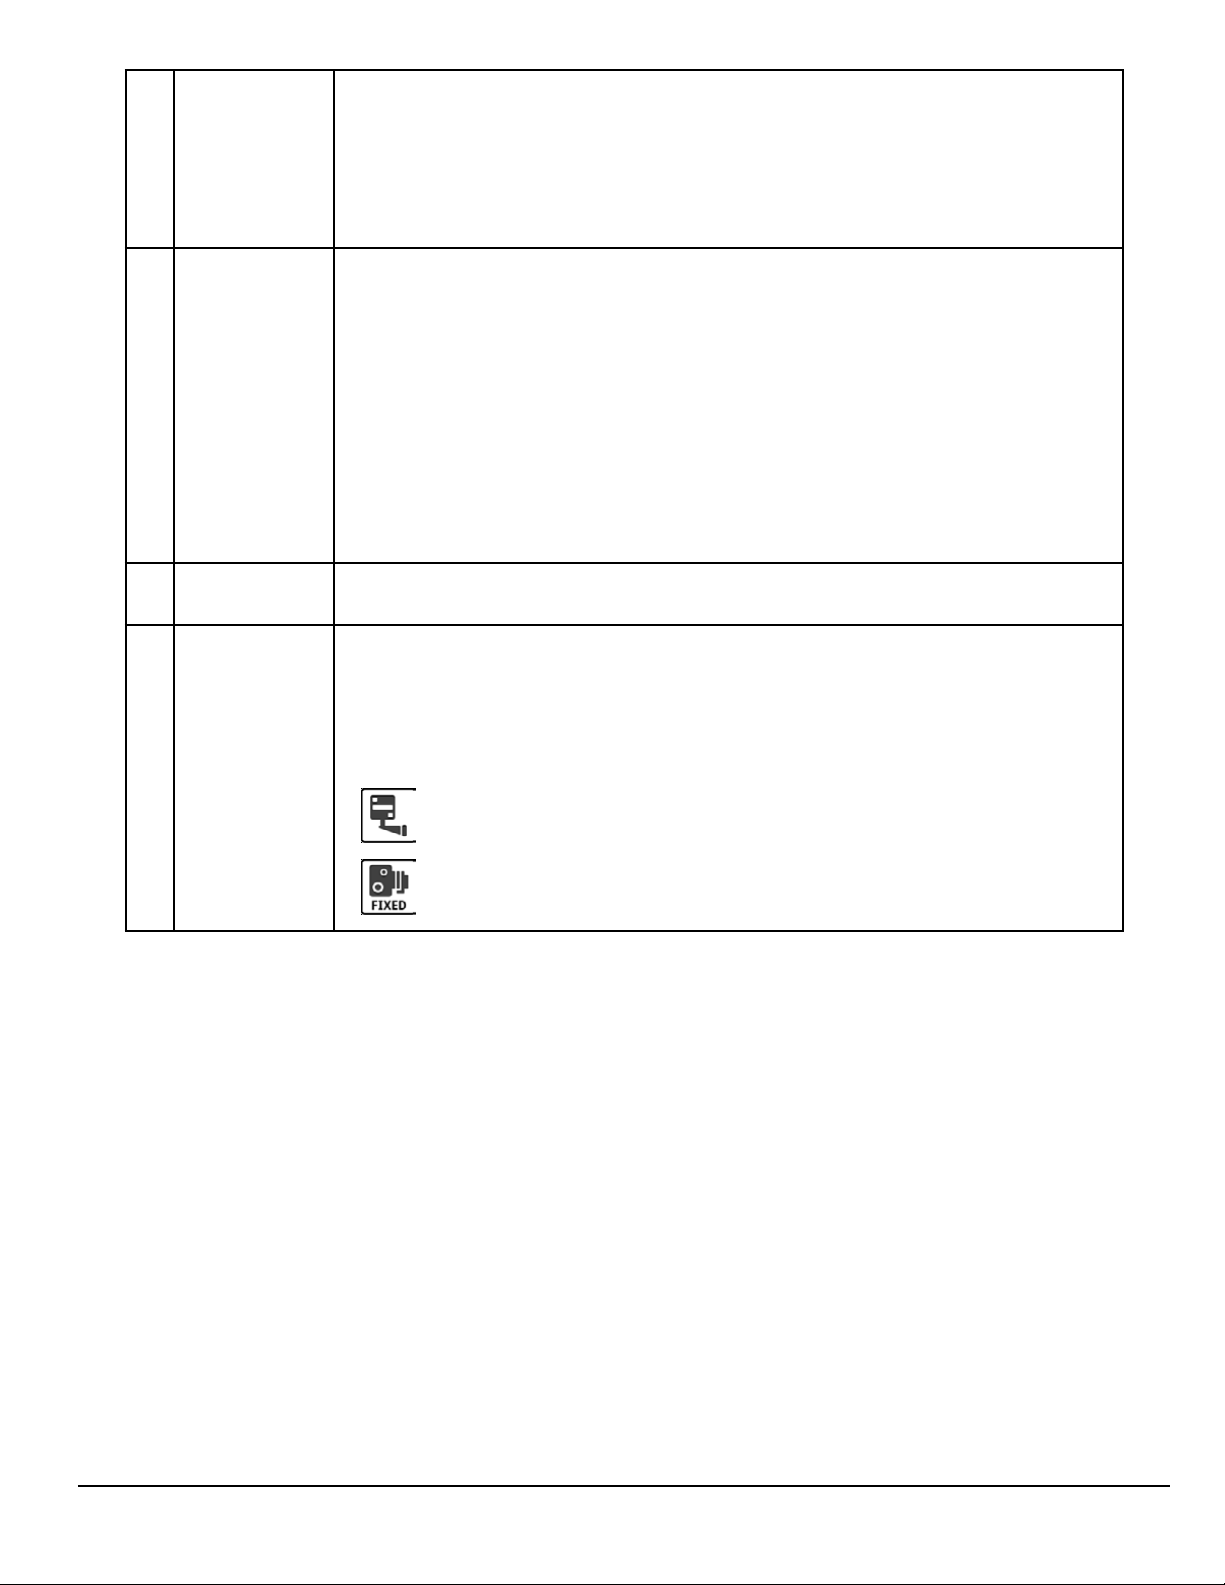
Magellan RoadMate Receiver
A
B
C
2
D
Home
A
Button
Power
B
button,
charge
indicator
light
microSD
C
Card
Headphone
D
Out
USB
E
connection
A-V input. For optional backup camera.
F
Press the Home button to return to the Map screen from
anywhere in the Magellan RoadMate receiver.
Tap to change between the Dashboard display, map with no
content squares, and map with content squares.
Press and hold to turn the device on or to completely shut down.
Press momentarily to suspend or resume the device.
Light is ON when connected to external power.
(Optional) Used for additional map storage.
Connect external headphones
Connect to power source or personal computer
E
F
RV9490T-LMB User Manual www.magellangps.com
1
Page 15
www.magellangps.com
Map Screen
The Map screen will be the screen most commonly used for driving and navigating to a destination.
The following will familiarize you with the icons and details of this screen.
Elements of the Map Screen
Header
Bar
Map Area
Footer
Bar
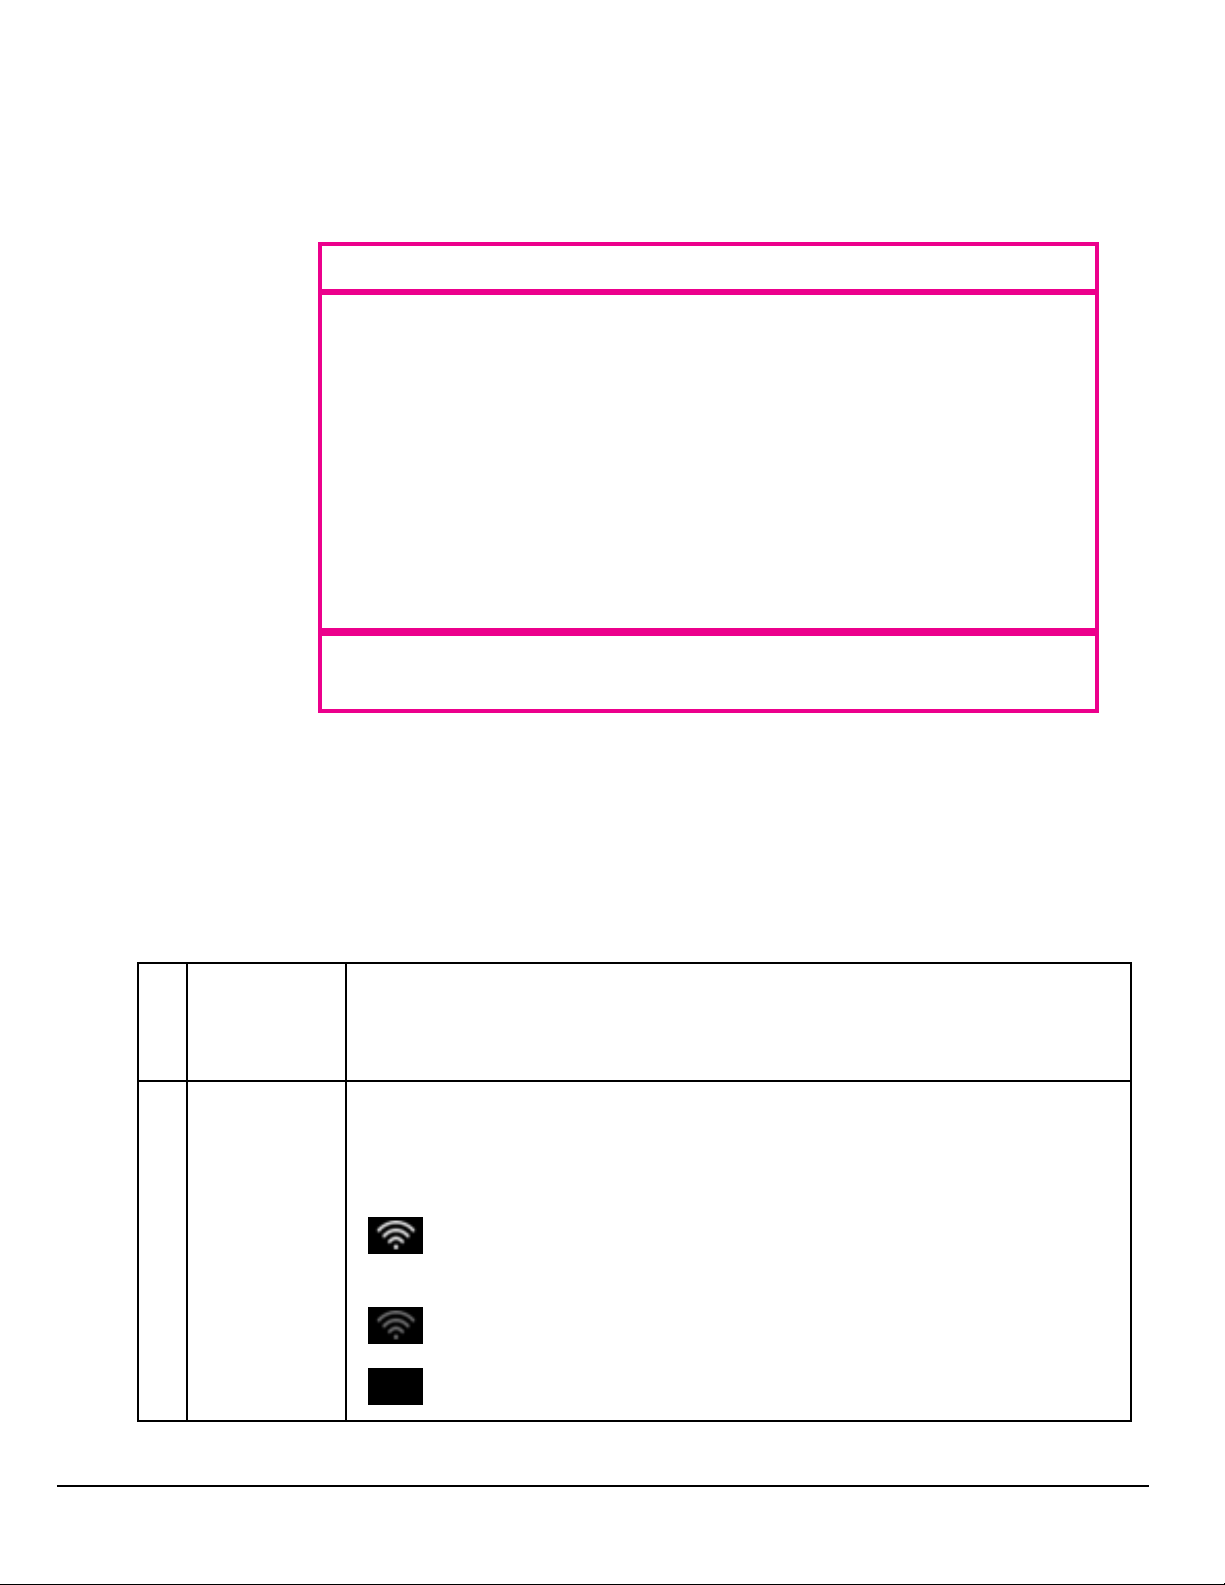
Map Screen Header Bar
A B C D E F G H
Time of Day Time is transmitted from the GPS satellites using an atomic clock as
A
Wi-Fi Signal Displays the current status of the Wi-Fi signal being received. Wi-Fi is
B
reference. The Magellan RoadMate factors in the time zone for your
location as well as daylight savings time conditions to compute the local
time displayed. There are no settings for the time displayed.
used to sync the device with SmartGPS Eco for content information.
Wi-Fi can be turned on or off as well as connecting to a network in
Settings.
Wi-Fi is turned on in Settings and is connected to a Wi-Fi network.
The number of bars displayed (0-4) indicate the received signal
strength of Wi-Fi.
Wi-Fi is turned on in Settings but is not connected to any Wi-Fi
network.
Wi-Fi is turned off in Settings.
2 RV9490T-LMB User Manual
Page 16
www.magellangps.com
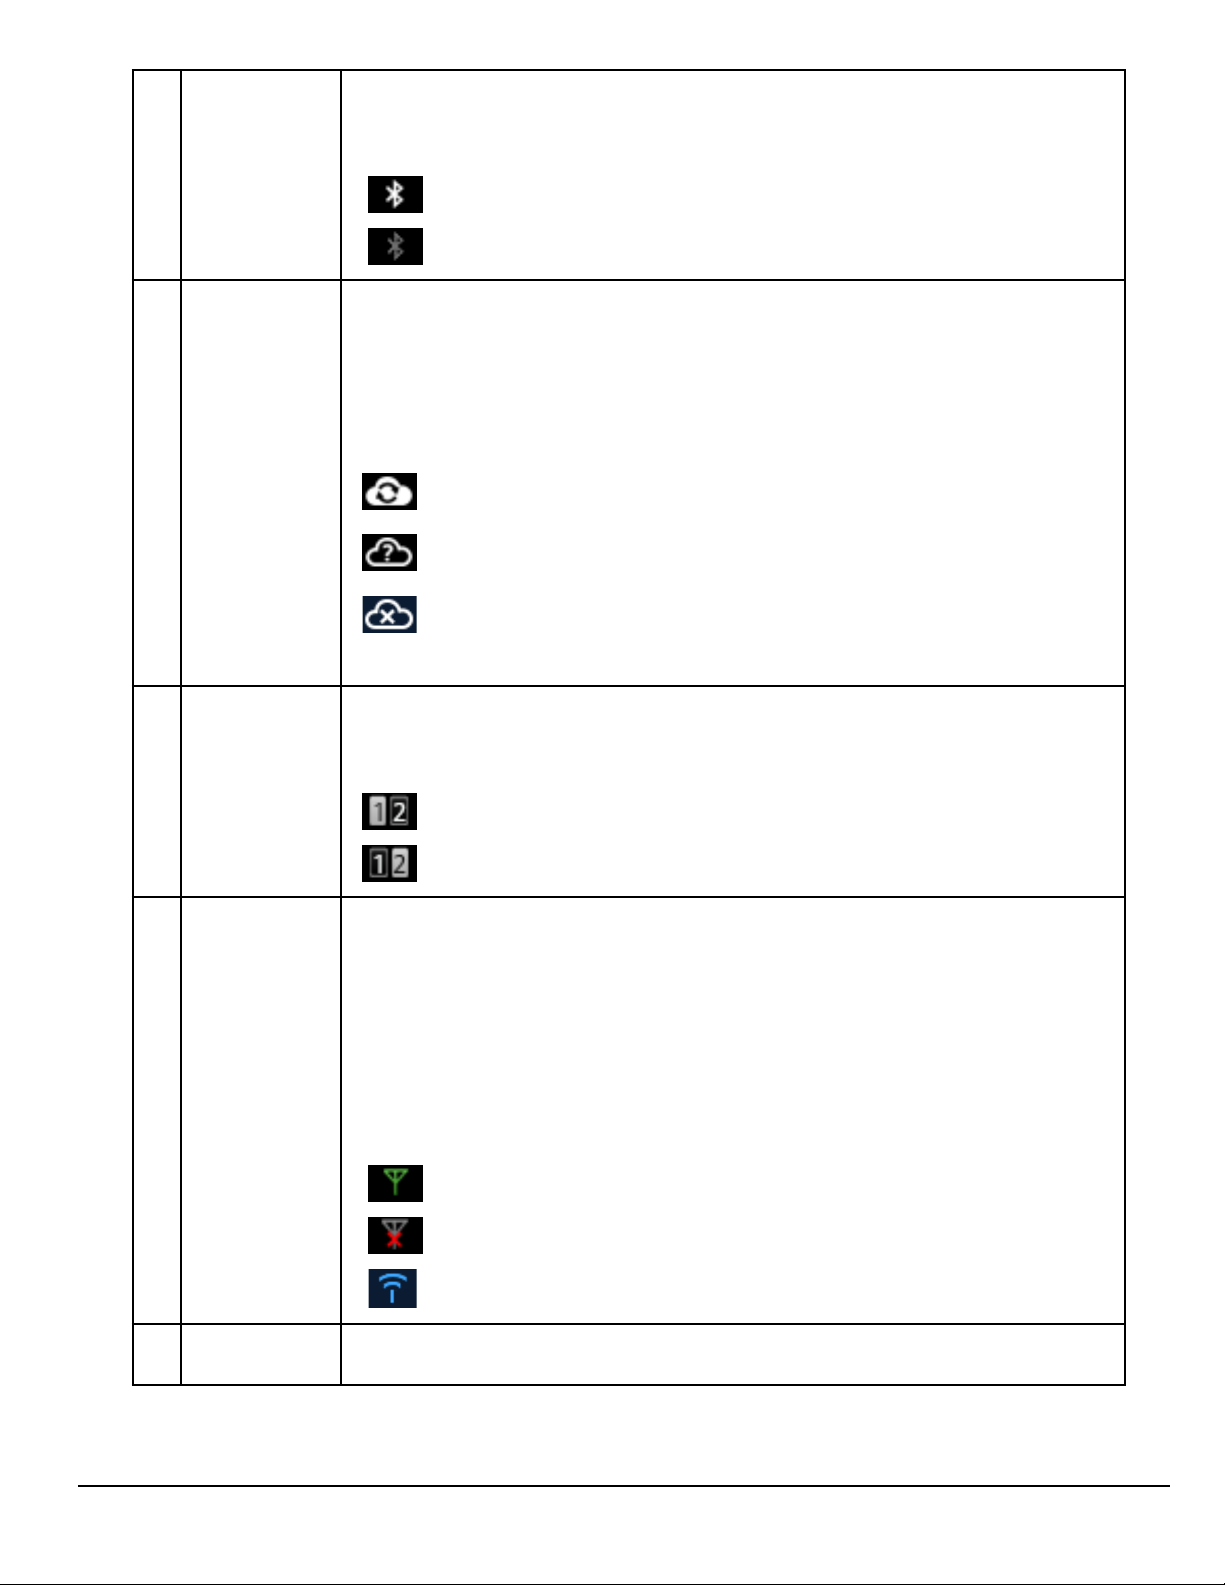
C
Bluetooth
Status
Displays the current pairing status of the Bluetooth connection. When
paired to a phone, the Magellan RoadMate receiver can be used as a
remote interface for your phone.
Bluetooth is paired to a phone.
Bluetooth is not paired to a phone.
SmartGPS-
D
Eco Status
Page Status When the Map screen display is in split screen the Page Status icon
E
The Magellan SmartRV receiver uses your SmartGPS Eco account
(created when registering the product) to sync content from
SmartGPSEco to the Magellan SmartRV receiver. Connection to
SmartGPSEco can be from a Wi-Fi network connection, a Bluetoothpaired phone or by connecting to a PC utilizing the Magellan
SmartGPSEco website.
Content is being synced from SmartGPSEco using Wi-Fi, Bluetooth
or Magellan Content Manager.
The Magellan SmartRV receiver is connected to SmartGPSEco and
the content is analyzed to determine if a sync is required.
The Magellan SmartRV receiver is connected to SmartGPSEco
but all the content is up-to-date or there is no Wi-Fi, Bluetooth or
Magellan Content Manager connection.
indicates which set of squares are being displayed. Swipe across the
four displayed squared to change the viewed squares.
Page 1 squares are displayed.
Page 2 squares are displayed.
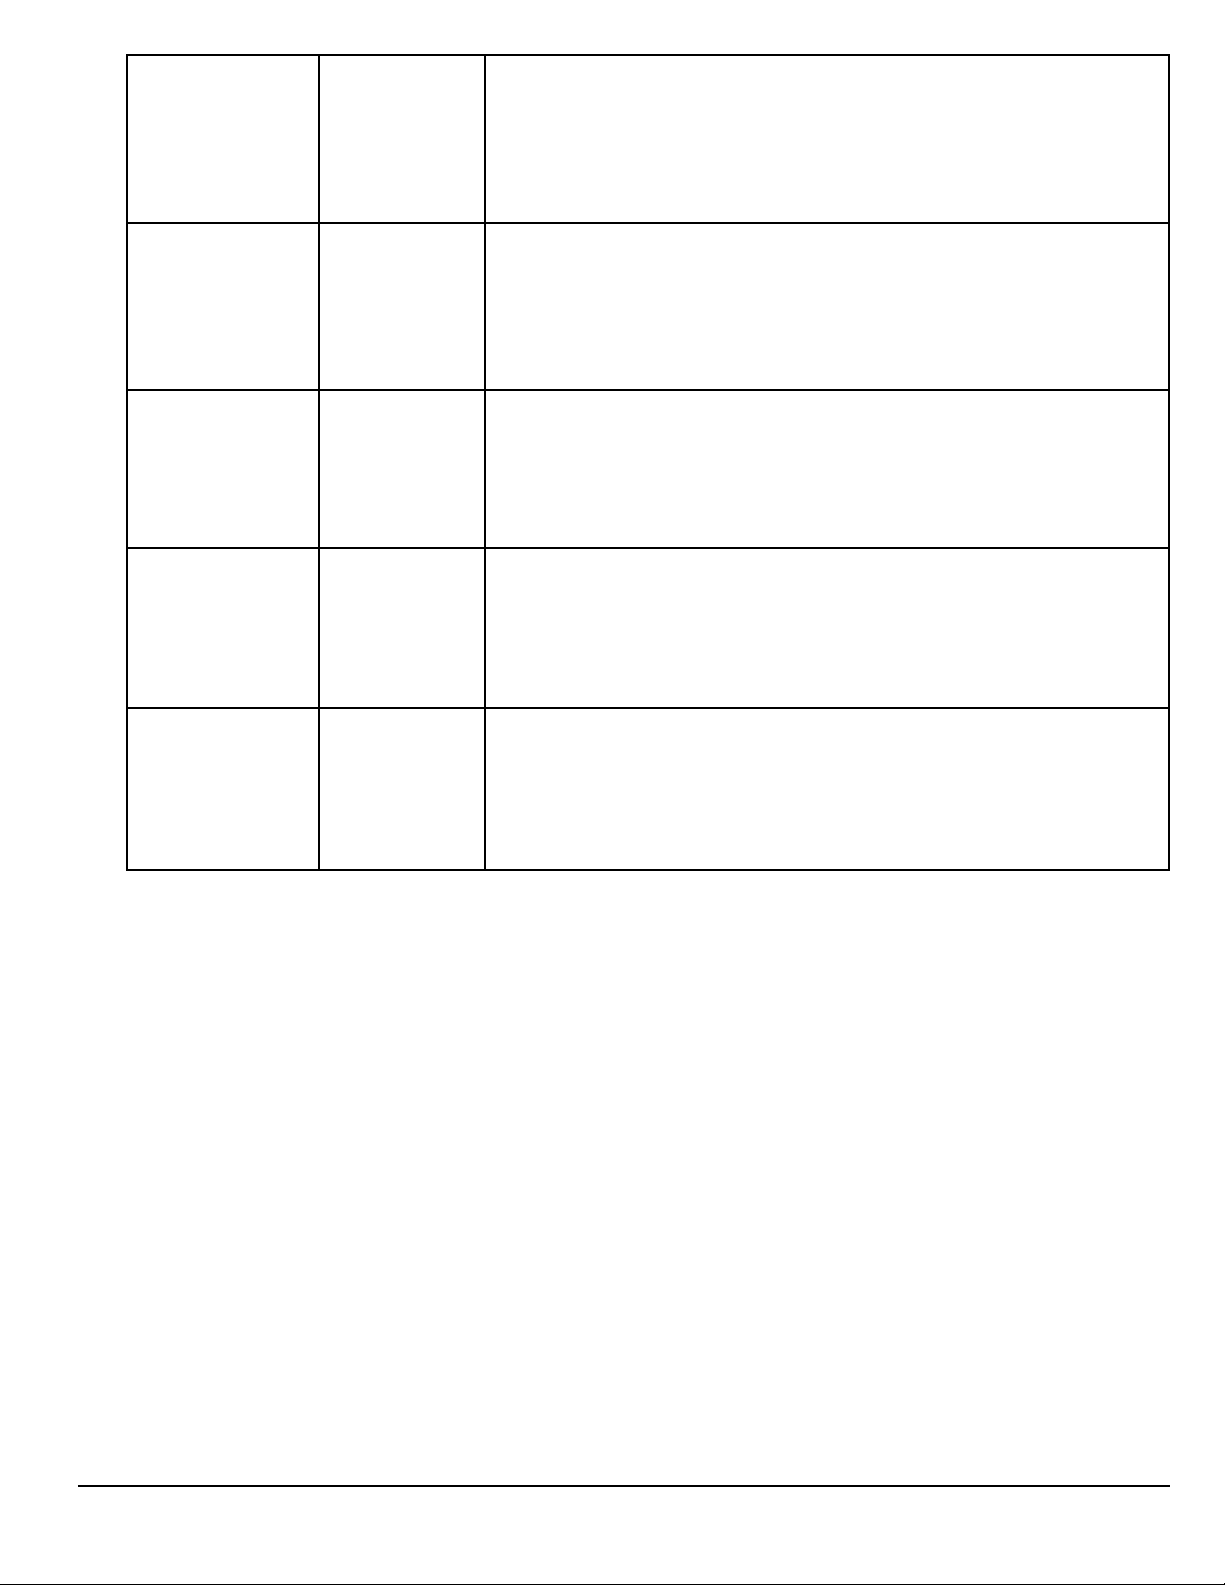
Traffic Signal
F
Status
Vehicle
G
Profile
This reports status of traffic reception from broadcast traffic or (optional
subscription) Internet Traffic.
For broadcast traffic, you must be in an area where traffic signals
are being transmitted and you must be using a Magellan-approved
vehicle power adapter. For Internet traffic, you must have purchased a
subscription and have an active Internet/data connection.
When the Magellan RoadMate receiver is turned on, it may take a
minute or more before any traffic information is displayed.
Traffic information is being received.
No traffic information is being received.
Subscription traffic is being received. (paid)
When the RV icon is shown, routing will take vehicle profile into
account, such as weight, length, and width.
RV9490T-LMB User Manual 3
Page 17

www.magellangps.com
Battery
H
Status
Map Screen Map Area
The battery status icon indicates the current battery charging condition.
A
Operating on battery, the internal battery is fully charged.
Operating on battery, with half charge remaining.
The battery is connected to an external power source
and is charging.
E
D
C
B F
Zoom Level Tap the “+” (zoom in) or “-” (zoom out) to change the map scale.
A
Alternately, you can use the two finger ‘pinch or spread’ technique
commonly found in smartphones.
Volume Tap the Volume button to reveal a slider bar for volume control. Set the
B
slider all the way to the bottom to mute the sound.
Speaker On. Volume set by slider bar.
Speaker Muted.
C
Current
Location
Indicator
Displays the current location of the Magellan RoadMate receiver in
relation to the displayed map.
Tap on the Current Location Indicator to get information on your
current location.
When the indicator is Blue, GPS signals are being
received and the current location has been computed.
When the indicator is Red, GPS signals are not being
received and the current location cannot be computed.
4 RV9490T-LMB User Manual
Page 18
www.magellangps.com
POI Icons The Magellan RoadMate receiver uses various POI icons to graphically
D
display POIs for your surrounding area. Some of those are pointed out in
the graphic.
The POI graphic indicates the POI category.
To select which POI Icons are displayed, go to
‘Settings > Content > Points of Interest Visibility’.
Speed Limits While traveling on major roads the speed limit for the road you are on is
E
displayed. When you have exceeded the posted speed limit, the speed
limit icon will have a red warning halo.
The Speed Limit Warning Threshold for highways and other roads can
be set in ‘Settings > Navigation & Maps’.
Current posted speed limit.
Exceeding the posted speed limit by the threshold set in
Settings > Navigation & Maps.
Data Field Contains information about your speed, elevation, or certain other
F
items. See “Types of Data Available” on page 9.
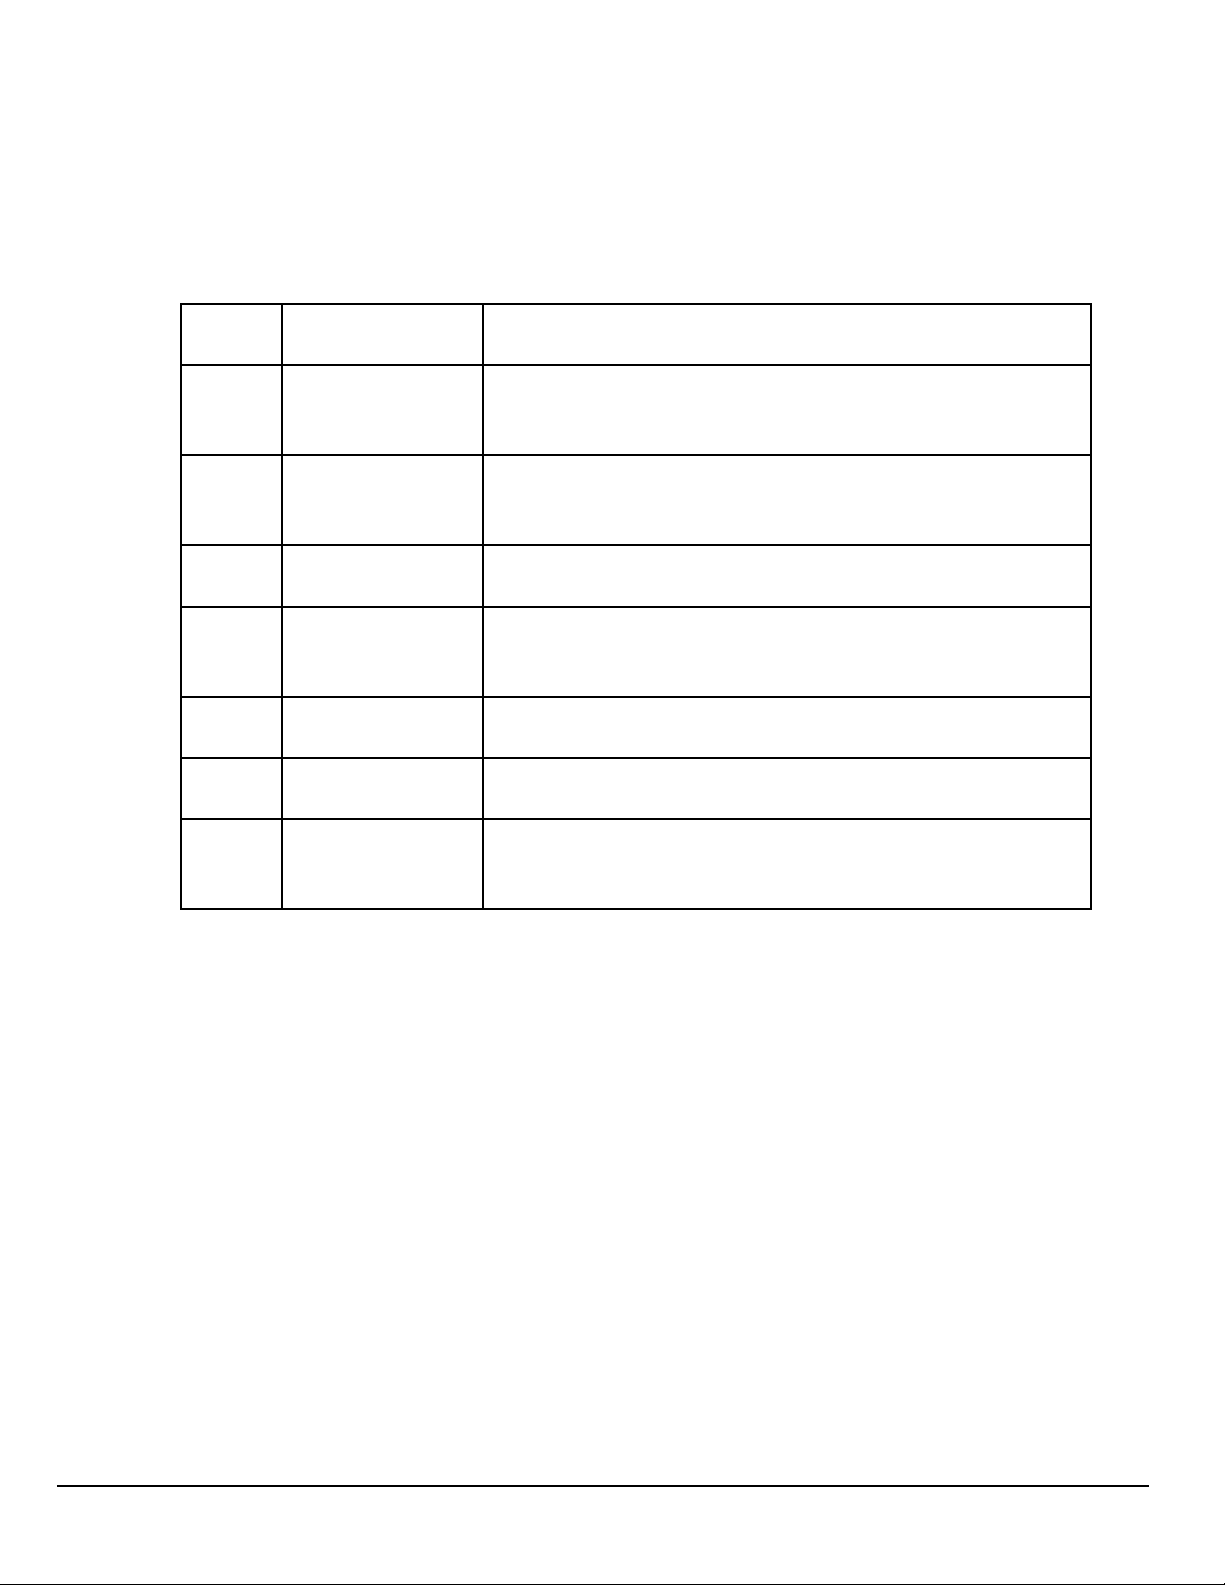
Alert Icons There are two standard alerts that can be displayed on the screen when
they are present in your area, Red Light Cameras and Fixed Speed
Cameras.
Premium Alerts can be purchased for the Magellan RoadMate receiver
from the Magellan Store (www.magellangps.com/Shop).
Location of a red light camera.
Location of a fixed speed camera.
RV9490T-LMB User Manual 5
Page 19

www.magellangps.com
Map Screen Content Squares
There are eight different content squares available on the Magellan RV9490T-LMB. When fewer
squares are displayed, tap the More Tiles arrow (on the footer bar) to view all eight squares.
Arranging content squares
With all eight squares displayed, touch a square until it turns dark, then drag it to the position you
want it. The square you drag it to will move to the vacated position.
While driving without a route active, the map can display by itself or with four squares. While
navigating to a destination, the map can display with two squares. One of the two squares displays
traffic and safety alerts. The other displays POI data and reminders. If music player is selected and
active, it will take this position. A brief explanation of the squares follows.
Fuel Prices “Flip” (Swipe up/down on) the square to view different
stations. Tap to view additional information on the gas station
displayed. You can then create a route to that gas station
or add it to your active route. The Fuel Prices square can be
customized from Settings > Content > Gas.
Traffic Alerts Tap to view information on the displayed delay. Other traffic
incidents can be viewed by flipping through the squares.
If you are traveling on a route, the Magellan SmartRV receiver
will try to compute a detour around the traffic incident. If
a detour is available that will save time, the Detour Traffic
button will be enabled.
Weather Flip the square to select city. Tap on the weather square to
view the 5 day forecast for the displayed city.
To choose which cities are displayed, go to “Settings > Content
> Weather”.
6 RV9490T-LMB User Manual
Page 20
www.magellangps.com
PhantomALERTS
Any basic phantomALERTS (red light cameras, speed cameras)
or premium phantomALERTS (purchased from www.
magellangps.com/shop) you are approaching are displayed.
Flip though the square to view additional alerts when present.
Current
Location
Browser Tap to access the web browser. (Requires internet access from
Sanidump Displays sanitary dumps. Flip to select facility, tap for
Truck driving
alerts
Tap to bring up additional information on your current
location (Lat/Long, streets ahead and behind you). A Save
button is displayed allowing you to save your current location
into your address book.
a Wi-Fi network.)
information.
“Truck driving alerts” include toll booth alerts and “yellow
sign” alerts. (Yellow sign alerts include sharp curve, etc.)
Dashboard Screen
The Dashboard screen provides driving information and instructions without a map or content
information You can use the Home button or More Tiles button to switch between the map screen
and the Dashboard screen.
When a multiple-destination route is
active, two Dashboard screens are
available. One displays the current
route segment, the other displays the
entire route. Swipe the screen up/
down to select.
RV9490T-LMB User Manual 7
Page 21
www.magellangps.com
Map Screen Footer Bar
C D EA B F G
A
B
B
C
D
E
F
G
More Tiles From Dashboard, tap to show map.
With map showing, tap to show more tiles.
Go To...
(When not
routing)
My Route
(While a route is
active)
OneTouch
Address Book Tap to access your address book. It contains saved
Phone
(Bluetooth)
Settings Tap to access setting options for the Magellan
Fewer tiles
/ show
Dashboard
™
Tap to use the keyboard and search a POI or address.
Searched items can be used as a destination or saved
to the address book.
While routing, it is displayed in place of GoTo. Tap
to view information about the route and for tools to
delete, pause, or revise the route.
Access the OneTouch menu providing easy access to
saved destinations.
addresses, contacts, trips, and recent destinations.
You can use any or those as a destination.
Tap to bring up phone functions and access to
Bluetooth settings.
RoadMate receiver.
Tap to show fewer tiles, then only the map, then to
show the Dashboard.
Starting Up
Power On, Suspend, Power Off
Turning the Magellan RoadMate Receiver On
1. Press and hold the Power button for 2-3 seconds. The Magellan logo may not appear
until a few seconds after you release the button.
Turning the Magellan RoadMate Receiver Off (Suspend Mode)
If you suspend operation, the route and all information is held so you can quickly resume use.
1. Remove power or press and release the Power button.
A confirmation with countdown timer will appear.
Tap Cancel to continue operation, otherwise the unit will suspend operation.
2. To resume, press and release the power button.
8 RV9490T-LMB User Manual
Page 22

www.magellangps.com
Turning the Magellan RoadMate Receiver Off (Shutdown)
1. Press and hold the Power button for 2-3 seconds and release when the Shutting Down
message is displayed.
The receiver will power off. This clears any inputs in progress, but does not cancel an
active route.
Adjustments
Adjusting the Volume
1. Tap the Volume icon.
2. Move the Volume slider to the desired level.
Muting the Volume
1. Tap the Volume icon.
2. Move the Volume slider to the bottom of the scale.
Changing the Data Field
The data field is shown on the Map screen.
1. Tap on the data field.
2. Select the desired data type from the list displayed.
Types of Data Available
Not Routing
Routing
On Muted
Heading
Speed
Elevation
Estimated Time of Arrival
Amount of Time Remaining to Arrive at Destination
Total Distance Remaining
Heading
Speed
Elevation
RV9490T-LMB User Manual 9
Page 23

www.magellangps.com
Changing Zoom Levels
Button Method
1. Tap
Pinch / Spread Method
1. Use two fingers to “Pinch” the map area to zoom out.
2. Use two fingers to “Spread” the map area to zoom in.
to zoom in or to zoom out of the map display.
Changing the Map Style
The map can be changed to be viewed in 3-dimensional, 2-dimensional - North up or
2-dimensional - heading up style.
1. Swipe the screen over the map area, and the map options footer will appear.
This also appears when you use two fingers to zoom .
2. Select the desired style from the footer bar. (The active style is shown in Orange.)
3. The map updates according to the selected style. You can pan and zoom if you like.
4. To re-center the map on your current location, tap
5. Tap Close or press the Home button to return to the usual map footer.
3-Dimensional
10
2-Dimensional - North Up
(Icon to re-center map
displayed in lower-left)
RV9490T-LMB User Manual
Page 24

www.magellangps.com
2-Dimensional - Heading Up
Viewing Current Location Details
1. Tap on the current location icon
.
2. The Current Location screen is
displayed.
Saving Current Location
1. Tap on the current location icon
.
2. The Current Location screen is
displayed.
3. Tap on the Save icon ( ).
4. Select where to save the location
(Wish List, My Places or OneTouch).
5. Use the keyboard to enter a name
for the location.
6. Tap Save.
7. Press the back arrow ( ) or the Home button to return to the Map screen.
RV9490T-LMB User Manual 11
Page 25

Chapter
Keyboard
3
Keyboard Basics
The keyboard is similar to the keyboard on a smartphone, and is designed to be easy to use.
Since there are some differences from a typical smartphone, and for those who have not used a
smartphone keyboard, the basics of the Magellan RoadMate keyboard will be explained here.
Backspace
Numeric and symbol
characters
Shift (uppercase characters
Cancel - return to the
previous page
Enter key (May be labeled
Search, Done, or Save)
The key in the lower right is used for Search, Done, Save, and Enter. Its label changes according to
the operation in progress, and will dim when it is not available to be used.
Using the Keyboard to Enter an Address
The search entry box is ready for input even when it displays its prompt. (See below.)
The RV9490T-LMB RoadMate does not require separate
entry of street and city. Instead, you can enter enough
of the address so that the search results will include the
location you want.
You can search by any combination of address, city, and
zip code.
1. Enter all or part of the address, then tap
Search.
2. The search results are displayed. When you see
the location you are looking for, tap it.
3. On the Search Results page, use the buttons in
the footer bar to select Addresses, Places, or All.
4. If you don’t see the location you want, tap
to return to the search.
RV9490T-LMB User Manual www.magellangps.com
5. When you select an item, its address details are displayed.
6. Tap GO or Add to use the selected item, or Back ( ) to return to the results list.
When searching to create an item for the Address Book, the screen will show Add instead of
Go.
13
Page 26

About street names:
If you can’t find a street, try including the direction,
as N, S, etc.
For example, “Cataract” will find a lot of other places
before it finds “N. Cataract”.
About City Names:
• City name is part of the address. You shouldn’t
enter it separately, unless that’s all you want.
If you search on a city name, you will get a list of
cities with that name, likely in multiple states.
• If the city you want is listed, tap it for directions
to the City Center.
Searching for POIs
The SmartFind screen lets you search for POIs near
your location, at another location, or relative to an
active route.
The buttons above the keyboard provide easy access
to POIs in many categories. You can scroll the list
sideways with your finger to see all the categories.
You can also search for a POI by name.
Tapping on one of the category buttons will add
that category to the search input. You can select a
sub-category (if available) and add it.
With a category selected, you can search, or add
information to limit the search.
1. Tap Search to display results on the Search
Results page. A list is shown with location
icons on a map.
2. On the Search Results page, you can select
Addresses, Places, or All using the buttons
in the footer bar.
3. When you see the place or location you are
looking for, tap it.
4. If you don’t see the location you want, tap
to return to the search page.
5. When you select an item, its address details
are displayed and its location is shown on
the map.
If you want to look at another item, tap
to return to the results list.
14
www.magellangps.com RV9490T-LMB User Manual
Page 27

Searching near a location
If you just tap Search, the search is centered on
your current location.
If you want to search near some other location,
tap the down arrow, and select Places near...
This shows the address entry keyboard. You can
enter a city or zip code to center the search.
Tap Done to return to the POI search screen.
For more information
See “Routing” on page 35.
See also: “Set GPS Position” on page 57.
RV9490T-LMB User Manual www.magellangps.com
15
Page 28
Chapter
Magellan SmartRV Content
4
Types of Content
There are various types of content available on the Magellan SmartRV.
Some items are optional or subscription-based. Magellan’s SmartGPSEco.com is used to manage
content and content subscriptions.
Preloaded POIs (Points of
Interest)
User-Entered Contacts
and Places
Contacts or Places from
Smartphone
Content from Yelp, others Content is synced from SmartGPSEco whenever the Magellan
Fuel Prices Fuel prices are updated when connected to a Wi-Fi network or
Traffic Traffic alerts are updated whenever the Magellan SmartRV
PhantomALERT There are two types of phantomALERTs, basic and premium.
There are approximately 7 million POIs preloaded into the
Magellan SmartRV. Any of these POIs can be selected as a
route’s destination using the “Go To...” button.
The Magellan SmartRV can store user-entered addresses
(contacts or places) into the built-in address book. These
addresses can be used in the creation of routes.
Smartphones running the Magellan app can transfer content
to the Magellan SmartRV via Bluetooth. These are saved in the
address book for use.
SmartRV is connected to a Wi-Fi network or a Bluetooth
connection (when enabled). Content can include Yelp, Redbox,
and others. Use Content Manager to select content to be synced
for use on the device.
a Bluetooth connection (when activated). The Fuel Prices square
can be set to display gas or diesel fuels by distance or price.
is being powered using the Magellan vehicle power adapter
cable. When routing, a traffic alert may provide access to
detouring around the traffic incident.
RV9490T-LMB User Manual www.magellangps.com
Basic phantomALERTs warn of red light cameras and
speed cameras, and are included with the device. Premium
phantomALERTs include many safety-related warnings, and may
be purchased from www.magellangps.com/shop.
Weather Weather information is updated whenever the Magellan
SmartRV is connected to a Wi-Fi network or a Bluetooth
connection (when enabled).
IP Traffic IP Traffic is a service available through paid subscription from
the Magellan online store. It offers faster traffic updates and
other advantages over the standard traffic service. It requires an
active Internet connection (WiFi or smartphone) to operate.
17
Page 29

Syncing Content from SmartGPSEco
As described in the table above, much of the content available on the Magellan SmartRV is
provided through SmartGPSEco. Content may be delivered using Magellan Content Manager, a
Wi-Fi network, or using mobile data over a Bluetooth connection.
How It Works
When you register your device a SmartGPSEco account is created where
your content is stored. SmartGPSEco continuously pulls information from the
Internet that will be used for content.
When your device connects to SmartGPSEco, SmartGPSEco begins
researching your current location and your address book to determine what
content best suits your driving needs.
After the analysis of what content to send, SmartGPSEco begins syncing new
content, as well as verifying that your existent content is up-to-date.
This process keeps your device current with the content most needed by you
without spending time sending more information than is needed.
How to Connect
Three channels are available for content delivery and update; Wi-Fi, Magellan
Content Manager and Bluetooth. You can use whichever is available to you.
•
Wi-Fi Connection:
connect to any Wi-Fi network that you have established a connection
with in Wi-Fi Settings. Once the network has been defined, the Magellan
SmartRV will try to connect to the network whenever it is in range. Once
connected, it will communicate with SmartGPSEco and start obtaining
new content. Additionally, when you turn off the Magellan SmartRV and
you are within range of a connected network, the Magellan SmartRV will continue syncing for
up to one hour after it is turned off.
Magellan Content Manager:
•
computer and open the Magellan Content Manager web page. From the Magellan Content
Manager you can initiate content syncing from SmartGPSEco to your device.
•
Bluetooth
with your device and update content from SmartGPSEco using the Bluetooth connection.
• Additional features are available when you have the Magellan app running on your
smartphone.
: If you have a smartphone (iPhone or Android-based phones) you can pair it
The Magellan SmartRV can automatically
Connect your Magellan SmartRV to your personal
WARNING
Syncing SmartGPSEco to your device via your smartphone is likely to cause
increased data usage. Please check with your carrier to ensure you have sufficient data available for use. Data rate charges vary by carrier and plan. It is your
responsibility to monitor your usage in an effort to not exceed your data plan
allowances.
18
www.magellangps.com RV9490T-LMB User Manual
Page 30

Selecting and Managing Content
The SmartRV can display eight different content squares.
Some content items are optional, and can be exchanged for other items using Content Manager,
Content Manager
When you launch Content Manager and connect your device, it will display a map and tools to
view and select content. It will also check for device software updates.
Store tab
Your installed content is shown, along with available
content. Select any item to view information about
it.
Click an item to select it, click it again to de-select it.
Installing available content
To install an item:
1. Select the Store
2. Select the item to install
3. Select the item to replace with the new
item.
4. Click Enable to install the content.
The content will be synchronized according to data
connections.
Synchronizing Content
To start synchronizing, click the button on the
device bar.
Warning: Do not disconnect while
sync is active. If you need to take the
device before sync is complete, click
Stop sync first.
• You may need to click the down
arrow to see the Stop sync
button.
If you need to use the device
immediately, you can let it sync over
WiFi and/or Bluetooth as available,
rather than using Content Manager.
A complete sync can take several
hours or overnight, depending on
selected content, internet connection,
and other factors.
19
www.magellangps.com RV9490T-LMB User Manual
Page 31

Syncing to SmartGPSEco with Wi-Fi
Connecting to a Wi-Fi Network
You need to initially connect to a Wi-Fi
network before you can access it. Once you
have successfully connected, the information
for connecting to the network is stored in
the Magellan SmartRV and it automatically
connects to the network when in range.
5. From the Map screen press
6. Tap on the Wi-Fi button.
7. The device will begin searching for
networks in the immediate area that
are broadcasting.
8. A list of networks are shown. Select the network you want to connect to and tap
Connect.
9. If the network has security protection (indicated by the icon), you will need to enter a
password. Contact the network administrator if you do not know the password.
10. The device will communicate with the network, authorizing and obtaining an IP
address. When that is successful, the device will indicate that the network is connected.
.
Connecting to a Non-Broadcasting Wi-Fi Network
Some networks are configured to not broadcast the SSID for the network. In this case the
network will not be displayed in the list of available networks. Follow these instructions to
connect to a non-broadcasting network.
1. From the Map screen press
2. Tap on the Wi-Fi button.
.
3. Tap Add Network.
4. Enter the name of the network. Contact the network administrator if you do not know
the name of the network, the network security type and the password.
5. Tap on Security Open>.
6. Tap on Open, WEP or WPA/WPA2 PSK to select the type of security used.
7. Enter the password for the network.
8. With the name and security set, tap on Join.
Forgetting a Network Connection
After connecting to a network, the password for the network is stored in the Magellan SmartRV
until you “forget” the password. After forgetting, you will need to re-enter the password to
connect.
1. From the Map screen press
2. Tap on the Wi-Fi button.
20
www.magellangps.com RV9490T-LMB User Manual
.
Page 32

3. Any network that you have successfully connected to will be indicated with the word
Connected.
4. Tap on to forget the network connection.
5. Tap OK to confirm.
Refreshing the Network List
Any time you are viewing the network settings screen you can refresh the list of available
networks by tapping Refresh.
Syncing to SmartGPSEco with Magellan Content Manager
The Magellan Content Manager is a web-based application used to register your device, keep your
device up-to-date, add content and sync content to your Magellan SmartRV.
Syncing Content from Magellan Content Manager
1. Connect your device to your PC using a micro-USB cable.
2. Turn on the device.
3. Launch your browser.
4. Access http://www.smartGPSeco.com.
NOTES
Be sure to bookmark the Magellan Content Manager web page for
easy access.
6. Sign In with your Magellan Account.
7. With your Magellan SmartRV properly connected it will appear in the list on the left side
of the page.
8. Click on the device icon.
9. Click on the Sync Data button.
10. The button will change to “Starting sync...” and then a progress bar will be displayed
when sync begins.
Connecting to SmartGPSEco with Smartphone
You can use your smartphone to keep your Magellan SmartRV content updated. This increases your
smartphone data usage, but avoids the need to stop for a WiFi connection to update weather and
other content.
To use your smartphone to sync content with your Magellan SmartRV you need to have the
Magellan app installed and running on your smartphone and your smartphone paired to the
Magellan SmartRV.
Installing the Magellan App on Android Phones
1. Go to play.google.com and search for the Magellan SmartGPS companion app for
Roadmate RV9490.
2. Follow the instructions for installing the app to your Android-based smartphone.
21
www.magellangps.com RV9490T-LMB User Manual
Page 33

Installing the Magellan App on iPhone
1. Open the App Store and search for “Magellan RoadMate On-the-Go”.
2. Follow the instructions for installing the app to your iPhone.
Pairing Your Smartphone
1. From the Map screen press .
2. Tap on the Bluetooth button.
3. Make sure that your phone is on and that Bluetooth is turned on.
4. The footer bar will ask you to “Pair your phone?”. Tap OK.
5. The Magellan SmartRV will begin searching for Bluetooth devices. When you see the
name of your phone in the list, tap the Connect button for your phone.
6. Follow the prompts on your phone and the Magellan SmartRV to confirm the pairing.
CAUTION
If the Magellan SmartRV doesn’t display Connected, try pressing the
Connect button again.
Setting Your Smartphone to Sync SmartGPSEco Content
WARNING
Syncing SmartGPSEco to your device via your smartphone is likely to
cause increased data usage. Please check with your carrier to ensure
you have sufficient data available for use. Data rate charges vary by
carrier and plan. It is your responsibility to monitor your usage in an
effort to not exceed your data plan allowances.
1. From the Map screen press
2. Tap on the Bluetooth button.
3. Check Sync to SmartGPSEco via phone.
.
22
www.magellangps.com RV9490T-LMB User Manual
Page 34

User-Entered Content
On the device, content can be saved when you create a route to a destination or by entering it
directly into your address book. The procedures are mostly the same, just accessed from different
areas.
Adding Places or Contacts
1. From the Map screen, tap the Address Book icon ( ).
2. Tap on the
3. Tap the Edit icon (
4. Tap the add button.
5. Enter the city or zip code.
6. Enter the street name.
7. Enter the address number.
8. Tap Add.
9. Enter a name for the place or
contact.
10. Tap Save.
11. When you are finished, tap Done.
icon to add a place or to add a contact.
NOTES
Please refer to the My Places chapter for explanation of how the
Address Book is structured.
).
Adding Content Through Magellan Content Manager
1. Launch your browser on your PC.
2. Access http://www.smartGPSeco.com
3. Sign In with your Magellan Account.
4. Add places, contacts and trips using the Create New button in Magellan Content
Manager.
5. When your Magellan SmartRV performs a sync, it will be updated with the changes
made in Magellan Content Manager.
Customizing Content
Fuel Squares
Fuel Squares can be customized to display the type of fuel you use, how you want the results
sorted, and which brands of fuel to display.
23
www.magellangps.com RV9490T-LMB User Manual
Page 35

Customizing the Fuel Square
1. From the Map screen press .
2. Tap Content.
3. Tap Gas.
4. Select the type of fuel to be
displayed.. (Regular/Plus/
Premium/Diesel)
5. Select the sort order of the squares
displayed. (Brand/Price/Distance)
6. Set the Brand Preferences.
a) You can uncheck those brands
you do not want to see.
b) To set the the order of brand importance, touch the “grip” next to the checkbox and
drag the brand up or down the list.
Note that this determines fuel type and brand for the content square. Visibility of icons on the
map is still controlled by Content > POI visibility. See next page for details.
PhantomALERT
You can select how PhantomALERTS are presented. You can turn the visibility of the alert on the
map on or off as well as turning the audible alert on or off.
Customizing the Alerts
1. From the Map screen press .
2. Tap Content.
3. Tap PhantomALERT.
4. Tap on the alert to be modified.
a) Set visibility on map on or off.
b) Set audible Alert on or off.
5. Tap
screens.
to return to previous
24
www.magellangps.com RV9490T-LMB User Manual
Page 36

Points of Interest Visibility
This option provides a way to select which POI categories are displayed on the map and in
content squares.
Setting POI Visibility on Map
1. From the Map screen press .
2. Tap Content.
3. Tap Points of Interest Visibility.
4. Tap on Visible on Map to select
which POIs will be displayed on the
map screen. (Checked categories
will be displayed.)
Setting POI Visibility on Squares
1. From the Map screen press .
2. Tap Content.
3. Tap Points of Interest Visibility.
4. Tap on Visible Alerts to select the type of POIs that will be displayed on the content
squares. (Checked categories will be displayed.)
Weather
Weather can be customized to display the temperature in Fahrenheit (°F) or Celsius (°C). You can
also set which five cities will have weather information available.
Setting Weather Units
1. From the Map screen press .
2. Tap Content.
3. Tap Weather.
4. Select °F or °C.
Selecting Cities for Weather
1. As above, select Weather.
2. Tap Edit for the city to change
3. The search facility is displayed. You can enter a zip code or city name to search for.
4. Scroll or refine your search as needed to find the city you want.
5. Tap the city to use.
When a new city is selected, the weather information will begin updating when the device has a
connection.
25
www.magellangps.com RV9490T-LMB User Manual
Page 37

Browser
Browser settings let you customize the way
you browse the web, including several that
help you control your privacy
Setting Browser Options
1. From the Map screen press .
2. Tap Content.
3. Tap Browser.
4. Scroll through the browser options
and set as desired.
26
www.magellangps.com RV9490T-LMB User Manual
Page 38

Chapter
My Places
5
My Places
My Places can be best described as the place where all of the saved destinations and routes are
stored. There are four separate sections to My Places, each one with its own distinct purpose.
Address Book
Wish List The Wish List are those places you found interesting and thought
Recent Anytime you create a route, the destination is saved into your
OneTouch OneTouch is a customizable menu to hold destinations that you
The Address Book stores contacts, places and trips that you have
saved. These can be used as destinations in a route or accessed
using Bluetooth to place a call.
that you might want to go to at some point.
Recent places list. This makes it easy to create a route to some
place you routed to before.
* The route is saved to Recent when you create it, regardless of
whether you actually drove there or not.
** The Recent list will hold hundreds of previous routes.
regularly use.
Address Book
The Address Book can hold places, contacts and trips. These are all user-entered and can easily be
accessed at any time to create a route.
Places Each place has a name and stores only one address.
Once stored, the name can be edited but the address can’t.
Places is designed to hold locations that you commonly go to or
need to reference while driving. This could be anything from your
local Starbucks to a historical landmark. Think of places as your
own personalized POIs (points of interest).
Contacts Each contact has a name and can store multiple places and
numbers. Contacts can be people, businesses, or any other thing
that needs to have more than one piece of information attached,
Each contact can have one or more addresses and can also have
one or more phone numbers. These might be home address,
home number, work address, work number, etc.
Trips Trips contain one or several places as a route.
You can create a trip (route) in advance or save a route while it is
active. When you save a route, it includes the end point and any
intermediate points.
Places, Contacts, and Trips can also be synchronized with SmartGPSEco.
(www.smartgpseco.com, requires a free account for saving and syncing data.)
RV9490T-LMB User Manual www.magellangps.com
27
Page 39

Accessing the Address Book
1. From the Map screen, tap the Address Book icon ( ).
Three tabs are available, as below:
Places tab
Contacts Tab
Trips Tab
Adding a Place to the Address Book
1. From the Map screen, tap GoTo...
2. You can select a POI or search an
address, as appropriate.
3. Select the POI or address (see
the Keyboard
4. Tap
5. Tap
6. Enter a name for the place or accept the default name displayed.
7. Tap Save.
8. Tap Done to finish editing.
) to add.
.
Using
.
Editing a Place Name in the Address Book
Only the descriptive name for a place can be edited.
1. From the Map screen, tap the Address Book icon (
2. Make sure that you are in the Places tab of the Address Book. The Place icon will be
yellow
3. Tap the Edit icon (
icons:
.
). The place names then displays the item edit and item delete
).
.
4. Tap on the item edit icon to the right of the place name. ( )
5. Use the keyboard to modify the name of the place.
6. When done, tap Save.
7. Tap Done to finish editing.
28
www.magellangps.com RV9490T-LMB User Manual
Page 40

Deleting a Place from the Address Book
1. From the Map screen, tap the Address Book icon ( ).
2. Make sure that you are in the Places tab of the Address Book. The Place icon will be
yellow
3. Tap the Edit icon (
4. Tap the item delete icon
5. Confirm the deletion.
6. Tap Done to finish editing.
.
).
for the place to be deleted.
Adding a Contact to the Address Book
1. From the Map screen, tap the Address Book icon ( ).
2. Tap the Contacts tab icon
3. Tap the Edit icon (
4. Tap the “item add” icon
5. Enter the address (see
Keyboard
6. When the address has been entered,
tap Add.
7. Enter a contact name, or edit/accept
the suggested name.
) to be added.
).
.
Using the
.
8. Tap Save.
9. Tap Done to finish editing.
Editing a Contact Name
The descriptive name for a contact can be edited here: To edit contact details, see the
instructions following these.
1. From the Map screen, tap the Address Book icon (
2. Tap the Contacts tab icon
3. Tap the Edit icon (
4. Tap on the appropriate Edit icon.
5. Use the keyboard to modify the name of the contact.
6. When done, tap Save.
7. Tap Done to finish editing.
.
).
).
RV9490T-LMB User Manual www.magellangps.com
29
Page 41

Editing Contact information
You can add, rename, or delete any phone number or place belonging to a contact.
In addition, you can edit any phone number for a contact. To do any of these operations, you
start by selecting the contact:
Selecting a contact to edit it
1. From the Map screen, tap the Address Book icon ( ).
2. Tap the Contacts tab icon
3. Select the contact to edit by tapping it.
4. The contact details will be listed - Tap the Edit icon (
.
).
Editing the name of a contact place:
1. Once you tap the Edit icon ( ), the Item Delete and Item Edit icons are displayed
on each contact place or number.
2. Tap the Item Edit icon on the detail to edit.
3. The keyboard is displayed so you can edit the display name.
4. Tap Save to return to the Contact Edit page.
5. Tap Done when finished editing.
Editing a contact number:
1. Once you tap the Edit icon ( ), the Item Delete and Item Edit icons are displayed
on each contact place or number.
2. Tap the Item Edit icon on the number to edit.
3. The numeric keyboard is displayed so you can edit the number.
4. Tap Done and the keyboard is displayed so you can edit the display name.
5. Tap Save to save changes and return to the Contact Edit page.
6. Tap Done when finished editing.
Adding a contact phone number:
1. Once you tap the Edit icon ( ), the Item Delete and Item Edit icons are displayed
on each contact place or number.
2. At the bottom header, the buttons + Address and + Phone are displayed.
3. Tap the + Phone button.
4. The numeric keyboard is displayed so you can input the number.
5. Tap Done and the keyboard is displayed so you can input the display name.
6. Tap Save to save changes and return to the Contact Edit page.
7. Tap Done when finished editing.
30
www.magellangps.com RV9490T-LMB User Manual
Page 42

Adding a contact place:
1. Once you tap the Edit icon ( ), the Item Delete and Item Edit icons are displayed
on each contact place or number.
2. At the bottom header, the buttons + Address and + Phone are displayed.
3. Tap the + Address button.
4. The full keyboard with POIs is displayed.
5. Locate the place to add. The full address/POI search is available.
6. Tap Done and the keyboard is displayed so you can edit the display name.
7. Tap Save to save changes and return to
the Contact Edit page.
8. Tap Done when finished editing.
Deleting a Contact in the Address Book
This is to delete the entire contact. If you
just want to remove or change details of the
contact, see the instructions previous.
1. From the Map screen, tap the Address
Book icon (
2. Tap the Contacts tab icon
3. Tap the Edit icon (
4. Tap the delete icon for the contact to be deleted.
5. Confirm the deletion.
6. Tap Done to finish editing.
).
).
Adding a Trip to the Address Book
1. From the Map screen, tap the Address Book icon ( ).
2. Tap the Trip tab icon
3. Tap the Edit icon (
4. Tap the
5. Create a trip (see
6. When the trip has been entered, tap Save.
7. Enter a name for the trip.
button to add a new trip.
Routes
.
).
) to be added.
.
8. Tap Save.
9. Tap Done to finish editing.
RV9490T-LMB User Manual www.magellangps.com
31
Page 43

Editing the Trip’s Name in the Address Book
Only the descriptive name for a contact can be
edited.
1. From the Map screen, tap the Address
Book icon (
2. Tap the Trip tab icon
3. Tap the Edit icon (
4. Tap on the appropriate Item Edit icon.
5. Use the keyboard to modify the name of the trip.
6. When done, tap Save.
7. Tap Done to finish editing.
).
.
).
Deleting a Trip in the Address Book
1. From the Map screen, tap the Address Book icon ( ).
2. Tap the Trip tab icon
3. Tap the Edit icon (
4. Tap the delete icon for the trip to be deleted.
5. Confirm the deletion.
.
).
Wish List
Accessing the Wish List
1. From the Map screen, tap the Address Book icon ( ).
2. Tap Wish List.
Deleting a Location from the Wish List
1. From the Map screen, tap the Address Book icon ( ).
2. Tap Wish List.
3. Tap the delete icon
locations in the Wish List.
4. Tap Done to finish editing.
.for the location to be deleted or tap Clear All to delete all the
32
www.magellangps.com RV9490T-LMB User Manual
Page 44

Recent
Recent destinations can’t be added or edited, but
you can delete one or all of them.
Deleting Recent Destinations
1. From the Map screen, tap the Address
Book icon (
2. Tap Recent.
3. Tap the Edit icon (
4. Tap the delete icon for the recent
destination to be deleted or tap Clear All to delete all the recent destinations in the list.
5. Confirm the deletion.
6. Tap Done to finish editing.
).
OneTouch
Adding a OneTouch Button - Location
1. From the Map screen, tap the OneTouch button .
2. Select an empty button and tap the add icon
3. Select where the location will be added from; Search, My Places or Recent.
Search displays the keyboard where you can search for a POI or enter an address.
(See
Using the Keyboard
).
.
.)
My Places displays the Address Book where you can select the location from your
saved places or contacts.
Recent displays the list of recent destinations that can be selected.
4. When the location has been chosen, tap Add.
5. Enter a name for the OneTouch button or use the default name presented. Tap Save.
Deleting a OneTouch Button
1. From the Map screen, tap the OneTouch button .
2. Tap the Edit icon ( ).
3. Tap the delete icon .
4. Confirm the deletion.
5. Tap Done.
RV9490T-LMB User Manual www.magellangps.com
33
Page 45
Editing the Name of a OneTouch Button
1. From the Map screen, tap the OneTouch button .
2. Tap the Edit icon ( ).
3. Tap
4. Edit the OneTouch button name.
5. Tap Save.
6. Tap Done.
.
Rearranging the OneTouch Buttons
1. From the Map screen, tap the OneTouch button .
2. Press and hold the OneTouch button to be moved. When the button dims you can
slide it to a new location on the OneTouch menu.
NOTES
The Home and Emergency buttons cannot be moved.
Setting the Home Button
1. From the Map screen, tap the OneTouch button .
NOTES
If you already have set a Home address you will need to delete it before continuing. Tap Edit. Tap . Confirm the deletion. This will not
delete the Home button, only the address.
2. If there is no current location, choose where the location will be selected from; Search,
My Places, or Recent.
Search displays the keyboard where you can search for a POI or enter an address.
(See
Using the Keyboard
My Places displays the Address Book where you can select the location from your
saved places or contacts.
Recent displays the list of recent destinations that can be selected.
3. When the location has been chosen, tap Add.
4. Tap Done.
.)
34
www.magellangps.com RV9490T-LMB User Manual
Page 46

Chapter
Routing
6
Map Screen While Routing
The Map screen changes when there is an active route. This provides you with the information
needed to route to your destination.
A
B
C
D
E
Maneuver The maneuver bar provides information on the
type of maneuver you are approaching, the
distance to the maneuver and the name of the
street that the maneuver will be done on.
Next Maneuver Shows following maneuver for planning purposes.
My Route Provides access to the tools you need to manage
the route.
Data Field Select data type to be displayed along the route.
Traffic Traffic Alerts, showing the projected delay along
the current route. If the delay is more than 15% of
the entire trip, the delay is shown in red.
A
B
E
C
D
RV9490T-LMB User Manual www.magellangps.com
35
Page 47

Maneuver Information
The top of the display shows a maneuver icon
representing the type of maneuver to be done
next. Next to the icon is the distance to and
name of the street where the maneuver will be
performed.
NOTES
The Magellan RoadMate will provide audible alerts while you are
routing. If you missed an alert or just want to hear it again, tap the
header with the street name for the maneuver and the message will
repeat.
Maneuver Icons
Slight left turn in 2.3 miles on W. Arrow Highway
Continue
Straight
U-Turn to the
right
Exit Freeway
to Left
Exit to
Offroad
Left Turn Right Turn Slight Left
Turn
U-Turn to
the left
Exit Freeway
to Right
Roundabout
(counter
Sharp Left
Turn
Merge Onto
Freeway
Roundabout
(clockwise)
Sharp Right
Turn
Merge Onto
Freeway
Destination
clockwise)
Slight Right
Turn
Proceed to
Road
Exit to
Offroad
Traffic Information
The Traffic Alert displays an icon and estimated delay for the traffic conditions.
36
www.magellangps.com RV9490T-LMB User Manual
Page 48

GO Screen
While creating a route, the GO screen lets you review and adjust it.
You can compare routing methods and view them on the map. You can see the distance to
the destination and the estimated time of arrival for the selected routing method. The routing
methods include Fastest, Shortest or Least Highways. As you select the routing method, the
highlighted route in the map area reflects the choice made.
A
F
B
C D E
Route Info
A
Map View
B
Routing
C
Options
Save
D
GO
E
Destination
F
NOTES
The distance and time calculations are based upon the location and
current time that the Go screen was accessed and do not update.
Distance and estimated time of arrival based on selected
routing options.
Displays a map showing your current location, the
destination and the computed route. Use the zoom controls
to change the map scale and swipe over the map to change
its location.
Select routing method between Fastest, Shortest or Least
Highways. The highlighted route on the map and the
computed arrival time are displayed according to this
selection.
The route you are on can be saved to your Address Book
under the Trips tab to be accessed again.
Create the route using the selected options..
Type and location of destination.
RV9490T-LMB User Manual www.magellangps.com
37
Page 49

My Route
Whenever there is an active route, the My Route button will be present on the Map screen. My
Route provides access to various route editing tools that are described below.
B C D E
A
B
C
D
E
F
G
H
I
J
A
J
Map View
Cancel Route
Pause/Resume
Route
Save
Optimize
Route List
Detour
Turn List
Edit
Go To...
F
GHI
Displays a map showing your current location, the
destination and the computed route (green). Use the zoom
controls to change the map scale and swipe over the map
to change its location.
Tap to cancel the active route. Confirmation of cancellation
is required.
Tap to pause the route and tap again to resume getting
routing information. This could be useful if you are on a
route and choose to travel off the route to perform a task
(get gas, store, etc.). Tap the Resume route button once you
have completed your task and are ready to begin routing to
the original destination.
The route you are on can be saved to your Address Book
under the Trips tab to be accessed again.
When a route has more than one destination the route can
be optimized by tapping the Optimize button.
Route list displays all of the destinations in the route. The
destinations can be rearranged or optimized.
Tap Detour and select the distance (3, 5, or 9 miles) to
detour. The Magellan RoadMate will recalculate the route
with the detour included.
The Turn List will display all of the maneuvers involved in
the route. There is also the option of deleting a maneuver
in the list and the Magellan RoadMate will recalculate the
route with that maneuver removed.
Edit provides the tools needed to add or delete a destination
in your route.
Search an address or POI. Can add to the active route or
replace it.
38
www.magellangps.com RV9490T-LMB User Manual
Page 50

Creating and Revising Routes
This section describes ways to create a route having one or multiple destinations.
Creating a Route from the Address Book
1. From the Map screen tap .
2. Select the tab containing the location
(Places, Contacts or Trips).
3. Scroll through the list displayed until
you see the place, contact or trip you
want to go to.
4. Tap the place, contact, or trip to use.
If you are selecting a contact, you need
to
tap on the location to use
the contact has only one location.
5. Choose how you want the route
computed; Fastest, Shortest, or Least Highways.
6. Tap GO.
, even if
Creating a Route from the Wish List
1. From the Map screen tap .
2. Tap Wish List.
3. Tap the desired destination from the list
of places in the Wish List.
4. Choose how you want the route
computed; Fastest, Shortest, or Least
Highways.
5. Tap GO.
Creating a Route from Recent Places
1. From the Map screen tap .
2. Tap Recent.
3. Tap the desired destination from the list of recent destinations.
4. Choose how you want the route computed; Fastest, Shortest, or Least Highways.
5. Tap GO.
Creating a Route from the OneTouch Menu
1. From the Map screen tap .
2. Tap the OneTouch button with the desired destination.
3. Choose how you want the route computed; Fastest, Shortest, or Least Highways.
4. Tap GO.
RV9490T-LMB User Manual www.magellangps.com
39
Page 51

Creating a Route to a User-Entered Address
1. From the Map screen tap Go To...
2. Using the instructions found in
to go to.
3. Choose how you want the route computed; Fastest, Shortest, or Least Highways.
4. Tap GO.
Creating a Route to a City Center
1. From the Map screen tap Go To...
2. Using the instructions found in
for the city.
3. Select the city from the displayed list.
4. Tap Done.
5. Choose how you want the route computed; Fastest, Shortest, or Least Highways.
6. Tap GO.
Creating a Route to an Intersection
1. From the Map screen tap Go To...
2. Using the instructions found in
“Keyboard” on page 9
name of the first street.
, enter the
“Keyboard” on page 9
“Keyboard” on page 9
, enter the address you want
, enter the name or zip code
3. Tap Search. A list of streets and cities
is displayed.
4. Tap the house icon for the street
and city the intersection is in.
5. A list of street intersections in that
city is displayed.
You can enter an address at this
step using the keyboard , or
swipe as needed to display the
intersection you want.
6. Tap the intersection when it is
displayed in the list.
7. Choose how you want the route
computed; Fastest, Shortest, or
Least Highways.
8. Tap GO.
40
www.magellangps.com RV9490T-LMB User Manual
Page 52

Creating a Route to a POI (Point of Interest)
1. From the Map screen tap Go To...
2. Using the instructions found in
3. Select the POI from the list displayed.
4. Choose how you want the route computed; Fastest, Shortest, or Least Highways.
5. Tap GO.
“Keyboard” on page 9
, search for the desired POI.
Creating a Multi Destination Route
This describes creating a route in your Address Book, not immediately routing to the
destination. You can also add, remove, and rearrange destinations for any active route using
tools on the My Route screen.
1. From the Map screen tap .
2. Tap the Trips
3. Tap .
4. Tap .
5. The New Trip screen is displayed. Tap to
enter the first destination.
6. Follow any of the “Creating a Route...” instructions provided in this chapter to select the
destination.
tab.
7. Tap Add when the location screen is displayed.
8. Continue using the
9. After all the destinations have been entered, you can rearrange them by pressing the
Optimize button or use the
of destinations.
10. Tap Save to store the trip in your Address Book or tap Go to begin routing
immediately.
button to select destinations for the route.
button to move the destination up or down in the list
RV9490T-LMB User Manual www.magellangps.com
41
Page 53

Adding a Destination to a Route
1. While traveling on a route, tap My Route from the Map screen.
2. Tap .
3. Tap
4. Follow any of the “Creating a Route...” instructions provided in this chapter to select the
destination.
5. Tap Add when the location screen is displayed.
6. Continue using the
7. After all the destinations have been entered, you can rearrange or optimize them. (See
Creating a multi-destination route, above.)
8. Tap Save to store the trip in your Address Book or tap Go to begin routing
immediately.
.
button to select destinations for the route.
Removing a Destination from a Multi Destination Route
1. Access the Multi Destination route from either saved Trips in the Address Book or if
traveling on the route, tap My Route.
2. Tap .
3. Tap
on a destination to remove it from the route.
Routing
Selecting the Data Field on the Map Screen
1. Tap the data field.
2. Select the desired data type from the list displayed.
NOTES
See
Canceling a Route
1. From the Map screen, tap My Route.
2. Tap the Route Cancel icon
3. Confirm the cancellation of the route.
Pause/Resume a Route
1. From the Map screen, tap My Route.
2. Tap the Pause icon
3. Confirm the cancellation of the route.
Fundamentals
or the Resume icon .
for a list of available data types.
.
42
www.magellangps.com RV9490T-LMB User Manual
Page 54

Detouring Around Traffic
1. When a Driving Alert indicates that there is traffic along the route, tap the Driving
Alert.
2. Tap the Detour button.
Detouring Around a Maneuver
1. From the Map screen, tap My Route.
2. Tap Turn List.
NOTES
Shortcut: tap the Maneuver Icon on the Map screen to go directly
to the Turn List.
3. Tap
4. Confirm by tapping GO.
on the maneuver to detour around.
CAUTION
Not all maneuvers can be detoured around but the Magellan RoadMate will try to recalculate the route avoiding the maneuver.
RV9490T-LMB User Manual www.magellangps.com
43
Page 55

Chapter
Bluetooth
7
Using Bluetooth on the Magellan RoadMate
The Magellan RV9490T-LMB provides hands-free capabilities for making and receiving phone calls
utilizing the Bluetooth link from your smartphone.
Before you can use your smartphone with the Magellan RoadMate you need to pair the phone to
the Magellan RoadMate .
Pairing Your Phone
1. From the Map screen press .
2. Tap on the Bluetooth button.
3. Make sure that your phone is on and that Bluetooth is turned on.
4. On the footer bar, tap “Pair Phone Now?”.
5. The Magellan RoadMate will begin searching for Bluetooth devices. When you see the
name of your phone in the list, tap the Connect button for your phone.
6. Follow the prompts on your phone and the Magellan RoadMate to confirm the
pairing.
CAUTION
If the Magellan RoadMate doesn’t display Connected, try pressing
the Connect button again.
When Answering a Call
With your smartphone paired, the Magellan RoadMate will display a notification when you have
an incoming call. You can choose to Ignore or Answer.
During the call, the Bluetooth screen is displayed. If you are traveling on a route, an audible alert
will sound to indicate an upcoming maneuver. The alert will not be the complete text-to-speech
notification which could disrupt your call, but rather an audible alert indicating that a maneuver is
pending.
To view the map during a call, tap the Home button on the Magellan RoadMate .
Tap the Bluetooth button to return to the Bluetooth screen. This will not affect the call you are on.
When Making a Call
The Magellan RoadMate provides all the tools you need to make a call, either from your address
book or using an on-screen phone pad. Tapping the Bluetooth button from the Map screen
displays a screen where you can generate a call. How you generate the call is completely up to
you.
RV9490T-LMB User Manual www.magellangps.com
45
Page 56

www.magellangps.com
NOTES
The Contacts list in the Bluetooth section of the Magellan RoadMate
is not associated with the Address Book portion of the device. The
contacts presented with Bluetooth have been imported from your
smartphone.
A call can also be generated from the My Places Address Book.
Instructions
Answering a Call
1. When a call is received the following is displayed along the bottom of the screen.
2. Tap Answer to accept the call.
3. The Bluetooth screen is displayed and you can begin speaking.
NOTES
Press the Home button to return to the Map screen without inter-
rupting the call. The Phone button
return you to the Bluetooth screen.
from the Map screen will
46
RV9490T-LMB User Manual
Page 57

www.magellangps.com
Hanging Up
1. From the Bluetooth screen, tap or hang up from your smartphone.
Creating a Call with the Dial Pad.
1. From the Map screen, tap .
2. Tap .
3. Use the dial pad to enter the
phone number.
4. When the number is correct, tap
the Call button.
Redialing
1. From the Map screen, tap .
2. Tap
.
NOTES
The number or contact that will be called is displayed in the Redial
button.
Making an Emergency 911 Call
1. From the Map screen, tap .
2. Tap
3. Confirm the emergency call by tapping OK.
.
Making an Call using Speed Dial
1. From the Map screen, tap .
2. Tap the speed dial tab
3. Tap on the name in the Speed Dial list that you want to call.
.
RV9490T-LMB User Manual 47
Page 58

www.magellangps.com
Adding to the Speed Dial list
1. From the Map screen, tap .
2. Tap the speed dial tab
3. Tap Edit ( ).
4. Tap on the edit icon
open item in the list (indicated
by the words “Speed Dial”).
5. Tap on Phone Book to select a
Speed Dial from your existing
phone book or Dial Pad to enter
the number and name to be
used.
.
for an
Deleting a Number from the Speed Dial list
1. From the Map screen, tap .
2. Tap the speed dial tab
3. Tap Edit ( ).
4. Tap on the delete icon
.
for number to be deleted.
5. Confirm the deletion by tapping OK.
Changing the Order of the Names in the Speed Dial list
1. From the Map screen, tap .
2. Tap the speed dial tab
3. Tap Edit ( ).
4. Tap and hold on the move icon
line up or down in the list. When it is in the place you want, release the button.
.
for line item to be moved. While holding, slide the
Making an Call using the Phone Book
1. From the Map screen, tap .
2. Tap the Contacts tab
3. Tap on the name in the list that you want to call.
4. The contact will be displayed with all phone numbers associated with that contact. Tap
on the desired number.
5. Tap on the Call button to begin the call.
.
48
RV9490T-LMB User Manual
Page 59

www.magellangps.com
Managing the Contacts Phone Book
The Contacts Phone Book can not be
edited within the Magellan RoadMate
but can be imported from your paired
smartphone. Make the changes to your
Address Book on your smartphone and
then follow these instructions.
1. From the Map screen, tap the
Settings button.
2. Tap on Bluetooth.
3. Tap on Import Contacts.
4. Confirm that you want the
contacts phone book replaced. Tap OK.
CAUTION
This requires that you have a smartphone paired with the Magellan
RoadMate . The Contacts Phone Book in the Magellan RoadMate
will be replaced.
Setting Bluetooth to Auto-connect to Smartphone
The Magellan RoadMate can be set to automatically connect to a phone that has been
previously paired when it is within range.
1. From the Map screen, tap the Settings button.
2. Tap on Bluetooth.
3. Tap on the Auto-connect checkbox. (When checked, the Magellan RoadMate will
automatically pair when within range of the smartphone.)
Setting Audible Maneuver Warning
The maneuver warning alert makes an audible sound when you are routing and on a phone
call. This warning can be turned on or off in Settings.
1. From the Map screen, tap the Settings button.
2. Tap on Bluetooth.
3. Tap on the Audible Maneuver Warning checkbox. (When checked, there will be an
audible alert when routing and on a phone call).
RV9490T-LMB User Manual 49
Page 60

www.magellangps.com
Syncing Content using Bluetooth
This setting will allow or prevent your smartphone from automatically syncing content from
SmartGPSEco to the Magellan SmartRV.
WARNING
Syncing SmartGPSEco to your device via your smartphone may
cause increased data usage. Please check with your carrier to ensure
you have sufficient data available for use. Data rate charges vary by
carrier and plan. It is your responsibility to monitor your usage in an
effort to not exceed your data plan allowances.
1. From the Map screen, tap the Settings button.
2. Tap on Bluetooth.
3. Tap on the Sync to SmartGPS Eco via Phone checkbox.
4. When the box is checked, the Magellan RoadMate will obtain and sync content through
your paired smartphone.
50
RV9490T-LMB User Manual
Page 61

Chapter
Vehicle Profile
Set your vehicle profile so that when routes
are being calculated you will not be routed
over roads that your vehicle cannot travel on.
Note: Vehicle Mode must be set to RV for
routing to consider Vehicle Profile.
Accessing Vehicle Profile
1. From the Map screen tap Menu.
2. Tap the Vehicle Profile icon.
3. You can choose not to use the
Vehicle Profile by unchecking the
box on the Vehicle Profile screen.
Set Vehicle Mode
8
Set Vehicle Weight
1. Access the Vehicle Profile screen.
If Vehicle Mode is set to RV, the Vehicle
Profile (size, weight, and Hazmat
information) will be used in route
planning.
When Vehicle Mode is set to Car, the
Vehicle Profile information is ignored.
Units of Measure
Units are set in Settings > General > Units
1. When set to Miles, profile is set in
feet, inches and in tons, pounds.
2. When Units are set to km, profile is
displayed/set in m, cm, and kg
Set Vehicle Height
1. Access the Vehicle Profile screen.
2. Tap the Height button.
3. Enter your vehicle height.
2. Tap the Weight button.
3. Enter your vehicle weight.
Set Vehicle Total Length
1. Access the Vehicle Profile screen.
2. Tap the Total Length button.
3. Enter your vehicle total length.
Set Vehicle Type
1. Access the Vehicle Profile screen.
2. Tap the Vehicle Type button.
3. Select from available choices.
Set Hazmat Type
1. Access the Vehicle Profile screen.
2. Tap the Hazmat Type button.
3. Select from available choices (as
applicable).
Set Vehicle Width
RV9490T-LMB User Manual www.magellangps.com
1. Access the Vehicle Profile screen.
2. Tap the Width button.
3. Enter your vehicle width.
51
Page 62

Chapter
Settings
9
Settings Menu
The Settings Menu is the starting point for accessing the tools needed to customize and set the
necessary parameters for the Magellan RoadMate .
General
Settings
Navigation
and Maps
Location Select the regional maps being used (when
Sounds Alternate method for setting the volume as well
Access tools to set the language, units of
measure, auto power off, screen brightness
settings as well as devices details such as
available storage, product information, etc.
Customize the way navigation is computed as
well as setting the night mode and speed limits.
Includes Vehicle Profile. See “Vehicle Profile” on
page 51.
additional maps are installed) and define how
the GPS position is set (via GPS or manually).
as defining what sounds will be presented.
RV9490T-LMB User Manual www.magellangps.com
53
Page 63

Wi-Fi Turn Wi-Fi on or off.
View the available networks and connect to the
network desired.
Bluetooth Set the rules for Bluetooth and paired phones.
Provides access to pairing phones.
Content Customize what content is displayed and set the
options for the browser.
Tutorial Optional tutorial video.
General Settings
Software Update
Tap Software Update when highlighted
to download and install updates. This
option is highlighted only when a
software update is available.
Language
Tap the flag icon to select the desired
language for the Magellan RoadMate .
Units
Tap the desired units of measure (miles or
kilometers).
Auto Power Off
Set the amount of idle time (not moving) allowed before the device automatically shuts off.
Screen Brightness
Use the Day and Night slider bars to set the screen brightness desired.
NOTES
Night brightness should be lowered when you find the display distracting while driving at night.
54
www.magellangps.com RV9490T-LMB User Manual
Page 64

Dim on Battery Power
Select whether or not the screen brightness will be dimmed when the device is operating on
its internal battery.
NOTES
The brighter the screen, the shorter the life of the internal battery. It
is recommended that this is checked to provide optimum battery life
while the device is operating on its internal battery only.
Storage Information
View the total internal memory of the device and the amount of available space is available for
addition data (contacts, content, etc.).
Product Information
View detailed information for the device. (Serial number, the geographic areas being used,
information on the maps, software version, etc.)
Register SmartGPS
View currently registered SmartGPSeco ID or register a new or existing ID.
End-User License Agreement
Legal statement describing the contract between Magellan and the end-user as to how the
software can and cannot be used as well as any restrictions imposed by Magellan.
Acknowledgments
Recognizes the originators of content data
used in the Magellan RoadMate .
Navigation and Maps
PhantomALERT
Tap to access PhantomALERT settings.
Tap on the PhantomALERT to view
additional options. When checked
Visible on Map will display an icon on
the map for the alert selected. When
checked Alert will sound an audible alert
for an upcoming PhantomALERT.
Premium PhantomAlerts may be purchased
from www.magellangps.com/store
RV9490T-LMB User Manual www.magellangps.com
55
Page 65

Points of Interest Visibility
Tap to access a list of POI (Points of Interest) types. When a POI type is checked, it will appear
on the map.
Enable Live Traffic
Turn the display of live traffic alerts on or off.
Auto-Zoom on Turns
Auto-zoom causes the zoom level of the map screen to automatically zoom into the lowest
level while performing a turn maneuver while navigating on a route. Uncheck to turn AutoZoom off.
Enable U-Turns
Turns off (when unchecked) the ability of the device to use u-turns as a maneuver while
creating a route or while recalculating a route.
Avoid Toll Roads
When checked all computed routes will avoid toll roads whenever possible.
Avoid Unpaved Roads
When checked the Magellan RoadMate will avoid creating a route that uses unpaved roads as
possible.
NOTES
When a route is created that requires the use of an unpaved road, a
warning will be displayed indicating that an unpaved road is being
used in the route. You can cancel, reroute or continue.
Night Mode
The Magellan RoadMate is normally set to Auto which changes the map colors to a darker
scheme during night hours automatically. This can be changed to On (the darker map is on
continuously) or Off (the normal map is displayed continuously).
Visible Speed Warning
Turns off (when unchecked) the visual alert surrounding the Speed Limit icon on the map
screen when the posted speed limit is exceeded by the thresholds set below.
Speed Limit Warning Threshold
Use the slider bars to set the miles per hour (mph) or kilometers per hour (kph) above the
posted speed limit that the warning will be displayed. Speed limit thresholds can be set
independently for highways and other roads.
56
www.magellangps.com RV9490T-LMB User Manual
Page 66

Location
Region
Displays the currently selected region for
the map used. When additional maps are
available you can select the desired region
to be used.
Set GPS Position
The current location is normally used for search and routing purposes.
The default setting is GPS — the current location is calculated from signals received from the
GPS satellite constellation. Select Manual to set “current location” from a search, contacts or
OneTouch options.
NOTES
When creating a route and searching for POIs, the Magellan RoadMate always starts from its “current location”. For planning purposes, you can set “current location to a place you want to go to. Then
your searches will start from that set location..
Sounds
Volume
Use the slider bar to set the volume level
for the device.
Smart Volume
When checked Smart Volume will
automatically adjust the volume up or
down depending upon existing noise
levels.
Turn Warnings
NOTES
When the Magellan RoadMate is turned off, (full shutdown) it will
start up with current location in GPS mode. If it is merely suspended,
it will ‘wake up’ with its ‘current location’ mode unchanged.
Tap to access a list of available sounds that can be used when alerting you to an upcoming
turn.
RV9490T-LMB User Manual www.magellangps.com
57
Page 67

Spoken Street Names
When checked the device will use text-to-speech to announce street names used in maneuver
alerts.
Audible Speed Warnings
When checked the device will play an audible alert when the speed limit threshold (set in
Navigation & Maps) is exceeded.
NOTES
Audible Speed Warnings is independent of Visible Speed Warnings
set in Navigation & Maps. When Audible Speed Warnings is turned
on, the warning will be played even if Visible Speed Warnings is
turned off.
Wi-Fi
To connect to a new WiFi account, use this
settings page.
1. From the Map screen tap
2. Tap the WiFi button to display the
settings.
.
Wi-Fi
Check the Wi-Fi checkbox to enable
content updates over WiFi.
Wi-Fi Networks
Wi-Fi Networks displays a list of Wi-Fi networks in range of the Magellan SmartRV.
Tap Add Network to include a known network that does not broadcast its SSID.
Tap Refresh to scan for additional networks.
For more information, see “Syncing to SmartGPSEco with Wi-Fi” on page 20.
58
www.magellangps.com RV9490T-LMB User Manual
Page 68

Bluetooth
Device Name
Displays the name of the Magellan
RoadMate device that will be displayed on
your smartphone while pairing.
Auto-connect
When checked the Magellan RoadMate
will attempt to use Bluetooth to connect to
a paired phone whenever in range.
Audible Maneuver Warning
When checked an alert will be played when a maneuver is upcoming and is in the middle of a
Bluetooth call.
Sync to SmartGPS Eco via Phone
When the Sync to SmartGPS Eco via Phone box is checked, the Magellan RoadMate will
obtain and sync content through your paired smartphone.
Paired Phones
Displays a list of any smartphones that are currently paired with the Magellan RoadMate via
Bluetooth.
To Pair your Phone
Tap Pair Phone Now to search for a list of available Bluetooth devices. Once the list is
displayed, tap the Connect button to begin the pairing process..
See “Bluetooth” on page 45 for more about pairing.
RV9490T-LMB User Manual www.magellangps.com
59
 Loading...