


 Loading...
Using
ADOBE® CONTRIBUTE® 6.5
Legal notices
For legal notices, see http://help.adobe.com/en_US/legalnotices/index.html.
Last updated 8/23/2012

iii
Contents |
|
Chapter 1: What’s new |
|
Chapter 2: Setting up Contribute |
|
The Contribute workflow . . . . . . . . . . . . . . . . . . . . . . . . . . . . . . . . . . . . . . . . . . . . . . . . . . . . . . . . . . . . . . . . . . . . . . . . . . . . . . . . . . . . . . . . . . . . . |
. 3 |
Connect to a blog . . . . . . . . . . . . . . . . . . . . . . . . . . . . . . . . . . . . . . . . . . . . . . . . . . . . . . . . . . . . . . . . . . . . . . . . . . . . . . . . . . . . . . . . . . . . . . . . . . . . . |
4 |
Connect to a website . . . . . . . . . . . . . . . . . . . . . . . . . . . . . . . . . . . . . . . . . . . . . . . . . . . . . . . . . . . . . . . . . . . . . . . . . . . . . . . . . . . . . . . . . . . . . . . . . . |
4 |
Open Contribute . . . . . . . . . . . . . . . . . . . . . . . . . . . . . . . . . . . . . . . . . . . . . . . . . . . . . . . . . . . . . . . . . . . . . . . . . . . . . . . . . . . . . . . . . . . . . . . . . . . . . . |
6 |
Create your blog/browse to your website . . . . . . . . . . . . . . . . . . . . . . . . . . . . . . . . . . . . . . . . . . . . . . . . . . . . . . . . . . . . . . . . . . . . . . . . . . . . . . |
7 |
Edit your blog/website . . . . . . . . . . . . . . . . . . . . . . . . . . . . . . . . . . . . . . . . . . . . . . . . . . . . . . . . . . . . . . . . . . . . . . . . . . . . . . . . . . . . . . . . . . . . . . . . |
8 |
Publish your blog/website . . . . . . . . . . . . . . . . . . . . . . . . . . . . . . . . . . . . . . . . . . . . . . . . . . . . . . . . . . . . . . . . . . . . . . . . . . . . . . . . . . . . . . . . . . . . . |
8 |
Integrate Contribute with Adobe Creative Suite applications . . . . . . . . . . . . . . . . . . . . . . . . . . . . . . . . . . . . . . . . . . . . . . . . . . . . . . . . . . . |
9 |
Integrate Adobe Bridge with Adobe Contribute . . . . . . . . . . . . . . . . . . . . . . . . . . . . . . . . . . . . . . . . . . . . . . . . . . . . . . . . . . . . . . . . . . . . . . . . |
9 |
Reference . . . . . . . . . . . . . . . . . . . . . . . . . . . . . . . . . . . . . . . . . . . . . . . . . . . . . . . . . . . . . . . . . . . . . . . . . . . . . . . . . . . . . . . . . . . . . . . . . . . . . . . . . . . . |
12 |
Chapter 3: Workspace |
|
OWL . . . . . . . . . . . . . . . . . . . . . . . . . . . . . . . . . . . . . . . . . . . . . . . . . . . . . . . . . . . . . . . . . . . . . . . . . . . . . . . . . . . . . . . . . . . . . . . . . . . . . . . . . . . . . . . . . |
13 |
The Contribute workspace . . . . . . . . . . . . . . . . . . . . . . . . . . . . . . . . . . . . . . . . . . . . . . . . . . . . . . . . . . . . . . . . . . . . . . . . . . . . . . . . . . . . . . . . . . . . |
21 |
Switch between browsing and editing . . . . . . . . . . . . . . . . . . . . . . . . . . . . . . . . . . . . . . . . . . . . . . . . . . . . . . . . . . . . . . . . . . . . . . . . . . . . . . . . |
23 |
Browse to web pages and blog entries . . . . . . . . . . . . . . . . . . . . . . . . . . . . . . . . . . . . . . . . . . . . . . . . . . . . . . . . . . . . . . . . . . . . . . . . . . . . . . . . |
24 |
Open web pages and blog entries without browsing . . . . . . . . . . . . . . . . . . . . . . . . . . . . . . . . . . . . . . . . . . . . . . . . . . . . . . . . . . . . . . . . . . |
25 |
Set up access to commonly used pages . . . . . . . . . . . . . . . . . . . . . . . . . . . . . . . . . . . . . . . . . . . . . . . . . . . . . . . . . . . . . . . . . . . . . . . . . . . . . . . |
27 |
Set Contribute preferences . . . . . . . . . . . . . . . . . . . . . . . . . . . . . . . . . . . . . . . . . . . . . . . . . . . . . . . . . . . . . . . . . . . . . . . . . . . . . . . . . . . . . . . . . . . |
29 |
Change or disable startup password . . . . . . . . . . . . . . . . . . . . . . . . . . . . . . . . . . . . . . . . . . . . . . . . . . . . . . . . . . . . . . . . . . . . . . . . . . . . . . . . . . |
31 |
Set browser encoding . . . . . . . . . . . . . . . . . . . . . . . . . . . . . . . . . . . . . . . . . . . . . . . . . . . . . . . . . . . . . . . . . . . . . . . . . . . . . . . . . . . . . . . . . . . . . . . . |
31 |
Contribute accessibility features . . . . . . . . . . . . . . . . . . . . . . . . . . . . . . . . . . . . . . . . . . . . . . . . . . . . . . . . . . . . . . . . . . . . . . . . . . . . . . . . . . . . . . |
31 |
Reference . . . . . . . . . . . . . . . . . . . . . . . . . . . . . . . . . . . . . . . . . . . . . . . . . . . . . . . . . . . . . . . . . . . . . . . . . . . . . . . . . . . . . . . . . . . . . . . . . . . . . . . . . . . . |
34 |
Chapter 4: Working with existing web pages and blog entries |
|
Overview of working with blogs and web pages . . . . . . . . . . . . . . . . . . . . . . . . . . . . . . . . . . . . . . . . . . . . . . . . . . . . . . . . . . . . . . . . . . . . . . . |
46 |
Edit existing web pages and blog entries . . . . . . . . . . . . . . . . . . . . . . . . . . . . . . . . . . . . . . . . . . . . . . . . . . . . . . . . . . . . . . . . . . . . . . . . . . . . . . |
50 |
Undo mistakes . . . . . . . . . . . . . . . . . . . . . . . . . . . . . . . . . . . . . . . . . . . . . . . . . . . . . . . . . . . . . . . . . . . . . . . . . . . . . . . . . . . . . . . . . . . . . . . . . . . . . . . |
58 |
Save drafts . . . . . . . . . . . . . . . . . . . . . . . . . . . . . . . . . . . . . . . . . . . . . . . . . . . . . . . . . . . . . . . . . . . . . . . . . . . . . . . . . . . . . . . . . . . . . . . . . . . . . . . . . . . |
58 |
Search within browser (Windows Only) . . . . . . . . . . . . . . . . . . . . . . . . . . . . . . . . . . . . . . . . . . . . . . . . . . . . . . . . . . . . . . . . . . . . . . . . . . . . . . . . |
59 |
Send web page drafts and files for review . . . . . . . . . . . . . . . . . . . . . . . . . . . . . . . . . . . . . . . . . . . . . . . . . . . . . . . . . . . . . . . . . . . . . . . . . . . . . |
60 |
Access new review drafts . . . . . . . . . . . . . . . . . . . . . . . . . . . . . . . . . . . . . . . . . . . . . . . . . . . . . . . . . . . . . . . . . . . . . . . . . . . . . . . . . . . . . . . . . . . . . |
63 |
Edit web page drafts . . . . . . . . . . . . . . . . . . . . . . . . . . . . . . . . . . . . . . . . . . . . . . . . . . . . . . . . . . . . . . . . . . . . . . . . . . . . . . . . . . . . . . . . . . . . . . . . . . |
63 |
Review web page drafts . . . . . . . . . . . . . . . . . . . . . . . . . . . . . . . . . . . . . . . . . . . . . . . . . . . . . . . . . . . . . . . . . . . . . . . . . . . . . . . . . . . . . . . . . . . . . . |
64 |
Work with template-based web pages . . . . . . . . . . . . . . . . . . . . . . . . . . . . . . . . . . . . . . . . . . . . . . . . . . . . . . . . . . . . . . . . . . . . . . . . . . . . . . . . |
65 |
Working with a Subversion-enabled website . . . . . . . . . . . . . . . . . . . . . . . . . . . . . . . . . . . . . . . . . . . . . . . . . . . . . . . . . . . . . . . . . . . . . . . . . . |
69 |
Work offline . . . . . . . . . . . . . . . . . . . . . . . . . . . . . . . . . . . . . . . . . . . . . . . . . . . . . . . . . . . . . . . . . . . . . . . . . . . . . . . . . . . . . . . . . . . . . . . . . . . . . . . . . . |
70 |
Edit web pages in an external application . . . . . . . . . . . . . . . . . . . . . . . . . . . . . . . . . . . . . . . . . . . . . . . . . . . . . . . . . . . . . . . . . . . . . . . . . . . . . |
72 |
Edit web page source in an external application . . . . . . . . . . . . . . . . . . . . . . . . . . . . . . . . . . . . . . . . . . . . . . . . . . . . . . . . . . . . . . . . . . . . . . . |
73 |
Compare page display in multiple browsers (Windows only) . . . . . . . . . . . . . . . . . . . . . . . . . . . . . . . . . . . . . . . . . . . . . . . . . . . . . . . . . . . |
74 |
Last updated 8/23/2012

USING CONTRIBUTE |
iv |
Contents |
|
Configure blog server settings . . . . . . . . . . . . . . . . . . . . . . . . . . . . . . . . . . . . . . . . . . . . . . . . . . . . . . . . . . . . . . . . . . . . . . . . . . . . . . . . . . . . . . . |
. 75 |
Discard a draft, new page, or new blog entry . . . . . . . . . . . . . . . . . . . . . . . . . . . . . . . . . . . . . . . . . . . . . . . . . . . . . . . . . . . . . . . . . . . . . . . . . . |
76 |
Delete a web page or blog entry . . . . . . . . . . . . . . . . . . . . . . . . . . . . . . . . . . . . . . . . . . . . . . . . . . . . . . . . . . . . . . . . . . . . . . . . . . . . . . . . . . . . . . |
77 |
Export a web page or blog entry (Windows only) . . . . . . . . . . . . . . . . . . . . . . . . . . . . . . . . . . . . . . . . . . . . . . . . . . . . . . . . . . . . . . . . . . . . . . |
78 |
Print a web page or blog entry . . . . . . . . . . . . . . . . . . . . . . . . . . . . . . . . . . . . . . . . . . . . . . . . . . . . . . . . . . . . . . . . . . . . . . . . . . . . . . . . . . . . . . . . |
79 |
Add Google search . . . . . . . . . . . . . . . . . . . . . . . . . . . . . . . . . . . . . . . . . . . . . . . . . . . . . . . . . . . . . . . . . . . . . . . . . . . . . . . . . . . . . . . . . . . . . . . . . . . |
79 |
Reference . . . . . . . . . . . . . . . . . . . . . . . . . . . . . . . . . . . . . . . . . . . . . . . . . . . . . . . . . . . . . . . . . . . . . . . . . . . . . . . . . . . . . . . . . . . . . . . . . . . . . . . . . . . . |
80 |
Chapter 5: Adding pages, blog entries, and documents |
|
Create or copy a page on your website . . . . . . . . . . . . . . . . . . . . . . . . . . . . . . . . . . . . . . . . . . . . . . . . . . . . . . . . . . . . . . . . . . . . . . . . . . . . . . . . |
83 |
Create a stand-alone web page . . . . . . . . . . . . . . . . . . . . . . . . . . . . . . . . . . . . . . . . . . . . . . . . . . . . . . . . . . . . . . . . . . . . . . . . . . . . . . . . . . . . . . . |
88 |
Create web pages using a content type . . . . . . . . . . . . . . . . . . . . . . . . . . . . . . . . . . . . . . . . . . . . . . . . . . . . . . . . . . . . . . . . . . . . . . . . . . . . . . . |
88 |
Create a blog entry for your blog . . . . . . . . . . . . . . . . . . . . . . . . . . . . . . . . . . . . . . . . . . . . . . . . . . . . . . . . . . . . . . . . . . . . . . . . . . . . . . . . . . . . . . |
89 |
Set page properties for a web page . . . . . . . . . . . . . . . . . . . . . . . . . . . . . . . . . . . . . . . . . . . . . . . . . . . . . . . . . . . . . . . . . . . . . . . . . . . . . . . . . . . |
93 |
Add keywords and a description for a web page . . . . . . . . . . . . . . . . . . . . . . . . . . . . . . . . . . . . . . . . . . . . . . . . . . . . . . . . . . . . . . . . . . . . . . . |
94 |
Set preferences for blog entries . . . . . . . . . . . . . . . . . . . . . . . . . . . . . . . . . . . . . . . . . . . . . . . . . . . . . . . . . . . . . . . . . . . . . . . . . . . . . . . . . . . . . . . |
95 |
Enter metadata for a blog entry . . . . . . . . . . . . . . . . . . . . . . . . . . . . . . . . . . . . . . . . . . . . . . . . . . . . . . . . . . . . . . . . . . . . . . . . . . . . . . . . . . . . . . . |
95 |
About converting documents to PDFs (Windows only) . . . . . . . . . . . . . . . . . . . . . . . . . . . . . . . . . . . . . . . . . . . . . . . . . . . . . . . . . . . . . . . . . |
99 |
Add Microsoft Word and Excel documents to a website . . . . . . . . . . . . . . . . . . . . . . . . . . . . . . . . . . . . . . . . . . . . . . . . . . . . . . . . . . . . . . . |
101 |
Open documents in Contribute from Microsoft Office applications (Windows only) . . . . . . . . . . . . . . . . . . . . . . . . . . . . . . . . . . . . |
103 |
Insert PDFs in Contribute pages . . . . . . . . . . . . . . . . . . . . . . . . . . . . . . . . . . . . . . . . . . . . . . . . . . . . . . . . . . . . . . . . . . . . . . . . . . . . . . . . . . . . . . |
110 |
Insert HTML code snippets . . . . . . . . . . . . . . . . . . . . . . . . . . . . . . . . . . . . . . . . . . . . . . . . . . . . . . . . . . . . . . . . . . . . . . . . . . . . . . . . . . . . . . . . . . |
112 |
Insert widget from Adobe widget browser . . . . . . . . . . . . . . . . . . . . . . . . . . . . . . . . . . . . . . . . . . . . . . . . . . . . . . . . . . . . . . . . . . . . . . . . . . . |
112 |
Add Favicon Graphic . . . . . . . . . . . . . . . . . . . . . . . . . . . . . . . . . . . . . . . . . . . . . . . . . . . . . . . . . . . . . . . . . . . . . . . . . . . . . . . . . . . . . . . . . . . . . . . . |
113 |
Reference . . . . . . . . . . . . . . . . . . . . . . . . . . . . . . . . . . . . . . . . . . . . . . . . . . . . . . . . . . . . . . . . . . . . . . . . . . . . . . . . . . . . . . . . . . . . . . . . . . . . . . . . . . . |
113 |
Chapter 6: Working with text |
|
About HTML and CSS styles in the Contribute Style menu . . . . . . . . . . . . . . . . . . . . . . . . . . . . . . . . . . . . . . . . . . . . . . . . . . . . . . . . . . . . . |
122 |
Add text to a web page . . . . . . . . . . . . . . . . . . . . . . . . . . . . . . . . . . . . . . . . . . . . . . . . . . . . . . . . . . . . . . . . . . . . . . . . . . . . . . . . . . . . . . . . . . . . . . |
122 |
Format text . . . . . . . . . . . . . . . . . . . . . . . . . . . . . . . . . . . . . . . . . . . . . . . . . . . . . . . . . . . . . . . . . . . . . . . . . . . . . . . . . . . . . . . . . . . . . . . . . . . . . . . . . |
124 |
Position text on the page . . . . . . . . . . . . . . . . . . . . . . . . . . . . . . . . . . . . . . . . . . . . . . . . . . . . . . . . . . . . . . . . . . . . . . . . . . . . . . . . . . . . . . . . . . . . |
129 |
Create lists . . . . . . . . . . . . . . . . . . . . . . . . . . . . . . . . . . . . . . . . . . . . . . . . . . . . . . . . . . . . . . . . . . . . . . . . . . . . . . . . . . . . . . . . . . . . . . . . . . . . . . . . . . |
130 |
Check spelling . . . . . . . . . . . . . . . . . . . . . . . . . . . . . . . . . . . . . . . . . . . . . . . . . . . . . . . . . . . . . . . . . . . . . . . . . . . . . . . . . . . . . . . . . . . . . . . . . . . . . . . |
135 |
Find and Replace text . . . . . . . . . . . . . . . . . . . . . . . . . . . . . . . . . . . . . . . . . . . . . . . . . . . . . . . . . . . . . . . . . . . . . . . . . . . . . . . . . . . . . . . . . . . . . . . . |
135 |
Reference . . . . . . . . . . . . . . . . . . . . . . . . . . . . . . . . . . . . . . . . . . . . . . . . . . . . . . . . . . . . . . . . . . . . . . . . . . . . . . . . . . . . . . . . . . . . . . . . . . . . . . . . . . . |
137 |
Chapter 7: Working with images and graphic elements |
|
About inserting images and buttons . . . . . . . . . . . . . . . . . . . . . . . . . . . . . . . . . . . . . . . . . . . . . . . . . . . . . . . . . . . . . . . . . . . . . . . . . . . . . . . . . |
141 |
Add an image to a page . . . . . . . . . . . . . . . . . . . . . . . . . . . . . . . . . . . . . . . . . . . . . . . . . . . . . . . . . . . . . . . . . . . . . . . . . . . . . . . . . . . . . . . . . . . . . |
142 |
Insert shared assets into a web page . . . . . . . . . . . . . . . . . . . . . . . . . . . . . . . . . . . . . . . . . . . . . . . . . . . . . . . . . . . . . . . . . . . . . . . . . . . . . . . . . |
145 |
Change image properties . . . . . . . . . . . . . . . . . . . . . . . . . . . . . . . . . . . . . . . . . . . . . . . . . . . . . . . . . . . . . . . . . . . . . . . . . . . . . . . . . . . . . . . . . . . . |
146 |
Change an image’s position or orientation . . . . . . . . . . . . . . . . . . . . . . . . . . . . . . . . . . . . . . . . . . . . . . . . . . . . . . . . . . . . . . . . . . . . . . . . . . . |
147 |
Edit an image in Contribute . . . . . . . . . . . . . . . . . . . . . . . . . . . . . . . . . . . . . . . . . . . . . . . . . . . . . . . . . . . . . . . . . . . . . . . . . . . . . . . . . . . . . . . . . . |
148 |
Edit image in image-editing applications . . . . . . . . . . . . . . . . . . . . . . . . . . . . . . . . . . . . . . . . . . . . . . . . . . . . . . . . . . . . . . . . . . . . . . . . . . . . . |
152 |
Hotspots . . . . . . . . . . . . . . . . . . . . . . . . . . . . . . . . . . . . . . . . . . . . . . . . . . . . . . . . . . . . . . . . . . . . . . . . . . . . . . . . . . . . . . . . . . . . . . . . . . . . . . . . . . . . |
152 |
Insert SWF content into your web page . . . . . . . . . . . . . . . . . . . . . . . . . . . . . . . . . . . . . . . . . . . . . . . . . . . . . . . . . . . . . . . . . . . . . . . . . . . . . . |
154 |
Insert a video in your web page . . . . . . . . . . . . . . . . . . . . . . . . . . . . . . . . . . . . . . . . . . . . . . . . . . . . . . . . . . . . . . . . . . . . . . . . . . . . . . . . . . . . . . |
154 |
Last updated 8/23/2012

USING CONTRIBUTE |
v |
Contents |
|
Change a video’s position or orientation . . . . . . . . . . . . . . . . . . . . . . . . . . . . . . . . . . . . . . . . . . . . . . . . . . . . . . . . . . . . . . . . . . . . . . . . . . . . . |
156 |
Insert HTML5 video and audio . . . . . . . . . . . . . . . . . . . . . . . . . . . . . . . . . . . . . . . . . . . . . . . . . . . . . . . . . . . . . . . . . . . . . . . . . . . . . . . . . . . . . . . |
157 |
Add audio and video files to your blog . . . . . . . . . . . . . . . . . . . . . . . . . . . . . . . . . . . . . . . . . . . . . . . . . . . . . . . . . . . . . . . . . . . . . . . . . . . . . . . |
160 |
Add or delete a horizontal rule . . . . . . . . . . . . . . . . . . . . . . . . . . . . . . . . . . . . . . . . . . . . . . . . . . . . . . . . . . . . . . . . . . . . . . . . . . . . . . . . . . . . . . . |
163 |
Insert PayPal e-commerce buttons . . . . . . . . . . . . . . . . . . . . . . . . . . . . . . . . . . . . . . . . . . . . . . . . . . . . . . . . . . . . . . . . . . . . . . . . . . . . . . . . . . |
164 |
Reference . . . . . . . . . . . . . . . . . . . . . . . . . . . . . . . . . . . . . . . . . . . . . . . . . . . . . . . . . . . . . . . . . . . . . . . . . . . . . . . . . . . . . . . . . . . . . . . . . . . . . . . . . . . |
166 |
Chapter 8: Working with tables |
|
About conflicts in table formatting . . . . . . . . . . . . . . . . . . . . . . . . . . . . . . . . . . . . . . . . . . . . . . . . . . . . . . . . . . . . . . . . . . . . . . . . . . . . . . . . . . |
173 |
Insert tables . . . . . . . . . . . . . . . . . . . . . . . . . . . . . . . . . . . . . . . . . . . . . . . . . . . . . . . . . . . . . . . . . . . . . . . . . . . . . . . . . . . . . . . . . . . . . . . . . . . . . . . . . |
173 |
Select table elements . . . . . . . . . . . . . . . . . . . . . . . . . . . . . . . . . . . . . . . . . . . . . . . . . . . . . . . . . . . . . . . . . . . . . . . . . . . . . . . . . . . . . . . . . . . . . . . . |
175 |
Resize tables, rows, and columns . . . . . . . . . . . . . . . . . . . . . . . . . . . . . . . . . . . . . . . . . . . . . . . . . . . . . . . . . . . . . . . . . . . . . . . . . . . . . . . . . . . . . |
176 |
Align tables . . . . . . . . . . . . . . . . . . . . . . . . . . . . . . . . . . . . . . . . . . . . . . . . . . . . . . . . . . . . . . . . . . . . . . . . . . . . . . . . . . . . . . . . . . . . . . . . . . . . . . . . . |
177 |
Cut, copy, and paste cells . . . . . . . . . . . . . . . . . . . . . . . . . . . . . . . . . . . . . . . . . . . . . . . . . . . . . . . . . . . . . . . . . . . . . . . . . . . . . . . . . . . . . . . . . . . . |
178 |
Add, delete, or merge table rows and columns . . . . . . . . . . . . . . . . . . . . . . . . . . . . . . . . . . . . . . . . . . . . . . . . . . . . . . . . . . . . . . . . . . . . . . . |
180 |
Modify table appearance . . . . . . . . . . . . . . . . . . . . . . . . . . . . . . . . . . . . . . . . . . . . . . . . . . . . . . . . . . . . . . . . . . . . . . . . . . . . . . . . . . . . . . . . . . . . |
183 |
Sort tabular data . . . . . . . . . . . . . . . . . . . . . . . . . . . . . . . . . . . . . . . . . . . . . . . . . . . . . . . . . . . . . . . . . . . . . . . . . . . . . . . . . . . . . . . . . . . . . . . . . . . . |
186 |
Reference . . . . . . . . . . . . . . . . . . . . . . . . . . . . . . . . . . . . . . . . . . . . . . . . . . . . . . . . . . . . . . . . . . . . . . . . . . . . . . . . . . . . . . . . . . . . . . . . . . . . . . . . . . . |
187 |
Chapter 9: Working with links |
|
Create text and image links . . . . . . . . . . . . . . . . . . . . . . . . . . . . . . . . . . . . . . . . . . . . . . . . . . . . . . . . . . . . . . . . . . . . . . . . . . . . . . . . . . . . . . . . . . |
192 |
Set the advanced linking options . . . . . . . . . . . . . . . . . . . . . . . . . . . . . . . . . . . . . . . . . . . . . . . . . . . . . . . . . . . . . . . . . . . . . . . . . . . . . . . . . . . . |
199 |
Edit links . . . . . . . . . . . . . . . . . . . . . . . . . . . . . . . . . . . . . . . . . . . . . . . . . . . . . . . . . . . . . . . . . . . . . . . . . . . . . . . . . . . . . . . . . . . . . . . . . . . . . . . . . . . . |
204 |
Test links . . . . . . . . . . . . . . . . . . . . . . . . . . . . . . . . . . . . . . . . . . . . . . . . . . . . . . . . . . . . . . . . . . . . . . . . . . . . . . . . . . . . . . . . . . . . . . . . . . . . . . . . . . . . |
206 |
Reference . . . . . . . . . . . . . . . . . . . . . . . . . . . . . . . . . . . . . . . . . . . . . . . . . . . . . . . . . . . . . . . . . . . . . . . . . . . . . . . . . . . . . . . . . . . . . . . . . . . . . . . . . . . |
206 |
Chapter 10: Working with pages with frames |
|
About frames . . . . . . . . . . . . . . . . . . . . . . . . . . . . . . . . . . . . . . . . . . . . . . . . . . . . . . . . . . . . . . . . . . . . . . . . . . . . . . . . . . . . . . . . . . . . . . . . . . . . . . . |
213 |
Edit frame content . . . . . . . . . . . . . . . . . . . . . . . . . . . . . . . . . . . . . . . . . . . . . . . . . . . . . . . . . . . . . . . . . . . . . . . . . . . . . . . . . . . . . . . . . . . . . . . . . . |
214 |
Save and publish a page with frames . . . . . . . . . . . . . . . . . . . . . . . . . . . . . . . . . . . . . . . . . . . . . . . . . . . . . . . . . . . . . . . . . . . . . . . . . . . . . . . . . |
215 |
Target frame content . . . . . . . . . . . . . . . . . . . . . . . . . . . . . . . . . . . . . . . . . . . . . . . . . . . . . . . . . . . . . . . . . . . . . . . . . . . . . . . . . . . . . . . . . . . . . . . . |
216 |
Reference . . . . . . . . . . . . . . . . . . . . . . . . . . . . . . . . . . . . . . . . . . . . . . . . . . . . . . . . . . . . . . . . . . . . . . . . . . . . . . . . . . . . . . . . . . . . . . . . . . . . . . . . . . . |
217 |
Chapter 11: Publishing web pages and blog entries |
|
Publishing a page to your website . . . . . . . . . . . . . . . . . . . . . . . . . . . . . . . . . . . . . . . . . . . . . . . . . . . . . . . . . . . . . . . . . . . . . . . . . . . . . . . . . . . |
218 |
Preview a page in your default browser . . . . . . . . . . . . . . . . . . . . . . . . . . . . . . . . . . . . . . . . . . . . . . . . . . . . . . . . . . . . . . . . . . . . . . . . . . . . . . |
222 |
Publish a file from your computer to your website . . . . . . . . . . . . . . . . . . . . . . . . . . . . . . . . . . . . . . . . . . . . . . . . . . . . . . . . . . . . . . . . . . . . |
223 |
Replace a file on your website . . . . . . . . . . . . . . . . . . . . . . . . . . . . . . . . . . . . . . . . . . . . . . . . . . . . . . . . . . . . . . . . . . . . . . . . . . . . . . . . . . . . . . . |
224 |
Roll back to a previous version of a page . . . . . . . . . . . . . . . . . . . . . . . . . . . . . . . . . . . . . . . . . . . . . . . . . . . . . . . . . . . . . . . . . . . . . . . . . . . . . |
226 |
Publish a document from Microsoft Office (Windows only) . . . . . . . . . . . . . . . . . . . . . . . . . . . . . . . . . . . . . . . . . . . . . . . . . . . . . . . . . . . . |
227 |
Post content to a blog . . . . . . . . . . . . . . . . . . . . . . . . . . . . . . . . . . . . . . . . . . . . . . . . . . . . . . . . . . . . . . . . . . . . . . . . . . . . . . . . . . . . . . . . . . . . . . . |
229 |
Post content to a blog from RSS aggregators . . . . . . . . . . . . . . . . . . . . . . . . . . . . . . . . . . . . . . . . . . . . . . . . . . . . . . . . . . . . . . . . . . . . . . . . . |
232 |
Publish a blog entry to your blog . . . . . . . . . . . . . . . . . . . . . . . . . . . . . . . . . . . . . . . . . . . . . . . . . . . . . . . . . . . . . . . . . . . . . . . . . . . . . . . . . . . . |
234 |
Reference . . . . . . . . . . . . . . . . . . . . . . . . . . . . . . . . . . . . . . . . . . . . . . . . . . . . . . . . . . . . . . . . . . . . . . . . . . . . . . . . . . . . . . . . . . . . . . . . . . . . . . . . . . . |
237 |
Chapter 12: Creating and managing website and blog server connections |
|
About creating and sending website connections . . . . . . . . . . . . . . . . . . . . . . . . . . . . . . . . . . . . . . . . . . . . . . . . . . . . . . . . . . . . . . . . . . . . |
243 |
Enable or disable CPS for a website . . . . . . . . . . . . . . . . . . . . . . . . . . . . . . . . . . . . . . . . . . . . . . . . . . . . . . . . . . . . . . . . . . . . . . . . . . . . . . . . . . |
251 |
Last updated 8/23/2012

USING CONTRIBUTE |
vi |
Contents |
|
Using Subversion with Contribute . . . . . . . . . . . . . . . . . . . . . . . . . . . . . . . . . . . . . . . . . . . . . . . . . . . . . . . . . . . . . . . . . . . . . . . . . . . . . . . . . . . |
254 |
Become an administrator of an existing Contribute website . . . . . . . . . . . . . . . . . . . . . . . . . . . . . . . . . . . . . . . . . . . . . . . . . . . . . . . . . . . |
256 |
Manage Locked Files . . . . . . . . . . . . . . . . . . . . . . . . . . . . . . . . . . . . . . . . . . . . . . . . . . . . . . . . . . . . . . . . . . . . . . . . . . . . . . . . . . . . . . . . . . . . . . . . |
257 |
Configure Contribute administration settings . . . . . . . . . . . . . . . . . . . . . . . . . . . . . . . . . . . . . . . . . . . . . . . . . . . . . . . . . . . . . . . . . . . . . . . . |
258 |
Send connection keys for websites . . . . . . . . . . . . . . . . . . . . . . . . . . . . . . . . . . . . . . . . . . . . . . . . . . . . . . . . . . . . . . . . . . . . . . . . . . . . . . . . . . . |
271 |
Send connections for CPS managed sites . . . . . . . . . . . . . . . . . . . . . . . . . . . . . . . . . . . . . . . . . . . . . . . . . . . . . . . . . . . . . . . . . . . . . . . . . . . . . |
273 |
Add users to websites that CPS manages . . . . . . . . . . . . . . . . . . . . . . . . . . . . . . . . . . . . . . . . . . . . . . . . . . . . . . . . . . . . . . . . . . . . . . . . . . . . . |
273 |
Remove users from sites that CPS manages . . . . . . . . . . . . . . . . . . . . . . . . . . . . . . . . . . . . . . . . . . . . . . . . . . . . . . . . . . . . . . . . . . . . . . . . . . |
275 |
Configure dependent files for blogs . . . . . . . . . . . . . . . . . . . . . . . . . . . . . . . . . . . . . . . . . . . . . . . . . . . . . . . . . . . . . . . . . . . . . . . . . . . . . . . . . . |
275 |
Manage website and blog server connections . . . . . . . . . . . . . . . . . . . . . . . . . . . . . . . . . . . . . . . . . . . . . . . . . . . . . . . . . . . . . . . . . . . . . . . . |
275 |
Reference . . . . . . . . . . . . . . . . . . . . . . . . . . . . . . . . . . . . . . . . . . . . . . . . . . . . . . . . . . . . . . . . . . . . . . . . . . . . . . . . . . . . . . . . . . . . . . . . . . . . . . . . . . . |
282 |
Chapter 13: Managing users and roles |
|
About roles . . . . . . . . . . . . . . . . . . . . . . . . . . . . . . . . . . . . . . . . . . . . . . . . . . . . . . . . . . . . . . . . . . . . . . . . . . . . . . . . . . . . . . . . . . . . . . . . . . . . . . . . . |
301 |
Create Contribute roles . . . . . . . . . . . . . . . . . . . . . . . . . . . . . . . . . . . . . . . . . . . . . . . . . . . . . . . . . . . . . . . . . . . . . . . . . . . . . . . . . . . . . . . . . . . . . . |
302 |
Edit a role’s settings . . . . . . . . . . . . . . . . . . . . . . . . . . . . . . . . . . . . . . . . . . . . . . . . . . . . . . . . . . . . . . . . . . . . . . . . . . . . . . . . . . . . . . . . . . . . . . . . . |
304 |
Manage drafts sent for review . . . . . . . . . . . . . . . . . . . . . . . . . . . . . . . . . . . . . . . . . . . . . . . . . . . . . . . . . . . . . . . . . . . . . . . . . . . . . . . . . . . . . . . |
317 |
Reference . . . . . . . . . . . . . . . . . . . . . . . . . . . . . . . . . . . . . . . . . . . . . . . . . . . . . . . . . . . . . . . . . . . . . . . . . . . . . . . . . . . . . . . . . . . . . . . . . . . . . . . . . . . |
318 |
Chapter 14: Windows keyboard shortcuts |
|
File menu . . . . . . . . . . . . . . . . . . . . . . . . . . . . . . . . . . . . . . . . . . . . . . . . . . . . . . . . . . . . . . . . . . . . . . . . . . . . . . . . . . . . . . . . . . . . . . . . . . . . . . . . . . . |
328 |
Edit menu . . . . . . . . . . . . . . . . . . . . . . . . . . . . . . . . . . . . . . . . . . . . . . . . . . . . . . . . . . . . . . . . . . . . . . . . . . . . . . . . . . . . . . . . . . . . . . . . . . . . . . . . . . |
328 |
View menu . . . . . . . . . . . . . . . . . . . . . . . . . . . . . . . . . . . . . . . . . . . . . . . . . . . . . . . . . . . . . . . . . . . . . . . . . . . . . . . . . . . . . . . . . . . . . . . . . . . . . . . . . . |
329 |
Insert menu . . . . . . . . . . . . . . . . . . . . . . . . . . . . . . . . . . . . . . . . . . . . . . . . . . . . . . . . . . . . . . . . . . . . . . . . . . . . . . . . . . . . . . . . . . . . . . . . . . . . . . . . |
329 |
Format menu . . . . . . . . . . . . . . . . . . . . . . . . . . . . . . . . . . . . . . . . . . . . . . . . . . . . . . . . . . . . . . . . . . . . . . . . . . . . . . . . . . . . . . . . . . . . . . . . . . . . . . . |
329 |
Table menu . . . . . . . . . . . . . . . . . . . . . . . . . . . . . . . . . . . . . . . . . . . . . . . . . . . . . . . . . . . . . . . . . . . . . . . . . . . . . . . . . . . . . . . . . . . . . . . . . . . . . . . . . |
330 |
Working with blog entries . . . . . . . . . . . . . . . . . . . . . . . . . . . . . . . . . . . . . . . . . . . . . . . . . . . . . . . . . . . . . . . . . . . . . . . . . . . . . . . . . . . . . . . . . . . |
330 |
Working in templates . . . . . . . . . . . . . . . . . . . . . . . . . . . . . . . . . . . . . . . . . . . . . . . . . . . . . . . . . . . . . . . . . . . . . . . . . . . . . . . . . . . . . . . . . . . . . . . |
330 |
Editing text . . . . . . . . . . . . . . . . . . . . . . . . . . . . . . . . . . . . . . . . . . . . . . . . . . . . . . . . . . . . . . . . . . . . . . . . . . . . . . . . . . . . . . . . . . . . . . . . . . . . . . . . . |
330 |
Working in tables . . . . . . . . . . . . . . . . . . . . . . . . . . . . . . . . . . . . . . . . . . . . . . . . . . . . . . . . . . . . . . . . . . . . . . . . . . . . . . . . . . . . . . . . . . . . . . . . . . . |
331 |
Working with images . . . . . . . . . . . . . . . . . . . . . . . . . . . . . . . . . . . . . . . . . . . . . . . . . . . . . . . . . . . . . . . . . . . . . . . . . . . . . . . . . . . . . . . . . . . . . . . . |
331 |
Getting help . . . . . . . . . . . . . . . . . . . . . . . . . . . . . . . . . . . . . . . . . . . . . . . . . . . . . . . . . . . . . . . . . . . . . . . . . . . . . . . . . . . . . . . . . . . . . . . . . . . . . . . . |
332 |
Chapter 15: Macintosh keyboard shortcuts |
|
File menu . . . . . . . . . . . . . . . . . . . . . . . . . . . . . . . . . . . . . . . . . . . . . . . . . . . . . . . . . . . . . . . . . . . . . . . . . . . . . . . . . . . . . . . . . . . . . . . . . . . . . . . . . . . |
333 |
Edit menu . . . . . . . . . . . . . . . . . . . . . . . . . . . . . . . . . . . . . . . . . . . . . . . . . . . . . . . . . . . . . . . . . . . . . . . . . . . . . . . . . . . . . . . . . . . . . . . . . . . . . . . . . . |
333 |
View menu . . . . . . . . . . . . . . . . . . . . . . . . . . . . . . . . . . . . . . . . . . . . . . . . . . . . . . . . . . . . . . . . . . . . . . . . . . . . . . . . . . . . . . . . . . . . . . . . . . . . . . . . . . |
334 |
Insert menu . . . . . . . . . . . . . . . . . . . . . . . . . . . . . . . . . . . . . . . . . . . . . . . . . . . . . . . . . . . . . . . . . . . . . . . . . . . . . . . . . . . . . . . . . . . . . . . . . . . . . . . . . |
334 |
Format menu . . . . . . . . . . . . . . . . . . . . . . . . . . . . . . . . . . . . . . . . . . . . . . . . . . . . . . . . . . . . . . . . . . . . . . . . . . . . . . . . . . . . . . . . . . . . . . . . . . . . . . . |
334 |
Table menu . . . . . . . . . . . . . . . . . . . . . . . . . . . . . . . . . . . . . . . . . . . . . . . . . . . . . . . . . . . . . . . . . . . . . . . . . . . . . . . . . . . . . . . . . . . . . . . . . . . . . . . . . |
335 |
Help menu . . . . . . . . . . . . . . . . . . . . . . . . . . . . . . . . . . . . . . . . . . . . . . . . . . . . . . . . . . . . . . . . . . . . . . . . . . . . . . . . . . . . . . . . . . . . . . . . . . . . . . . . . . |
335 |
Working in templates . . . . . . . . . . . . . . . . . . . . . . . . . . . . . . . . . . . . . . . . . . . . . . . . . . . . . . . . . . . . . . . . . . . . . . . . . . . . . . . . . . . . . . . . . . . . . . . |
335 |
Editing text . . . . . . . . . . . . . . . . . . . . . . . . . . . . . . . . . . . . . . . . . . . . . . . . . . . . . . . . . . . . . . . . . . . . . . . . . . . . . . . . . . . . . . . . . . . . . . . . . . . . . . . . . |
335 |
Working in tables . . . . . . . . . . . . . . . . . . . . . . . . . . . . . . . . . . . . . . . . . . . . . . . . . . . . . . . . . . . . . . . . . . . . . . . . . . . . . . . . . . . . . . . . . . . . . . . . . . . |
336 |
Working with images . . . . . . . . . . . . . . . . . . . . . . . . . . . . . . . . . . . . . . . . . . . . . . . . . . . . . . . . . . . . . . . . . . . . . . . . . . . . . . . . . . . . . . . . . . . . . . . . |
336 |
Last updated 8/23/2012

1
Chapter 1: What’s new
HTML 5 Support HTML5 is a new standard for HTML that enhances the browsing experience. Using Contribute, you can edit HTML5 pages. Contribute supports insertion of HTML5 tags such as video and audio. You can also convert the Doctype of an existing HTML document to HTML5 Doctype. For more information, see “Insert HTML5 video and audio” on page 157.
Add the Title / Border Color / Pattern attributes while editing image properties You can add a title for the image. The title that you add is displayed as a tool tip when you move the mouse over the image while viewing it. You can also add border color and pattern for the image. To add these attributes, double-click the image. In the Image Properties dialog box, enter the title, border color, and pattern. For more information, see “Completing the Image Properties dialog box” on page 166.
Add the Title attribute while creating a link You can add a title for the link. The title that you add is displayed as a tool tip when you move the mouse over the link. For more information, see “Add a title to the link” on page 199.
Create Secure FTP connection In Contribute, you can create a connection through FTPS (FTP Secure). FTPS is an extension to the commonly used File Transfer Protocol (FTP) that adds support for the more secure and authentic communication to the server. For more information, see “Providing ftps information” on page 289.
Create anchors Using this option, you can create an anchor in the web page using the anchor icon in the toolbar. For more information, see “Link to a specific place in a page” on page 202.
Add Favicon A Favicon icon, known as shortcut icon, is an image that is associated with a website. This icon appears in the browser’s address bar. A Favicon icon can be added in the website level and web page level. To add a Favicon graphic at the website level, see “Add Favicon Graphic” on page 259. To add a Favicon graphic in the page level, see “Add Favicon Graphic” on page 113.
Add widgets from Adobe Widget Browser Users can drag-and-drop a widget from Adobe Widget Browser to a web page. Widget Browser allows the user to create and configure widgets. For more details, see “Insert widget from Adobe widget browser” on page 112.
Manage Lock Files Contribute allows the administrator to see all locked pages and unlock the same. A nonadministrator user can view only the pages they locked. Users can also unlock the pages they locked. For more details, see “Manage Locked Files” on page 257.
Sort and search site connection You can sort the site connections in the My Connection dialog box, Draft Console page, and Welcome screen. It allows you to locate a connection quickly.
•My Connection dialog box: This page lists the details such as connection name, address, and role. To sort a connection, click the corresponding column header. The site connection is sorted based on the ascending or descending order. Also, you can search for a connection by entering a string in the Search text box. For more details, see “Sort and search connections” on page 5.
•Draft Consol page: This page lists the title, web address, status, and last updated date. To sort a connection, click the corresponding column header. The site connections are sorted based on the ascending or descending order. For more details, see “Sort drafts” on page 62.
•Welcome page: The Welcome page lists the connection and the connection status. To sort a connection, click the corresponding column header. The site connections are sorted based on the ascending or descending order of the column.
Last updated 8/23/2012

USING CONTRIBUTE |
2 |
What’s new
Search text on Mac machines in the Browse mode On Mac, you can use the Find option provided in the Edit menu while you are in the Browse mode. You can also use command + F to find a text. For more information, see “Find and Replace text” on page 135.
Edit Spry data A Spry data set allows you to set up a website by providing interactive data based on the selections made while viewing the page. These dynamic data comes from an XML file or from an HTML file. You can edit Spry data set files easily. For more information, see “Edit spry data” on page 53
Last updated 8/23/2012

3
Chapter 2: Setting up Contribute
After you have completed installing Adobe® Contribute®, you can set it up to work with an existing website or blog. Administrators can use the workflow in Contribute to enforce processes that help efficiently manage a website.
The Contribute workflow
Contribute works with your existing website, whether it’s an intranet or a public website. It often takes a team of people to get a website up and running and to keep the content current.
The team may include the following people:
Web developers Create the website. The web developers (or design team) uses a website-creation application, such as Adobe Dreamweaver®, to build the website. This team is responsible for planning, designing, developing, testing, and publishing the website. They are also responsible for creating templates for websites that require a consistent look and feel.
Web developers using Dreamweaver should see Dreamweaver Help for more information.
Contribute users Maintain the website. Contribute users are the marketers, managers, educators, students, smallbusiness owners, administrative assistants, project managers, and so on, who use Contribute to keep their websites up- to-date. The user needs no experience in HTML or web design. Because Contribute works like a word processor, the user experience is intuitive and familiar. Users can add or update text, images, tables, links, and Microsoft® Word and Excel® documents.
Contribute administrators Set up Contribute users and help them use Contribute to maintain the website. Administrators enforce document workflows to web pages by assigning predefined workflows in Contribute to Dreamweaver templates. When you create a page using a Dreamweaver template, the page is assigned the workflow associated with that template. The Contribute administrator is also responsible for setting folder and user permissions, which determine who can edit website content and what contents they can edit. Only one Contribute administrator can be designated for each website in Contribute. However, more than one person can administer the website if the Contribute administrator shares the administration password for the website.
Note: You must connect to a website before you can edit and publish pages on that website, and you must connect to a blog server before you can edit and publish entries in that blog.
The Contribute workflow involves the following steps:
1Connect to a website or blog.
2Open Contribute.
3Create/browse to web a page or blog entry.
Use the Contribute browser to find the web page or blog entry you want to edit. The browser is familiar to users of Microsoft Internet Explorer and other popular browsers. The browser toolbar has the normal navigation buttons plus a Choose button to help you navigate to files that aren’t linked on your website. You can create bookmarks in Contribute and view your Internet Explorer bookmarks. You can also use shortcuts to view current drafts quickly.
1Open your web page or blog for editing.
2Edit your content.
Last updated 8/23/2012

USING CONTRIBUTE |
4 |
Setting up Contribute
After you browse to the desired page or blog entry, click the Edit Page or Edit Entry button in the toolbar to open the web page or blog entry in the Contribute editor. Contribute copies the file from your web or blog server and locks it on the server so that no one else can edit the page or blog entry while you’re working on it.
The Contribute editor works much like a word processor. You can edit text, images, tables, and links on the page or blog entry, and you can even add Microsoft Word or Excel documents to your website or blog entry. The toolbar contains familiar editing buttons as well as buttons for saving, discarding, or publishing your edits.
3Send your content for review or approval.
Depending on the workflow, get your document reviewed or approved before it is published.
4Publish the changes.
When a web page completes its workflow or you are done with editing your blog, you can publish the page or blog entry to your website or blog server. Click the Publish button, and Contribute replaces the existing page or blog entry on your web server or blog with the edited version. Contribute also unlocks the file on the server so other users can edit the page or blog entry.
Connect to a blog
Install Contribute® if it is not already installed on your computer. Before installation, ensure that your computer meets the minimum setup requirements.
Before you can use Adobe® Contribute to edit and update your website and blog content, you must create a connection to the web server that stores your website or blog. By creating a connection, you enable Contribute to access the web pages on your website and blog entries on your blog, and you can then edit pages and blog entries and publish any changes you make.
In most cases, your Contribute administrator sets up Contribute for you or provides the information you need to connect to your website or blog server.
You can connect to a blog account that is hosted on one of the following:
•A blog publishing service, such as Blogger™, Typepad®, or WordPress®.
•An internal server using a service such as Movable Type® or WordPress.
To connect to a blog, you need the necessary connection information for the blog so you can enter the information in the Connection Wizard. You can use the MetaWeblog API to connect to a blog account that is hosted on a blog publishing service, such as Blogger, WordPress, Roller, or TypePad or an internal server. If you use a Macintosh® computer and have a .Mac account, Contribute detects the .Mac account and asks if you want to create a connection to it.
Note: Connection keys are not used for blog connections; they are available only for website connections.
For more information about connecting to a blog, see “Create a blog server connection” on page 248.
Connect to a website
There are two ways you can connect: by using a connection key that was sent to you, or by entering the connection information manually.
Last updated 8/23/2012
USING CONTRIBUTE |
5 |
Setting up Contribute
Your Contribute administrator does one of the following to help set up a connection to your website for you:
•Send you an e-mail message with a website connection key file, which you can use to establish a connection to your website. The connection key contains all the network information that Contribute needs for connecting to your website.
•Provide the network location from where you can download the connection key.
Note: Connection keys are used only with website connections; they are not used for blog connections.
•Give you the necessary connection information for the website so you can enter the information in the Connection Wizard (see “Create a website connection” on page 246).
If you use a Macintosh computer and have a .Mac account, Contribute detects the .Mac account and asks if you want to create a connection to it.
If your website is managed by Contribute Publishing Server, your administrator sends you a connection key or gives you connection information to enter in the Contribute browser address bar.
Connect using a connection key
1Open the e-mail containing the connection key.
2Double-click the attachment.
The Import Connection Key dialog box appears or the Log In To Publishing Services dialog box appears.
3Do one of the following:
•If the Import Connection Key dialog box appears, enter your name, your e-mail address, and the connection key password, and then click OK.
•If the Log In To Publishing Services dialog box appears, enter your user name and password, and then click OK.
Note: If you don’t have the password, contact your system administrator.
4If you are prompted for other connection information, such as FTP login, type that information, and then click OK. When the connection is complete, the website’s home page appears in the Contribute browser.
Connect by entering the connection information manually
1Select Edit > My Connections (Windows) or Contribute > My Connections (Mac OS), and then click Create. The Connection Wizard or Connection Assistant appears.
2Follow the on-screen instructions to enter your connection information.
Your web hosting service or your IT administrator can provide you with the required information. For more information, click the Help button located at the bottom of the dialog box.
Note: During startup, Contribute will not connect to any website or blog server. To change this behavior, in the My Connections dialog box, select the desired website or blog server, and clear the selection of the Don’t Connect To <site/blog> at Startup.
Sort and search connections
This My Connection lists the details such as connection name, address, and role.
1Click the corresponding column header.
The site connection is sorted based on the ascending or descending order.
Last updated 8/23/2012

USING CONTRIBUTE |
6 |
Setting up Contribute
2Search for a connection by entering a string in the Search text box.
After entering the string, click the < and > buttons provided to find the connection.
Open Contribute
If the Require Contribute startup password option is selected in the Security category of Preferences, Contribute prompts you for your startup password when you start the program.
A startup password protects unauthorized users from editing or publishing pages and blog entries to your website or blog. If you do not enter the password when you start Contribute, all web pages and blogs are disabled and cannot be enabled. You can only browse to web pages or blog entries and create web pages or blog entries. After you enter the correct password, you can make updates and publish changes or new entries to the connected websites and blogs until you close Contribute.
In addition to providing secure access, when the Require Contribute Startup password option is selected, Contribute uses a stronger encryption method when saving your connection information on your computer.
Note: If you receive a connection key that requires a Contribute startup password, you must create a startup password before you can import that connection.
Enter a Contribute startup password
1In the Enter Password dialog box, type the Contribute startup password.
You can enter the password incorrectly only three times before Contribute locks you out. If you are locked out, you can restart Contribute and reenter the startup password.
If you forget your password, you have to delete all of your website connections and add them again.
2Click OK.
Note: If you click Skip, you bypass the password prompt and Contribute starts. When you skip the password, you can only edit or cancel existing drafts for the website. You won’t be able to edit pages other than drafts, or publish changes to drafts until you restart Contribute and enter the correct startup password.
More Help topics
“Change or disable startup password” on page 31
Start Contribute without a network connection
When you start Contribute, it checks your network connection so that it can connect to your website or blog. Contribute alerts you if it does not detect a connection. You can do one of the following in such circumstances.
1Start Contribute.
The Connection Failure dialog box appears.
2Select Work Offline if you know that you’re not connected to the network. For more information, see “Work offline” on page 70.
3Select Try To Connect Anyway to force Contribute to continue checking for a network connection.
Last updated 8/23/2012

USING CONTRIBUTE |
7 |
Setting up Contribute
4If Contribute still fails to connect, Contribute displays an error message with two options:
•Click Yes to continue trying to connect to other websites and blog servers.
•Click No to disable the rest of your websites and blog servers. You can later enable them after you resolve your network connection problem.
5Click OK.
Note: You can disable a website or blog at any time—not just at startup—when there’s a problem. If you have multiple websites and blogs, you can disable the ones you aren’t currently working on, so Contribute does not maintain the connection for an extended period of time. For more information, see “Disable individual website and blog connections” on page 280.
Enable a disabled website or blog
1Browse to any page on the website or to any blog entry in the blog, and click Connect in the toolbar.
2Select Edit > My Connections (Windows) or Contribute > My Connections (Mac OS). The My Connections dialog box appears.
3Do one of the following:
•To enable a website, select the website you want to enable from the list, and click Enable.
•To enable a blog, select the blog server under which the blog is listed, and click Enable. All the blogs listed under this blog server are enabled. You cannot enable individual blogs.
4Click Close.
Create your blog/browse to your website
Contribute enables you to create and edit blog entries in its visual editor. You can also open and edit content from your browser or a Microsoft® Office application.
For websites, the Contribute browser works like a standard web browser, letting you do the following:
•Navigate to websites and locate pages by clicking links.
•Refresh pages to see updates.
•Reload pages you’ve visited using Back and Forward buttons.
•Enter website addresses in the Address text box.
You can also create new web pages and link them to other web pages, files on your computer, pages on other websites, and e-mail addresses.For more information, see “Adding pages, blog entries, and documents” on page 83.
Create your blog
You can create a new blog entry from scratch. After you create the entry, you can add content such as text, images, and multimedia.
1On your blog homepage in the Contribute browser, click the New button in the toolbar or select File > New.
2In the New Web Page Or Blog Entry dialog box, enter a title for your new blog entry.
3Click OK. The new entry opens as a draft in Contribute.
Last updated 8/23/2012

USING CONTRIBUTE |
8 |
Setting up Contribute
Note: Use the My Connections dialog box to select websites and blog servers that Contribute must not connect to during the startup process.
You can browse to any website with Contribute, but you can edit only the pages of websites that you’ve created connections to.
Browse to a website
•Enter a web address (URL) in the Address text box in the toolbar.
•Click links to navigate to a web page.
•Click the Back or Forward button in the toolbar.
Create new pages
1In the Contribute browser, click New in the toolbar.
2In the New Web Page Or Blog Entry dialog box, choose one of the following options:
•Use The Blank Web Page.
•Select A Template Available On The Server.
•Copy One Of The Contribute Starter Web Pages.
3Click OK. The new page opens as a draft in Contribute.
Note: While Starter web pages are available in Contribute, templates are available on the server. Some templates may not be updated from the server. Use the Refresh Templates button to download the desired template.
Edit your blog/website
You can edit an existing blog entry on any blog/website you’ve connected to. When you browse to such a website, the Edit Page button is enabled.
You can also create new web pages and insert contents from Microsoft documents directly into web pages.
You can edit a document from a Microsoft Office application, or open a web page for editing in your favorite web browsers.
For information on opening and editing existing web pages and blogs, see “Working with existing web pages and blog entries” on page 46.
For information on opening and editing new web pages and blogs, see “Adding pages, blog entries, and documents” on page 83.
Publish your blog/website
After a web page completes its workflow or you have completed editing a blog, you can publish it to your website or blog from Contribute. You can also publish content from Microsoft Office applications or your web browser.
Note: You will not be able to publish a web page if you do not have publish permissions.
For more information on publishing blogs and websites, see “Publishing web pages and blog entries” on page 218.
Last updated 8/23/2012

USING CONTRIBUTE |
9 |
Setting up Contribute
Integrate Contribute with Adobe Creative Suite applications
You can run custom startup scripts during the installation of other Adobe Creative Suite® applications to enable access from the relevant suite product to Adobe Contribute. When these scripts are run, Adobe Contribute-related menus, options, and toolbar icons are created in the Creative Suite applications. Also, relevant Creative Suite product-related menus, options, and toolbar icons are created in Adobe Contribute.
Perform Adobe Contribute-related operations in Creative Suite applications
The Cross DOM is a small API that provides a set of functions that are common across Adobe Creative Suite applications. These include functions to open files, execute scripts, and print files. You can use the Cross DOM API for startup scripts to perform any of the following operations across the Adobe Creative Suite applications:
•Open a new web page or blog entry in Adobe Contribute from another Creative Suite application using the Open function in the Cross-DOM API. Also, you can open files in Adobe Contribute from another Creative Suite application using the Cross-DOM API in a startup script.
•Open files from the following Creative Suite applications in Adobe Contribute by using the Open function in the Cross-DOM API: Adobe Bridge®, Adobe Photoshop®, Adobe Illustrato®r, Adobe InDesign®, Adobe Acrobat®, Adobe Flash®, Adobe Dreamweaver®, and Adobe Fireworks®.
•Open video and audio files from the following Creative Suite applications using the Open function in the CrossDOM API: Adobe After Effects®, Adobe Premiere® Pro, Adobe Audition®, and Adobe Encore®. If the file can be viewed in the embedded browser, it is opened in the embedded browser.
•Edit files in one of the following Creative Suite applications, and call the Reveal function to switch to Adobe Contribute: Adobe Bridge, Adobe Photoshop, Adobe Illustrator, Adobe InDesign, Adobe Acrobat, Adobe Flash, Adobe Dreamweaver, Adobe Fireworks, Adobe After Effects, Adobe Premiere Pro, Adobe Audition, and Adobe Encore.
•Print files from the following Creative Suite applications in Adobe Contribute using the PDF printer and the Print function in the Cross-DOM API: Adobe Bridge, Adobe Photoshop, Adobe Illustrator, Adobe InDesign, Adobe Acrobat, Adobe Flash, Adobe Dreamweaver, and Adobe Fireworks.
•Print files from the following Creative Suite applications using the Print function in the Cross-DOM API: Adobe After Effects, Adobe Premiere Pro, Adobe Audition, and Adobe Encore. (Although video files are rarely printed, printing these files lets you verify whether the corresponding applications respond to BridgeTalk messages.)
•Close Adobe Contribute from other Creative Suite applications using the Close function in the Cross-DOM API.
•Quit Adobe Contribute from the following Creative Suite applications using the Quit function in Cross DOM API: Adobe Bridge, Adobe Photoshop, Adobe Illustrator, Adobe InDesign, Adobe Acrobat, Adobe Flash, Adobe Dreamweaver, Adobe Fireworks, Adobe After Effects, Adobe Premiere Pro, Adobe Audition, and Adobe Encore.
Note: Adobe Bridge scripts using the BridgeTalk protocol enable communication between Adobe Contribute and the Adobe Creative Suite applications. The BridgeTalk message object is used to send message packets between the applications.
Integrate Adobe Bridge with Adobe Contribute
The Adobe Bridge software is the new navigational control center built for Adobe Creative Suite applications and their components. Adobe Bridge provides centralized access to your Creative Suite project files, applications, and settings.
Last updated 8/23/2012

USING CONTRIBUTE |
10 |
Setting up Contribute
Adobe Contribute has been integrated with the Adobe Bridge application in the Adobe Creative Suite release. This integration lets you perform the following tasks:
•Organize assets
•Insert files
•Communicate across applications using the BridgeTalk protocol
•Access Adobe stock photos.
Insert files from Adobe Bridge into Adobe Contribute
Using Adobe Bridge, you can insert files or folders into web pages or blog entry drafts in Adobe Contribute. If the Contribute draft supports the selected file type, then the selected file is placed in the draft, or a link to the selected file is displayed in the draft. File types which are not supported, are not inserted in the draft.
1Start Adobe Contribute.
2Open a draft of a web page or blog entry.
Note: While placing a file in Contribute, if Adobe Contribute is not running, or if a web page or blog entry draft is not open, a message is displayed indicating that there is no open draft to place the file.
3Select File > Browse or click the Bridge toolbar icon  .
.
Note: You can select multiple files or folders to place in a Contribute draft.
Adobe Bridge is opened in a new window.
4In Adobe Bridge, select the file you want to insert.
5Select File > Place > In Contribute.
The file, or a link to the file is inserted in the Contribute draft. If you select a file type which is not supported, such a file is not inserted in the draft.
Note: You can also insert a file into a Contribute web page or blog entry draft by dragging the file from Windows Explorer or Mac OS Finder, and dropping it into the Contribute web page or blog entry draft.
More Help topics
“Publish files from Adobe Bridge to Adobe Contribute (Windows only)” on page 11
Open files from Adobe Bridge in Adobe Contribute (Windows Only)
You can select a file in Adobe Bridge, and open the file in Adobe Contribute.
1Start Adobe Bridge.
2Select the file you want to open in Contribute.
Note: You can open only Microsoft Word documents with .doc or .docx extension, and Microsoft Excel documents with .xls, .xlsm, or .xlsx extension.
3Select Tools > Contribute > Open In Contribute.
Note: The Tools > Contribute > Open In Contribute menu is available for the Windows platform only.
Contribute is started and the contents of the Word or Excel document are inserted in the web page draft based on the insertion option you selected.
Last updated 8/23/2012

USING CONTRIBUTE |
11 |
Setting up Contribute
More Help topics
“Open documents in Contribute from Microsoft Office applications (Windows only)” on page 103
Publish files from Adobe Bridge to Adobe Contribute (Windows only)
You can select the following file types in Adobe Bridge, and publish them in Adobe Contribute: .doc, .xls, .docx, .xlsm, and .xlsx. When you publish a Microsoft Office document that contains other files, the additional files are copied to your web page draft automatically.
1Start Adobe Bridge.
2Select the file you want to publish to Adobe Contribute.
3Select Tools > Contribute > Publish To Website.
Note: The Tools > Contribute > Publish To Website menu is available for the Windows platform only.
The Publish To Website dialog box appears.
4To select the settings for publishing the document, do the following: a Select the website where you want to publish the file.
Note: If you do not have a connection to your website before you publish a document, you can create one by selecting Create New Connection in the Select pop-up menu in the Publish To Website dialog box. For more information on creating a website connection, see “Create a website connection” on page 246.
bSelect a location for storing the file.
Note: You can select multiple files or folders from Adobe Bridge to publish in Contribute.
cEnter a filename. The filename must not have any spaces, tabs, or alphanumeric characters.
dSelect a format.
e(Optional) Clear the Publish Current Selection Only check box to publish the whole document instead of the selection.
You can also set these preferences in the Microsoft Documents tab from the Edit menu in Contribute. To do  this, select Edit > Preferences > Microsoft Documents and make a selection. For more information on setting these preferences, see “Set Contribute preferences” on page 29.
5Click Publish.
Contribute publishes the document to your web page, and a confirmation dialog box appears.
Note: If Contribute is not running when you publish a file from Adobe Bridge to Contribute, Adobe Contribute is started first, and then the Publish To Website dialog box is opened.
6Click OK.
More Help topics
“Integrate Adobe Bridge with Adobe Contribute” on page 9 “Insert files from Adobe Bridge into Adobe Contribute” on page 10
“Publish a document from Microsoft Office (Windows only)” on page 227
Last updated 8/23/2012

USING CONTRIBUTE |
12 |
Setting up Contribute
Reference
This section provides information about the dialog boxes introduced in this chapter.
Completing the Import Connection Key dialog box
Use the Import Connection Key dialog box to import a connection key that establishes a connection to your website. Connection keys are available only for websites; they are not available for blogs.
1Enter your name and your e-mail address.
2Enter the password for the connection key.
Note: If you don’t have a password, contact the Contribute administrator who sent you the connection key.
3Click OK.
When the connection is complete, the home page of the website appears in the Contribute browser.
Entering an FTP password
The Contribute administrator might send you a connection key that does not include the FTP login and password information. An FTP password and user name are required to access password-controlled files on the server.
When you import a connection key that doesn’t include the required FTP information, Contribute displays the FTP password dialog box after you enter your name, e-mail address, and password for the connection key.
Note: Connection keys are available only for websites; they are not available for blogs.
If you are connecting to a local network computer, the login information you enter in this dialog box is typically the  same as your network login information.
1In the Username text box, type your FTP user name.
2In the Password text box, type your password.
3Click OK.
The Connection Failure dialog box
1If Contribute can’t detect a network connection for one or more of your websites or blogs, the Connection Failure dialog box gives you two choices:
•Select Work Offline if you know that you’re not connected to the network and you want to work offline. For more information, see “Work offline” on page 70.
•Select Try To Connect Anyway if you aren’t sure what the problem is and you want Contribute to try to connect again. If Contribute still cannot connect, you can disable one or more of your website or blog connections.
2Click OK.
Last updated 8/23/2012

13
Chapter 3: Workspace
You can use Adobe® Contribute® as a web browser and as a web page editor. You can easily switch between browsing web pages and editing web pages. The Contribute workspace makes it easy for you to access pages, whether you’re browsing or editing.
You can navigate the Contribute dialog boxes and workspace without using your mouse. You can also set preferences to customize Contribute.
OWL
Workspace overview
You create and manipulate your documents and files using various elements, such as panels, bars, and windows. Any arrangement of these elements is called a workspace. The workspaces of the different applications in Adobe® Creative Suite® 5 share the same appearance so that you can move between the applications easily. You can also adapt each application to the way you work by selecting from several preset workspaces or by creating one of your own.
Although the default workspace layout varies in different products, you manipulate the elements much the same way in all of them.
Last updated 8/23/2012

USING CONTRIBUTE |
|
|
|
|
|
|
14 |
||||
Workspace |
|
|
|
|
|
|
|
||||
|
|
|
A |
B |
C |
D |
|||||
E |
|
|
|
|
|
|
|
|
|
G |
|
|
|
|
|
|
|
|
|
|
|||
|
|
|
|
|
|
|
|
|
|||
|
|
|
|
|
|
|
|
||||
|
|
|
|
|
|
|
|
|
|
||
|
|
|
|
|
|
|
|
|
|
|
|
F
H
Default Illustrator workspace
A. Tabbed Document windows B. Application bar C. Workspace switcher D. Panel title bar E. Control panel F. Tools panel G. Collapse To Icons button H. Four panel groups in vertical dock
•The Application bar across the top contains a workspace switcher, menus (Windows only), and other application controls. On the Mac for certain products, you can show or hide it using the Window menu.
•The Tools panel contains tools for creating and editing images, artwork, page elements, and so on. Related tools are grouped.
•The Control panel displays options for the currently selected tool. In Illustrator, the Control panel displays options for the currently selected object. (In Adobe Photoshop® this is known as the Options bar. In Adobe Flash®, Adobe Dreamweaver®, and Adobe Fireworks® this is known as the Property Inspector and includes properties of the currently selected element.)
•The Document window displays the file you’re working on. Document windows can be tabbed and, in certain cases, grouped and docked.
•Panels help you monitor and modify your work. Examples include the Timeline in Flash, the Brush panel in Illustrator, the Layers panel in Adobe Photoshop®, and the CSS Styles panel in Dreamweaver. Panels can be grouped, stacked, or docked.
•The Application frame groups all the workspace elements in a single, integrated window that lets you treat the application as a single unit. When you move or resize the Application frame or any of its elements, all the elements within it respond to each other so none overlap. Panels don’t disappear when you switch applications or when you accidentally click out of the application. If you work with two or more applications, you can position each application side by side on the screen or on multiple monitors.
Last updated 8/23/2012
USING CONTRIBUTE |
15 |
Workspace
If you are using a Mac and prefer the traditional, free-form user interface, you can turn off the Application frame. In Adobe Illustrator®, for example, select Window > Application Frame to toggle it on or off. (In Flash, the Application frame is on permanently for Mac, and Dreamweaver for Mac does not use an Application frame.)
Hide or show all panels
•(Illustrator, Adobe InCopy®, Adobe InDesign®, Photoshop, Fireworks)To hide or show all panels, including the Tools panel and Control panel, press Tab.
•(Illustrator, InCopy, InDesign, Photoshop) To hide or show all panels except the Tools panel and Control panel, press Shift+Tab.
You can temporarily display hidden panels if Auto-Show Hidden Panels is selected in Interface preferences. It’s  always on in Illustrator. Move the pointer to the edge of the application window (Windows®) or to the edge of the monitor (Mac OS®) and hover over the strip that appears.
• (Flash, Dreamweaver, Fireworks) To hide or show all panels, press F4.
Display panel options
Click the panel menu icon  in the upper-right corner of the panel.
 You can open a panel menu even when the panel is minimized.
In Photoshop, you can change the font size of the text in panels and tool tips. In the Interface preferences, choose a  size from the UI Font Size menu.
(Illustrator) Adjust panel brightness
In User Interface preferences, move the Brightness slider. This control affects all panels, including the Control panel.
Reconfigure the Tools panel
You can display the tools in the Tools panel in a single column, or side by side in two columns. (This feature is not available in the Tools panel in Fireworks and Flash.)
In InDesign and InCopy, you also can switch from single-column to double-column (or single-row) display by setting  an option in Interface preferences.
Click the double arrow at the top of the Tools panel.
Manage windows and panels
You can create a custom workspace by moving and manipulating Document windows and panels. You can also save workspaces and switch among them. For Fireworks, renaming custom workspaces can lead to unexpected behavior.
Note: The following examples use Photoshop for demonstration purposes. The workspace behaves the same in all the products.
Rearrange, dock, or float document windows
When you open more than one file, the Document windows are tabbed.
•To rearrange the order of tabbed Document windows, drag a window’s tab to a new location in the group.
•To undock (float or untab) a Document window from a group of windows, drag the window’s tab out of the group.
Last updated 8/23/2012

USING CONTRIBUTE |
16 |
Workspace
Note: In Photoshop you can also choose Window > Arrange > Float in Window to float a single Document window, or Window > Arrange > Float All In Windows to float all of the Document windows at once. See tech note kb405298 for more information.
Note: Dreamweaver does not support docking and undocking Document windows. Use the Document window’s Minimize button to create floating windows (Windows), or choose Window > Tile Vertically to create side-by-side Document windows. Search “Tile Vertically” in Dreamweaver Help for more information on this topic. The workflow is slightly different for Macintosh users.
•To dock a Document window to a separate group of Document windows, drag the window into the group.
•To create groups of stacked or tiled documents, drag the window to one of the drop zones along the top, bottom, or sides of another window. You can also select a layout for the group by using the Layout button on the Application bar.
Note: Some products do not support this functionality. However, your product may have Cascade and Tile commands in the Window menu to help you lay out your documents.
•To switch to another document in a tabbed group when dragging a selection, drag the selection over the document’s tab for a moment.
Note: Some products do not support this functionality.
Dock and undock panels
A dock is a collection of panels or panel groups displayed together, generally in a vertical orientation. You dock and undock panels by moving them into and out of a dock.
•To dock a panel, drag it by its tab into the dock, at the top, bottom, or in between other panels.
•To dock a panel group, drag it by its title bar (the solid empty bar above the tabs) into the dock.
•To remove a panel or panel group, drag it out of the dock by its tab or title bar. You can drag it into another dock or make it free-floating.
Navigator panel being dragged out to new dock, indicated by blue vertical highlight
Last updated 8/23/2012

USING CONTRIBUTE |
17 |
Workspace
Navigator panel now in its own dock
You can prevent panels from filling all the space in a dock. Drag the bottom edge of the dock up so it no longer meets  the edge of the workspace.
Move panels
As you move panels, you see blue highlighted drop zones, areas where you can move the panel. For example, you can move a panel up or down in a dock by dragging it to the narrow blue drop zone above or below another panel. If you drag to an area that is not a drop zone, the panel floats freely in the workspace.
Note: The position of the mouse (rather than the position of the panel), activates the drop zone, so if you can’t see the drop zone, try dragging the mouse to the place where the drop zone should be.
•To move a panel, drag it by its tab.
•To move a panel group, drag the title bar.
A
B
C
Narrow blue drop zone indicates Color panel will be docked on its own above the Layers panel group.
A. Title bar B. Tab C. Drop zone
Press Ctrl (Windows) or Command (Mac OS) while moving a panel to prevent it from docking. Press Esc while  moving the panel to cancel the operation.
Add and remove panels
If you remove all panels from a dock, the dock disappears. You can create a dock by moving panels to the right edge of the workspace until a drop zone appears.
•To remove a panel, right-click (Windows) or Control-click (Mac) its tab and then select Close, or deselect it from the Window menu.
•To add a panel, select it from the Window menu and dock it wherever you want.
Last updated 8/23/2012
USING CONTRIBUTE |
18 |
Workspace
Manipulate panel groups
• To move a panel into a group, drag the panel’s tab to the highlighted drop zone in the group.
Adding a panel to a panel group
•To rearrange panels in a group, drag a panel’s tab to a new location in the group.
•To remove a panel from a group so that it floats freely, drag the panel by its tab outside the group.
•To move a group, drag the title bar (the area above the tabs).
Stack floating panels
When you drag a panel out of its dock but not into a drop zone, the panel floats freely. The floating panel allows you to position it anywhere in the workspace. You can stack floating panels or panel groups so that they move as a unit when you drag the topmost title bar.
Free-floating stacked panels
•To stack floating panels, drag a panel by its tab to the drop zone at the bottom of another panel.
•To change the stacking order, drag a panel up or down by its tab.
Note: Be sure to release the tab over the narrow drop zone between panels, rather than the broad drop zone in a title bar.
•To remove a panel or panel group from the stack, so that it floats by itself, drag it out by its tab or title bar.
Resize panels
•To minimize or maximize a panel, panel group, or stack of panels, double-click a tab. You can also double-click the tab area (the empty space next to the tabs).
•To resize a panel, drag any side of the panel. Some panels, such as the Color panel in Photoshop, cannot be resized by dragging.
Collapse and expand panel icons
You can collapse panels to icons to reduce clutter on the workspace. In some cases, panels are collapsed to icons in the default workspace.
Last updated 8/23/2012

USING CONTRIBUTE |
19 |
Workspace
Panels collapsed to icons
Panels expanded from icons
•To collapse or expand all panel icons in a column, click the double arrow at the top of the dock.
•To expand a single panel icon, click it.
•To resize panel icons so that you see only the icons (and not the labels), adjust the width of the dock until the text disappears. To display the icon text again, make the dock wider.
•To collapse an expanded panel back to its icon, click its tab, its icon, or the double arrow in the panel’s title bar.
In some products, if you select Auto-Collapse Icon Panels from the Interface or User Interface Options preferences,  an expanded panel icon collapses automatically when you click away from it.
•To add a floating panel or panel group to an icon dock, drag it in by its tab or title bar. (Panels are automatically collapsed to icons when added to an icon dock.)
•To move a panel icon (or panel icon group), drag the icon. You can drag panel icons up and down in the dock, into other docks (where they appear in the panel style of that dock), or outside the dock (where they appear as floating icons).
Save and switch workspaces
By saving the current size and position of panels as a named workspace, you can restore that workspace even if you move or close a panel. The names of saved workspaces appear in the workspace switcher in the Application bar.
Save a custom workspace
1With the workspace in the configuration you want to save, do one of the following:
•(Illustrator) Choose Window > Workspace > Save Workspace.
•(Photoshop, InDesign, InCopy) Choose Window > Workspace > New Workspace.
•(Dreamweaver) Choose Window > Workspace Layout > New Workspace.
Last updated 8/23/2012

USING CONTRIBUTE |
20 |
Workspace
•(Flash) Choose New Workspace from the workspace switcher in the Application bar.
•(Fireworks) Choose Save Current from the workspace switcher in the Application bar.
2Type a name for the workspace.
3(Photoshop, InDesign) Under Capture, select one or more options:
Panel Locations Saves the current panel locations (InDesign only).
Keyboard shortcuts Saves the current set of keyboard shortcuts (Photoshop only).
Menus or Menu Customization Saves the current set of menus.
Display or switch workspaces
Select a workspace from the workspace switcher in the Application bar.
 In Photoshop, you can assign keyboard shortcuts to each workspace to navigate among them quickly.
Delete a custom workspace
•Select Manage Workspaces from the workspace switcher in the Application bar, select the workspace, and then click Delete. (The option is not available in Fireworks.)
•(Photoshop, InDesign, InCopy) Select Delete Workspace from the workspace switcher.
•(Illustrator) Choose Window > Workspace > Manage Workspaces, select the workspace, and then click the Delete icon.
•(Photoshop, InDesign) Choose Window > Workspace >Delete Workspace, select the workspace, and then click Delete.
Restore the default workspace
1Select the Default or Essentials workspace from the workspace switcher in the application bar. For Fireworks, see the article http://www.adobe.com/devnet/fireworks/articles/workspace_manager_panel.html.
Note: In Dreamweaver, Designer is the default workspace.
2For Fireworks (Windows), delete these folders:
Windows Vista \\Users\<username>\AppData\Roaming\Adobe\Fireworks CS4\
Windows XP \\Documents and Settings\<username>\Application Data\Adobe\Fireworks CS4
3(Photoshop, InDesign, InCopy) Select Window > Workspace > Reset [Workspace Name].
(Photoshop) Restore a saved workspace arrangement
In Photoshop, workspaces automatically appear as you last arranged them, but you can restore the original, saved arrangement of panels.
•To restore an individual workspace, choose Window > Workspace > Reset Workspace Name.
•To restore all the workspaces installed with Photoshop, click Restore Default Workspaces in the Interface preferences.
 To rearrange the order of workspaces in the application bar, drag them.
Last updated 8/23/2012

USING CONTRIBUTE |
21 |
Workspace
The Contribute workspace
The Contribute workspace has three main areas: the Contribute browser and editor, the toolbar, and the sidebar.
B
C
A
A. Sidebar B. Toolbar C. Start page in the browser and editor
The Contribute browser and editor
The main window in Contribute is used for browsing and editing. If you are not sure whether you are browsing or editing in Contribute, look at the toolbar. The toolbars are different when you are browsing and when you are editing a draft.
When you use the Contribute browser, you can browse to any web page—not just to pages on your website. The Contribute browser functions as a true web browser: Click links in web pages to browse to the page you want to edit. You can also create bookmarks to pages that you visit frequently.
When you use the Contribute editor, you can edit pages in websites you have connected to (see “Connect to a blog” on page 4). You can edit text, images, tables, links, and pages with frames.
It’s easy to browse and edit in Contribute, and to switch between browsing and editing. For more information, see “Switch between browsing and editing” on page 23.
The Contribute toolbars
The Contribute toolbar changes according to whether you are browsing or editing a web page or a blog entry. When you are editing a web page, the editor toolbar lets you edit text or images, depending on the content you’ve selected. And when you are editing a draft for your blog, the blog metadata and secondary metadata toolbars help you tag your blog pages.
Last updated 8/23/2012
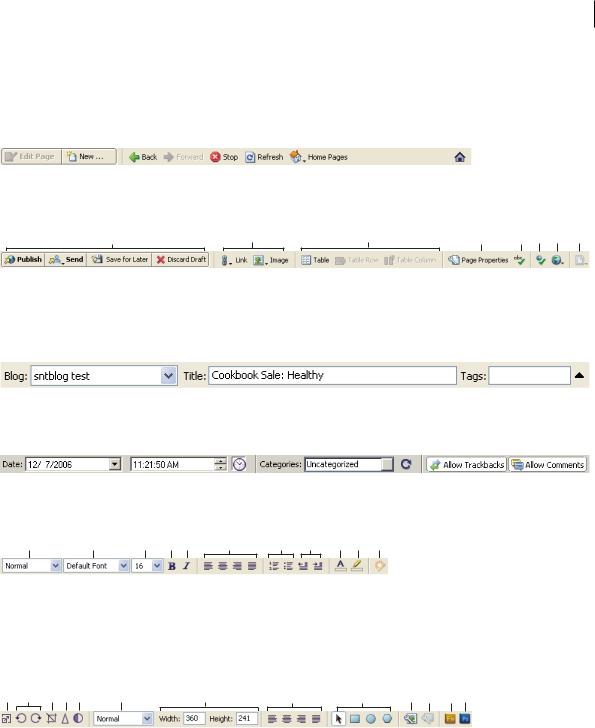
USING CONTRIBUTE |
22 |
Workspace
When you receive or open a web page, the toolbar displays buttons for only those actions that you can perform at that stage of the workflow, and to which you have permissions.
The Browser toolbar Contains buttons for navigating your website or creating a page or blog entry. The browser toolbar contains the same options for websites and blogs.
The Editing toolbar Contains buttons for common operations from the File, Insert, Format, and Table menus. The toolbar options vary depending on whether you are working on a draft for a website or a blog.
A B C D E F G H
A. Action buttons B. Insert content C. Add row or column D. Page properties E. Check Spelling F. Compare page display in browsers G. Preview the draft by selecting a browser H. Edit included file
The Blog Metadata toolbar Contains information about the draft, including the blog title, the blog post title, and the associated tags. This toolbar is available for blog drafts only.
The Secondary Metadata toolbar Contains more options for associating metadata with a blog post. This toolbar is available for blog drafts only.
The Text Formatting toolbar Contains buttons for formatting text. The text formatting toolbar options also vary depending on whether you are working on a draft for a website or a blog.
A B C D E F G H I J K
A. Style menu B. Font menu C. Font size menu D. Bold E. Italic F. Alignment buttons G. List buttons H. Outdent/Indent buttons I. Text color J. Highlight color K. Widget properties
Note: If your Contribute administrator has restricted editing to text only, some formatting options are not available. Also, options might be disabled if a cascading style sheet has been applied to a text selection.
The Image Editing Toolbar Contains buttons for editing images.
A B C D E F G H I J K L M
A. Resize B. Rotate buttons C. Crop D. Sharpen E. Brightness/Contrast F. Style G. Resize H. Alignment I. Hotspot selection tools J. Image Properties K. Page Properties L. Edit image with Fireworks M. Edit image with Photoshop
The Contribute sidebar
The Contribute sidebar makes it easy to switch between editing and browsing, and gives you quick access to your drafts. You can also use the sidebar to get quick instructions for performing tasks in Contribute.
Last updated 8/23/2012

USING CONTRIBUTE |
23 |
Workspace
The sidebar has two parts:
The Pages panel Gives you access to the web browser and all drafts you’re currently editing. There is also a link to the Draft Console, which shows the status of your drafts.
Note: The Draft Console is not available if your website doesn’t have an administrator assigned.
The How Do I panel Provides quick step-by-step instructions to help you complete some common Contribute tasks. The panel shows a list of browsing tasks while you are browsing, and a list of editing tasks while you are editing.
Click any link in the How Do I panel in the sidebar to get more information on that task. If the desired task is not in the list, see Contribute Help (Help > Adobe Contribute Help) to get detailed information.
You can expand, collapse, or resize the panels and the sidebar.
Expand or collapse the sidebar
Do one of the following:
•Select View > Sidebar.
•In Windows, click the arrow on the splitter bar between the sidebar and the Contribute browser and editor.
•In Mac OS, double-click the grabber on the splitter bar between the sidebar and the Contribute browser and editor.
Resize the sidebar
Drag the splitter bar between the sidebar and the Contribute browser and editor.
Expand or collapse a panel in the sidebar
Double-click the panel title bar.
Resize panels vertically in the sidebar
Drag the title bar in the How Do I panel.
Switch between browsing and editing
You can use Contribute to browse or edit web pages and blog entries. You can switch between browsing and editing at any time. When you leave a draft you’re editing, Contribute saves your changes so that you can return to the draft later and continue editing where you left off.
When you switch to browsing, Contribute does not publish your draft. While you are browsing the page or blog entry, the message area advises you that you have an unpublished draft of the page or blog entry.
If you are not sure if you are browsing or editing in Contribute, look at the toolbar. When you are browsing, you’ll see the browser toolbar with the Edit Page (or Create Connection) button, and when you are editing, the editor toolbar appears (see “The Contribute toolbars” on page 21).
Switch from browsing to editing
Do one of the following:
•Click the Edit Page button in the toolbar to edit a web page, or click the Edit Entry button to edit a blog entry.
Last updated 8/23/2012

USING CONTRIBUTE |
24 |
Workspace
Note: Edit Page and Edit Entry are enabled only for pages on a website or entries in a blog that you are connected to and that you have permission to edit.
• Click a draft title in the Pages panel in the sidebar.
Switch from editing to browsing
Do one of the following:
•Click Browser in the Pages panel in the sidebar.
•Click the Save For Later button in the toolbar.
•Select View > Browser.
More Help topics
“Browse to web pages and blog entries” on page 24
Browse to web pages and blog entries
The easiest way to find a web page or blog entry you want to edit is to browse to the page or entry in Contribute like you would browse in any web browser.
To learn other ways to find your web pages or blog entries, see “Open web pages and blog entries without browsing”  on page 25.
Note: (Windows only) If you use Microsoft Internet Explorer as your primary web browser, the Contribute browser inherits preferences from Internet Explorer. To change basic settings, such as fonts, cookies, or plug-ins, change your preferences in Internet Explorer; then start Contribute again.
You can browse to any website or blog entry with Contribute, but you can edit only web pages and blog entries that are in your websites and blogs; that is, websites or blogs that you’ve created connections to (for more information, see “Connect to a blog” on page 4). When you browse to a page that is in your website or a blog entry that is in your blog and that you have permission to edit, the Edit Page button is enabled in the toolbar.
Do one of the following:
•Click links in web pages or blog entries to navigate to other pages.
•Type the web address (URL) of the page in the Address text box, and click Go. You can also press Enter or Return.
•Select View > Go To Web Address, enter the web address (URL), and click OK.
More Help topics
“Open web pages and blog entries without browsing” on page 25
“Edit existing web pages and blog entries” on page 50
Last updated 8/23/2012
Loading...