How it Works
Log In / Sign Up
Buy Points
How it Works
FAQ
Contact Us
Questions and Suggestions
Users
LOGITECH
Loading...
G
G923 XBOX ONE
G930
5
G933
8
G935
3
G940
4
G9X
G9X LASER MOUSE
Gaming G302 Daedalus Prime
Gaming G Pro X
Gaming Software
GC8300
GPro Gaming headset
GPro Gaming Mouse
GPro Hero
2
GRB7
5
GRC
2
Group
3
GROUP 15M EXTENDED CABLE
GX2D
GX3B
H
H110
5
H111
9
H130
3
H150
5
H151
6
H230
H250
3
H330
H340
5
H390
3
H390 USB
H530
H540
3
H550
H555
H570e
3
H600
6
H650e
4
H760
2
H800
3
H820e
2
H880
H 950
Handbuch
Handleiding
Harmony
5
Harmony 1000
5
Harmony 1100
5
Harmony 1100i
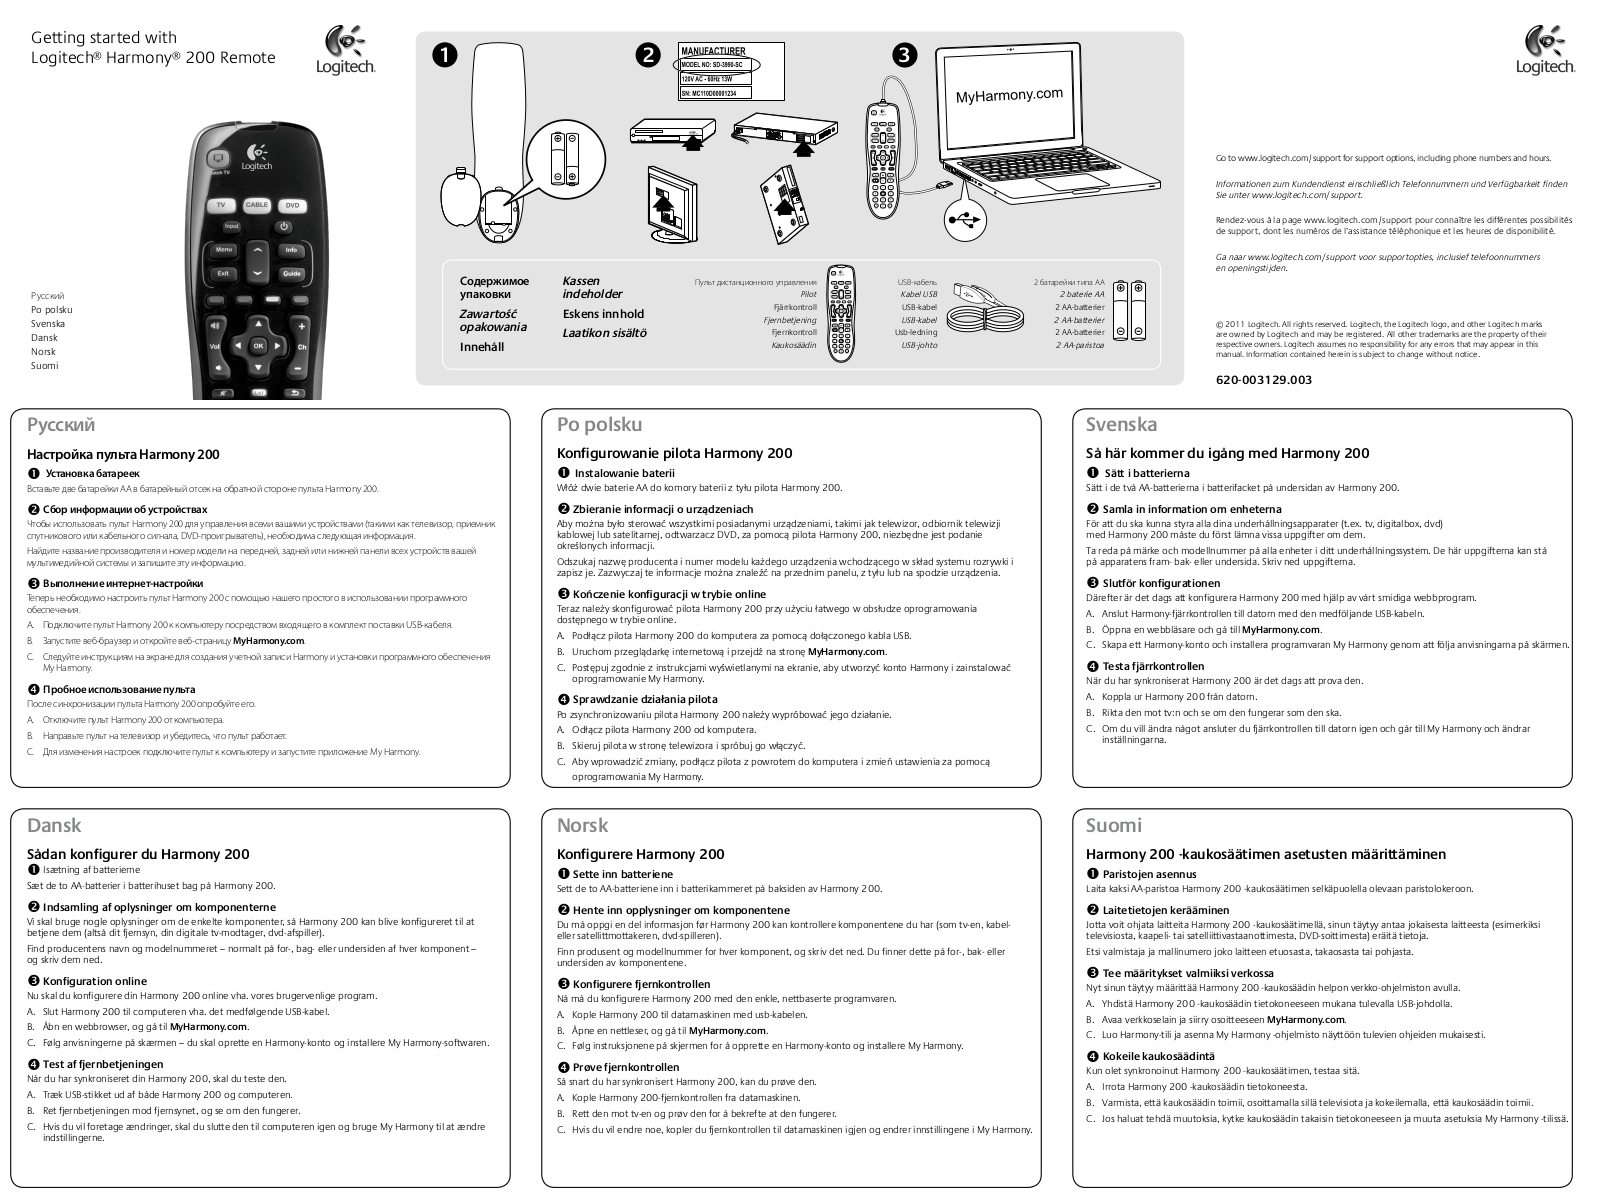
Harmony 200
2
Harmony 300
4
HARMONY 300I
Harmony 350
3
HARMONY 350 CONTROL
Harmony 350 Remote
Harmony 360
Harmony 510
Harmony 515
HARMONY 520
HARMONY 525
14
Harmony 550
3
Harmony 555
14
Harmony 600
7
Harmony 600 Remote
Harmony 610
Harmony 620
HARMONY 628
2
Harmony 650
8
HARMONY 650 REFRESH
Harmony 655
2
Harmony 659
2
HARMONY 665
Harmony 670
3
Harmony 676
2
Harmony 680
2
Harmony 688
Harmony 700
7
HARMONY 700 REFRESH
Harmony 700 Remote
Harmony 720
HARMONY 785
4
Harmony 880
2
HARMONY 885
5
HARMONY 885 VERSION 1.1
HARMONY 890
3
Harmony 890 Pro
HARMONY 895
5
Harmony 900
5
Harmony 900 RF
2
HARMONY 900 RF SYSTEM
HARMONY 950
2
Harmony Companion
HARMONY ELITE
4
HARMONY EXPRESS
Harmony for Xbox 360
HARMONY H600
Harmony Home Control
Harmony Hub
6
Harmony Link
3
Harmony One
10
Loading...
Loading...
Nothing found
Harmony 200
User guide [hu]
1 pgs
135.22 Kb
0
User Manual [fr]
2 pgs
1.44 Mb
0
Table of contents
Loading...
LOGITECH Harmony 200 User Manual [fr]
...
LOGITECH User Manual [fr]
Download
Specifications and Main Features
Frequently Asked Questions
User Manual
Download
Page 1
Page 2
Loading...
+
hidden pages
Unhide
You need points to download manuals.
1 point = 1 manual.
You can buy points or you can get point for every manual you upload.
Buy points
Upload your manuals