

Page 1
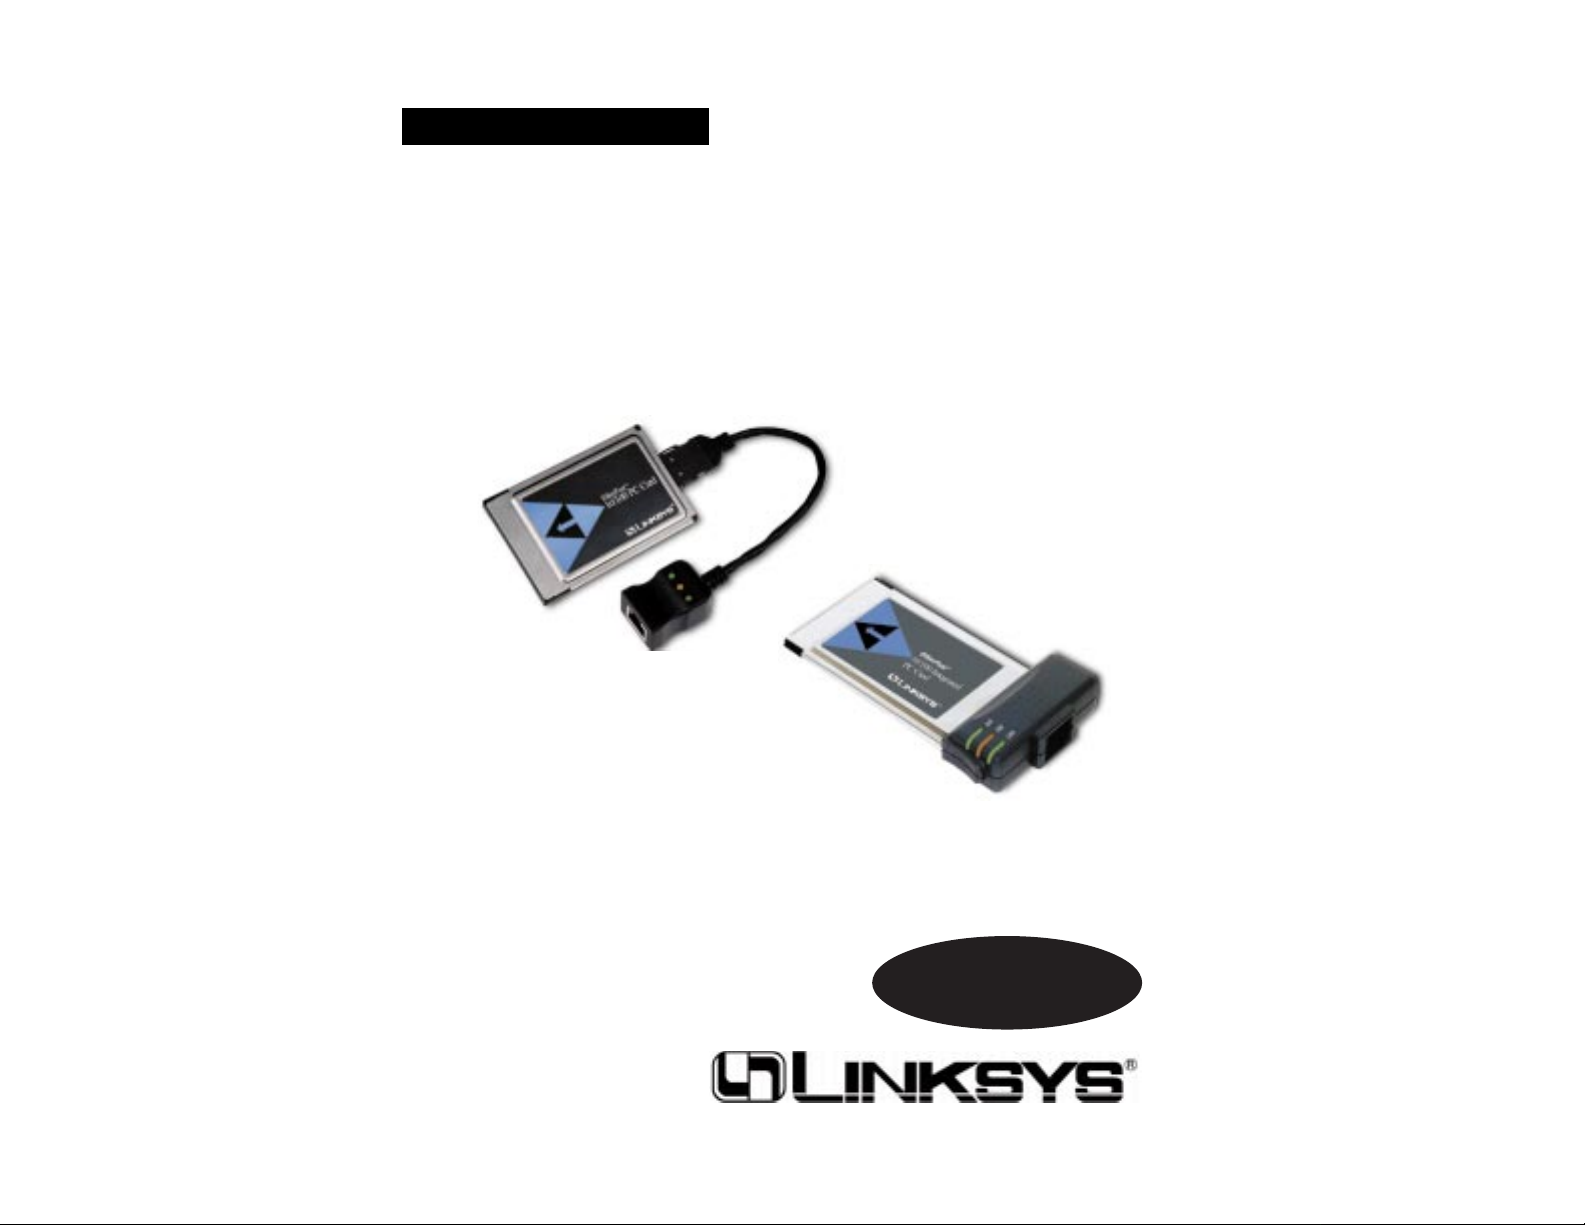
Instant EtherFast®Series
EtherFast
®
10/100
PC Cards
Use this guide to install:
EtherFast 10/100
PC Card (PCMPC100 v3)
EtherFast 10/100 Integrated
PC Card (PCM100 v2)
User Guide
Page 2

COPYRIGHT & TRADEMARKS
Copyright © 2001 Linksys, All Rights Reserved. EtherFast is a registered trademark of
Linksys. Microsoft, Windows, and the Windows logo are registered trademarks of
Microsoft Corporation. All other trademarks and brand names are the property of their
respective proprietors.
LIMITED WARRANTY
Linksys guarantees that every EtherFast 10/100 PC Card is free from physical defects in
material and workmanship under normal use for FIVE years from the date of purchase. If
the product proves defective during this warranty period, call Linksys Customer Support
in order to obtain a Return Authorization Number. BE SURE TO HAVE YOUR PROOF OF
PURCHASE ON HAND WHEN CALLING. RETURN REQUESTS CANNOT BE
PROCESSED WITHOUT PROOF OF PURCHASE. When returning a product, mark the
Return Authorization Number clearly on the outside of the package and include your
original proof of purchase.. All customers located outside of the United States of
America and Canada shall be held responsible for shipping and handling charges.
IN NO EVENT SHALL LINKSYS’ LIABILITY EXCEED THE PRICE PAID FOR THE PRODUCT FROM DIRECT, INDIRECT, SPECIAL, INCIDENTAL, OR CONSEQUENTIAL DAMAGES RESULTING FROM THE USE OF THE PRODUCT, ITS ACCOMPANYING SOFTWARE, OR ITS DOCUMENTATION. Linksys makes no warranty or representation,
expressed, implied, or statutory , with r espect to its pr oducts or the contents or use of this
documentation and all accompanying software, and specifically disclaims its quality,
performance, merchantability, or fitness for any particular purpose. Linksys reserves the
right to revise or update its products, software, or documentation without obligation to
notify any individual or entity. Please direct all inquiries to:
Linksys P.O. Box 18558, Irvine, CA 92623.
FCC STATEMENT
The EtherFast 10/100 PC Cards have been tested and found to comply with the limits for
a Class B digital device, pursuant to Part 15 of the FCC Rules. These limits are designed
to provide reasonable protection against harmful interference in a residential installation.
This equipment generates, uses, and can radiate radio frequency energy and, if not
installed and used according to the instructions, may cause harmful interference to radio
communications. However , there is no guarantee that interference will not occur in a particular installation. If this equipment does cause harmful interference to radio or television
reception, which is found by turning the equipment off and on, the user is encouraged to
try to correct the interference by one or more of the following measures:
• Reorient or relocate the receiving antenna
• Increase the separation between the equipment or device
• Connect the equipment to an outlet other than the receiver’s
• Consult a dealer or an experienced radio/TV technician for assistance
UG-PCMPC100v3-010509A-AC
Page 3

Instant EtherFast®Series EtherFast®10/100 PC Cards
Introduction
Welcome to the world of convenient and flexib le notebook PC networking! The
EtherFast 10/100 PC Cards allow you to connect with virtually any Ethernetbased network or Internet connection including: Cable modem, DSL modem,
and more. Sharing files and printers has never been easier, and their single-slot
designs are perfect for slim notebooks--freeing up your additional slots for use
with other accessories.
Whether you choose the convenience of the standard PC card, with its removable media coupler, or the Integrated PC Card and it’s all-in-one design, you’ll
get fast file transfers, hot-swap capability*, and bus mastering. Compatible with
PCMCIA-equipped notebook PCs, the 10/100 PC Cards offer Minimal voltage
consumption and an automatic sleep mode to help conserve your notebook
PC’s battery life.
The 10/100 PC Cards also automatically adjust their speed to optimize data
trafficking. Virtually all brand name PCs and major operating systems, including Windows 95, 98, 2000, Millennium, and NT are supported. Convenience
and Flexibility--that’s what makes the EtherFast 10/100 PC Cards the ultimate
networking solution for your notebook PC.Package Contents for the Eth
*
When used with Plug-and-Play Operating Systems
Table of Contents
Introduction 1
The Linksys EtherFast 10/100 Cards 1
About Fast Ethernet 2
Package Contents 3
Getting to Know the EtherFast 10/100 PC Cards 4
LEDS / The RJ-45 Port 4
Installing the EtherFast 10/100 PC Cards 5
Getting the Right Cable / Installing the PC Card and Cabling 5
About the Software / Choosing I/O and IRQ Values 6
Socket and Card Services 7
How to Use the 10/100 PC Card’s Enabler for DOS-Based Network 8
Network Driver Setup 9
Windows 95 Installation and Setup 10
Windows 98 Installation and Setup 16
Windows Millennium Installation and Setup 22
Windows NT 4.0 Installation and Setup 25
Windows 2000 Installation and Setup 35
Troubleshooting 39
Appendix 42
Sharing Your Files and Printers 42
Novell NetWare 3.x Client Setup for Windows 98 or 95 44
Windows 98 or 95 Client for Windows NT 45
Starting Over in Windows 95,98, or 2000 46
Manually Installing the Network Components in
Windows 95 and Windows 98 51
Linux, Open Source, and Beta Operating Systems 52
Twisted-Pair Cabling 53
Crimping Your Own Network Cables 54
Specifications 55
Linksys Warranty Information 57
1
The Linksys EtherFast 10/100 PC Cards
Page 4
EtherFast®10/100 PC Cards
3
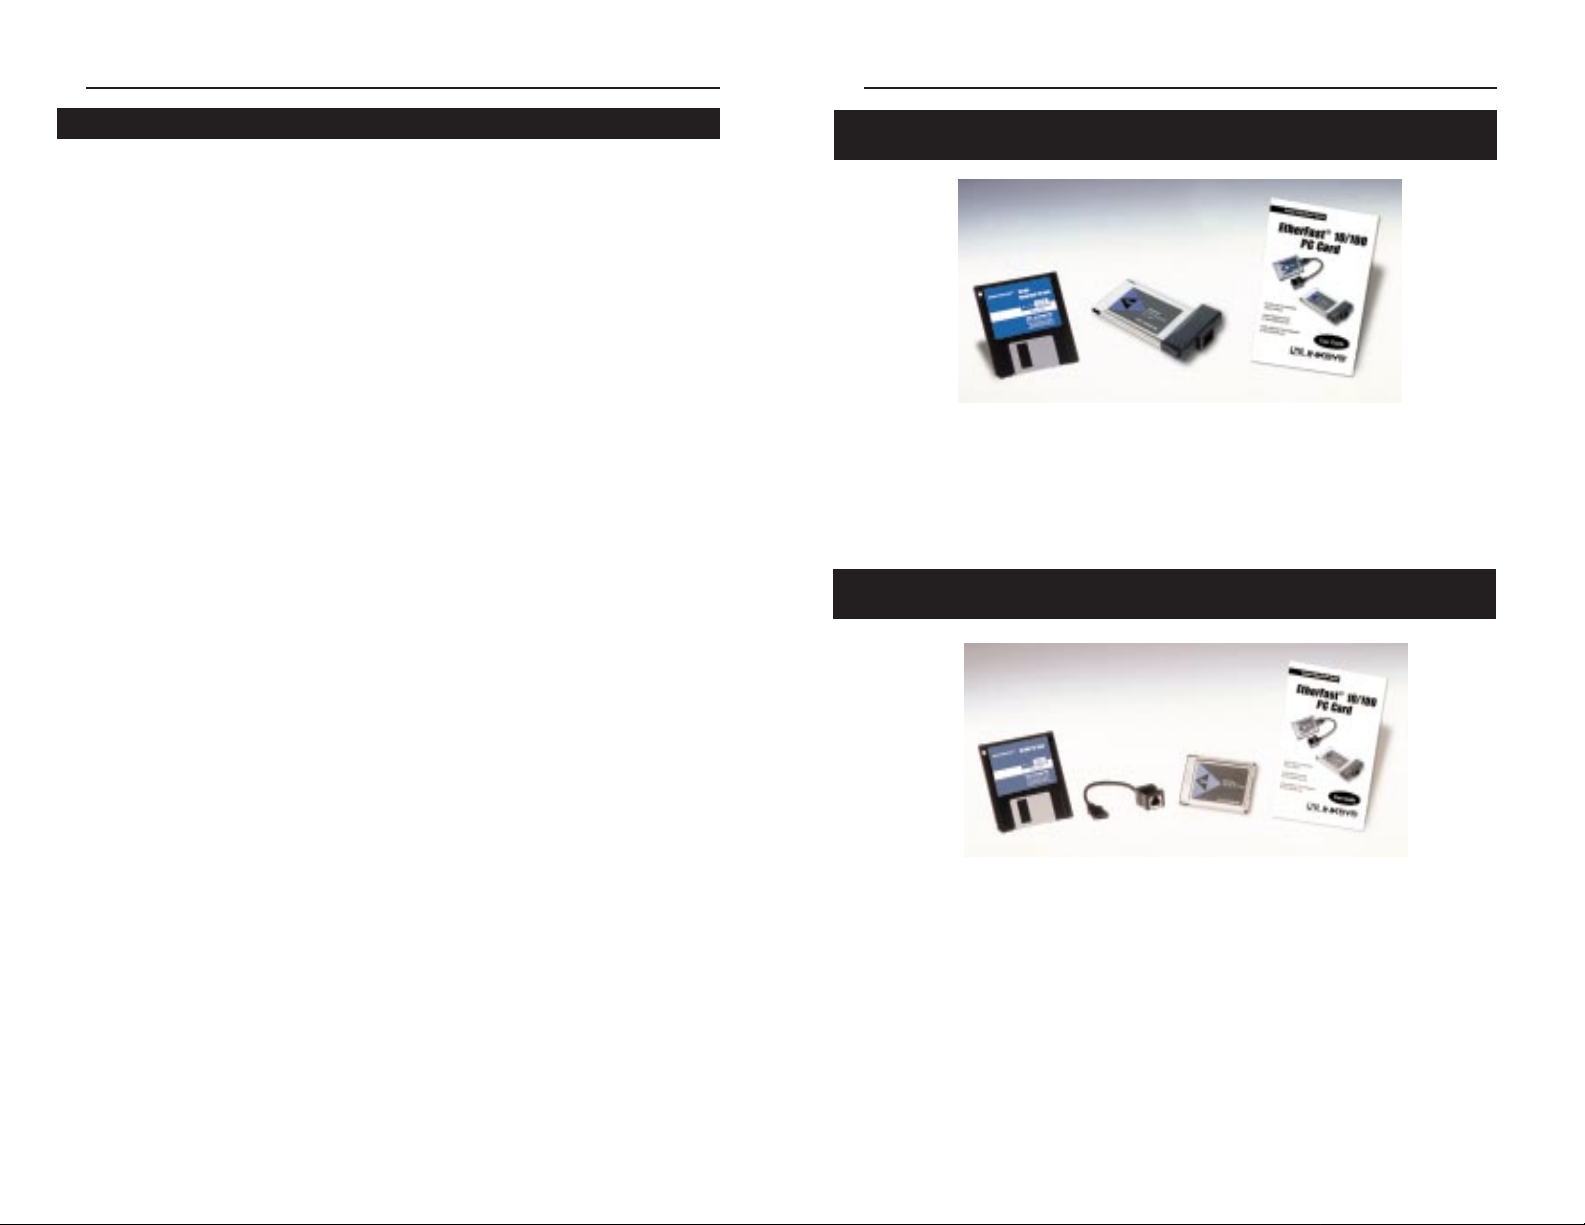
• EtherFast 10/100 PC Card
• One Driver Disk
• One User Guide and Registration Card
• EtherFast 10/100 PC Card
• One Dongle Cord
• One Driver Disk
• One User Guide and Registration Card
Package Contents for the EtherFast
10/100 Integrated PC Card (PCM100 V2)
Instant EtherFast®Series
In recent years, Fast Ethernet has emerged as the fastest growing network
topology around. Operating at an incredible 100 million bits per second
(100Mbps), and sometimes referred to as 100BaseTX, Fast Ethernet is more
than fast enough to handle the latest speed-dependent applications like video,
multimedia, and Internet connectivity.
Fast Ethernet is ten times faster than regular Ethernet networks. Also known as
10BaseT, regular Ethernet networks typically run at 10Mbps.
Unfortunately because of their speed and other technological differences,
Ethernet and Fast Ethernet cannot be readily mixed together in most cases. A
10BaseT network adapter, for example, cannot be attached directly to a Fast
Ethernet network. In environments where 10BaseT and Fast Ethernet need to
be mixed together - in migration scenarios, for example, where file servers are
moved to 100Mbps speeds for better performance - a switch or a dual-speed
hub can be used to connect network segments of disparate speeds together.
The EtherFast 10/100 PC Cards will run with both 10BaseT and 100BaseTX
networks without any special settings, allowing you to plug into virtually any
network while at the office or on the road, regardless of speed. When a network
cable is plugged in, the EtherFast Card automatically determines the speed,
duplex, and polarity of the arriving network packets and adjusts itself accordingly. Also known in the industry as NWAY, this "live wire" ability also allows
network cables to be s wapped*with the EtherFast Card w hile it's turned on--the
card will automatically reconnect itself to the network as soon as a new cable
is plugged in.
*
When used with Plug-and-Play Operating Systems
2
About Fast Ethernet
Package Contents for the EtherFast
10/100 PC Card (PCMPC100 V3)
Page 5

EtherFast®10/100 PC Cards
Installing the EtherFast
10/100 PC Cards
Like most network devices, the EtherFast Card must be connected to a
10BaseT or Fast Ethernet hub with the right kind of twisted-pair network
cabling. Although twisted-pair is available in different styles and grades, this
installation requires a category 5 network cable with RJ-45 connectors, not
exceeding 100 meters (328) feet in length. Cabling can be obtained at most
computer stores. If you are using Fast Ethernet, Category 5 (or better) cable
must be used. For more information about Fast Ether net cabling, including
information on how to crimp your own cables, go to the Crimping Y our Own
Network Cables section of the Appendix.
1. Turn off your PC.
2. If you are installing the standard PC Card, connect the flat end of the
media coupler to the EtherFast 10/100 PC Card. It should lock firmly into
place.
3. Locate your PC's PCMCIA slot (usually located on the side). Slide the
EtherFast 10/100 PC Card into the slot with the triangle on the card facing
up. The 128-pin end goes in first. Make sure that the card is seated snugly
in place.
4. Attach one end of a UTP category 5 network cable into the RJ-45 port on
the end of the EtherFast Card or media coupler. Then plug the other end
of the cable into a Fast Ethernet or 10BaseT network device. The
EtherFast 10/100 PC Card will automatically sense the type, polarity, and
speed of your network's cabling and adjust itself accordingly.
5
Instant EtherFast®Series
4
Installing the PC Card and Cabling
Getting the Right Cable
NNoottee::
If the PC Card does not fit all the way into the slot, check your
PC’s documentation to be sure that your laptop has a PCMCIA slot.
Getting to Know the EtherFast
10/100 PC Cards
Link The LED will illuminate when the card is sucessfully
connected to a network.
Act The Activity LED will flicker when data is being transmit
ted or received over the network.
10/100 This LED will be illuminated when the card is operating at
100Mbps; dormant when operating at 10Mbps.
The RJ-45 Port is where you will connect your Category 3 or 5 network
cabling. Refer to the section on Twisted Pair Cabling for detailed information
on network cabling.
LEDs
The RJ-45 Port
Page 6

EtherFast®10/100 PC Cards
If you can't seem to find an I/O address or inter rupt value to use, contact your
PC's manufacturer to determine which values are currently available for use
with the EtherFast 10/100 PC Card.
Socket and card services allow your computer to recognize a PCMCIA card
when it is inserted into your PC's PCMCIA slot. Your PC will need some kind
of services installed in order to use the EtherFast 10/100 PCMCIA PC Card.
Most PCMCIA-equipped PCs have socket and card services pre-installed by
the computer's manufacturer. If you are upgrading your PC by adding a new
PCMCIA slot, then you need to upgrade your services as well. You have two
choices:
• Use Built-in Services in the Driver
If your computer doesn't have services (or you don't know what kind are
installed), you may be able to use the enabler built into the driver of the PCMCIA Card for DOS or NT computers. The enabler tries to automatically get the
card recognized by the laptop and enable the slot to work with the 10/100 PC
Card only.
• Contact Your PC's Manufacturer
If your computer doesn't have services, and the generic services contained in
the 10/100 PC Card's driver don't seem to work with your PC, contact your
computer's manufacturer to find out what kind of services your computer uses,
or how to get compatible services if your computer doesn't have them.
7
Instant EtherFast®Series
The EtherFast 10/100 PC Card requires two different kinds of software in order
to work:
Socket and card services are special software drivers that allow a PC card to
communicate with your computer . Your computer might have services that were
installed by the manufacturer, making your PC compatible with a wide range
of CardBus and PCMCIA cards. If your computer doesn't have services, or if
you're not sure how to get yours working, the EtherFast 10/100 PC Card comes
with a generic enabler you can use to get the card up and running in your DOS
or Windows NT computer's card slot. Card services are always loaded into
memory each time your PC is started up, and always before your network drivers are loaded.
Network driv ers allow the card to communicate with your network at large. The
EtherFast 10/100 PC Card disk includes drivers for many network operating
systems, including Windows 95, 98, 2000, Millennium, NT, Windows for
Workg roups, NetWare, packet driver networks, and more. When the EtherFast
10/100 PC Card is up and running, it will talk to your PC's card slot, which will
talk to the Card services, which will finally talk to the network drivers and the
network at large.
Just like modems, mice, CD-ROMs, hard drives, and other devices, the
EtherFast 10/100 PC Card requires an I/O address and an IRQ value.
An I/O base address is the Input/Output area of your computer's Input/Output
range that the EtherFast 10/100 PC Card will use for transferring data to and
from a network. The I/O v alue you assign to the EtherFast 10/100 PC Card must
not be in use by any other devices. I/O values are always expressed in hexadecimal values. A hexadecimal value is basically a number that serves as an
abbreviation of a larger number.
Also known as an interrupt, an IRQ is a signal that notif ies the PC when certain input or output events have occurred and where the attention of the PC is
needed. IRQs are expressed in numerical values. Your computer’s system BIOS
will automatically assign an IRQ value.
6
NNoottee::
Plug-and-Play operating systems like Windows 98, Windows 95
OSR2, (also known as Windows 95 Version B) Millennium , and 2000
will usually assign available I/O and IRQ values to the EtherFast 10/100
PC Card automatically, making the card's installation quick and easy.
Socket and Card Services
NNoottee::
Plug-and-Play operating systems like Windows 95,98, Millennium, and
2000 have socket and card services built into the operating system. You
don’t need to install them if you are using these Operating Systems.
Choosing I/O and IRQ Values
About the Software
Page 7

EtherFast®10/100 PC Cards
Follow these instr uctions carefully. You can view or print the setup directions
from your favorite word processor. For the operating systems not covered in
this user guide, insert the program disk into your PC. The supported Operating
Systems not covered in this User Guide have subdirectories that contain “read
me” instructions. These DOS-based Operating Systems are listed below.
A:\NETWARE NetWare Client (DOS ODI)
NetWare Lite
Personal NetWare
Sun PCNFS (with ODI drivers)
A:\PKTDRV Packet Driver
A:\WFW311 Windows for Workgroups 3.11
A:\NDIS2 NDIS support
Lantastic
Sun PCNFS (with NDIS drivers)
Microsoft LAN Manager
9
Instant EtherFast®Series
The software disk provided with the EtherFast 10/100 PC Card includes generic
socket and card services built into the driver that can be used to enable the EtherFast
10/100 PC Card. The card's hardware-specific client enabler will only enable the
EtherFast 10/100 PC Card. If you want to use other PCMCIA cards in the future,
you will need to obtain additional services for those card(s) before you'll be able to
use them.
When enabler loads itself into memory, it tries to choose IRQ and I/O base
address values for the EtherFast 10/100 PC Card not already in use.
Enabler also checks to see if any other service packages are loaded. If there are
any services already present in memory, enabler will attempt to load itself
without disturbing them.
Open up your config.sys f ile in a text editor. Scroll through the file. Find the
line that reads (or is similar to) the following:
DEVICE=C:\EMM386.EXE
It will probably be located near the beginning of the file. You will need to add
a command to the end of the EMM386 command in order to reserve an area of
memory for the 10/100 PC Card's client enabler to use.
Add the following command to the end of the EMM386 line:
NOEMS X=D000-D3FF
so that the new EMM386 line now looks something like this (it may vary
slightly):
DEVICE=C:\EMM386.EXE NOEMS X=D000-D3FF
If there are already commands on the EMM386 line, try not to disturb them
when you add the NOEMS X=D000-D3FF
8
Network Driver Setup
How to Use the 10/100 PC Card’s
Enabler for DOS-Based Network Operating Systems
NNoottee
: Plug-and-Play operating systems such as
Windows 95, 98, 2000, and Millennium do not
require the use of the enabler or memory exclusion.
NNoottee
: When loading the enabler, it must
be saved in the
autoexec.dat
.
Page 8

EtherFast®10/100 PC Cards
2. While the Update Device Driver Wizard window is visible, put the Linksys
EtherFast 10/100 PC Card Driver Disk into the floppy drive and click the
Next button.
3. Windows will begin searching y our floppy drive for the correct device drivers. A message will appear stating that Windows found the driver for the
Linksys EtherFast 10/100 PC Card (PCMPC100 v3). Click the Finish but-
ton.
If W indo ws cannot find the driver for the card , refer to the Troubleshooting
section.
4. Windows 95 will begin copying a number of files onto your computer.
If Windows asks you to supply your original Windows 95 installation or
setup files, inser t your Windows CD-ROM or disks as needed, and direct
Windows 95 to the proper location, (e.g., “D:\win95”,
“C:\windows\options\cabs”). Click the OK button.
11
Instant EtherFast®Series
10
Windows 95 Installation and Setup
Follow the instructions below to install your EtherFast 10/100 PC Card on
Microsoft W indo ws 95. After installing the EtherFast 10/100 PC Card hardware
in your computer, follow the instr uctions below to install the EtherFast 10/100
PC Card's Windows 95 network driver from the card's driver disk.
The standard 16-bit PC Card standard is a Plug and-Play network adapter that
is designed to be automatically detected by Windows 95 as soon as you insert
it into your computer.
There are currently three versions of Windows 95:
· Windows 95 (the first release)
· Windows 95 version A
· Windows 95 version B, also called OSR2
Please keep in mind that the installation procedure for the network driver will
vary slightly depending on the edition of Windows 95 OSR2 you are using and
your current system conf iguration.
To install the network driver, start up your computer.
1. Windows 95 will automatically detect the presence of the EtherFast 10/100
PC Card in your computer. If Windows 95 goes directly to the windows
desktop and does not display the Update Device Driver window, refer to
the Troubleshooting section.
Overview
NNoottee::
Screen shots used in this Installation and Setup section are
from installation of the standard EtherFast 10/100 PC Card v3
(PCMPC100 v3). If you are installing the EtherFast 10/100
Integrated PC Card v3 (PCM100 v2), the installation process will
be unchanged, however, the product name will be different.
Page 9
EtherFast®10/100 PC Cards
If other components are
listed, this is fine. However,
if an
y components are missing, you'll need to install
them manually. Refer to
Manually Installing the
Network Components sec-
tion.
If you need to install the
TCP/IP protocol, refer to
your system administrator
or your Windows 95 documentation. Linksys does
not provide technical support for the configuration
or troubleshooting of the
TCP/IP protocol.
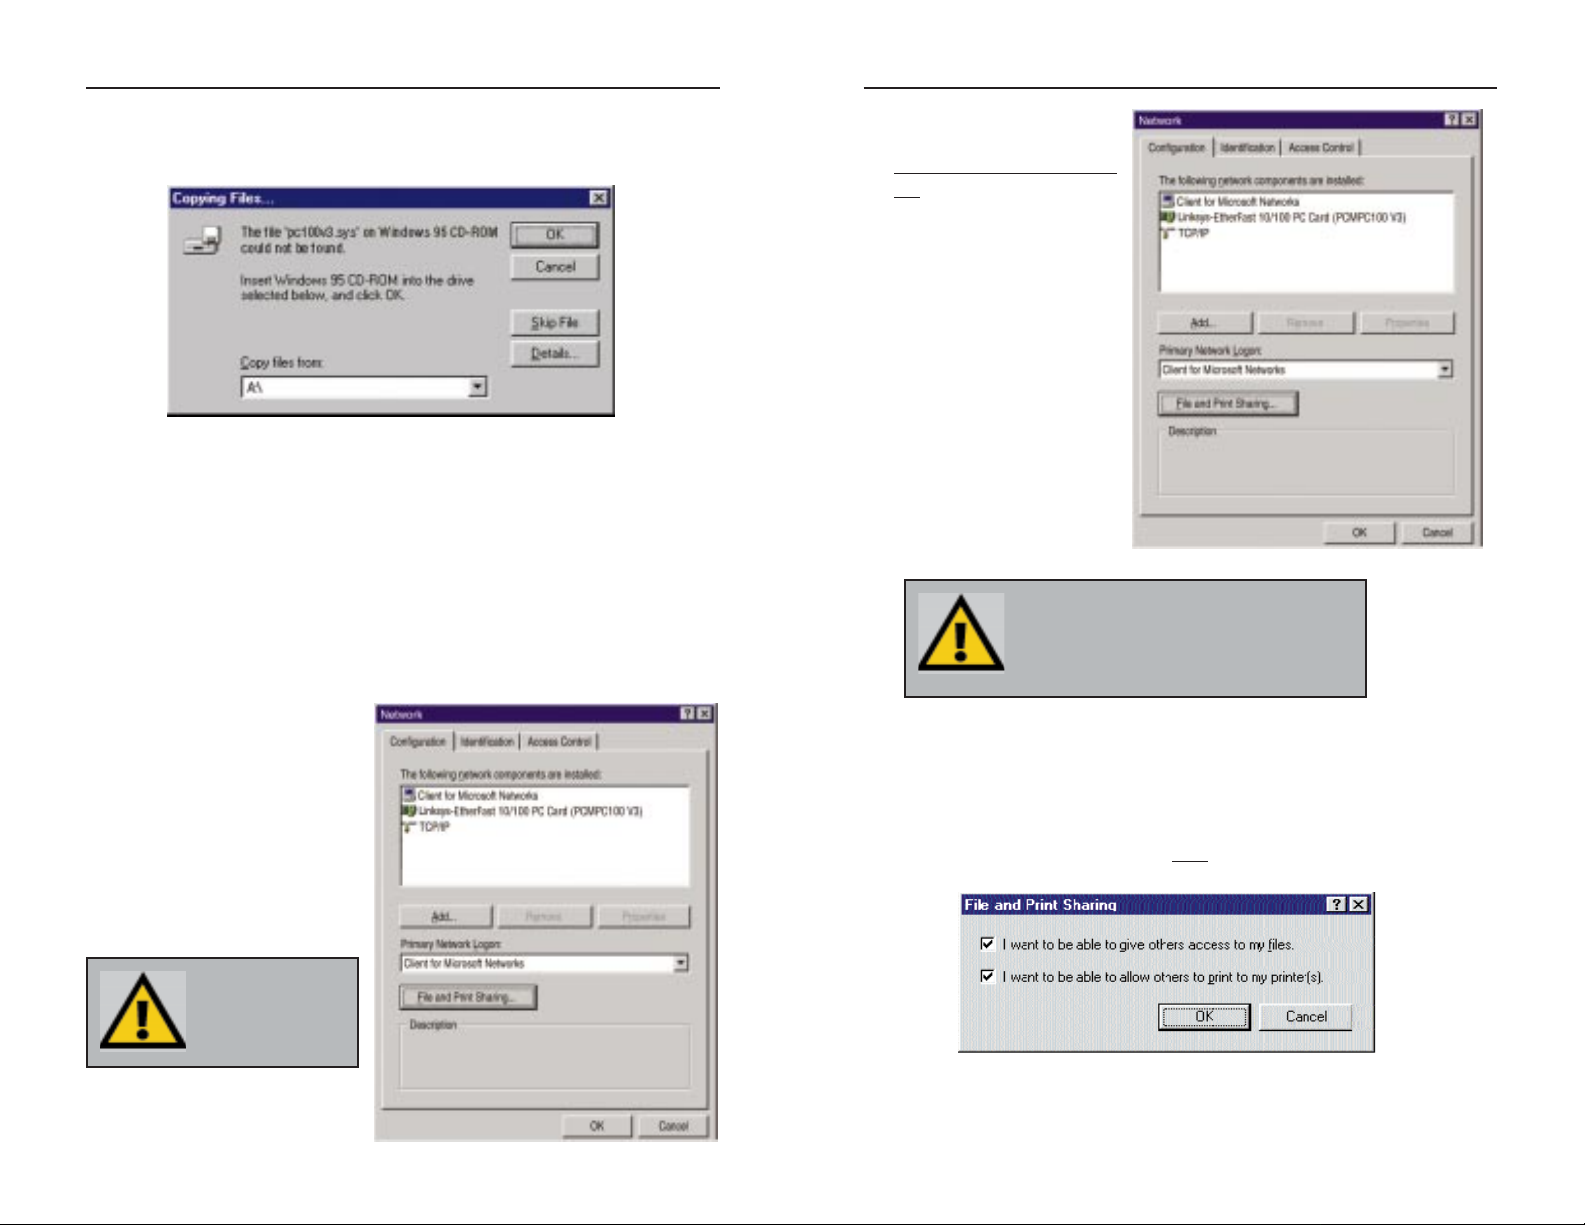
7. In the Primary Network Logon box, make sure that Client for Microsoft
Networksis selected from the pull down menu. When you reboot, you will
be prompted for a user name and password for Microsoft Networking.
8. To enable File and Printer Sharing, click on the File and Print Sharing button, then put a check mark next to both
boxes in the window. Click the OK
button.
13
Instant EtherFast®Series
If Windows asks you to supply a file containing the letters “pc100”, type
“a:\” in the box that pops up as shown below. Click the OK button.
During the installation, Windows may ask you for a computer and workgroup name. If so, refer to steps 9 and 10 in this section. Otherwise, continue with the installation.
Windows will finish copying all of the necessary files to your system.
When asked if you want to restart your computer, click the No button.
Once you are back at the Windows 95 desktop, click on the Start button.
Click on Settings, then Control Panel.
5. Double-click on the Network icon. The Network window will appear. Click
on the Configuration tab.
6. Make sure that the following
network components are
installed:
Client for Microsoft Networks
Linksys EtherFast 10/100 PC
Card (PCMPC100 V3)
TCP/IP
12
NNoottee::
Linksys does
not provide technical
support for TCP/IP
configuration or troubleshooting.
NNoottee::
Linksys does not provide technical sup-
port for TCP/IP configuration or troubleshooting.
Page 10
EtherFast®10/100 PC Cards
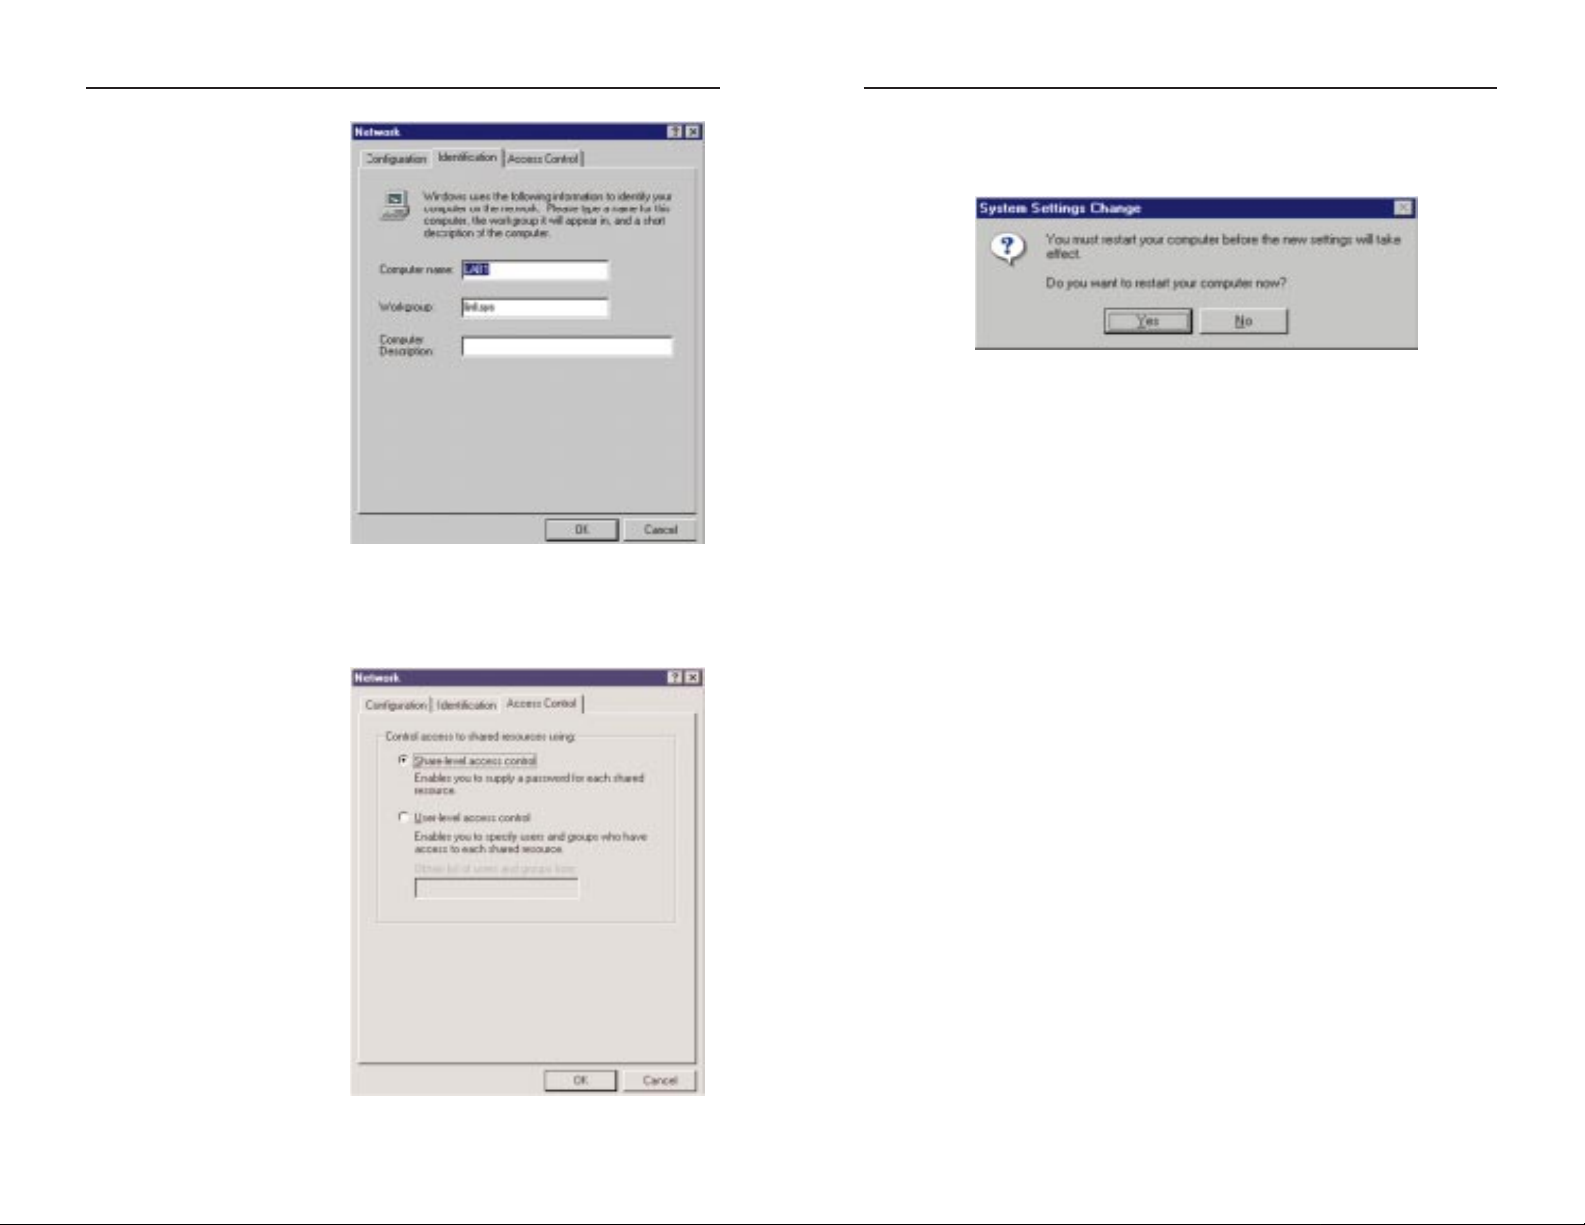
14. Once Windows is done copying the necessary files, the System Settings
Change window appears. Remove all disks from your computer and click
on theYes button to restart your PC.
If you don't see this window, simply close down Windows 95 and restart
your computer by clicking on the Start button, then Shut Down, select
Restart the Computer, then click theYes button. The installation is complete. Remember to remove the Driver Disk from the floppy drive.
15. Once the computer has restarted, look at the EtherFast Card's LEDs. If your
cabling is properly attached and the network is detected, the green Link
light will be on, and the Activity (ACT) light will be flickering or solid.
16. A Logon window will appear. Make up a username and password and click
OK. Do not click the Cancel or Esc button, or you won't be able to log onto
the network. If the logon does not appear or if it does not allow you to log
on, refer to the Troubleshooting section.
17. Once you are at the Windows 95 desktop, double-click on the Network
Neighborhood icon. You should see an icon for the Entire Network,
and/or the names of the other PCs on the network. In order to see your other
computers and shared resources in Network Neighborhood, you need to
enable File and Printer Sharing. For help, refer to Sharing Your Files and
Printers in the Appendix .
If you don't see anything at all, press the F5 key on your keyboard a few
times to refresh the screen.
If you only see your computer in Network Neighborhood, if you only see
computers that are running the same operating system as you and you don’t
see any others, or if you see all computers on the network except yours, and
the other PCs can't see your computer, refer to the T roub leshooting section.
15
Instant EtherFast®Series
9. Click on the Identification
tab. Type the name of your
computer in the “Computer
name” box. Make up a
name that is unique from
all the other computers'
names on the network.
(e.g., Dino, Alpha, etc.)
10.Type the name of your
workgroup in the
“Workgroup” box. The
name you type should be
the same workgroup name
in use by all of the other
PCs on the network. Make
sure to use the same case
that is used on your other
computers.
11. Enter a description of your computer in the “Computer Description” box.
This box is optional.
12. Optional: Click on the
Access Control tab. Make
sure that Shared-level
access control is selected. If
the setting is on User-Level
access control and you can’t
change it, refer to the
Troubleshooting section.
13. Click on the OK button. If
your system asks you for
your Windows 95 CDROM or the location of the
95 installation files, direct
Windows to the appropriate
location, (e.g., “D:\win95”,
“C:\windows\options\cabs”).
14
Page 11

EtherFast®10/100 PC Cards
2. While the Update Device Driver Wizard window is visible, put the
EtherFast 10/100 PC Card Driver Disk into the floppy drive and click the
Next button. A window will appear and ask What do you want Windows to
do?
3. Select Search for the best driver for your device (Recommended). Click the
Next button.
4. A window will appear asking where you would like Windows 98 to search
for the driver . Select "Specify a location" and enter A:\W in98into the dropdown box. Click Next to continue.
17
Instant EtherFast®Series
Windows 98 Installation and Setup
After installing the EtherFast 10/100 PC Card hardware in your computer, follow these instructions to install the EtherFast 10/100 PC Card's Windows 98
network driver from the card's driver disk.
Please keep in mind that the installation procedure for the network driver will
vary slightly depending on the version of Windows 98 you are using and your
current system conf iguration.
To install the network driver, Start up your computer.
1. The Add New Hardware Wizard window will appear. Click the Next button.
If Windows 98 goes directly to the windows desktop and does not display
this window, refer to the Troubleshooting section.
16
Overview
NNoottee::
Screen shots used in this Installation and Setup section are
from installation of the standard EtherFast 10/100 PC Card
(PCMPC100 v3). If you are installing the EtherFast 10/100
Integrated PC Card (PCM100 v2), the installation process will be
unchanged, however, the product name will be different.
Installing the PC Card’s Driver
Page 12

EtherFast®10/100 PC Cards
When asked if you want to restart your computer, click No. Once you are
back at the Windows 98 desktop, click on the Start button, click Settings,
then Control Panel.
7. Double-click on the Network icon. The Network window will appear. Click
on the Configuration tab.
8. Make sure that the following
network components are
installed:
Client for Microsoft Networks
Linksys EtherFast 10/100 PC
Card (PCMPC100 V3)
TCP/IP
There may be other components
listed in addition to the ones
shown above. This is fine.
How e v er, if an
y components listed above are missing, y ou'll need
to install them manually. Refer
to the Manually Installing the Network Components in Windows 95 and
Windows 98 section of the Appendix.
9. In the Primary Network Logon box, select Client for Microsoft Networks.
10. To enable File and Printer Sharing, click on the File and Print Sharing but-
ton, then put a check mark next to both boxes in the window. Click OK.
19
Instant EtherFast®Series
5. Windows will begin searching your drives for the correct device drivers.
Once Windows has located the driver, the window below will appear indicating that it located the Linksys EtherFast 10/100 PC Card v3
(PCMPC100 v3). Click Next.
‘
If Windows cannot find the driver for the card, refer to the Troubleshooting
section.
6. Windows 98 will begin copying a number of files onto your computer. If
Windows asks you to supply y our original Windows 98 installation or setup
files, insert the CD-ROM or disks as needed, and direct Windows 98 to the
proper location, (e.g., C:\windows\options\cabs, D:\win98, or the appropri-
ate drive letter of your CD-ROM drive). If Windows asks you to supply a
driver that contains the letters “PC100”, type “a:\win98” in the box that pops
up. Click OK.
During the installation, Windows may ask you for a computer and workgroup name. If so, refer to steps 11-13 in this section. Otherwise, continue
with the installation. Windows will finish copying all of the necessary files
to your system. Click Finish.
18
NNoottee
: If you need to install the TCP/IP Protocol, contact your system
administrator or refer to the Windows 98 documentation. Linksys
does not provide technical support for the configuration or troubleshooting of the TCP/IP protocol.
NNoottee::
DO NOT
press
SSkkiipp
or
CCaanncceell
at any
time during the
installation.
Doing so will
prevent your
driver from
being properly
installed on your
PC.
Page 13

EtherFast®10/100 PC Cards
16. Once Windows is done copying the necessary files, the System Settings
Change window appears. Remove all disks from your computer and click
on Yes to restart your PC. If you don't see this window, simply restart your
computer. The installation is complete. Remember to remove the Driver
Disk from the floppy drive.
If you don't see this window, simply close down Windows 98 and restart
your computer by clicking on the Start button, then Shut Down, select
Restart the Computer, then click Yes. The installation is complete.
Remember to remove the Driver Disk from the floppy drive.
17. Once the computer has restarted, look at the EtherFast Card's LEDs. If your
cabling is properly attached and the network is detected, the green Link
light will be on, and the Activity (ACT) light will be flickering or solid.
18. Once Windows is up, a Logon window will appear requiring you to enter a
username and password. Make up a username and password, enter them,
and click OK. Do not click the Cancel or Esc button, or you won't be able
to log onto the network. If the logon does not appear or if it does not allow
you to log on, refer to the Troubleshooting section.
19. Once you are at the Windows 98 desktop, double-click on the Network
Neighborhood icon. You should see an icon for Entire Network, and the
names of the other PCs on the network. In order to see other computers and
shared resources in Network Neighborhood, you need to enable File and
Printer Sharing (refer to the section titled such).
If you don't see anything at all, press the F5 key on your keyboard a few times
to refresh the screen.
If you only see your computer in Network Neighborhood, refer to the
Troubleshooting section.
If you see all computers on the network except yours, and the other PCs can't
see your computer, refer to the Troubleshooting section.
If you only see computers that are running the same operating system as you
and you don’t see any others, refer to the Troubleshooting section.
21
Instant EtherFast®Series
11. Click on the
Identification tab. Type
the name of your computer in the “Computer
name” box. Make up a
name that is unique from
all the other computers'
names on the network
(e.g., Dino, Titus, etc.).
12. Type the name of
your workgroup in the
“Workgroup” box. The
name you type should be
the same workgroup
name in use by all of the
other PCs on the network. Make sure that the
case and spelling of the
workgroup matches what
is used on your other
computers.
13. Enter a description of your computer in the Computer Description box. This
box is optional.
14. Optional: Click on the Access Control tab. Make sure that Shared-level
access control is selected. If the setting is on User-Level access control and
you can’t change it, skip to Troubleshooting problem 5.
15. Click on the OK button. Your system may or may not ask you for your
Windows 98 CD-ROM or the location of the 98 installation files. Direct
Windows to the appropriate location, (e.g., “D:\win98”,
“C:\windows\options\cabs”).
20
Page 14

EtherFast®10/100 PC Cards
23
Instant EtherFast®Series
22
Windows Millennium Installation
and Setup
The instructions provided in this section will help you to install the EtherFast
10/100 PC Card on Microsoft Windows Millennium. After installing the
EtherFast 10/100 PC Card hardware in your computer, follow these instructions to install the EtherFast 10/100 PC Card's Windows Millenium network
driver from the card's driver disk.
To install the network driver, Start up your computer.
1. Start your computer. Windows will automatically detect the presence of the
EtherFast 10/100 PC Card in y our computer and displa y the Update Device
Driver Wizar d window.
2. Insert the EtherFast 10/100 PC Card Driver Disk into your Notebook PC’s
floppy disk drive and click Next.
3. Select the Specify the location of the driver (Advanced) option. Click Next.
Installing the PC Card’s Driver
NNoottee::
Screen shots used in this Installation and Setup section are
from installation of the standard EtherFast 10/100 PC Card
(PCMPC100 v3). If you are installing the EtherFast 10/100
Integrated PC Card (PCM100 v2), the installation process will be
unchanged, however, the product name will be different.
4. If you are asked to supply a path for the driver, type A:\WINME in the
drop-down box that appears and click Next.
5. Once Windows has located the driver, a message will appear that reads
Windows is now ready to install the Linksys EtherFast 10/100 PC Card V3
driver. Click Next.
Windows will begin copying the necessary files onto your computer.
If Windows asks you to supply the original Windows ME CD-ROM, insert
it now and direct W indo ws to the proper location for the disk (e.g., “c:\windows\options\Install” or “D:\Win9x”).
If Windows asks you to supply a driver containing the letters “pc100”, enter
“a:\” in the Copy Files From box and click Enter.
Overview
Page 15

EtherFast®10/100 PC Cards
25
Windows NT 4.0 Installation and
Setup
The following instructions will set up an NT 4.0 server/workstation on your
PC. You should have your original Windows NT CD-ROM handy during the
installation, as you might be asked to supply it.
To install the network driver for an NT 4.0 Server or Workstation
1. Log into Windows NT as a network administrator.
2. Click on Start, Settings, Control Panel, and then double-click on the
Network icon.
3. If you hav e not previously installed Windows NT networking on your computer, a message will appear that reads: Windows NT Networking is not
installed. Do you want to install it now?
• If you see this message, click Yes to install NT networking along with the
EtherFast Card's network driver, and continue with step 1 below.
• If you don't see this message, NT networking is already installed. Skip to
the section entitled Installing the EtherFast Network Driver if Networking
is Already Installed.
1. After clicking on Ye s, the Network Setup Wizard window will appear.
2. Put a checkmark next to the Wired to the network option. Click Next.
Installing NT Networking & the EtherFast Card Driver
Overview
NNoottee::
Screen shots used in this Installation and Setup section are
from installation of the standard EtherFast 10/100 PC Card
(PCMPC100 v3). If you are installing the EtherFast 10/100
Integrated PC Card (PCM100 v3), the installation process will be
unchanged, however, the product name will be different.
Instant EtherFast®Series
24
6. When the following window appears, click Finish. When you are asked if
you want to restart your computer, remove any Driver Disks from the floppy disk drive, click Yes, and allow your system to restart.
7. After Windows restar ts, enter a User Name and a Password when
prompted, and click the OK button.
8. Once you are back on the Windows desktop, you can make the necessary
changes to your system’s network settings by clicking on the Start button,
then Settings, then Control Panel, then double-click the Network icon.
9. When the above window is displayed, click on the Configuration tab.
Confir m that all the following network components are installed:
• Client for Microsoft Networks
• Linksys EtherFast 10/100 PC Card (PCMPC100 V3)
• TCP/IP
To set up File and Printer Sharing, or to configure Client for Microsoft
Networks or Client for Netware Networks, please refer to the Appendix.
Your EtherFast card is now successfully set up.
NNoottee::
Linksys does
not provide technical
support for TCP/IP
configuration or troubleshooting.
Page 16

EtherFast®10/100 PC Cards
6. The adapter will be added to the list of installed Network Adapters. Click
Next.
7. Place check marks beside each listed network protocol that you wish to
install. See your Microsoft Windows NT user guide or talk to your network
administrator for more information about network protocols. When you're
finished, click Next.
27
Instant EtherFast®Series
3. Click on the Select from list... button to select a network adapter.
4. Select the EtherF ast 10/100 PC Card, click on the Have Diskbutton. Insert
the Driver Disk into the floppy drive. Type “A:\” into the box on your
screen and click the OK button.
5. When the following window appears, select Linksys EtherFast 10/100 PC
Card, click the OK button.
26
NNoottee::
If you install the
TTCCPP//IIPP pprroottooccooll
, refer to your Windows NT documentation
when installation steps that aren’t listed in this User Guide appear. Linksys does
not provide technical support for the configuration or troubleshooting of the
TCP/IP protocol.
Page 17

EtherFast®10/100 PC Cards
29
Instant EtherFast®Series
28
11. W indo ws NT will copy the necessary network driv ers to y our PC. When the
copying is complete, you will see a list of installed bindings. Change the
bindings settings if needed and click Next.
12. Choose either Workgroup or Domain, depending on the type of network
you're setting up. (Your NT user guide explains the difference between
Workg roups and Domains.) Click the Next button.
A window will appear stating that Networking has been installed on this
computer. Click the Finish button.
NNoottee::
For information and help on choosing your bindings, services and protocols, ask your network administrator, or check your Windows NT documentation
.
8. A list of services will appear. Click Next to approve these services, followed by Next again.
9. NT will probably ask you to supply your original Windows NT CD-ROM
or setup disks. If so, place your Windows NT CD-ROM in your CD drive.
If the CD-ROM loads a pop-up window, close it. Type “D:\I386” (or the
appropriate CD-ROM drive letter) in the box and click Continue.
10. NT will then display a window containing several setting types. Keep the
default settings unless you know that you need to change them.
After you have made the appropriate settings, click Continue.
Page 18

EtherFast®10/100 PC Cards
31
Instant EtherFast®Series
13. When asked if you want to restart your computer, remove the Driver Disk
and click Yes.
14. Once your PC has rebooted and you log on to the network, double-click the
Network Neighborhood icon on your desktop. Make sure that you have
access to the network. If you do, you card has been properly installed.
Windows NT Installation and Setup for the EtherFast 10/100
PC Card is complete. Do not continue with the next set of
instructions.They are for NT users who already have their
networking configured.
30
The following steps will install the EtherFast Card’s driver software on your
PC, enabling your PC to properly communicate with the card. Remember that
you must be logged on as a network administrator to continue.
1. Click on Start, Settings, Control Panel, then double-click on the Network
icon.
2. When the networking window appears, choose the Adapters tab. Click the
Add button.
Installing the EtherFast Network Driver if Networking is
Already Installed
NNoottee::
For information and help on choosing your bindings, services
and protocols, ask your network administrator or check your Windows
NT documentation.
NNoottee
: If you had
previously installed
any NT service
packs, you must reinstall them.
Page 19

EtherFast®10/100 PC Cards
33
Instant EtherFast®Series
32
5. When the following window appears, select Linksys EtherFast 10/100 PC
Card (PCMPC100 v3), click the OK button.
6. NT will then display a window containing several setting types. Keep the
default settings unless you know that you need to change them.
After you have made the appropriate settings, click the Continue button.
7. If Windows NT asks you to supply y our original Windows NT CD-ROM or
setup disks, direct Windows NT to the proper location (e.g., D:\I386).
Click the OK button.
3. When the list of available network adapters appears, select Linksys EtherF ast
10/100 PC Card. Click the Have Disk button.
4. Put the EtherFast Card Driver Disk into drive A. Type “A:\” into the box on
your screen and click the OK button.
Page 20

EtherFast®10/100 PC Cards
Windows 2000 Installation and
Setup
After physically installing the EtherFast PC Card in your computer, follow
these instructions to install the network driver.
1. Windows 2000 will automatically recognize your EtherFast PC Card.
2. Windows will then display the Found New Hardware Wizard Screen. Click
Next.
35
Instant EtherFast®Series
8. Click on the Protocols tab.
Add any protocols you
require by clicking the
Add button.
9. After your bindings, set-
tings, and services are set,
click the Close button.
10 The Network Settings Change box will appear. Remove your Driver Disk
and click theYes button to restart your PC.
11. Once your PC has rebooted , double-click the Network Neighborhood icon
on your desktop. Make sure that you have access to the network. If you do,
you card has been properly installed.
The Windows NT EtherFast Card Installation and Setup is complete.
NNoottee
: If you had previously installed any NT service packs, you must
re-install them.
34
Overview
NNoottee::
Screen shots used in this Installation and Setup section are
from installation of the standard EtherFast 10/100 PC Card
(PCMPC100 v3). If you are installing the EtherFast 10/100
Integrated PC Card (PCM100 v3), the installation process will be
unchanged, however, the product name will be different.
NNoottee::
If you install the
TTCCPP//IIPP pprroottooccooll
, refer to
your system administrator or your Windows NT
documentation when
installation steps that
aren’t listed in this User
Guide appear. Linksys
does not provide technical support for the configuration or troubleshooting of the
TCP/IP protocol.
Page 21

EtherFast®10/100 PC Cards
5. Windows should display the Driver Files Search Results box. Note that
the driver shown in the box is in the path a:\netpc100.inf. If it is, click
Next. Windows will begin to copy the installation files from your floppy
disk.
6. Windows may display the following box next. If so, click Yes.
37
Instant EtherFast®Series
3. Windows will display the installation screen next. Make sure that the radio
button next to Search for a suitable driver for my device (Recommended) is
filled in. Click Next.
4. When the Locate Driver Files box is displayed, put a check in the box
next to Floppy disk drives. Place your driver disk into the floppy drive and
click Next.
36
Page 22

EtherFast®10/100 PC Cards
39
Instant EtherFast®Series
7. After copying all the files, Windows will display the following screen.
This screen means that the device driver has been properly installed.
Click theFinish button. Your installation is complete. If you want to share
files or printers, refer to the Windows 2000 documentation.
38
Troubleshooting
1. Windows doesn’t detect new hardware with the EtherFast Card hardware
installed, or it continues to detect the card each time you restart your PC.
• You might not have inserted the PC card correctly or securely into the appropriate slot of your computer. Check that the card is securely inserted into
the appropriate slot.
• Try inserting your card into an alternate PC slot.
• You may have previously aborted a new hardware setup. Check your device
manager and remove the EtherFast Card (if shown) or any unknown
devices. Then, follow the instructions in the Starting Over in Windows 95,
98, or 2000.
2. Windows can’t locate the driver for the EtherFast Card device.
• You may have inserted the wrong diskette into your PC’s drive.
• The diskette may be defective or files may be missing. Make sure the disk has
a few files in a:\ starting with “pc100” or a folder called “Win95” for
Window 95 or “Win98” for Windows 98.
3. The Windows Logon screen doesn’t appear after you restart your computer.
• Click on Start, Shut Down, then Close All Programs and Logon as a Different
User, (in Windows 98, select Log Off). If this doesn’t solve the problem,
your PC’s manufacturer may have disabled Windows’ networking. Contact
your computer’s manufacturer for help.
• Check in the Device Manager to verify the network card is properly installed.
4. After entering a username and password, a window appears that reads, “No
Domain Server could be found to validate your Username and Password.”
• Click on Start, Settings, Control Panel. Double-click on Network. Click
on the Configuration tab. Under The Following Network Components are
Installed box, highlight Client for Microsoft Networks and click on the
Properties button. Once you are in the Client For Microsoft Networks
Properties window, make sure that Log on to Windows NT Domain is
unchecked. Once you have made sure that it is unchecked click on the
OK button and restart your computer.
Page 23

EtherFast®10/100 PC Cards
10. In Network Neighborhood you can only see computers running the same operating system as your computer (i.e.,your PC is running Windows 95 and it can
only see other Windows 95 computers and not any computer running Windows
98).
• Choose Start, Find, Computer and type the name of the computer in the
window that comes up and click Find Now.
• Now make sure that the you are using the same protocol(s) and workgroup
name on the 95 and 98 computers. To do this, click Start, Settings, Control
Panel on two computers running different Windows operating systems.
Click on the Network icon, choose the Configuration tab. Compare the
protocols on both computers and make sure that they are the same. If any
protocols are missing, refer to your Windows documentation to install any
needed protocol(s).
• If all computers are using the same protocol(s) and Workgroup name (in
Identification tab), and W indo ws 95 computers can't see W indows 98 computers, enable NetBIOS on all the computers using Windows 95 and 98.
Follow these instr uctions:
• The IPX/SPX-compatible protocol should be installed on all Windows computers. Refer to your Windows documentation if this protocol is not
installed. Bring up the properties of the IPX/SPX-compatible protocol by
clicking on Start, Settings, Control Panel, then double-click the Network
icon. Choose the Configuration tab and highlight IPX/SPX-compatible
Protocol. Click on Properties. Now, to install NetBIOS, click on the
NetBIOS tab. Put a check next to I want to enable NetBIOS over IPX/SPX.
Click OK, then OK again. Windows will copy the appropriate files to your
computer. When asked to restart your PC, remove any floppy disks and
click OK. Be sure to do this on all of your computers that are having trou-
ble seeing your entire network.
41
Instant EtherFast®Series
5. On the Access Control Tab, User Level Access is selected, but Shared Level
Access is grayed out and not accessible.
• You previously had your primary network logon set to Client for NetWare
Networks. On the Configuration tab of the Network Properties window,
ensure that your primary network logon is set to Client for Microsoft
Networks.
• Your personal web server PC or Microsoft Front Page may require you to
choose a user level for security reasons.
6. In Network Neighborhood you can only see your self and no other computers on
the network.
• Make sure that the cables are connected correctly. Make sure you are getting
Link or Activity lights on both the EtherFast Card and your hub. Try changing to a new cable that you know is working, or use a different port on the
hub.
• Your workgroup name may be different from other computers on your network. Make sure each PC on the network is using the same workgroup
name and protocol.
7. In Network Neighborhood, you can see all other computers on the network but
not yourself, and all other computers can see each other and not your computer.
• You may have not have enabled File and Printer Sharing. To do so, go to step
8 on page 13 for Windows 95, or step 10 on page 19 for Windows 98.
• The network card might not be setup properly. Try reinstalling the card’s drivers. To clean your system of the old installation, go to the section Starting
Over in Windows 95, 98, or 2000 in the Appendix.
8. Network Neighborhood is Empty.
• Verify that your Microsoft Client is installed. See the Windows 95 or 98 setup
instructions in this guide for directions. Verify that you have logged in correctly.
9. You receive DHCP Errors in Windows.
• If you are connecting to a DHCP server, check your cabling and connection.
If you require TCP/IP to be configured, check with your network administrator or your Windows documentation for proper settings.
• If you don’t have a DHCP server on your network, you may remove the
TCP/IP component from Windows’ networking if your network doesn’t
require it. To do this, click on Start, Settings, Control Panel, then doubleclick on Network. Click once on the component entry with the words
TCP/IP and Linksys or TCP/IP on its own, then click on the Remove button. Click OK when finished and restart your PC.
40
Page 24

EtherFast®10/100 PC Cards
43
Instant EtherFast®Series
Appendix
Sharing Your Files and Printers
Overview
By sharing your files and printers, other PCs on your network will be able to
access the resources on your PC.
Before sharing your files and printers, you should prepare your computer to
be used with any file servers that may be on the network. If you are not using
Windows 95 or Windows 98 with an NT or NetWare file server, or if you are
not sure if you have a file ser ver, continue below.
If you are using a NetWare or NT file server, review page 45 or 46, respectively, for client setup.
Enabling File Sharing
1. On your Desktop, double-click your My Computer icon. A window of
available disk drives will appear.
2. Using your right mouse button, click once on the drive or folder that you
want to make available to other users.
3. Click on Sharing, followed by the Sharing tab. Click on Share As.
4. In the Share Name box, enter a name for the drive or folder you are shar-
ing. This can be any drive on your PC—floppy drive, hard drive, CD drive,
zip drive, etc.
5. Decide on the type of access that you want to give
other users.
• Read-Only access lets other users view the f iles
on the selected drive.
• Full access lets users create, change, or delete files on the selected drive.
• Depends on Password lets users have Read-Only and/or Full access to
the selected drive, depending on the password that you decide to give
them.
42
6. If you want to assign access passwords, type the passwords into the
Password boxes.
7. When you're done, click on the Apply button, followed by OK. Repeat
steps 1-7 for any drive or folder you desire to share on the network.
You have successfully enabled File Sharing on your PC.Your selected
drives can now be accessed by other network users. If a user tries to
access one of your password-protected drives or folders, he or she will be
asked for the appropriate Read-Only or Full-Access password.Continue
on if you wish to share your PC’s printer over the network.
Enabling Printer Sharing
1. On your Desktop, double-click on the My Computer icon.
2. Double-click the Printers folder. A window of available printers will
appear.
3. Using your right mouse button, click once on the
printer that you want to share with other users.
Click on Sharing, followed by the Sharing tab.
4. Click on Share As. In the Share Name box, give a
name to the printer you want to share. If you want
to assign a password to the printer so that only certain users can access it, type a password in the
Password box.
5. Click on the Apply button, followed by OK. Your printer(s) are now
shared.
The Printer Sharing setup and installation is complete. Your printer can
now be accessed by other network users. The printer’s driver may have to
be installed on other PCs. Consult your printer’s documentation.
NNoottee::
Not all printers
may be shared on the
network. Others may
require special instructions. Refer to your
printer’s user guide or
contact your printer
manufacturer if you
think this may be the
case with your printer.
NNoottee::
If you are only
using your PC to
access the Internet, it
is highly recommended that you use passwords for your shares.
Sharing Your Files and Printers
Page 25

Instant EtherFast®Series
44
EtherFast®10/100 PC Cards
45
If you are installing the EtherFast 10/100 PC Card in a Windows 95 or 98 PC
that you plan on logging into a NT domain server, follow the directions
below.
1. Follow the Windows 95 setup instructions or the Windows 98 setup
instructions
2. Start up Windows. Click on Star t, Settings, then Control Panel. Doubleclick on Network. The Network window appears. Click on the
Configuration tab.
3. In the Primary Network Logon box, choose Client for Microsoft
Networks, which instructs your PC to log into an NT 4.0 server where you
already have a username and password set up.
4. Under the the following network components are installed box, highlight
Client for Microsoft Networks and click on the Properties button.
5. The Client for Microsoft Networks Proper ties window will appear. Under
the Logon Validation box, make sure that Log on to Windows NT domain
is checked. Enter the name of your domain into the Windows NT Domain
box. Click OK.
6. Optional: Click on the Access Control tab. Make sure that Share-level
access control is selected; do not choose User-level access control. If
Access Control is grayed out and cannot be selected, refer to the
Troubleshooting section.
7. When you’re done, click OK. When asked if you want to restart your PC,
choose to do so.
The NT portion of the Windows setup is complete.
Windows 98 or 95 Client for windows NT
The instructions below explain how to set up the regular Novell NetWare 3.x
client for use on a Windows 98 or 95 PC.
1. Follow the Windows 95 setup instructions or the Windows 98 setup
instructions.
2. Start up Windows 95 or 98. Click on Star t, Settings, then Control Panel.
Double-click on Network. The Network window appears. Click on the
Configuration tab.
3. Make sure that Client for Microsoft Networks and Client for Netware
Networks are listed. If either are missing, you will have to install them
manually. Refer to Manually Installing Network Components in Windows
98 and 95 in the Windows 98 Installation section.
4. In the Primary Network Logon box, choose Client for NetWare Networks.
5. Under the The following network components are installed box, highlight
Client for NetWare Networks and click on the Properties button.
6. The Client for NetWare Networks Properties window appears. Under the
General tab, enter the name of your network’s Preferred Server. Assign the
First Network Drive Letter; the default is F. If available, make sure the
Enable logon script processing is checked. Click OK.
7. Click on the Access Control tab. Make sure the Share-level access control
option is selected; do not select User-level access control.
8. When you’re done, click OK to restart your computer.
The NetWare portion of your Windows setup is complete.
Novell NetWare 3.x Client Setup for windows 98 or 95
Page 26

EtherFast®10/100 PC Cards
47
4. Remove any instance of the name Linksys in the box. This includes
IPS/SPX…Linksys, NetBEUI…Linksys, and TCP/IP…Linksys. Also
remove Client for Microsoft Networks, Client for NetWare Networks, and
File and Printer Sharing for Microsoft Networks.
In some cases, removing one of these components may in turn automatically
remove other components as well. If this happens, skip ahead to step 6 .
5. For PCs with Dial-Up Networking and/or an AOL adapter, remove any
instance of the name Linksys, all IPX/SPX protocols, all NetBEUI, all
Clients, and File and Printer Sharing for Microsoft Networks. Do not
remove Dial-Up Adapter, AOL Adapter, TCP/IP-Compatible Protocol-
AOL Adapter or TCP/IP-Compatible Protocol-Dial-Up Adapter.
6. When you are done removing all the unnecessar y components, click OK.
When asked to restart, click No.
Instant EtherFast®Series
If you experience installation difficulties, you may need to re-install all of the
Windows networking components from scratch. The instr uctions below
explain how to give your PC a clean sweep so that you can start the EtherFast
Card’s software installation over.
1. At the desktop click on the Start Button, highlight Settings, click on
Control Panel.
2. Double-click on the Network Icon.
3. If the Configuration box has a component called Dial-Up Adapter, skip
forward to step 5. If it doesn’t, continue with step 4.
46
Starting Over in Windows 95 and 98
NNoottee::
Screen shots are for demonstration purposes only. Actual product and
adapter names may vary depending on
which product you are installing.
NNoottee::
Linksys does not provide technical sup-
port for TCP/IP configuration or troubleshooting.
Page 27

EtherFast®10/100 PC Cards
1. Click the Start button, choose Settings, choose Control Panel, then dou-
ble-click the System icon.The System Properties window will open.
2. Choose the Hardware tab.
3. Click the Device Manager
button. The Device Manager
window will open.
4. Click the plus sign (+) beside
Network Adapters. The
Linksys EtherFast 10/100 PC
Card listing should appear.
5. Right-click on Linksys
EtherFast 10/100 PC Card. A
menu box should open.
Choose Disable.
7. When asked if you want to
Disable the device, click Yes.
Starting Over in Windows 2000
Instant EtherFast®Series
7. Retur n to the Windows Control Panel. Double-click on the System Icon.
The System Properties window will appear. Click on the Device Manager
Tab.
8. Scroll down to the Network Adapters item and expand it by clicking on
the open [+] sign.
9. Remove all devices with the name Linksys in it’s description. (If at any
point you are asked to restart the computer, Click No).
10. Scroll down to the Other Devices section. Remove all devices with
Linksys, EtherFast, or PCMPC100 in the name. (If Other Devices is not
listed, proceed to the next step.)
11. When you’re f inished, click on the Close button, shut down Windows, and
restart your computer.
12. After your computer has restarted, turn to the section called Windows 95
Installation and Setup or Windows 98 Installation and Setup, whichever is
appropriate for your computer. Follow the setup instr uctions.
48 4
Page 28

EtherFast®10/100 PC Cards
There may be times when you might need to manually install missing
Windows networking components.
1. Click on Start, Settings, then Control Panel.
2. Double-click the Network icon. The Network window appears.
3. Click on the Configuration tab. Make sure that the following network
components are installed.
• Client for Microsoft Networks
• Linksys EtherFast 10/100 PC Card (PCMPC100 v3)
• TCP/IP
There may be other components listed in addition to the ones shown above. If
any of the above components are missing, add them as follows.
Client for Microsoft Networks
If you plan on connecting to an NT file server or peer-to-peer network, click
on the Add button. Highlight Client and click on Add. Choose Microsoft as
the manufacturer in the Network Client box. Highlight Client for Microsoft
Networks and click OK.
TCP/IP
Click on the Add button. Select Protocol, then click Add. Under
Manufacturer, highlight Microsoft. Under Network Protocol, highlight
TCP/IP. Click OK.
If you install the TCP/IP protocol, refer to your Windows NT documentation
when installation steps that aren’t listed in this User Guide appear.
51
Instant EtherFast®Series
50
Manually Installing Network Components in Windows
95 and 98
8. Right-click on the Linksys EtherFast 10/100 PC Card again. This time,
select Uninstall. The following screen will appear. Click the OK button.
9. The Network Adapters category should be removed from the Device
Manager listing.
10. Click the OK button, and restar t your computer.
NNoottee::
Linksys does not provide technical sup-
port for TCP/IP configuration or troubleshooting.
Page 29

EtherFast®10/100 PC Cards
There are different grades, or categories, of twisted-pair cabling. Category 5
is the most reliable and is highly recommended. Category 3 is a good second
choice. Straight-through cables are used for connecting computers to a hub.
Crossover cables are used for connecting a hub to another hub (there is an
exception: some hubs have a built-in uplink port that is crossed internally,
which allows you to link or connect hubs together with a straight-through
cable instead).
You can buy pre-made Category 5 cabling, or cut and crimp your own.
Category 5 cables can be purchased
or crimped as either straight-through
or crossover cables. A Category 5
cable has 8 thin, color-coded wires
inside that run from one end of the
cable to the other. All 8 wires are
used. In a straight-through cable,
wires 1, 2, 3,
and 6 at one
end of the cable
are also wires
1, 2, 3, and 6 at
the other end.
In a crossover cable, the order of the
wires change from one end to the
other: wire 1 becomes 3, and 2
becomes 6. See the diagrams on the
next page for more detailed informa-
tion on straight-through and crossover cabling.
To determine which wire is wire number 1, hold the cable so that the end of
the plastic RJ-45 tip (the part that goes into a wall jack first) is facing away
from you. Face the clip down so that the copper side
faces up (the springy clip will now be parallel to the
floor).When looking down on the copper side, wire 1
will be on the far left.
53
Instant EtherFast®Series
Linksys does not provide technical support for Linux, BSD, or other freeware, Beta, or open source operating systems. Although many Linksys products have been proven to perform well under Linux and other freeware
Operating Systems, technical support for setup and troubleshooting is not
provided. For infor mation on where to find device drivers and setup instructions for Linux and other freeware Operating Systems, visit the support pages
and FAQ files on the Linksys website at www.linksys.com.
52
Twisted-Pair CablingLinux, Open Source and Beta Operating Systems
NNoottee::
After manually installing a component,
you will be asked to reboot your computer.
DDoo nnoott
reboot until after you have finished
installing all desired components.
Page 30

EtherFast®10/100 PC Cards
55
Instant EtherFast®Series
54
Model Number: PCMPC100 v3
System: PCMCIA-compliant PC
Standards: IEEE 802.3, IEEE 802.3u, PCMCIA
Ports: One 10BaseT/100BaseTX Auto-Sensing Port
Speed
Half Duplex: 10Mbps or 100Mbps
Full Duplex: 20Mbps or 200Mbps
Cabling: UTP Category 5 (or better)
Topology: Star
LED Status Lights: Link, Activity, 10/100 Mbps (on coupler)
Dimensions: 3.4” x 2.1” x 0.2” (86mm x 53mm x 5mm)
Unit Weight: 1.7 oz. (53g)
Power: 3V, 180mA, 30mA Sleep Mode
Certif ications: FCC Class B, CE Mark Commercial,
UL and CSA Listed
Operating Temperature: 32°F to 122°F (0°C to 49°C)
Storage Temperature: -4°F to 158°F (-20°C to 70°C)
Operating Humidity: 10% to 85% Non-Condensing
Storage Humidity: 5% to 90% Non-Condensing
10/100 PC Card Specifications
10/100 PC Card Environmentals
Straight-Through Cabling
Crimping Your Own Network Cables
Cross-Over Cabling
Page 31

EtherFast®10/100 PC Cards
57
Instant EtherFast®Series
56
Customer Support
Linksys guarantees that every EtherFast 10/100 PC Card is free from physical
defects in material and workmanship under normal use for FIVE years from the
date of purchase. If the product proves defective during this warranty period,
contact Linksys Customer Support to obtain a Return Authorization Number.
When returning a product, mark the Return Authorization Number clearly on
the outside of the package and include your original proof of purchase.
IN NO EVENT SHALL LINKSYS’ LIABILITY
EXCEED THE PRICE PAID FOR THE PRODUCT FROM DIRECT, INDIRECT, SPECIAL,
INCIDENTAL, OR CONSEQUENTIAL DAMAGES RESULTING FROM THE USE OF THE
PRODUCT, ITS ACCOMPANYING SOFTWARE, OR ITS DOCUMENTATION. LINKSYS
OFFERS NO REFUNDS FOR ITS PRODUCTS. ALL CUSTOMERS
LOCATED OUTSIDE OF THE UNITED STATES OF AMERICA AND
CANADA SHALL BE HELD RESPONSIBLE FOR SHIPPING AND HANDLING CHARGES. PLEASE CALL LINKSYS FOR MORE DETAILS.
Tampering with or disassembling this product voids its warranty.
Linksys makes no warranty or representation, expressed, implied, or statutory,
with respect to its products or the contents or use of this documentation and all
accompanying software, and specifically disclaims its quality, performance,
merchantability, or fitness for any particular purpose. Linksys reserves the
right to revise or update its products, software, or documentation without obligation to notify any individual or entity.
NNoottee::
You must have your
proof of purchase and a barcode from the product’s
packaging on hand when
calling. Return requests can
not be processed without
proof of purchase.
Linksys Warranty Information
Model Number: PCM100 v3
System: PCMCIA-compliant PC
Standards: IEEE 802.3, IEEE 802.3u, PCMCIA
Ports: One 10BaseT/100BaseTX Auto-Sensing Port
Speed
Half Duplex: 10Mbps or 100Mbps
Full Duplex: 20Mbps or 200Mbps
Cabling: UTP Category 5 (or better)
Topology: Star
LED Status Lights: Link, Activity, 10/100 Mbps
Dimensions: 4.7” x 2.6” x 0.75” (119mm x 66mm x 19mm)
Unit Weight: 1.8 oz. (56g)
Power: 3.3V,100Mbps 240mA max; 10Mbps 170mA, max.
Certif ications: FCC Class B, CE Mark Commercial
UL and CSA Listed
Operating Temperature: 32°F to 122°F (0°C to 49°C)
Storage Temperature: -4°F to 158°F (-20°C to 70°C)
Operating Humidity: 10% to 85% Non-Condensing
Storage Humidity: 5% to 90% Non-Condensing
10/100 Integrated PC Card Specifications
10/100 Integrated PC Card Environmentals
Page 32

© Copyright 2001 Linksys, All Rights Reserved.
http://www.linksys.com
 Loading...