

Page 1
Dreamtilt VoIP Setup Guide
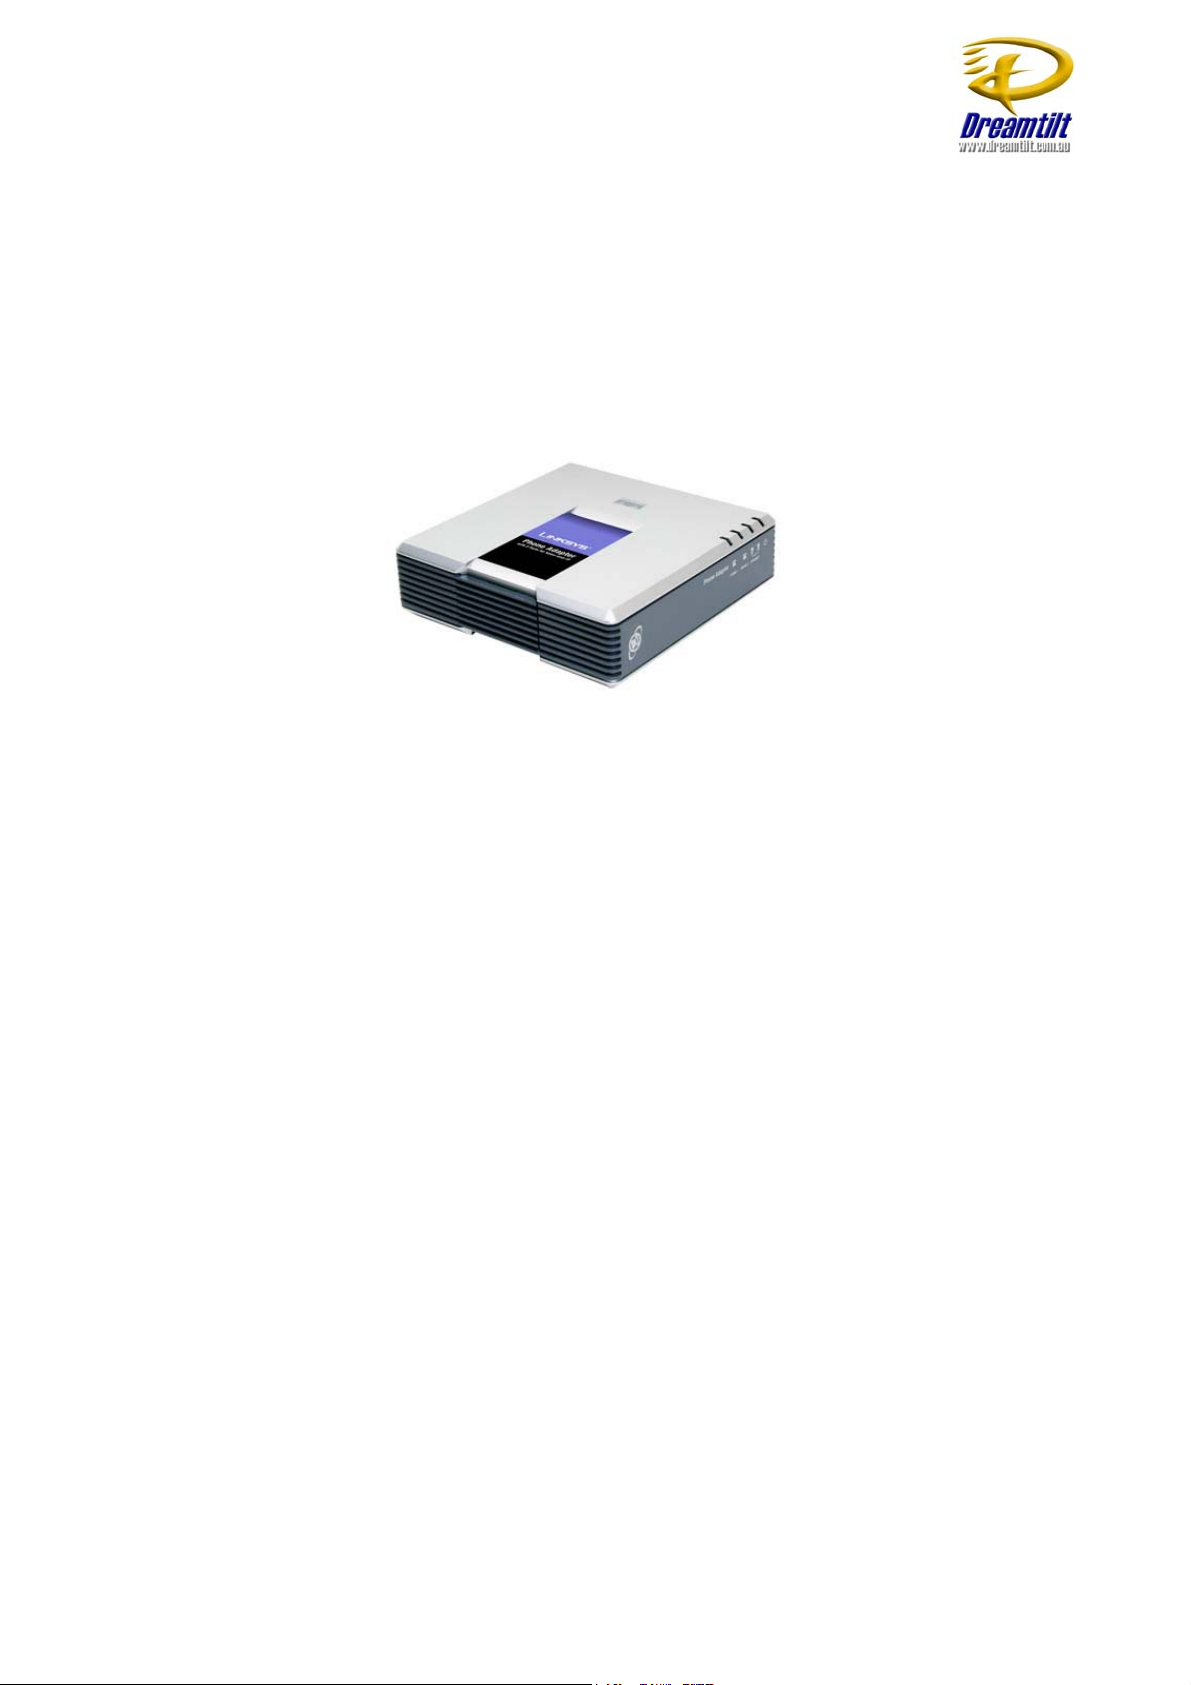
LINKSYS PAP2
CONFIGURATION GUIDE
Minimum Requirements
Active Dreamtilt Wireless and VoIP account
Broadband Modem/Router
o Must have an Ethernet port to connect to the PAP2.
Analogue Telephone with RJ-11 line (Desktop or Cordless)
Page 2
Dreamtilt VoIP Setup Guide
Before You Begin
Please ensure you have your Dreamtilt VoIP details handy so that you can configure
the PAP2 with the required settings. You can view your account settings by logging
in online at www.dreamtilt.com.au
Initial Setup
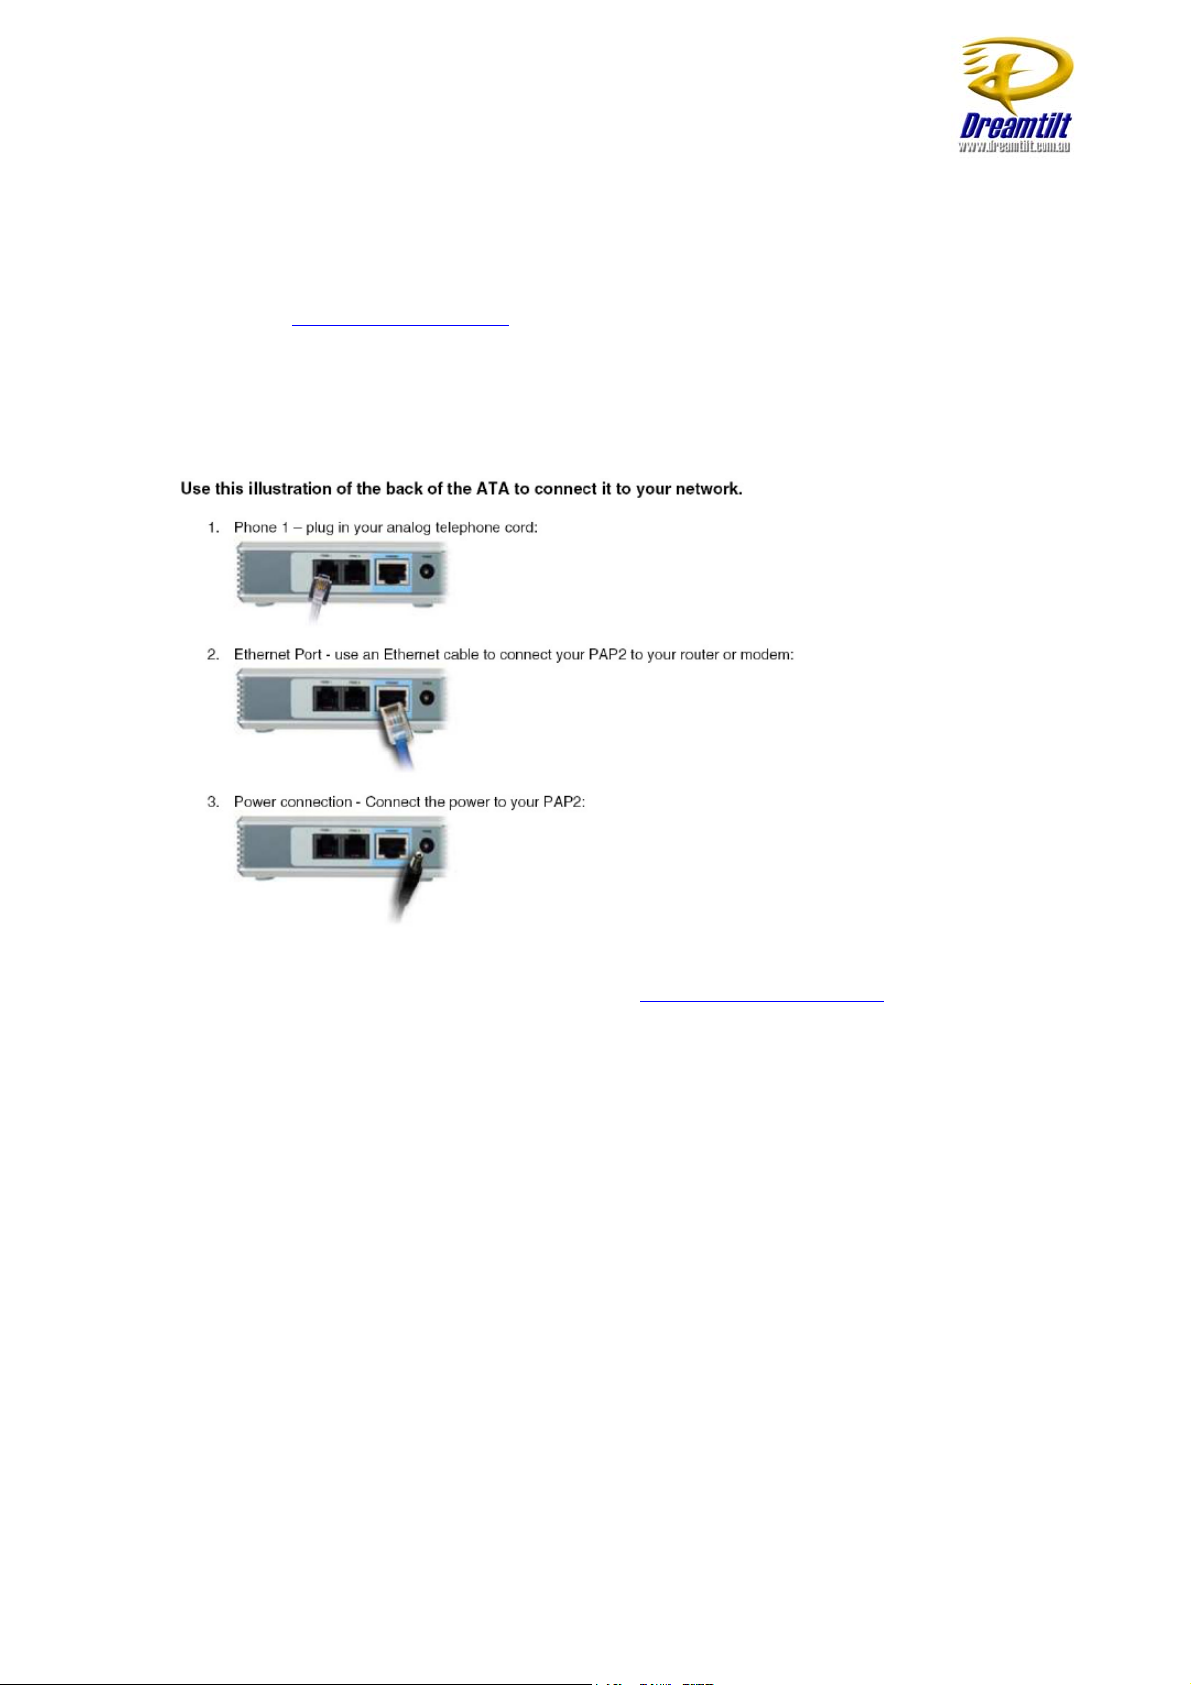
Before configuration please refer to the Linksys PAP2 user guide for further
information on how to connect the device to your network.
If you require more advice, please refer to the help documents on our website at
http://support.dreamtilt.com.au or contact us at admin@dreamtilt.com.au
PAP2 Configuration
To obtain the IP address of the PAP2, proceed with the following steps:
1. Dial ****
2. Dial 110#
An automated voice will then announce the IP address. Make sure to keep a
record of the IP address for future use.
Open a browser window and enter the PAP2’s IP address in your browser’s address
bar to access the PAP2’s configuration menu. If you are experiencing difficulty trying
to connect to the device at this point, please refer to the PAP2 user guide or contact
Linksys Technical Support for further assistance.
Page 3
Dreamtilt VoIP Setup Guide
VoIP Configuration
Once you have logged into the PAP2 Configuration Center, log in as the
Administrator by clicking the ADMIN LOGIN on the top right hand side of the page.
For more information regarding each property and option, please refer to the PAP2
user manual. Click on the ADVANCED button (top right hand side) to access the
Advanced settings.
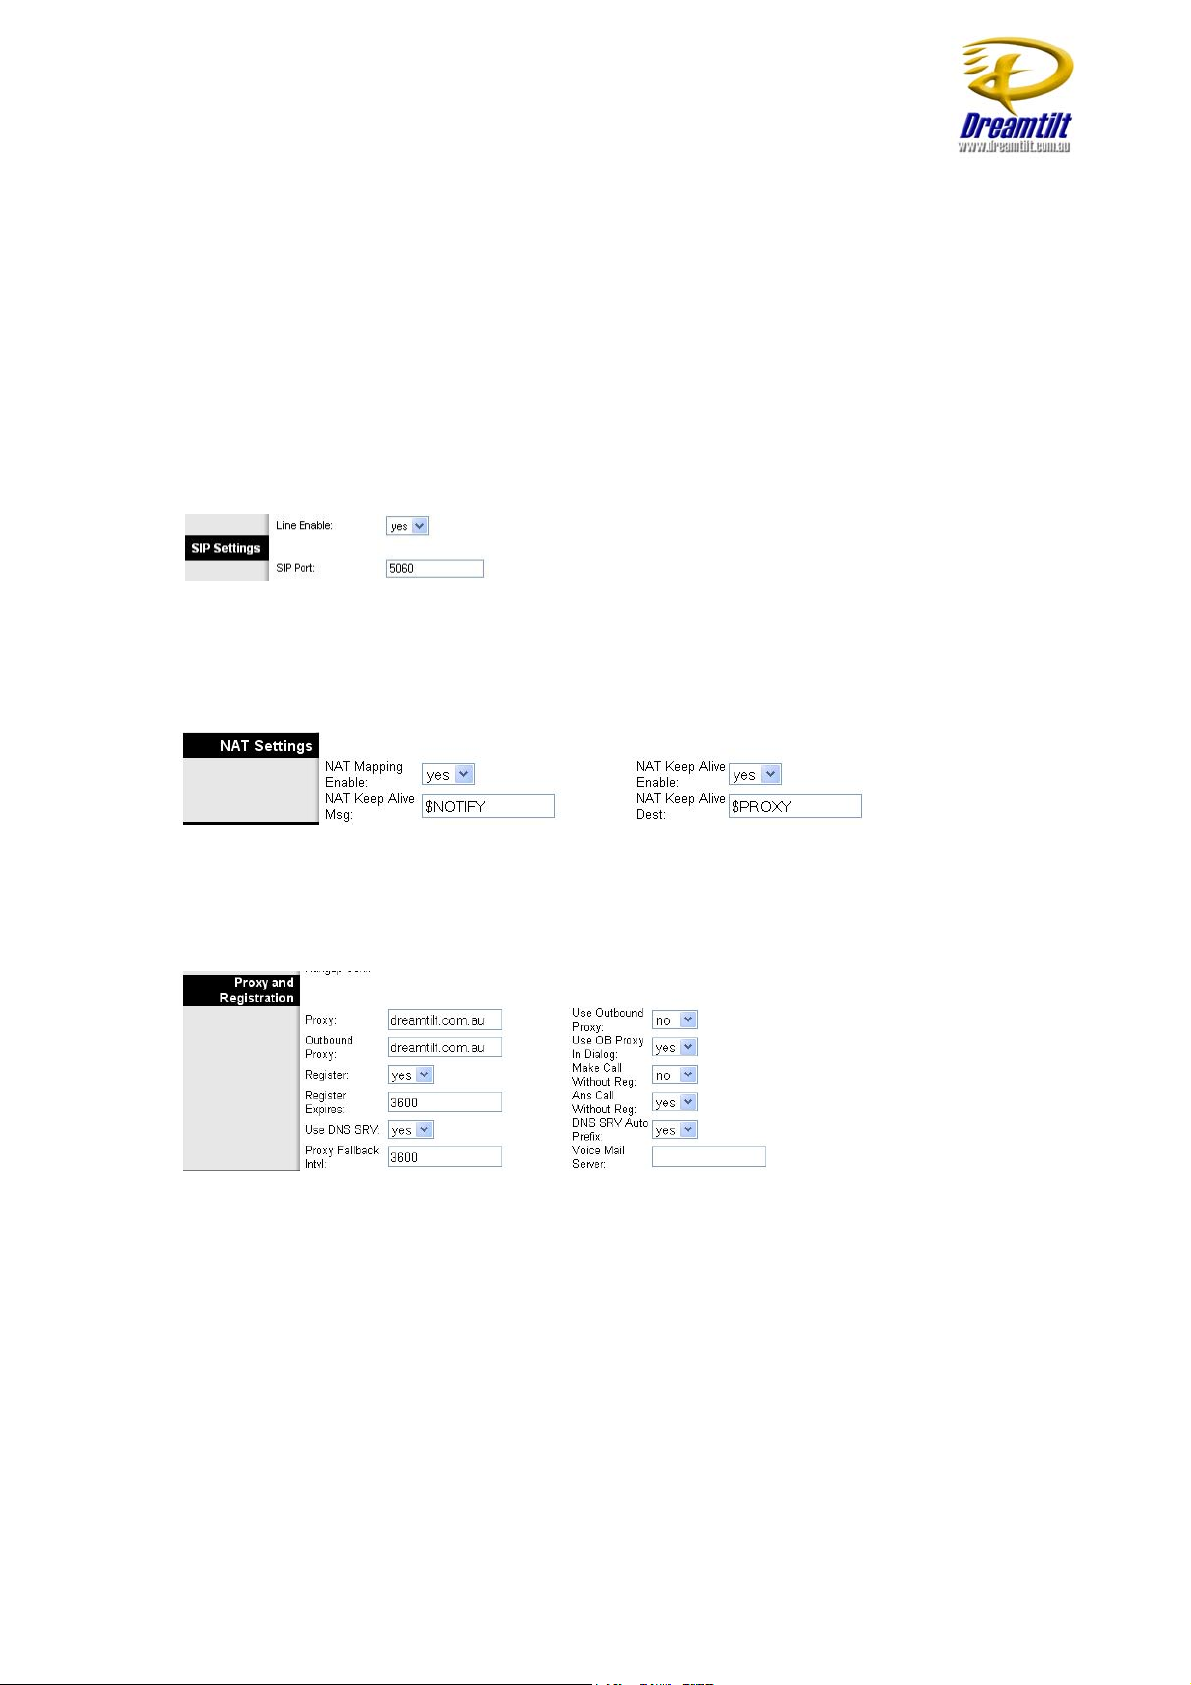
Click on the LINE 1 tab
SIP Settings
LINE ENABLE: Yes
SIP PORT: 5060
NAT Settings
NAT MAPPING ENABLE: Yes
NAT KEEP ALIVE: Yes
Proxy and Registration
PROXY: dreamtilt.com.au
OUTBOUND PROXY: dreamtilt.com.au
MAKE CALL WITHOUT REG: No
ANS CALL WITHOUT REG: Yes
USE DNS SRV: Yes
DNS SRV AUTO PREFIX: Yes
Page 4

Dreamtilt VoIP Setup Guide
Subscriber Information
DISPLAY NAME: Enter your Dreamtilt VoIP Number
USER ID: Enter your Dreamtilt VoIP Number
PASSWORD: Enter your Dreamtilt VoIP Password
Audio Configuration
PREFERRED CODEC: G.729a
Dial Plan
Copy into the DIAL PLAN the following -
(*xx|13[1-9]xxxS0|1[38]00xxxxxxS0|190xxxxxxx!|000S0|0011xxxxx.|[2-9]xxxxxxxS0|0[2-
9]xxxxxxxxS0)
Now click on SAVE SETTINGS
Click on the SIP tab
Page 5
Dreamtilt VoIP Setup Guide
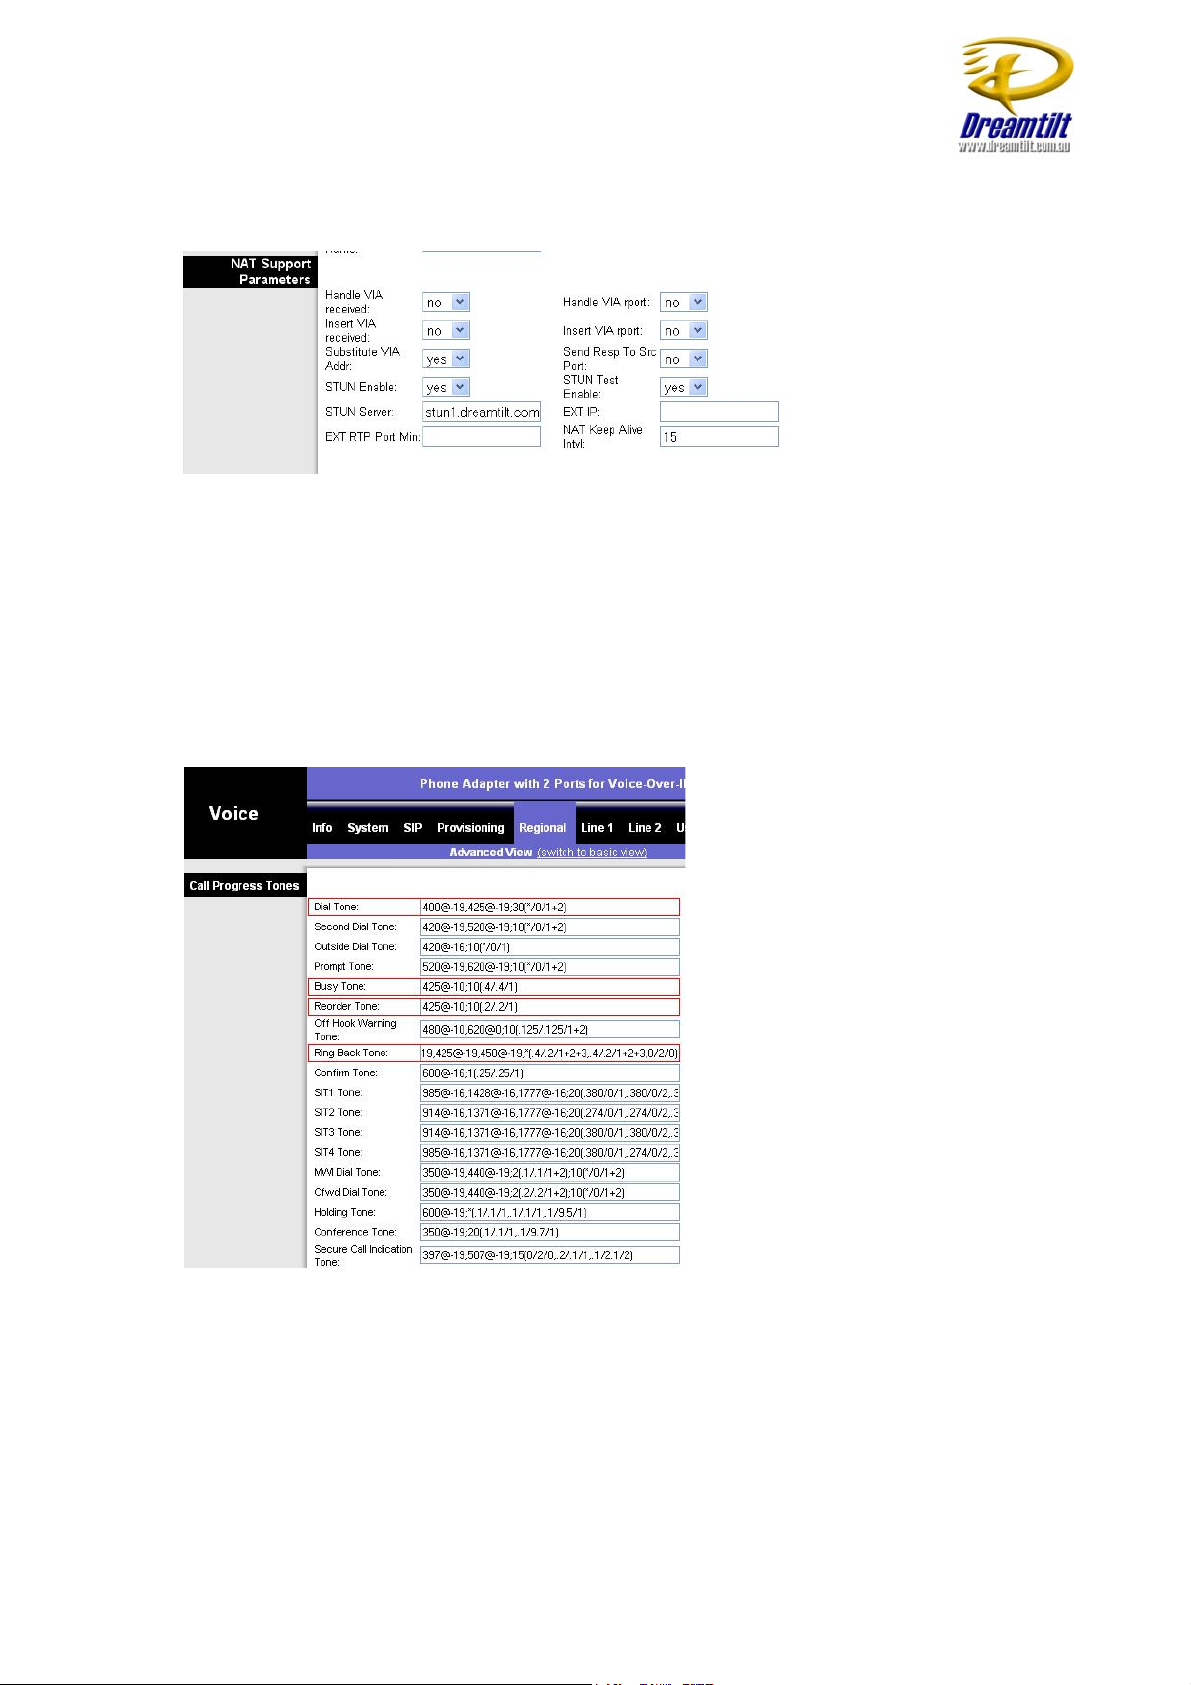
NAT Support Parameters
SUBSTITUTE VIA Address: Yes
STUN ENABLE: Yes
STUN TEST ENABLE: Yes
STUN SERVER: stun1.dreamtilt.com.au
Click on SAVE SETTINGS
Click on the REGIONAL tab
Call Progress Tones
DIAL TONE:
400@-19,425@-19,450@-19;10(*/0/1+2+3)
BUSY TONE:
425@-19;10(.375/.375/1)
REORDER TONE:
425@-19, 425@-29;60(.375/.375/1,.375/.375/2)
RING BACK TONE:
400@-19,425@-19,450@-19;*(.4/.2/1+2+3,.4/2/1+2+3)
Page 6

Dreamtilt VoIP Setup Guide
MWI DIAL TONE
400@-19,425@-19,450@-19;2(.1/.1/1+2);10(*/0/1+2)
Control Timer Values
HOOK FLASH TIMER MIN: 0.07
HOOK FLASH TIMER MAX: 0.13
Distinctive Call Waiting Tone Patterns
CWT8 CADENCE: 30(.2/.2,.2/4.4)
Distinctive Ring Patterns
RING 1 CADENCE:
60(.4/.2,.4/2)
Miscellaneous
TIME ZONE: GMT+10:00
FXS PORT IMPEDANCE
220+820||115nF
Click on SAVE SETTINGS.
Click on SYSTEM SETTINGS.
Page 7
Dreamtilt VoIP Setup Guide
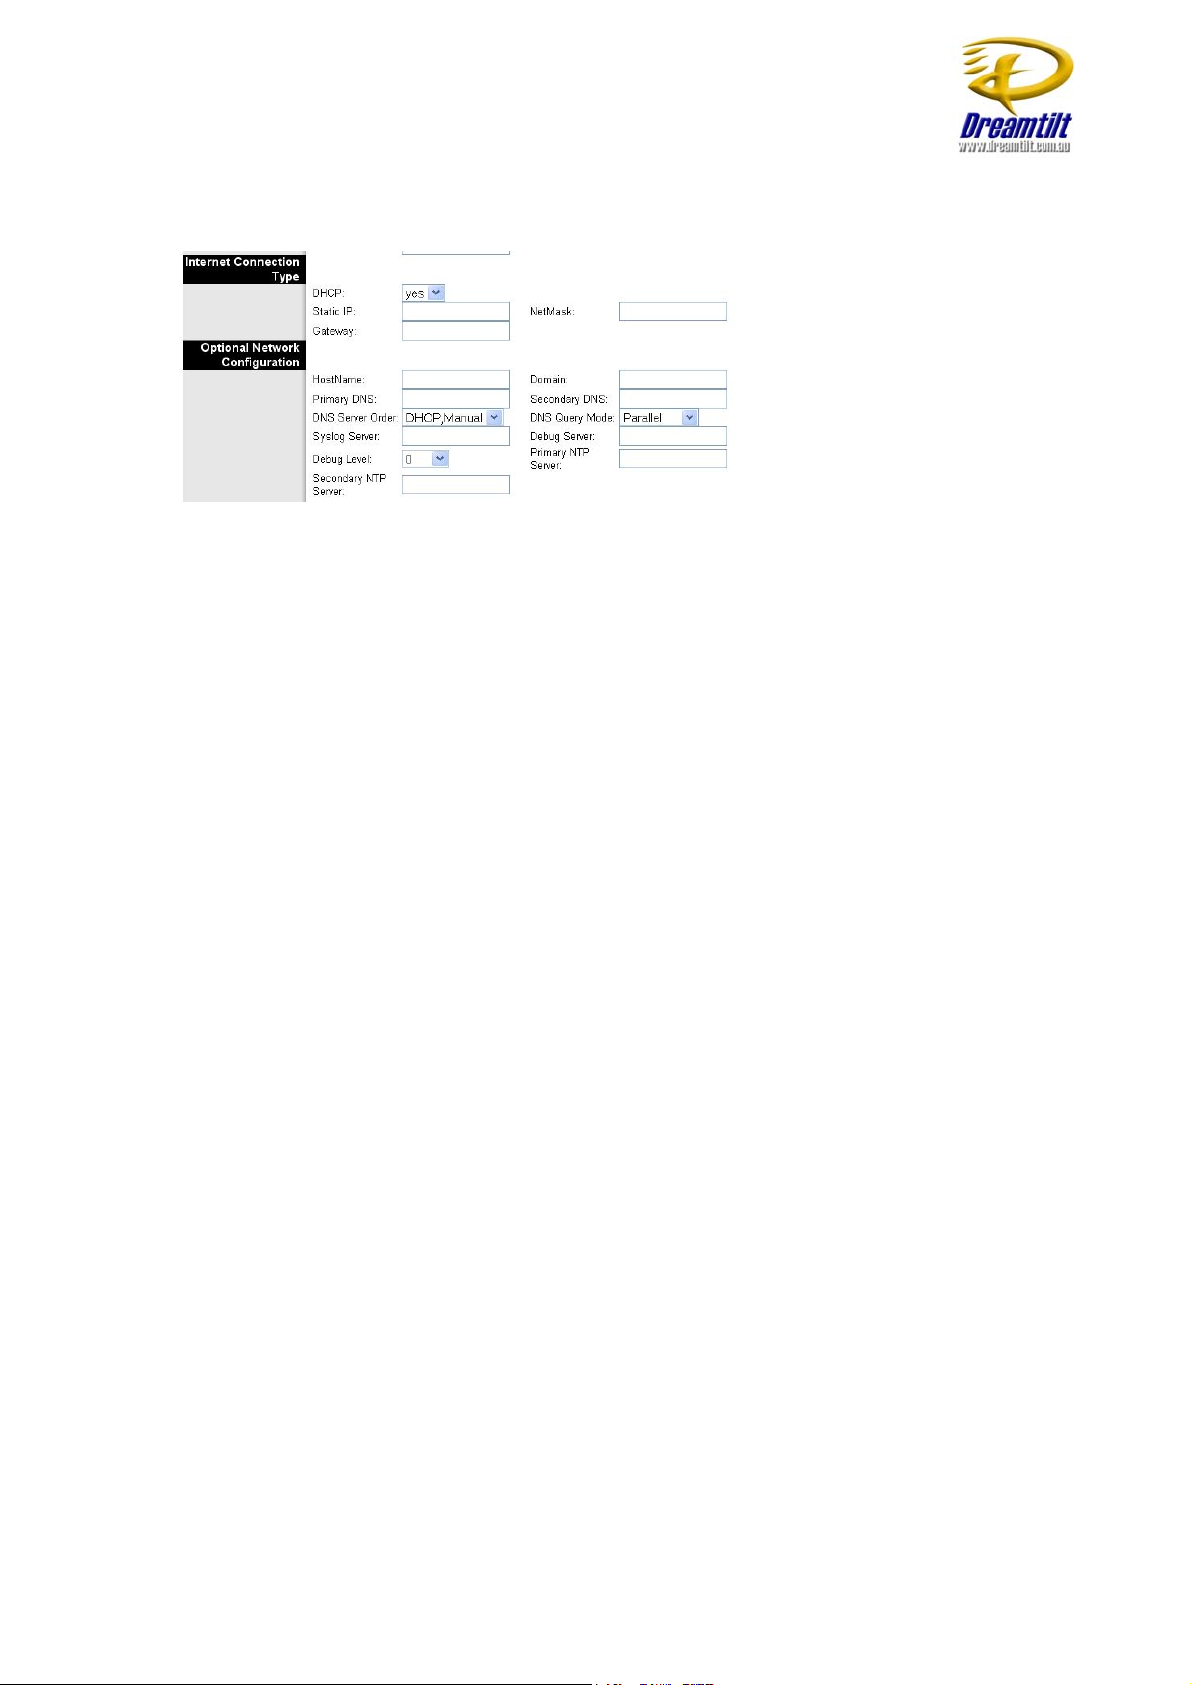
Internet Connection Type and Optional Network Configuration
DHCP: Yes
DNS Server Order: DHCP, Manual
Click on SAVE SETTINGS.
You should now be able to make calls on your phone.
Extra Information
To reset the device to its factory defaults, perform the following with your handset:
1. Dial “ **** “
2. Dial “ 73738# “
3. Dial “ 1” (to confirm)
 Loading...