

Page 1
Linksys PAP 2
Configuration Guide
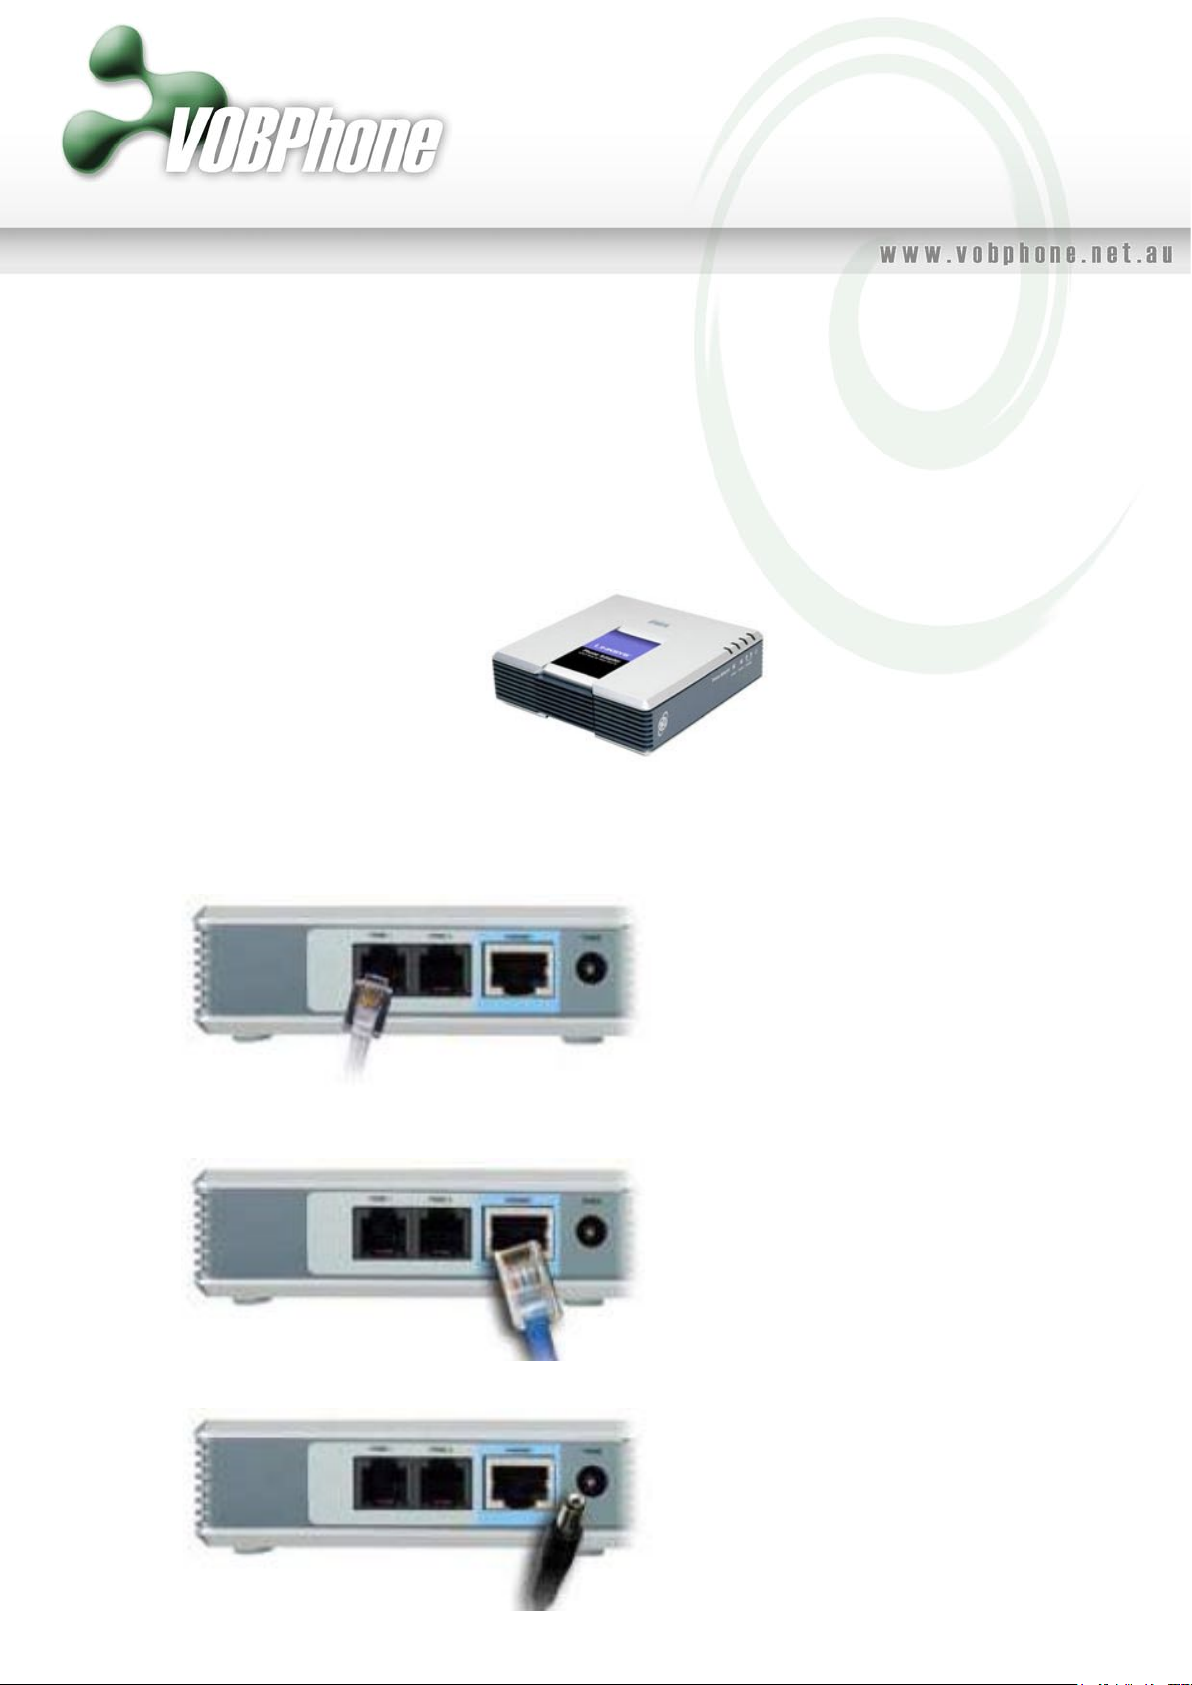
Step 1: Connect the Linksys PAP2 to your Broadband connection
Use this illustration of the back of the ATA to connect it to your network.
1. Phone 1 – plug in your analog telephone cord:
2. Ethernet Port - use an Ethernet cable to connect your PAP2 to your router
or modem:
3. Power connection - Connect the power to your PAP2:
Page 2

Step 2: Verify & Configure your IP Address
First we need to verify that your PAP2 will acquire an IP Address
automatically if your network supports DHCP.
If your network uses a DHCP Server to assign IP Addresses to network devices,
or if you are connecting the PAP2 to a home router such as a Linksys or Netgear
router or a modem that supports DHCP/NAT, please do the following:
1. Plus a standard telephone into the Phone 1 port of your PAP2.
2. Pick up the phone connected to Phone 1 and enter “* * * *”. You will hear a
voice prompt saying “Configuration menu: please enter option followed by
the pound key, or hangup to exit”.
3. Press the keys 1 0 1 # on your analog phone.
4. Then press 1 # to enable DHCP.
5. Then press 1 to save your configuration settings. Hang up the phone and
wait 2 minutes.
Next, we must verify that the PAP2 has a valid IP Address:
1. Pick up the phone connected to Phone 1 of the PAP2 and enter “* * * *”.
You will hear a voice prompt saying “Linksys configuration menu”.
2. Press the keys 1 1 0 # on your analog phone. The system will now read
back the IP address of your PAP2. Please write it down.
If the IP is 0.0.0.0, your PAP2 does not have a valid IP address. In this
case you need to:
1. Hang up the phone, unplug and re-plug your PAP2 power cord.
2. Wait 2 minutes, and check the IP again.
3. If you still get 0.0.0.0, there can be two reasons for this:
a. Your DHCP Server is not assigning an IP address to the PAP2 (in
which case you should contact your network administrator or ISP
for assistance).
b. Your network does not have a DHCP server or you have
purchased a Static IP Address for the PAP2 from your ISP. In this
case, please proceed to Manually Assigning a Static IP Address `
below, otherwise skip this step.
Page 3

Manually Assigning a Static IP Address
Members using static IP on their home network may wish to configure the adap
tor with static IP. If you have obtained a static IP from your internet service
provider (ISP) and wish to configure your adaptor with your static IP settings,
please follow the instructions below:
1. You will first have to obtain the following information:
• IP Address • Default Gateway • Subnet Mask.
If you are using a router, please contact your router manufacturer for
instructions for retrieving this information from the router directly. If you
are not using a router, please obtain the above information from your ISP.
2. Pick up the telephone receiver of the phone connected to the adaptor,
and dial * * * *. You will hear a voice prompt saying “Linksys configuration
menu”.
3. Press the keys 1 0 1 # on your analog phone to access the Static IP
configuration menu.
4. Press 0 # to disable DHCP, then press 1 to save the setting.
5. Press 1 1 1 # to access the IP Address Menu.
6. Enter your IP Address followed by # (i.e. 1 2 3 * 4 5 * 6 7 * 8 9 # to
represent the IP 123.45.67.89). Press 1 to save the setting.
7. Press 1 3 1 # to access the Default Gateway Menu.
8. Enter your Default Gateway (i.e. 1 2 3 * 4 5 * 6 7 * 8 9 # to represent the
Gateway 123.45.67.89). Press 1 to save the setting.
9. Press 1 2 1 # to access the Subnet Mask Menu.
10. Enter your Subnet Mask (i.e. 2 5 5 * 2 5 5 * 2 5 5 * 0 # to represent
Subnet Mask 255.255.255.0). Press 1 to save the setting.
You have now completed the static IP configuration.
To verify the configuration was correct, please pick up the telephone receiver
on the phone connected to the ATA, and dial * * * * to enter the Linksys
configuration menu. Dial 1 1 0 # to hear the adaptor read back the IP address that you have configured. If the IP read out is not the same as what
you have entered in, please repeat steps 1 through 10 once again to ensure
the settings.
Page 4

Step 3: Configure the PAP2 to connect to the VOBPhone Network
1. Open your configuration page. To do so, type the following into your web
browser: http://xxx.xxx.xxx.xxx/admin/advanced
( “xxx.xxx.xxx.xxx” represents the IP address of your PAP2)
2. Click on the Provisioning menu
3. In the text box marked Profile Rule enter one of the following addresses,
based on your location. Each of the configuration files has been modified to
provide the correct settings for your local country:
Dialling:
To dial a PSTN number, dial like you would with a normal phone.
Eg 61390000000
To dial a VOBPhone number or voicemail, prefix a star to the number.
Eg *60001234, *123
Australia:
http://www.vobphone.net.au/support/hardware/linksys_pap2/initial_au.cfg
4. Click on the Save Settings button and close your web browser.
Step 4: Updating to the latest firmware and configuring your
VOBPhone number and password
1. Once the ATA has applied the changes, browse to the following address to
instruct the ATA to upgrade its firmware. Eg, for an IP address of
xxx.xxx.xxx.xxx:
http://xxx.xxx.xxx.xxx/admin/upgrade?http://www.vobphone.net.au/support/hardware/linksys_pap2/firmware.bin
2. You can now enter your VOBPhone details into the Line 1 (and optionally
Line 2) configuration areas. Enter your Display Name, User ID (this is your
VOBPhone number) and Password.
3. Click on the Save Settings button.
Important: Please remember to close the browser before attempting to make
calls
Your Linksys PAP2 is now fully configured and ready to use on the
VOBPhone Network! Simply pick up the handset and dial.
 Loading...