

Lift-master 71 909207 User Manual
MID STOP MODIFICATION
WARNING
Mini Limit Switches
71-909207
APPLICATION REQUIREMENTS:
WARNING
This modification is available to models T, GT,
APT, J, H, GH, SD and GSD standard door
operators with 24V control circuits. Not for use
with Solid State Logic Control Board (L).
The operator must have C2/B2 control wiring
Not available with Hazardous Area or Variable Speed Modifications.
A one button radio control cannot be used. In order to use a radio control you need a 2
channel receiver and transmitter. One channel to open and the other to close.
FUNCTIONS:
Provides capability of stopping the door while opening a pre-set mid position.
Constant pressure on the open button will fully open the door (on a very high door the coil
might relatch before fully open but the limit switches will shut it off). The switch will have
no effect on the close travel.
TO AVOID SERIOUS PERSONAL INJURY OR DEATH
FROM ELECTROCUTION, DISCONNECT ELECTRIC
POWER TO OPERATOR BEFORE INSTALLING MID-STOP
ARNING:
W
If a safety device is used it will only stop the door when it is above the mid-stop.
PREP
ARATION:
Unpack kit to verify the parts listed below are included. Refer to installation instructions on
reverse side.
PACKING LIST:
PART NUMBER
01-11602
82-PX08-04T
95-RD10-23
75-12480
10-14179
*01-1179-1
**01-1179-3
*SHIPPED WITH 1O OPERATORS
**SHIPPED WITH 3O OPERATORS
MID STOP MODIFICATION INSTRUCTIONS
SCREW, #8-32 x 1/4” LG PAN HEAD PHILLIPS SELF TAP
WIRE 18GA RED 10” .110 FASTON X .187 FASTON
MID STOP SWITCH BRACKET ASSEMBLY
AUXILIARY LIMIT SWITCH
1O B2 MID-STOP WIRING DIAGRAM
3O B2 MID-STOP WIRING DIAGRAM
DESCRIPTION
QUANTITY
1
3
1
1
1
1
1
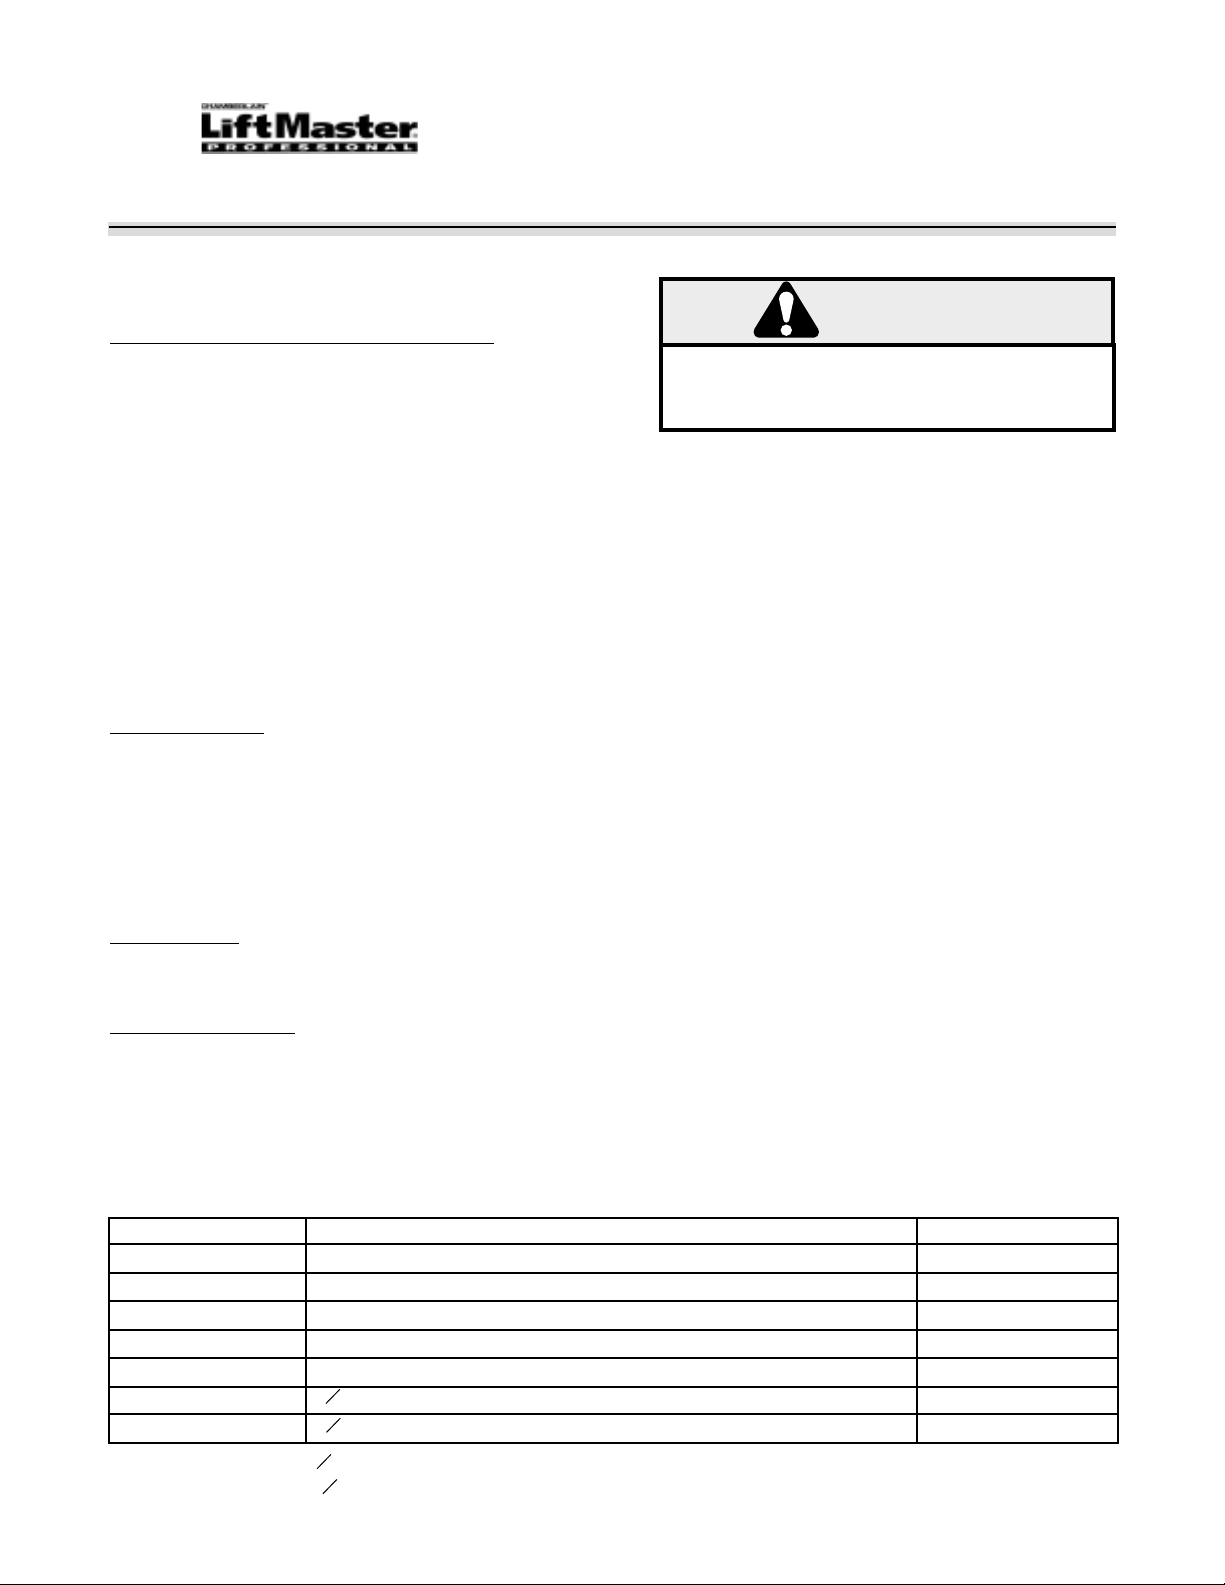
INSTALLATION INSTRUCTIONS
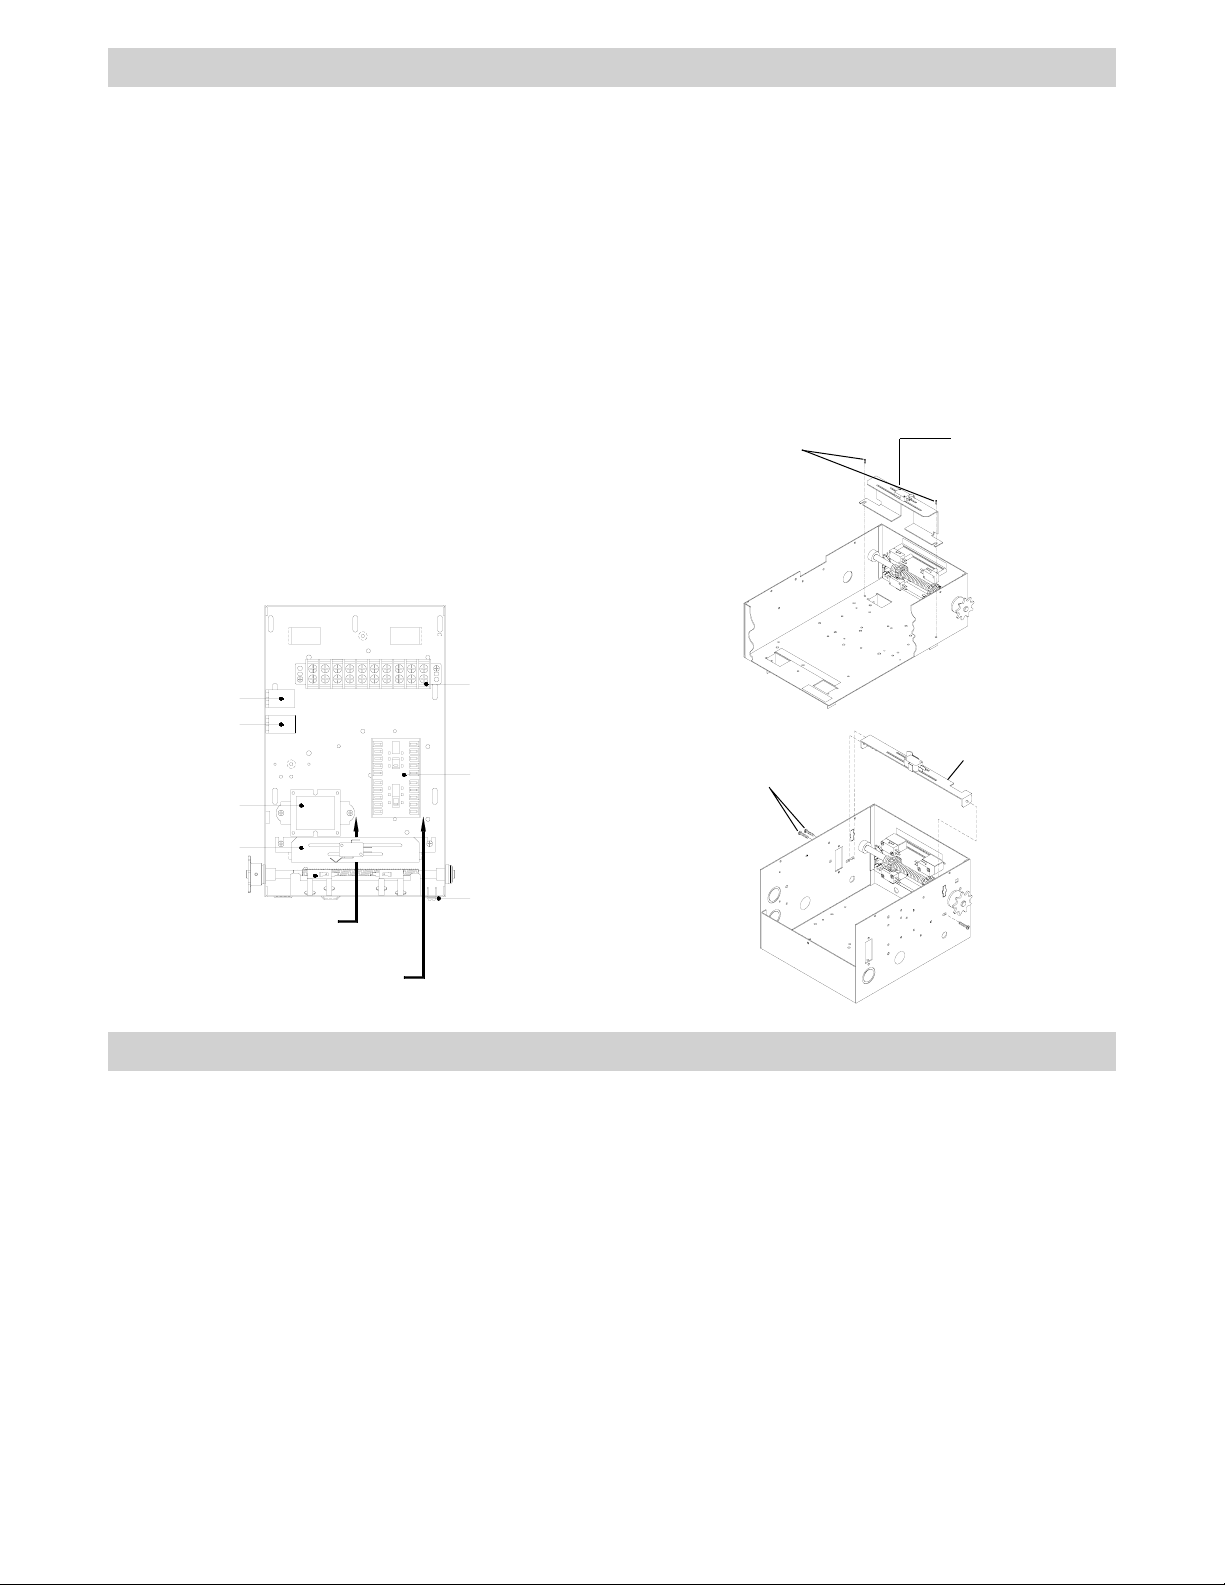
1. Locate the new bracket assembly with the limit
switch attached.
2. Before installing the new bracket inside the box
you must first run the wires from the top limit switches
along side the bracket on the contactor side of the
box and run the wires from the bottom limit switches
through the cut out in the bracket. Be sure not to
pinch wires under the bracket (refer to figure 1).
Fasten the bracket down with the (2) screws supplied
(refer to figure 2).
3. Locate the yellow wire on terminal #3 and move to
terminal #1.
4. Locate the red wire that runs from (R3) on the
radio terminal block to the relay coil on the (R1) relay,
remove the end connected to the relay coil and tape
or cap end so it can’t short out.
5. Install a new red wire from the relay coil (from step
4) to (A2) on the open contactor.
FIGURE 1
6. Locate the yellow wire from common on the
auxiliary open limit switch and move to common on
the new mid stop switch.
7. Locate the orange wire from normally close on the
auxiliary open limit switch and move to normally
closed on the new mid stop switch.
8. Adjust bracket (installed in step 2) so limit nut
actuates switch in passing..
9. Adjust midstop switch for desired opening height
by moving it on bracket.
FIGURE 2
(2) #8-32 X 1/4” LONG PAN
HD PHILLIPS SELF TAPING
SCREWS
MID STOP SWITCH
BRACKET ASSEMBLY
IR RELAY
R1 RELAY
TRANSFORMER
MID STOP SWITCH
BRACKET ASSEMBLY
RUN WIRES FROM BOTTOM LIMIT
SWITCHES THROUGH CUT OUT
IN BRACKET.
RUN WIRES FROM TOP LIMIT
SWITCHES AROUND OUTSIDE OF
BRACKET.
TERMINAL BLOCK
CONTACTOR
RADIO TERMINAL
BLOCK
(3) #8-32 X 1/4” LONG PAN
HD PHILLIPS SELF TAPING
SCREWS
MID STOP SWITCH
BRACKET ASSEMBLY
RADIO CONTROL CONFIGURATIONS
It will be necessary to use a two channel Receiver an Transmitter. One channel will be used to open and the
other channel will be used to close.
a. If your receiver has terminals 1, 2 and 3 and two
separate wires for the second channel connect as follows:
Radio 1 will connect to terminal 3 in the operator,
Radio 2 will connect to terminal 1 in the operator,
Radio 3 will connect into the wire nut in the operator
control box - this wire nut connects a yellow, purple
and orange wire. (This channel will open)
b. If your operator has an external radio terminal,
radio will only open to mid stop. Connect the wires as
follows:
Connect the two wires for the second channel to
terminals 3 and 2 of the main terminal strip. (This
channel will close).
c. If your receiver has 6 wires (2 for power, 2 for one
channel and 2 for second channel) connect wires as
follows:
Connect power to terminal 5 and into the wire nut as
described in section A. One channel connects to
terminals 1 and 3 (to open). The second channel
connects to terminals 2 and 3. (This channel will
close)
01-11602C All Rights Reserved
© 1999, The Chamberlain Group, Inc.
 Loading...