


Introduction
Installation
Operation
Suggestion on food storage
Care and maintenance
Table of contents
Entry |
3 |
Important safety instruction |
3 |
Identification of parts |
4 |
Where to install |
5 |
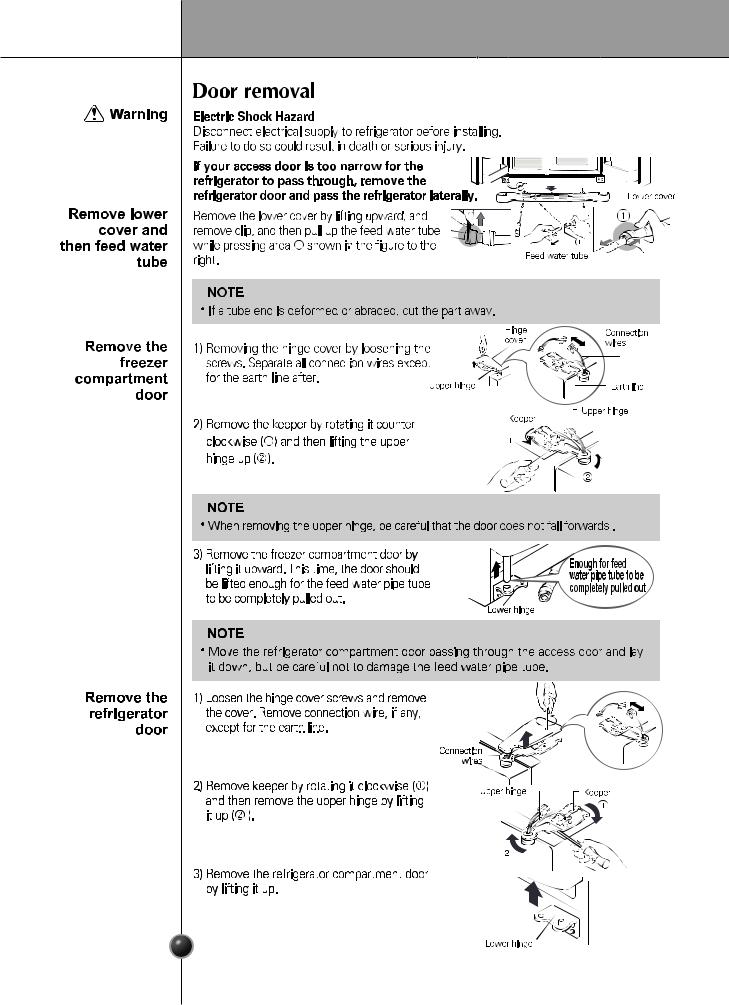
Door removal |
6 |
Door replacement |
7 |
Feed water pipe installation |
7 |
Height adjustment |
8 |
when the freezer door does not align with the height of the refrigerator door |
8 |
Starting |
9 |
Adjusting the temperatures and functions |
9 |
Refreshment center (Applicable to some models only) |
14 |
Shelf (Applicable to some models only) |
15 |
Wine holder (Applicable to some models only) |
15 |
Egg box (Applicable to some models only) |
15 |
Humidity control in the vegetable compartment |
16 |
Convert into a vegetable or meat compartment (Applicable to some models only) |
16 |
Deodorizer(Applicable to some models only) |
16 |
Miracle Zone Temperature Transition Corner(Applicable to some models only) |
17 |
Temerature Change at Miracle Zone (Applicable to some models only) |
17 |
Miracle Zone(Applicable to some models only) |
17 |
Location of foods |
18 |
Storing foods |
19 |
How to dismantle parts |
20 |
General information |
22 |
Cleaning |
22 |
Trouble shooting |
23 |
The working life of this set is 7 years since the date of delivery to consumer.
2
Introduction
Entry
The model and serial numbers are found on the inner case or back of refrigerator compartment of this unit. These numbers are unique to this unit and not available to others. You should record requested information here and retain this guide as a permanent record of your purchase. Staple your receipt here.
Date of purchase |
: |
Dealer purchased from |
: |
Dealer address |
: |
Dealer phone no. |
: |
Model no. |
: |
Serial no. |
: |
Important safety instruction
Before it is used, this refrigerator must be properly installed and located in accordance with the installation instructions in this document.
Never unplug your refrigerator by pulling on the power cord. Always grip plug firmly and pull it straight out from the outlet.
When moving your appliance away from the wall, be careful not to roll over the power cord or to damage it in any way.
After your refrigerator is in operation, do not touch the cold surfaces in the freezer compartment, particularly when your hands are damp or wet. Skin could adhere to these extremely cold surfaces.
Unplug the power cord from the power outlet for cleaning or other requirements. Never touch it with wet hands because you can get an electric shock or be hurt.
Never damage, process, severely bend, pull out, or twist the power cord because damage the power cord may cause a fire or electric shock. You have doubts on whether the appliance is properly grounded.
Never place glass products in the freezer because they may be broken due to expansion when their contents are frozen.
Never allow your hands within the ice storage bin of the automatic ice maker. You could be hurt by the operation of the automatic ice maker.
The appliance is not intended for use by young children or infirm persons without supervision.
Young children should be supervised to ensure that they do not play with the appliance.
Never allow anyone to climb, sit, stand or hang on the refreshment center door. These actions may damage the refrigerator and even tip it over, causing severe personal injury.
Don’t use an If possible, connect the refrigerator to its own individual electrical outlet to prevent it and
extension cord other appliances or household lights from causing an overload that could cause a power outage.
Accessibility of The refrigerator-freezer should be so positioned that the supply plug is accessible for Supply Plug quick disconnection when accident happens.
Supply Cord If the supply cord is damaged, it must be replaced by the manufacturer or its service Replacement agent or a similarly qualified person in order to avoid a hazard.
Warning |
Do not modify or extend the Power Cord length. |
|
|
|
It will cause electric shock or fire. |
|
|
|
3 |
|
|
|
|
|

Introduction
4

Installation
|
Where to Install |
|
Select a good |
1. Place your appliance where it is easy to |
|
location |
|
use. |
|
2. |
Avoid placing the unit near heat sources, |
|
|
direct sunlight or moisture. |
|
3. |
To ensure proper air circulation around the |
|
|
fridge -freezer, please maintain sufficient |
|
|
space on both the sides as well as top and |
|
|
maintain at least 2 inches (5 cm) from the |
|
|
rear wall. |
|
4. |
To avoid vibrations, the appliance must |
|
|
be leveled. |
|
5. |
Don't install the appliance below 5°C. It may cause affect the performance. |
Disposal of the |
This appliance contains fluid (refrigerant, lubricant)and is made of parts and materials |
|
old appliance |
which are reusable and/or recyclable. |
|
|
All the important materials should be sent to the collection center of waste material |
|
|
and can be reused after rework (recycling). For take back, please contact with the |
|
|
local agency. |
|
5
Installation
6
Installation
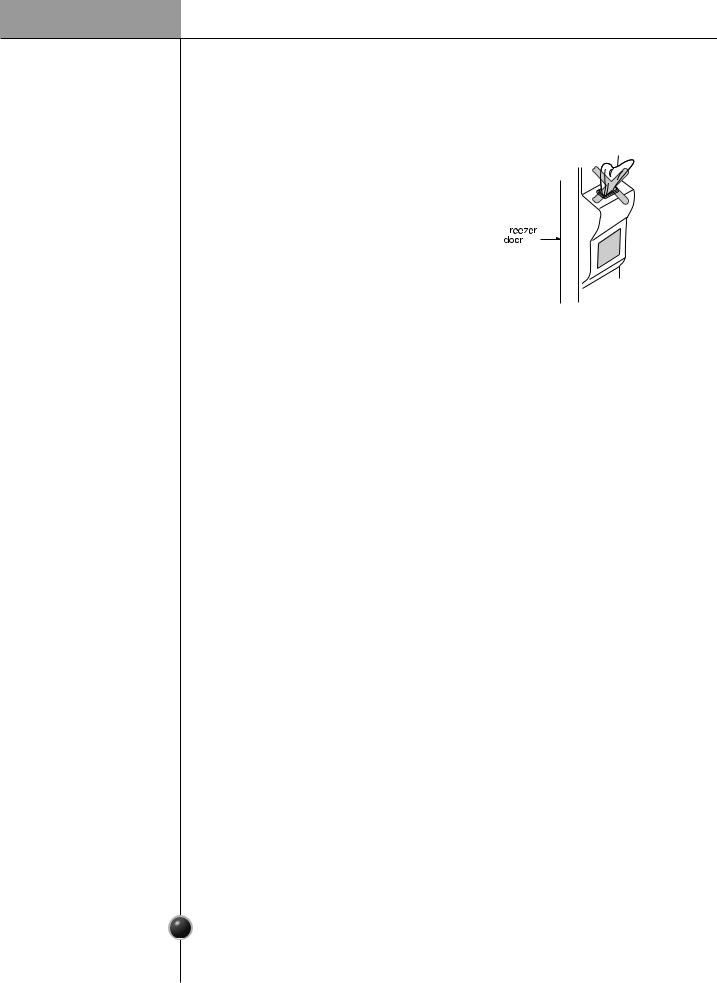
Pass the Pass the refrigerator laterally through the access refrigerator door as shown in the right figure.
Door replacement
Mount them in the reverse sequence of removal after they pass through the access door.
Feed water pipe installation
Before Automatic ice maker operation needs water pressure of 147~834 kPa (1.5~8.5 installation kgf/cm2) (That is, an instant paper cup (180 cc) will be fully filled within 3 sec.).
If water pressure does not reach the rating 147 kPa (1.5 kgf/cm2) or below, it is necessary to purchase a separate pressure pump for normal automatic icing and cool water feed.
Keep the total length of the feed water pipe tube within 8 m and be careful for the tube not be bent. If the tube is 8 m or longer it may cause trouble in water feed owing to the drain water pressure.
Install the feed water pipe tube at a place free from heat.
Warning |
Connect to potable water supply only. |
|
Refer to instructions with water filter kit for installation. |
7

Installation
8
Operation
Starting
When your refrigerator is first installed, allow it to stabilize at normal operating temperatures for 2-3 hours prior to filling it with fresh or frozen foods.
If operation is interrupted, wait 5 minutes before restarting.
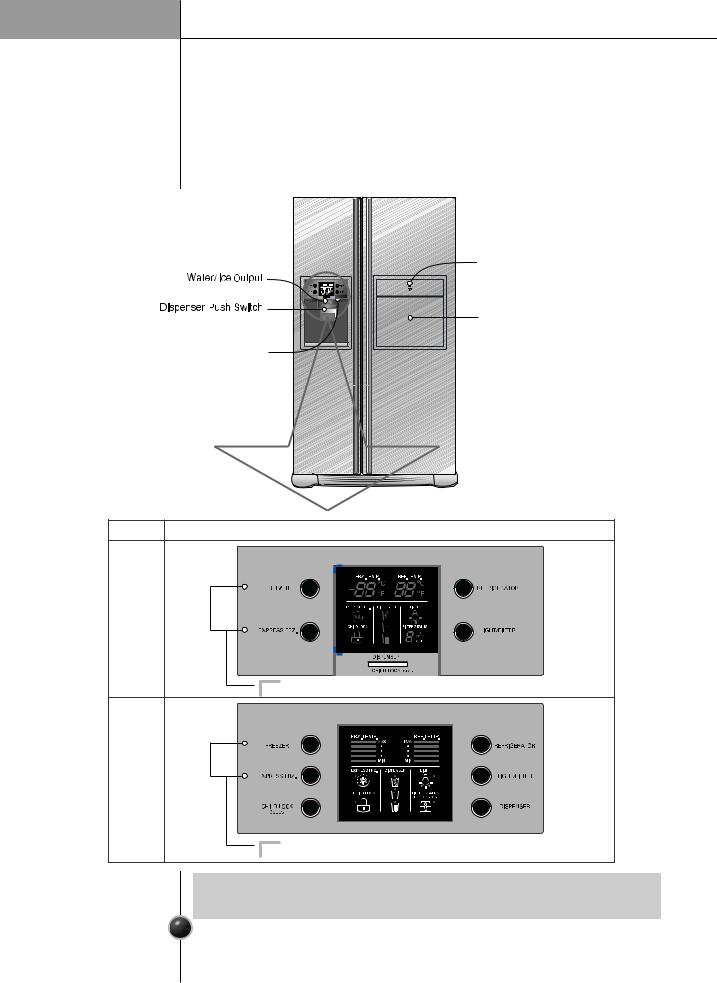
Adjusting the temperatures and functions


|
|
NOTE
• Your model may not include every option.
9

Operation
Display Power Saving Mode
This function places the display into power saving mode until the next time the door is opened.
Press the FREEZER and EXPRESS FRZ. buttons simultaneously and hold them for 5 seconds until the Ding sounds. All LED/LCDs will then turn ON, then OFF. When the power saving mode is activated, the display will remain off until the next time the door is opened. Then, it will come on whenever a door is opened or a button is pressed and remain on for 20 seconds after the last door opening or button selection. To deactivate the power saving mode, press the FREEZER and EXPRESS FRZ. buttons simultaneously and hold them for 5 seconds until the Ding sounds.
|
You can adjust temperature of and freezer room and refrigerator room. |
||
|
|
|
|
How to adjust the |
|
|
|
temperature in |
|
|
|
the freezer |
|
|
|
|
|
|
|
compartment |
|
|
|
|
|
Middle(-190C) Middle strong(-220C) Strong(-230C) Weak(-150C) Middle weak(-170C) |
|
|
|
|
|
How to adjust the |
|
|
|
temperature in |
|
|
|
|
|
|
|
the refrigerator |
|
|
|
compartment |
|
|
|
|
|
Middle(30C) Middle strong(20C) Strong(00C) Weak(60C) Middle weak(40C) |
|
Whenever pressing button, setting is repeated in the order of (Weak) (Middle Weak) (Middle) (Middle Strong) (Strong).
The actual inner temperature varies depending on the food status, as the indicated setting temperature is a target temperature, not actual temperature within refrigerator.
Refrigeration function is weak in the initial time. Please adjust temperature as above after using refrigerator for minimum 2~3 days.
Automatic ice |
The icemaker can automatically make 8 pieces of ice cubes at anyone time, |
maker |
approximately 80 pieces per day. However these quantities may vary according to |
|
certain conditions. E.g. the duration and amount of times the refrigerator door is |
|
opened. |
The Ice making proceeds ceases automatically when the ice storage bin is full.
If you choose not to use the automatic ice making function, repositioned the icemaker selection switch to the off position or the on position for reselection. Note: The manual selection function is only applicable to some models only.
|
NOTE |
|
• It is normal that a noise is produced when ice made is dropped into the ice storage |
10 |
bin. |
|
Operation
The arrow mark graphic remains at the“on ” status when selecting Special Refrigeration “ on”.
11
Operation
12
Operation
Cautions Throw away the ice (about 20 pieces) and water (about 7 glasses) first made after refrigerator installation.
The first ice and water may include particles or odor from the feed water pipe or feed water box. This is necessary in case that the refrigerator has not been used for a long time.
Keep children away from the dispenser.
Children may push switch incorrectly bad or damage
lamps.
Be careful that food is not block the ice passage.
If foods are placed at the entrance of ice passage, ice
may not be dispensed. The ice passage may also be covered with ice powder if splinter ice is used only. This
time, remove the ice powder accumulated.
Never store beverage cans or other foods in ice storage bin for the purpose of rapid cooling.
Such actions may damage the automatic ice maker.
Never use thin crystal glass or crockery to collect ice.
Such glasses or containers may be broken.
Put ice first into a glass before filling water or other beverages.
Water may be splashed if ice is added to existing liquid in a glass.
Never touch a hand or other tools on ice outlet.
Touch may cause a part breakage or hand injury.
Never remove the ice maker cover.
Sometimes level the surface so that the ice storage bin is fully filled with ice.
Ice is piled up just near the ice maker. So, such status may be considered, by the ice maker, that the ice storage bin is fully filled and ice making operation may stop.
If discolored ice is dispensed, immediately contact service center, stopping use.
Never use too narrow or deep glass.
Ice may be jammed in ice passage and, thus, the refrigerator may be failed.
Keep the glass at a proper distance from ice outlet.
A glass too close to the outlet may hinder ice from coming out.
13
Operation
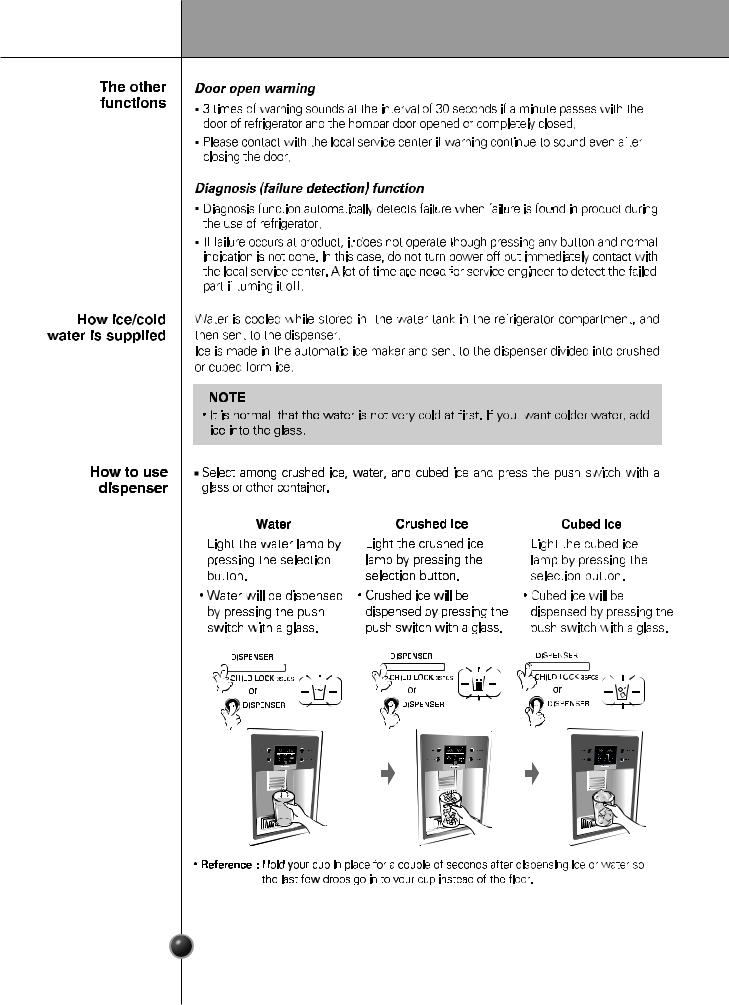
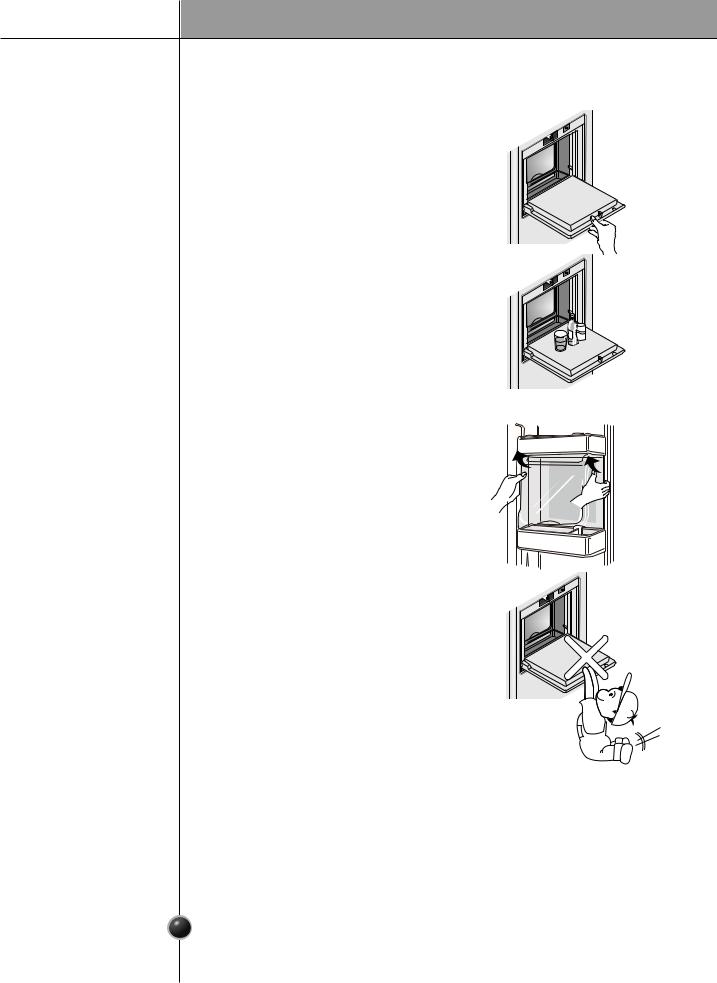
Refreshment center (Applicable to some models only)
How to use Open the refreshment center door.
You can access the refreshment center without opening refrigerator door and thus saving electricity.
Inner lamp is lit in refrigerator compartment when the refreshment center door opens. Thus it is easy to identify the contents.
Use the |
Never use the refreshment center door as a |
|
|
|
|
|
|||
refreshment |
chopping board and take care not to damage it |
|
|
|
center door as a |
with sharp tools. |
|
|
|
|
||||
Never rest your arms or severely press on it. |
|
|||
stand |
|
|||
Never take out |
The refreshment center can not function |
the inner |
normally without the cover. |
refreshment |
|
center cover |
|
Never place Not only can the refreshment center door may heavy items on be damaged, but also children may be hurt.
the refreshment center door or allow children to hang it on.
14
Operation
Shelf (Applicable to some models only)
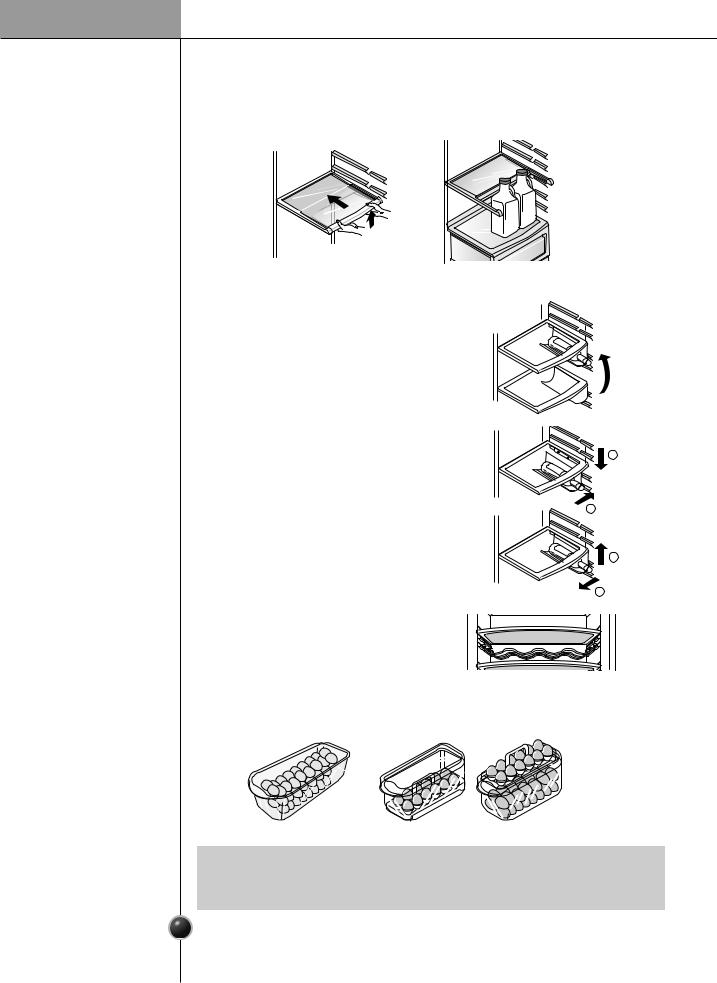
Folding Shelf You can store taller items such as a gallon container or bottles by simply pushing in front half of shelf underneath back half of shelf. Pull toward you to return to a full shelf.
Wine holder (Applicable to some models only)
Wine holder Bottles can be stored laterally with adjustment this wine corner.
(Type 1) This can be attached to any shelf.
In case of inserting the wine holder : |
|
|
Pull the wine holder downward as in |
2 |
|
after inserting it into the side anchoring |
|
|
part of the shelf as in by catching it |
|
|
upward as in . |
1 |
|
In case of separating the wine holder : |
|
|
Pull the wine holder inward as in after |
3 |
|
holding it upward as in by catching it. |
||
|
||
|
4 |
(Type 2) Bottles can be stored laterally with this wine rack.
Egg box (Applicable to some models only)
You can move the egg box to wherever you want.
[Type-1] |
[Type-2] |
NOTE
•Never use the egg box as an ice storage bin. It can be broken.
•Never store the egg box in the freezer compartment or fresh compartment.
15

Operation
Humidity control in the vegetable compartment
The humidity can be controlled by adjusting the humidity control switch to the left/right when storing vegetables or fruits.
High humidity
HUMIDITY CONTROL
HIGH 

 LOW
LOW
Low humidity
HUMIDITY CONTROL
HIGH 

 LOW
LOW
LOW
HIGH
LOW
HIGH
Convert into a vegetable or meat compartment (Applicable to some models only)
The bottom drawer in the refrigerator can be converted into a vegetable or meat compartment
How to use the deodorizing system
The meat compartment maintains the temperature at a lower point than the refrigerator compartment so that meat or fish can be stored fresh longer.
NOTE
•Vegetables or fruits are frozen if the conversion switch is set to meats compartment. So, be sure to check it before storing foods.
Deodorizer (Applicable to some models only)
This system efficiently absorbs strong odors by using the optical catalyst. This system does hot have any affect on stored food.
Since it is installed already installed onto the cool air intake duct from the from the refrigerator compartment, you need no separate installation.
Please use closed containers to store food with pungent odors.
16 Otherwise, this oder can be absorbed by other food in the compartment.
Operation
Miracle Zone Temperature Transition Corner (Applicable to some models only)
By pressing the button, store vegetables, fruits or other types of food such as meat to be defrosted, raw fish, etc.
Temperature Change at Miracle Zone (Applicable to some models only)
Method to Use You can select optimum
temperature range depending on types of foods stored.
- 3-step of temperature selection including -3°C, -1°C and 4°C is
available. Vegetables/fruits and cold
storage foods requiring humidity maintenance and meats/fishes can
be more freshly stored depending on type of foods stored.
When using the Miracle Zone as storage room of meats, storing vegetables or fruits may be frozen
When using the Miracle Zone as storage room of meats, keeping meats or fishes may be spoiled and thus meats or fishes must be kept at the F-room.
If opening a door of the R-room, lamp turns on in the selected status and lamp turns off if closing it.
(Vegetable/Fruit) (Cold storage while maintaining humidity) (Meat) is sequentially repeated whenever pressing the "Selection" button.
|
Miracle Zone (Applicable to some models only) |
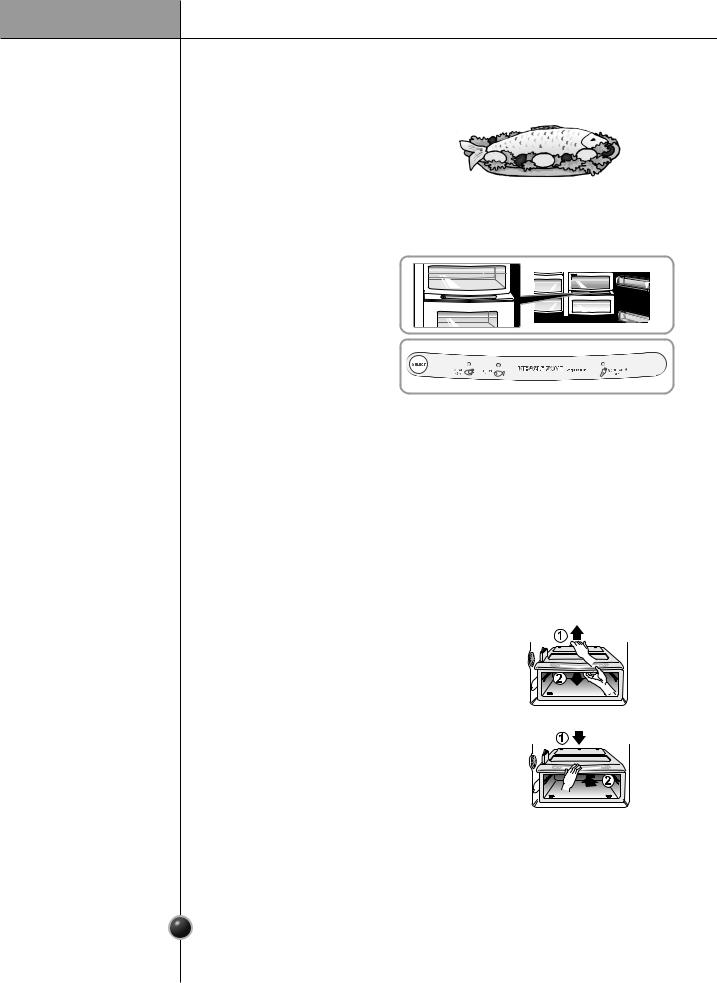
When removing |
First, remove the vegetable bin. |
Miracle Zone |
After lifting the Miracle Zone case slightly , reach |
|
inside and pull it outward . |
When installing |
Fit the Miracle Zone case on to the ledge and |
Miracle Zone |
gently slide it in . |
|
When forced, the connecting parts can be damaged. |
17
 Loading...