

Lenovo Tab P11 Pro Safety, Warranty & Quick Start Guide [zc, zh]

Lenovo
Tab P11 Pro
Safety, Warranty
& Quick Start Guide
Lenovo TB-J706F
Lenovo TB-J706L
English/繁體中文/简体中文

Contents
English ............................................................................................................1
繁體中文 ........................................................................................................ 11
简体中文 ......................................................................................................29

English
https://support.lenovo.com
https://forums.lenovo.com
Read this guide carefully before using your device.
All information labeled with * in this guide only refers to the WLAN + LTE model.
Reading before using your device
Reading first - regulatory information
Device models equipped with wireless communications comply with the radio
frequency and safety standards of any country or region in which it has been approved
for wireless use. In addition, if your product contains a telecom modem, it complies with
the requirements for connection to the telephone network in your country.
Be sure to read the Regulatory Notice for your country or region before using
the wireless devices contained in your device. To obtain a PDF version of the
Regulatory Notice, go to https://support.lenovo.com.
Getting support
To get support on network services and billing, contact your wireless network
operator. To learn how to use your device and view its technical specifications, go
to https://support.lenovo.com.
Accessing your User Guide
Your User Guide contains detailed information about your device. To download
the publications for your device, go to https://support.lenovo.com and follow the
instructions on the screen.
Legal notices
Lenovo and the Lenovo logo are trademarks of Lenovo in the United States, other
countries, or both.
Other company, product, or service names may be trademarks or service marks of
others.
Dolby, Dolby Audio, Dolby Vision, Dolby Atmos, and the double-D symbol are
trademarks of Dolby Laboratories. Manufactured under license from Dolby
Laboratories. Confidential unpublished works. Copyright © 1992-2020 Dolby
Laboratories. All rights reserved.
LIMITED AND RESTRICTED RIGHTS NOTICE: If data or software is delivered
pursuant a General Services Administration “GSA” contract, use, reproduction, or
disclosure is subject to restrictions set forth in Contract No. GS-35F-05925.
1
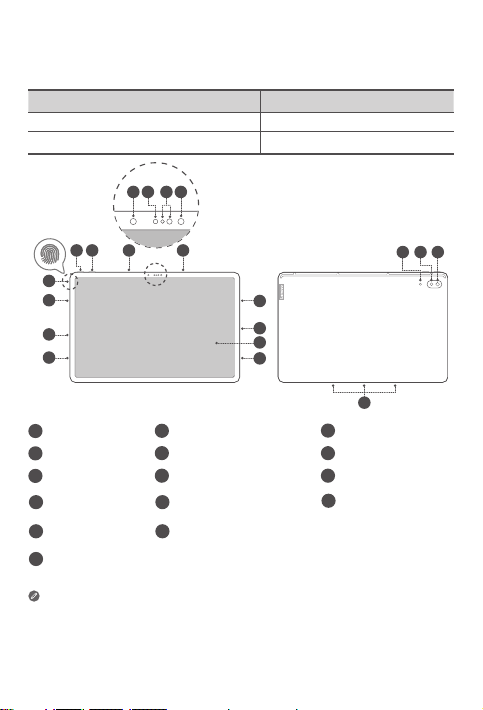
Device overview
4 5 6 4
1 2 3 3
7
8
9
7
7
10
7
11
12 13 14
15
Model Version
Lenovo TB-J706F WLAN
Lenovo TB-J706L WLAN + LTE
Volume up button2Volume down button
1
4
Front camera
Speakers
7
10
13
15
Card tray
Rear camera
4-point pogo-pin smart connector (for the compatible keyboard and Smart
Charging Station)
• The WLAN version does not have a Nano-SIM card slot.
• USB-C connector only supports the USB-C to 3.5mm digital adapter to
connect a 3.5mm audio plug.
• All pictures and illustrations in this document are for your reference only and
may differ from the final product.
5
Light sensor
8
USB-C connector
Power button/Fingerprint
11
sensor
Wide-angle camera
14
Microphones
3
6
ToF sensor
9
Touch screen
12
Flashlight
2
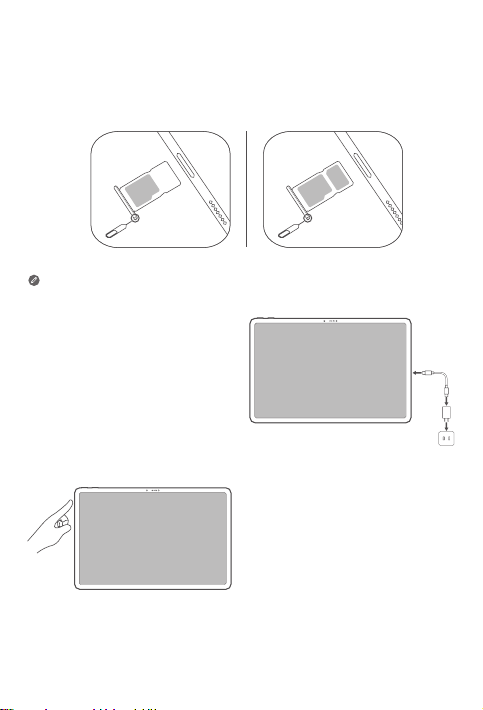
Preparing your device
Installing cards
Install the cards as shown in the figure.
SIM
microSD
• Power o the device before inserting or removing a card.
• Note that the WLAN version does not have a Nano-SIM card slot.
Charging your device
Connect your device to a power
outlet using the USB cable and
power adapter provided.
Turning on
Press and hold the Power button until
the Lenovo logo appears.
microSD
3
Logging in with your fingerprint
1
Touch the fingerprint sensor to quickly unlock the screen.
It is recommended to follow the
onscreen instructions and register
your fingerprint when powering
on your device for the first time.
You can also go to Settings >
Security > Fingerprint to register
a fingerprint.
Before using fingerprint functions, you need to set a lock screen password. Go to
Settings > Security > Screen lock to set up.
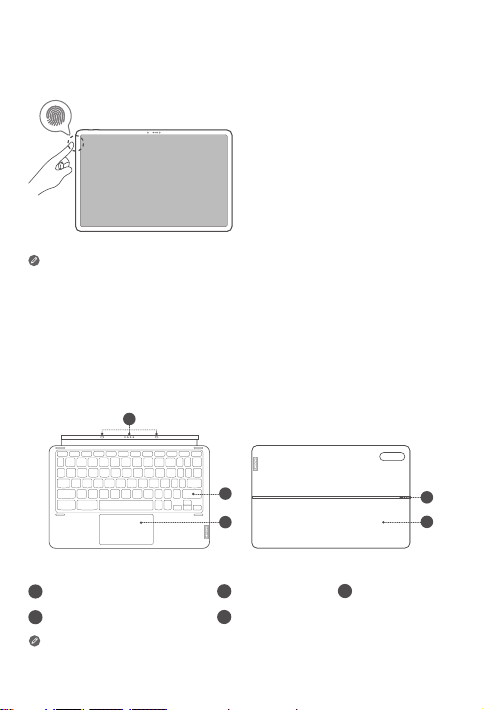
Accessories (optional)
The accessories do not come with all models, and are sold separately.
Keyboard pack
2
3
Keyboard Stand Cover
Keyboard connector
1
4
Hinge
Keyboard layouts vary from country to country. The Keyboard layout in this
document is for reference only and your Keyboard may differ.
Keyboard
2
5
Kickstand
4
3
Trackpad
4
5
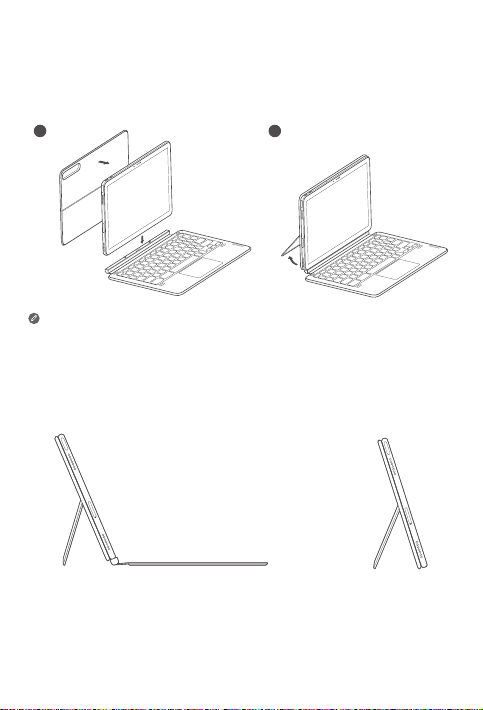
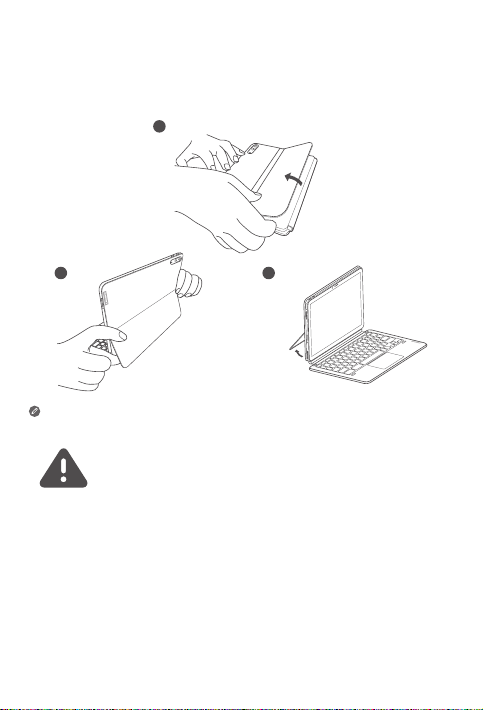
Attaching the Keyboard pack
1 2
Attach the stand cover and keyboard to the tablet as shown in the following
figure.
• When you are attaching the Stand Cover to the Tablet, make sure
that the camera hole is aligned with the tablet’s rear cameras.
Keyboard pack configurations
The Tablet can be used with the entire Keyboard pack attached, or with the
Stand Cover alone.
5
Opening and adjusting the Kickstand
You can adjust the Tablet angle using the Stand Cover. Grasp either side of
the kickstand and gently open it until you reach the desired angle.
1
2 3
To prevent damage, do not apply excessive pressure to the Stand Cover or force
the Kickstand beyond its natural range of motion.
• Do not overtilt or apply excessive pressure to the Stand Cover,
doing so may damage the hinges.
• Adjust the tablet angle by opening the Kickstand and changing the
position of the tablet until the desired angle is found.
• The Tablet, Keyboard, and Stand Cover all contain magnetic
materials. To avoid loss of magnetism, avoid exposing the Tablet,
Keyboard, and Stand Cover to high temperatures or direct sunlight.
• To prevent demagnetization of credit cards and other items with magnetic
data, keep them away from the Tablet, Keyboard, and Stand Cover.
6
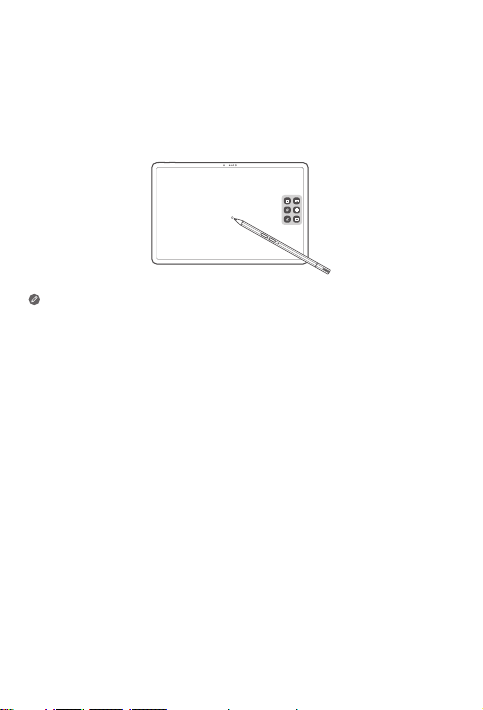
Lenovo Precision Pen 2
1
You can use the Lenovo Precision Pen 2 in place of your fingers for a better
experience, such as working with specific applications to write or draw on
the screen.
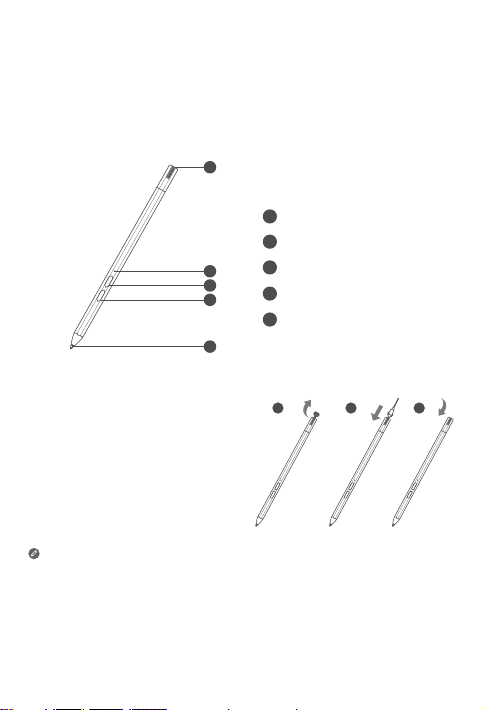
Overview
Pen cap
1
Indicator LED
2
Upper button
3
2
3
4
4
5
Charging the pen
1. Remove the pen cap in the direction
shown in the figure.
2. Connect the pen to a charger with a
USB-C cable.
3. Replace the pen cap on the pen.
You can start to use the pen after
charging.
• The indicator light will have an amber glow while charging the pen
and a white glow after it is fully charged.
• Please be cautious when using the pen. The pen contains sensitive
electronic components. Dropping it may cause damage.
Lower button
5
Tip
1 2 3
7
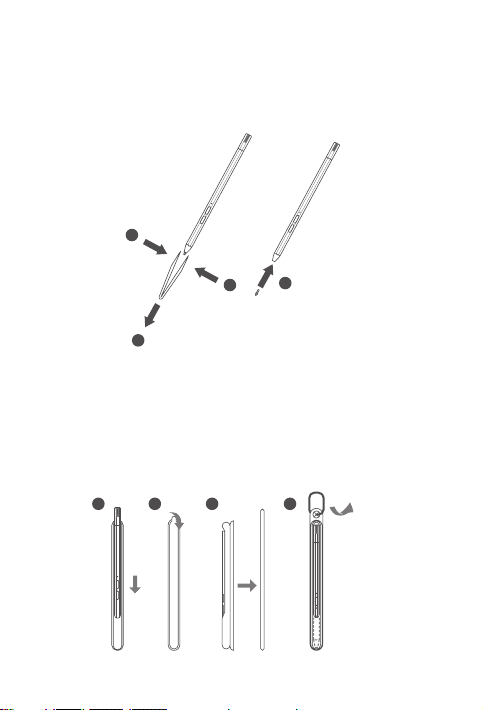
Replace tip
2
1. Pinch the tip with tweezers or another suitable tool.
2. Remove the tip.
3. Install the replacement tip (supplied).
1
3
1
Store the Pen
Method one:
1. Slide the pen into the pen case.
2. Remove the transparent film on the back of the pen case.
3. Stick the pen case to the plastic panel.
4. Thread the ring through the X-shaped hole in the top of the plastic panel.
1 2 3 4
8
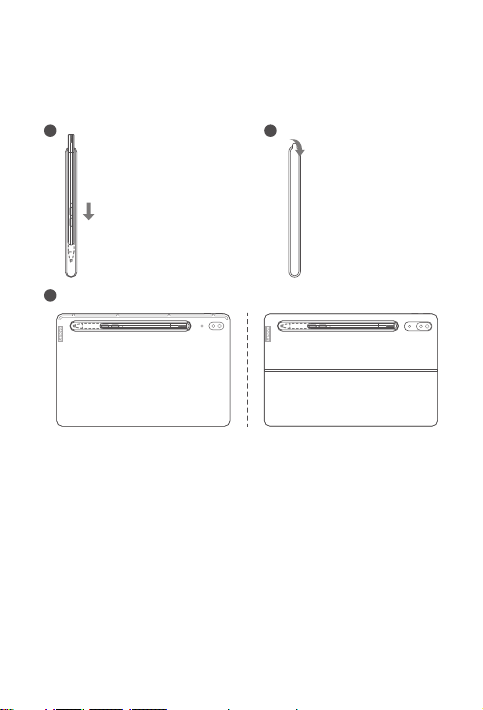
Method two:
1. Slide the pen into the pen case.
2. Remove the transparent film on the back of the pen case.
3. Stick the pen case to the back of the tablet or stand cover.
21
3
9
Use the pen
1. Hold the pen close to the tablet until a white dot appears on the screen.
2. Use the upper and lower button functions of the pen.
• Press the upper button to return to the home screen.
• Press the lower button to use the Smart Navigation Bar, and then open the
supporting software to write.
Using the pen on a coated screen may interfere with the pen-writing
experience.
10

繁體中文
https://support.lenovo.com
https://forums.lenovo.com
在使用裝置前,請仔細閱讀本指南。
本指南內所有標示為 * 的資訊只適用於 WLAN + LTE 型號。
使用裝置前先閱讀
請先閱讀監管資訊
配備無線通訊的裝置型號符合任何需批准作無線使用的國家或地區之電台頻率及安全標
準。此外,若您的產品包含電訊數據機,其符合連接您國家電話網絡的要求。
請務必先閱讀您所屬國家或地區的「
取得「
監管通知
」的 PDF 版本,請前往 https://support.lenovo.com 。
取得支援
如需取得關於網絡服務和收費的支援,請聯絡您的無線網絡供應商。如要了解如何使用
裝置及檢視其技術規格,請前往 https://support.lenovo.com 。
取得
用戶指南
您的
用戶指南
https://support.lenovo.com 並遵循螢幕上的指示操作。
包含裝置的詳細資訊。如需下載裝置刊物,請瀏覽
法律注意事項
Lenovo 及 Lenovo 標誌為美國、其他國家或美國及其他國家的 Lenovo 商標。
其他公司、產品或服務名稱可能是其他公司的商標或服務商標。
Dolby、Dolby Audio、Dolby Vision、Dolby Atmos 及雙 D 符號為 Dolby
Laboratories 的商標。在 Dolby Laboratories 的許可下製造。機密未出版物。版權
© 1992-2020 Dolby Laboratories。版權所有。
有限及受限權利之注意事項:若數據或軟件是根據一般服務管理署「GSA」合約提供
的,則使用、再製作或披露均受合約號碼 GS-35F-05925 所限。
監管通知
」,然後才使用裝置內的無線裝置。如要
11
 Loading...