

Leica Trinovid User Manual [de]

LEICA TRINOVID 8 x 42
LEICA TRINOVID 10 x 42
Anleitung | Instructions
Notice d’utilisation | Gebruiksaanwijzing
Istruzioni | Instrucciones
Leica Camera AG / Oskar-Barnack-Straße 11 / D–35606 Solms
www.leica-camera.com / info@leica-camera.com
Telephone +49 (0) 6442-208-0 / Fax +49 (0) 6442-208-333
93388 XII/12/FLW/B&S
Bruksanvisning |
取扱説明書
Инструкция по эксплуатации

1a
1b
2
2
3
4
5

Deutsch 02
English 14
Françias 26
Nederlands 38
Italiano 50
Español 62
Norske 74
日本語 86
русский 98

VORWORT
Sehr geehrte Kundin, sehr geehrter Kunde,
Der Name Leica steht weltweit für höchste
Qualität, feinmechanische Präzision bei äus ser ster Zuverlässigkeit und langer Lebensdauer.
Wir wünschen Ihnen viel Freude und Erfolg mit
Ihrem neuen Leica Trinovid Fernglas. Damit
Sie es richtig einsetzen können, empfehlen wir
Ihnen, zunächst diese Anleitung
zu lesen.
LIEFERUMFANG
– Fernglas
– Tragriemen
– Bereitschaftstasche
– Okularschutzdeckel
– 2 Objektiv-Schutzdeckel
– Anleitung
– Garantiekarte
– Prüfzertifikat
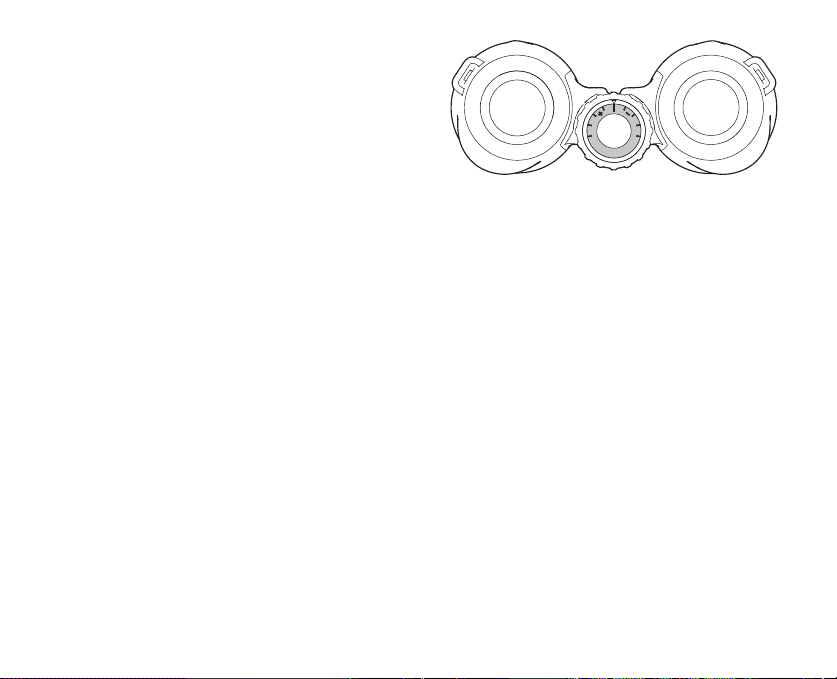
BEZEICHNUNG DER TEILE
1. Okular-Augenmuscheln
Stellung a: herausgedreht für
Beobachtung ohne Brille
Stellung b: hereingedreht für
Beobachtung mit Brille
2. Ösen für Tragriemen
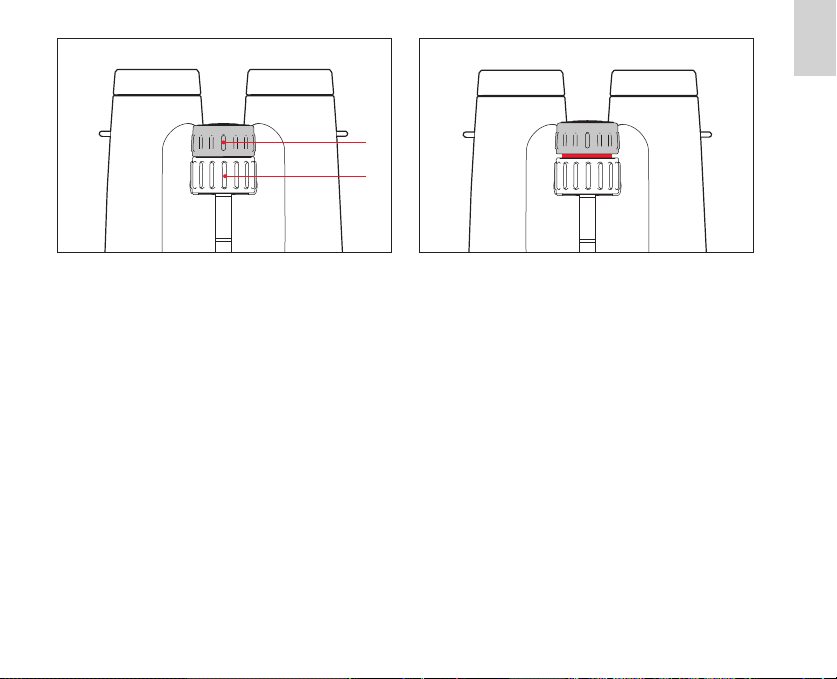
3. Verriegelbarer Dioptrienring
4. Zentralfokussierungsring
5. Gelenkachse für Einstellung des Augenabstands
2

INHALTSVERZEICHNIS Seite
Vorwort .......................................................................................................................................2
Lieferumfang ...............................................................................................................................2
Bezeichnung der Teile ................................................................................................................. 2
Anwendungsmöglichkeiten .......................................................................................................... 4
Anbringen des Tragriemens und des Okular-Schutzdeckels .......................................................... 4
Montage der Objektiv-Schutzdeckel ............................................................................................ 4
Einstellen der Augenmuscheln / Verwendung mit und ohne Brille ................................................ 5
Einstellen des Augenabstands ..................................................................................................... 6
Einstellen der Schärfe / Dioptrienausgleich ................................................................................. 7
Skalenangaben ........................................................................................................................... 8
Pflege/Reinigung ........................................................................................................................ 9
Zubehör ...................................................................................................................................... 9
Ersatzteile ................................................................................................................................... 9
Was tun, wenn... ....................................................................................................................... 10
Technische Daten ..................................................................................................................... 11
Leica im Internet und Leica Akademie ....................................................................................... 12
Leica Infodienst ........................................................................................................................12
Leica Kundendienst ...................................................................................................................13
ACHTUNG:
• Niemals mit dem Fernglas in die Sonne oder andere helle Lichtquellen blicken!
Es kann zu Augenverletzungen führen!
• Niemals während des Gehens durch das Fernglas blicken!
Sie könnten Hindernisse übersehen!
3
3

ANWENDUNGSMÖGLICHKEITEN
Die Leica Trinovid Ferngläser besitzen ein hermetisch abgedichtetes, stickstoffgefülltes, Magnesium-Gehäuse. Sie eignen sich daher auch
für den Outdoor-Einsatz. Dabei muss auch auf
Nässe keine Rücksicht genommen werden –
sie sind bis 5m Wassertiefe absolut dicht und
die innenliegende Optik beschlägt nicht.
ANBRINGEN DES TRAGRIEMENS UND
DES OKULAR-SCHUTZDECKELS
Siehe Illustration auf hinterer Umschlag seite.
Hinweis:
Falls Sie die Okular-Schutzdeckel am Tragriemen befestigen möchten, muss dies zusammen mit dem Anbringen des Trag riemens am
Fernglas erfolgen.
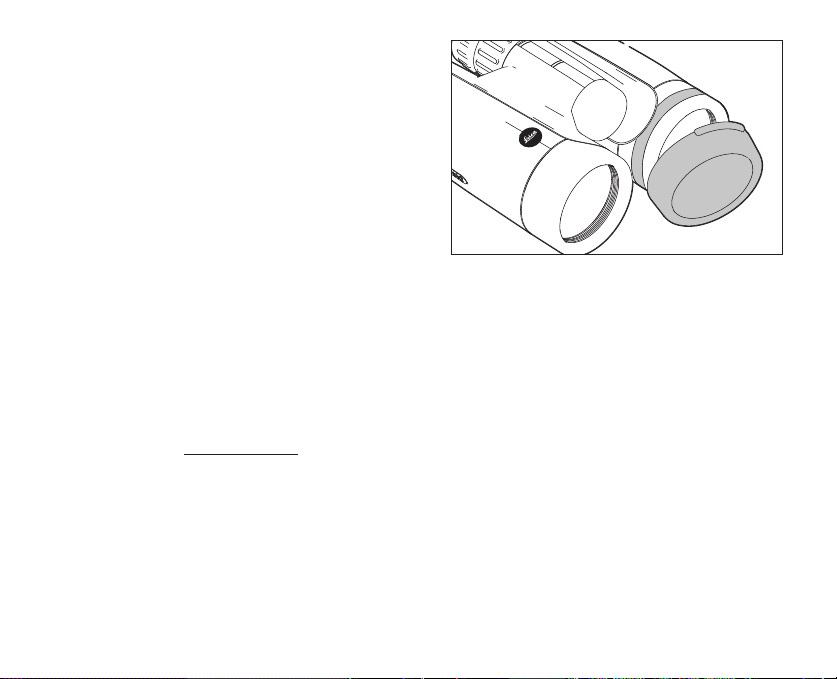
MONTAGE DER OBJEKTIV-SCHUTZDECKEL
Zur Montage wird der Gummiring des Deckels
von der Objektivseite her über das Fernglas
gezogen.
4

A B C D
EINSTELLEN DER AUGENMUSCHELN /
VERWENDUNG MIT UND OHNE BRILLE
Die Okular-Augenmuscheln (1) lassen sich
durch Drehen einfach verstellen und rasten
in den gewählten Positionen sicher ein. Zur
gründ lichen Reinigung können sie auch ganz
entfernt werden.
Für die Beobachtung mit Brille (Bild A) bleiben
sie in der ganz eingedrehten Stellung. Für die
Beobachtung ohne Brille werden sie durch
Drehen gegen den Uhrzeigersinn herausgedreht. Es stehen vier Positionen zur optimalen
Anpassung zur Verfügung (Bilder B, C).
Sind die Okulare stark verschmutzt, empfiehlt es sich, die Augenmuscheln zur Säuberung
abzunehmen (Bild D). Dazu werden sie aus der
ganz herausgedrehten Position einfach abgezogen.
5
5

EINSTELLEN DES AUGENABSTANDS
Durch Knicken des Fernglases um die Gelenkachse (5) wird der individuelle Augenabstand eingestellt. Rechtes und linkes Sehfeld müssen dabei zu einem kreisrunden Bild
verschmelzen.
6
A
B
3
4
EINSTELLEN DER SCHÄRFE /
DIOPTRIENAUSGLEICH
Die Einstellung der Schärfe auf verschieden
weit entfernte Objekte erfolgt an den Leica
Trinovid Ferngläsern mit dem Zentral-Fokussierungsring (4).
Zum Ausgleich individueller Fehlsichtigkeit für
die Beobachtung ohne Brille dient der Dioptrienring (3), der normalerweise verriegelt ist
(Bild A). Zum Entkoppeln der zwei Ringe wird
der Dioptrienring herausgezogen (Bild B). Der
Zentral-Fokussierungsring verändert nun nur
noch die Schärfe des linken
optischen Systems, der Dioptrienring nur die
des rechten.
Mit einem der beiden Ringe wird dann das jeweilige Rohr auf ein Objekt scharf gestellt.
Anschließend wird an dem anderen Ring das
zweite Rohr auf optimale Schärfe eingestellt.
Die Reihenfolge kann beliebig gewählt werden. Durch Herunterdrücken des Diop trienrings wird der eingestellte Wert verriegelt. Der
jeweils eingestellte Wert lässt sich be quem an
der präzisen Skala ablesen.
7
7
Hinweise:
• Der Dioptrienring ist frei drehbar, d.h. er
kann versehentlich um mehr als 360° gegenüber dem Zentral-Fokus sierungs ring
verdreht werden. Je nach vorheriger Stellung des Zentral -Fokussierungsrings kann
dadurch der Fokussierweg des Gesamtsystems erheblich eingeschränkt werden.
Achten Sie deshalb darauf, den Dioptrienring stets nur um das zur Ein stellung des
Ausgleichs notwendige Maß zu drehen.
• Beim einseitigen linken oder rechten Durchblicken sollte das jeweils andere Auge zugekniffen, oder einfach die entsprechende
Fernglashälfte vorne am Objektiv zugehalten werden.
SKALENANGABEN
Der über die Schärfeanpassung ermittelte
individuelle Wert des Benutzers bleibt bei gekoppeltem Zustand der Ringe gesichert. Er
muss also nur einmal ermittelt werden. Wird
das Fernglas von verschiedenen Personen
benutzt und die Einstellung des Dioptrienausgleichs verändert, so kann es anhand der
einmal ermittelten Skalenein stellung immer
wieder in Sekundenschnelle individuell angepasst werden.
Bei dem auf der Skala abzulesenden Wert ist
der Abstand zwischen zwei Strichen gleich ca.
einer Dioptrie Fehlsichtigkeits differenz zwischen linkem und rechtem Auge.
8

PFLEGE/REINIGUNG
Eine besondere Pflege Ihres Leica Trinovid
Fernglases ist nicht notwendig. Grobe
Schmutz teilchen, wie z.B. Sand, sollten mit
einem Haarpinsel entfernt oder weggeblasen
werden. Fingerabdrücke u.ä. auf Objektiv- und
Okularlinsen können mit einem weichen, sauberen Leder oder staubfreien Tuch abgewischt
werden. Bei starker Verschmutzung, z.B. der
Okular-Drehhülsen, kann eine Reini gung des
Fernglases durch einfaches Ab spülen unter
fließendem Wasser erfolgen. Salzwasser sollte
ebenso abgespült werden. Wasserflecken auf
den Objektiv- und Okular linsen lassen sich am
einfachsten mit einem mit Wasser befeuchteten Tuch entfernen.
In den Mitteltrieb eingedrungene Feuchtigkeit (sichtbar im Skalenfenster), trocknet am
schnellsten ab, wenn die Ringe (3/4) entkoppelt sind.
Alkohol und andere chemische Lösungen
dürfen nicht zur Reinigung benutzt werden.
Achtung:
Üben Sie auch beim Abwischen stark verschmutzter Linsenoberflächen keinen großen
Druck aus. Die Vergütung ist zwar hoch abriebfest, durch Sand oder Salzkristalle kann
sie dennoch beschädigt werden.
ZUBEHÖR Best. Nr.
Stativadapter mit ¼“ Gewinde .............. 42220
Schwimm-Trageriemen, orange ............ 42163
ERSATZTEILE
Falls sie einmal Ersatzteile für Ihr Fernglas
benötigen sollten, wie z.B. Augenmuscheln,
Deckel oder Tragriemen, wenden Sie sich bitte
an unsere Customer Care Abteilung oder Ihre
Leica Landesvertretung. Die Adressen sind in
der Garantiekarte aufgeführt.
9
9

FEHLFUNKTIONEN UND IHRE BEHEBUNG
Fehler Ursache Abhilfe
Bei der Beobachtung a) Das Fernglas ist nicht genügend a) Einfach durch stärkeres oder
wird kein kreisrundes dem persönlichen Augenabstand schwächeres Knicken der GelenkBild erreicht. angepasst. achse den Abstand der beiden
Fernglas-Rohre korrigieren.
b) Die Pupille des Beobachters liegt b) Kopfhaltung, Augen- und Fernglas nicht in der Austrittspupille des position korrigieren.
Fernglases.
c) Die Stellung der Augenmuscheln c) Anpassung korrigieren:
entspricht nicht der richtigen Brillenträger drehen die Augen Benutzung mit und ohne Brille. muscheln hinein; bei Beobachtung
ohne Brille: Augenmuscheln
herausdrehen.
Feuchtigkeit im d) Bei Reinigung unter fließendem d) Ringe entkoppeln und die FeuchtigSkalenfenster Wasser waren die beiden Ringe keit abtrocknen lassen. Keine Gefahr
des Mitteltriebes nicht korrekt einer Beschädigung.
gekoppelt.
1010

TECHNISCHE DATEN
LEICA TRINOVID 8 X 42 LEICA TRINOVID 10 X 42
Vergrößerung 8 x 10 x
Objektivdurchmesser 42 mm 42 mm
Austrittspupille 5,3 mm 4,2 mm
Dämmerungszahl 18,3 20,5
Geometrische Lichstärke 17,64 27,56
Sehfeld auf 1.000 m / 126 m / 108 m /
Objektiver Sehwinkel 7,2° 6,2°
Austrittspupillen-Lage 15,5 mm 16 mm
Naheinstellgrenze (bei 0 Dioptr.) ca. 3,5 m ca. 3,5 m
Dioptrienausgleich ± 4 dpt. ± 4 dpt.
Brillenträgerokular ja ja
Augenmuschel Demontierbar, mit 4 Raststufen
Einstellbarer Augenabstand 55-75 mm
Fokussierung Innenfokussierung über Mitteltrieb
Anzahl der Linsen (je Seite) 10, mit HDC™-Mehrschichtvergütung
Prismensystem Dachkantsystem mit Phasenkorrekturbelag P40 und HighLux-System HLS™
Wasserdichtigkeit Druckwasserdicht bis 5 m Wassertiefe
Gehäuse Magnesium-Druckguss, stickstoffgefüllt
Abmessungen (B x H x T) 121 x 142 x 67 mm 120 x 147 x 68 mm
Gewicht ca. 810 g ca. 795 g
11
11

LEICA INFODIENST
Anwendungstechnische Fragen zum Leica
Programm beantwortet Ihnen, schriftlich, telefonisch, per Fax oder per e-mail der Leica
Informations-Service:
Leica Camera AG
Informations-Service
Postfach 1180
D-35599 Solms
Tel.: +49 (0) 6442-208-111
Fax: +49 (0) 6442-208-339
info@leica-camera.com
LEICA KUNDENDIENST
Für die Wartung Ihrer Leica Ausrüstung sowie
in Schadensfällen steht Ihnen die Customer
Care Abteilung der Leica Camera AG oder
der Reparatur-Service einer Leica Landesvertretung zur Verfügung (Adressenliste siehe
Garantiekarte).
Leica Camera AG
Customer Care
Solmser Gewerbepark 8
D-35606 Solms
Tel.: +49 (0) 6442-208-189
Fax: +49 (0) 6442-208-339
customer.care@leica-camera.com
12

1313

FOREWORD
Dear Customer,
Worldwide, the name Leica stands for superb
optical quality, close-tolerance precision enginee r ing, absolute reliability, and long prod
uct life. We wish you a great deal of enjoyment
and success with your new Leica
Trinovid
bino c ulars. So that you can use them properly,
we recommend that you first of all read these
instructions.
SCOPE OF DELIVERY
– Binoculars
– Carrying strap
– Ever-ready case
– Eyepiece protection cover
– 2 lens caps
– Instructions
– Warranty Card
– Test certificate
NOMENCLATURE
1. Eyepiece cups
Position a: unscrewed for viewing
without glasses
Position b: screwed in for viewing
with glasses
2. Eyelets for carrying strap
3. Lockable diopter adjustment ring
4. Central focusing ring
5. Hinged joint for adjusting the eyebase
14

TABLE OF CONTENTS
Foreword .................................................................................................................................. 14
Scope of delivery ......................................................................................................................14
Nomenclature ........................................................................................................................... 14
Possible applications .................................................................................................................16
Attaching the carrying strap and the protective eyepiece cover ..................................................16
Attaching the protective lens caps.............................................................................................16
Adjusting the eyecups / Use with and without glasses...............................................................17
Adjusting the eyebase ............................................................................................................... 18
Focusing / Diopter adjustment .................................................................................................19
Indications on the scale ............................................................................................................20
Care and maintenance .............................................................................................................. 21
Accessories .............................................................................................................................. 21
Replacements ........................................................................................................................... 21
Trouble shooting guide .............................................................................................................. 22
Technical data ..........................................................................................................................23
Leica in the Internet and Leica Academy ................................................................................... 24
Leica Information Service .......................................................................................................... 24
Leica Customer Care ................................................................................................................25
ATTENTION:
• Never look directly at the sun or other sources of bright light with your binoculars!
This could cause eye damage!
• Never use your binoculars while you are walking! You might fail to notice obstacles!
15
POSSIBLE APPLICATIONS
The Leica Trinovid binoculars have hermetic ally
sealed and nitrogen-filled magnesium housings. They are therefore suited for rough outdoor use. There is no need to be con cerned
with moisture as they are 100% waterproof to
a depth of 5m and the internal optical system
is not subject to fogging.
ATTACHING THE CARRYING STRAP AND
THE PROTECTIVE EYEPIECE COVER
See illustration on the rear cover flap.
Note:
If you want to attach the protective eyepiece
cover to the carrying strap, this must be done
while attaching the carrying strap to the binoculars.
ATTACHING THE PROTECTIVE LENS CAPS
To attach the caps, their rubber ring is pulled
over the binoculars from the lens side.
16

A B C D
ADJUSTING THE EYECUPS / USE WITH
AND WITHOUT GLASSES
The eyepiece cups (1) can be easily adjusted
by turning them and they lock securely into
the selected positions. They can also be completely removed for thorough cleaning.
For viewing with eyeglasses (Figure A) they remain in the fully screwed-in position. For viewing without eyeglasses, they are un screwed
by turning them anticlockwise. Two positions
are available for optimum adjustment (Figure
B, C).
If the eyepieces are very dirty, it is recom -
m ended to remove the cups for cleaning (Figure D). To do this, they are simply pulled off
while in the fully unscrewed position.
17
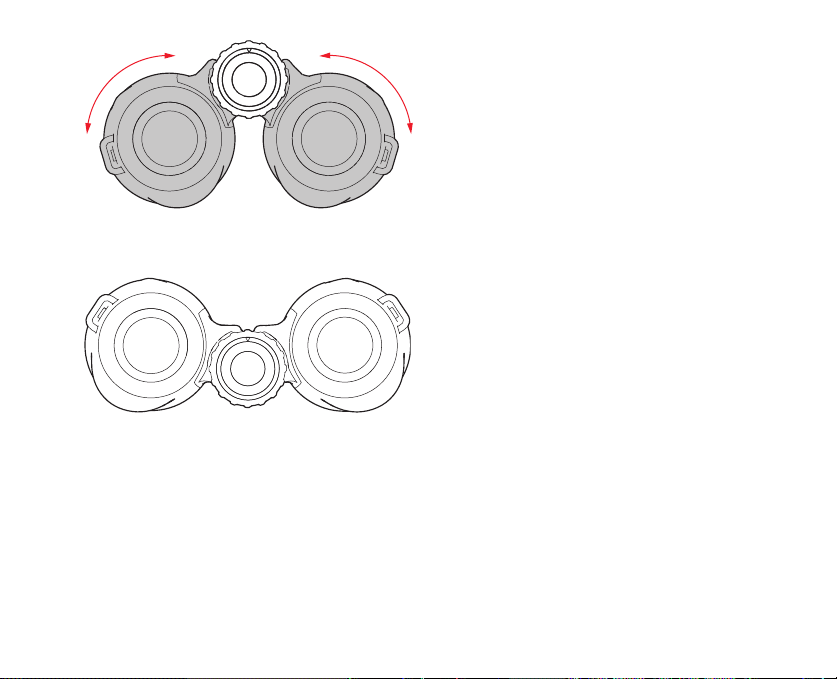
ADJUSTING THE EYEBASE
To set the eyebase, adjust the binoculars at
the hinged joint. The left and right fields of
view must merge and produce a single circular
image.
18

A
B
3
4
FOCUSING / DIOPTER ADJUSTMENT
With the Leica Trinovid binoculars the central
focusing ring (4) is used to set the focus for
variously distant objects.
Compensation for individual defective vision
for viewing without eyeglasses is made using
the diopter ring (4), which is normally locked
(Figure A). To unlock the two rings the diopter
ring is pulled up (Figure B). Now, the central
focusing ring only affects the focus of the left
optical system, the diopter ring only that of
the right system.
Using one of the rings, then focus the respective barrel on the desired subject. Continue
by setting the optimum focus for the second
barrel with the other ring. Pressing the diopter
ring back down locks the set value. The set
value can be conveniently read from the accurate scale on the diopter ring.
19

Notes:
• The diopter ring rotates freely, i.e. it can
accidentally be rotated by more than 360°
with respect to the central focusing ring.
Depending on the latter‘s previous setting,
the combined system‘s focusing range can
be limited considerably by this. Therefore,
take care to turn the diopter ring only as far
as necessary for the eyesight adjustment.
• For viewing on just the left or the right side,
the other eye should be kept closed or the
appropriate half of the binoculars simply
covered at the front on the lens.
INDICATIONS ON THE SCALE
As long as the two halves of the drive are coupled together, the binoculars are permanently
adjusted to your eyesight, irrespective of the
focusing distance to an object. You need to
make the adjustment only once. If other people use your binoculars, they may have to alter
the setting. Simply note your personal setting
on the scale; when someone else has used
them, you can reset the binoculars in a matter
of seconds.
The distance between two divisions on the
scale represents a difference of approx. one
diopter of correction being applied to the left
and right eye.
20

CARE AND MAINTENANCE
Your Leica Trinovid binoculars need no special maintenance. Use a soft lens brush or a
blower to remove large particles of dirt, sand,
etc. To remove fingerprints etc., first wipe the
eyepiece and lens with a damp cloth, then
dry them with a piece of clean, soft chamois
leather or lint-free cloth. If the binoculars, particularly the rotating eyecups, are very dirty,
simply rinse them under a running fau c et. Always rinse off salt water.
Moisture inside the central focusing unit
(visible through the scale window) will dry
quickest when the two rings (3/4) are unlocked.
Alcohol and other chemical solutions must not
be used.
Attention!
Do not apply too much pressure when wiping
heavily soiled lens surfaces. Even though the
coating is very tough, sand and salt crystals
can cause scratches.
ACCESSORIES Order No.
Tripod adapter with ¼“ thread .............. 42220
Floating carrying strap, orange ............. 42163
REPLACEMENTS
Should you need replacements for your binoculars, such as eyecups, covers, or a strap,
please contact our Customer Care department
or your national Leica agent. The addresses
are listed on the Warranty Card.
21

TROUBLE SHOOTING GUIDE
Problem Cause Solution
The image seen through a) The binoculars are not properly a) Hinge the binoculars more or less
the binoculars is not adjusted to your personal at their centerline, as necessary,
concentric. eyebase. until the left and right image merges.
b) Your pupils are not properly b) Check the position of your head,
aligned with the exit pupils eyes and the binoculars.
of the binoculars.
c) The eyepiece cups are not set for c) Correct the setting of the eye piece
the correct viewing conditions cups: If you wear glasses, screw
with or without eyeglasses. in the eyepiece cups, if you do not
Fogging due to water in d) The two-piece drive was not d) Disengage the two halves of the
the scale window. properly coupled together when drive. Allow the moisture to
you cleaned the binoculars under dry. There is no risk of damage.
running water.
wear glasses, screw the
eyepiece cups out.
22

TECHNICAL DATA
LEICA TRINOVID 8 X 42 LEICA TRINOVID 10 X 42
Magnification 8 x 10 x
Lens diameter 42 mm 42 mm
Exit pupil 5.3 mm 4.2 mm
Twilight factor 18.3 20.5
Geometric light value 17.64 27.56
Field of view at 1,000 m/ 126 m / 108 m /
Objective angle of view 7.2° 6.2°
Eye relief 15.5 mm 16 mm
Close focusing limit Approx. 3.5 m Approx. 3.5 m
Diopter compensation ± 4 Dioptr. ± 4 Dioptr.
Eyepieces for eyeglass wearers Yes Yes
Eye cup Removable, with 4 detent positions
Adjustable interpupillary distance 55-75 mm
Focusing Internal focusing using center spindle
Number of lenses (per side) 10, with HDC™ multi-layer coating
Prism system
Water tightness Impermeable to press water up to 5 m deep
Housing Cast magnesium with nitrogen filling
Dimensions (W x H x D) 121 x 142 x 67 mm 120 x 147 x 68 mm
Weight Approx. 810 g Approx. 795 g
Roof prism system with P40 phase correction coating and HLS™ HighLux system
23

LEICA INFORMATION SERVICE
Should you have any technical questions regarding the use of Leica products, the Leica
Information Service will be happy to answer in
writing or by phone, fax, or e-mail:
Leica Camera AG
Informations-Service
Postfach 1180
D-35599 Solms
Tel.: +49 (0) 64 42-208-111
Fax: +49 (0) 64 42-208-339
info@leica-camera.com
LEICA CUSTOMER CARE
For service of your Leica equipment and in
case of neccessary repairs please contact the
customer Care of Leica Camera AG or of any
national Leica agency (see Warranty Card for
address list). Ask your authorized dealer and
Leica specialist for advice.
Leica Camera AG
Customer Care
Solmser Gewerbepark 8
D-35606 Solms
Tel.: +49 (0) 64 42-208-189
Fax: +49 (0) 64 42-208-339
customer.care@leica-camera.com
2424

2525

AVANT-PROPOS
Chère cliente, Cher client,
Le nom Leica est dans le monde entier syno-
nyme de summum de la qualité optique, de
mécanique de haute précision extrêmement
fiable et de longévité légendaire.
Nous vous souhaitons beaucoup de plaisir et
une grande réussite avec vos nouvelles ju-
melles Leica Trinovid
De manière à utiliser correctement ce nouvel
instrument, nous vous recommandons dans
un premier temps de lire la présente notice
d’utilisation.
PRODUIT LIVRÉ
– Jumelles
– Courroie de port
– Sac „toujours prêt“
– Couvercle de protection d‘oculaire
– 2 couvercles de protection d‘objectif
(uniquement modèles HD)
– Notice d‘utilisation
– Carte de Garantie
– Certificat de contrôle
DÉSIGNATION DES ÉLÉMENTS
1. Œilletons
Position a: déployés pour une observation
sans lunettes de vue
Position b: rétractés pour une observa tion
avec lunettes de vue
2. Œillets pour la courroie
3. Bague de réglage dioptrique à verrouillage
4. Molette de mise au point centrale
5. Axe articulé pour le réglage de la distance
interpupillaire
26

TABLE DE MATIÈRES
Avant-propos ............................................................................................................................26
Produit livré ..............................................................................................................................26
Désignation des éléments ......................................................................................................... 26
Possibilités d’application ........................................................................................................... 28
Attache de la courroie et de couvercle de protection d‘oculaire ................................................. 28
Montage du couvercles de protection d‘objectif .......................................................................28
Réglage des œilletons / Utilisation avec et sans lunettes ..........................................................29
Réglage de la distance interpupillaire.........................................................................................30
Mise au point / Compensation dioptrique .................................................................................31
Echelle de graduation ................................................................................................................32
Entretien / Nettoyage ............................................................................................................... 33
Accessoires .............................................................................................................................. 33
Pièces de rechange ...................................................................................................................33
Que faire, quand… .....................................................................................................................34
Caractéristiques techniques ...................................................................................................... 35
Leica sur Internet et Leica Académie ......................................................................................... 36
Service-Info Leica .....................................................................................................................36
Service après-vente Leica .........................................................................................................37
ATTENTION:
• Ne jamais observer le soleil ou d‘autres sources lumineuses vives avec les jumelles,
en raison du risque de lésions oculaires!
• Ne jamais regarder dans les jumelles en marchant!
Vous ne pourriez pas voir les obstacles!
27
POSSIBILITÉS D’APPLICATION
Les jumelles Leica Trinovid sont équipées
d‘un boîtier en magnésium hermétiquement
fermé et rempli d‘azote. Il est par conséquent
également adapté aux rudes conditions d’une
utilisation en extérieur. Il ne craint pas non
plus l’humidité – il est parfaitement étanche
jusqu’à 5 m de profondeur et l’optique intér-
ieure ne s’embue pas.
ATTACHE DE LA COURROIE ET DE COUVERCLE DE PROTECTION D‘OCULAIRE
Voir illustration au verso de la couverture.
Remarque:
Si vous souhaitez fixer le bouchon de protection des oculaires sur la courroie de port, vous
devez le faire en même temps que la mise en
place de la courroie de port sur les jumelles.
MONTAGE DU COUVERCLE DE
PROTECTION D‘OBJECTIF
Pour le montage, la bague de caoutchouc du
couvercle est tirée depuis le côté de l‘objectif
sur les jumelles.
28
 Loading...