

La Crosse Technology 513-1311OTN Instruction Manual
Model: 513-1311OTN
DC: 120115
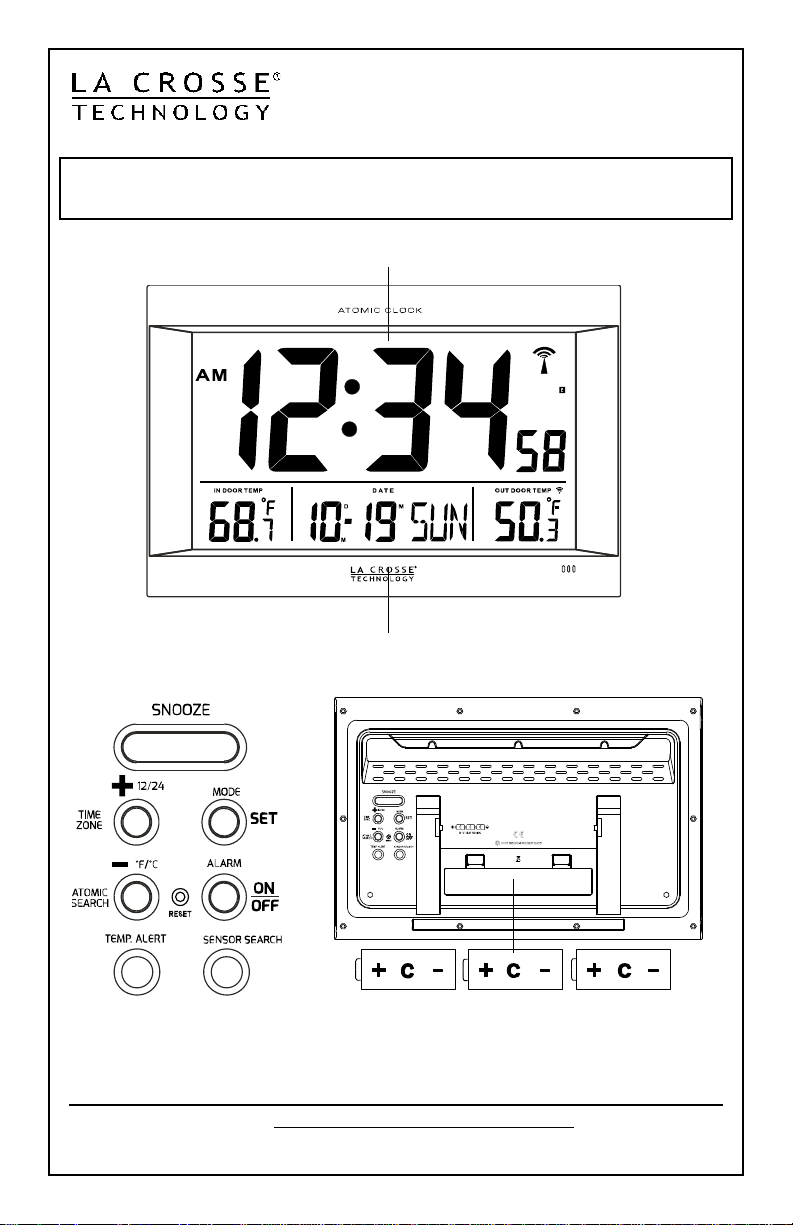
Indoor Temperature, Month, Date,
Time, Alarm, Time Zone + WWVB Reception Icon
3 “C” batteries
Buttons
with Indoor/Outdoor Temperature and Date
Instruction Manual
Large Atomic Digital Wall Clock
Weekday + Outdoor temperature
Model: 513-1311OTN www.lacrossetechnology.com/support Page | 1
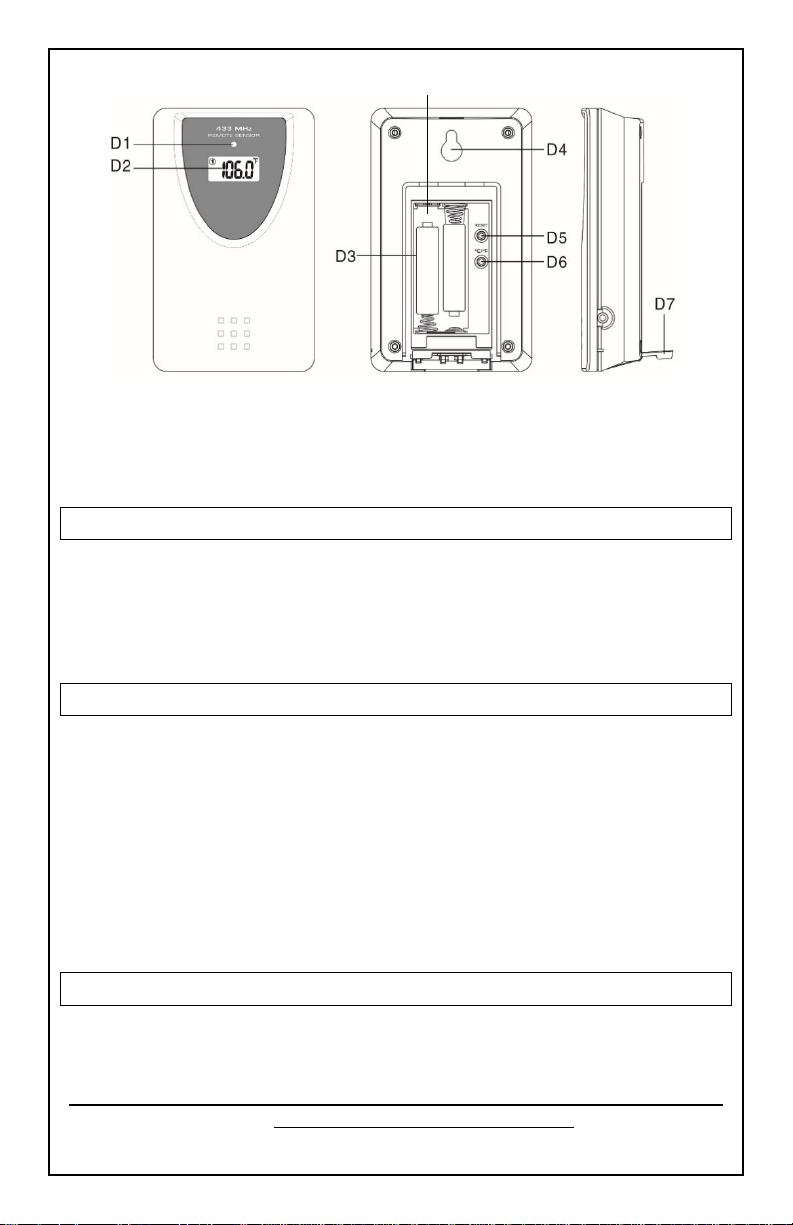
KW9177T Sensor
Battery Compartment
2-“AAA” batteries
D5: “RESET” button
D1: Transmission Indication LED
D2: Outdoor Temperature
D3: Battery Compartment
D4: Wall Mount Hole
D6: °C/°F” button
Get Started
Step 1: Insert 3 new “C” batteries (not included) into the clock.
Observe the correct polarity.
Step 2: Insert 2 new “AAA” batteries into the outdoor sensor. Observe
correct polarity. The red LED will flash when transmitting.
Step 3: After 5 minutes place sensor outside in a shaded location.
Set Time, Calendar, DST Indicator
• Hold the MODE/SET button to enter the setting mode.
• Press the
+ or – buttons to adjust a value.
• Press the MODE/SET button to confirm adjustment and move to the
next item.
Setting order:
1. Hour, 2. Minutes, 3. Seconds, 4. Year, 5. Month/Date format (M/D or
D/M), 6. Month, 7. Date, 8. DST indicator
Note: The clock will default back to time display if no buttons are pressed
for 30 seconds.
Fahrenheit/Celsiu s S el ecti on
Press the - °C/°F button to change the temperature display from
Fahrenheit to Celsius.
Model: 513-1311OTN www.lacrossetechnology.com/support Page | 2
 Loading...