

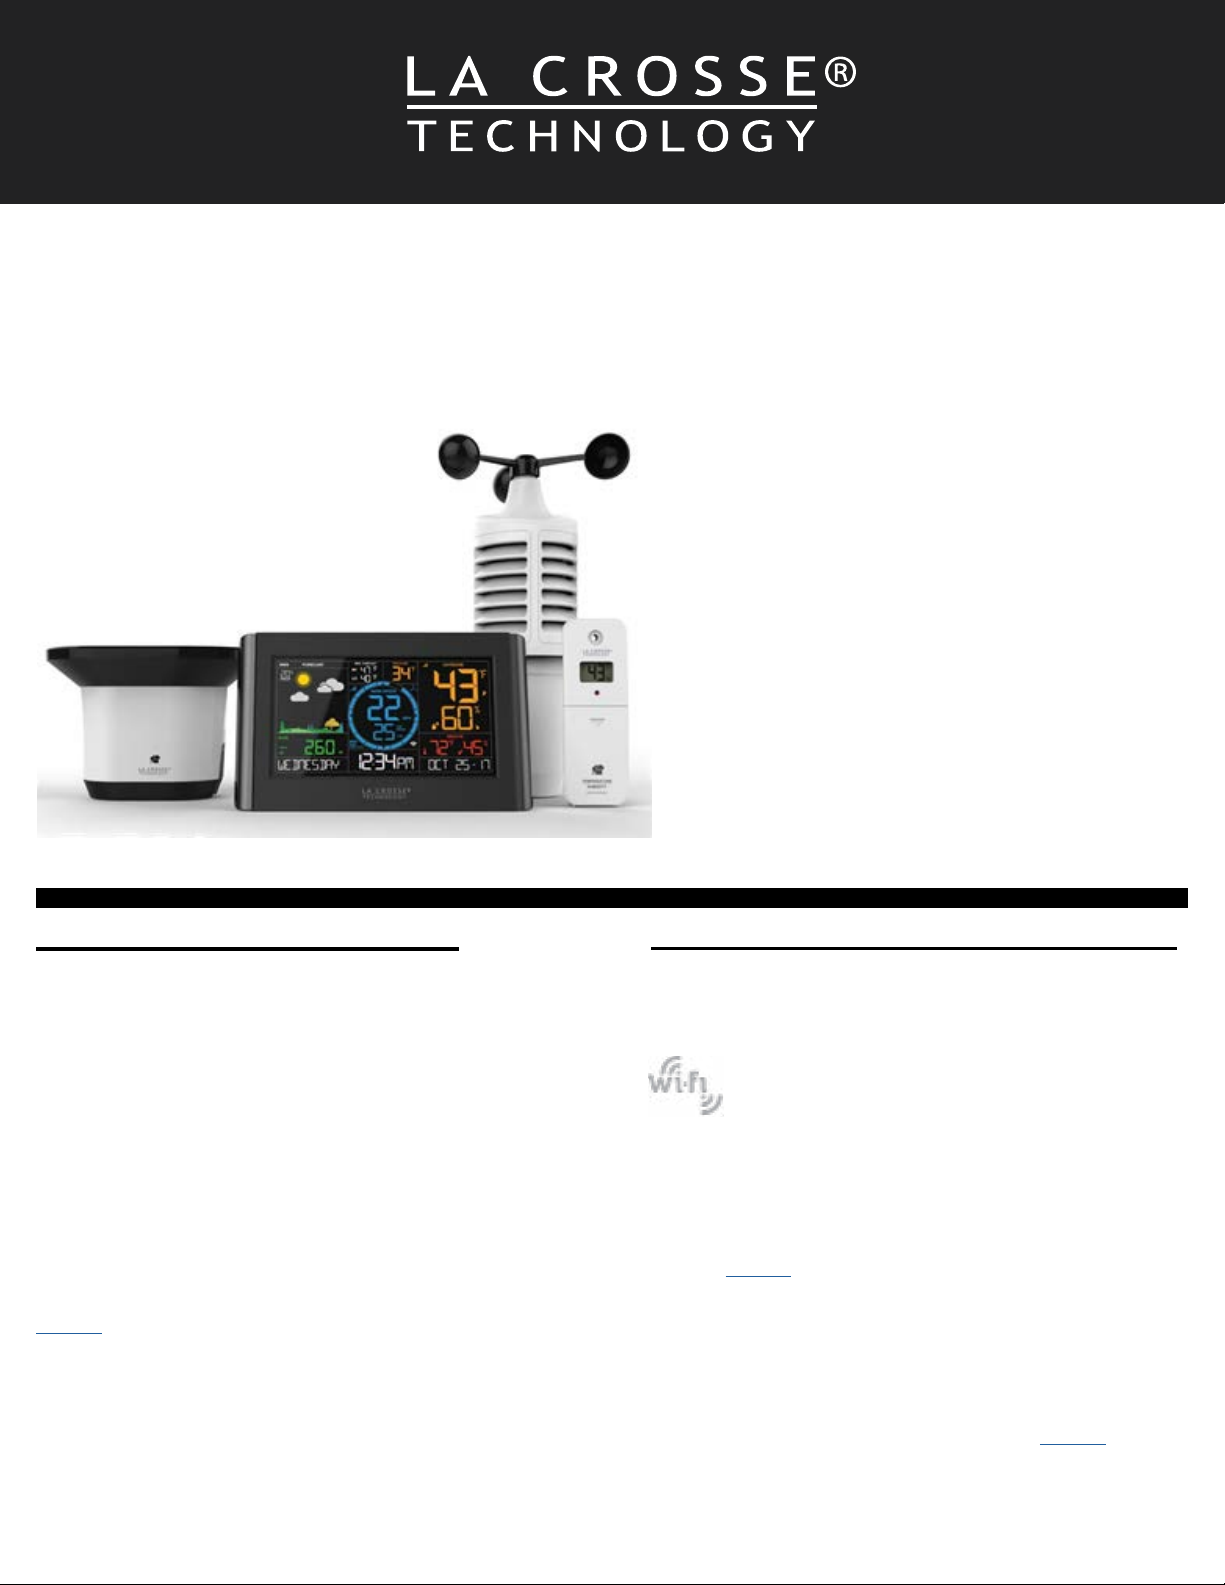
PROFESSIONAL
Remote Monitoring Weather Station
Instructional Manual
Models: C84428 & LTV-D1
DC: 060617
1. Simple Easy Setup
Insert (in any order):
• 2-AA batteries into Thermo-hygro sensor
• 2-AA batteries into Rain sensor
• 2-C batteries into Wind speed sensor
• 2-AAA batteries into LTV-D1 bonus station
• 5 volt power cord (required) into C84228 station
3-AA batteries optional backup for time and date*
For detailed sensor setup and mounting instructions, see
page 6.
Note: Press and release the SENSOR button to confirm
sensor ID’s on station match bar codes on your sensors.
*Batteries operation only will not update sensor or Wi-Fi
data. Power cord is required.
2. Select Your Station Use
Option 1: Connected with
• Benefits:
o Remotely monitor your home’s data from
anywhere* at any time using this station’s
built-in wireless Wi-Fi technology
o Automatically receive time, date, and NWS
forecast information
o Set mobile alerts to keep loved ones safe
o Easily share data with friends & family
o Unlock new Data Stream technology
o And so much more…
• Continue with La Crosse View instructions on
Page 3
Option 2: Standalone Station
• Benefits:
o View all local sensor data right on your
bright easy to read LCD display
o No phone or Wi-Fi needed
• Continue with these instructions on Page 13
*Anywhere you have an Internet connection
La Crosse View
Page | 1Professional Remote Monitoring Station

Table of Contents
3
Easy Connection to La Crosse View
3
Wi-Fi Network Requirements
4
Benefits of your La Crosse View App
4
NWS Expanded Forecasts
4
Extra Weather Information
4
Select your Own Data Streams
4
Wi-Fi Indicator
5
Your Station has Status Messages
6
Detailed Sensor Setup and Mounting
7
Wind Speed Readings
8
Wind Speed History
8
Reset Wind Speed History
8
Rainfall Readings
9
Reset Rainfall Readings
9
HI | LO Temperature/Humidity Readings
9
Reset HI | LO Temperature/Humidity Readings
9
Feels Like Temperature
10
Temperature | Humidity Trend Arrows
10
Seasonal Changes in Trees
10
Backlight (5 levels)
10
Low Battery Icons
11
Sensor Update Interval
11
Sensor Search | Sensor ID
11
Delete Sensor ID
12
Add-on Sensors (sold separately)
13
Settings Menu C84228
13
Factory Restart C84428
14
Your LTV-D1 Bonus Station
14
Settings Menu LTV-D1
14
View Indoor or Outdoor Data LTV-D1
14
Search for Sensor LTV-D1
14
Restart LTV-D1
15
Help Us, Help You
15
Let’s Be Social!
15
Specifications
17
Care and Maintenance
17
Warranty and Support
18
FCC Statement
Page | 2Professional Remote Monitoring Station
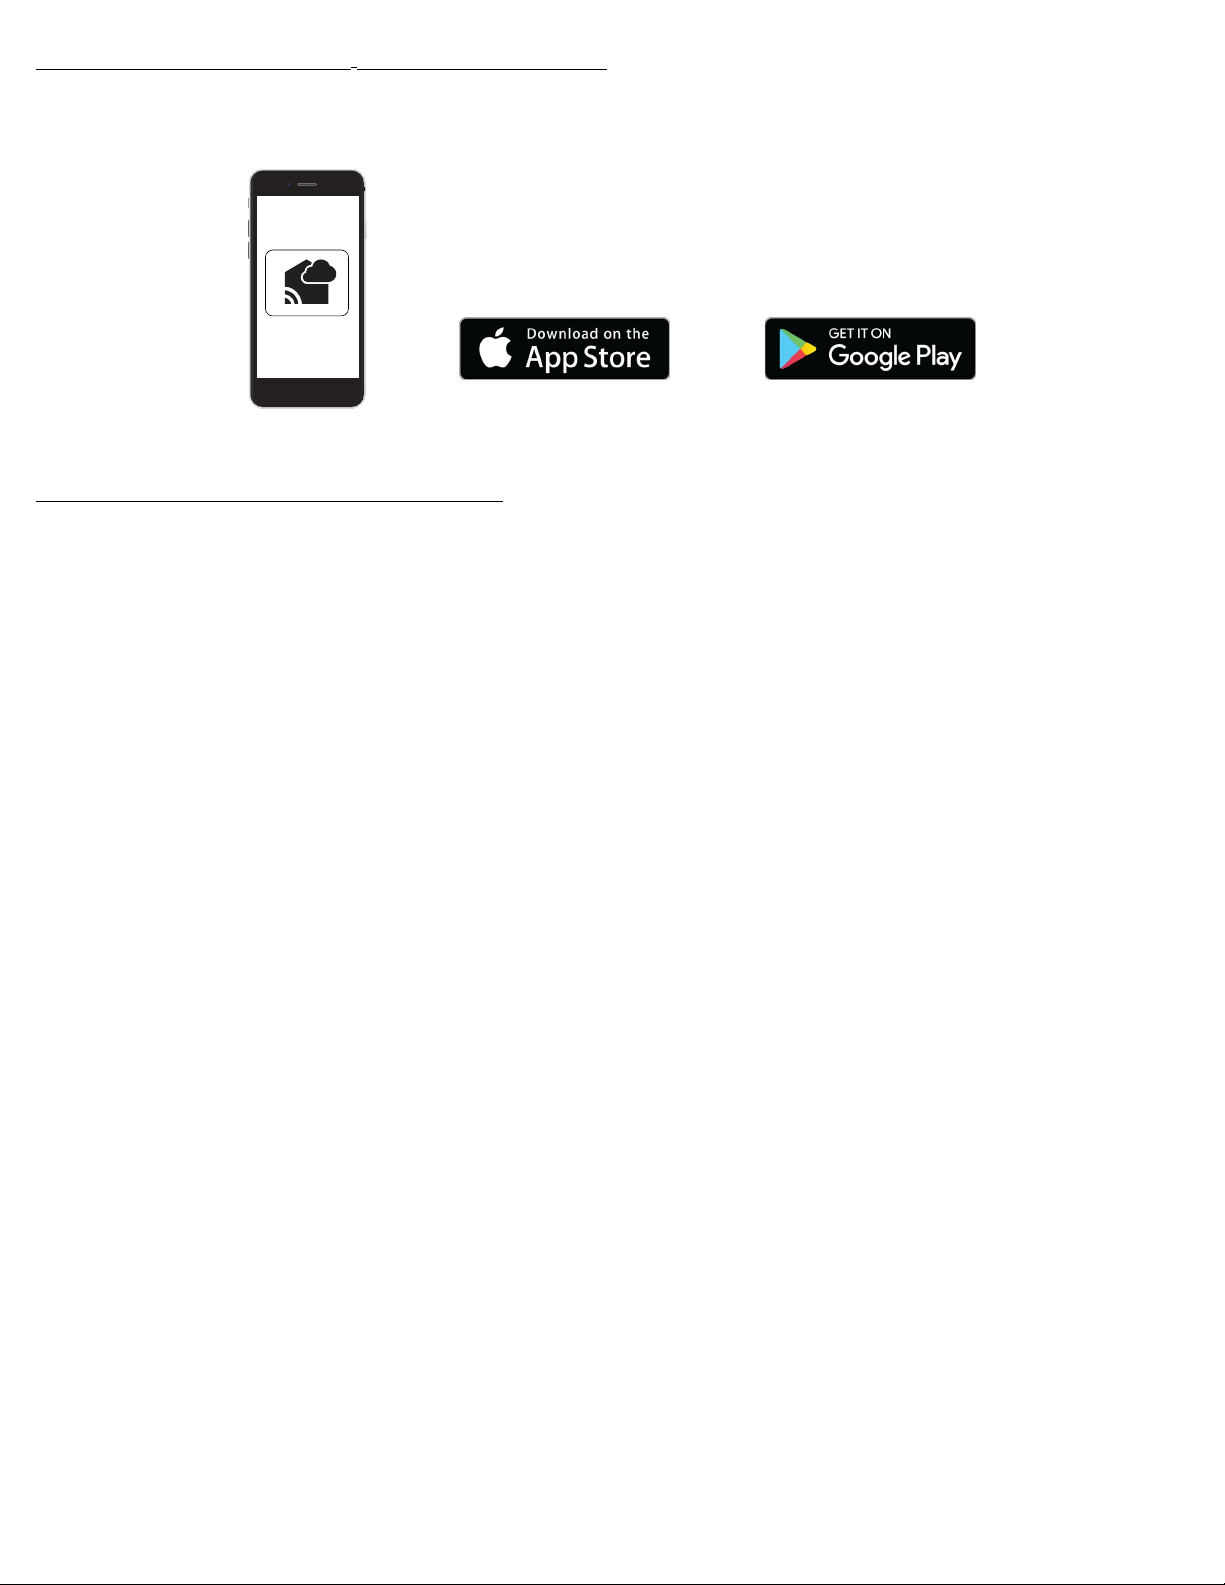
Easy Connection to
La Crosse View
Connecting You to Your Home Anytime, Anywhere.
• Simply download your
La Crosse View
app and follow the on-screen instructions.
Wi-Fi Network Requirements
In order for your station to connect to your WiFi, it will need to meet the following requirements:
• Your Wi-Fi network broadcasts at 2.4GHz (802.11 b/g/n).
• Your network name and password do not exceed 45 characters
• Your network upload speed is greater than 1Mbps.
• Power cord is required for Wi-Fi connection.
IOS Requirements:
Mobile device with iOS 9.0 (or higher) with cellular or Wi-Fi service
Android Requirements:
Mobile device with Android OS 5.0 (or higher) with cellular or Wi-Fi service
Tips:
• For your security, this app will only work on protected WiFi networks.
• Open public networks that require a browser sign in, should not be used.
• The Wi-Fi for your mobile device must be on the same network as your weather station. Check the Wi-Fi setting on
your mobile device.
• During setup, your weather station and mobile device must be in close proximity.
• Hold the PLUS and MINUS buttons together for 3 seconds to have your station search for your Wi-Fi.
• If you change your Wi-Fi network, hold the RAIN and LIGHT buttons together for 5 seconds to complete a factory
restart. This will reset the Wi-Fi settings so you can connect to your new network.
Note: Your station may take up to 3 minutes to reacquire all sensors.
Note: in the event of a power outage, or your station being unplugged temporarily, your station should reconnect to your existing Wi-
Fi network.
Note: Batteries operation only will not update sensor or Wi-Fi data. Power cord is required
Page | 3Professional Remote Monitoring Station
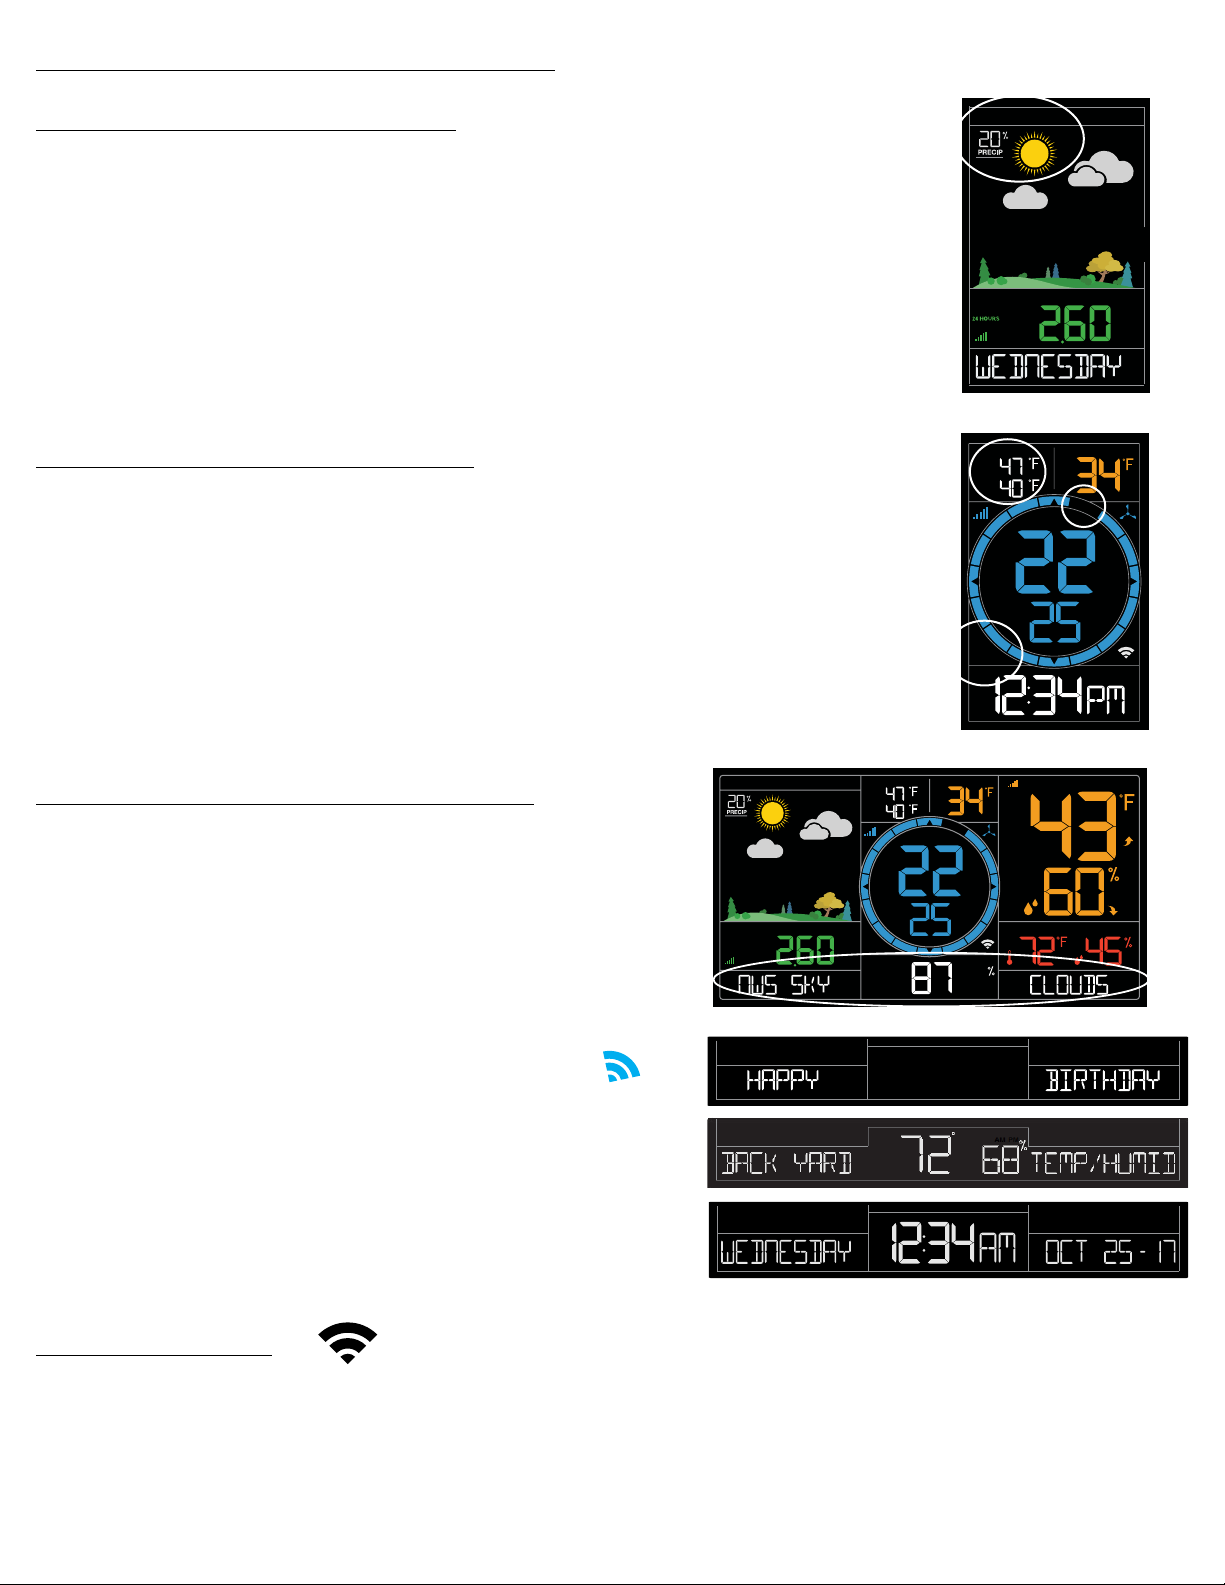
Benefits of Your La Crosse View
NWS Expanded Forecasts
1. NWS will show in front of the word forecast
2. NWS chance of precipitation will be shown.
3. Your station will show additional weather icons based on NWS
weather forecasts.
Standard Icons:
• Sunny • Partly Sunny • Clouds • Rain • T-Storm • Snow
Extra Weather Information
1. NWS Daily HI | LO temperature
Note: When not using the App, the daily HI | LO will come from your
outdoor sensor.
2. The words “NWS Wind Direction” will show, and the blue circle will
change to indicate wind direction.
3. Time and Date will update from the NIST.
Note: NIST time will over rule manual set time and date. You can
choose to turn this feature o within La Crosse View.
Additional Icons:
• Windy
• Light Rain
• Severe T-Storm
• Light Snow
• Wintry Mix
• Blizzard
• Fog
• Ice
RAIN
NWS FORECAST
HI
LO
NWS
WIND
DIRECTION
FORE CASTNWS
WIND SPEED
FEELS LIKE
TOP
SPEED
1 HR
IN
MPH
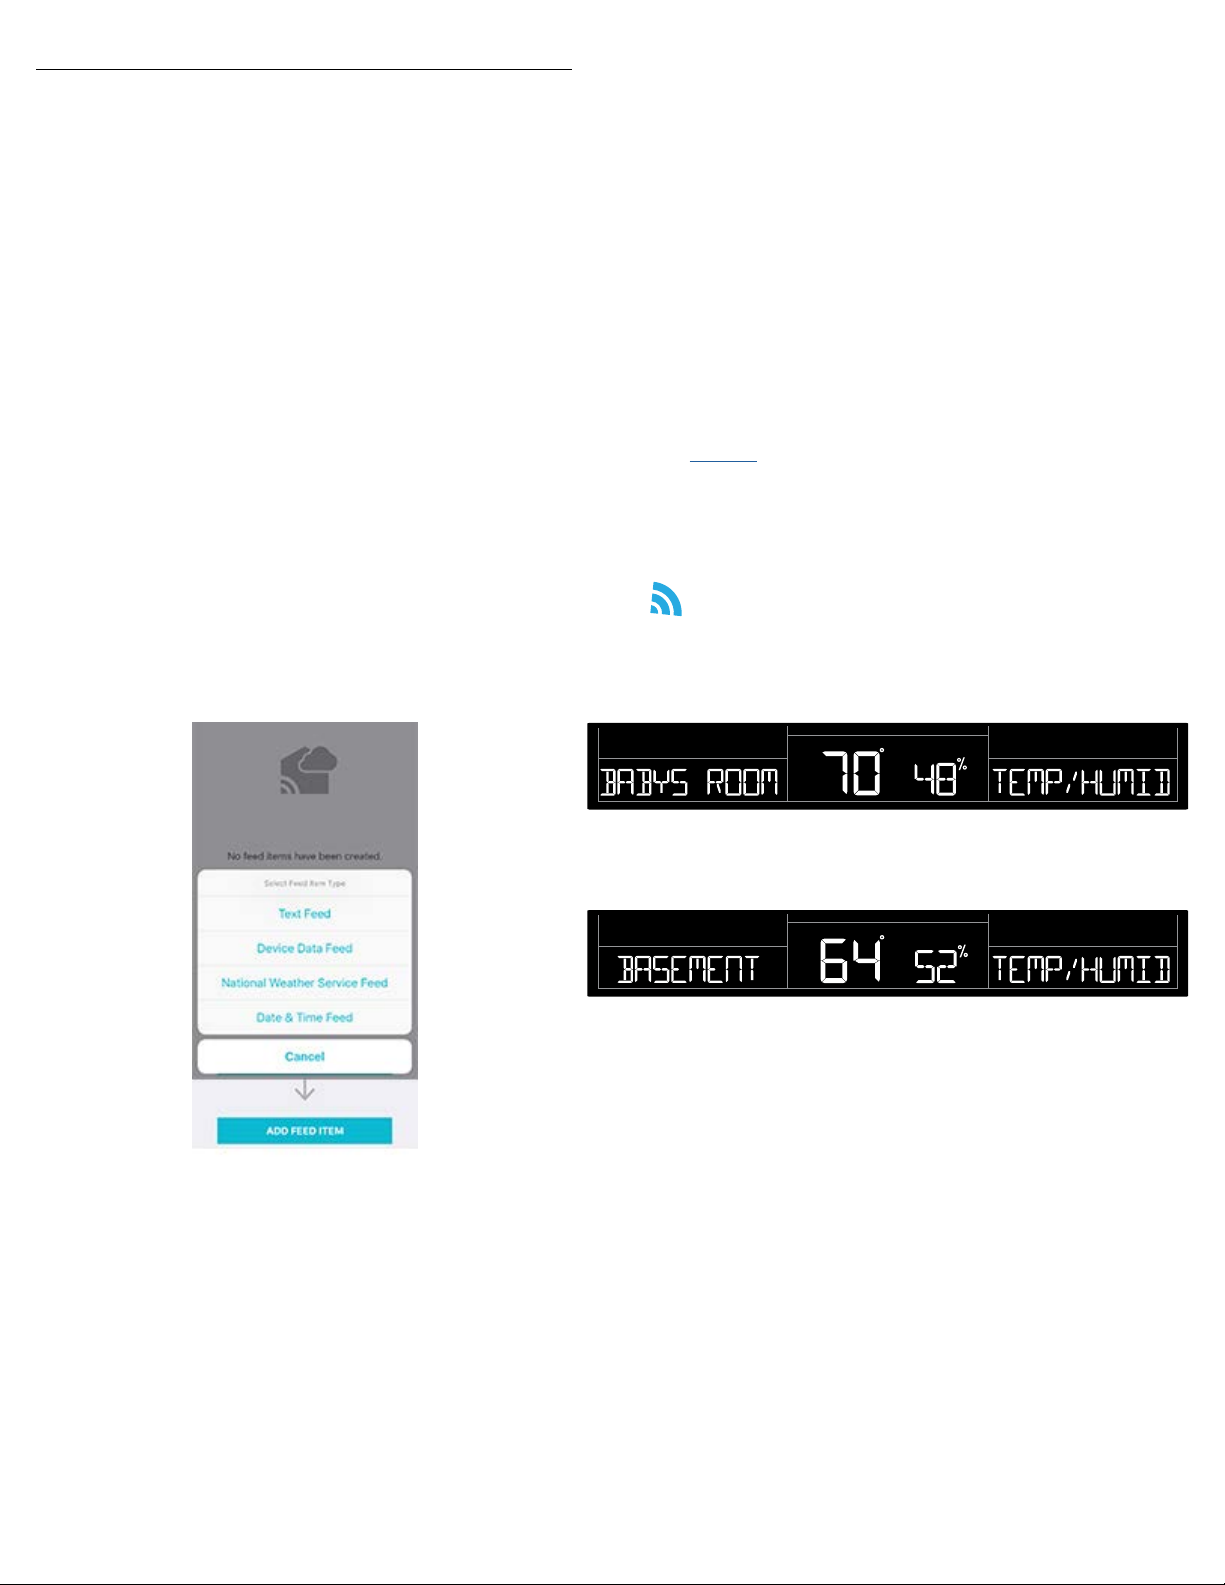
Select Your Own Data Streams
Use the Smartbox in the La Crosse View app to select up to 4
data items to stream on the station.
• NWS data items
• Your current sensor data
• Time/Date
• Personal message
• Add-on sensors (sold separately)
1. Open the La Crosse View app and select your station.
2. Scroll down to the Smartbox section and press the blue icon.
3. Follow instruction on app to add” Device Data Feed” and
select your Smartbox feeds.
Allow a few minutes for all the data to show on your station.
Wi-Fi Indicator
RAIN
1 HOUR
FORE CASTNWS
NWS FORECAST
HI
LO
NWS
WIND
DIRECTION
IN
WIND SPEED
FEELS LIKE
TOP
SPEED
1 HR
OUTDOOR
MPH
INDOOR
• Solid: indicates that your Wi-Fi connection is good.
• Flashing: Searching for connection
• Not displayed: Not Connected
• One, two or three bars: Wi-Fi signal strength.
Page | 4Professional Remote Monitoring Station
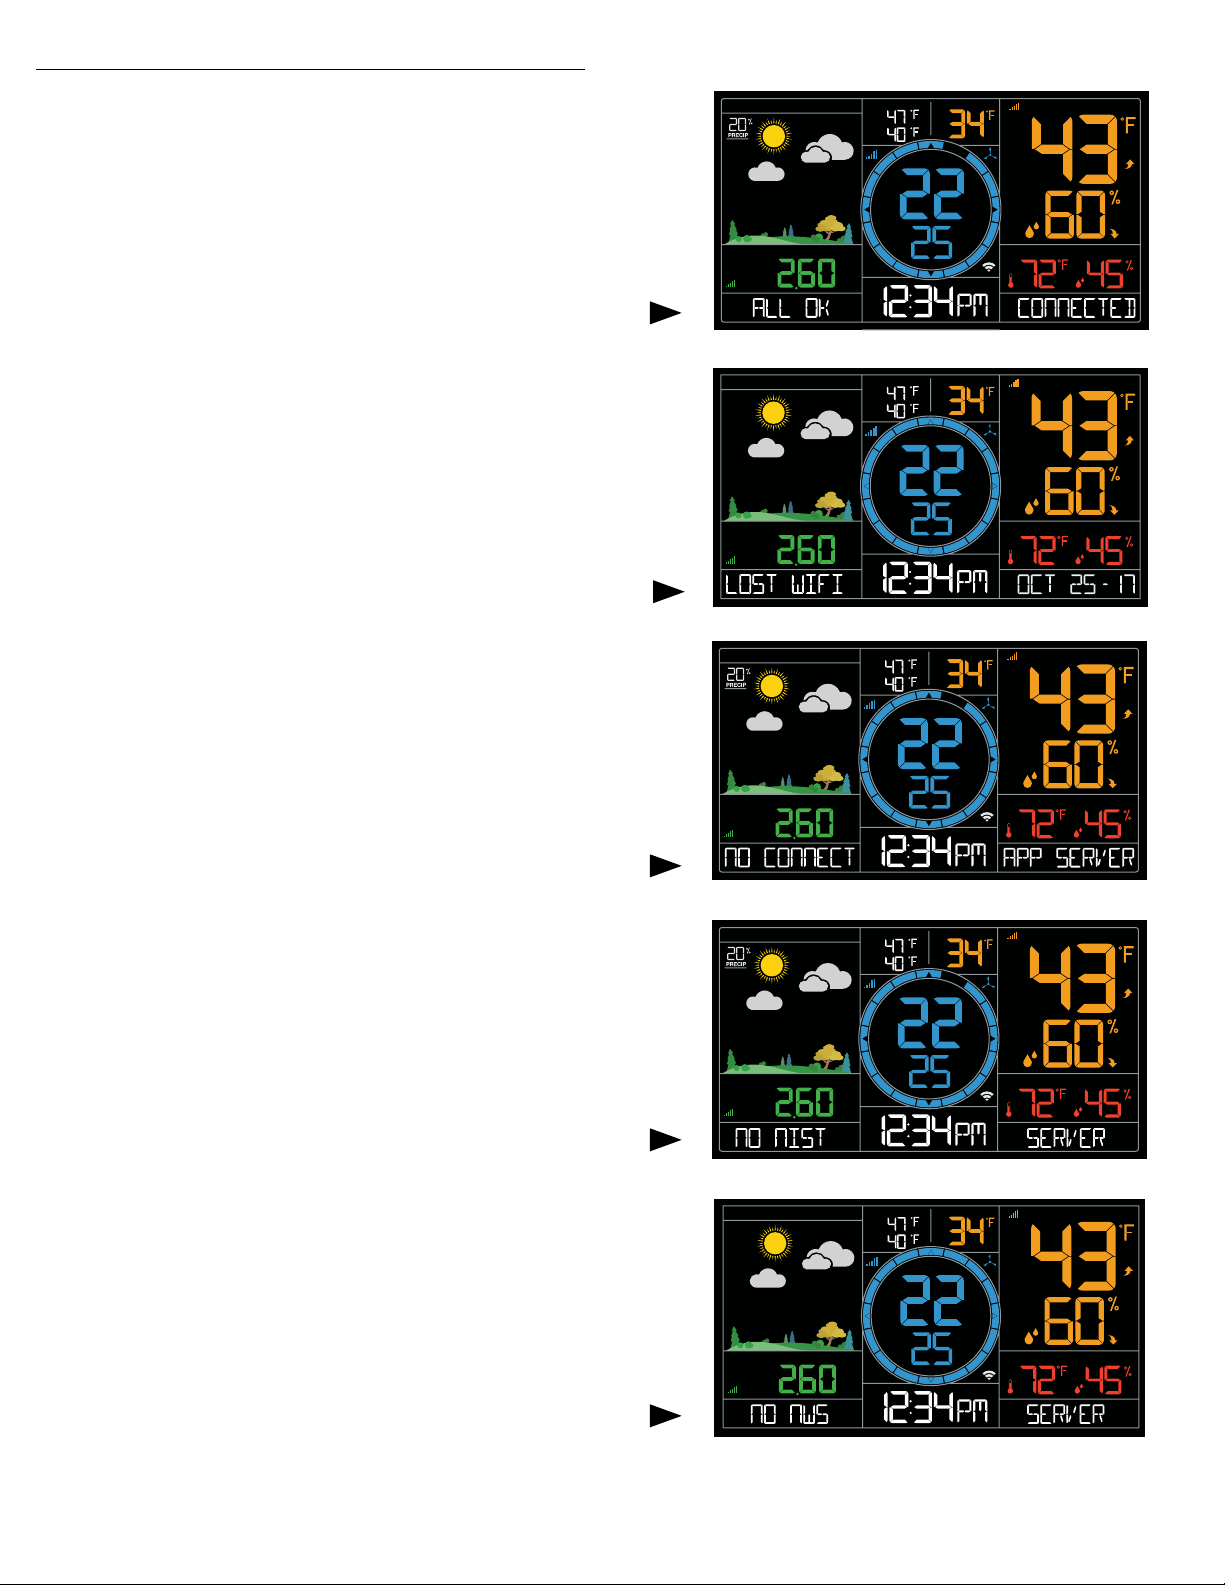
Your Station has Status Messages
Your station has built in status messages.
• Press and release of the SET button to view.
Note: Only one relevant status message will display.
“ALL OK CONNECTED”
• Your station is connected, there are no problems.
“LOST WIFI”
• Check your power cord connection.
(must use power cord to connect)
• Check your router connection (use 2.4GHz)
• Check your network connection.
• Press the + and - buttons together for 3 seconds to
search for Wi-Fi
RAIN
1 HOUR
RAIN
1 HOUR
FORE CASTNWS
FORE CAST
FORE CASTNWS
NWS FORECAST
HI
LO
NWS
WIND
DIRECTION
IN
HI
LO
IN
NWS FORECAST
HI
LO
WIND SPEED
WIND SPEED
WIND SPEED
FEELS LIKE
TOP
SPEED
1 HR
FEELS LIKE
TOP
SPEED
1 HR
FEELS LIKE
OUTDOOR
MPH
INDOOR
OUTDOOR
MPH
INDOOR
OUTDOOR
“NO CONNECT APP SERVER”
• Check your connection to the La Crosse View app.
• Is there an update to install?
• The WiFi router connection is working.
“NO NIST SERVER”
• This indicates an error on the NIST server.
• The NIST will resolve this.
• Very rare to have this error.
• Time will update from your weather station.
“NO NWS SERVER”
• This indicates and error on the NWS server.
• The NWS will resolve this.
• Very rare to have this error.
RAIN
1 HOUR
RAIN
1 HOUR
RAIN
1 HOUR
FORE CASTNWS
FORE CAST
MPH
TOP
SPEED
WIND SPEED
WIND SPEED
1 HR
FEELS LIKE
TOP
SPEED
1 HR
FEELS LIKE
TOP
SPEED
1 HR
MPH
MPH
NWS
WIND
DIRECTION
IN
NWS FORECAST
HI
LO
NWS
WIND
DIRECTION
IN
HI
LO
IN
INDOOR
OUTDOOR
INDOOR
OUTDOOR
INDOOR
Page | 5Professional Remote Monitoring Station
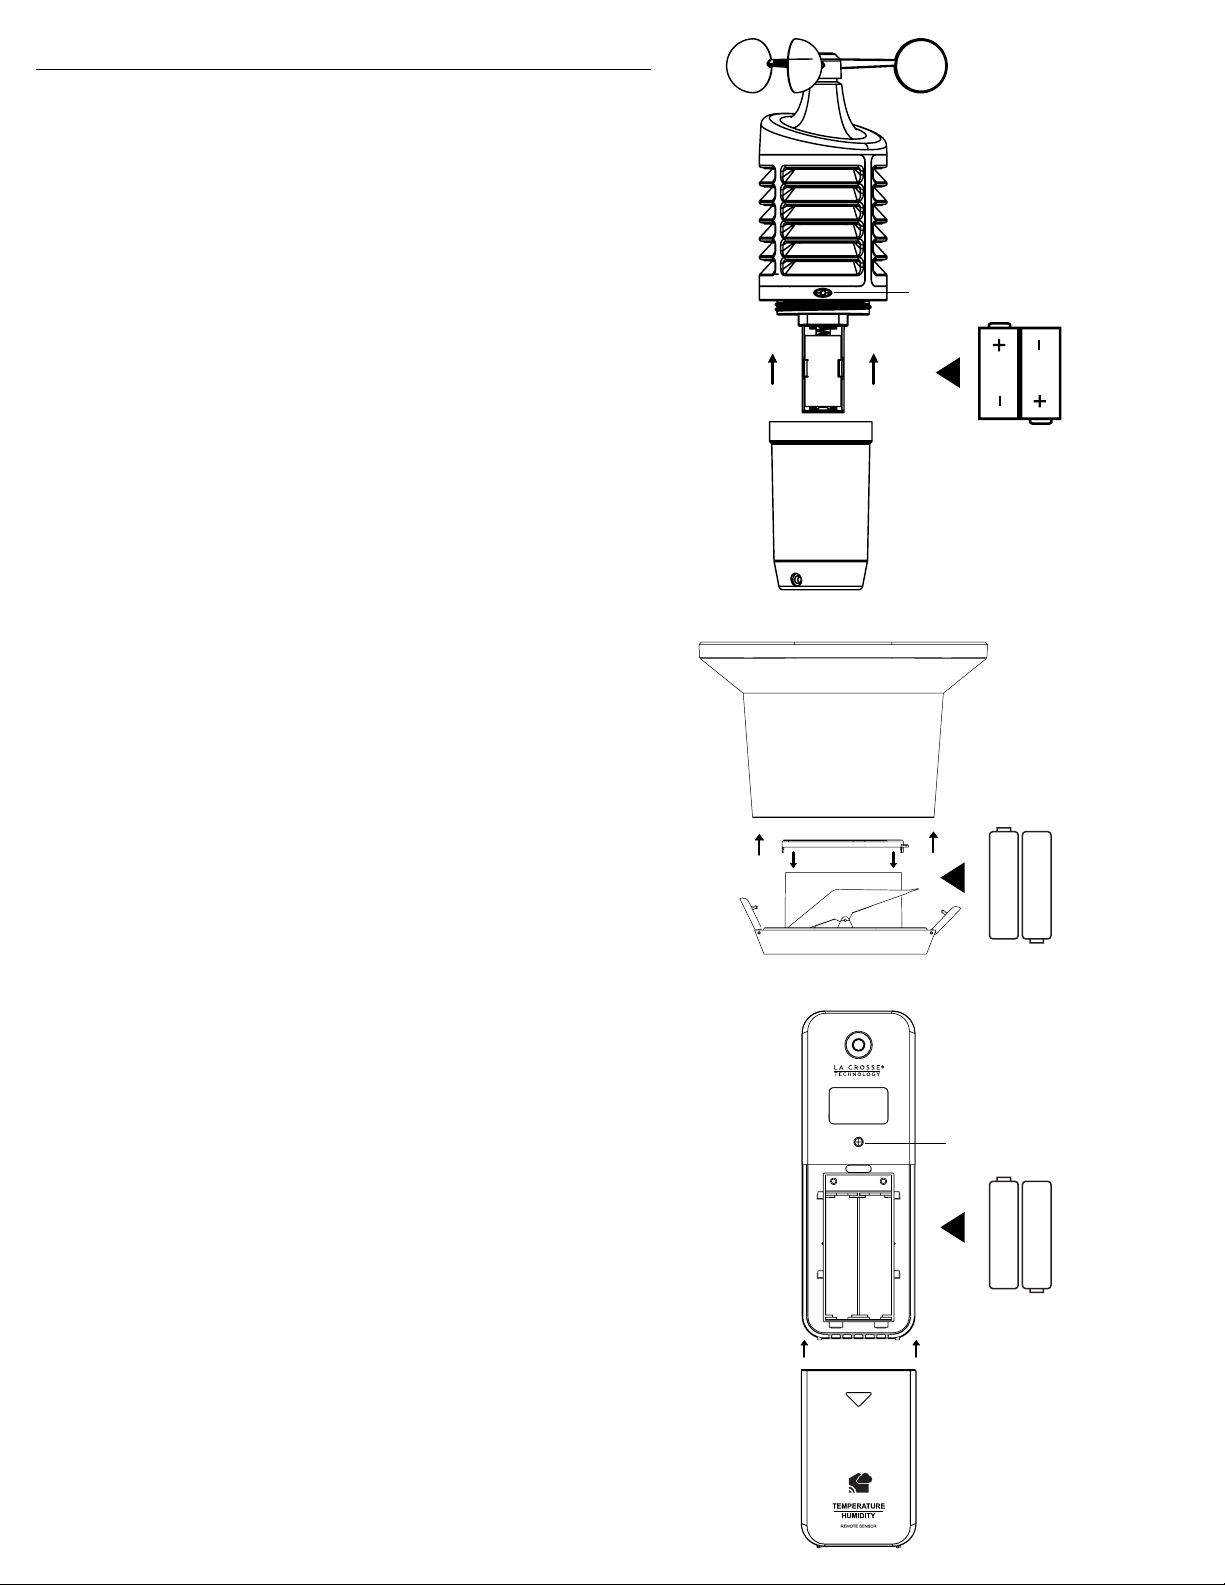
Detailed Sensor Set Up and Mounting
1. Turn the vented portion of your wind sensor counter clockwise.
2. Install fresh “C” batteries.
3. Carefully align and turn vented portion clockwise to tighten.
4. There is a blue LED light on the sensor that will flash when transmitting.
Mounting:
• Position in an open area that will have the least amount of interference
with wind speed.
• Mount your sensor vertically with the wind cups on top.
• The maximum wireless transmission range to the wind station is over 330
feet (100 meters) in open air, not including walls or trees.
1. Insert mounting pole into your sensor.
2. Tighten screws
3. Insert bottom of pole into mounting bracket
4. Tighten knob to secure
5. Use screws through the bottom of the mounting bracket to attach.
6. The sensor can be mounted from the bottom or side.
Alternatively:
1. Insert your own mounting pole into the sensor.
2. Tighten screws
LED Light
Wind Speed sensor
LTV-W2
2-C
C
C
1. Flip open both side tabs on your rain sensor and lift o the top portion.
2. Pull up on the battery cover and remove.
3. Install 2-AA batteries according to polarity.
4. Firmly seat the battery cover so it locks onto your rain sensor.
5. Place the top portion on the sensor and lock the tabs.
Mounting:
1. Mount in an open area for a more accurate rain count.
2. Install the Rain sensor on a level platform that is stationary. The rain
sensor should be wider than the platform to allow rain to empty.
3. Insert one, two, or three mounting screws through the holes in the base
of your rain sensor.
4. Mount your rain sensor at least 6 ft in the air and have a direct line of
sight to the display.
5. Your rain sensor should be accessible to allow for periodic cleaning of
debris or insects.
6. The maximum wireless transmission range to the rain station is over
330 feet (100 meters) in open air, not including walls or floors.
7. For video instruction, please visit: http://bit.ly/Rain_SensorMounting
1. Slide the battery cover o the front of your sensor.
2. Install 2-AA batteries according to polarity and replace battery cover.
Mounting:
1. Use the hole at the top to hang your sensor from the back using a nail.
Or, insert one mounting screw through the front of your sensor.
2. Mount your sensor on a north-facing wall or in any shaded area. Under
an eave or deck rail is preferred.
3. The maximum wireless transmission range to the weather station is over
330 feet (100 meters) in open air, not including walls or floors.
4. Be sure your sensor is mounted vertically, to allow moisture to drain out
properly.
5. For video instruction, please visit: http://bit.ly/TH_SensorMounting
LED Light
Rain sensor
LTV-R2
2-AA
-
+
AA
AA
+
-
Thermo-hygro
sensor
LTV-TH2
2-AA
-
+
AA
AA
+
-
Page | 6Professional Remote Monitoring Station

C84428
1. Insert the power cord into the wall outlet then into your station.
2.Optional: insert 3 AA batteries into your station to maintain time/date in
the event of a power outage.
Mounting:
1. Place your station near an outlet. Power cord is required for operation.
2.Use the mounting holes on the back to place your station on a wall.
3.Use the pull out stand on the back of your station to place on a desk or
counter.
4.Your station should be withing 80 feet of your wireless router if you
choose to use all the remote monitoring options.
LTV-D1
1. insert 2 AAA batteries into your bonus station according to polarity.
Mounting:
1. Place you bonus station on a desk or counter top.
2.Use the mounting hole on the back to place your station on a wall.
Note: the bonus station does not connect to the La Crosse View app.
Wind Speed Readings
Wind Speed: Reflects highest current wind speed in the past 31 seconds.
Power
Cord
+
AA
+
AA
AA
-
+
-
Optional
+
-
Stand Alone Station
-
AAA
+
AAA
Top Speed: Reflects highest wind speed in the past 60 minutes.
Wind Cup animation: The wind cups spinning speed will vary with actual
wind speed. When wind speed is higher, the cups spin faster.
Blue Circle: The blue circle will remain solid, when operating as a stand
alone station.
Note: When station is synced to the La Crosse View App, the circle will
reflect NWS Wind Direction.
WIND SPEED
MPH
TOP
SPEED
1 HR
Station with La Crosse View App
WIND SPEED
MPH
TOP
SPEED
1 HR
NWS
WIND
DIRECTION
Page | 7Professional Remote Monitoring Station

Wind Speed History
Your station records Wind History. Simply press and release the WIND
button to view your wind history. Other readings will disappear
temporarily
One Hour: past 60 minute period
(default Top Speed record, always shown)
24 hour: Past 24 hour period, from last record
7 Days: Past 7-day period, from last record
Month: Defined by Calendar Month i.e. January 1 - January 31
Year: Defined by Calendar Year i.e. January 1 - December 31
Reset Wind Speed History
1. Press and release the WIND button to view individual wind speed readings.
2. Hold the MINUS button for five seconds to reset the individual value.
WIND SPEED
TOP
SPEED
MPH
3. Wind speed reading will reset to current wind speed, time and date.
Rainfall Readings
You can quickly view Rain History on your station. Press and release the
RAIN button to view rainfall history to display. Other readings will
disappear temporarily. Your station will stay on your selection.
NOW: Rain readings from the start of a rain event until no rain has
accumulated for 30 minutes. When there has been no rainfall for 30
minutes, this number will reset to zero.
1 Hour: Rainfall in the past 60 minutes (last twelve 5 minute samples).
Example: current time is 6:49, 1HOUR is the accumulated rain between
5:50 to 6:49.
24 Hours: Rainfall for the past 24 hours. Updates at each full hour.
This is a running total.
7 Days: Rainfall from the last 7 consecutive 24 hour rainfall readings.
Updates each day at midnight. Not a subject to the calendar. Be sure
your time is set.
RAIN
24 HOURS
IN
1 Month: Current Month: First day to current day. Current month will show.
1 YEAR: Current month plus past 11 months total. Current year will show.
Total: Total rainfall since station was powered on or reset.
Note: As time passes without rain, the 1 hour, 24 hour, and 7 day rain
totals will count down to zero.
RAIN
1 YEAR
IN
Page | 8Professional Remote Monitoring Station
Reset Rainfall Readings
1. Press the RAIN button to view individual rain readings.
2. Hold the MINUS button for five seconds to reset the individual value.
3. Rainfall reading will reset to 0.00
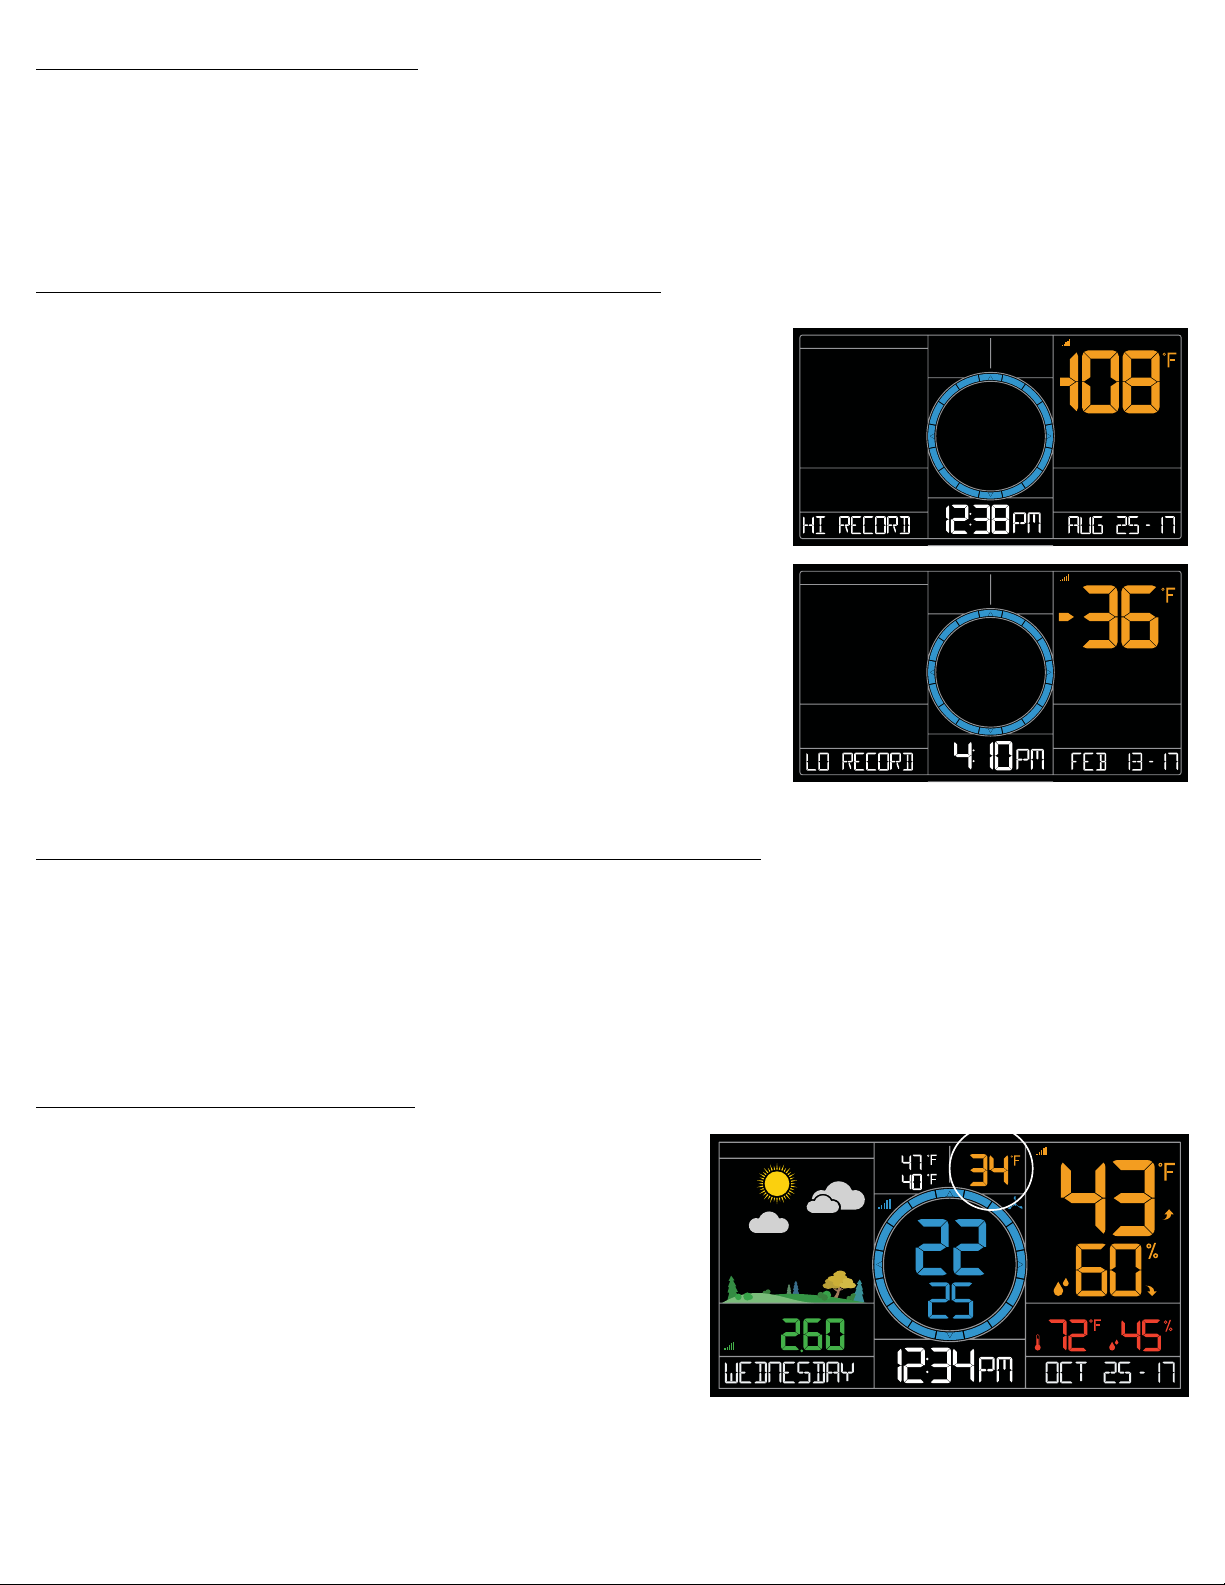
HI | LO Temperature/Humidity Records
Your station records HI and LO records with time and date of occurrence.
A new HI or LO record will replace the existing record.
Press and release the TEMP button to view your HI and LO records.
Viewing order:
• Outdoor HI Temp with Time/Date
• Outdoor LO Temp with Time/Date
• Outdoor HI Humidity with Time/Date
• Outdoor LO Humidity with Time/Date
• Indoor HI Temp with Time/Date
• Indoor LO Temp with Time/Date
• Indoor HI Humidity with Time/Date
• Indoor LO Humidity with Time/Date
• Feels Like HI with time and date stamp
• Feels Like LO with time and date stamp
• Outdoor Dew Point
Reset HI | LO Temperature/Humidity Records
1. Press the TEMP button to view individual readings.
OUTDOOR
OUTDOOR
2. Hold the MINUS button for five seconds to reset the individual value.
3. HI | LO reading will reset to current temperature, humidity, and current time/date.
Feels Like Temperature
Your “Feels Like” temperature is a combination of outdoor
temperature/humidity and wind speed.
• When outdoor temperature is higher than 80˚F, Heat Index will
show as the Feels Like Temperature.
• When outdoor temperature is lower than 50˚F, Wind Chill will
show as the Feels Like Temperature.
• When outdoor temperature is between 50˚F and 80˚F, will show
current outdoor temp as the Feels Like Temperature.
FORE CAST
RAIN
1 HOUR
WIND SPEED
FEELS LIKE
TOP
SPEED
1 HR
MPH
HI
LO
IN
OUTDOOR
INDOOR
Page | 9Professional Remote Monitoring Station

Temperature | Humidity Trend Arrows
March 20th – June 20th
Spring
Autumn
Summer
Winter
June 21st – Sept. 20th
Sept. 21st – Dec 20th
Dec 21st – Mar 19th
Your temperature (2°F / 1°C) and humidity (3%) trend indicators (arrows)
UP ARROW: Temperature/Humidity is rising
update every 15 minutes. The trend reflects changes over the past
one hour period.
RIGHT ARROW: Temperature/ Humidity is steady
DOWN ARROW: Temperature/Humidity is falling
Seasonal Changes in Trees
The tree foliage will change seasonally on your weather station. The dates are programmed into the weather station for
automatic foliage change.
Backlight (5 levels)
Your station has 5 levels of brightness for the backlight:
• When operating with the AC adapter press and release the LIGHT button to adjust the backlight:
Intensity Levels: 0% | 3% | 20% | 50% | 100%
• When operating on battery power only, press the LIGHT button to activate the backlight for 10 seconds at 100%.
Low Battery Icons
• Battery by Outdoor Temperature, replace batteries in your
Thermo-Hygro sensor.
• Battery by Wind, replace batteries in your Wind sensor.
• Battery by Rain, replace batteries in your rain sensor.
• Battery by Indoor Temperature, replace batteries in your station.
RAIN
1 HOUR
FORE CASTNWS
NWS FORECAST
HI
LO
NWS
WIND
DIRECTION
IN
WIND SPEED
FEELS LIKE
TOP
SPEED
1 HR
MPH
OUTDOOR
INDOOR
Page | 10Professional Remote Monitoring Station

Sensor Update Interval
Sensor: Change Required for Update Updates: No Change- Sensor Updates:
Rain 0.007 inch (0.2mm) every 45 seconds every 3 minutes
Wind 0.5 mph (0.8 km) every 31.5 seconds every 3 minutes
Temp/Humidity 0.9F (0.5 C) every 50 seconds every 3 minutes.
Example: It does not rain everyday. When it is not raining the rain sensor will update every 3 minutes. When it is raining , the rain
sensor will updated every 45 seconds.
Sensor Search | Sensor ID
Each of your sensors has an individual ID number on the bar code of the
sensor. This sensor ID is visible on your station by pressing the SENSOR
button.
WIND SPEED
View ID numbers:
• Press and release the SENSOR button to view individual station and
sensor ID numbers. All other information will disappear temporarily.
Search for all sensors:
• While viewing sensor ID, hold the SENSOR button for 3 seconds to
search for all sensors.
• The station will search for all sensor ID numbers on the station.
• The sensor reception icon will flash for each sensor while searching.
• Allow up to 3 minutes to receive sensor signal.
Delete Sensor ID
In the rare event you need to replace your sensor, you will first need to
delete the old sensor ID from your station.
1. Press and release the SENSOR button to view your sensor ID number.
TOP
SPEED
1 HR
MPH
OUTDOOR
2. While viewing your sensor ID, hold the MINUS button for 5 seconds
to delete your old sensor ID. Dashes will show for the ID number.
3. Your station will search for a new sensor. Remove batteries from your
old sensor.
4. Install batteries in your new sensor and allow up to three minutes for
your new sensor readings and ID to appear on your station.
Note: When replacing your Thermo-hygro sensor, press the TX button
(under the battery cover) to send a signal immediately. The Rain and
Wind sensors do not have a TX button.
TX
C/F
Page | 11Professional Remote Monitoring Station
Add-on Sensors (sold separately)
One benefit of your La Crosse View App is the ability to remote monitor multiple locations in your home by adding compatible sensors. These add-on sensors will read directly to the app. You can conveniently name each sensor and have it
read to the smart box on your station.
To add a sensor that reads directly to La Crosse View:
1. Bring your add-on sensor close to station.
2. Insert batteries into sensor.
3. Open your La Crosse View app and select ADD DEVICES. Press the + button to add the sensor (device)
4. Scan the bar code on the sensor and follow instructions in La Crosse View.
5. Place sensor in appropriate location (see mounting instructions on page 6)
Stream the add-on sensor (Device Data Feed) on your station:
1. Open the La Crosse View app and select your station.
2. Scroll down to the Smartbox section and press the blue icon.
3. Follow instruction on app to add” Device Data Feed” and select your sensor.
Page | 12Professional Remote Monitoring Station

Settings Menu C84428
When operating as a stand alone station you can manually set your station.
Note: When using the La Crosse View app, time and date will be set automatically.
1. Hold the SET button for 3 seconds to enter settings menu.
2. Press and release the + or - buttons to adjust the flashing values. Hold to adjust quickly.
3. Press and release the SET button to confirm and move to the next item.
Note: Press and release the LIGHT button any time to exit settings.
Settings menu order:
1. BEEP ON | OFF
2. 12h/24h hour format
3. Hour
4. Minutes
5. Year
6. Month
7. Date
8. Temperature Fahrenheit | Celsius
Note: SEE APP TO CONNECT will show as a reminder to connect to
La Crosse View (optional).
• Press the LIGHT button to exit setting menu.
Factory Reset C84428
A Factory Reset will remove all sensor ID numbers and Wi-Fi settings and return your station to default settings.
1. Hold the RAIN and LIGHT button together for 5 seconds.
2. Your station will reset and search for all sensors.
3. Allow up to 3 minutes to reacquire all sensors.
4. You will need to reconnect to your La Crosse View app.
Page | 13Professional Remote Monitoring Station
1. 12 | 24
2 Hour
3. Minutes
4. Fahrenheit |
Celsius
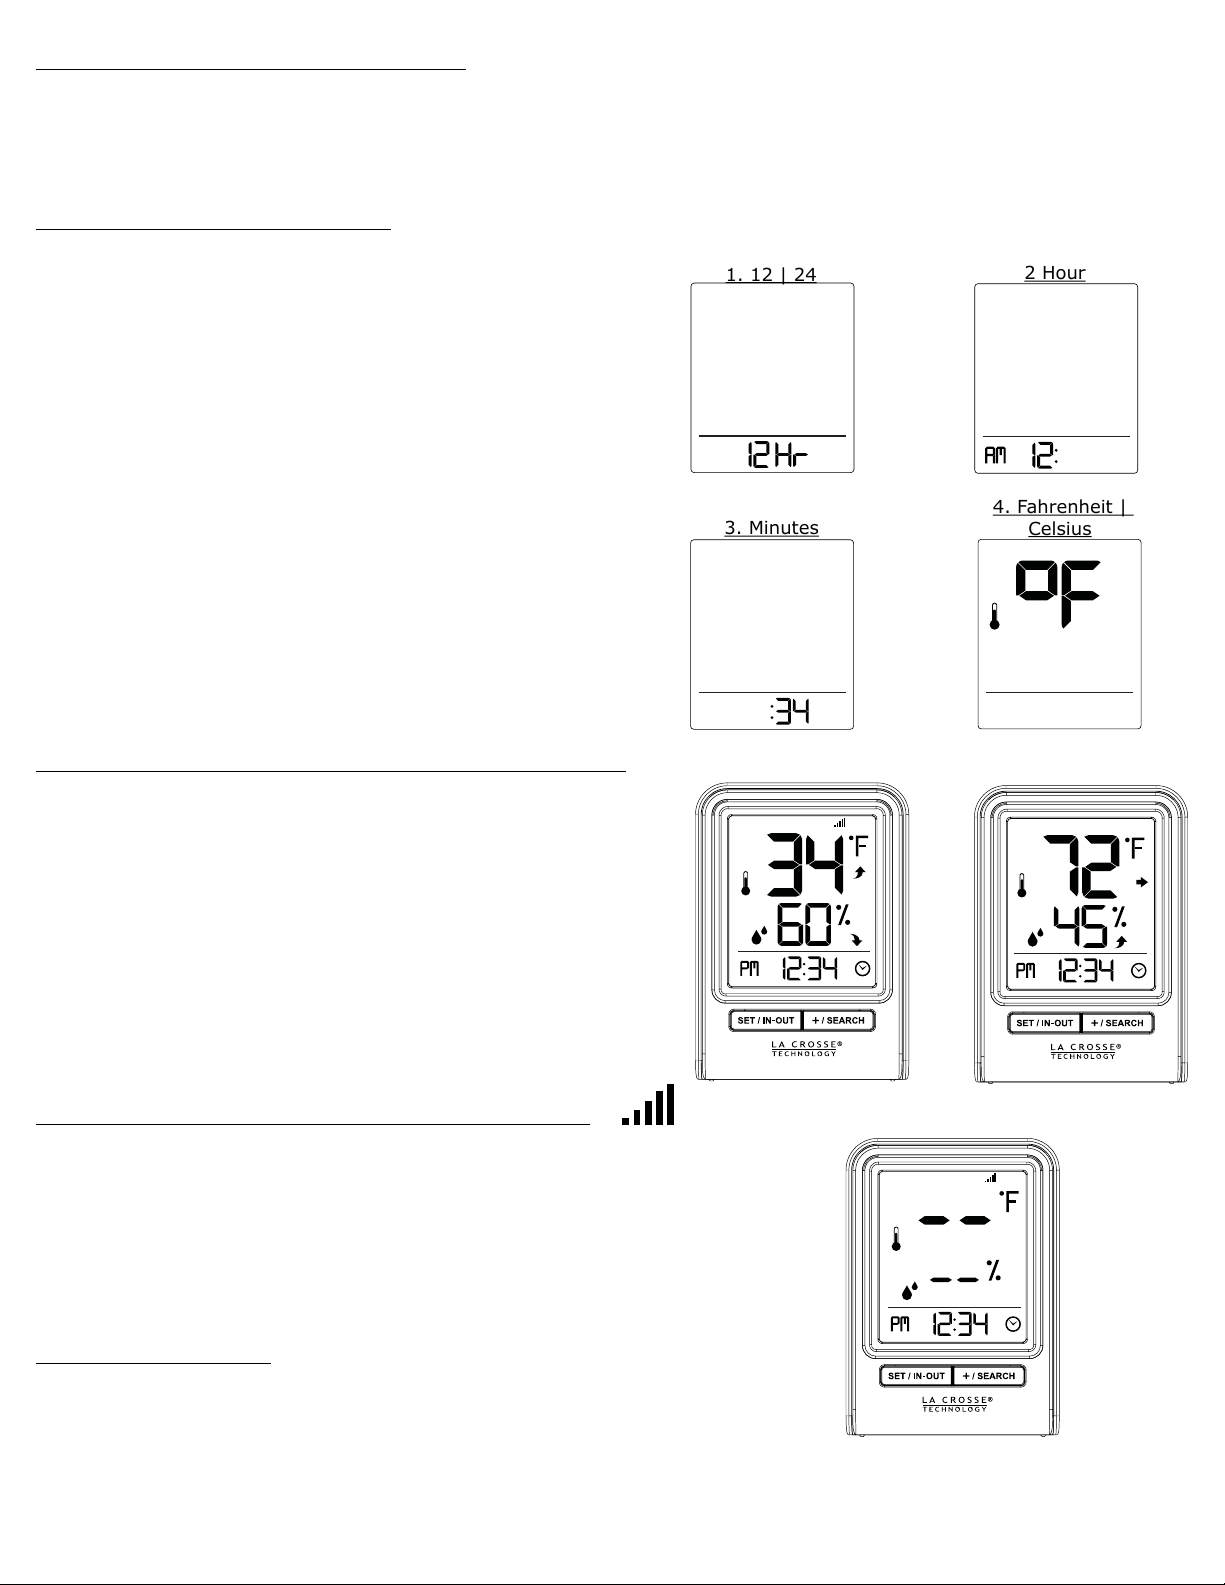
Your LTV-D1 Bonus Station
• As an added bonus, we have included a LTV-D1 to provide basic temperature and humidity in another room.
• Your bonus station receives information from your professional Thermo-hygro sensor
Settings Menu LTV-D1
Your Bonus Station does not connect to La Crosse View and will need
to be set manually:
1. Hold the SET/IN-OUT button for 3 seconds to enter setting menu
2. Press and release the +/SEARCH button to adjust settings. Hold to
adjust quickly.
3. Press and release the SET/IN-OUT button to move to next item
Setting order:
1. 12/24 Hour Time
2. Hour
3. Minutes
4. Fahrenheit/Celsius
View Indoor or Outdoor Data LTV-D1
Press and release the SET/IN-OUT button to switch between:
• Outdoor temperature/ humidity
• Indoor temperature/humidity readings.
Search for Outdoor Sensor LTV-D1
In the rare event your bonus station loses connection with the
Thermo-hygro sensor, the outdoor readings will show dashes.
OUTDOOR
INDOOR
OUTDOOR
• Simply hold the +/SEARCH button for three second to search for the
sensor.
• The sensor reception icon will flash for each sensor while searching.
Restart LTV-D1
1. Remove batteries for 15 minutes.
2. Press any button 20 times.
3. Install fresh batteries.
4. Allow up to 3 minutes tor connect to Thermo-hygro sensor
Page | 14Professional Remote Monitoring Station

Help Us, Help You!
If you have ideas for features or support solutions you’d like to see us make, please let us know! We truly want to make owning a La
Crosse Technology product not only a practical experience, but also a fun one. So email us at::
store@lacrossetechnology.com
Let’s Be Social!
Follow us on our social media outlets for the latest promotions, product support, and awesome giveaways.
Specifications
Indoor
Temperature Range:
Humidity Range:
Update Interval:
Temperature Range:
Humidity Range:
Update Interval:
Transmission Range:
Wind Speed Range:
Update Interval:
Transmission Range:
32˚F to 122˚F (0˚C to 50˚C)
10% RH to 99%RH
About every 60 seconds
Thermo-hygro Sensor
-40˚F to 140˚F (-40˚C to 60˚C)
10% RH to 99%RH
About every 51 seconds (3 minutes if no change)
Up to 400 feet (121 meters) in open air, RF 915 MHz
Wind Speed Sensor
0-111 mph (0-178 kmh)
About every 31.5 seconds (3 minutes if no change)
Up to 400 feet (121 meters) in open air, RF 915 MHz
Rain Sensor
Rainfall Range:
Update Interval:
Transmission Range:
0-393.6 inches ( 0-9999 mm)
About every 45 seconds (3 minutes if no change)
Up to 400 feet (121 meters) in open air, RF 915 MHz
Wi-Fi
Transmission Range: 80 feet (24 meters) RF 2.4 GHz
Page | 15Professional Remote Monitoring Station

Power
C84428 Station:
Optional Battery Backup:
LTV-TH2 Thermo-hygro Sensor:
LTV-W1 Wind Speed Sensor:
LTV-R2 Rain Sensor:
LTV-D1 Bonus Station:
C84428 Station:
LTV-TH2, LTV-W1, & LTV-R2 Sensors:
LTV-D1 Bonus Station:
C84428 Station:
5.0 Volt 500mA power cord included (Required)
AC6 HX06-0500500-AU-1
3-AA batteries included, backup for time and date
2-AA batteries included
2-C batteries included
2-AA batteries included
2-AAA batteries included
Battery Life
48-60 months with power cord use
over 24 months with reputable batteries.
over 12 months with reputable batteries.
Dimensions
8.98” L x 1.0” W x 5.43” H (22.8cm L x 2.6 cm W x 13.8cm H)
LTV-TH2 Thermo-hygro Sensor:
LTV-W1 Wind Speed Sensor:
LTV-R2 Rain Sensor:
LTV-D1 Bonus Station:
1.97” L x 0.75” W x 5.73” H (5.0cm L x 1.91cm W x 14.55cm H)
7.10” L x 7.10” W x 18.57” H (18.03cm L x 18.03cm W x 47.17cm H)
with mounting bracket/pole
7.14” L x 3.43” W x 4.94” H (18.13cm L x 8.72cm W x 12.54cm H)
2.64” L x 1.32” W x 3.62” H ( 6.7 cm L x 3.35cm W x 9.19cm H)
Page | 16Professional Remote Monitoring Station

Care and Maintenance
• Do not mix old and new batteries.
• Do not mix Alkaline, Standard, Lithium, or Rechargeable Batteries.
• Always purchase the correct size and grade of battery most suitable for intended use.
• Replace all batteries of a set at the same time.
• Clean the battery contacts and also those of the device prior to battery installation.
• Ensure the batteries are installed with correct polarity (+ and -).
• Remove batteries from equipment when it is not used for an extended period of time.
• Promptly remove expired batteries.
Warranty and Support
La Crosse Technology, Ltd. provides a 1-year limited time warranty (from date of purchase) on this product relating to manufacturing
defects in materials & workmanship.
Before returning a product, please contact our friendly customer support with questions or visit our online help:
Phone: 1-844-200-8452
Online Product Support and Registration: www.lacrossetechnology.com/support
View full warranty details online at: www.lacrossetechnology.com/warranty_info_lt/
Page | 17Professional Remote Monitoring Station

FCC Statement
This equipment has been tested and found to comply with the limits for a Class B digital device, pursuant to part 15 of the FCC Rules.
These limits are designed to provide reasonable protection against harmful interference in a residential installation. This equipment
generates, uses and can radiate radio frequency energy and, if not installed and used in accordance with the instructions, may cause
harmful interference to radio communications. However, there is no guarantee that interference will not occur in a particular
installation.
If this equipment does cause harmful interference to radio or television reception, which can be determined by turning the equipment
o and on, the user is encouraged to try to correct the interference by one or more of the following measures:
• Reorient or relocate the receiving antenna.
• Increase the separation between the equipment and receiver.
• Connect the equipment into an outlet on a circuit dierent from that to which the receiver is connected.
• Consult the dealer or an experienced radio/TV technician for help.
This device must not be co-located or operating in conjunction with any other antenna or transmitter.
Operation is subject to the following two conditions:
(1) This device may not cause harmful interference, and
(2) This device must accept any interference received, including interference that may cause undesired operation.
Caution!
The manufacturer is not responsible for any radio or TV interference caused by unauthorized changes or modifications to this
equipment. Such changes or modifications could void the user authority to operate the equipment.
This equipment must be installed and operated in accordance with provided instructions and the antenna(s) used for this transmitter
must be installed to provide a separation distance of at least 20 cm from all persons and must not be co-located or operating in
conjunction with any other antenna or transmitter
All rights reserved. This manual may not be reproduced in any form, even in part, or duplicated or processed using electronic,
mechanical or chemical process without the written permission of the publisher. This booklet may contain errors or misprints. The
information it contains is regularly checked and corrections are included in subsequent editions. We disclaim any responsibility for
any technical error or printing error, or their consequences.
All trademarks and patents are recognized.
Made in China - Printed in China
Page | 18Professional Remote Monitoring Station
 Loading...