


WIRELESS PROFESSIONAL
WEATHER STATION
SET UP GUIDE
MODEL NUMBER: 328-1414BW
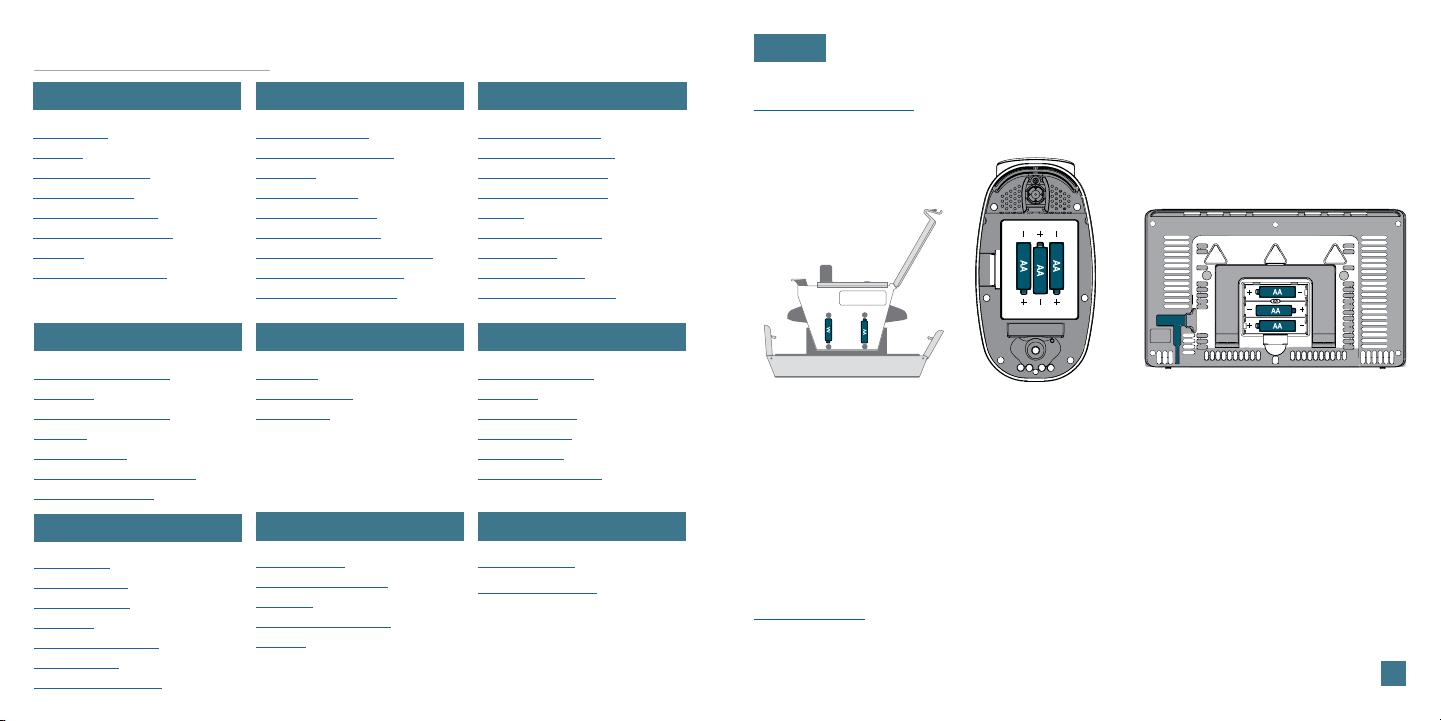
Table of Contents
BASICS
BASICS
Initial Setup
Buttons
LCD Display Icons
Station Settings
Atomic Time Signal
Daylight Saving Time
Options
Time Zone Selection
02
03
04
05
06
06
06
TEMPERATURE & HUMIDITY
View Temp/Humidity
Readings
View Temp/Humidity
Records
Reset Records
“Feels Like” Temperature
Add-on TH Sensor
16
17
17
17
21
SUPPORT
Low Battery
Sensor Search
Factory Restart
Warnings
We’re Here to Help
Stay in Touch
California Residents
22
22
22
22
22
22
22
PRESSURE & RAIN
Pressure Settings
View Pressure & Rain
Readings
Change Display
View Rain Records
Reset Rain Records
Positioning the Rain Sensor
Search for Rain Sensor
Cleaning and Storage
ALERTS
Set Alerts
Alert Indicators
Active Alert
APPENDIX
Specifications
Care & Maintanence
Warranty
Recycling & Disposal
Caution
WIND
07
Viewing Wind Data
08
Wind Speed Records
Reset Wind Records
08
Position the Breeze
09
Sensor
10
Included Mounting
10
Accessories
10
Basic Installation
11
Advanced Installation
FORECAST
18
Viewing Forecast
18
Readings
18
Seasonal Trees
Forecast Icons
Trend Arrows
Day/Night Forecast
STATEMENTS
23
FCC Statement
23
Canada Statement
24
24
24
20
Initial Setup
12
13
13
14
14
15
15
19
19
19
19
25
25
Power Up
Inside of Rain Sensor
Model No. TX145R
Remove the Rain
1.
Sensor funnel
and insert 2
“AA” batteries
Bottom of Breeze Sensor
Model No. TX145WSDTHv3
2.
Install 3 “AA” batteries
into the Battery
Compartment of your
Breeze Sensor.
Back of Station
Model No. 328-1414BW
3. Insert 3 “AA” batteries
into the Battery
Compartment of your
Weather Station
into the Battery
Compartment.
Note: It may take up to 10 minutes for your sensor data to appear on your
station’s screen.
02
BASICS BASICS
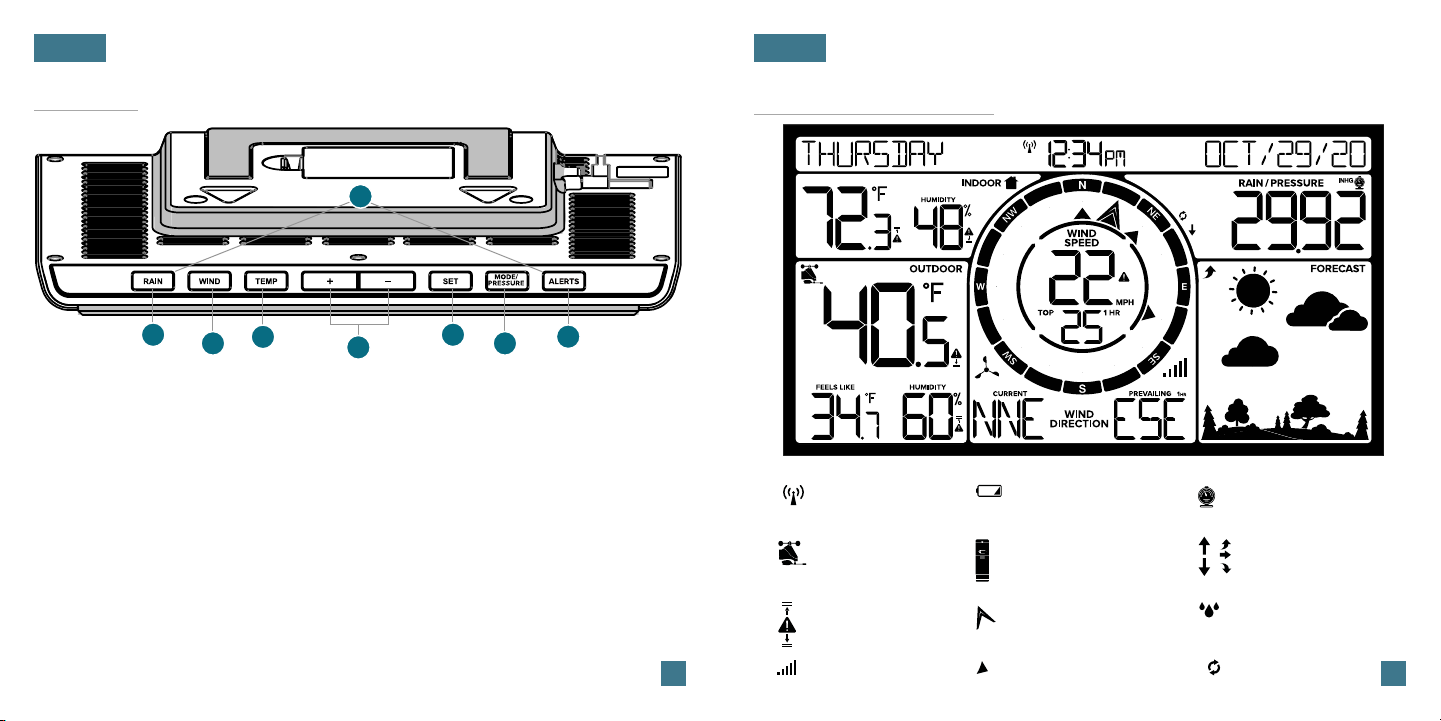
Buttons LCD Display Icons
8
1
1. RAIN
Press to view Rain History.
While viewing, hold the MINUS
button to delete the history
reading. Hold to search for
Rain Sensor.
Use to adjust values in the
Settings Menu.
7. ALERTS
Hold to enter Alert Settings.
3
2
2. WIND
5. SET4. PLUS/MINUS (+/-)
8. RAIN & ALERTS
4
Press to view Wind Speed
History. While viewing, hold the
MINUS button to delete the
history reading. Hold to search
for Breeze Sensor.
Hold to enter Settings Menu.
Press to save settings and
move to the next menu item.
Hold together to Factory Reset
your station. All history will
be lost.
5
6
7
3. TEMP.
Press to view Temperature
and Humidity History. While
viewing, hold MINUS button
to delete the history reading.
Hold to search for TH sensor.
6. MODE/PRESSURE
Press to toggle between
Pressure, Rain, and autoscroll.
Hold to set Pressure Value and
Units.
03
Atomic Time
Breeze Sensor
Temp/Humidity
Alerts
Sensor Reception
Low Battery
Add-on Sensor
Temp/Humidity
Wind Direction
Prevailing Direction
Pressure
Trend Arrows
Rain
Autoscroll
04
BASICS BASICS
Station Settings
1.2.When the station is first powered on, it will begin searching for your outdoor
sensor, which should connect shortly.
Hold the SET button to enter the Settings Menu.
Settings Menu Order
• Greeting
• Language
• Beep ON/OFF
• Atomic ON/OFF
• DST:
Automatic/Always ON/Always OFF
• Time Zone
• 12/24 Hour Time
• Hour
• Minutes
• Year
• Month
• Date
• Month/Date or Date/Month
• Fahrenheit/Celsius
• Wind Speed Units (MPH or KMH)
• Wind Direction (Letters or Degrees)
• Rainfall Inches or Millimeters
Weekday will set automatically after year, month, & date settings are adjusted.
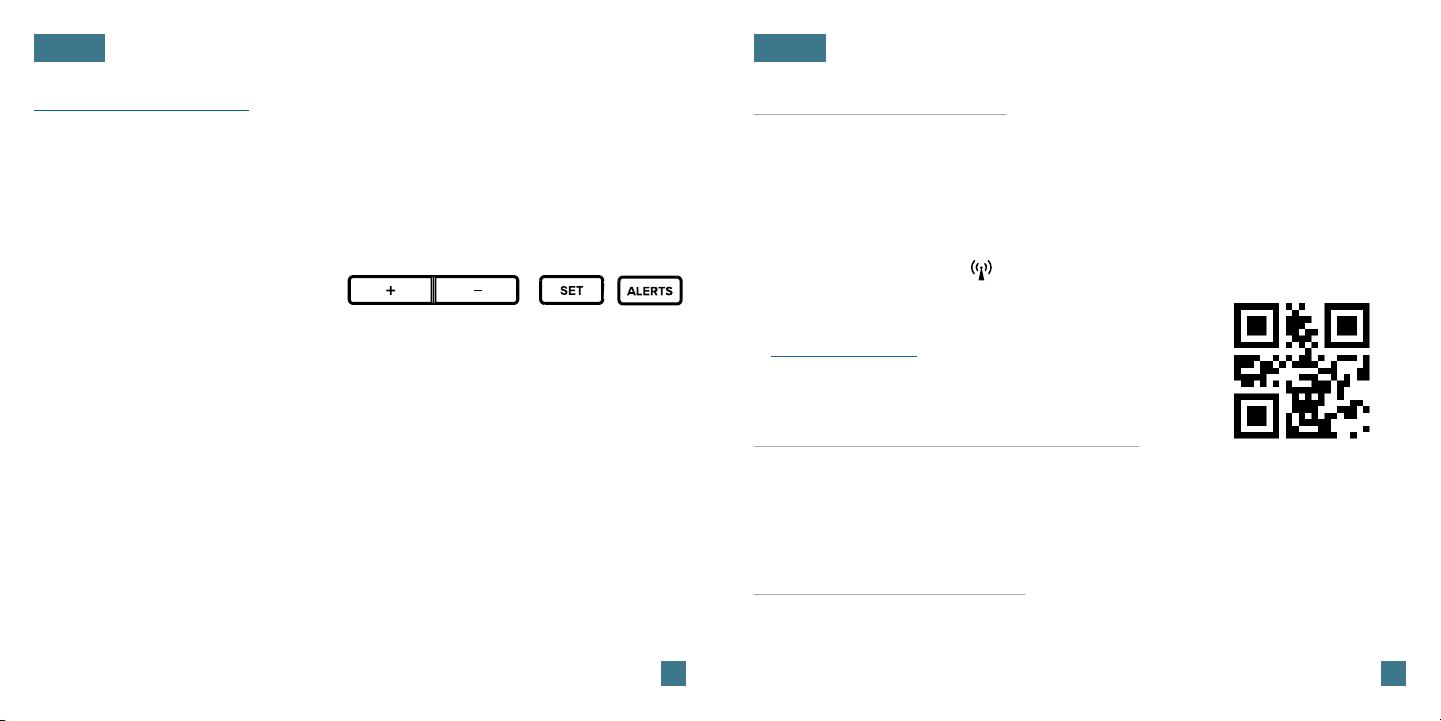
Use the +/- buttons on the top of the station to
adjust the values.
Press the SET button to confirm selection and
move to next step.
You may exit the Settings Menu at any time by
pressing the ALERTS button.
Atomic Time Signal
• The station will begin searching for the Atomic Time Signal when first
powered on.
• If the reception is not picked up right away, it will search every 2 hours
until the WWVB signal is received.
• Press the SET button to start or stop a manual WWVB signal search.
• The WWVB tower Icon will flash when searching, and be solid when
the signal is received.
• For information about WWVB Atomic Time visit:
bit.ly/AtomicTime
Daylight Saving Time Options
DST Automatic: Changes Spring and Fall
DST Always ON: Does not change to standard time in Fall
DST Always OFF: Does not change to DST in the Spring.
Time Zone Selection
Selectable Time Zones:
ATLANTIC, EASTERN, CENTRAL, MOUNTAIN, PACIFIC, ALASKA, & HAWAII
05 06
PRESSURE PRESSURE & RAIN
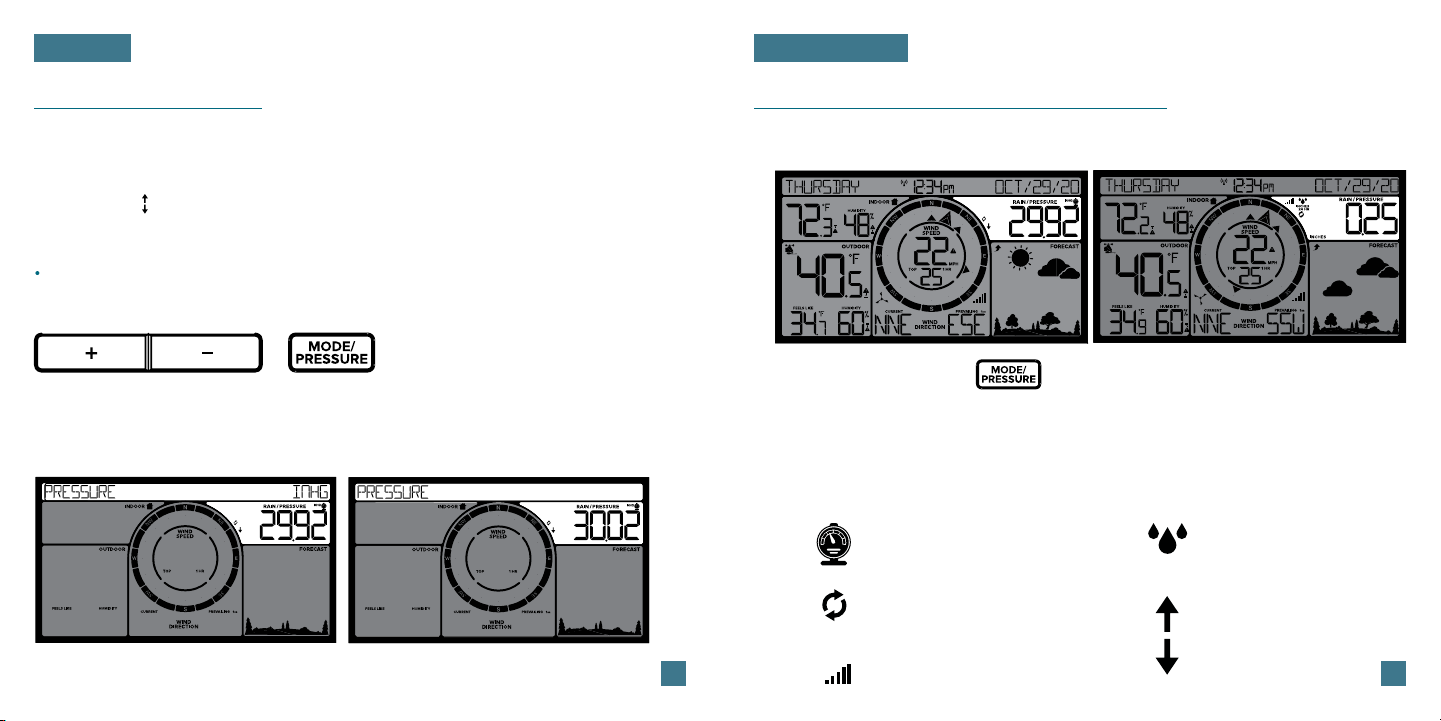
Pressure Settings
• Your Relative Pressure reading will come from your station’s internal barometer.
• Please allow up to 10 days for automatic calibration, or program your local
pressure value with the MODE/PRESSURE button.
• The arrows located to the left of the values represents Pressure Tendency
(rising/falling).
Hold the MODE/PRESSURE button to enter the Pressure Settings Menu to set
your Units of Measure (INHG or HPA) and Pressure Value.
Use the +/- buttons on the
top of the station to adjust
the values.
Press the
to confirm selection and move to next
step or exit.
MODE/PRESSURE button
View Pressure & Rain Readings
• Pressure and Rainfall readings share the same display area on your station.
Pressure is displayed
Change what is displayed:
• Press the MODE/PRESSURE button to toggle between Pressure and Rain
readings.
• The Pressure or Rain icon will show to indicate which reading you are viewing.
• When the Autoscroll Icon is displayed, the station will toggle between current
Pressure and Rain readings.
Pressure is displayed.
Autoscroll between
Pressure and Rain
readings.
07 08
Sensor Reception
Rain is displayed
Rain is displayed.
Pressure Trend Arrows
Indicate rising or
falling pressure.
 Loading...