

Page 1

QUICKSTART
KM 100/100 R Bp/Bp Pack
Warning
These are only brief instructions! Please read and comply with these instructions prior to using or servicing your
appliance.
The non-compliance of the operating and safety instructions may lead to damage of the appliance and to risks for
the operator and other persons.
Start up
1
2
A
A
A B Ajdust the seat
B
B
C
C
Bp model
A Open the device hood.
B Switch off the charger and remove the plug
from the socket.
Pull the battery cable from the charger cable
and connect it to the appliance.
C Close cover.
Bp Pack model
A Open the device hood.
B Unplug the charger from the mains.
Place the mains cable into the storage
compartment.
C Close cover.
A Pull seat adjustment lever inwards.
B Move seat, release lever and
lock in place.
Check that the seat is properly locked in
position by attempting to move it backwards
and forwards.
1
Operation
A
D
B C Starting the machine
A Sit on the driver's seat.
B Do NOT press the accelerator pedal.
C Set programme switch to stage 1 (driving).
D Turn the ignition key to position "I" - the bat-
tery display lights up.
5.963-997.0 06/11
Page 2
QUICKSTART
2
3
Operation
A B C Drive the machine
A Press slowly the accelerator pedal "forward".
B Press slowly the accelerator pedal "reverse".
C Release the accelerator pedal, the machine
brakes automatically and stops.
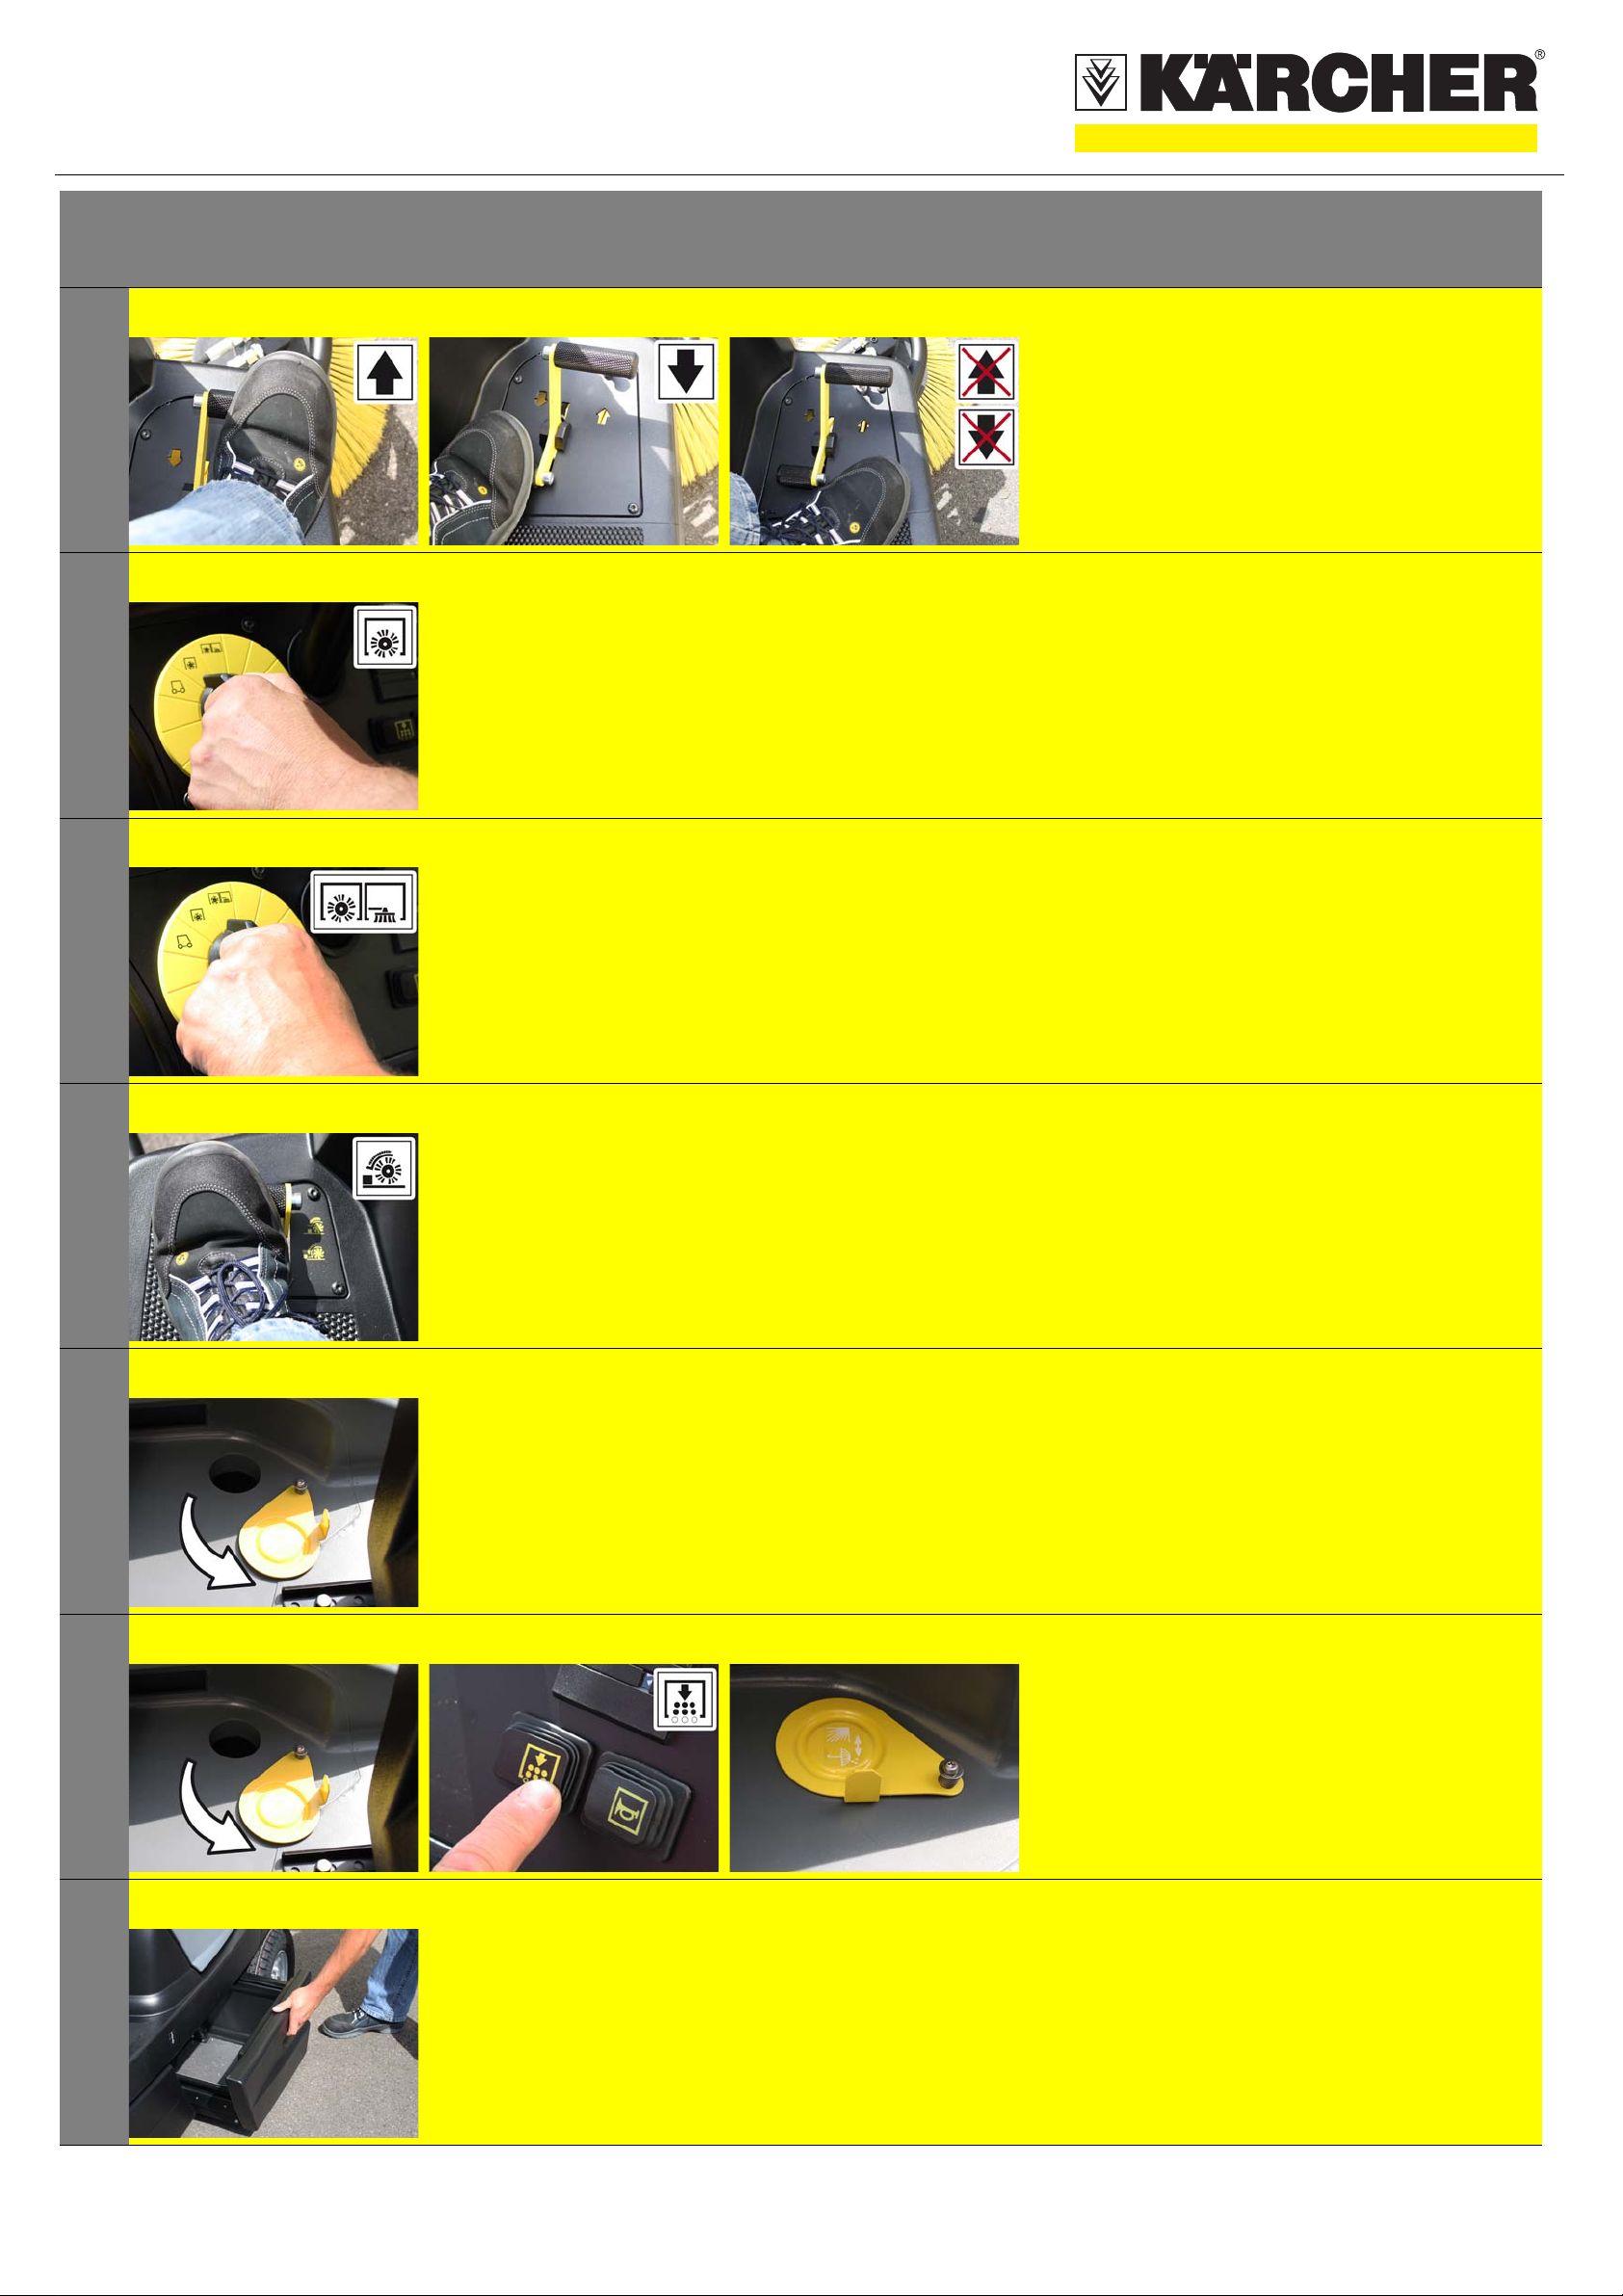
A Sweeping with sweep roller
A Set programme switch to stage 2.
Roller brush is lowered.
4
5
6
A Sweeping with side brushes
A Set programme switch to stage 3.
The side brushes and roller brush are
lowered.
A Sweeping with raised
coarse waste flap
A Push the coarse waste flap pedal towards the
front
and hold it there.
To lower it, take foot off pedal.
A Sweeping damp or wet floors
A Open wet/dry flap.
7
8
A B C Cleaning the dust filter
A Open wet/dry flap.
B Depending on the amount of the collected
dust, the
dust filter should be cleaned every
15-30 minutes during operation.
C Close wet/dry flap
A Emptying waste container
A Slightly lift and
pull out the waste container.
Empty waste container.
Slide in the waste container and
snap it in place.
Empty the opposite
waste container.
5.963-997.0 06/11
Page 3

QUICKSTART
1
2
Finish operation
A B Turn off the appliance
A Set programme switch to stage 1 (driving)
. The side brushes and roller brush are
raised.
B Turn main key to "0" and remove it.
A Emptying waste container
A Slightly lift and
pull out the waste container.
Empty waste container.
Slide in the waste container and
snap it in place.
Empty the opposite
waste container.
3
A
A
B
B
C
C
Bp model
A Open the device hood.
B Remove battery plug and join it to the charg-
ing cable.
Switching on the charger
C Close cover.
Bp Pack model
A Open the device hood.
B Remove the mains cable from the
storage bin.
Connect the charger to the mains and
turn it on.
C Close cover.
1
Maintenance and care
A A Check the sweeping roller and the
side brush for wear and wrapped
belts.
daily
weekly
Kärcher Customer Service
5.963-997.0 06/11
Page 4

QUICKSTART
Maintenance and care
2
1
A B A Check dust filter and clean filter
box, if required.
B Clean the machine with a damp
cloth which has been soaked in
mild detergent.
몇 Warning
Risk of damage! Do not wash down the
appliance with water and do not use
aggressive detergents.
Troubleshooting
A
C
B
D
E
Appliance cannot be started
A Sit on the driver seat, the
seat contact switch gets activated
B Turn the ignition key to position "I" -
the battery display lights up.
C Bp model
Remove battery plug and join it to the
charging cable.
Switching on the charger
D Bp Pack model
Remove the mains cable from the
storage bin.
Connect the charger to the mains and
turn it on.
E Release emergency-stop button.
daily
weekly
Kärcher Customer Service
2
3
A Engine is running but machine is not moving
A Check setting of freewheel lever
A B Machine is not sweeping properly
A Check roller brush and side brushes for wear,
replace if necessary.
B Check function of bulk waste flap
5.963-997.0 06/11
Page 5

QUICKSTART
Troubleshooting
4
A
C
B Dust gathers in the machine
A Empty waste container
B Check, clean or
replace dust filter
C Close wet/dry flap
Roller brush does not turn.
A Remove belts or cords from roller brush
5.963-997.0 06/11
 Loading...