

Page 1

NC-2
NETWORK INTERFACE CARD
INSTRUCTION HANDBOOK
for the Network Administrator
ALWAYS read this Instruction Handbook thoroughly before
use. After reading, maintain it in good condition and keep it
together with the Instruction Handbook for your copier.
Page 2

Page 3

Acknowledgments
All brands and product names are trademarks or registered trademarks of their
respective companies.
Page 4

NC-2
FCC Regulations
The NC-2 generates, uses, and can radiate radio frequency energy. If it is not
installed and used in accordance with the instruction handbook, interference with
radio communications may result.
This equipment has been tested and found to comply with the limits for a Class A
computing device, pursuant to Subpart J, Part 15, of FCC rules, which are designed
to provide reasonable protection against interference from such equipment when it is
operating in a commercial environment.
Users operating this equipment in a residential area are likely to cause interference,
in which case they may be required to correct the interference at their own expense.
Canadian Department of Communications Regulations
Le présent appareil n'émet pas de bruits radioélectriques dépassant les limites
applicables aux de Class A prescrites dans le règlement sur la brouillage
radioélectrique édicté par Le Ministère des Communications du Canada.
This equipment does not exceed the Class A limits for radio noise emissions as set
out in the radio interference regulations of the Canadian Department of Communications.
Page 5

Welcome to this Instruction Handbook for the
NC-2 Network Interface Card.
This handbook is formatted to fit into the binder that is provided with your Print
Controller.
The Instruction Handbook provides instructions on installing network software
Utilities on network systems such as Novell NetWare; TCP/IP for the UNIX
operating system; Ethertalk; Banyan Vines; or a network system that combines any
of these protocols.
Included are configuration procedures and instructions for setting up the your
NC-2 as a print server on a network.
Page 6

1
Page 7

Contents
Section 1: NC-2 Introduction
Features of NC-2 ....................................................................... 1-2
Benefits With Each Protocol ..................................................... 1-3
Configuration ............................................................................ 1-3
About Installation ...................................................................... 1-4
Troubleshooting Software for Workstations ............................. 1-4
What's In Your Package ............................................................. 1-4
Installation Requirements .......................................................... 1-5
Basic Specifications .................................................................. 1-6
Section 2: Installation
Network Protocols ..................................................................... 2-2
About the NC-2 Board .............................................................. 2-3
Connectors ................................................................................ 2-3
Hardware Installation ................................................................ 2-4
Configuring the Network Protocol ............................................ 2-5
Network Management Utility ................................................... 2-6
Section 3: NetWare Configuration
NetWare Utilities Overview ...................................................... 3-2
How To Access The HTTP Server With An IP Browser ........... 3-5
Using the Network Management Utility ................................... 3-6
Overview ........................................................................ 3-6
Using MAP (Management Access Program) ................. 3-7
MAP Welcome Screen .................................................... 3-7
MAP Main Menu Screen ................................................ 3-8
Using Help Screens ........................................................ 3-9
Configure NC-2 For Use With Novell NetWare ....................... 3-24
Overview ........................................................................ 3-24
Configure Using NetWare 2.15 and 3.1x .................................. 3-25
Setting Up Print Queues ................................................ 3-25
Using PCONSOLE ........................................................ 3-26
Configure Using NetWare 4.x NetWare Directory Services ...... 3-36
Overview ........................................................................ 3-36
Using the Network Management Utility ........................ 3-38
NetWare Configuration Menu ........................................ 3-40
Using the NWADMIN Utility ........................................ 3-43
Configure Using NetWare 4.x Bindery Emulation .................... 3-50
Overview ........................................................................ 3-50
Using PCONSOLE ........................................................ 3-51
Primary File Server ................................................................... 3-57
When To Define A Primary File Server ......................... 3-57
How To Define A Primary File Server ........................... 3-58
Page 8

Contents
Section 4: AppleTalk Configuration and Administration Program
Overview .................................................................................... 4-2
Enabling the AppleTalk Protocol ............................................... 4-2
Configuration for AppleTalk ..................................................... 4-2
Choosing the Printer .................................................................. 4-3
How To Access the AppleTalk Administration Program ........... 4-4
Configuring the NC-2 Print Server ............................................ 4-5
Error Log ........................................................................ 4-6
Printer Setup .............................................................................. 4-7
Protocol Setup For TCP/IP Users ................................... 4-8
How To Access The HTTP Server With An IP Browser ............ 4-9
Control Options .......................................................................... 4-9
Section 5: Unix Printing Through TCP/IP
Overview .................................................................................... 5-2
Installation in a Windows Environment ......................... 5-2
Windows for Workgroups .......................................................... 5-3
Installing TCP/IP ............................................................ 5-4
Loading the lpr Spooler ................................................. 5-4
Setting Up The NC-2 Print Server ................................. 5-4
Assigning IP Address with BOOTP Lite ........................ 5-5
Assigning IP Address with ARP ..................................... 5-6
Creating an lpr Queue on the Workstation ..................... 5-7
Microsoft Windows 95 .............................................................. 5-8
Loading the lpr Spooler .................................................. 5-8
Setting up the NC-2 Print Server .................................... 5-8
Assigning IP Address with ntBOOTP ............................ 5-9
Assigning IP Address With ARP .................................... 5-10
Setting up lpr on the Workstation .................................. 5-10
Windows NT Instructions .......................................................... 5-11
Setting Up the NC-2 Print Server ................................... 5-11
Assigning IP Address with ntBOOTP ............................ 5-12
Assigning IP Address With ARP .................................... 5-13
Setting Up lpr on the Workstation .................................. 5-14
Dynamic Host Configuration Protocol ...................................... 5-15
FTP UNIX Printing ........................................................ 5-15
FTP Client ...................................................................... 5-16
Printing Overview ..................................................................... 5-17
Configuring the IP Address on the NC-2 Print Server .............. 5-19
lpd UNIX Printing ..................................................................... 5-25
Installing TCP/IP If Not Running lpd ........................................ 5-34
Page 9

Contents
Section 6: Troubleshooting
Diagnosing Problems ................................................................ 6-2
Green LED Conditions ............................................................ 6-2
Amber LED Conditions ........................................................... 6-3
Status and Error Pages .............................................................. 6-4
How to Determine the Cause of a Problem .............................. 6-6
Printer Basic Checklist ............................................................. 6-7
Network Connections to the NC-2............................................ 6-7
NC-2 Troubleshooting .............................................................. 6-8
Novell Protocol ......................................................................... 6-9
Novell File Server Checklist ..................................................... 6-10
If the NC-2 Loses Its Novell File Server Connection ............... 6-10
NC-2 Workstation Checklist ..................................................... 6-10
NC-2 Configuration Checklist .................................................. 6-11
Print Server/File Server/Printer Connection Checklist ............. 6-11
Workstation to NC-2 Connection Checklist ............................. 6-12
AppleTalk Protocol ................................................................... 6-13
Printer Checklist ............................................................ 6-13
Multiple Zones .............................................................. 6-13
UNIX (TCP/IP) ........................................................................ 6-14
Appendix
Cable Specifications ................................................................. A-2
Assigning Multiple File Servers ............................................... A-3
Jumper Settings ......................................................................... A-5
Windows 95 PeerToPeer Printing ............................................ A-11
Index
Page 10

Section 1: NC-2 Introduction
Page 11

NC-2 Introduction
Features of NC-2
High-speed parallel port
q
q Network operating systems (NOS) & Protocol support for:
Novell NetWare versions 2.15, 3.10; and 4.0 and above
(Bindery and Network Directory Services)
AppleTalk
TCP/IP-UNIX for SUN (Solaris 1.x, 2.x), BSD System V
Rel. 4, DEC ULTRIX 4.3 RISC, OSF1/ALPHA, HP/UX,
SCO UNIX and Windows NT systems
Banyan Vines (Vines 4.11 (5), 5.0 (5) (6), and Vines for
UNIX, Version 2).
q Flash read-only memory (ROM) for easily upgrading the NC-2
with new protocols and future product enhancements
q Ethernet interface connection - Thinnet (10Base2) and 10BaseT
q Unshielded Twisted Pair (UTP) and Shielded Twisted Pair (STP).
q Windows 95 PeerToPeer Printing allows Windows 95 workstations
to print to NC-2 printers. Refer to Appendix, Windows 95
PeerToPeer Printing, for details.
q The NC-2 is both flexible and easy to install.
Flexibility of the NC-2 is provided with automatic network
switching between network protocols. Print jobs can be sent from
each NOS that is NC-2 configured.
The NC-2 supports multiple active protocols. You can activate the protocols
and troubleshoot printing problems using the Network Management Utility
or Apple Administration Program utilities.
Installation is easy because each network protocol requires a simple
network or utility in order to configure the NC-2 printers for the NOS.
1-2 NC-2 Introduction
Page 12

NC-2 Introduction
Benefits With Each Protocol
High performance - Send data as fast as your printer can receive it.
q
q Easy installation
q Full Print Server Support - Supports all print server features
defined for Novell NetWare and TCP/IP-UNIX.
q Put printers anywhere. Directly connect a printer anywhere on the
network. The NC-2 connects one printer.
Configuration
q
For Novell NetWare
Use NetWare’s PCONSOLE utility for NetWare versions 2.15,
3.10 and 4.x (Bindery Services); Network Management
Utility or NWADMIN for NetWare 4.x (Directory Services).
q For TCP/IP
Use lpd to print directly from the NC-2 without using our
software on your host. If you require host-side printing with
broader filtering and banner options, then use our install script.
q For AppleT alk
The NC-2 is pre-configured. If you have different requirements
or wish to assign a different name to the printer, you can use
our AppleTalk Administration program to configure the NC-2.
q For Banyan Vines
Use NIManage for Windows, a Banyan specific setup application
general protocol.
NC-2 Introduction 1-3
Page 13

NC-2 Introduction
About Installation
For detailed hardware instructions, see Section 2.
q
For detailed configuration instructions, see Sections 3 and 4.
Troubleshooting Software for Workstations
q
Novell NetWare: The NC-2 Network Management Utility for
Windows lets you troubleshoot problems by sending test prints or
viewing status reports or error logs on the NC-2 print server; check
or modify any configuration option not directly tied to the print
server; and change the print server name and the password it uses
to login.
q TCP/IP: Our software provides error messages and a status page to
alert you to incorrectly entered data.
q AppleTalk: AppleTalk Administration Program provides functions
that let you reset the NC-2, view the NC-2 configuration or an error
log, and change the printer setup. NC-2 Network Management
Utility for Macintosh lets you troubleshoot problems
q Banyan Vines
What’s In Your Package
q
NC-2 Network Interface Card (board)
q Ethernet 10BaseT connector and Ribbon Cable
q Ethernet 10Base2 (Thinnet) connector and parallel port
q Instruction Handbook (this handbook)
q Three 3 1/2" diskettes, which contain the Network Management
Utility for Windows program; the Apple Administration program;
and the TCP/IP installation script.
1-4 NC-2 Introduction
Page 14

NC-2 Introduction
Installation Requirements
Version of Protocol or NOS
q
Novell NetWare Version 2.15, 3.1x, or 4.x
q UNIX/Windows/LAN Server systems supporting lpr over TCP/IP.
q Macintosh System 7
q DEC ULTRIX 4.3 or 4.4, DEC OSF/1 2.0 or 3.0, Solaris 1.1.3
or 2.3, (SUNOS 4.1.3 or 5.3), System V Release 4, HP-UX 9.01,
IBM AIX 3.2.5, or SCO UNIX 2 for our supporting TCP/IP
q Banyan Vines
Software
q
Novell NetWare printing requires NetWare Capture, NPRINT or
PCONSOLE (later than 1.0) utilities.
q The NC-2 Network Management Utility for Windows utility
requires Windows 3.1 or later; Windows for Workgroups 3.11;
Windows 95; or Windows NT 3.5 or later.
q The Apple Administration program utility.
q TCP/IP setup and maintenance requires the Network Management
Utility.
Hardware
q
Support for 10 megabit Ethernet networks: 10Base2 (also known
as ThinWire or Thinnet); and 10BaseT cables and hardware.
q 3 1/2" diskette drive on the workstation to accept Windows,
Macintosh or UNIX utilities.
NC-2 Introduction 1-5
Page 15

NC-2 Introduction
Basic Specifications
Ethernet Network Interface Controller/Internal Print Server
(NIC/IEEE 1284)
Firmware
Novell, TCP/IP, Apple, Banyan (HTTP/HTML)
Protocols
Novell: NetWare 2.15, 3.x, 4.x (NDS and Bindery based);
(IPX/SPX supports Windows compatible browser utility)
TCP/IP: ARP, RARP, BootP, ICMP, SNMP
Ethertalk: Transparent implementation Ver.1
Banyan Vines: VINES 4.11 (5), 5.0 (5), (6); Vines for UNIX ver.2
Administration & Management
HTTP server providing access to HTML pages over IP & IPX
Network Management Utility for Windows via the MAP
(Management Access Program) Browser
Network Management Utility for Macintosh
BootP Lite for Windows and NT
Printer Interface
IEEE 1284 via 26 pin Connector
Instruction Store Download:
Entire program can be updated from Windows program
operating through Novell network.
Compatible w/FTP transmission of properly formatted core image
operating through TCP/IP network supporting FTP.
Hardware
10BaseT and 10Base2
0.5 MB RAM (upgrade to 1 MB of RAM)
1 MB Flash Memory
Support Software
Management Access Program For Windows (MAP)
Network Management Utility for Windows
(NetWare specific)
(Banyan specific)
BootP (Lite) and NTBootP (for Windows & NT)
Unix Host Based Software
1-6 NC-2 Introduction
Page 16

Section 2: Installation
Page 17

Installation
The NC-2 Ethernet Network Interface Card is a 5"x7" board that inserts into
a designated slot of your print controller device.
Network Protocols
q Novell NetWare 2.15, 3.10, and later, or 4.x (Bindery and Network
Directory Services - NDS).
q TCP/IP-UNIX networks with lpd capabilities or systems compat-
ible with SUN (Solaris 1.x, 2.x), BSD System V Release 4,
OSF1/Alpha, DEC ULTRIX 4.3 RISC, HP/UX, and SCO UNIX .
Status Light Indicators
q Status light indicators display as green and amber LEDs on the
print controller to enable you to monitor the power-on status
and to diagnose problems.
q You can easily troubleshoot the conditions indicated by the lights.
See Section 6, Troubleshooting.
2-2 Installation
Page 18
Installation
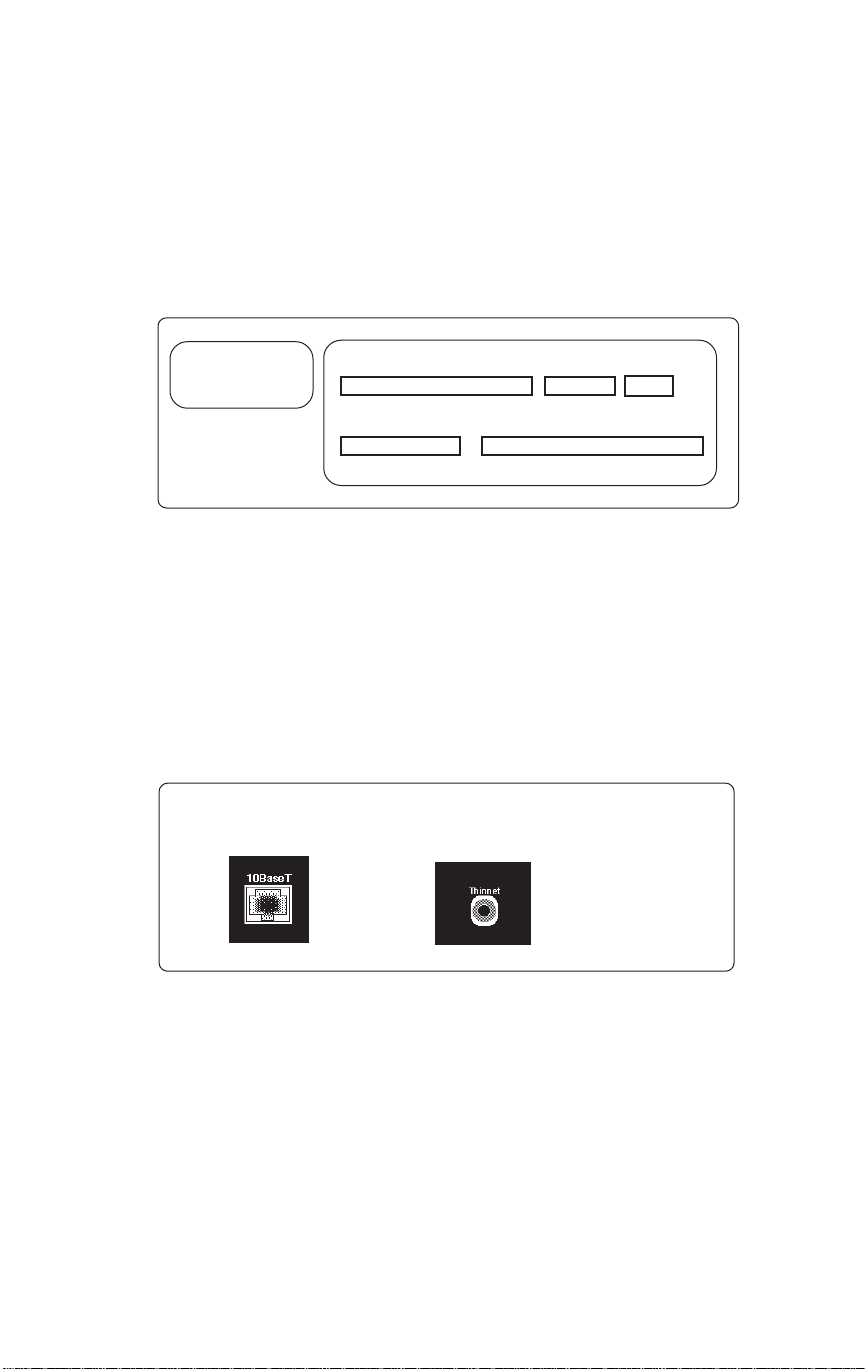
About the NC-2 Board
The two labels shown below are attached to the NC-2 board to identify the
model name, manufacture date code, serial number MAC address number
and initial firmware version.
PN:6097000
FO:024205
REV:A/2-PROTO
P/N: ROM: Code:
P C U A 9 5 0 - 7 7 2 0. 0 0 0 1 7
S/N: LAN Address:
9 9 0 4 6 1 0 0 - 4 0 - A F - 7 8 - E 7 - E 8
Made in the USA
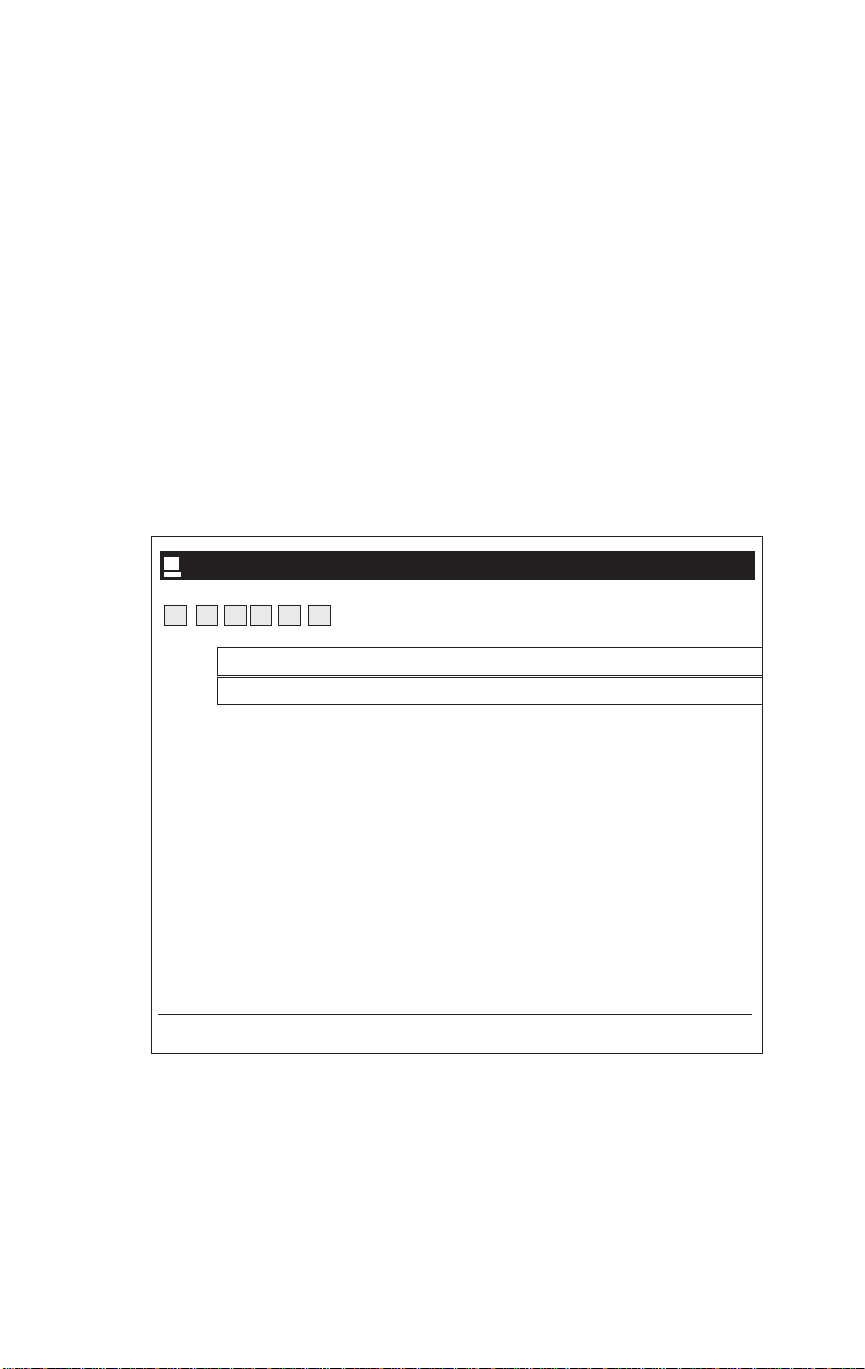
Connectors
The Ethernet connectors are illustrated below.
q Ethernet 10BaseT uses a RJ45 cable to connect the NC-2 to the
network.
q Ethernet Thinnet 10Base 2 uses a BNC T-connector to connect to
the coaxial cable of the network.
10BaseT
Thinnet 10Base 2
Installation 2-3
Page 19

Installation
Hardware Installation
DO NOT apply power to the NC-2 until all hardware installation and
software configuration steps are completed. Use the following steps to
connect your printer controller to the NC-2 print server.
Connecting the Ethernet Network to the NC-2
Connect your Ethernet network by using either the 10BaseT Ethernet
interface or the Thinnet Ethernet interface.
Using the 10BaseT Ethernet Interface
This network connection uses a 4-wire RJ cable to plug into the RJ45
network connector located on the back panel of the print controller. Once
you make the connection, you are ready to configure the network protocol
(see instructions on the next page).
Using a Thinnet Ethernet Interface
The Thinnet Ethernet wires use a BNC T-connector (not included in your
package) to plug into the BNC port on the NC-2 (marked Thinnet). Thin
Ethernet cable is 1/4-inch coaxial cable (usually RG-58/U) that uses the
cylindrical BNC T-connector to attach to the BNC port.
The following illustration shows how the proper BNC connection looks.
BNC Connection
IMPORTANT: Use the T-Connector when making the BNC connection,
making sure the T-connector is dir ectly connected to the port marked
Thinnet; otherwise, the connection will not work.
2-4 Installation
Page 20

Installation
Configuring the Network Protocol
After installation is completed, configure and activate your network
protocol to work with the NC-2.
• For NetWare configuration, refer to Section 3, NetWare
Configuration, which shows you how to use the Printer
Management System with MAP (Management Access Program).
(See next page for Utility Installation instructions.)
• For AppleTalk configuration, refer to Section 4, which shows you
how to use the AppleTalk Configuration and Administration
Program.
• For TCP/IP configuration information, refer to Section 5, Unix
Printing Thr ough TCP/IP.
Installation 2-5
Page 21

Installation
Network Management Utility
Installation Procedure
This Windows based utility can be installed on any workstation hard drive
or network drive. It is recommended that you install the utility program onto
an area of the file server restricted to users with Supervisor/Administrator
rights; however this is not a requirement.
When you install the Network Management Utility diskette, the MAP
(Management Access Program) browser installs automatically.
1. Start Windows on your PC or workstation.
2. Insert the Network Management Utility diskette in drive A: or B:
3. In the Windows Program Manager, select File.
4. Select RUN from the menu.
5. At RUN, type A:\SETUP.EXE or B:\SETUP.EXE and click OK.
6. Read the information screen and click on Continue.
7. Identify a path for the program.
The path default is C:\MAP
You can change the path or use the default. The installation begins.
8. When installation is completed, remove the diskette from the disk drive.
To use the Network Management Utility, see information starting on p. 3-6.
2-6 Installation
Page 22

Section 3: NetWare Configuration
Page 23

NetWare Configuration
NetWare Utilities Overview
This section provides information on the various NetWare utility programs
that are available to you, with emphasis on the Novell PCONSOLE utility
that is used to perform all NC-2 print server functions.
As an alternative to using PCONSOLE, the procedure using the
NWADMIN utility is provided for configuring NetWare 4.0x (NDS).
PCONSOLE is an integral part of the Network Management Utility.
Separate procedures are provided to show how to configure the NC-2 for
the NetWare version you are using.
Before users of the Novell NetWare Network Operating System can print,
the NC-2 print server must be configured according to the instructions
included in this section.
Highlights of this section are outlined below.
q How to Access the HTTP Server with an IP browser other than MAP .
q The Management Access Program (MAP) is a W indows based browser
utility. The MAP utility allows you to access the NC-2 and can be used to
activate network protocols, configure the print server and printer port, reset
NC-2 from a remote location, and troubleshoot problems. Help screen
information is included to show you how to use the MAP Utility.
q Configure Using NetWare 2.15 and 3.1x describes how to use
PCONSOLE to configure and set up NC-2 printers for printing and to set
up the Notify option.
q Configure Using NetWar e 4.0x Directory Services (NDS) describes how
to use the Network Management Utility as well as the NWADMIN utility to
configure and set up the NC-2 print Server for use with version 4.0x
Directory Services.
q Configure Using NetWare 4.0x Bindery Emulation describes how to use
PCONSOLE to configure and set up the NC-2 Print Server for use with
Version 4.0x Bindery Services.
q Primary File Server explains how to define a Primary File Server and
gives you guidelines beforehand about the effect it has on your network
system.
3-2 NetWare Configuration
Page 24

NetWare Configuration
NetWare Utilities Overview
The following is a list of Novell NetWare utilities.
PCONSOLE
• Use PCONSOLE to set up the NC-2 print server and set the print
queues. This utility helps you control network printing and allows
you to view information about network printing.
PRINTDEF
• Use to set up a database of printer definitions. Define device
drivers for network printers, plotters, and other devices. The
information defined with the utility is then used by CAPTURE,
NPRINT, PCONSOLE, and PRINTCON.
PRINTCON
• Use to define the preferred print options and set the options up as
standard configurations. PRINTCON serves as a database for
printing with CAPTURE, NPRINT, and PCONSOLE.
• The tasks include edit print job configurations, select default print
job configurations, and copy print job configurations from one user
to another.
CAPTURE
• Use to print screen displays, save data to a network file, and print
to a network printer from a non-network software application.
NPRINT
• Use to print files from outside an application to a network printer.
The files must be DOS text files, or files that are formatted by the
application for a specific printer type (for example, HP Laser).
NetWare Configuration 3-3
Page 25

NetWare Configuration
NetWare Utilities Overview
Basic Steps for Making Changes To NC-2
CHANGE REQUIRED ACTION STEP REQUIRED
To move our printing system
to another location on the
same network . . .
To move our printing system
from its current network to a
new network . . .
To attach new file servers to
NC-2 unit . . .
To remove a file server
attached to the NC-2. . .
To add new queues to the
NC-2 unit . . .
To remove queues from the
NC-2 unit . . .
To change the NC-2 print
server name . . .
Relocate the printing system to the new
location and make hardware connections
explained in Section 2. You do not need
to configure with PCONSOLE.
Perform hardware installation and
software configuration procedures in
Sections 2, 3, 4, 5, and 6.
Use the PCONSOLE utility.
Use the PCONSOLE utility.
Use the PCONSOLE utility. See Print
Queue Functions in this Section.
Use the PCONSOLE utility. See Print
Queue Functions in this Section.
Use the MAP utility that is on our
providing Network Management Utility
diskette.
3-4 NetWare Configuration
Page 26

NetWare Configuration
How T o Access The HTTP Server With An IP Browser
Use the following procedure to access the HTTP (HyperText Transfer
Protocol) with your favorite IP Browser, such as Netscape. This access
allows you to perform all print server functions.
Option: If you have the MAP (the Management Access Program) browser,
use instructions on p. 3-7. MAP gives you access to our providing Network
Management Utility, which allows you to perform all print server functions.
If you do not have the MAP Utility, perform the following steps:
1. Assign an IP address to the NC-2.
See instructions for Assigning IP Address, starting on p. 5-5.
2. Start the IP Browser you normally use.
3. When the browser is up and running, type http:// followed by the
IP address of the unit in the Location field at the top of the browser
screen, or by going to File at the menu bar and choosing Open
Location.
Example: For a unit with an IP address of 199.9.200.200, type:
http://199.9.200.200
At this point, the IP Browser works the same as our MAP Utility (see Main
Menu screen on p. 3-8.
NetWare Configuration 3-5
Page 27

NetWare Configuration
Using the Network Management Utility
Overview
The Network Management Utility is a Windows based HyperText Transfer
Protocol (HTTP) utility that enables you to configure network protocols for
the NC-2 print server; remotely reset the NC-2 print server to clear an error
or to return the print server to factory settings; troubleshoot problems;
enable/disable the status sheet printout; and access context-sensitive Help.
While the Network Management Utility can be accessed with any browser,
such as Netscape, you can also use the MAP (our Management Access
Program) browser to access and configure the NC-2. The MAP browser
automatically installs when you install the our providing Network Management Utility diskette.
If you have not already done so, install the Network Management Utility
program using the installation procedure on p. 2-6.
NOTE: The Network Management Utility we provide CANNOT be installed from DOS.
3-6 NetWare Configuration
Page 28
NetWare Configuration
Using the Network Management Utility
Using MAP (Management Access Program)
The MAP Welcome screen allows you to view and change Print Server
configuration settings. Simply click on the various function selections
displayed on the upper left screen, e.g., File, View, Go, Option, Help, Exit,
Direction Arrows, Home, and Printer; or, click the drop down arrow
displayed at the far right of the Server bar to show a drop down list of active
NC-2 Print Server units.
After making a selection, the Main Menu screen displays to allow you to
select any function related to the NC-2 Print Server. The Main Menu screen
is displayed on the next page.
Management Access Program - Management Access Program Home Page
File
View
Go Options Help
Server
NC2-317483 Ver. 1.04 NC-2
NC2-317690 Ver. 1.05 NC-2
Welcome to the Print Server Management Access
Program
This program uses IPX/SPX to communicate with the Print Servers.
To select a unit, click on a Print Server Identification in the drop down Server list.
To get the Print Server name (if different from the default ID), highlight the Print Server Identification and then
To get the detailed information for all listed Print Servers, select "Show All" under the Options menu. If there are
For Help, press F1
NOTE: Menus and function items are explained in Using Help Screens, which starts on
p. 3-7.
select "Show Detail" under the Options menu.
many Print Servers, this operation may take some time to complete.
NUM
ò
NetWare Configuration 3-7
Page 29

NetWare Configuration
Using the Network Management Utility
Using MAP (Management Access Program)
The MAP Main Menu allows you to access our providing program and use
the functions relating to the System, the Protocols and Ports.
Simply click on the menu item you require, and the easy-to-use screens will
guide you through each procedure.
The bottom of your screen displays Home and Help. Clicking on Home
gets you back to the basic menu. Clicking on Help gets you to the Help
screens where you may select the topic of your choice.
To learn more about using the MAP Utility, see Using Help Screens which
begins on the next page.
To configure the NC-2 Print Server for use with NetWare, see Configure
NC-2 for Use With Novell NetWare p. 3-24.
Management Access Program NC2_317483
cess Proam KN2_317483
Main Menu
Server NC2_317483
System Protocols Ports
Reset Setup NetWare Configure Port Settings
Factory Defaults Setup TCP/IP Test Printer
Unit Status Setup AppleTalk Configure Status Page
Network Address
Change Password Status Information
Home | Help | Unit Information
NOTE: Y ou will be required to enter a password to perform most of the functions. The default
factory password is "sysadm". Enter the password in lowercase.
3-8 NetWare Configuration
Page 30

NetWare Configuration
Using the Network Management Utility
Using Help Screens
System Functions
Reset
Factory Defaults
Unit Status
Novell NetWare
Banyan VINES
TCP/IP
AppleTalk
Serial Port Status
Network Address
Change Password
Protocols
Setup NetWare
Setup TCP/IP
Setup AppleT alk
Setup Banyan VINES
Ports
Configure Port Settings
Parallel Port Settings
Serial Port Settings
Test Printer
Configure Status Page
Status Information
NetWare Configuration 3-9
Page 31

NetWare Configuration
Using the Network Management Utility
Using Help Screens
System Functions
System Functions allow you to reset the unit when an error condition
occurs; reset the unit to download a new version of the print server software; return the unit to its factory defaults before configuring; check the
unit status on Novell NetWare, Banyan VINES, TCP/IP, or AppleTalk
protocols; update the Ethernet network; change the password assigned to
the unit.
Reset
Two functions are available: Reset Unit lets you reset the print server to
clear an error condition that is preventing you from printing. Reset simply
recycles the unit and leaves all current print server settings intact. Typical
error conditions that would require resetting the unit include the situation
where the printer port does not accept data for a print job, or the printer is
printing codes instead of the desired text. When you reset the unit, you may
need to recycle the printer power Off, then On again to correct the problem.
Reset the Unit for Download lets you reset the print server in to download
mode to enable you to update the unit's flash read-only memory (ROM)
with a new or updated software release. A software release normally
includes new features or fixes for the print server.
Factory Defaults
This function resets the print server to the factory default settings that came
with the unit. This feature is useful in the event you are moving the print
server to a new location, or if the unit was set up improperly and you need
to start over again. Remember that this option clears any settings already
defined for the print server.
Unit Status
The Unit Status screen displays the current state for each protocol and print
server port available on your print server model. For each supported
protocol (Novell NetWare, Banyan VINES, TCP/IP, AppleTalk), the top line
displays the protocols supported and indicates whether the protocol is
currently enabled or disabled.
3-10 NetWare Configuration
Page 32

NetWare Configuration
Using the Network Management Utility
Using Help Screens
System Functions
Unit Status
Novell NetWare
For Novell NetWare, the file server status for each print server post is
displayed as explained in the following field descriptions:
File Server: The name of the file server(s) to which the print server is
connected.
File Server Status: These status messages inform you of whether the server
is connected or disconnected to the print server. It also lets you know when
the server is shutting down its connection to the print server.
Queue Name: The queue name assigned to the print server printer port.
Queue Status: This field displays the status of the queues servicing the print
server printers. If there is a problem printing, e.g., the queue is not available, the problem will be listed here.
Banyan VINES
The connection and service status for each print server and print server port
are listed in the following VINES Login fields and VINES Services fields:
VINES Login Fields
Device Login Name: The Login name assigned to the print server.
Current State: This field displays messages for the Current State of the print
server, including Connecting, Connected, Disconnected, Starting Up, or
Starting Service; Killing, in the event Service could not be found by the
print server; and Shutting Down, in the event the file server was commanded to shut down.
NetWare Configuration 3-11
Page 33

NetWare Configuration
Using the Network Management Utility
Using Help Screens
System Functions
Unit Status
Banyan VINES - Login Fields (continued)
Errors: Error messages for the print server display, as follows:
• Access Refused: Print server is not authorized for the service.
• Bad Config: Configuration for service is required.
Resend the login name, password, and print service name(s) to the print server.
• Connection Failed: Print server could not communicate with the service.
• Connection Lost: Connection to the service has been lost or disconnected.
• Garbage Received: The service has received garbage characters.
• StreetTalk Failed: StreetTalk service is unavailable.
• Network Error: Problem to be determined. Consult system administrator.
• No Errors: Print server is connected and ready to receive print jobs.
• Out of Memory: Insufficient memory to send print jobs to the print server ports.
• Printer Offline: The printer is not powered On or is not connected to the network.
Check the printer or its connections.
Banyan VINES - Services Fields
Service Name: Name of the service for the printer connected to a print
server's parallel port. For example, a parallel port would have its own
service name.
Current State: Status messages for the service listed in the field above,
including the following:
• Abort Job: User has stopped a print job and the print buffer is being cleared.
• Disconnect: Server informed print server that printer port on the server is unavailable.
• End Job: Printing an end-of-job string.
• Pause Reconnect: Service has been lost, print server is trying to reconnect.
• Printing: Sending data out to the printer port.
• Reconnect: Located the service, checking to see if it is available.
• Start Service: Has not received a response from the server yet, trying to reconnect.
• Shutdown: The service has been shut down.
• Wait for Job: Online, waiting for a print job.
• Wait for Printer: Waiting for printer to become free.
• Possibly a test print file has been sent to the printer.
3-12 NetWare Configuration
Page 34

NetWare Configuration
Using the Network Management Utility
Using Help Screens
System Functions
Unit Status
Banyan VINES - Services Fields (continued)
Errors: Error messages for the service listed in the first field, including:
• Access Refused: Print server not authorized to service printer port on print server.
• Bad Config: configuration for service needs to be redone.
Resend the login name, password and print service name(s) to the print server.
• Connection Failed: Could not communicate with the service.
• Connection Lost: Connection to the service has been lost.
• Garbage Received: The service has received garbage characters.
• StreetTalk Failed: StreetTalk service is unavailable.
• Network Errors: The problem is undetermined. Contact the System Administrator.
• No Errors: Unit is connected and is ready to receive print jobs.
• Out of Memory: Memory is insufficient to send print jobs to the print server ports.
• Printer Offline: Printer is not powered up or is not connected to the network.
• Check the printer and its connections.
Job Owner: The login name of the user sending the print job.
Job Name: The name of the print job being sent to the print server port.
NetWare Configuration 3-13
Page 35

NetWare Configuration
Using the Network Management Utility
Using Help Screens
System Functions
Unit Status
TCP/IP
The internet protocol (IP) and line printer daemon (LPD) settings are
displayed for the print server and the printer server printer ports. IP field
settings are described below.
IP Address: The network address for the print server.
Subnet Mask: This address identifies the number of bits used for the subnet
and host portions of the address.
Default Gateway Address (if needed): This address is used if the routers on
your network have a default gateway address that needs to be listed for
accessing the print server printers.
Base Port Number: The base number assigned to the print server port. For
example, port [1] would be 100001.
Banner: This displays whether the banner page option is turned On or Off.
The LPD settings are displayed for each print server port. This information
includes the type of print jobs supported for each print server printer. For
example, if PCL and PS are displayed, this means that the printer supports
PCL and PS compatible print jobs.
AppleTalk
The print server unit name and the AppleTalk zone in which the print server
resides are displayed. The name will either be the default name
NC2_(serial_number) or a user-defined name. The Port Status has a default
assigned printer name of Unit # (serial_number) 1. You cannot print to any
printer with a disabled port status.
3-14 NetWare Configuration
Page 36

NetWare Configuration
Using the Network Management Utility
Using Help Screens
System Functions
Network Address
Important: This field is for experienced users only.
The network address screen displays the print server unit serial number and
the Ethernet address for the unit.
You need to have a password to update the network address. With this
option, once you enter an authorized password (if you have not done so
already), you can click on Update Network address to update the current
Ethernet address or Clear Inputs to go back to your last serial number entry.
Change Password
To change an existing password, you need to enter the new password in the
New Password field, then retype the new password in the Retype New
Password field to confirm it.
Once you have confirmed the new password, then click on [Change
Password] to make the change permanent. Your existing password will be in
the Old Password field.
NetWare Configuration 3-15
Page 37

NetWare Configuration
Using the Network Management Utility
Using Help Screens
Protocols
This section lets you set up configuration parameters for each protocol
supported by your print server unit.
The following functions can be performed.
Setup Novell NetWare
Novell NetWare Setup includes assigning a new name and password to the
NC-2 Novell Print Server, identifying the preferred file server connection,
setting up for Novell Directory Services (NDS), identifying the Ethernet
frame type, and disabling Bindery Services.
Setup Banyan VINES
Banyan VINES Setup includes entering the login name, password, and print
service name(s). You must do this FIRST before you start to use the printers
attached to the print server.
Setup TCP/IP
TCP/IP Setup includes setting the Internet Protocol [IP] and line printer
daemon (LPD) settings.
Setup AppleT alk
AppleTalk Setup includes identifying the AppleTalk zone where the print
server resides, and assigning a new name to the print server.
3-16 NetWare Configuration
Page 38

NetWare Configuration
Using the Network Management Utility
Using Help Screens
Protocols
Setup NetWare
The following information explains how you can change each field or make
entries on the NetWare Configuration Menu.
Enable NetWare
When checked, Novell NetWare is enabled as a protocol for the print server.
If Novell NetWare is a permanent protocol, then the box cannot be unchecked. For print servers where Novell NetWare is not the primary
protocol, click this box to either enable or disable the protocol.
Print Server Name
Each Novell print server has a unique name assigned to it. The print server
uses the default name of NC2_(serial_number). The serial number is located
on a label attached to the NC-2 board.
If you want to change the default name or the existing name, enter the new
print server name in this field. The name can be up to 63 characters in
length. You must also remember to change the name in PCONSOLE;
otherwise the name change will not take effect.
Print Server Password
The network administrator assigns a password to the Novell print server.
When a password is assigned through NetWare's PCONSOLE, you need to
inform the print server of the assigned password.
When you enter the password in this field, make sure it is the same password that was assigned through PCONSOLE. The password is stored in the
print server configuration memory.
To assign a password to the print server in PCONSOLE, refer to your
Novell documentation. Using this program, first type in the password in the
Print Server Password field, then retype the password in the Password
Retype field. The password is the same for all file servers assigned to the
print server.
Password Retype
See above.
NetWare Configuration 3-17
Page 39

NetWare Configuration
Using the Network Management Utility
Using Help Screens
Protocols
Setup NetWare (continued)
Preferred File Server
In this field, enter the name of the preferred file server for the print server.
The preferred file server is the server you want the unit to connect to first.
This function lets you connect to the file server of choice rather that having
it search for a file server, which might bring up a server that is not your
choice.
Preferred NDS Context
For Novell NetWare 4.x Directory Services users, enter the preferred NDS
context. The preferred NDS Context must be the entire context, whether
typed or non-typed. Do not begin the context path with a trailing period (.).
You do not need to write a container name (print server name) because it
was provided in the name field above. A typed context example name is as
follows:
ou=standard. ou=organization_1
or
ou=standard. ou=organization_1 (o=Local)
Should you need help with this entry, see your system administrator.
Preferred NDS Tree
For Novell NetWare 4.x Directory Services, enter the preferred tree in this
field. If you do not know the tree, type WHOAMI at the DOS command
line, then press Enter.
Print Queue Scan Rate
This option lets you modulate the time it takes for the Network Management
Utility to poll the network for fresh print queues, by permitting polling in
selected intervals. Enter an interval from 1 to 255 seconds.
Ethernet Frame Type
Use this option to select the appropriate frame type for your network. If you
choose Auto-Sense, then the frame type is automatically selected. Click on
the radio button that matches your frame type or click on Auto-Sense.
3-18 NetWare Configuration
Page 40

NetWare Configuration
Using the Network Management Utility
Using Help Screens
Protocols
Setup NetWare (continued)
Disable Bindery
Click on this box to enable or disable Bindery Services for Novell NetWare
4.x and above. Bindery is disabled when the check box is marked. When
you disable Bindery, the print server will not support any of the print servers
on the Bindery file server.
Enable Ports
When the check box is marked for any of the ports, then the port and the
printer attached to it are enabled for printing. When the check box is empty,
then printing is disabled and you cannot print to that printer.
If you have not entered a password already, you will need to enter one now
in order to make any entries or changes to this screen. The factory default
password is "sysadm." Enter the password in lowercase.
Click on [Accept Settings] when you are finished making your entries. This
puts your new entries into effect. Click on [Clear Inputs] to clear the entries
you made or to revert to the previous settings.
Setup Banyan VINES
This screen lets you enter a login name and password for the print server, as
well as service names for each print server port. During initial installations,
you must do this IMMEDIATELY after the hardware installation, because
the login name, password and service names must be downloaded to the
print server before it can be used. This screen can also be used to change
and of the names or passwords. Each field is described below.
Enable VINES
When this check box is marked, the print server is enabled for the Banyan
VINES protocol. If the check box is not marked, then the print server is not
enabled for the protocol. To enable the protocol, click on the check box. An
X will appear in the box, indicating the enabled protocol.
NetWare Configuration 3-19
Page 41

NetWare Configuration
Using the Network Management Utility
Using Help Screens
Protocols
Setup Banyan VINES (continued)
Login Name
Enter the login name assigned to the print server in the VINES MUSER
utility. Make sure you create the login name FIRST in MUSER before
specifying a login name here. Also, be sure to spell the name correctly;
otherwise you will be unable to access the print server or its printers.
Login Password and Password Retype
Enter the password assigned to the print server in the VINES MUSER
utility (if a password was assigned). Make sure you create the password
FIRST in MUSER before specifying a password here. Also, be sure to spell
the password correctly; otherwise you will be unable to access the print
server or its printers.
Port 1 Service
If you have not entered a password already, you will need to enter a
password before making any entries or changes to this screen.
Click on [Accept Settings] when you are finished making your entries. This
puts your new entries into effect. Click on [clear Inputs] to clear the entries
you made or to revert to the previous settings.
3-20 NetWare Configuration
Page 42

NetWare Configuration
Using the Network Management Utility
Using Help Screens
Protocols
Setup TCP/IP
This screen lets you update or change the TCP/IP configuration settings you
entered for the print server. Each field is described below.
IP Address
Type in the IP address for the print server if one is not listed on this screen.
You can also enter the IP address here if you do not have access to a rarp
server. See your system administrator for the address.
Subnet Mask
Type in the Subnet mask for the print server if one is not listed on this
screen. Enter the Subnet Mask here if you have no access to a rarp server.
Default Gateway
Type in the default Gateway address, if required, to allow the print server to
communicate with other subnets. If you have no address, leave the field
blank. See your system administrator for the Default Gateway address.
Base Port Number
Enter the base number assigned to the print server. The default No. is
10000.
Enable LPD Banners
When the box is marked, printers print out a banner page for each print job.
Parallel Port
• PCL: PCL and compatible print jobs.
• PS: For PostScript print jobs.
• ASCII: For all ASCII and text print jobs.
• Other: For all other print job types, such as line printers, etc.
• NoFF: For no form feed. When this box is checked, no form feed will be sent to the
printer as part of a print job. A form feed is used to eject the last page of a print job
from a printer. Many printers and applications automatically send a form feed at the
end of a print job. If you need to send a form feed, leave this option unmarked.
Click on [Accept Settings] when you are finished making your entries. This
puts your new entries into effect. Click on [Clear Inputs] to clear the entries
you made or to revert to the previous settings.
NetWare Configuration 3-21
Page 43

NetWare Configuration
Using the Network Management Utility
Using Help Screens
Protocols
Setup AppleT alk
This screen lets you update or change the AppleTalk configuration settings
you entered for the print server. Each field on the configuration menu is
described below.
Enable AppleT alk
Click on the check box to enable or disable AppleTalk as a print server
protocol. When the check box is marked, AppleTalk is enabled.
Unit Name
This is the name assigned to the print server on the AppleTalk network. By
default, the name is NC2_(serial_number). You can change the name to
identify the print server for your network.
Zone Name
Identifies the zone in which the print server is located. Be sure to identify
the correct zone; otherwise, printing will not be possible.
Port Type
Identifies the ports available on your print server.
Printer Name
Identifies the AppleTalk Printer Name. The assigned default name is Unit
#(serial_number) 1.
Enable Port
Click on the check box to enable or disable AppleTalk printing. When a
check box is marked, it is enable for printing.
Click on [Accept Settings] when you are finished making your entries. This
puts your new entries into effect. Click on [Clear Inputs] to clear the entries
you made or to revert to the previous settings.
3-22 NetWare Configuration
Page 44

NetWare Configuration
Using the Network Management Utility
Using Help Screens
Port
This section describes all the settings that are required to configure the
printing port on the print server; send test print jobs to the print server
printer; and configure the print server status page.
Parallel Port Settings
The parallel ports is configured for strobe size only. Strobe size is the value
for a hardware signal that is sent to a printer. This value depends on the
strobe value the printer will accept and the length of cable between the print
server and printer. This value may need to be changed if you have problems
printing (the default value is 1.0). If you have problems, you should first
change the value to a higher setting. Consult your printer manual for details.
Test Printer
The Test Printer menu lets you send a printer test to the print server port. If
you want to send a printer test, then choose the type of print job you want to
send to the printer - PostScript or ASCII. Once you select the print job type,
click on [Start Test] to send the test print job. If you have not done so
already, you will need to enter a password before performing this function.
The factory default password is "sysadm." Enter the password in lowercase.
Configure Status Page
The Status Page menu lets you select whether you want to send a status
page to the printer each time you power on the print server.
• When the check box for [Print Status Page on Startup] is marked, a status page will be sent to
the printer each time you power on the print server.
• When the check box is empty, a status page is not sent at power up.
• You also need to select the type of print job you want sent to the printer - a PostScript or
ASCII print job. Click on the appropriate radio button. If you want to send a status page to the
printer immediately, then click on [Generate Now].
Click on [Accept Settings] when you are finished making your entries. This
puts your new entries into effect. Click on [Clear Inputs] to clear the entries
you made or to revert to the previous settings.
NetWare Configuration 3-23
Page 45

NetWare Configuration
Configure NC-2 For Use With Novell NetWare
Overview
Basically, the configuration function tells the Print Server which printers it
is supporting. Configuration procedures are performed using the
PCONSOLE utility. To use the PCONSOLE utility, you must have supervi-
sor privileges.
Make sure your PCONSOLE version is not version 1.0, as the NC-2 cannot
be configured with version 1.0. Contact Novell if you need to upgrade your
version of PCONSOLE.
• To configure the NC-2 for use with NetWare 4.x NetWare
Directory Services, see p. 3-36.
• To configure the NC-2 for use with NetWare 4.x Bindery
Emulation, see p. 3-49.
• To configure the NC-2 for use with NetWare 2.15 and 3.1x,
see procedure starting on the next page. Configuration on
NetWare 2.15 or 3.1x requires the following basic steps:
1. Login to the network as Supervisor.
2. Start PCONSOLE.
3. Create a Print Queue to be serviced by the NC-2 (see next page).
This step may be skipped if you intend to use an already existing queue.
4. Create a new print server and enter the NC-2 print server name.
5. Configure the NC-2 print server.
6. Assign print queues to the NC-2 printer.
7. Set up the NOTIFY options for the NC-2 printer (optional).
Repeat the procedure for other file servers. When you are finished,
turn the printer off and on again. The printer creates a status report
that indicates the file servers to which the unit is attached and the
queues which it services.
See the detailed procedure starting on the next page.
3-24 NetWare Configuration
Page 46

NetWare Configuration
Configure Using NetWare 2.15 and 3.1x
Setting Up Print Queues
In the PCONSOLE Available Options menu you can make selections to
display the list of current print queues or create a new print queue to be
served by the NC-2.
Display the list of Current Print Queues
1. From the Available Options menu shown below, select the Print Queue
Information option.
Print Server Information
2. Press Enter to display the list of existing print queues.
Create A New Print Queue
1. From the Available Options menu, select Print Queue Information.
2. Press Enter to display the Print Queues list.
3. Press Insert to open the New Queue Name entry box.
4. Type the name you want to give the new queue, such as:
NC-2_Queue
5. Press Enter to add it to the list.
Repeat the procedure to create as many queues as you need.
6. Press Esc when completed to back out to the Available Options Menu.
NetWare Configuration 3-25
Page 47

NetWare Configuration
Configure Using NetWare 2.15 and 3.1x
Using PCONSOLE
Create and Enter the NC-2 Print Server Name
A print server takes the print jobs from queues and sends them to a NC-2
printer. Create a Print Server name for the NC-2.
1. From the A vailable Options menu, select the Print Server Information
option, then press Enter.
2. When the Print Servers menu displays, press the [INS] key to display
the New Print Server Name entry box, as shown in the illustration below.
3. Type the name of the NC-2 Print Server into the entry box.
First type NC2_, then type in the 6-digit serial number printed on the label
on the network interface board, then press Enter. Example: NC2_317483
The NC-2 Print Server name is added to the list of Print Servers.
NOTE: If you wish to change the NC-2's default Novell Print Server name form "NC2_<serial
number>" to a more descriptive user-defined name, such as "My_Printer" you may do so now.
Wednesday September 30, 1998
NC2_000009
NC2_000008
NC2_000007
NC2_000006
NC2_000005
NC2_000004
NC2_000003
NC2_000002
NC2_000001
NC2_900000
NC2_900001
NC2_317483
IMPORTANT: The Print Server name indicated above must match the name
assigned to the NC-2 Novell Print Server. (See Using The MAP Utility on
p. 3-31 to verify or edit the NC-2 Print Server Name.)
3-26 NetWare Configuration
Page 48

NetWare Configuration
Configure Using NetWare 2.15 and 3.1x
Using PCONSOLE
Configure the NC-2 Print Server
4. Select the newly created NC-2 Novell Print Server (or a Print Server you
wish to configure) from the Print Servers box, then press Enter.
5. Select Print Server Configuration, then press Enter to display the Printer
Server Configuration menu.
Wednesday September 30, 1998
NC2_000009
NC2_000008
NC2_000007
NC2_000006
NC2_000005
NC2_000004
NC2_000003
NC2_000002
6. Select Printer Configuration from the Print Server Configuration
Menu, then press Enter. The Configured Printers menu displays.
Assign the NC-2 printer to Printer 0
in PCONSOLE.
Not Installed
7. Select "Not Installed [0]", then press Enter to
display the Printer 0 configuration screen
shown below.
8. Select "Name:
Printer 0", then press
Printer 0
0
Enter. Backspace to
erase that default
printer name and assign
a descriptive name for
the printer, such as
PCU-1, then press Enter.
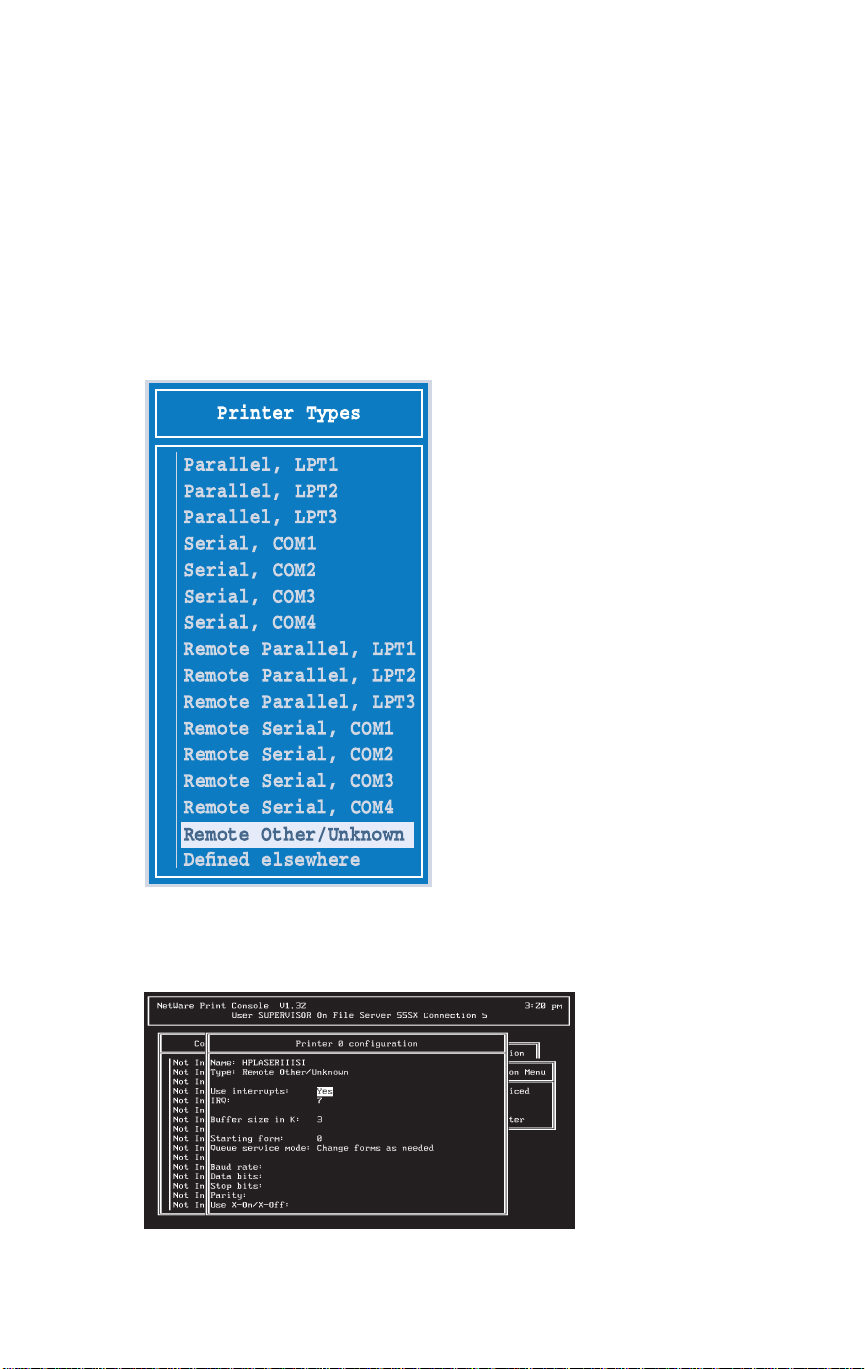
9. Select "Type: Defined elsewhere"
then press Enter to display the next screen (see next page).
NetWare Configuration 3-27
0
Page 49
NetWare Configuration
Configure Using NetWare 2.15 and 3.1x
Using PCONSOLE
Configure the NC-2 Print Server
10. When the Printer Types menu displays, select "Remote Other/Un-
known" then press Enter. Make no other changes unless you have the
knowledge to do so.
11. When you have finished configuring each printer, then press [Esc] to
exit, and when prompted, choose Yes to save changes (see screen below).
Make sure you return to the Print Server Configuration Menu.
Wednesday September 30, 1998
3-28 NetWare Configuration
Page 50

NetWare Configuration
Configure Using NetWare 2.15 and 3.1x
Using PCONSOLE
Assign Print Queues to NC-2 Printers
When you assign queues to the defined printers, you authorize the NC-2
Print Server to service these queues.
Important: It is recommended that you assign print queues only to the NC-2
print server. Do not assign one queue to two different print servers. If a
queue is assigned to multiple print servers, print jobs may not go to the NC2 printer(s).
12. Choose Queues Serviced by Printer from the Print Server Configura-
tion menu.
13. Select the appropriate printer from the list of Defined Printers, then
press Enter. A screen (which should be blank for the initial installation)
appears.
Press the [INS] key to bring up a list of Available Queues for the NC-2
printer. See screen example below:
Wednesday September 30, 1998
NC2_000009
NC2_000008
NC2_000007
NC2_000006
NC2_000005
NC2_000004
14. Choose a queue, and assign a priority level (from 1-high to 10-low) to
the queue. It is recommended that you accept the default priority level
displayed.
15. Press Enter. The queue appears on the list for the selected printer.
NetWare Configuration 3-29
Page 51

NetWare Configuration
Configure Using NetWare 2.15 and 3.1x
Using PCONSOLE
Assign Print Queues to NC-2 Printers
16. Press [INS] to enter additional queues. See screen example below.
17. When you have finished assigning the queues, press [Esc] and then
choose YES to save the changes.
18. Continue pressing [Esc] to go back to the Print Server Configuration
Menu.
If you do not want to set up Notify functions, press [Esc] and choose YES
to save changes. You may repeat the above procedure for other file servers.
If you wish to set up Notify functions, see Setting Up Notify Options for
NC-2 Printer(s) on p. 3-33.
To verify that the NC-2 Print Server Name you just created matches the
Novell Print Server Name, continue to the next page.
3-30 NetWare Configuration
Page 52

NetWare Configuration
Configure Using NetWare 2.15 and 3.1x
Using PCONSOLE
Using the MAP Utility to Verify or Edit the NC-2 Print Server
Name
Continuing from the previous page, verify that the New Novell Print Server
Name is also the name indicated on the NC-2's Print Server Name field for
Novell NetWare.
1. First, select Setup NetWare from the Main Menu shown below.
Main Menu
Unit Serial Number 317483
System Protocols Ports
Reset Setup NetWare Configure Port Settings
Factory Defaults Setup TCP/IP Test Printer
Unit Status Setup AppleTalk Configure Status Page
Network Address
Change Password Status Information
Home | Help | Unit Information
(Continue on next page.)
NetWare Configuration 3-31
Page 53

NetWare Configuration
Configure Using NetWare 2.15 and 3.1x
Using PCONSOLE
Using the MAP Utility to Verify or Edit the NC-2 Print Server
Name
After selecting Setup NetWare, the NetWare Configuration Menu displays
(see below).
2. Check the Print Server Name field. This field should match the Print
Server name you created in PCONSOLE. Edit as necessary.
3. When this is completed, edit the password and click on Accept Settings
to store the new Configuration settings in the NC-2 nonvolatile memory.
4. Power down the our Printing System and then power it back up to make
the new settings effective.
Main Menu
Unit Serial Number 317483
Enable NetWare:
Print Server Name:
Print Server Password:
Password Retype:
Preferred File Server:
Preferred NDS Context:
Preferred NDS Tree:
x
NC2_317483
Print Queue Scan Rate:
Ethernet Frame Type: Auto-Sense 802.3 Ethernet II 802.2 SNAP 802.2
Disable Bindery:
Enable Ports:
A password is required to perform this function.
x
sysadm
Accept Settings
3-32 NetWare Configuration
Page 54

NetWare Configuration
Configure Using NetWare 2.15 and 3.1x
Using PCONSOLE
Setting Up Notify Options for NC-2 Printer(s) - Optional
The NC-2 supports enhanced Notify feature for printers, which notifies
users or user groups of problems occurring with a NC-2 print job, such as
when the printer is off-line, jammed, open, out of paper, in need of a reset,
low on toner; or when it requires manual paper feed. Notify also informs
users of a wrong form loaded in the printer, and when there is a memory
error, engine failure, or a higher priority print job from another source.
1. Choose Notify List for Printer on the Print Server Configuration menu.
2. Select a printer from the Defined Printers list. The notification screen
appears (which should be blank for the initial installation).
3. Press [INS] to view a list of Notify Candidates.
NC-2
4. Select the user or group from the Notify Candidate list.
5. Set the first and next intervals in the Notify Intervals screen.
(It is recommended that you use the default settings.)
The first and next intervals determine how many seconds the network will
wait before it notifies candidates about a print job problem. The intervals
specify how often, after the first notification, candidates will be notified.
Type in the number in seconds only for each interval, then press Enter.
6. Press [Esc] to exit the program.
7. Select YES when prompted to save changes. You may exit the
PCONSOLE function or make changes to your NC-2 configuration.
NetWare Configuration 3-33
Page 55

NetWare Configuration
Configure Using NetWare 2.15 and 3.1x
Using PCONSOLE
Supporting Multiple File Servers
See Appendix for information on supporting multiple file servers. This
includes information on passwords for multiple file servers assigned to the
NC-2 print server.
Status Page
The status page is formatted for PostScript printers and prints after self-tests
and after power up of the NC-2 print server. For text-based printers such as
HP LaserJet, the status page prints the information shown on the sample on
the next page, as well as any PostScript codes.
If after the self-tests, the NC-2 unit cannot log into the file server or find a
password, the status page prints details of the problem and the solution.
Use the status page to check if the protocols you are using are defined for
each NC-2 printer port. If a protocol is not defined, first make sure the
protocol is enabled. Protocols are enabled and disabled in the Network
Management Utility.
Definition of Terms listed on the Status Page
1.
Unit Serial Number - Serial number listed on the label on the NC-2 board.
2. Version - Version number of the NC-2 firmware.
3. Network Address - NC-2 physical address, used to install and configure
the NC-2 in a TCP/IP environment and to identify the unit Ethernet traces.
4. Network Topology - Ethernet.
5. Connector - The type of Ethernet connection you are using.
6. Novell Network Information - includes print server name and frame type.
7. AppleTalk Network Information - NC-2 Frame Type and node number 1.
8. TCP/IP Network Information - Includes the Frame Type; subnet mask
default is 255.0.0.0; protocol address (default is not configured, IP is not
assigned).
3-34 NetWare Configuration
Page 56

NetWare Configuration
Configure Using NetWare 2.15 and 3.1x
Using PCONSOLE
(Sample Status Page)
----------------------------------------------------------------------------------------------------
Unit Serial Number: 841001 Version: 1.05
Network Address: 00:40:af:66:a9:48
Network Topology: Ethernet Connector: 10 Base T
Network Speed: 10 Mega Bits
Novell Network Information enabled
Novell Print Server Name: OLD Password Defined: Yes
Directory Services Context not defined
Frame Type: Novell 802.3
AppleTalk Network Information enabled
Frame Type: 802.2 SNAP ON 802.3
Protocol Address: NET Number 10 NodeNumber 202 SocketNumber 128
Preferred AppleTalk Zone: Default Zone
TCP/IP Network Information enabled
Frame Type: Ethernet II Protocol Address: 199.92.187.128
----------------------------------------------------------------------------------------------------
Port Number: 1 Port Type: Parallel
Novell Connection Information
Printer Name: QA2_0
File Server: QA2
Queue: QA2 Priority: 1 Attached: Yes
Notify: First: 60 Repeat: 60
NetWare Configuration 3-35
Page 57

NetWare Configuration
Configure Using NetWare 4.x NetWare Directory Services
Overview
NetWare Directory Services (NDS) offers a different, more advanced
approach to network management than previous NetWare versions. Generally, it stores and tracks all network objects.
As a rule, all 4.x servers must have NDS loaded in order to function. In this
way , every NetWare 4.x server is a Directory server, because it services
named Directory objects, such as printers, print servers and print queues.
With the appropriate privileges, you can create a print server object, which,
once configured in its context (or location) on the network, eliminates the
cumbersome setup of print servers on every network server.
NDS provides true enterprise networking based on a shared network
database rather than on individually defined physical sites. The result is
greatly improved print server setup and management.
NetWare 4.x also provides backward compatibility for 2.x, 3.x and 4.x print
service in Bindery emulation.
The Directory Information Base (DIB) is used to store information about
servers and services, users, printers, gateways, etc., and is a distributed
database, allowing access to data anywhere on the network wherever it is
stored.
NetWare versions prior to 4.x provide the same data found in the DIB but
the data is stored in the NetWare Bindery. DIB was designed with more
flexible access, more specific security, and, since it is distributed, it was
designed to be partitioned.
The Directory uses an object-oriented structure rather than the flat-file
structure of the Bindery, and offers network-oriented access, rather than
server-oriented access found in the Bindery.
The Directory is backward-compatible with the NetWare Bindery through
Bindery emulation mode. When Bindery emulation is enabled, Directory
Services will accept Bindery requests and respond just as if a Bindery
existed on the NetWare server being accessed.
3-36 NetWare Configuration
Page 58

NetWare Configuration
Configure Using NetWare 4.x NetWare Directory Services
Overview (continued)
Information obtained from the Bindery query may not be stored in the
server, since the Directory is a partitioned and distributed database. Even
though the NetWare 4.x server is not operating from a Bindery, the applications making Bindery requests will not know the difference.
The Network Management Utility
The Network Management Utility program provided with the NC-2 is used
to configure the context of the NC-2 Print Server.
Novell NWADMIN
The Novell NWADMIN (NetWare Administration) program is used to
create the directory tree, print server, printer and print queue objects within
the tree. See procedure on p. 3-43.
Snap-in support for the NetWare administrator (NWADMIN) utility is
provided for the print server. This offers a single point of control for
Administrators for NetWare Directory Services (NDS).
NWADMIN lets administrators manage the print server from a central
location.
NetWare Configuration 3-37
Page 59

NetWare Configuration
Configure Using NetWare 4.x NetWare Directory Services
Using the Network Management Utility
Management Access Program - Management Access Program Home Page
File
ViewGoOptions
Help
Server
NC2-317483 Ver. 1.04 NC-2
NC2-317690 Ver. 1.05 NC-2
Welcome to the Print Server Management Access
Program
This program uses IPX/SPX to communicate with the Print Servers.
To select a unit, click on a Print Server Identification in the drop down Server list.
To get the Print Server name (if different from the default ID), highlight the Print Server Identification and then
To get the detailed information for all listed Print Servers, select "Show All" under the Options menu. If there are
For Help, press F1
select "Show Detail" under the Options menu.
many Print Servers, this operation may take some time to complete.
NUM
The MAP Welcome Screen shown above is for your reference while
configuring NetWare Directory Services. The procedure starts on p. 3-40.
ò
3-38 NetWare Configuration
Page 60

NetWare Configuration
Configure Using NetWare 4.x NetWare Directory Services
Using the Network Management Utility
Management Access Program NC2_317483
Main Menu
Server NC2_317483
System Protocols Ports
Reset Setup NetWare Configure Port Settings
Factory Defaults Setup TCP/IP Test Printer
Unit Status Setup AppleTalk Configure Status Page
Network Address
Change Password Status Information
Home | Help | Unit Information
NOTE: you will be required to enter a password to perform most of the functions. The default
factory password is "sysadm". Enter the password in lowercase.
The Main Menu shown above is for your reference while configuring
NetW are Directory Services. The procedure starts on p. 3-40.
NetWare Configuration 3-39
Page 61

NetWare Configuration
Configure Using NetWare 4.x NetWare Directory Services
Using the Network Management Utility
NetWare Configuration Menu
Main Menu
Unit Serial Number 317483
Enable NetWare:
Print Server Name:
Print Server Password:
Password Retype:
Preferred File Server:
Preferred NDS Context:
Preferred NDS Tree:
Print Queue Scan Rate:
Ethernet Frame Type: Auto-Sense 802.3 Ethernet II 802.2 SNAP 802.2
Disable Bindery:
Enable Ports:
A password is required to perform this function.
x
PCU-1
FileServer1
O=Marketing
TreeTop
1
Parallel Port 1
x
sysadm
Accept Settings
The NetW are Configuration Menu shown above is for your reference while
configuring NetWare Directory Services. The procedure starts on the next
page.
3-40 NetWare Configuration
Page 62

NetWare Configuration
Configure Using NetWare 4.x NetWare Directory Services
Using the Network Management Utility
Follow the steps below to complete the configuration procedure using the
Network Management Utility:
1. If you have not already done so, install the Network Management Utility
on your system (see Installing the Network Management Utility, p. 2-6).
Make sure the Printing system is powered up and connected to the network.
2. Start the MAP utility at a Windows workstation.
The “WELCOME” screen displays (see p. 3-37).
3. Click server drop list box and select the NC-2 device you want to
configure.
The displayed NC-2 device names are NC2_<serial Number>.
NOTE: The serial number is the 6-digit number located on the label
attached to the NC-2 circuit board.
To display detailed information about the individual NC-2 device(s), select
“Options” from the main menu and then select “Show All”).
The selected NC-2 unit’s Main Menu appears. See p. 3-38.
4. Under the “Protocols” section of the Main Menu, click on “Setup
NetWare.” The NetWare Configuration Menu displays.
Refer to the menu screen illustration shown on the previous page, as you
follow the steps shown below.
5. Make sure that the “Enable Netware” checkbox is checked.
6. To change the default Novell Print Server name from “NC2_<serial
number> to a more descriptive name, edit the “Print Server Name” field.
This name must match the Novell Print Server Object Name you will define
when creating the object with NWADMIN or PCONSOLE.
7. Leave “Print Server Password” and “Password Retype” fields blank,
unless you plan to assign a password to the Novell Print Server. The
password entered here must match the password you define when creating
the print server object in NWADMIN or PCONSOLE.
NetWare Configuration 3-41
X
Page 63

NetWare Configuration
Configure Using NetWare 4.x NetWare Directory Services
Using the Network Management Utility
8. In the “Preferred File Server:” field, enter the name of the Preferred File
Server that you want the NC-2 Print Server to attach to first. This operation, in conjunction with listing all the file servers to be serviced on this
preferred file server, lets you connect directly to the file servers of choice
rather than having the NC-2 search for all file servers it is to service (which
may take a long time).
9. In the “Preferred NDS Context:” field, enter the preferred NDS context.
The Preferred NDS Context must be the entire context, whether typed or
non-typed. Do not begin the context path with a trailing period (.). You do
not need to write a container name (NC-2 Print Server Name) because it
was provided in the field above. See example below:
ou=standard.o=organization_1 (o=Local)
10. In the “Preferred NDS Tree” field, enter the preferred NDS tree name. If
you don’t know what the tree name is, type WHOAMI at the DOS prompt.
11. The “Print Queue Scan Rate” lets you select how often the NC-2 polls
the Novell Netware queues to see if any new print jobs need to be serviced.
The default is one (1) second. Enter in the “Print Queue Scan Rate” field a
value between 1 and 255 seconds.
12. Select the “Ethernet Frame Type:” you want the NC-2 to use. If you
select Auto-Sense, the correct frame type is automatically selected.
13. Click on the “Disable Bindery:” checkbox if you want to disable
Bindery Services. Bindery services is disabled if the checkbox is marked .
When you disable Bindery Services, the NC-2 will not support any of the
print servers on any Bindery file servers.
14. Make sure the “Enable Ports” check box is marked.
This box must be checked if NetWare is to be active.
15. After completing the above steps, enter the password (in lowercase) in
the password field and click on “Accept Settings to store the new configuration settings in the NC-2’s nonvolatile memory. The default password is
“sysadm”.
These changes will not take effect until you power down the Printing
System, and then power it back on.
3-42 NetWare Configuration
X
Page 64

NetWare Configuration
Configure Using NetWare 4.x NetWare Directory Services
Using the NWADMIN Utility
See the steps below to complete the NWADMIN configuration. You will
create printer, print server and print queue objects; and assign, or associate,
those objects with each other. You can keep Bindery resources on any server
under NetWare 4.x by declaring a SET statement in your AUTOEXEC.NCF
file.
As an alternative to NWADMIN, NetWare offers PCONSOLE for those
who prefer it. PCONSOLE can be used to set up static information about
print servers such as, which queues to service, and whom to notify in the
event of a problem. See Novell NetWare documentation for more information about the use of PCONSOLE for NDS.
Create Printer Object
1. Click the NWADMIN icon in NetWare Tools group in Windows. NetWare
Administrator window displays. To bring up your Directory Tree, open a
Browser window by clicking the Tools menu item and selecting Browse.
Marketing
FileServer1
Ai5555
Vi-550
PS_PCU-1M
PS_PCU-1
Ai5555
Vi-550
FileServer1_SYS
2. Highlight the Organizational Unit or Organization where you want to
create the print service in the Directory Tree, select the Object item from the
main menu and choose Create.
NOTE: In NWADMIN, you can create objects another way by selecting an Organizational
Unit, clicking on the right mouse button to display a pop-up menu, clicking on Create, then
using the left mouse button to display the New Object window.
NetWare Configuration 3-43
Page 65
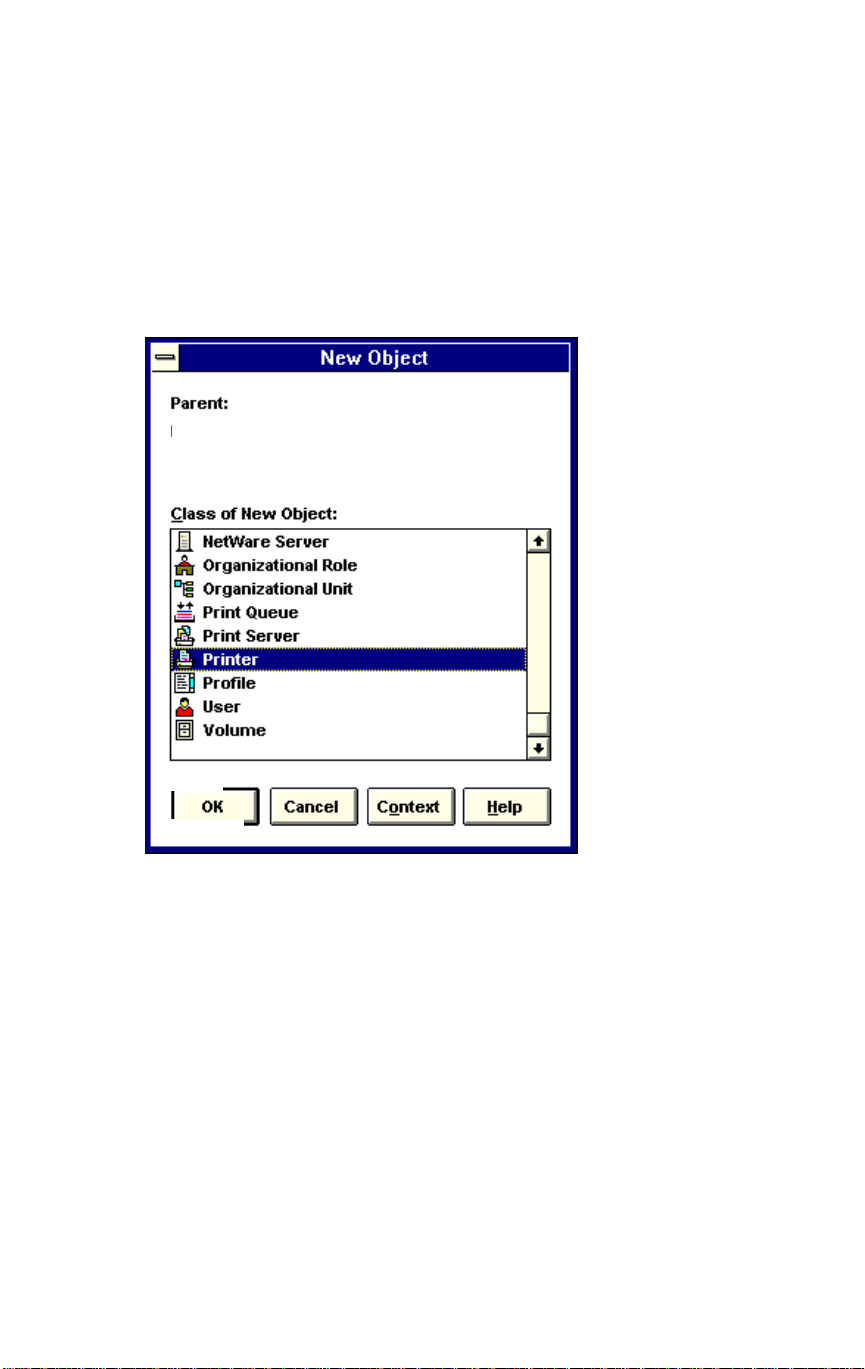
NetWare Configuration
Configure Using NetWare 4.x NetWare Directory Services
Using the NWADMIN Utility
3. When the New Object window appears, scroll down the Class of New
Object icon list, select the Printer icon and click on the OK button.
KBM
4. When the Create Printer window appears, type a value in the Printer
Name field and click on the Create button.
Create Print Server Object
1. Again, highlight the Organizational Unit, select the Object item from the
menu and choose Create.
2. At the New Object window, scroll down the Class of New Object icon
list, select the Print Server icon, and click on the OK button.
3. At the Create Print Server window, type a value in the Print Server
Name field and click on the Create button. The Print Server Name must
match the name that is entered in the NC-2's Print Server Name field (see
Step 6, p. 3-41).
3-44 NetWare Configuration
Page 66

NetWare Configuration
Configure Using NetWare 4.x NetWare Directory Services
Using the NWADMIN Utility
Create Print Queue Object
1. Once again, highlight the Organizational Unit, select the Object item
from the menu and choose Create.
2. At the New Object window, scroll down the Class of New Object icon
list, select the Print Queue icon, and click on the OK button.
3. At the Create Print Queue screen, click on the Directory Service Queue
button, then type in values for Print Queue Name and Print Queue Volume
and click on the Create button.
If you do not know the Print Queue Volume name (the hard drive you will
be accessing), click on the icon to the right of the volume field. The Select
Object window will appear with the volume listed in Objects. If the volume
is not listed, scroll the Directory Context items until you find the volume
where you want the queue to reside.
Click on the object (hard drive) of your choice and it will appear in the
Selected Object field. Click on the OK button. The full volume will now
appear in the Print Queue Volume field. Finally, click on the Create button.
NetWare Configuration 3-45
Page 67

NetWare Configuration
Configure Using NetWare 4.x NetWare Directory Services
Using the NWADMIN Utility
Assign Printer Object
1. Go to the Directory Tree.
2. Double click on the printer object just created and bring up the Printer
window. See below.
3. Find the Assignments button on the right-side of the window.
4. When the screen appears, click the Add button.
3-46 NetWare Configuration
Page 68
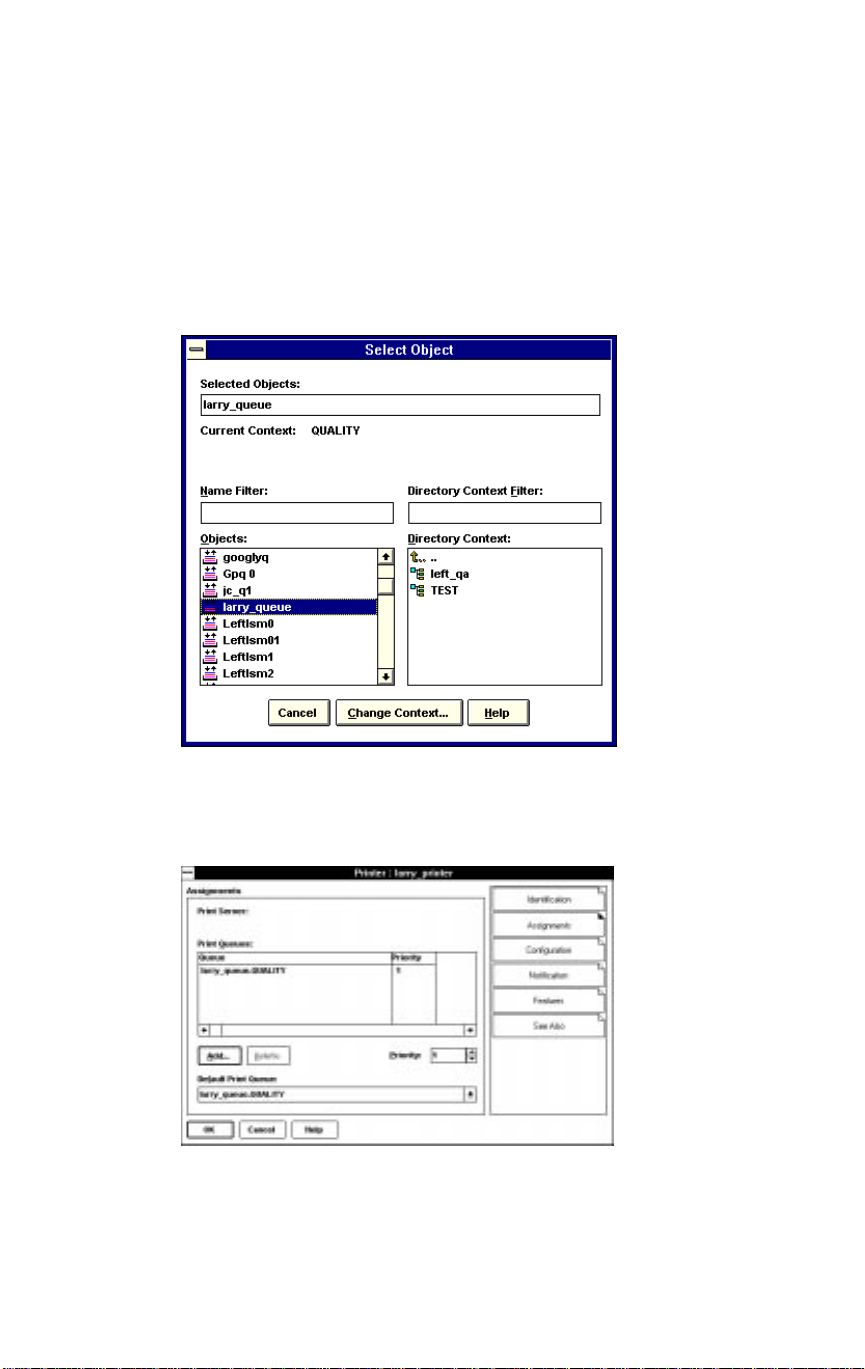
NetWare Configuration
Configure Using NetWare 4.x NetWare Directory Services
Using the NWADMIN Utility
5. When the Select Object window appears, find the print queue object just
created among the choices listed in the Objects box and select it.
6. Click on the OK button and the print queue just created is added to the
Print Queues box in the Printer window. Click on the OK button again.
NetWare Configuration 3-47
Page 69
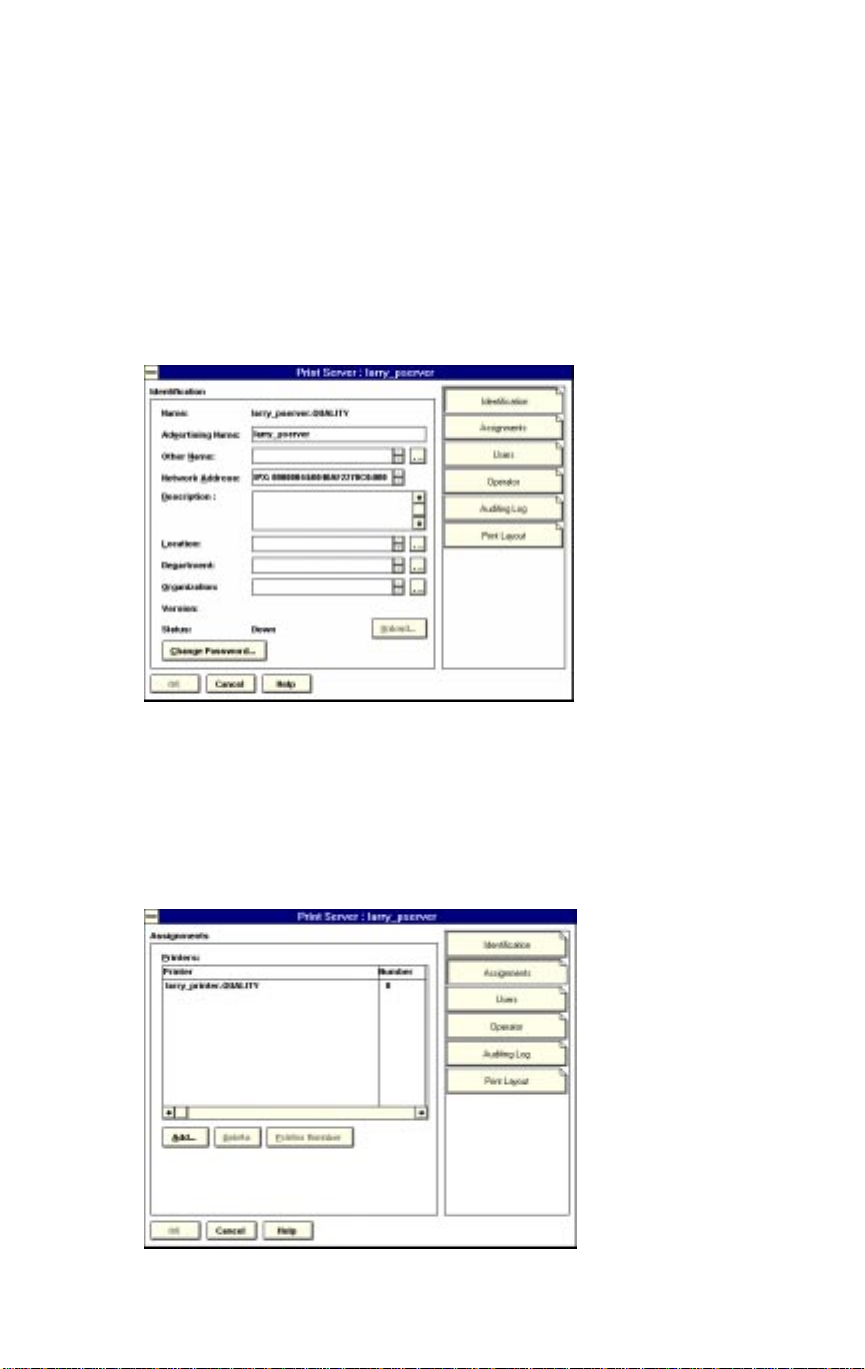
NetWare Configuration
Configure Using NetWare 4.x NetWare Directory Services
Using the NWADMIN Utility
Assign Print Server Object
1. At the Directory Tree, double click on the print server object you just
created and bring up the Print Server window.
2. At the Print Server window, click on the Assignments button and Add
button to bring up the Select Object window.
3. Select the printer object created from the Objects box and click on OK. The
printer (with its context) appears in Printers box of the Print Server window.
4. Click on the OK button.
3-48 NetWare Configuration
Page 70
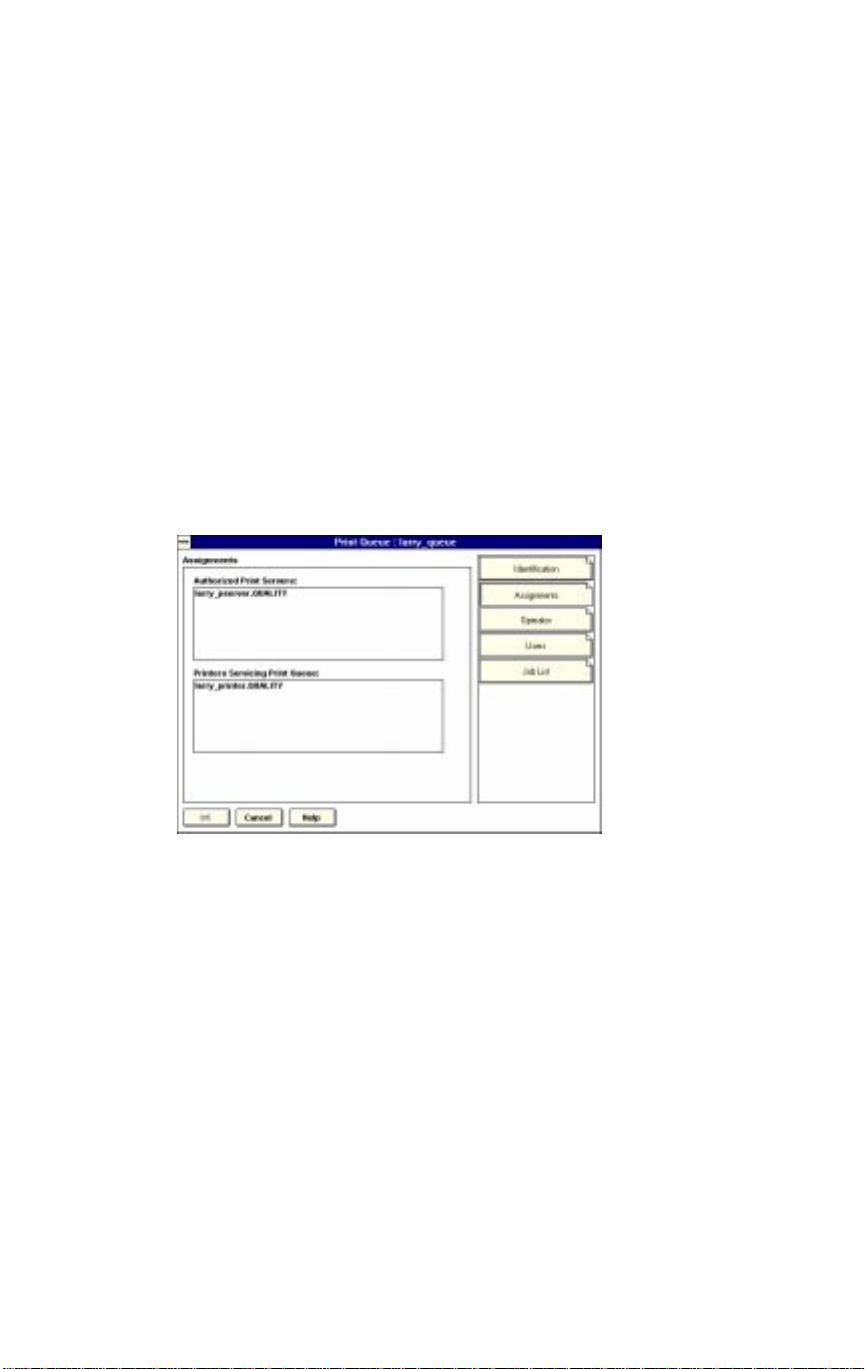
NetWare Configuration
Configure Using NetWare 4.x NetWare Directory Services
Using the NWADMIN Utility
Check Assignments
1. At the Directory Tree, double click the Print Queue object just created.
2. At the Print Queue window, click on Assignments.
If you configured the print queue and printer correctly they will appear in
the proper boxes on the Print Queue window.
3. Press the Cancel button.
Power Cycle the Printer
NWADMIN configuration is complete. Before you can begin printing, be
sure to power cycle the Printing System.
NetWare Configuration 3-49
Page 71

NetW are Configuration
Configure Using NetW are 4.x Bindery Emulation
Overview
Novell’s NetWare 4.0x can operate in the Bindery Services Emulation mode
and NetW are Directory Services (NDS) mode (see NetWare Dir ectory
Services to configure the print server in this mode).
While Bindery Emulation services and NDS services run simultaneously and
transparently to each other, the print server may be configured to operate
with Bindery Services mode only, as described in this section; or with NDS
only . When configured under NDS, the print server will also service older file
servers operating in bindery mode.
NOTE: If the Bindery Services mode is not running, the print server will be unable to
find its file servers, and the status page will indicate that the Novell NetWare protocol is
not active.
Before installing the print server on a Novell NetW are 4.x server in Bindery
Emulation mode, first check to be sure the server has Bindery Context by
using the Confirming Bindery Context procedure on the next page.
If the server does not have Bindery Context, the Novell administrator must
execute either a SET command from the console prompt, or, modify the
AUTOEXEC.NCF file to include the proper SET command and restart the
server .
NOTE: The command entered from the console prompt takes effect immediately,
whereas, the definition in the autoexec file takes effect only when the server is shut
down and then restarted.
3-50 NetWare Configuration
Page 72

NetWare Configuration
Configure Using NetWare 4.x Bindery Emulation
Using PCONSOLE
Confirming Bindery Context
Perform the following steps to determine if the server has Bindery Context:
1. Login to the server as ADMIN.
2. At the prompt, perform a DOS TYPE of Z:\SYSTEM\AUTOEXEC.NCF.
3. When the file displays, look to see if you have a statement similar to
SET BINDERY CONTEXT=O=<Name>
Where =O=<Name> is a sample name for the file server context.
Use your own file server context in place of =O=<Name>.
<Name> is the designation for the Server Context, and is obtained by
starting PCONSOLE. The Server Context name is displayed in the upper
left corner of the Available Options menu screen.
4. If no such name statement in on the screen, you must add that statement to
enable the NC-2 to work. In that case, exit from PCONSOLE and use a DOS
text editor to add the following statement to the AUTOEXEC.NCF file:
SET BINDERY CONTEXT =O=LOCAL
5. After adding the statement to the AUTOEXEC.NCF file, you must power
down the server and restart it for the changes to take effect.
Or, as an alternative method, the network administrator can type the SET
command at the Server console to make changes immediately. In this case,
any changes will be in effect until the server is powered down and restarted
again.
Important: The command at the console prompt takes effect immediately,
whereas, the definition in the autoexec file takes effect only when the server
is shut down and then restarted.
NetWare Configuration 3-51
Page 73

NetWare Configuration
Configure Using NetWare 4.x Bindery Emulation
Using PCONSOLE
Once you confirm the server has Bindery Context, you can configure the
NC-2 using the PCONSOLE procedure shown below. Use the function keys
located at the bottom of the screen to configure the NC-2.
Configuring NetWare 4.0x Bindery Emulation requires the following steps:
1. Start PCONSOLE.
2. Select Bindery Mode.
3. Select Quick Setup option.
4. Enter the print server, printer, and queue names.
5. Enter the printer TYPE name.
6. Add to the print server and queue lists.
Note: If you encounter any errors during installation, try logging out and
logging in again.
Start PCONSOLE
1. Login to the network as ADMIN, type PCONSOLE, then press Enter.
The screen below appears.
Available Options
Print Queues
Printers
Print Drivers
Quick Setup
Change Context
Select Bindery Mode
2. When the Available Options menu appears, press the [F4] key for the
Bindery Mode.
NOTE: If you receive a message asking you to login to a server with Bindery connections,
that server may not have its Bindery Mode enabled. To confirm the enabled condition, use
the Confirm Bindery Context procedure; otherwise, log onto a server that you know has
Bindery Services activated.
3-52 NetWare Configuration
Page 74

NetWare Configuration
Configure Using NetWare 4.x Bindery Emulation
Using PCONSOLE
Select Quick Setup Option
3. From the A vailable Options screen, select Quick Setup and press Enter.
Available Options
Print Queues
Printers
Print Drivers
Quick Setup
Change Context
NOTE: Use Quick Setup to connect your print server, print queue and printer correctly. You
can modify these later, if necessary.
Enter Print Server, Printer and Queue Names
4. When Print Services Quick Setup window appears, enter the print server
name using the [F3] key.
5. Type in the Print Server name using the format NC2_<serial number>.
The serial number is located on the label attached to the NC-2 board.
6. Press Enter to display the screen shown below. Tab down to the New
Printer name field, enter a name, and press Enter. Then tab down to the New
print queue name field, enter a name, and press Enter.
Wednesday September 30, 1998
NC2_123456
NetWare Configuration 3-53
Page 75

NetWare Configuration
Configure Using NetWare 4.x Bindery Emulation
Using PCONSOLE
Enter Printer Type Name
7. Tab down to the Printer type field, and press Enter.
8. When the pop-up window appears, select the Other/Unknown option.
9. Press Enter to select your choice. With all your choices now selected,
press the [F10] (Save) key to save your configuration.
Follow the previous steps to configure all the servers connected to NC-2
units on the network.
Add to Print Server and Queue Lists
10. If you need to view, add, delete or modify print servers or print queues
after your initial setup, select either Print Queues or Print Servers from the
Available Options screen. Either selection will call up information screens
from which you can view or modify more choices.
• On the Print Queues Information screen you can select from Print Jobs,
Status, Attached Print Servers, Information, Users, Operators, and Print
Server choices.
• On the Print Server Information screen, you can select from Printers,
Information and Status, Users, Operators, Description, Password and Audit
items.
In about 15 seconds, the network software initializes, and you are ready to
print. If the green LED does not go on at any time, try plugging the power
cord into another wall outlet. If it still does not power on, contact the
authorized dealer.
3-54 NetWare Configuration
Page 76

NetWare Configuration
Configure Using NetWare 4.x Bindery Emulation
Using PCONSOLE
Supporting Multiple File Servers
See Appendix section for information on supporting multiple file servers.
This includes information on passwords for multiple file servers assigned to
the NC-2 print server.
Status Page
The status page is formatted for PostScript printers and prints after self-tests
and after power up of the NC-2 print server. For text-based printers such as
HP LaserJet, the status page prints the information shown on the sample on
the next page, as well as any PostScript codes. If after the self-tests, the
NC-2 unit cannot log into the file server or find a password, the status page
prints details of the problem and the solution.
Use the status page to check if the protocols you are using are defined for
each NC-2 printer port. If a protocol is not defined, first make sure the
protocol is enabled. Protocols are enabled and disabled in the Network
Management Utility.
Definition of Terms listed on the Status Page
1.
Unit Serial Number - Serial number listed on the label on the NC-2 board.
2. Version - Version number of the NC-2 firmware.
3. Network Address - NC-2 physical address, used to install and configure
the NC-2 in a TCP/IP environment and to identify the unit Ethernet traces.
4. Network Topology - Ethernet.
5. Connector - The type of Ethernet connection you are using.
6. Novell Network Information - includes print server name and frame type.
7. AppleTalk Network Information - NC-2 Frame Type and node number 1.
8. TCP/IP Network Information - Includes the Frame Type; subnet mask
default is 255.0.0.0; protocol address (default is not configured, IP is not
assigned).
NetWare Configuration 3-55
Page 77

NetW are Configuration
Configure Using NetW are 4.x Bindery Emulation
Using PCONSOLE
(Sample Status Page)
----------------------------------------------------------------------------------------------------
Unit Serial Number: 841001 Version: 1.05
Network Address: 00:40:af:66:a9:48
Network Topology: Ethernet Connector: 10 Base T
Network Speed: 10 Mega Bits
Novell Network Information enabled
Novell Print Server Name: OLD Password Defined: Yes
Directory Services Context not defined
Frame Type: Novell 802.3
AppleTalk Network Information enabled
Frame Type: 802.2 SNAP ON 802.3
Protocol Address: NET Number 10 NodeNumber 202 SocketNumber 128
Preferred AppleTalk Zone: Default Zone
TCP/IP Network Information enabled
Frame Type: Ethernet II Protocol Address: 199.92.187.128
----------------------------------------------------------------------------------------------------
Port Number: 1 Port Type: Parallel
Novell Connection Information
Printer Name: QA2_0
File Server: QA2
Queue: QA2 Priority: 1 Attached: Yes
Notify: First: 60 Repeat: 60
3-56 NetWare Configuration
Page 78

NetWare Configuration
Primary File Server
When To Define A Primary File Server
The procedure for defining a primary file server starts on the next page. A
primary file server should be defined only if you have a very large network
tied into many different sites with several file servers. This procedure is
performed with the PCONSOLE utility in the File Servers To Be Serviced
option, details of which start on the next page.
If you do not wish to define a primary file server, go directly to the
PCONSOLE configuration procedure for your particular NetWare version.
The following information describes the effect on your system when a
primary file server is defined and not defined.
When a primary file server is defined -
• File servers require no more than a 1/4 second propagation delay.
• Minimum of two file servers can be placed on the file server list.
• The NC-2 searches for the primary server, starting with the
servers that are closest (0 hops), and works its way outward to a
maximum of four hops.
When the NC-2 finds a primary file server, the print server -
• Stops searching for other servers
• Reads the list of servers in NetWare’s PCONSOLE
• Attempts to attach to every server on the list, wherever located.
When a primary file server is not defined -
• File servers require no more that a 1/4 second propagation delay
• The NC-2 has a maximum limit of 16 file servers
• The NC-2 searches for file servers that are four hops or less
away. The four hops that NC-2 searches are the four LAN
segments directly connected to the first workstation or server.
NOTES:
1. The propagation delay is the time it takes for a packet of data to go from the file
server to the NC-2 unit.
2. A hop is a step in the data transmission from one node (a workstation or server)
through an intermediate node.
NetWare Configuration 3-57
Page 79

NetW are Configuration
Primary File Server
How T o Define A Primary File Server
Before performing the following procedure, please read the information on
the previous page.
To use PCONSOLE you must have supervisor or administrator rights.
1. T o start PCONSOLE, login to the network as Supervisor or ADMIN.
2. T ype PCONSOLE, then press Enter.
3. Choose Print Server Information on the Available Options menu or Print
Servers (for NetWare 4.0 users), then press Enter to display the Print servers
menu.
3-58 NetWare Configuration
Page 80
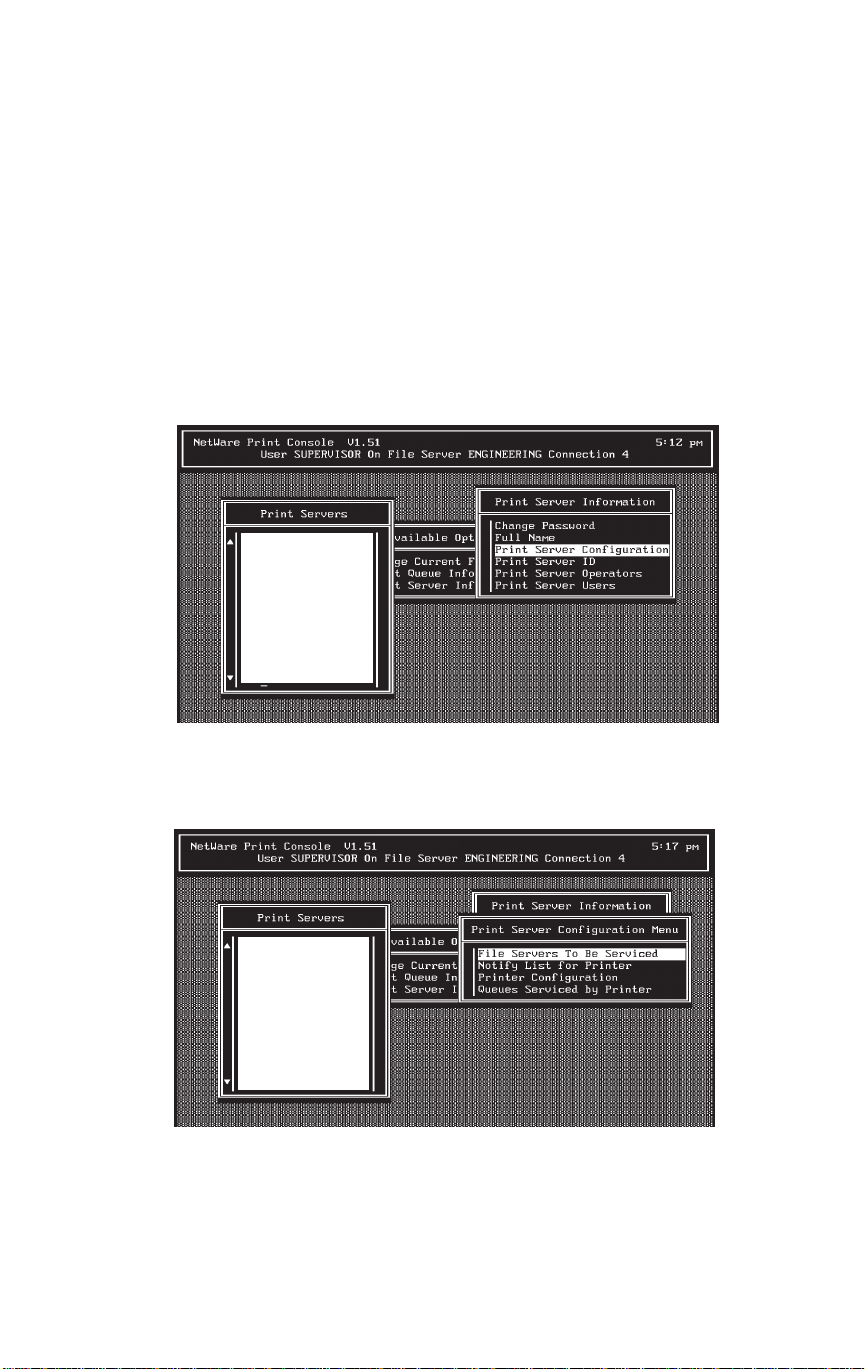
NetWare Configuration
Primary File Server
How To Define A Primary File Server
4. When the list of Print Servers appears, highlight the NC-2 Print Server
you are configuring, then press Enter.
5. When the Print Server Information menu appears, choose Print Server
Configuration, then press Enter.
Wednesday September 30, 1998
NC2_100001
NC2_100002
NC2_100003
NC2_100004
NC2_100005
NC2_100006
NC2_100007
NC2_100008
NC2_100009
NC2_100000
6. Choose File Servers to be Serviced, then press Enter.
For NetWare 4.0 users, select Serviced NetWare Servers, then press Enter.
Wednesday September 30, 1998
NC2_100001
NC2_100002
NC2_100003
NC2_100004
NC2_100005
NC2_100006
NC2_100007
NC2_100008
NC2_100009
NC2_100000
(continue on next page)
NetWare Configuration 3-59
Page 81

NetWare Configuration
Primary File Server
How To Define A Primary File Server
7. When the File Servers To Be Serviced (or Serviced NetWare Servers for
NetWare 4.0) menu appears, select the file server you want as the primary
file server.
If the file servers (minimum of 2) displayed under the File Servers To Be
Serviced menu are the ones you want to use as your primary file server, then
this step is completed. You may now configure the NC-2 print server using
the configuration procedure for your NetWare version.
8. If the file servers displayed under the File Servers To Be Serviced menu
are not the ones you want to use as your primary file server, press the Enter
key for all selections and then press the [Esc] key to save these choices.
Once you have chosen your primary file server(s), you are ready to configure the NC-2 print server using the configuration procedure for your
NetWare version.
KernGroup
Mathieu
Johns
Couciero
Swanke
Pandit
Hayber
NC2_100001
3-60 NetWare Configuration
Wednesday September 30, 1998
Page 82

Section 4: AppleTalk Configuration
and Administration Program
Page 83

AppleTalk Configuration & Administration Program
Overview
This section explains how to configure and use the AppleTalk Administration Program so that printing can be performed from a Macintosh system.
The AppleTalk Administration Program is used to perform the following
functions:
q Change the network zone and/or change printer names for NC-2
printers.
q Assist Customer Support diagnose problems.
Enabling the AppleTalk Protocol
The AppleTalk protocol must be enabled before printing can be performed.
Use the Network Management Utility for Windows to check or to enable the
AppleTalk protocol.
Refer to Chapter 3, NetWare Configuration for more details.
Configuration for AppleTalk
q Print to our Printing System by using Chooser to select
the network and printer.
q Our Printing System is found in Chooser as
NC-2<serial_number> 1, where 1 stands for the printer
connected to parallel [port 1].
4-2 AppleTalk Configuration & Administration Program
Page 84
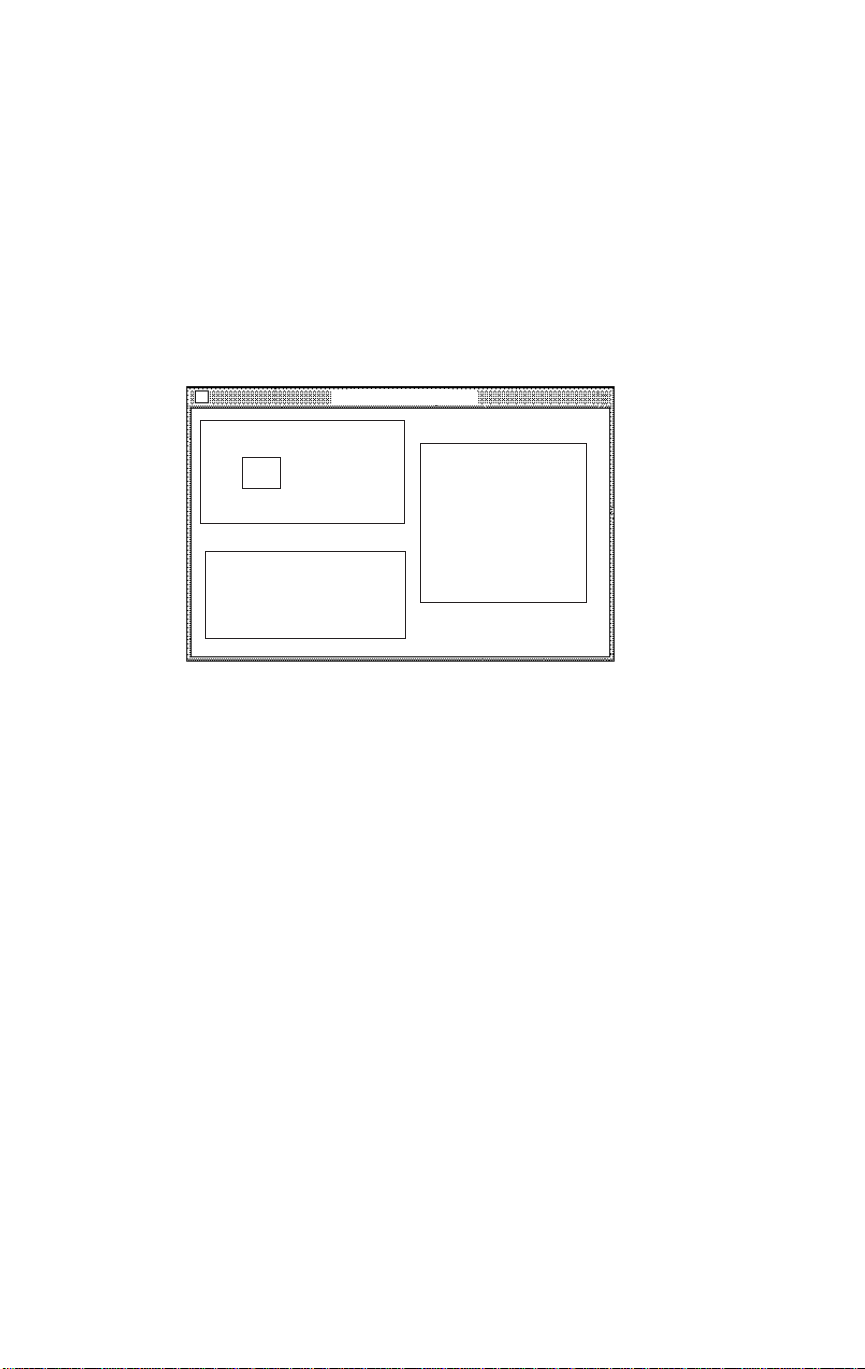
AppleTalk Configuration & Administration Program
Choosing the Printer
The following procedure describes how to choose the printer using Apple's
Chooser utility.
1. Click on the Apple icon.
2. Select Chooser to display the Chooser screen.
Chooser
Select a LaserWriter:
&
&
LaserWriter 8
AppleTalk Zones:
App_TEST
Corporate
Marketing
Engineering
NOTE: The Chooser screen above will show AppleTalk zones only if your network has more
than one zone.
NC2_123456
#xxxxxx 1
#xxxxxx 2
#xxxxxx1
#xxxxxx 2
#xxxxxx 1
#xxxxxx 2
Background Printing
On OffSetup---
3. Select LaserWriter 8, then choose NC2_123456 from the list of available
printers.
4. Click on Setup AppleTalk, then click on Select PPD . . . .
5. Highlight the proper PPD file for your Printer.
Example: 550_US.PPD
6. Click on Select.
7. When finished, click on OK, then close the Chooser Utility.
AppleTalk Configuration & Administration Program 4-3
Page 85

AppleTalk Configuration & Administration Program
How T o Access the AppleTalk Administration Program
The Macintosh AppleTalk Administration Program diskette is supplied with
the NC-2.
1. Copy the NP2000 ADMIN Program on the Macintosh AppleTalk
Administration Program diskette to a folder. For example, place the
program in a folder called Utility.
2. Double click on the NP2000 ADMIN Program icon when it appears on
the desktop. The Zone and NC-2 Device Dialog menu appears.
If your network has no zones, choose only from the NC-2 Device field, as
no Zone field is displayed.
3. Select the Zone that has the NC-2 device you want to administer.
Available NC-2 devices on that Zone appear in the NC-2 Device field.
4. Select the NC-2 Device you want to use.
4-4 AppleTalk Configuration & Administration Program
Page 86
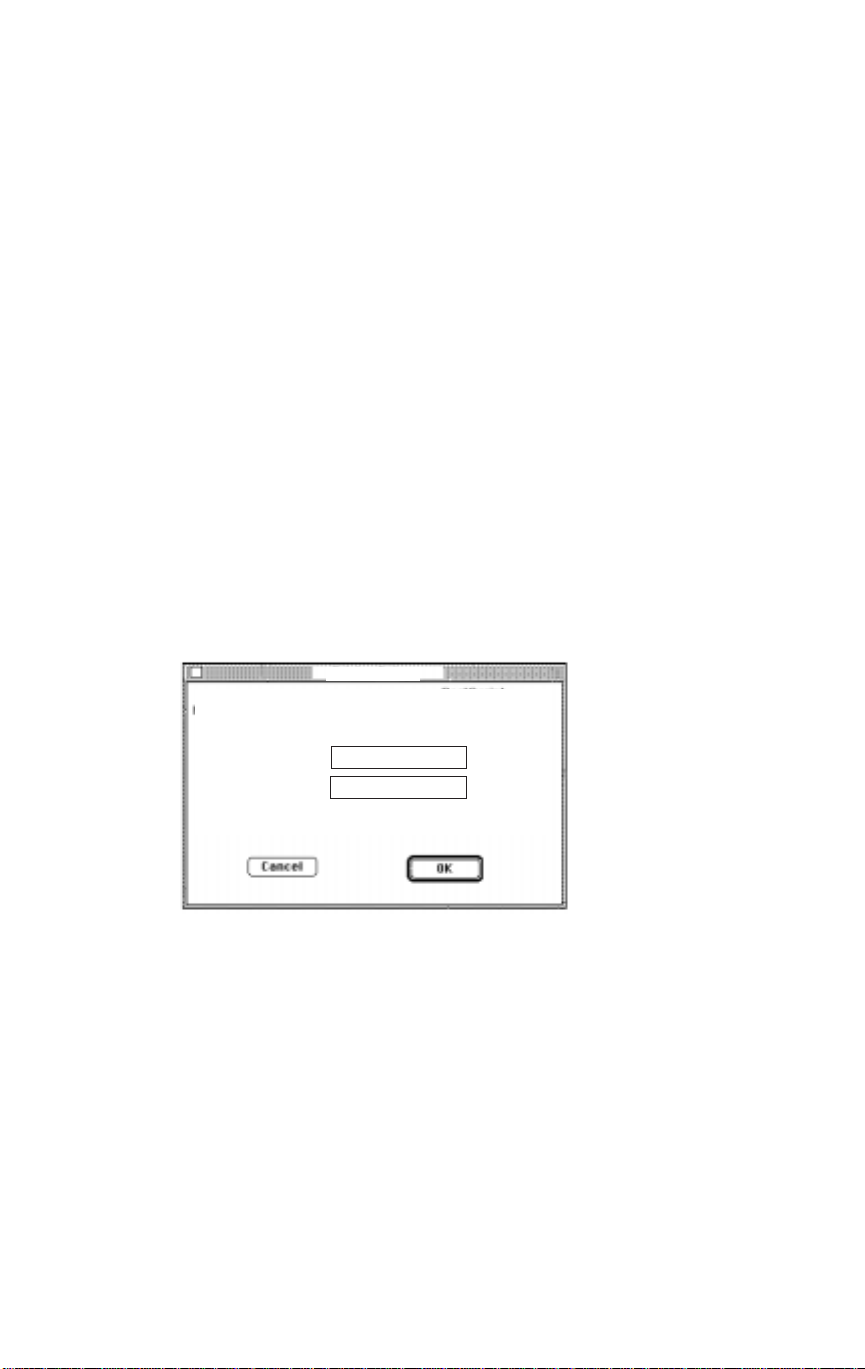
AppleTalk Configuration & Administration Program
Configuring the NC-2 Print Server
Use the options added to the menu bar to configure the print server. Depending on your printer, certain functions may appear grayed out, which
indicates that they cannot be selected.
q Use Printer Setup to configure your NC-2 for PostScript
printers.
q Use Reset to perform a full reset of the NC-2 unit.
When you select Reset from the NC-2 menu, the NC-2 resets
automatically.
q Use Configuration to change the NC-2 device name, and the
AppleTalk Zone name; and also view the NC-2 configuration
features. You can change the NC-2 default name to another one
you may prefer. Be sure to recycle the power to the NC-2 Off,
then On; otherwise, the changes you made will not occur.
When you choose Configuration the following screen appears:
Configuration
Device Type: NC-2
Serial Number: 123456
Name: NC-2
AppleTalk Zone: Engineering
1. To change the print server device name, click on the name displayed, then
enter the new name.
2. To change the AppleTalk Zone, click on the zone displayed. A menu
displays all available zones.
3. Select the new zone from the menu.
4. Click on OK when you have finished viewing this screen or when you are
done making changes.
5. Turn off the printer and then turn it on again to make the changes take
effect. The status sheet should identify the new printer name and the new
zone preference.
AppleTalk Configuration & Administration Program 4-5
Page 87

AppleTalk Configuration & Administration Program
Configuring the NC-2 Print Server
Error Log
The Error Log function is used to view a log of events that the NC-2 unit
has registered. The log contains information as well as errors.
Customer Support may need the information on this screen if your Print
Server encounters problems.
When you choose the Error Log function, a screen containing the text of the
log is displayed. You can print the error log contents by using the Print
option under the File menu.
To save the contents of the error log, do one of the following:
q Use Save As option from the File menu to save the entire log file.
q Use Edit option to cut, copy, and paste some or all of the log file.
NOTE: This does not enter data into the error log itself. The data is cleared each time the
printer is power cycled.
4-6 AppleTalk Configuration & Administration Program
Page 88

AppleTalk Configuration & Administration Program
Printer Setup
When you choose this option, the following screen appears:
NC-2 #123456 1
This Port Not Available
This Port Not Available
This Port Not Available
This Port Not Available
Port Number
Identifies the NC-2 port.
PostScript
Identifies whether the printer connected to the port is PostScript or not.
If the printer is PostScript, YES is chosen. Only PostScript printers appear
in the Chooser. Non-PostScript printers cannot be used by AppleTalk users.
Printer Name
The Name assigned to the NC-2 printer. If there is no entry or if you want to
change the name, then click on the box and type in the printer name.
1. Click on OK when you finish viewing the configuration or making
changes.
2. After making your selections, recycle power to the NC-2 by turning it
Off, then On; otherwise changes will not occur.
AppleTalk Configuration & Administration Program 4-7
Page 89

AppleTalk Configuration & Administration Program
Printer Setup
Protocol Setup For TCP/IP Users
Protocol Setup is used to set up the protocols on the unit when you do not
have access to a Novell NetWare server or workstation.
q Be sure to turn On the protocols you want to use. It is recom-
mended that you turn Off the protocols you are not using.
q TCP/IP users must also enter the IP address, Subnet Mask, and
Default Gateway. Entering a value for the Default Gateway enables
the NC-2 to communicate with other Subnets.
q If NC-2 does not have an IP Address/Subnet Mask established when
you display the Protocol Setup screen, the information in the IP
Address and Subnet Mask fields will be incorrect.
q Enter the correct IP Address and Subnet Mask.
If incorrect values are supplied, TCP/IP will not be enabled.
In that case, you will not be alerted with an error message.
q After you select protocols, be sure to recycle the NC-2 power by
turning it Off, then On; otherwise changes will not be made. After
choosing the item on the menu, the following screen displays.
Protocol Setup
Protocol On Off IP Address :
NetWare
TCP/IP • o
Vines o •
DEC Lat o•
NOTE: The default values for the IP address and Subnet Mask are shown as zeros. However,
this represents a “no IP Address” condition, not an IP Address.
4-8 AppleTalk Configuration & Administration Program
• o
Subnet Mask :
Default Gateway :
Page 90

AppleTalk Configuration & Administration Program
How T o Access The HTTP Server With An IP Browser
Access to the HTTP Server allows you to perform all print server functions.
Use the following procedure to access HTTP (HyperText Transfer Protocol)
with your favorite IP Browser, such as Netscape or Microsoft Internet
Explorer .
1. Assign an IP address to the NC-2.
(See TCP/IP Users on the previous page.
2. Start the IP Browser you normally use.
When the Browser is up and running, type http:// followed by the IP
address of the unit in the Location field at the top of the Browser screen, or
by going to File at the menu bar and choosing Open Location.
Example: For a unit with an IP address of 199.9.200.200, type:
http://199.9.200.200
Control Options
When you have no access to Novell NetWare, Control Options can be used
to enable or disable the display of the Power-on Status Page.
q When enabled, the Power-on Status Page prints after your
NC-2-attached printer is turned on. The default is the ON
(enable) position.
q When you choose Options from the NC-2 menu, the following
Control Options screen appears:
Control Options
Status Sheets:
• Enable Powerup Display
O Disable Display
AppleTalk Configuration & Administration Program 4-9
Page 91

Section 5: UNIX Printing Through TCP/IP
Page 92

UNIX Printing Through TCP/IP
Overview
The following pages explain how to configure the Print Server and your
network for use with TCP/IP communication in various environments.
Independent setup and installation procedures are provided for Windows
systems and for most popular UNIX systems.
The Print Server TCP/IP capability will also operate with lpr spoolers on
other systems, and with spooler/supervisor capabilities that communicate
raw print jobs to the Print Server TCP/IP Port.
This port number defaults to 10001, but may be changed to any desired
number using the Network Management Utility.
You can use Dynamic Host Configuration Protocol for delivering IP
addresses to hosts through an IP network.
Simple Network Management Protocol (SNMP) is a protocol for network
management services.
SNMP is supported for Management Information Base (MIB) II over IP for
the print servers. This support allows you to query MIB II to get system
information about the print server.
Installation in a Windows Environment
Several versions and variations of Microsoft Windows may be used on
NetWare and/or TCP/IP networks, as well as on native Microsoft Windows
network. This flexibility allows various options for setting up the network
printing system even though this Print Server does not support Netbeui.
• If the Windows workstations are connected to a NetWare network,
configure the printer interfaces for NetWare, and use standard Windows/
NetWare utilities to provide access to the printer.
• If NetWare is not to be used, the users may access the printer using TCP/
IP. This section describes installation under Windows for Workgroups,
Windows 95, and Windows NT.
5-2 UNIX Printing Through TCP/IP
Page 93

UNIX Printing Through TCP/IP
Windows for Workgroups
UNIX Printing with TCP/IP requires that the workstation have TCP/IP
capability; or that the workstation can share an lpr queue on a Windows NT
server (for example) that has one. In general, if printers are not shared, an
lpr queue must be created on each workstation from which printing is
initiated. See Windows documentation about sharing printers.
Windows for Workgroups does not normally come with TCP/IP. However,
various TCP/IP facilities are available for Windows for Workgroups
workstations, including a free TCP/ IP stack provided by Microsoft. Third
party lpr spoolers are available.
The following instructions are based on the Microsoft TCP/IP stack and a
shareware lpr application that is available from various sources, including
the Print Server manufacturer.
• You will need files WFWTCP32.zip and WFWTCP32.txt for TCP/IP, and
files WLPRS41.zip and wlprspl.txt for lpr .
• You will need the BOOTPL.exe file if you wish to use the BOOTP Lite
program to set up IP parameters. The BOOTPL.exe file is located on the
Network Management Utility diskette.
UNIX Printing Through TCP/IP 5-3
Page 94

UNIX Printing Through TCP/IP
Windows for Workgroups
Installing TCP/IP
To set up TCP/IP on the workstations, follow the instructions in the text file
for the TCP/IP stack. These instructions are part of the self-exploding files
that you downloaded from the Web site. They are the copyright of Microsoft
and cannot be included here.
Loading the lpr Spooler
The Windows lpr Spooler Version 4.1 (wlprspl.txt), provides detailed
instructions for decompressing and installing the shareware lpr spooler.
Setting Up The NC-2 Print Server
The NC-2 Print Server must be given an IP address and routing information
before being used with TCP/IP.
This can be accomplished with our providing Printer Management for
Windows if you have a NetWare connection on your network, or with Apple
Administration Program for Macintosh if there is an Apple Macintosh on
the network.
Follow the instructions for these programs provided in Section 3 or Section
4 (see Note).
NOTE: If you cannot use these programs, you can use either the BOOTP Lite program
described on p. 5-5 or the ARP procedure described on p. 5- 6.
Procedure prior to running these programs:
1. Install the NC-2 Print Server in your printer.
2. Power -up the printer.
3. Keep the status sheet handy for the Ethernet (MAC) address.
It should show that TCP/IP is enabled, but that the Protocol address is not
configured.
NOTE: If the unit already has an IP address, the IP Address procedures on the following
pages will not be required.
5-4 UNIX Printing Through TCP/IP
Page 95

UNIX Printing Through TCP/IP
Windows for Workgroups
Assigning IP Address with BOOTP Lite
This procedure uses the BOOTP protocol. The NC-2 Print Server must be
on the same network segment as the workstation that you are using to
configure it. The TCP/IP stack must be installed and operating.
The BOOTPL.exe program works with a 16 Bit TCP/IP Stack (FTP,
NetManage, B&W, or WFWG).
1. Reset the print server.
NOTE: The BOOTP request is for a finite period of time. The print server must be freshly
reset for this to work.
2. From Program Manager under File, select Run \windows\ BOOTPL.exe.
3. Pull down the Admin menu to Configure option.
4. Enter the IP address (you want to assign to the NC-2 Print Server);
the Subnet Mask ( matching what you are using on your subnet); the
Default Gateway (your router's IP address); the MAC address of the NC-2
Print Server (Hardware Address, listed on the Status sheet as Ethernet
Address). Use colons as delimiters as shown on the status sheet rather than
the dashes that Windows uses.
5. Click on Go. You will get a message that the program is Verifying, and
then it will tell you whether the unit is active or not.
6. Wait for about five minutes for the NC-2 Print Server to reset. The Status
sheet should report the newly entered IP information.
7. Enter the MS/DOS box. At the command prompt enter:
ping [IP address of the NC-2 Print Server]
Continue until you get a reply. If you get no response, verify that TCP/IP is
enabled on the status sheet. If the IP information is not displayed on the
sheet, then repeat the above procedure.
UNIX Printing Through TCP/IP 5-5
Page 96

UNIX Printing Through TCP/IP
Windows for Workgroups
Assigning IP Address with ARP
Use the following procedure to use ARP to configure the IP address.
1. From Windows, enter the MS/DOS box.
2. At the command prompt enter:
(a) ping [any valid IP address on your network - not the print server].
The identified unit should reply. If you do not ping the network, the
arp cache will be empty (no static entries), and you will receive an
error 2 message (after performing the next step).
(b) arp -s [IP address of the NC-2 Print Server]
[MAC Address of the NC-2 Print Server]
The entry should be accepted. You will receive an error 3 message
if our Remote Access Software (RAS) is installed.
(c) ping [IP address of the NC-2 Print Server].
The request should time out.
3. Recycle the power on the print server. The NC-2 Print Server will
produce a status page that should include the entered IP address.
4. When the NC-2 Print Server is up again, type the following at the
command prompt:
(a) ping [IP address of the NC-2 Print Server]
Continue until you get a reply.
NOTE: This only enters the IP address. You must use the Network Management Utility to
enter the other IP parameters.
5-6 UNIX Printing Through TCP/IP
Page 97

UNIX Printing Through TCP/IP
Windows for Workgroups
Creating an lpr Queue on the Workstation
Once you install the spooler onto the workstation, the setup program will
create a group and icon.
1. Double click on the spooler icon.
2. Click on setup, and define a new queue.
3. At the Remote Host Name prompt, enter the NC-2 Print Server IP
Address, and enter PORT1 for the Remote Printer Name.
4. Go to Control Panel, Printers, and choose Connect.
5. Select your driver and click on Next.
At this point, you should see an entry for your Windows lpr Spooler's
printer in the “Available ports” listing. For example:
C:\SPOOL\PRINTER_NAME.
UNIX Printing Through TCP/IP 5-7
Page 98

UNIX Printing Through TCP/IP
Microsoft Windows 95
Windows 95 comes with a TCP/IP stack. To print with this protocol, a client
also requires an lpr utility. This program is available from various sources.
The lpr queue can be created on each workstation or the lpr queue can be
created on one workstation and shared on the network. Windows 95
workstations can also share a lpr printer installed on an Windows NT server
on the network.
The following instructions are based on a shareware lpr application that is
available from various sources, including the NC-2 Print Server manufacturer. You will need the wlprs41.zip and wlprspl.txt for the lpr.
If you wish to use the BOOTP Lite program, you will also need the
ntBOOTP.exe file. The ntBOOTP.exe files provided on the Network
Management Utility diskette.
Loading the lpr Spooler
The Windows lpr Spooler Version 4.1 (wlprspl.txt), provides detailed
instructions for decompressing and installing the shareware lpr spooler.
Setting up the NC-2 Print Server
The NC-2 Print Server must be given an IP address and routing information
to be used with TCP/IP. This can be done with the Network Management
Utility for Windows if you have a NetWare connection on your network, or
with Apple Administration Program for Macintosh if there is an Apple
Macintosh on the network. Instructions for these programs are in Section 3
or Section 4. If you cannot use these programs, you can use either
thentBOOTP program or the ARP procedure.
1. Install the NC-2 Print Server in your printer.
2. Power up the printer.
Keep the status sheet handy for the Ethernet (MAC) address. It should show
that TCP/IP is enabled but that the Protocol address is not configured. If the
unit already has an IP address, these procedures will not work. Use the
ntBOOTP Program or any standard Internet Web Browser to change the IP
parameters.
5-8 UNIX Printing Through TCP/IP
Page 99

UNIX Printing Through TCP/IP
Microsoft Windows 95
Assigning IP Address with ntBOOTP
This procedure uses the BOOTP protocol. The NC-2 Print Server must be
on the same network segment as the workstation that you are using to
configure it, and the TCP/IP stack must be installed and operating.
Use ntBootp instead of ARP to configure the IP address.
You may provide the IP address and other IP parameters to the NC-2 Print
Server on 32 Bit TCP/IP Stack (Windows NT & Windows 95) using the
ntBOOTP.exe program. You must store the file in the Windows directory.
1. Reset the print server.
NOTE: The BOOTP request is for a finite period of time. The print server must be freshly
reset for this to work.
2. From Program Manager under File, select Run ntBOOTP.exe.
3. Pull down the Admin menu to Configure option.
4. Enter the IP address that you want to assign to the NC-2 Print Server, its
Subnet Mask (make sure it matches what you are using on your subnet),
Default Gateway (your router's IP address), and the MAC address of the
NC-2 Print Server (Hardware Address, listed on the Status sheet as Ethernet
Address). Use colons as delimiters as shown on the status sheet rather than
the dashes Windows uses.
5. Click on Go.
6. Wait about five minutes. The NC-2 Print Server should recycle and
produce a status sheet showing the IP parameters you have just entered.
7. Pull down the Admin menu to Verify. Y ou should get a message back
stating that the Unit is Active. If you do not get this message, verify that
TCP/IP is enabled on the status sheet.
8. When you get a response that your unit is active, you should be able to
ping the NC-2 Print Server.
UNIX Printing Through TCP/IP 5-9
Page 100

UNIX Printing Through TCP/IP
Microsoft Windows 95
Assigning IP Address With ARP
1. From Windows, enter the MS/DOS box. At the command prompt enter:
(a) ping [any valid IP address on your network - not the print server].
The identified unit should reply.
(b) arp -s [IP address of the NC-2 Print Server] and [MAC Address].
The entry should be accepted.
(c) ping [IP address of the NC-2 Print Server].
Request should time out.
2. Recycle the power on the printer, or let the NC-2 Print Server reset itself.
The NC-2 Print Server will produce a status page that should include the
entered IP address.
3. When the NC-2 Print Server is up again, at the command prompt, enter:
ping [IP address of the NC-2 Print Server]
Continue until you get a reply.
NOTE: This only enters the IP address. Use the ntBOOTP Program or any standard Internet
Web Browser to change the IP parameters.
Setting up lpr on the Workstation
Once the spooler is installed on the workstation, the setup program will
create a group and icon.
1. Double click on the spooler icon.
2. Click on setup, and define a new queue.
3. For Remote Host Name, enter the IP Address; for Remote Printer Name,
enter PORT1. You should be able to print via the spooler.
4. Go to Settings.
5. Select Printers.
6. Choose Add Printer.
7. Click on Next.
8. Select your driver, and click on Next.
At this point, you should see an entry for your Windows lpr Spooler's
printer in the “Available ports” listing displayed as, for example:
C:\SPOOL\PRINTER_NAME
5-10 UNIX Printing Through TCP/IP
 Loading...