

Kyocera FS-820, QCP 2700 User Manual
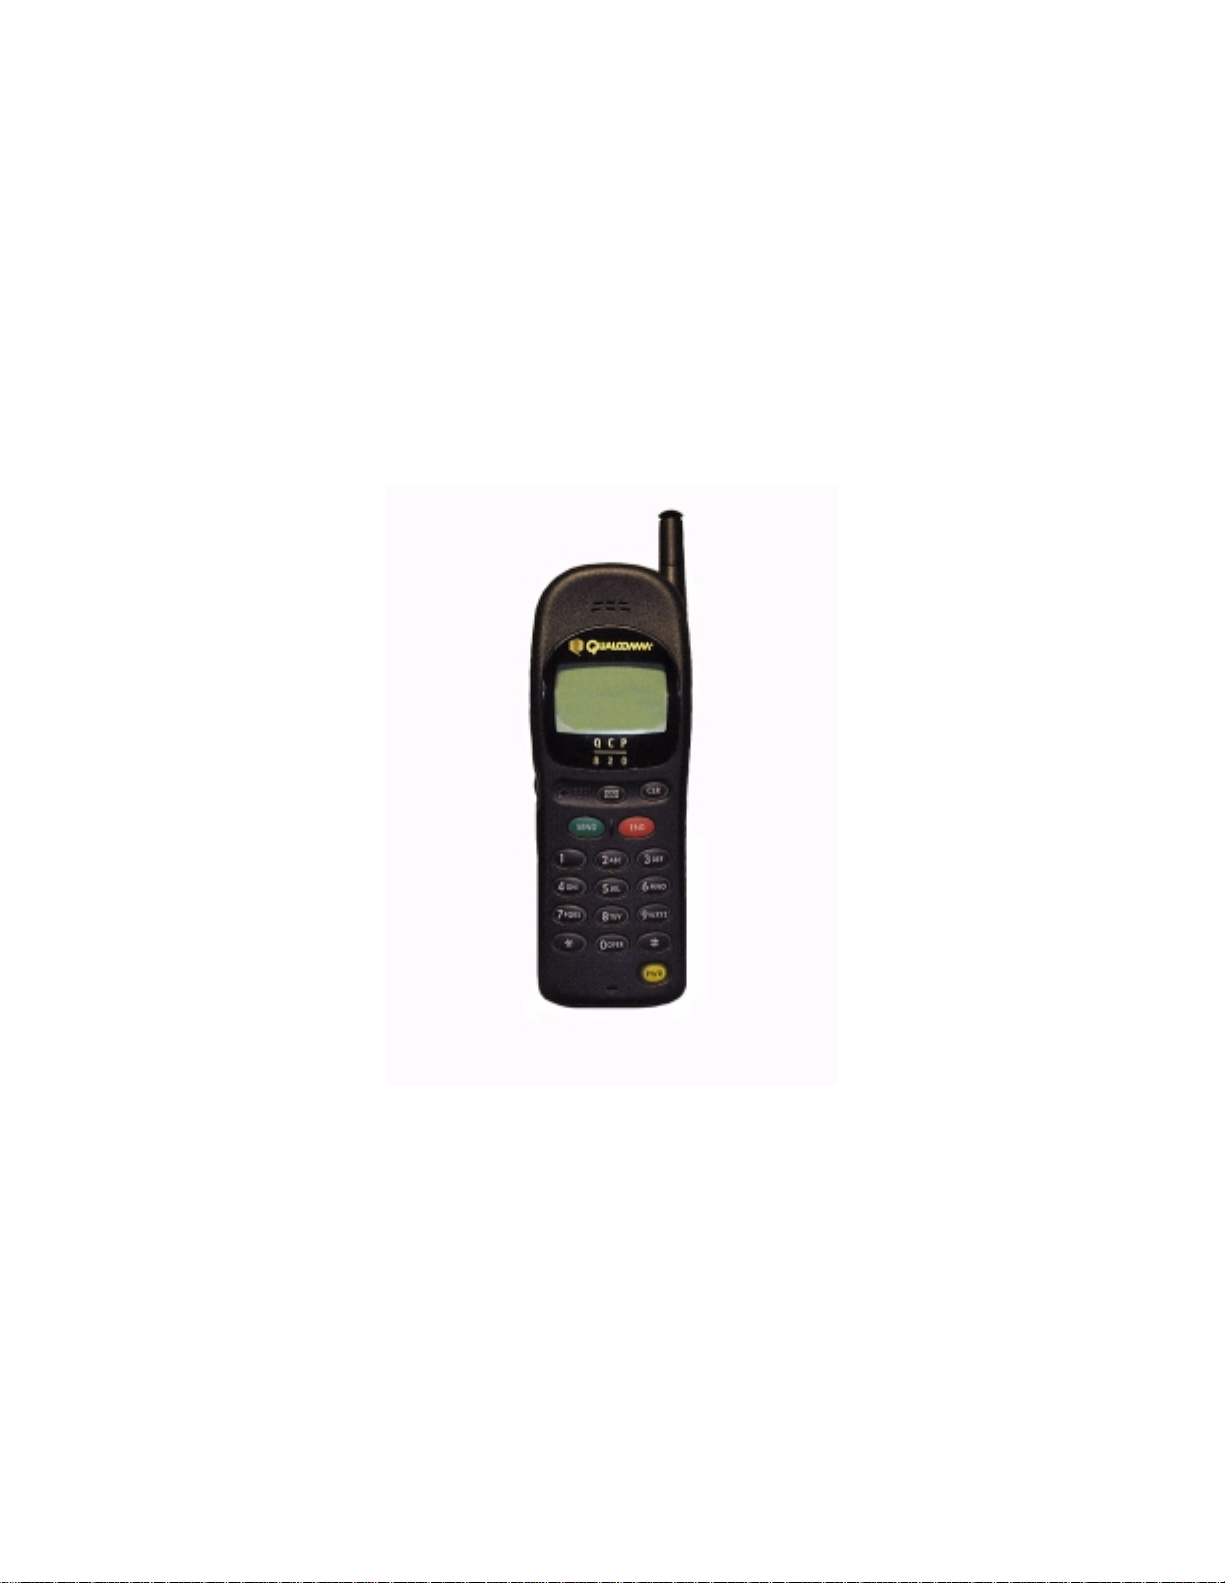
QCP 820, QCP 1920
and QCP 2700 PHONE
USER GUIDE

This manual is based on the production version of the QCP 820, QCP 1920 or QCP 2700 portable
wireless telephone. The products and equipment described in this documentation are
manufactured under license from Kyocera Wireless Corp. Incorporated under one or more of the
following U.S. Pa tents:
4,901,307, 5,056,109, 5,099,204, 5,101,501, 5,103,459, 5,107,225, 5,109,390, 5,193,094, 5,228,054,
5,257,283, 5,265,119, 5,267,261, 5,267,262, 5,280,472, 5,283,536, 5,289,527, 5,307,405, 5,309,474,
5,337,338, 5,339,046, 5,341,456, 5,383,219, 5,392,287, 5,396,516, D356,560, 5,408,697, 5,414,728,
5,414,796, 5,416,797, 5,426,392, 5,437,055, D361,065, 5,442,322, 5,442,627, 5,452,473, 5,461,639,
5,469,115, 5,469,471, 5,471,497, 5,475,870, 5,479,475, 5,483,696, 5,485,486, 5,487,175, 5,490,165,
5,497,395, 5,499,280, 5,504,773, 5,506,865, 5,509,015, 5,509,035, 5,511,067, 5,511,073, 5,513,176,
5,515,177, 5,517,323, 5,519,761 5,528,593, 5,530,928, 5,533,011, 5,535,239, 5,539,531, 5,544,196,
5,544,223, 5,546,459, 5,548,812, 5,559,881, 5,559,865, 5,561,618, 5,564,083, 5,566,000, 5,566,206,
5,566,357, 5,568,483, 5,574,773, 5,574,987, D375,740, 5,576,662, 5,577,022, 5,577,265, D375,937,
5,588,043, D376,804, 5,589,756, 5,590,069, 5,590,406, 5,590,408, 5,592,548, 5,594,718, 5,596,570,
5,600,754, 5,602,834, 5,602,833, 5,603,096, 5,604,459, 5,604,730, 5,608,722, 5,614,806, 5,617,060,
5,621,752, 5,621,784, 5,621,853, 5,625,876, 5,627,857 5,629,955 5,629,975 5,638,412, 5,640,414,
5,642,398, 5,644,591, 5,644,596, 5,646,991, 5,652,814, 5,654,979, 5,655,220, 5,657,420, 5,659,569,
5,663,807 Other patents pe n di n g .
DCN 80-B6673-1EN
[ii]

Important Information
FCC/IC Notice
This device complies with part 15 of the FCC rules. Operation is subject to the following two
condition s: (1) This device may n ot cause harmful interference, and (2) this device must accept
any interference received, including interference that may cause undesired operation.
Caution
The user is cautioned that changes or modifications not expressly appr oved by the party
responsible for compli an c e could void the warranty and user’s authori ty to operate the
equipment.
Warning
Use only Kyocera Wir eless Corp.-approved accessori es with Kyocer a Wireless Corp. phon es. U se of
any unauthorized accessories may be dangerous and will invalidate the phon e wa rranty if said
accessories cause damage or a defect to the phone.
Copyright © 2000 Kyocera Wireless Corp. All rights reserved. Portions of the document are
Copyright © 1998 QUALCOMM Incorporated.
This user guide applies to the follo wing K yocera Wireless Corp. CDMA wirel ess phone models:
•The QCP 820 phone:
Dual-Mode CDMA Digital and Analog Cellular Phones
•The QCP 1920 phone:
CDMA Digital PCS Phones
• The QCP 2700 phone:
Dual-Band, Dual-Mode CDMA Digital PCS and Analog Cellular Phones
[iii]
Dial
Shuttle:
Scroll
up
Push
in to
select
Scroll
down
[iv]

CONTENTS
GETTING STARTED . . . . . . . . . . . . . . . . . . . . . . . . . . . . . . . . . . . . . . . . . . . . . . . . . . . 1
FUNCTION KEYS. . . . . . . . . . . . . . . . . . . . . . . . . . . . . . . . . . . . . . . . . . . . . . . . . . . . 2
DISPLAY ICONS . . . . . . . . . . . . . . . . . . . . . . . . . . . . . . . . . . . . . . . . . . . . . . . . . . . . 3
USING THE BATTERY . . . . . . . . . . . . . . . . . . . . . . . . . . . . . . . . . . . . . . . . . . . . . . . . . 4
Installing and removing the battery 4
Charging the battery 4
TURNING THE PHONE ON AND OFF . . . . . . . . . . . . . . . . . . . . . . . . . . . . . . . . . . . . . . . 5
Turning on the phone 5
Turning off the phone 5
YOUR LOCK CODE . . . . . . . . . . . . . . . . . . . . . . . . . . . . . . . . . . . . . . . . . . . . . . . . . . . 5
STANDBY STATUS. . . . . . . . . . . . . . . . . . . . . . . . . . . . . . . . . . . . . . . . . . . . . . . . . . . 5
POWER SAVE. . . . . . . . . . . . . . . . . . . . . . . . . . . . . . . . . . . . . . . . . . . . . . . . . . . . . . 6
SHORT OR LONG FEATURES MENU . . . . . . . . . . . . . . . . . . . . . . . . . . . . . . . . . . . . . . . . 6
BASIC FUNCTIONS . . . . . . . . . . . . . . . . . . . . . . . . . . . . . . . . . . . . . . . . . . . . . . . . . . . 7
MAKING A CALL. . . . . . . . . . . . . . . . . . . . . . . . . . . . . . . . . . . . . . . . . . . . . . . . . . . . 7
CORRECTING DIALING MISTAKES. . . . . . . . . . . . . . . . . . . . . . . . . . . . . . . . . . . . . . . . . 7
DISPLAYING YOUR OWN PHONE NUMBER . . . . . . . . . . . . . . . . . . . . . . . . . . . . . . . . . . . 7
LOCKING AND UNLOCKING THE KEYPAD . . . . . . . . . . . . . . . . . . . . . . . . . . . . . . . . . . . . 7
Locking the keypad 7
Unlocking the keypad 8
RECEIVING CALLS. . . . . . . . . . . . . . . . . . . . . . . . . . . . . . . . . . . . . . . . . . . . . . . . . . . 8
Call waiting 8
Three-way calling 8
REDIALING CALLS . . . . . . . . . . . . . . . . . . . . . . . . . . . . . . . . . . . . . . . . . . . . . . . . . . 8
Redialing your last outgoing call 8
Redialing from the recent calls list 8
MAKING EMERGENCY CALLS . . . . . . . . . . . . . . . . . . . . . . . . . . . . . . . . . . . . . . . . . . . . 9
Making emergency calls 9
Saving and editing emergency numbers 9
ADJUSTING VOLUME. . . . . . . . . . . . . . . . . . . . . . . . . . . . . . . . . . . . . . . . . . . . . . . . . 9
CHANGING LANGUAGES. . . . . . . . . . . . . . . . . . . . . . . . . . . . . . . . . . . . . . . . . . . . . . . 9
SETTING SERVICE. . . . . . . . . . . . . . . . . . . . . . . . . . . . . . . . . . . . . . . . . . . . . . . . . . 10
QCP 820 phone 10
QCP 1920 phone 10
QCP 2700 phone 11
PERMANENT PHONE BOOK . . . . . . . . . . . . . . . . . . . . . . . . . . . . . . . . . . . . . . . . . . . . . 12
SAVING NUMBERS TO THE PHONE BOOK. . . . . . . . . . . . . . . . . . . . . . . . . . . . . . . . . . . 12
RETRIEVING NUMBERS FROM PHONE BOOK. . . . . . . . . . . . . . . . . . . . . . . . . . . . . . . . . 13
Retrieving all memory locations 13
Retrieving one entry by memory 13
Retrieving by name search 13
[v]

Retrieving by part of phone number search 13
CHANGING YOUR PHONE BOOK. . . . . . . . . . . . . . . . . . . . . . . . . . . . . . . . . . . . . . . . . 14
Erasing a stored memory 14
Editing a stored memory location 14
DIALING NUMBERS FROM YOUR PHONE BOOK . . . . . . . . . . . . . . . . . . . . . . . . . . . . . . . 15
Speed dialing 15
One/two-touch dialing 15
Dialing from a memory list 15
Dialing from a phone book memory location 15
ADVANCED PHONE BOOK FEATURES. . . . . . . . . . . . . . . . . . . . . . . . . . . . . . . . . . . . . . 16
Pause 16
Linking 16
Punctuation characters for name entry 16
Changing case during name entry 17
Viewing a number 17
Restricting an entry 17
RECENT CALLS LIST . . . . . . . . . . . . . . . . . . . . . . . . . . . . . . . . . . . . . . . . . . . . . . . . . 18
PLACING A CALL FROM THE CALLS LIST . . . . . . . . . . . . . . . . . . . . . . . . . . . . . . . . . . . 18
CALLS LIST OPTIONS. . . . . . . . . . . . . . . . . . . . . . . . . . . . . . . . . . . . . . . . . . . . . . . . 18
FEATURE MENUS . . . . . . . . . . . . . . . . . . . . . . . . . . . . . . . . . . . . . . . . . . . . . . . . . . . 20
SWITCHING BETWEEN MENUS. . . . . . . . . . . . . . . . . . . . . . . . . . . . . . . . . . . . . . . . . . 20
LONG MENU . . . . . . . . . . . . . . . . . . . . . . . . . . . . . . . . . . . . . . . . . . . . . . . . . . . . . 20
SHORT MENU. . . . . . . . . . . . . . . . . . . . . . . . . . . . . . . . . . . . . . . . . . . . . . . . . . . . . 21
LONG MENU ITEM DESCRIPTIONS . . . . . . . . . . . . . . . . . . . . . . . . . . . . . . . . . . . . . . . 21
Sounds (Menu 1) 21
Timers (Menu 2) 22
Directory (Menu 3) 23
Extras (Menu 4) 23
Security (Menu 5) 24
Display (Menu 6) 24
Network (Menu 7) 25
PAGING, MESSAGING, AND VOICE MAIL . . . . . . . . . . . . . . . . . . . . . . . . . . . . . . . . . . . 26
NEW MESSAGE ALERT . . . . . . . . . . . . . . . . . . . . . . . . . . . . . . . . . . . . . . . . . . . . . . . 26
VIEWING PAGES AND MESSAGES. . . . . . . . . . . . . . . . . . . . . . . . . . . . . . . . . . . . . . . . 27
Reading text messages and pages 27
VIEWING VOICE MAIL NOTIFICATIONS . . . . . . . . . . . . . . . . . . . . . . . . . . . . . . . . . . . . 27
Viewing voice mail notifications 27
MESSAGE OPTIONS . . . . . . . . . . . . . . . . . . . . . . . . . . . . . . . . . . . . . . . . . . . . . . . . . 28
LOW MEMORY WARNING . . . . . . . . . . . . . . . . . . . . . . . . . . . . . . . . . . . . . . . . . . . . . 28
OUT OF MEMORY WARNING . . . . . . . . . . . . . . . . . . . . . . . . . . . . . . . . . . . . . . . . . . . 28
INTERNET BROWSER . . . . . . . . . . . . . . . . . . . . . . . . . . . . . . . . . . . . . . . . . . . . . . . . . 29
STARTING THE BROWSER. . . . . . . . . . . . . . . . . . . . . . . . . . . . . . . . . . . . . . . . . . . . . 29
STARTING A BROWSER APPLICATION. . . . . . . . . . . . . . . . . . . . . . . . . . . . . . . . . . . . . 30
[vi]

RETURNING TO YOUR HOME PAGE. . . . . . . . . . . . . . . . . . . . . . . . . . . . . . . . . . . . . . . 30
EXITING THE BROWSER . . . . . . . . . . . . . . . . . . . . . . . . . . . . . . . . . . . . . . . . . . . . . . 30
NAVIGATING THE PHONE BROWSER. . . . . . . . . . . . . . . . . . . . . . . . . . . . . . . . . . . . . . 30
Status indicators 30
Icons 31
INTERNET ALERTS . . . . . . . . . . . . . . . . . . . . . . . . . . . . . . . . . . . . . . . . . . . . . . . . . 31
DATA . . . . . . . . . . . . . . . . . . . . . . . . . . . . . . . . . . . . . . . . . . . . . . . . . . . . . . . . . . . 32
SETTING UP A DATA CONNECTION . . . . . . . . . . . . . . . . . . . . . . . . . . . . . . . . . . . . . . . 32
Data Connectivity Kit 32
Data On the Go Fax/Modem PC Card 32
SETTING UP OUTGOING DATA CALLS . . . . . . . . . . . . . . . . . . . . . . . . . . . . . . . . . . . . . 32
SETTING UP INCOMING DATA CALLS . . . . . . . . . . . . . . . . . . . . . . . . . . . . . . . . . . . . . 33
IN-CALL STATUS . . . . . . . . . . . . . . . . . . . . . . . . . . . . . . . . . . . . . . . . . . . . . . . . . . 33
ACCESSORIES . . . . . . . . . . . . . . . . . . . . . . . . . . . . . . . . . . . . . . . . . . . . . . . . . . . . . . 34
ORDERING ACCESSORIES . . . . . . . . . . . . . . . . . . . . . . . . . . . . . . . . . . . . . . . . . . . . . 34
PHONE SAFETY AND CARE . . . . . . . . . . . . . . . . . . . . . . . . . . . . . . . . . . . . . . . . . . . . . 35
BACKGROUND . . . . . . . . . . . . . . . . . . . . . . . . . . . . . . . . . . . . . . . . . . . . . . . . . . . . 35
Exposure to radio frequency signals 35
FOR BEST PERFORMANCE . . . . . . . . . . . . . . . . . . . . . . . . . . . . . . . . . . . . . . . . . . . . . 35
ANTENNA CARE . . . . . . . . . . . . . . . . . . . . . . . . . . . . . . . . . . . . . . . . . . . . . . . . . . . 36
CARING FOR THE BATTERY. . . . . . . . . . . . . . . . . . . . . . . . . . . . . . . . . . . . . . . . . . . . 36
DRIVING SAFETY . . . . . . . . . . . . . . . . . . . . . . . . . . . . . . . . . . . . . . . . . . . . . . . . . . 36
ELECTRONIC DEVICES . . . . . . . . . . . . . . . . . . . . . . . . . . . . . . . . . . . . . . . . . . . . . . . 37
Pacemakers 37
Hearing aids 37
Other medical devices 38
Vehicles 38
Posted facilities 38
OTHER SAFETY GUIDELINES . . . . . . . . . . . . . . . . . . . . . . . . . . . . . . . . . . . . . . . . . . . 38
Aircraft 38
Blasting areas 38
Potentially explosive atmospheres 38
WHERE TO FIND HELP . . . . . . . . . . . . . . . . . . . . . . . . . . . . . . . . . . . . . . . . . . . . . . . . 40
YOUR SERVICE PROVIDER . . . . . . . . . . . . . . . . . . . . . . . . . . . . . . . . . . . . . . . . . . . . 40
YOUR PHONE DOCUMENTATION . . . . . . . . . . . . . . . . . . . . . . . . . . . . . . . . . . . . . . . . . 40
KYOCERA TECHNICAL SUPPORT. . . . . . . . . . . . . . . . . . . . . . . . . . . . . . . . . . . . . . . . . 40
[vii]

[viii]

GETTING STARTED
Kyocera Wireless Corp. appreciates your business and is pleased you have selected a CDMA
wireless phone. The QCP 820, QCP 1920, and QCP 2700 phones defines new industry standards
and will give you many years of dependable service. Your new phone includes time-saving
features like these:
• Easy-to-read, four-line, lighted screen that includes a line for informative icons
• Lighted keypad
• Fast, convenient scroll and select “dial-shuttle,” shown in the illustration to the left
• Interactive menu prompts
• Inherent call privacy through Code Division Multiple Access (CDMA) encoding
• Exceptionally long battery life
• Any-key answer, speed dial, auto redial, and 99 memory locations for phone numbers
• Advanced features like voice mail notification, paging, and caller ID
• A variety of helpful accessories
• ... and more!
This section identifies the location of phone controls and function keys and describes the icons
that appear on its screen. It explains how to charge the battery and turn the phone on and off.
In addition, it descri bes some of the phone ’s features.
1. Depending on services avail able from your carrier
1
[1]
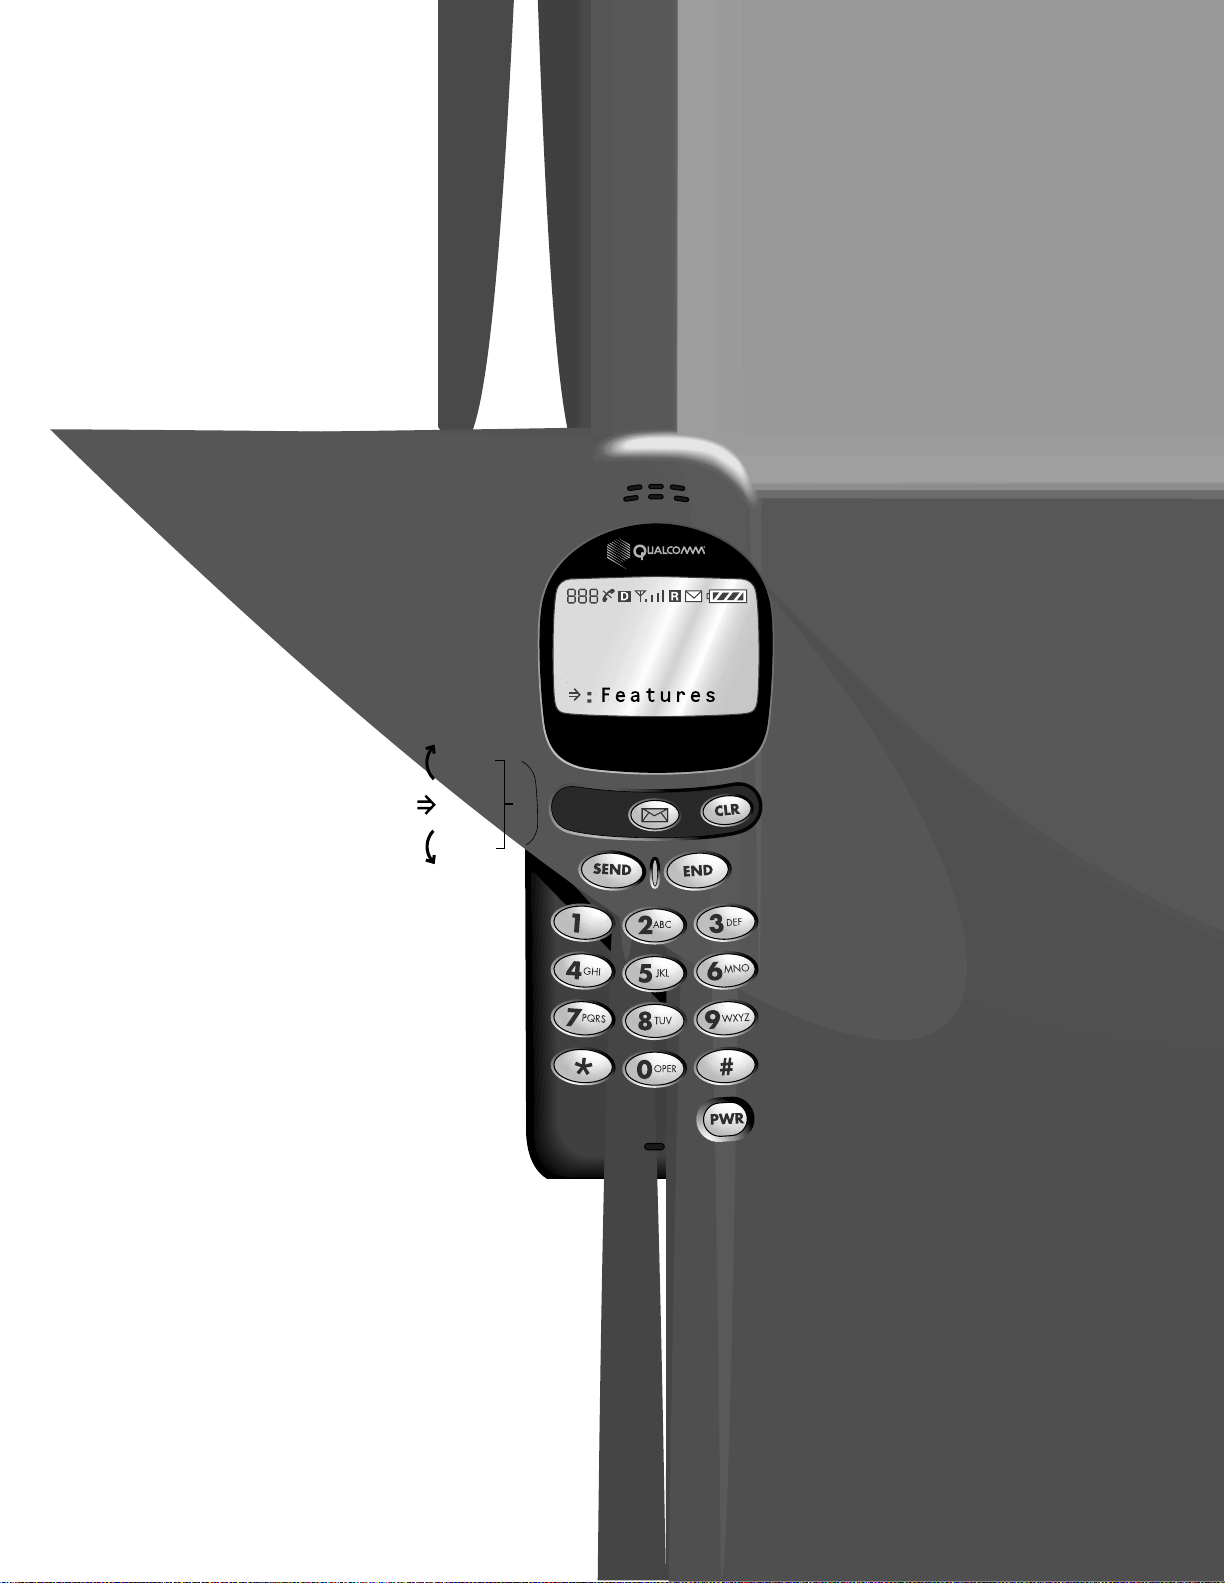
FUNCTION KEYS
Use the follo wing keys as described below.
Dial-shuttle. U se the di al-shuttle on the left si de of th e phon e as you work with
menus and perform operations. Turn the dial up and down to scroll through
options and press it into the phone to perform actions, such as choosing a
feature or option.
Message. Pre ss t o view pages, text messages, and voice mail messages.
Clear. Use to erase numbers or characters from the screen or return to a
preceding menu. Press it one time to erase text. Hold it down to erase all text.
When working with a menu, press it one time to return to the preceding menu.
Hold it down to return to the stan dby screen.
Send. Press to place and receive calls or use features like call waiting and
three-way calling (see your service provider for details).
End. Press to disconnect a call or return to the standby screen from any menu.
... Numbers. Press to enter numbers or characters, and to choose menu items.
Power. Press to turn the phone on and off.
Star. Press to scroll to the left when enterin g text.
Pound. Press to scroll to the right when entering text.
[2]

DISPLAY ICONS
Icons, described below, convey information regarding phone operations.
Memory location. Conveys information, based on the open menu, in the
upper-left corner of the screen. For example, phone book memory location
number “L01,” recent calls list number “C07,” or feature menu number “F01.”
Digital mode. Appears when the phone is operating in CDMA di gital mode . If it
does not appear, your ph one is eith er opera ting in an alog mod e or servi ce is not
available.
Signal strength. Shows the signal strength based on the number of lines that
appear; the more lines you see, the stronger the signal.
(If the signal is weak, e xten d th e an tenna. If you are in a buildin g, try standin g
near a window to increase the strength of the signal.)
No signal. Indicates service is not available, which means you cannot make or
receive calls. Wait a few min utes to see if you get a signal, or try movin g into an
open area.
On call. Appears when a call is in progress.
Roaming. Appears when the phone is outside o f its regular service area. If the i con
is flashing, it means you ar e completely outsi de your service area and different
calling rates may apply.
Envelope. Indicates you have received a new voice mail, page, or text message.
Press for details.
Battery charge. Shows the remaining battery charge. The more black you see, the
greater the charge.
Keyguard. Indicates the keypad is protected from accidental keypresses. You can
receive calls or messages when the keyguard is activated, but you can’t place a
call or perform operations.
Scroll up. Allows you to scroll through menu items using the dial-shuttle.
Scroll down. Allows you to scroll through menu items using the dial-shuttle.
Select. Indi cates th e menu item that will be selected if you press the
dial-shuttle.
[3]

USING THE BATTERY
The phone com es with a recharg eable battery pack. Three types of batteries are available for use
with this phone. Remember to fully charge the battery as soon as its charge gets low to
maximize available talk and standby times.
Installing and removing the battery
The battery pack snaps easily into th e back of th e phon e , bottom en d first, for qui ck installati on
and removal. To ensure you d o not lose stored numbers an d mess ages , always turn off th e phon e
before rem oving the battery.
Charging the battery
The battery charge level icon appears in the upper-righ t corn er o f the phone’s screen.
FULLY CHARGED VERY LOW ALMOST OUT
When the battery charge level is low, the message “Low Battery” appears and the phone sounds
a tone. If the battery level becomes too low, the phone turns itself off and any function in
progress is not saved.
NOTE: Charge your battery when you see the icon begin to blink. Use the standard Kyocera
Wireless Corp. AC adapter charger or the optional travel charger, desktop charger, or cigarette
lighter adapter to recharge th e battery.
NOTE: Y ou do not n eed to completely discharge the battery before charging. U nlike other battery
systems, lithium ion has no memory effect that could degrade battery performance .
W ARNING: U se only K yocera Wireless Corp.-approv ed charger s and adapter s . U sin g another adapter may be dangerous and
will invalidate the phone warranty if said accessories cause damage or a defect to the phone.
1. If the battery is not installed, snap it into place on the back of the phone—bottom end first.
2. Plug the standard AC adapter into a wall outlet.
3. Insert the other end of the cord into the bottom of the phone. A message indicating
the battery is charging should appear immediately. Chargin g a completely discharged
standard Extended Li-ion battery takes approximately 6 hours; the Slim Li-ion battery
takes approximately 4 hours; and the Ultra-Light Li-ion battery takes approximately
2.5 hours (see Accessories later in this guide).
NOTE: If the phone is turned on, “CH” appears in the upper-left corner of the screen an d
indicates the battery is charging. If the phone is turned off, the message “Battery is Charging”
appears.
[4]

TURNING THE PHONE ON AND OFF
When you make or receive a call, always extend the antenna and hold the phone above your
shoulder to ensure the best voice quality possible.
Turning on the phone
Ensure that a charged battery is installed in the back of the phone or that external power is
available (that is, the AC adapter, cigarette lighter adapter, or car kit is properly plugged in).
1. Press momentarily. Th e m e ssage “LOOKING FOR SERVICE” appears on the screen.
2. Release .
Turning off the phone
1. Press for a few seconds until “POWERING OFF” appears.
2. Release .
When the phone is turned off, nothing appears on the screen (unless you are charging the
battery).
NOTE: If is pressed for less than 1 second, the phone will not turn off. You must
press for more than 1 second.
YOUR LOCK CODE
Your phone is assigned a four-digit lock code. This code is used to access the Security menu
items described on page 24.
Typi c ally, the lock code on a new or recently activated ph one is the last four digits of its phone
number (see page 7). Your service provider may also have set your lock code to another default
such as 0000, 1234, or some number assigned specifically to you.
STANDBY
Standby status results when the phone is turned on and whenever is pressed. When the
phone is in standby status th e progr ammable banner, which in clud es the time an d date , appears .
Y ou have access to the ph one’s features from standby.
NOTE: The time and date is automatically acquired from the CDMA digital network. You do not
need to set it.
[5]

POWER SAVE
The power save mode feature automatically turns on if the pho n e has n’t been able to acquire a
signal after 15 minutes of searching. While this feature is active, the phone’s battery charge is
saved and the ph one automati cally rech ecks for service period ically. To man ually f orce the ph one
to recheck for service, press any key. A message on the screen indicates the phone is in power
save mode.
SHORT OR LONG FEATURES MENU
The phone offers the choice between the use of an extensive long features menu or an
abbreviated short features m enu. Th e long m enu allows you to view and chan ge all o f the featur e
settings of the phone. The short menu provides access to just a few often-used features. It’s
likely that you’ll need only th e short m enu after you person alize and fully set up your phon e (see
the Feature Menus chapter of this guide for more information).
NOTE: The instructions in this guide are based upon the long features menu structure.
[6]
BASIC FUNCTIONS
Your phone is easy to use and has many time-saving features.
MAKING A CALL
First, ensure that the phone is on, as described in the Getting Started chapter of this guide.
1. Press the keys to enter the phone number.
2. Press or press the dial-shuttle two times. If the phone is locked or another
problem exists , a help messag e appears.
3. Press to end the call.
You can also make calls from phone book memory (page 15) or from your recent calls list
(page 18).
CORRECTING DIALING MISTAKES
➤ Press to erase one character at a time.
or
➤ Press and hold for at least 1 second to delete all characters.
DISPLAYING YOUR OWN PHONE NUMBER
If your phone has service and you do not know the number, you can display the phone number
assigned to the phone.
1. Select “Features,” by pressing the dial-shuttle.
2. Scroll and select “Directory” in the same way.
3. Select “My Number.”
NOTE: If the short fe a tures menu is active, select “Features” and then scroll and select “My
Number” to see your phone’s number.
LOCKING AND UNLOCKING THE KEYPAD
Y ou can lock the k eypad to avoid accid entally pr essing a k ey. When the keypad is locked , you can
press to receive an incoming call or m ess a ge. However, you cannot lock the keypad when
a call is in progress.
The quick method of activating the keyguar d is shown below. This feature is also available via
the long features menu.
Locking the keypad
➤ Press the dial-shuttle until the message “Keypad is now guarded” appears.
[7]
 Loading...