

Page 1

Quick Start Guide for the
KYOCERA Hydro Plus
Get Started 2
Important Safety Information 13
Manufacturer’s Warranty 22
End User License Agreement 24
© 2013 Kyocera Corporation. All rights reserved. KYOCERA is a registered trademark of Kyocera Corporation. All other
trademarks are the property of the ir respective owners.
Android, Google Play, Google Maps, Gmail, Go ogle Talk, and YouTube are trademarks of Go ogle Inc.
®
The
Bluetooth
by Kyocera Corporation is under license. Other trademarks and trade names are those of their respective owners.
word mark and logos are registered trademarks owned by Bluetooth SIG, Inc. and any use of such marks
Page 2
Get Started
♦ Your KYOCERA Hydro Plus (page 2)
♦ Get Your Phone Ready (page 3)
♦ Use Your Phone (page 4)
♦ Customer Support (page 12)
♦ Notes (page 12)
This section introduces you to the basics of getting
started with your KYOCERA Hydro Plus. Visit http://
www.uscellular.com/ for the complete User Guide
and additional information.
2 Get Started
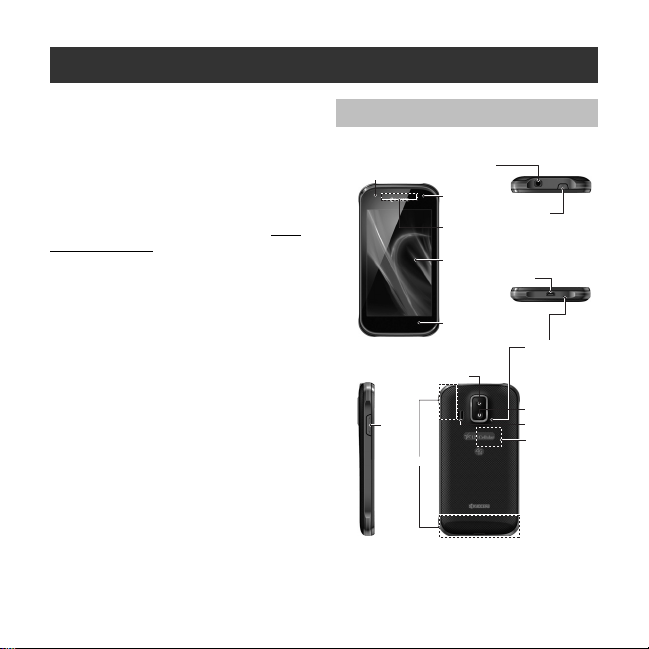
Your KYOCERA Hydro Plus
< Front > < Top >
Proximity Sensor/
Light Sensor
< Side >
Volume
Button
Internal Antennas
Headset Jack
Self Camera Lens
Smart Sonic
Receiver (Internal)
Touchscreen
Charger/Accessory Jack
LED Indicator
Back Camera Lens
Power Button
< Back >
< Bottom >
Microphones
Camera Flash
Speaker
SIM Card Slot/
microSD Card Slot
(Internal)
Page 3
Get Your Phone Ready
Install the Battery
1. Insert the battery, contacts end first, and gently
press into place.
2. Replace the cover, making sure all tabs on the
cover align with the battery compartment slots
and press down until the cover snaps into
place.
Charge the Battery
1. Plug the smaller end of the micro-USB cable
into the phonee’s charger/accessory jack.
2. Plug the other end of the USB cable into the
charger, and then plug the charger into an
electrical outlet.
Turn the Phone On
Press and hold the Power button to turn your
phone on.
Turn the Screen On and Off
Press the Power button to turn the screen on and
off.
Unlock the Screen
Touch and hold the screen and flick the key icon
which appears under your finger toward the
unlock icon .
Turn the Phone Off
Press and hold the Power button and then touch
Power off > OK to turn the phone off.
Get Started 3
Page 4
Use Your Phone
Voicemail
Set Up Your Voicemail
All unanswered calls are automatically transferred to
your voicemail, even if your phone is in use or turned
off. You should set up your voicemail and personal
greeting as soon as your phone is activated:
1. Touch > Phone to display the phone
dialpad.
2. Touch and hold .
3. Follow the voice prompts to create your
password and record your name and greeting.
It is strongly recommended that you set a voicemail
password. Without a password, anyone who has
access to your phone can access your messages.
Retrieve Your Voicemail
Touch and hold on the phone dialpad.
From any other phone:
1. Dial your wireless phone number.
2. When your voicemail answers, press the
asterisk key (*).
3. Enter your password.
4 Get Started
Phone Calls
Make a Phone Call
1. Touch > Phone to display the phone
dialpad.
2. Touch the digits of the number you want to call
on the dialpad. Touch to delete one or
more digits.
3. Touch at the bottom of the screen to place
the call.
4. Touch when you are finished.
Respond to an Incoming Call
On the incoming call screen, flick the Anwswer
icon .
Flick the Ignore icon to send the call to your
voicemail inbox.
Flick the Ignore & Text icon to ignore the call
and send a message to the caller.
Note: While on a call and holding the phone near
your face to speak, the touchscreen
automatically deactivates to avoid accidental
screen presses. When you move the phone
away from your face, the touchscreen
automatically reactivates.
Page 5
Display Settings
Add App Shortcuts or Widgets to the Home
Screen
1. Touch > .
2. Slide the APPS or WIDGETS screens to find the
item you want to add to the home screen.
3. Touch and hold the app icon or a widget and
move your finger to find the place to add it to.
The blue frames which appear on the screen
indicate where you might place the item.
4. Release your finger.
Move or Remove Items on the Home Screen
Touch and hold the item you want to move or
remove from the home screen.
▪ To move the item, drag it to a new area and
release it.
▪ To remove the item, drag it to “X Remove” at
the top of the screen and release it when it turns
red.
Change the Wallpaper
1. Touch and hold the empty area on the home
screen.
2. Select an option:
▪ Gallery/Graphics to use saved or captured
images on your phone.
▪ Live Wallpapers to use Live wallpapers.
▪ Wallpapers to use preset wallpapers.
3. Select an image, crop it if necessary, and touch
OK or Set wallpaper.
Sound Settings
Adjust the Volume
1. Touch > > Settings > Sound.
2. Touch Volumes and use the sliders to set the
volume level for Music, video, games, &
other media, Ringtone & notifications, and
Alarms.
3. Touch OK to save your settings.
Tip: You can adjust the ringer volume in standby
mode (or the earpiece volume during a call) by
using the volume button on the left side of your
phone.
Mute All Sounds
Press the volume button down in standby mode
until you see or on the status bar.
Select a Ringtone
1. Touch > > Settings > Sound >
Phone ringtone.
2. Select the app to use and select if using the
app Always or Just once.
3. Select a ringtone from the available list. Touch
OK if required.
Get Started 5
Page 6
Select a Notification Sound
1. Touch > > Settings > Sound >
Default notification.
2. Select the app to use and select if using the
app Always or Just once.
3. Select a notification sound from the available
list. Touch OK if required.
Select a Vibration Pattern
1. Touch > > Settings > Sound >
Vibrate pattern.
2. Touch a vibrate pattern from the available list
and touch OK.
6 Get Started
Contacts
View Contacts
1. Touch > > People.
2. Scroll through the list to view your contacts.
Add a New Contact
1. Touch > > People > .
2. Add as much or as little information as you
want.
▪ To add information in a field, touch the field to
display the touchscreen keyboard.
▪ To assign a number or address type (such as
MOBILE, WORK, HOME, etc.), touch the label
next to the number or address field.
▪ To assign a picture, touch the icon next to the
name, and select to take a picture or choose
a picture from Gallery.
3. Touch DONE when you are finished.
Edit Contacts
1. Touch > > People.
2. Touch a contact to open it, and then
touch > Edit.
▪ Touch a field to add or edit information.
3. Touch DONE when you are finished.
Note: To delete a contact, touch > Delete >
OK.
Page 7
Messaging
Send a Message
1. Touch > > Messaging > .
2. Enter a phone number or email address in the
Enter up to 10 recipients field.
Tip: Enter a name saved in Contacts to call up the
phone number or email address. Touch a
match from an available list.
Tip: Touch next to the field to access your
Contacts.
3. Touch the Type message field and type your
message.
▪ To attach pictures or files, touch and
select a file.
▪ To add a subject or insert a smiley,
touch > Add subject or Insert smiley,
and then type a subject or select a smiley.
4. When you are finished, touch or .
Access Messages
Tou ch > > Messaging. Touch a
message to open and read it.
If you have a new message notification, drag the
status bar down to open the Notifications panel.
Touch a message to open and read it.
Email Setup
Set Up a Gmail® Account
1. Touch > > Gmail.
2. Follow the instructions to set up or sign in to a
Gmail account.
Note: Although you need a Gmail account to use
certain features such as Google Play™, you
do not have to use Gmail as the default
account for your phone.
Note: When setting up a new Google Account, you
will be prompted to add a secondary email
address. Enter a second Gmail address or
any other email address from which you
currently send and receive email. This
address is used to authenticate your account
should you ever encounter problems or forget
your password. It is strongly encouraged for
Android users so you can regain access to
Google Mobile™ services and purchases on
your phone.
®
Get Started 7
Page 8

Set Up an Email Account
1. Touch > > Email.
2. Follow the instructions to sign in to your email
account.
▪ If you are adding an account from a common
email provider, such as Windows Live Hotmail
or Yahoo Mail, enter your email address and
password and touch Next. Your email should
be set up automatically.
▪ If you are adding an account from a less
common email provider, or if you have
additional settings to configure, enter your
email address and password and touch
Manual setup. Follow the instructions to
provide the required information.
Note: If you are not sure about your account, touch
Next after entering your email address and
password. If your phone can’t autoconfigure
your account, you’ll then be asked to
configure it manually.
8 Get Started
®
Set Up a Microsoft
1. Touch > > Settings >
Add account > Corporate.
2. Enter the Exchange server account details and
touch Next.
Exchange® Account
▪ Contact your Exchange Server administrator
for required sign-in information.
3. Select the frequency and sync options and
touch Next.
4. Identify your new account with a unique name
and touch Next.
Send an Email Message
1. Touch > > Email or Gmail.
▪ If necessary, touch the email account you
want to use.
2. On the email account inbox, touch .
3. Enter an email address or contact name in the
To field.
4. Enter a subject and a message.
▪ To add attachments, touch > Attach file,
Attach picture, or Attach video and select
an attachment.
5. Touch .
Page 9
Bluetooth
Web
Pair and Connect With a BluetoothR Device
1. Touch > > Settings > Bluetooth.
▪ If Bluetooth is not turned on, touch the
Bluetooth ON/OFF icon to ON.
2. Select an available device and follow the
prompts to pair your phone with the device. You
may be required to enter a passcode (oftern
0000) to complete pairing.
Go Online
Touch > > Chrome.
Open a Web Page by Entering an URL
1. From any open Web page, touch the URL field
and enter the Web address.
▪ As you type the address, if your desired
website appears within the suggested sites
list, touch the entry to begin surfing.
2. Touch Go.
Access Bookmarks
From any open Web page, touch >
Bookmarks.
Create Bookmarks
1. Open the Web page you want to bookmark and
touch > .
2. Enter a descriptive name for the new
bookmark.
3. Select where to save the bookmark and touch
Save.
Get Started 9
Page 10

Camera & Camcorder
Google Play™ on Your Phone
Take a Picture
1. Press > > Camera.
▪ Touch to select the front-facing camera.
2. Frame your subject on the screen.
3. Touch and release to take a picture.
Record a Video
1. Press > > Camera.
2. Touch > .
▪ Touch to select the front-facing video
camera.
▪ Tou ch Settings > Video quality > QVGA to
select the video size for MMS.
3. Frame your subject in the screen.
4. Touch to begin recording. Touch to
stop.
10 Get Started
Download Applications and Games
1. Touch > > Play Store.
2. The first time you visit the Google Play Store
app, the Terms of Service window will appear.
Touch Accept to continue if you agree to the
Ter ms o f Se rvi ce.
3. Find an application you want and touch it to
open its details screen.
4. Touch an application to read a description
about the application and user reviews.
5. Touch Install > Accept & download (for free
applications) or the price button > Accept &
buy (for paid applications).
Note: You must have a Google (Gmail™) Account
set up on your phone to purchase and
download content from Google Play.
Note: You need a Google Wallet account to
purchase items on Google Play.
Page 11

Your Navigator Deluxe
With Your Navigator Deluxe, get all of the features of
an advanced car navigation system on your mobile
phone with voice turn-by-turn navigation enabled by
GPS. Search for any destination including gas
stations, ATMs, restaurants, and more. Get detailed
maps of any location.
Activate Location Mode
In order to use Your Navigator Deluxe, you must first
turn on your phone's location and GPS settings.
1. Touch > > Settings >
Location access.
2. Touch the OFF icon next to Access to my
location.
3. Read the message and touch Agree to allow
apps to use the GPS location feature.
4. Read the second message and touch Agree to
allow apps to use Google's location service.
Use Your Navigator Deluxe
1. Touch > > Your Navigator.
2. From the Home screen, you can select:
▪ Drive To for turn by turn direction to an
address, airport, contacts addresses and
more.
▪ Places to search for nearby businesses, the
cheapest gas prices and more.
▪ Maps & Traffic to see where you currently
are located on a map and what traffic is in the
area.
Get Started 11
Page 12

Customer Support Notes
Our customer support is available from the following
resources:
● Access http://www.uscellular.com/support to see
a range of our support.
● Call Customer Service at 1-888-944-9400, or
611 from your U.S. Cellular phone.
12 Get Started
● The services described in this guide may require a
● Instructions to perform tasks in this guide may
● All screens and icon images in this guide are
● Important Privacy Message. This phone is
subscription to a service plan and/or may incur
additional charges. Not all services will work on all
phones. Please visit http://www.uscellular.com/
for more details.
change depending on the software version on your
phone.
simulated. Actual displays may vary.
capable of determining its/your geographical
location. To set controls for access and use of
your location information by others, touch >
> Settings > Location access, turn on
Access to my location and then select location
sources. Follow any applicable prompts. These
settings for the use of location information can be
turned on and off. For some applications and
services you select, a phone must be turned on
and set to allow collection of location information
in order to function.
Page 13

Important Safety Information
♦ General Precautions (page 13)
♦ Maintaining Safe Use of and Access to Your
Phone (page 14)
♦ Water Resistance (page 15)
♦ Using Your Phone With a Hearing Aid Device
(page 16)
♦ Caring for the Battery (page 18)
♦ Radio Frequency (RF) Energy (page 19)
♦ Owner’s Record (page 21)
This section contains important operational and
safety information that will help you safely use your
phone. Failure to read and follow the information
provided in this section may result in serious bodily
injury, death, or property damage.
General Precautions
There are several simple guidelines to operating your
phone properly and maintaining safe, satisfactory
service.
● To maximize performance, do not touch the
portions of your phone where the internal
antennas are located while using the phone.
● Speak directly into the mouthpiece.
● Your phone is water-resistant but not waterproof.
● Do not expose your phone to direct sunlight for
extended periods of time (such as on the
dashboard of a car).
● Although your phone is quite sturdy, it is a
complex piece of equipment and can be broken.
Avoid dropping, hitting, bending, or sitting on it.
● Any changes or modifications to your phone not
expressly approved in this document could void
your warranty for this equipment and void your
authority to operate this equipment.
Note: For the best care of your phone, only
Kyocera-authorized personnel should service
your phone and accessories. Failure to do so
may be dangerous and void your warranty.
Important Safety Information 13
Page 14

Maintaining Safe Use of and Access to Your Phone
Do Not Rely on Your Phone for
Emergency Calls
Mobile phones operate using radio signals, which
cannot guarantee connection in all conditions.
Therefore you should never rely solely upon any
mobile phone for essential communication (e.g.,
medical emergencies). Emergency calls may not be
possible on all cellular networks or when certain
network services or mobile phone features are in
use. Check with your local service provider for
details.
Using Your Phone While Driving
Talking on your phone while driving (or operating the
phone without a hands-free device) is prohibited in
some jurisdictions. Laws vary as to specific
restrictions. Remember that safety always comes
first.
Using Your Phone Near Other
Electronic Devices
Most modern electronic equipment is shielded from
radio frequency (RF) signals. However, RF signals
from wireless phones may affect inadequately
shielded electronic equipment.
RF signals may affect improperly installed or
inadequately shielded electronic operating systems or
entertainment systems in motor vehicles. Check with
the manufacturer or their representative to determine if
these systems are adequately shielded from external
RF signals. Also check with the manufacturer regarding
any equipment that has been added to your vehicle.
Consult the manufacturer of any personal medical
devices, such as pacemakers and hearing aids, to
determine if they are adequately shielded from
external RF signals.
Note: Always turn off the phone in healthcare
facilities, and request permission before
using the phone near medical equipment.
Turning Off Your Phone Before Flying
Following Safety Guidelines
To operate your phone safely and efficiently, always
follow any special regulations in a given area. Turn
your phone off in areas where use is forbidden or
when it may cause interference or danger.
14 Important Safety Information
Turn off your phone before boarding any aircraft. To
prevent possible interference with aircraft systems, the
U.S. Federal Aviation Administration (FAA) regulations
require you to have permission from a crew member
to use your phone while the plane is on the ground. To
prevent any risk of interference, FCC regulations
prohibit using your phone while the plane is in the air.
Page 15

Turning Off Your Phone in Dangerous
Areas
Restricting Children’s Access to Your
Phone
To avoid interfering with blasting operations, turn
your phone off when in a blasting area or in other
areas with signs indicating two-way radios should be
turned off. Construction crews often use remotecontrol RF devices to set off explosives.
Turn your phone off when you’re in any area that has
a potentially explosive atmosphere. Although it’s rare,
your phone and accessories could generate sparks.
Sparks can cause an explosion or fire, resulting in
bodily injury or even death. These areas are often,
but not always, clearly marked. They include:
● Fueling areas such as gas stations.
● Below deck on boats.
● Fuel or chemical transfer or storage facilities.
● Areas where the air contains chemicals or
particles such as grain, dust, or metal powders.
● Any other area where you would normally be
advised to turn off your vehicle’s engine.
Note: Never transport or store flammable gas,
flammable liquids, or explosives in the
compartment of your vehicle that contains
your phone or accessories.
Your phone is not a toy. Do not allow children to play
with it as they could hurt themselves and others,
damage the phone or make calls that increase your
U.S. Cellular invoice.
Water Resistance
Your Hydro Plus is water-resistant. To ensure that
your phone maintains water resistance, the following
precautions must be observed.
● Make sure the battery cover is properly attached
and locked.
● Do not expose your phone to water heated in
excess of 104°F (40°C), or to liquids other than
water, such as detergent, beverages, or
chlorinated or treated water.
● Dry your phone as quickly as possible when wet.
Important Safety Information 15
Page 16
Charging
Your Hydro Plus has an M4 and
a T3 rating.
● Dry your phone with a clean cloth before charging.
● Do not touch the charger, charging cable, or
charger/accessory jack with wet hands. Doing so
may cause electric shock, injury, or product
failure.
● Do not charge your phone in a wet or damp place,
such as in a bathroom or near a kitchen sink.
Warning: Your phone is designed to withstand
16 Important Safety Information
exposure to water for up to 30 minutes
at a depth not exceeding one meter
(about 3.25 feet). Exposing your phone
to water outside these limits or not
following the above precautions can
result in water damage.
Using Your Phone With a Hearing Aid Device
When some wireless phones are used with certain
hearing devices (including hearing aids and cochlear
implants), users may detect a noise which can
interfere with the effectiveness of the hearing device.
Some hearing devices are more immune than others
to this interference noise, and phones also vary in the
amount of interference noise they may generate.
ANSI standard C63.19 was developed to provide a
standardized means of measuring both wireless
phone and hearing devices to determine usability
rating categories for both.
Ratings have been developed for mobile phones to
assist hearing device users find phones that may be
compatible with their hearing device. Not all phones
have been rated for compatibility with hearing
devices. Phones that have been rated have a label
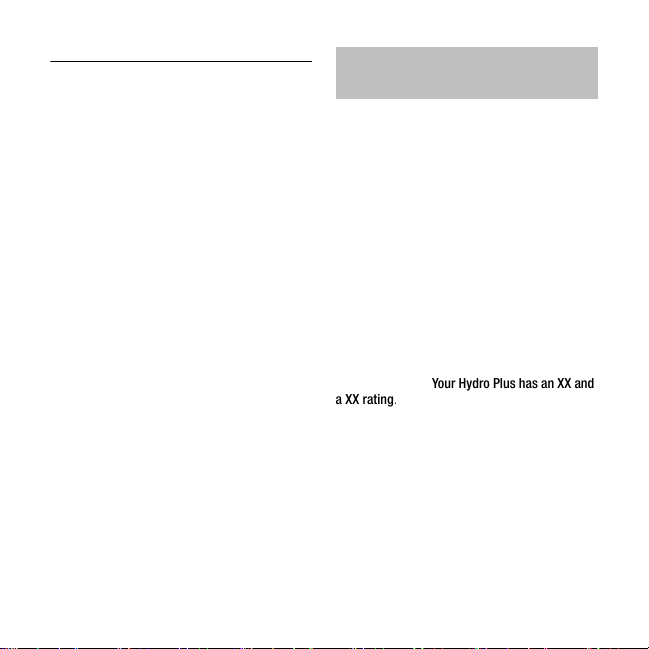
located on the box. Your Hydro Plus has an XX and
a XX rating.
These ratings are not guarantees. Results will vary
depending on the user’s hearing device and
individual type and degree of hearing loss. If a
hearing device is particularly vulnerable to
interference noise; even a phone with a higher rating
may still cause unacceptable noise levels in the
hearing device. Trying out the phone with your
hearing device is the best way to evaluate it for your
personal needs.
Page 17

M-Ratings: Phones rated M3 or M4 meet FCC
requirements for hearing aid compatibility and are
likely to generate less interference to hearing devices
than unrated phones. (M4 is the better/higher of the
two ratings.)
T-R at in gs: Phones rated T3 or T4 meet FCC
requirements and are likely to be more usable with a
hearing device’s telecoil (“T Switch” or “Telephone
Switch”) than unrated phones. (T4 is the better/
higher of the two ratings. Note that not all hearing
devices have telecoils in them.)
Note: This phone has been tested and rated for use
with hearing aids for some of the wireless
technologies that it uses. However, there may be
some newer wireless technologies used in this
phone that have not been tested yet for use
with hearing aids. It is important to try the
different features of this phone thoroughly
and in different locations, using your hearing
aid or cochlear implant, to determine if you
hear any interfering noise. Consult your
service provider or the manufacturer of this
phone for information on hearing aid
compatibility. If you have questions about
return or exchange policies, consult your
service provider or phone retailer.
Hearing aid devices may also be measured for
immunity to interference noise from wireless phones
and should have ratings similar to phones. Ask your
hearing healthcare professional for the rating of your
hearing aid. Add the rating of your hearing aid and
your phone to determine probable usability:
● Any combined rating equal to or greater than six
offers excellent use.
● Any combined rating equal to five is considered
normal use.
● Any combined rating equal to four is considered
usable.
Thus, if you pair an M3 hearing aid with an M3
phone, you will have a combined rating of six for
“excellent use.” This is synonymous for T ratings.
More information about hearing aid compatibility may
be found at: www.fcc.gov
www.accesswireless.org
, www.fda.gov, and
.
Getting the Best Hearing Device
Experience With Your Phone
To further minimize interference, move the phone
around to find the point with least interference.
Important Safety Information 17
Page 18

Caring for the Battery
Protecting Your Battery
The guidelines listed below help you get the most out
of your battery’s performance.
● Recently there have been some public reports of
wireless phone batteries overheating, catching
fire, or exploding. It appears that many, if not all,
of these reports involve counterfeit or inexpensive,
aftermarket-brand batteries with unknown or
questionable manufacturing standards. Use only
manufacturer-approved batteries and accessories.
Buying the right batteries and accessories is the
best way to ensure they’re genuine and safe.
● Do not disassemble or open, crush, bend or
deform, or puncture or shred the battery.
● Do not modify or remanufacture, attempt to insert
foreign objects into the battery, immerse or
expose to water or other liquids, expose to fire,
explosion, or other hazard.
● Avoid dropping the phone or battery. If the phone
or battery is dropped, especially on a hard
surface, and the user suspects damage, take it to
a service center for inspection.
● Improper battery use may result in a fire,
explosion or other hazard.
● Do not short-circuit a battery or allow metallic
conductive objects to contact battery terminals.
18 Important Safety Information
● Keep the metal contacts on top of the battery
clean.
● Battery usage by children should be supervised.
Charging
● In order to avoid damage, charge the battery only
in temperatures that range from 32° F to 113° F
(0° C to 45° C).
● Don’t use the battery charger in direct sunlight or
in high humidity areas, such as the bathroom.
● The battery may need recharging if it has not been
used for a long period of time.
● It’s best to replace the battery when it no longer
provides acceptable performance. It can be recharged
hundreds of times before it needs replacing.
Storing
● Don’t store the battery in high temperature areas
for long periods of time. It’s best to follow these
storage rules:
▪ Less than one month:
-4° F to 140° F (-20° C to 60° C)
▪ More than one month:
-4° F to 113° F (-20° C to 45° C)
Page 19
Disposal of Lithium Ion (Li-Ion)
Batteries
● Promptly dispose of used batteries in accordance
with local regulations.
● Never dispose of the battery by incineration.
● Do not handle a damaged or leaking Li-Ion battery
as you can be burned.
● For safe disposal options of your Li-Ion batteries,
contact your nearest authorized service center.
Special Note: Be sure to dispose of your battery
properly. In some areas, the disposal of batteries in
household or business trash may be prohibited.
Radio Frequency (RF) Energy
Understanding How Your Phone
Operates
Your phone is basically a radio transmitter and
receiver. When it’s turned on, it receives and
transmits radio frequency (RF) signals. When you use
your phone, the system handling your call controls
the power level. This power can range from 0.006
watt to 0.2 watt in digital mode.
Knowing Radio Frequency Safety
The design of your phone complies with updated
NCRP standards described below.
In 1991–92, the Institute of Electrical and Electronics
Engineers (IEEE) and the American National
Standards Institute (ANSI) joined in updating ANSI’s
1982 standard for safety levels with respect to
human exposure to RF signals. More than 120
scientists, engineers and physicians from
universities, government health agencies and
industries developed this updated standard after
reviewing the available body of research. In 1993,
the Federal Communications Commission (FCC)
adopted this updated standard in a regulation. In
August 1996, the FCC adopted hybrid standard
consisting of the existing ANSI/IEEE standard and the
guidelines published by the National Council of
Radiation Protection and Measurements (NCRP).
Important Safety Information 19
Page 20
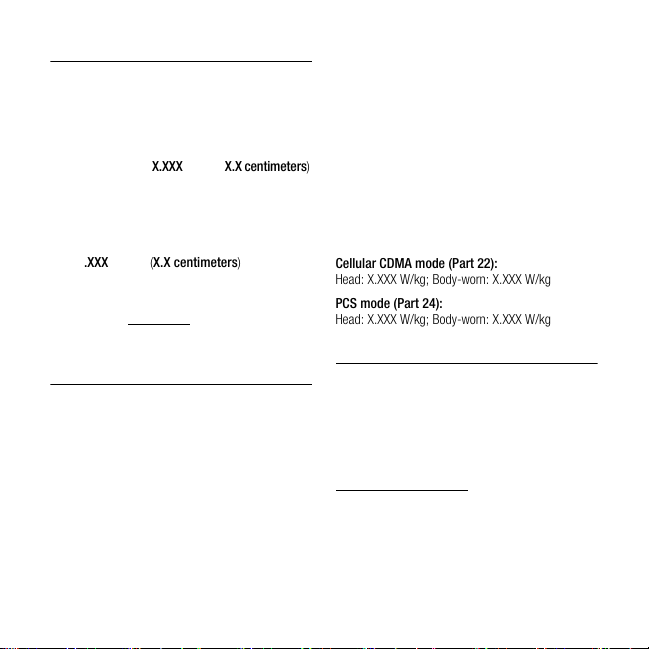
Body-Worn Operation
Head: 1.27 W/kg
Body-Worn: 0.97 W/kg
Hot Spot: 1.02 W/kg
0.39
1.0 centimeter)
0.39
(1.0 centimeter)
To maintain compliance with FCC RF exposure
guidelines, if you wear a handset on your body, use a
U.S. Cellular-supplied or U.S. Cellular-approved
carrying case, holster or other body-worn accessory.
If you do not use a body-worn accessory, ensure the
antennas are at least X.XXX inches (X.X centimeters)
from your body when transmitting. Use of non-U.S.
Cellular-approved accessories may violate FCC RF
exposure guidelines. Other accessories used with
this phone for body-worn operations must not
contain any metallic components and must provide at
least X.XXX inches (X.X centimeters) separation
distance between the antennas and the user’s body.
For more information about RF exposure, visit the
FCC website at www.fcc.gov
.
Specific Absorption Rates (SAR) for
Wireless Phones
The SAR value corresponds to the relative amount of
RF energy absorbed into the head of a user of a
wireless handset.
The SAR value of a phone is the result of an
extensive testing, measuring and calculation
process. It does not represent how much RF the
phone emits. All phone models are tested at their
highest value in strict laboratory settings. But when
in operation, the SAR of a phone can be substantially
less than the level reported to the FCC. This is
because of a variety of factors including its proximity
20 Important Safety Information
to a base station antenna, phone design and other
factors. What is important to remember is that each
phone meets strict federal guidelines. Variations in
SARs do not represent a variation in safety.
All phones must meet the federal standard, which
incorporates a substantial margin of safety. As stated
above, variations in SAR values between different
model phones do not mean variations in safety. SAR
values at or below the federal standard of 1.6 W/kg
are considered safe for use by the public.
The highest reported SAR values of the Hydro Plus
are:
Cellular CDMA mode (Part 22):
Head: X.XXX W/kg; Body-worn: X.XXX W/kg
PCS mode (Part 24):
Head: X.XXX W/kg; Body-worn: X.XXX W/kg
FCC Radio Frequency Emission
This phone meets the FCC Radio Frequency Emission
Guidelines.
FCC ID number: V65C6721A1.
More information on the phone’s SAR can be found
from the following FCC website:
http://www.fcc.gov/oet/ea/
.
Page 21

FCC Notice
This device complies with Part 15 of the FCC Rules.
Operation is subject to the following two conditions:
(1) this device may not cause harmful interference,
and (2) this device must accept any interference
received, including interference that may cause
undesired operation.
Changes or modifications not expressly approved by
the party responsible for compliance could void the
user’s authority to operate the equipment.
Note: This equipment has been tested and found to
comply with the limits for a Class B digital
device, pursuant to Part 15 of the FCC Rules.
These limits are designed to provide reasonable
protection against harmful interference in a
residential installation. This equipment generates,
uses and can radiate radio frequency energy and, if
not installed and used in accordance with the
instructions, may cause harmful interference to radio
communications.
However, there is no guarantee that interference will
not occur in a particular installation.
If this equipment does cause harmful interference to
radio or television reception, which can be
determined by turning the equipment off and on, the
user is encouraged to try to correct the interference
by one or more of the following measures:
● Reorient the direction of the internal antennas.
● Increase the separation between the equipment
and receiver.
● Connect the equipment into an outlet on a circuit
different from that to which the receiver is
connected.
● Consult the dealer or an experienced radio/TV
technician for help.
Owner’s Record
The model number, regulatory number, and serial
number are located on a nameplate inside the
battery compartment. Record the serial number in
the space provided below. This will be helpful if you
need to contact us about your phone in the future.
Model: Hydro Plus (C6721)
Serial No.:
Important Safety Information 21
Page 22

Manufacturer’s Warranty
Kyocera Communications Inc. (“KYOCERA”) offers
you a limited warranty that the enclosed product or
products (the “Product”) will be free from defects in
material and workmanship for a period that expires
one year from the date of sale of the Product to you,
provided that you are the original end-user purchaser
of the Product and provided that your purchase was
made from an authorized supplier. Transfer or resale
of a Product will automatically terminate warranty
coverage with respect to that Product.
This limited warranty is not transferable to any third
party, including but not limited to any subsequent
purchaser or owner of the Product. KYOCERA shall,
at its sole and absolute discretion, either repair or
replace a Product (which unit may use refurbished
parts of similar quality and functionality) if found by
KYOCERA to be defective in material or
workmanship, or if KYOCERA determines that it is
unable to repair or replace such Product, KYOCERA
shall refund the purchase price for such Product,
provided that the subject Product (i) is returned, with
transportation prepaid, to a KYOCERA authorized
service center within the one year warranty period,
and (ii) is accompanied by a proof of purchase in the
form of a bill of sale or receipted invoice which
evidences that the subject Product is within the one
year warranty period (“Proof of Purchase”). After the
one year warranty period, you must pay all shipping,
parts and labor charges. This limited warranty does
not cover and is void with respect to the following: (i)
22 Manufacturer’s Warranty
Products which have been improperly installed,
repaired, maintained or modified (including the
antenna); (ii) Products which have been subjected to
misuse (including Products used in conjunction with
hardware electrically or mechanically incompatible or
Products used with software, accessories, goods or
ancillary or peripheral equipment not supplied or
expressly authorized by KYOCERA for use), abuse,
accident, physical damage, abnormal use or
operation, improper handling or storage, neglect,
exposure to fire, water or excessive moisture or
dampness or extreme changes in climate or
temperature; (iii) Products operated outside
published maximum ratings; (iv) cosmetic damage;
(v) Products on which warranty stickers or Product
serial numbers have been removed, altered, or
rendered illegible; (vi) customer instruction; (vii) cost
of installation, set up, removal or reinstallation; (viii)
signal reception problems (unless caused by defect
in material or workmanship); (ix) damage the result of
fire, flood, acts of God or other acts which are not the
fault of KYOCERA and which the Product is not
specified to tolerate, including damage caused by
mishandling and blown fuses; (x) consumables (such
as memory cards, fuses, etc.); (xi) third party
software or applications, data and equipment not
originally supplied with the Product; (xii) any Product
in which the software has not been updated to the
current version; (xiii) any Product in which the
operating system has been unlocked (allowing
installation of a third party operating system); or (xiv)
Page 23

any Products which have been opened, repaired,
modified or altered by anyone other than KYOCERA
or a KYOCERA authorized service center. Before
returning any Product for service, be sure to back up
data and remove any confidential, proprietary, or
personal information from the Product. KYOCERA is
not responsible for damage to or loss of any
software, applications, data or removable storage
media.
USE ONLY KYOCERA APPROVED ACCESSORIES
WITH KYOCERA PHONES. USE OF ANY
UNAUTHORIZED ACCESSORIES MAY BE
DANGEROUS AND WILL INVALIDATE THE PHONE
WARRANTY IF SAID ACCESSORIES CAUSE DAMAGE
OR A DEFECT TO THE PHONE.
KYOCERA SPECIFICALLY DISCLAIMS LIABILITY FOR
ANY AND ALL DIRECT, INDIRECT, SPECIAL,
GENERAL, PUNITIVE, EXEMPLARY, AGGRAVATED,
INCIDENTAL OR CONSEQUENTIAL DAMAGES, EVEN
IF ADVISED OF THE POSSIBILITY THEREOF,
WHETHER FORESEEABLE OR UNFORESEEABLE OF
ANY KIND WHATSOEVER, INCLUDING BUT NOT
LIMITED TO LOSS OF PROFITS, UNANTICIPATED
BENEFITS OR REVENUE, ANTICIPATED PROFITS
ARISING OUT OF USE OF OR INABILITY TO USE ANY
PRODUCT (FOR EXAMPLE, WASTED AIRTIME
CHARGES DUE TO THE MALFUNCTION OF A
PRODUCT) OR CONTRIBUTION OR INDEMNITY IN
RESPECT OF ANY CLAIM RELATED TO A PRODUCT.
REPAIR OR REPLACEMENT OF A DEFECTIVE
PRODUCT OR REFUND OF THE PURCHASE PRICE
RELATING TO A DEFECTIVE PRODUCT, AS PROVIDED
UNDER THIS WARRANTY, ARE YOUR SOLE AND
EXCLUSIVE REMEDIES FOR BREACH OF THE LIMITED
WARRANTY, AND SUBJECT TO THIS WARRANTY, THE
PRODUCTS ARE APPROVED AND ACCEPTED BY YOU
“AS IS”.
KYOCERA MAKES NO OTHER WARRANTIES,
REPRESENTATIONS OR CONDITIONS OF ANY KIND,
ORAL OR VERBAL, EXPRESS OR IMPLIED,
STATUTORY OR OTHERWISE, WITH RESPECT TO THE
PRODUCTS, INCLUDING BUT NOT LIMITED TO ANY
IMPLIED WARRANTY OR CONDITION OF
MERCHANTABILITY OR FITNESS FOR A PARTICULAR
PURPOSE OR AGAINST INFRINGEMENT OR ANY
IMPLIED WARRANTY OR CONDITION ARISING OUT
OF TRADE USAGE OR OUT OF A COURSE OF
DEALING OR COURSE OF PERFORMANCE. NO
DEALER, DISTRIBUTOR, AGENT OR EMPLOYEE IS
AUTHORIZED TO MAKE ANY MODIFICATION OR
ADDITION TO THIS WARRANTY.
Some jurisdictions do not allow the exclusion or
limitation of incidental or consequential damages, or
allow limitations on how long an implied warranty
lasts, so the above limitations or exclusions may not
apply to you. This limited warranty gives you specific
legal rights, and you may also have other rights
which vary from jurisdiction to jurisdiction. For
warranty service information, please call the
following telephone number from anywhere in the
continental United States and Canada: 1-800-3494478 or 858-882-1401.
Manufacturer’s Warranty 23
Page 24

End User License Agreement
Kyocera Communications, Inc. (“Kyocera”) End User
License Agreement
CAREFULLY READ THE FOLLOWING TERMS AND
CONDITIONS (“AGREEMENT”) BEFORE USING OR
OTHERWISE ACCESSING THE SOFTWARE OR
SERVICES PROVIDED WITH YOUR KYOCERA
DEVICE. THE SOFTWARE AND SERVICES
PROVIDED WITH YOUR KYOCERA DEVICE ARE
SOLELY FOR PERSONAL USE BY YOU, THE
ORIGINAL END USER, AS SET FORTH BELOW.
BY ACTIVATING, USING, DOWNLOADING OR
INSTAL LI NG T HI S KYOCERA DEVICE AND/OR THE
SOFTWARE PROVIDED WITH IT, YOU ARE
AGREEING TO BE BOUND BY THE TERMS OF THIS
LICENSE AGREEMENT. IF YOU DO NOT AGREE TO
THE TERMS AND CONDITIONS OF THIS
AGREEMENT, DO NOT USE, DOWNLOAD OR
OTHERWISE ACCESS THE SOFTWARE OR
SERVICES AND (I) PROMPTLY RETURN THE
SOFTWARE OR SERVICE TO KYOCERA OR DELETE
IT; OR (II) IF YOU HAVE PURCHASED THE KYOCERA
DEVICE ON WHICH THE SOFTWARE OR SERVICE
IS PRE-INSTALLED, PROMPTLY RETURN THE
DEVICE AND THE ACCOMPANYING S
(INCLUDING DOCUMENTATION AND PACKAGING)
TO KYOCERA OR THE KYOCERA AUTHORIZED
DISTRIBUTOR FROM WHICH YOU PURCHASED
THE KYOCERA DEVICE.
License: Subject to the terms and conditions of this
Agreement and any other terms that may be
24 End User License Agreement
OFTWARE
incorporated by reference or otherwise presented to
you prior to your use of the Software, Kyocera grants
you a limited, non-exclusive, license to use Kyocera
and third party proprietary software and services
found on your Kyocera device and/or packaged with
your Kyocera device, including any updates to such
material by whatever means provided, and any
related documentation (“Software”). You may use the
Software only as expressly authorized by this
Agreement.
Limitations: This Software is licensed for use only on
the single Kyocera device you originally purchased.
You acknowledge and agree that ownership of the
Software and all other rights associated with the
Software not expressly granted in this Agreement are
retained by Kyocera or its suppliers or licensors. You
are not permitted to, in any way, distribute the
Software or make it available over a network for use
on more than the single Kyocera device for which it
was originally supplied. The Software may be copied
only as permitted by applicable law and as necessary
for backup purposes. You may not remove any
proprietary notices or labels on the Software or any
copies thereof. You may not in any way, modify,
reverse engineer, decompile, disassemble or create
derivative works based on the Software (except to the
extent that this restriction is expressly prohibited by
law). You agree that you will not attempt to
circumvent, disable or modify any security technology
associated with the Software. You may use the
Page 25

Software only in a manner that complies with all
applicable laws in the jurisdictions in which you use
it, including, but not limited to, applicable restrictions
concerning copyright and other intellectual property
rights and/or the export control regulations.
Some of the Software packaged with your Kyocera
device may be provided by third parties (“Third Party
Software”). Third Party Software may also be
available from third party content distributors such as
application stores. Third Party content may be
subject to different or additional terms and conditions
as determined by the Third Party Software provider.
THIRD PARTY SOFTWARE IS NOT A KYOCERA
PRODUCT. KYOCERA IS NOT RESPONSIBLE FOR
AND HAS NO LIABILITY WITH REGARD TO THIRD
PARTY SOFTWARE.
Open Source Software: The Software contains
certain open source software which may be subject
to the GNU General Public License (“GPL”), GNU
Library/ Lesser General Public License (“LGPL”) and/
or other copyright licenses, disclaimers and notices
(“Open Source License Terms”). The applicable Open
Source License Terms for the corresponding Open
Source Software are reproduced and available at
http://www.opensource.org/licenses
the Open Source License Terms regarding your rights
under such licenses to the Open Source Software. To
the extent any such agreement requires that Kyocera
provide you the rights to copy, modify, distribute or
otherwise use any Open Source Software that are
inconsistent with the limited rights granted to you in
this Agreement, then such rights in the applicable
Open Source License shall take precedence over the
. Please refer to
rights and restrictions granted in this Agreement, but
solely with respect to such Open Source Software.
Disclaimer of Warranty and Liability: THE
SOFTWARE IS PROVIDED “AS IS” WITHOUT
WARRANTY OF ANY KIND. KYOCERA FURTHER
DISCLAIMS ALL WARRANTIES, INCLUDING
WITHOUT LIMITATION ANY IMPLIED WARRANTIES
OF MERCHANTABILITY, FITNESS FOR A
PARTICULAR PURPOSE, NONINFRINGEMENT,
TITLE, ACCURACY, CORRESPONDENCE WITH
DESCRIPTION AND SATISFA CTOR Y QU ALI TY. TO
THE MAXIMUM EXTENT PERMISSIBLE BY LAW,
THE ENTIRE RISK ARISING OUT OF THE USE OR
PERFORMANCE OF THE SOFTWARE REMAINS
WITH YOU. IN NO EVENT WILL KYOCERA, ITS
EMPLOYEES, OFFICERS, SHAREHOLDERS,
LICENSORS, SUPPLIERS, CARRIER OR
DISTRIBUTOR CUSTOMERS OR AFFILIATES BE
HELD LIABLE FOR ANY CONSEQUENTIAL,
INCIDENTAL, INDIRECT, S
OTHER DAMAGES WHATSOEVER (INCLUDING,
WITHOUT LIMITATION, DAMAGES FOR LOSS OF
BUSINESS PROFITS, BUSINESS INTERRUPTION,
LOSS OF BUSINESS INFORMATION, OR OTHER
PECUNIARY LOSS) ARISING OUT OF THIS
AGREEMENT OR THE USE OF OR INABILITY TO
USE THE SOFTWARE, WHETHER BASED IN
CONTRACT, TORT (INCLUDING NEGLIGENCE),
STRICT PRODUCT LIABILITY OR ANY OTHER
THEORY, EVEN IF KYOCERA HAS BEEN ADVISED
OF THE POSSIBILITY OF SUCH DAMAGES AND
EVEN IF ANY LIMITED REMEDY IS DEEMED TO
HAVE FAILED ITS ESSENTIAL PURPOSE.
KYOCERA’S TOTAL LIABILITY FOR ANY DAMAGES
PECIAL, PUNITIVE, OR
End User License Agreement 25
Page 26

UNDER THIS AGREEMENT SHALL NEVER EXCEED
THE PURCHASE PRICE YOU PAID FOR THE
KYOCERA DEVICE.
No software is fault free. The Software is designed
for use in systems that do not require fail-safe
performance. You may not use the software in any
device or system in which a malfunction of the
software would result in foreseeable risk of loss,
injury or death to any person. This includes operation
of nuclear or infrastructure facilities, medical
equipment, aircraft navigation or communication
systems or use in risky or dangerous situations or
environments.
Consent to Use of Data: You agree that Kyocera, its
affiliates and its designated agents may collect and
use technical and related information, gathered in
any manner, as part of its product support services.
Kyocera, its affiliates and designated agents may use
this information solely to improve its products or to
provide customized services or technologies to you.
Kyocera will collect and use this information in
accordance with its privacy policy and accordance
with applicable data protection laws. Kyocera, its
affiliates and designated agents may disclose this
information to others, but not in a form that
personally identifies you.
Modification of Software and Terms of Use:
Kyocera reserves the right to from time to time
modify any portion of the Software. Kyocera may be
required to take these actions due to restrictions
from third party licensors or due to safety or security
concerns or government restrictions or court orders.
26 End User License Agreement
Kyocera reserves the right to modify the terms of this
Agreement at its sole discretion. Any such
modification will be effective upon Kyocera or a
Kyocera affiliate or agent sending notice to you by
email, text message, other electronic communication
or postal mail. Your continued use of the Software
after such notice will constitute your binding
acceptance of the Agreement as revised.
Additionally, some Software may be subject to
different or additional terms presented to you through
a separate click-through or other type of agreement
or notice prior to your use of such Software.
Termination: This License Agreement will
automatically terminate without notice from or action
by Kyocera if you fail to comply with any term hereof.
Governing Law: This Agreement is governed by the
laws of State of California except any conflict of law
provisions. The U.N. Convention on Contracts for the
International Sales of Goods is hereby excluded in its
entirety from this Agreement.
Severability: If any provision of this Agreement is
found to be invalid, illegal or unenforceable, the
validity, legality or enforceability of the remaining
provisions will not in any way be impacted or
impaired.
Entire Agreement: By using or otherwise accessing
the Software, you agree that this Agreement sets
forth the entire agreement between you and Kyocera
with regard to the Software and supersedes all prior
agreements, notwithstanding the terms of any such
agreements.
 Loading...