

KYMCO SPADE 150i, RT30HE Owner's Manual
SPADE 150 Fi Series
Scooter
Owner’s Manual
Battery & EFI Damage Alert
WARNING
To avoid damage from the scooter's electronic fuel
injection system, do not remove or install a battery
wire when the ignition switch is at the "ON" position.
Read this manual carefully
This Owner’s Manual contains important information on safety, operation and
maintenance of your KYMCO SPADE 150i scooter. Anyone who operates your
scooter should carefully read and understand the contents of this manual before
riding the scooter. For your safety, understand and follow all of the warnings contained
in this Owner’s Manual and the labels applied to your scooter. This Owner’s Manual
should be considered a permanent part of the vehicle, keep it with your scooter at all
times. ON- ROAD USE ONLY This scooter has been designed to be used on the road.
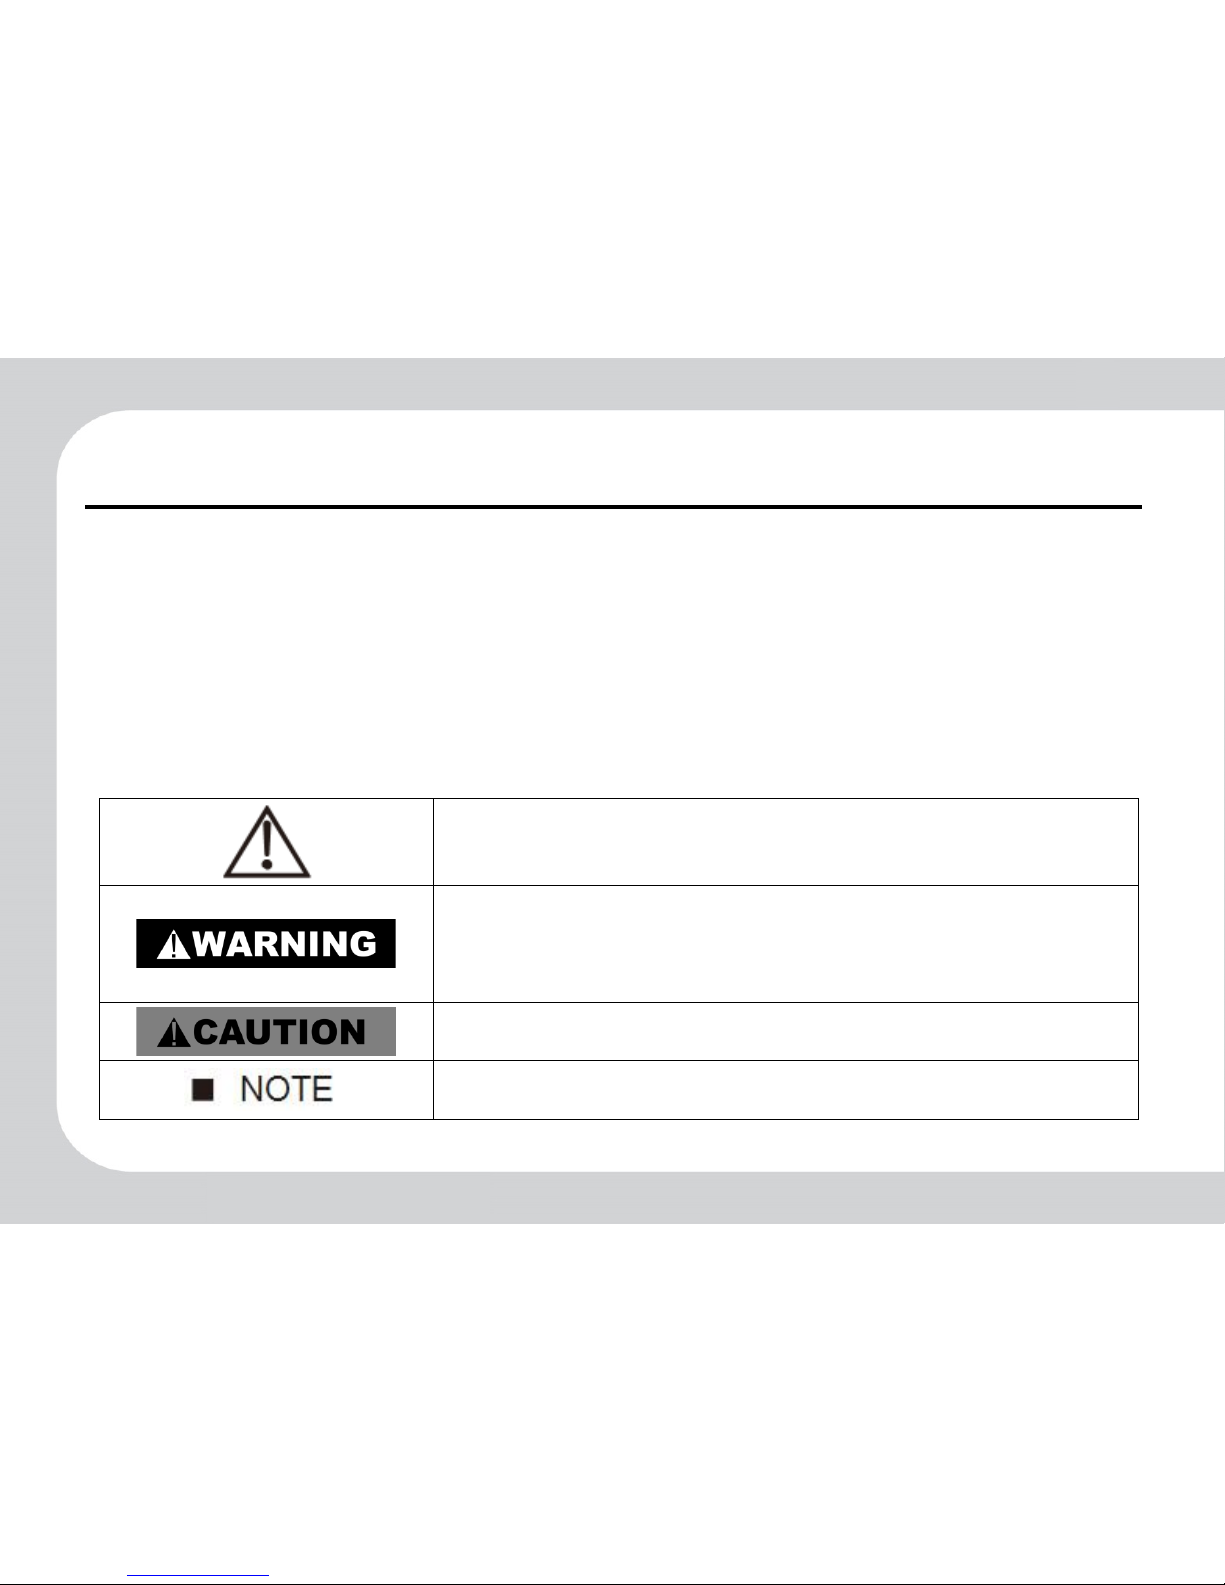
Particularly important information is called out in this manual by the
following icons and notations:
The SAFETY ALERT symbol with the exclamation
point in the triangle means ATTENTION! BE ALERT!
YOUR SAFETY CAN BE AFFECTED.
Failure to follow instructions associated with a
WARNING symbol could result in severe injury or
death to the rider, a passenger, a bystander, or a
person inspecting or repairing the scooter.
A CAUTION symbol indicates that special precautions
must be taken to avoid damaging the scooter.
The NOTE symbol indicates key information about a
procedure or to clarify an operation.
Important Information
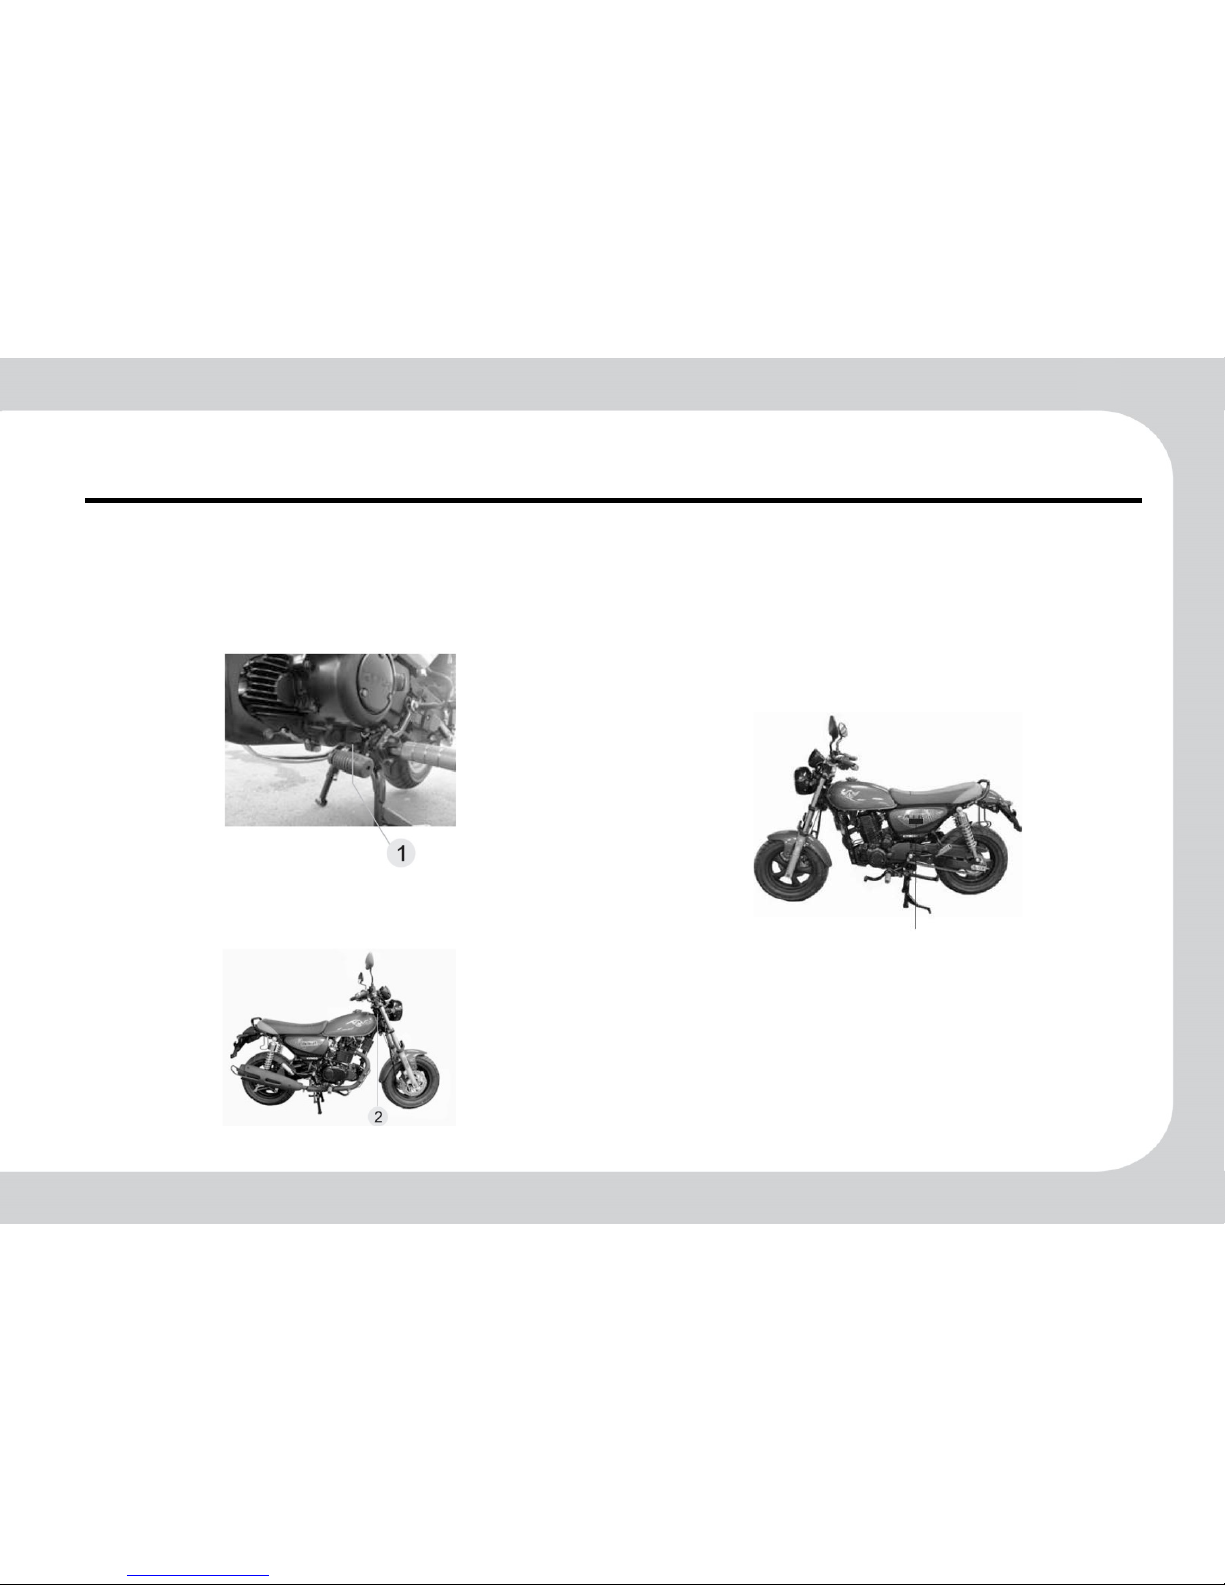
Vehicle ID Number
1. Engine Number:
Engine number of this model is imprinted
underneath the left crank box as shown in Fig.
(1):
2. Chassis Number:
Chassis number is imprinted on the Frame as
shown in Fig. (2):
Theft Prevention Branding
Coping with theft prevention policy of the
government to prevent your motorcycle
from
being stolen,
the vehicle is branded with a theft
preventive
code, identical to Engine Number,
(see Figure below) at proper positions.
◎
This figure is an example, actual location
depends on the physical vehicle.
Theft Prevention ID
Contents
1. Precautions on Safe Driving
1
2. Motorcycle Parts
2
3. Operation of Dashboard and
Controller Functions
3
4. Starting the Engine
4
5. Proper Riding Method
5
6. Checks Before Riding
6
7. Periodical and Simplified
Maintenance and Troubleshooting
7
8. EPA Authorities and Maintenance
8
9. Specifications
9
The actual product must prevail if any content in this manual differs
from the actual product.
1
1.Precautions on Safe Driving
1-1. Checks before driving
1-5. Clothing
1-6. Loading
1-1
1
Checks before driving
1. Peruse the User Manual and Precautions.
2. Driver must wear a helmet, gloves, goggles, etc.
3. Avoid wearing clothes that may impede drive safety
(such as long skirt, flared trouser s, e tc . ).
4. Excessively wide and loose sleeves may be caught b y
the brake lever and is extremely dangerous.
5. Operation of brake lever must in no case be obstructed.
6. Daily and regular checks are necessities.
7. Visually check tire externals for any foreign object or
abnormal wear.
8. Exhaust gas from the muffler contains carbon
monoxide which is harmful to human body.
9. Star t the engine only in a well ventilated loc a tion.
1-2
1
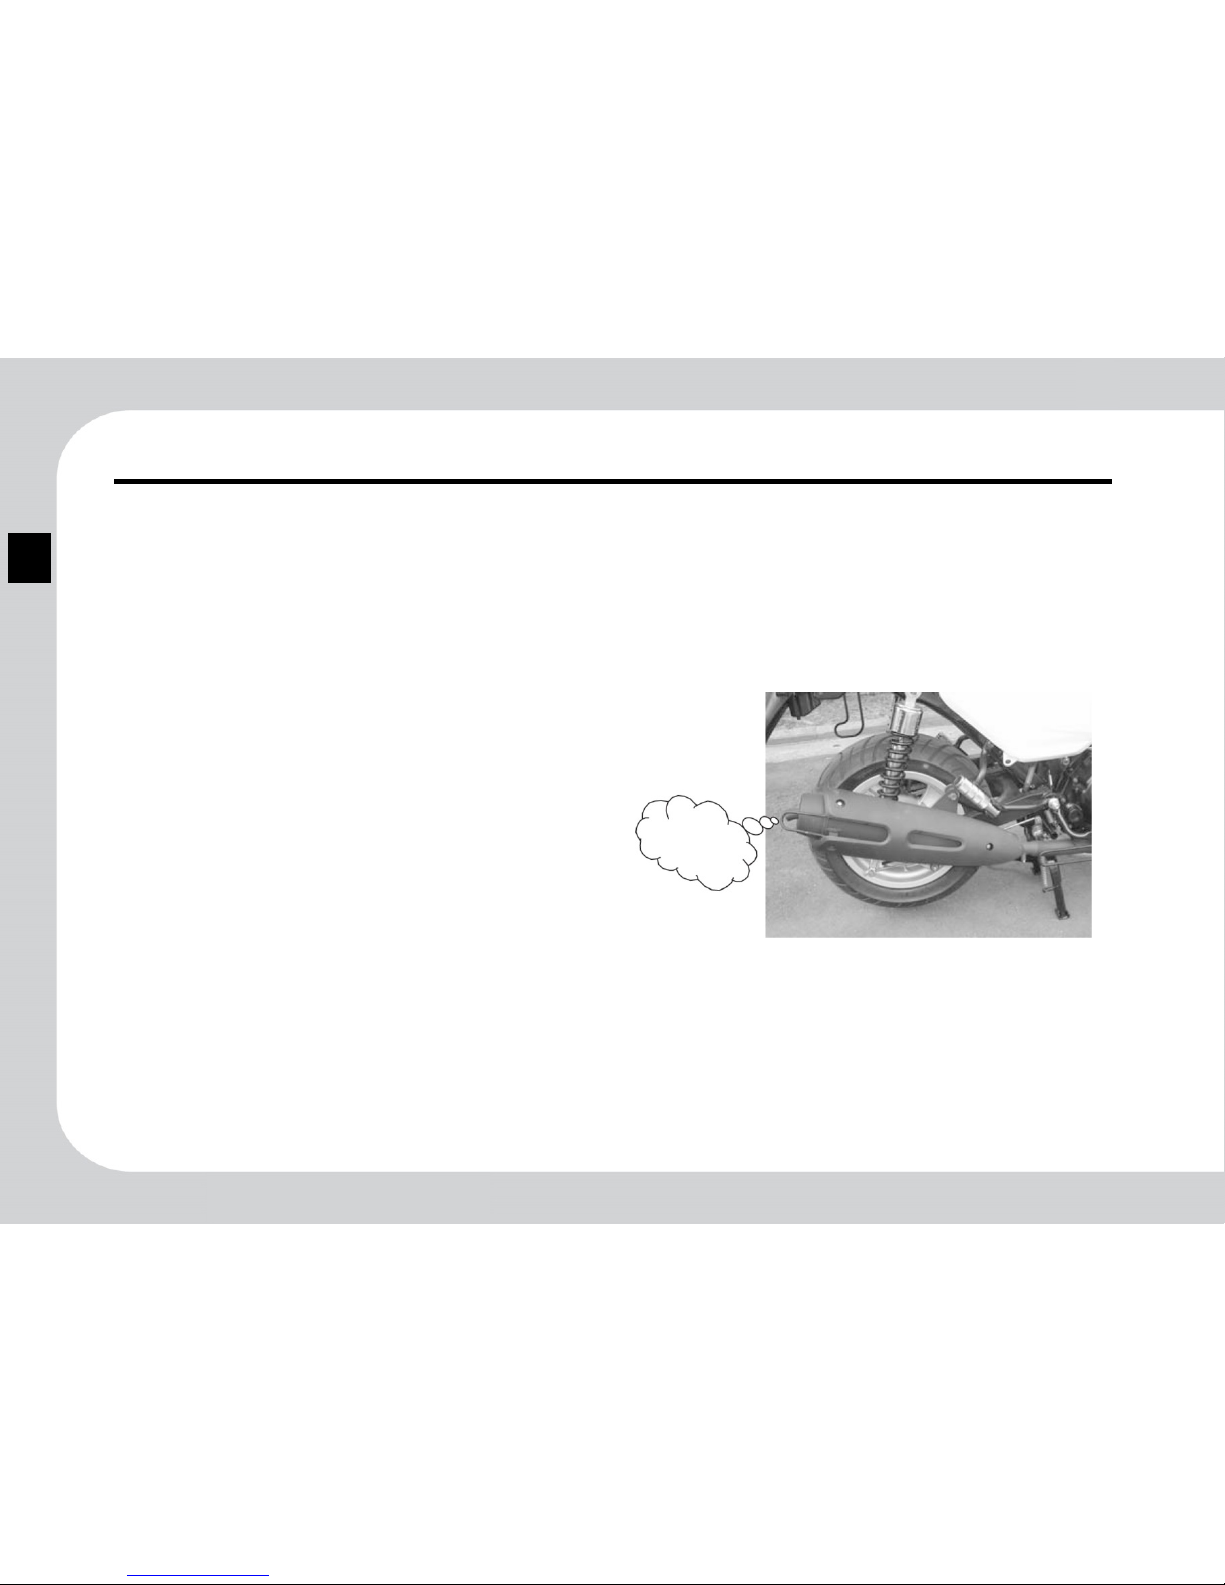
1. T he exha ust muffler is very hot after the engine stop s,
avoid touching it.
2. Avoid dry grasses or flammables when parking the
motorcycle, for the prevention of fire risks.
3. The exhaust pi pe is very hot when parking the vehicle;
make sure the exhaust pipe faces a wall or away from
any pedestrian, to avoid burn injury.
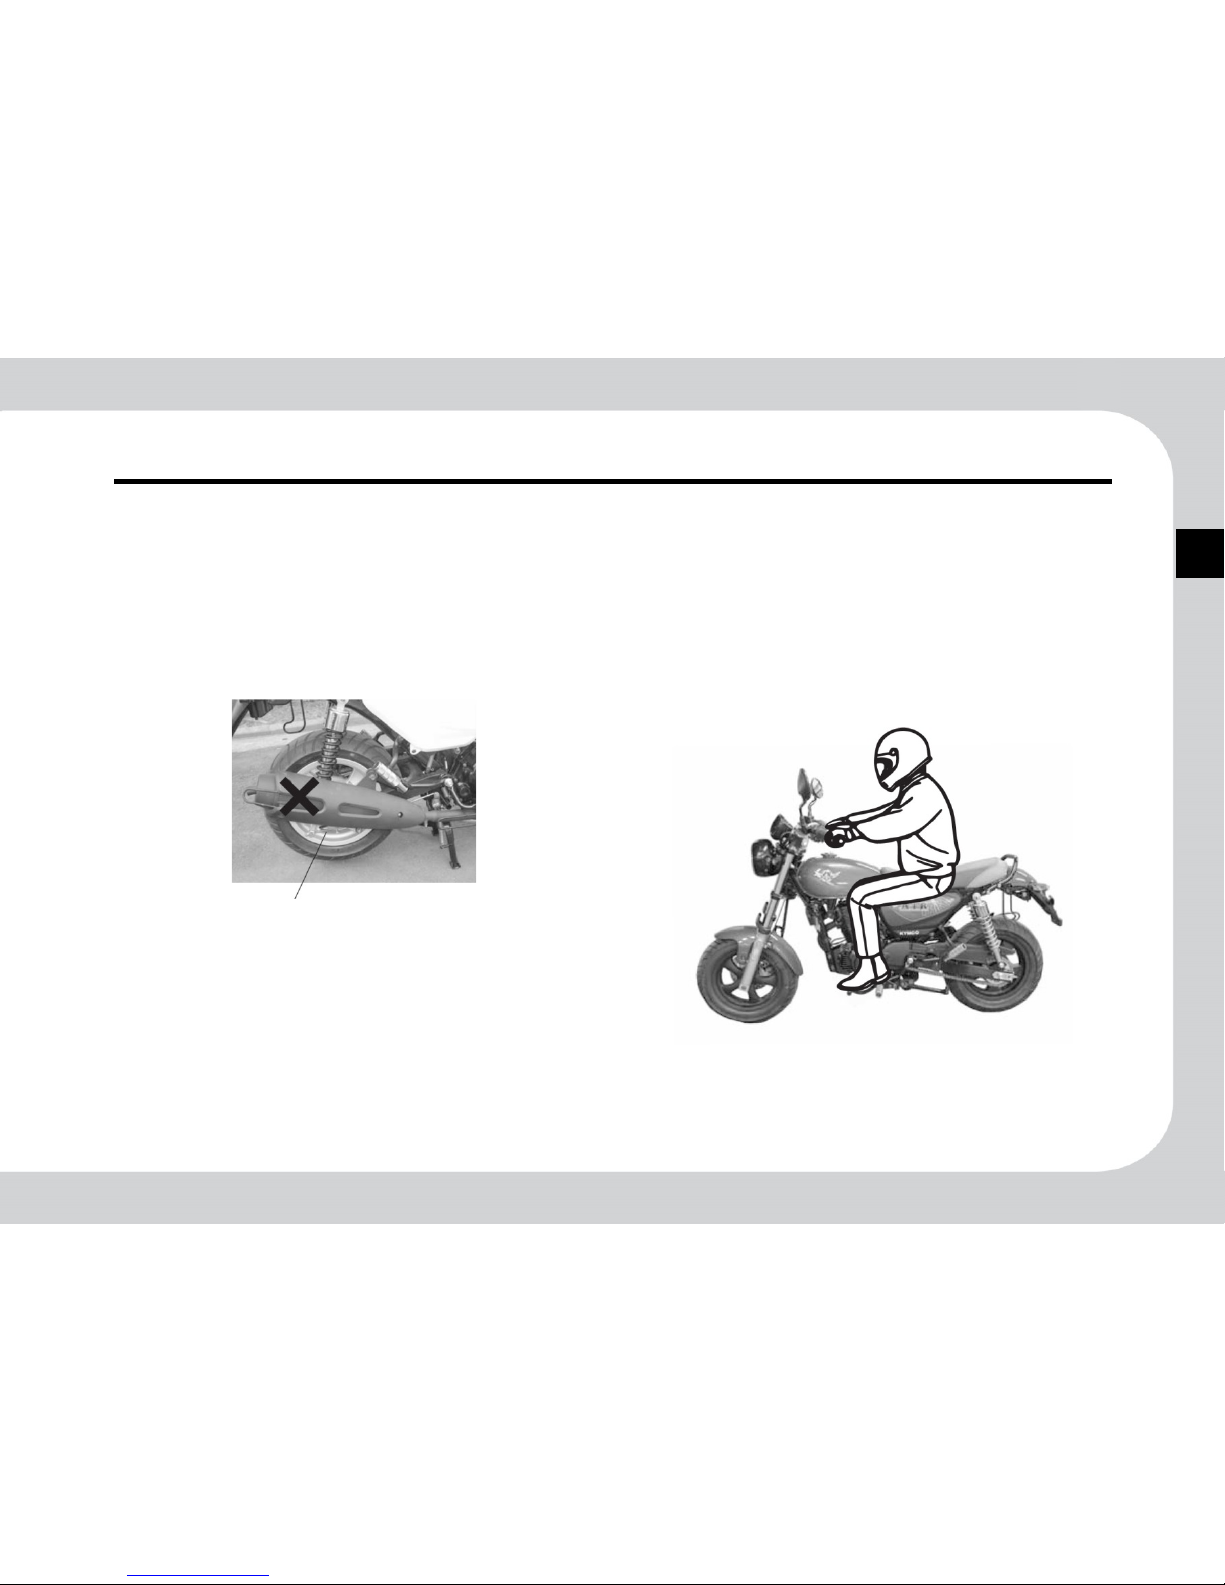
4. While driving, hold handlebars with both hands and
place feet on footrests; th e rear rider must hold the front
rider’s waist with both arms and put feet on rear
footrests.
5. The rear rider must avoid touching the hot exhaust pipe
while mounting/dismounting, to prevent from being
burnt.
HOT, do not touch.
1-3
1
1. Making an acute turn or driving with single hand is
strictly forbidden.
2. Abide by traffic rules.
3. Op erability of the handle varies in conditions with or
without an extra load.
4. Avoid overloading when carrying obj ects. Make sure
that objects are fixed properly. Extra care m ust be taken
for a safe driving.
Small hold is limited for a
load of 1kg maximum.
1-4
1
1. N ever smoke when filling f uel.
2. Stop engine when filling fuel.
3. Vehicle functionalities are related to its structure;
arbitrary modification may deteriorate operability of
vehicle, causing shortened service life and obstructed
driver safety.
4. Arbitr ary modification of a vehicle is an illegal ac tion
forbidden by law. Never try to make any modification.
5. Modification of vehicle may result in a nullified
warrant.
1-5
1
Caution
Natural mental relaxation and comforta ble clothes are
essentials to a safe driving.
Abide by traffic rules, do not be anxious,
relax and
drive carefully.
Do not wear loose clothing that may affect drive safety
and cause a danger. (e.g., long skirt
, flared trousers,
etc.)
The exhaust p ipe is extre mely hot when yo u drive or
within 30 minutes after driving the vehicle; avoid
touching it to prevent any burn injury.
Avoid dry grasses or flammables when parking the
vehicle, fo r the prevent ion of fire risks.
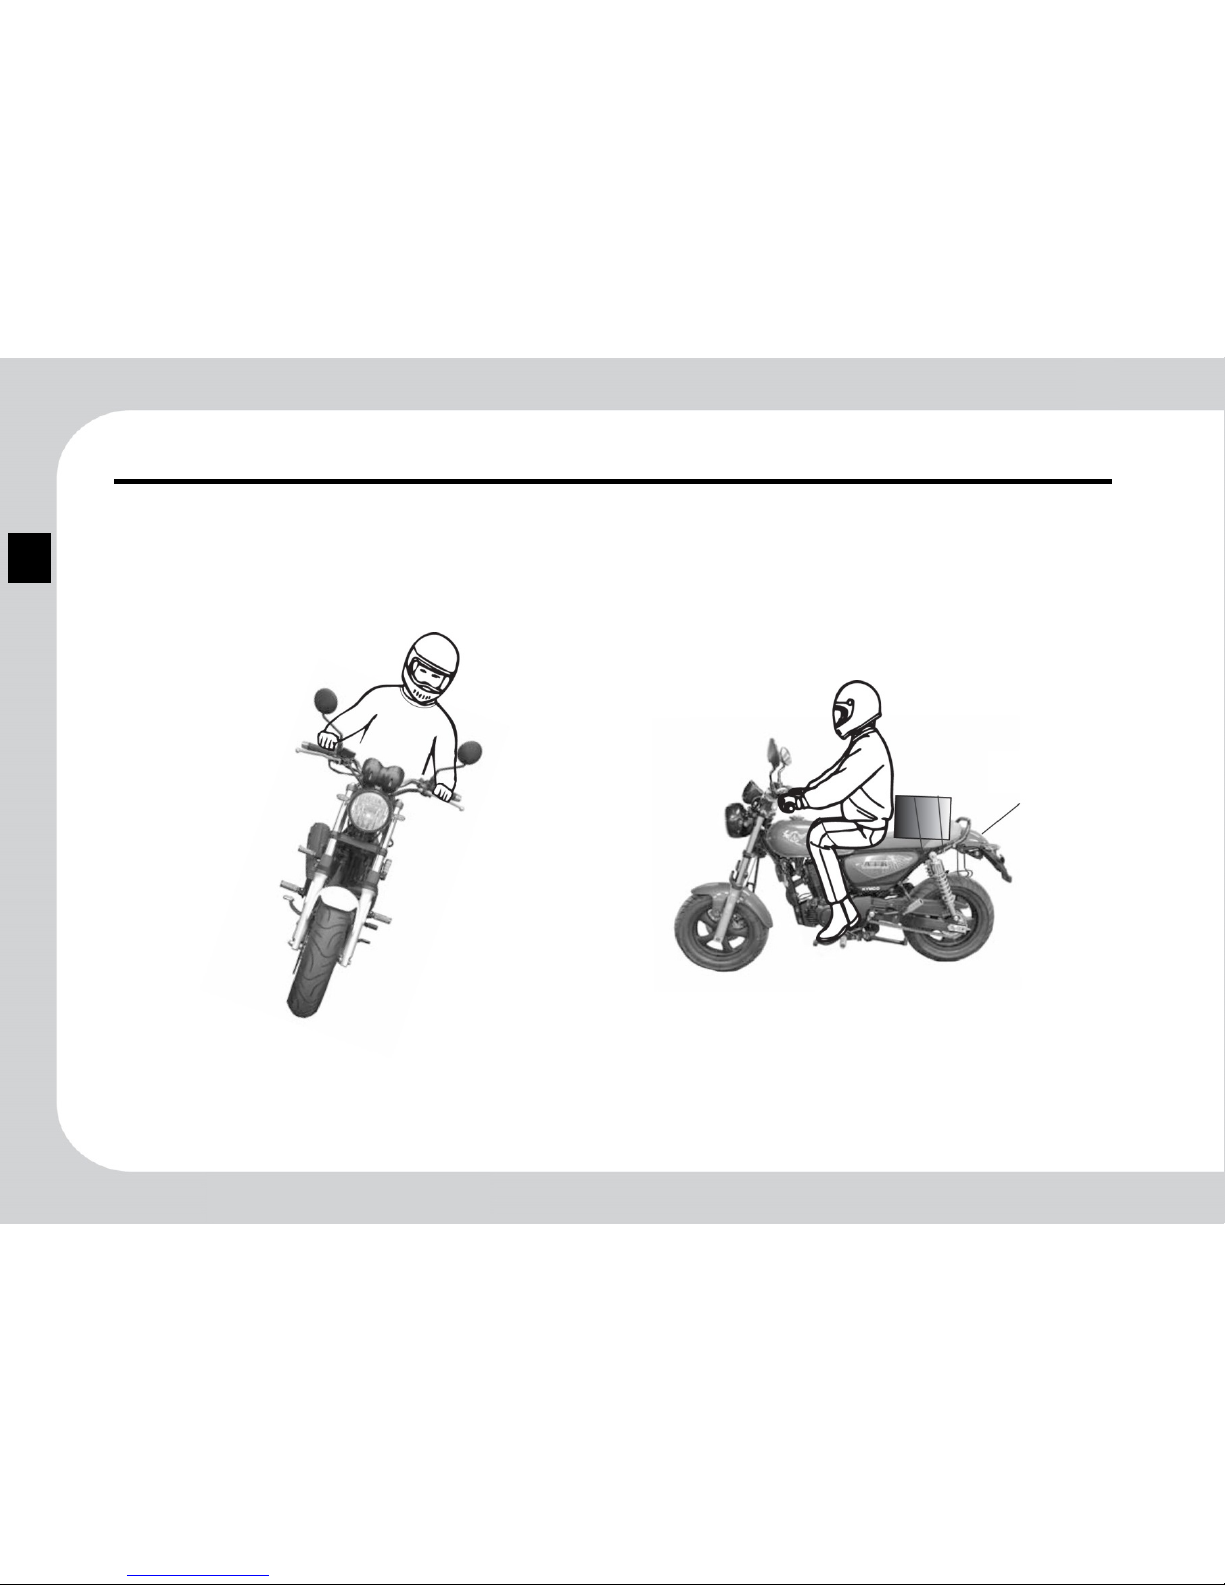
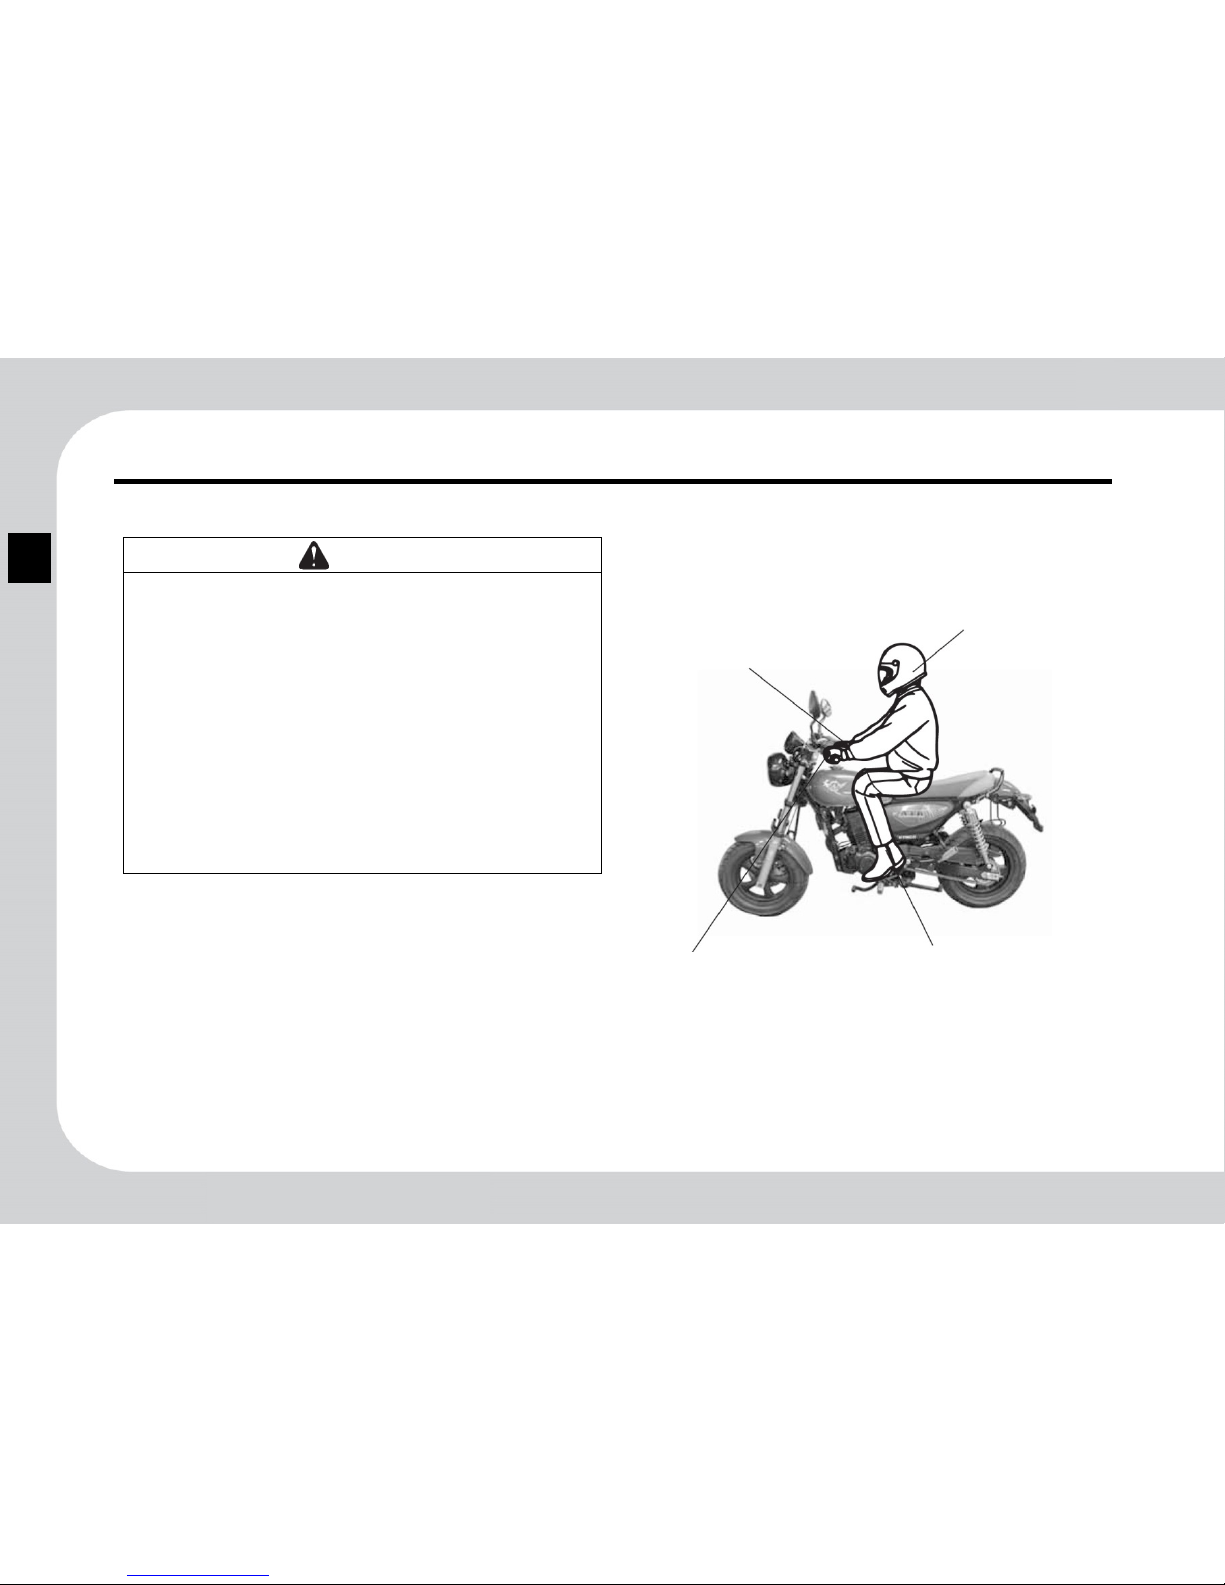
Clothing
Button up long sleeves,
snug tidily, prevent
cuffs from hooking on
the brake lever.
Buckle up c hin-belt
when wearing a
helmet.
Wearing flat shoes is
safer.
Hold the Handlebar with
both hands when riding.
Do not ride by single
hand for this is
extremely dangerous.
1-6
1
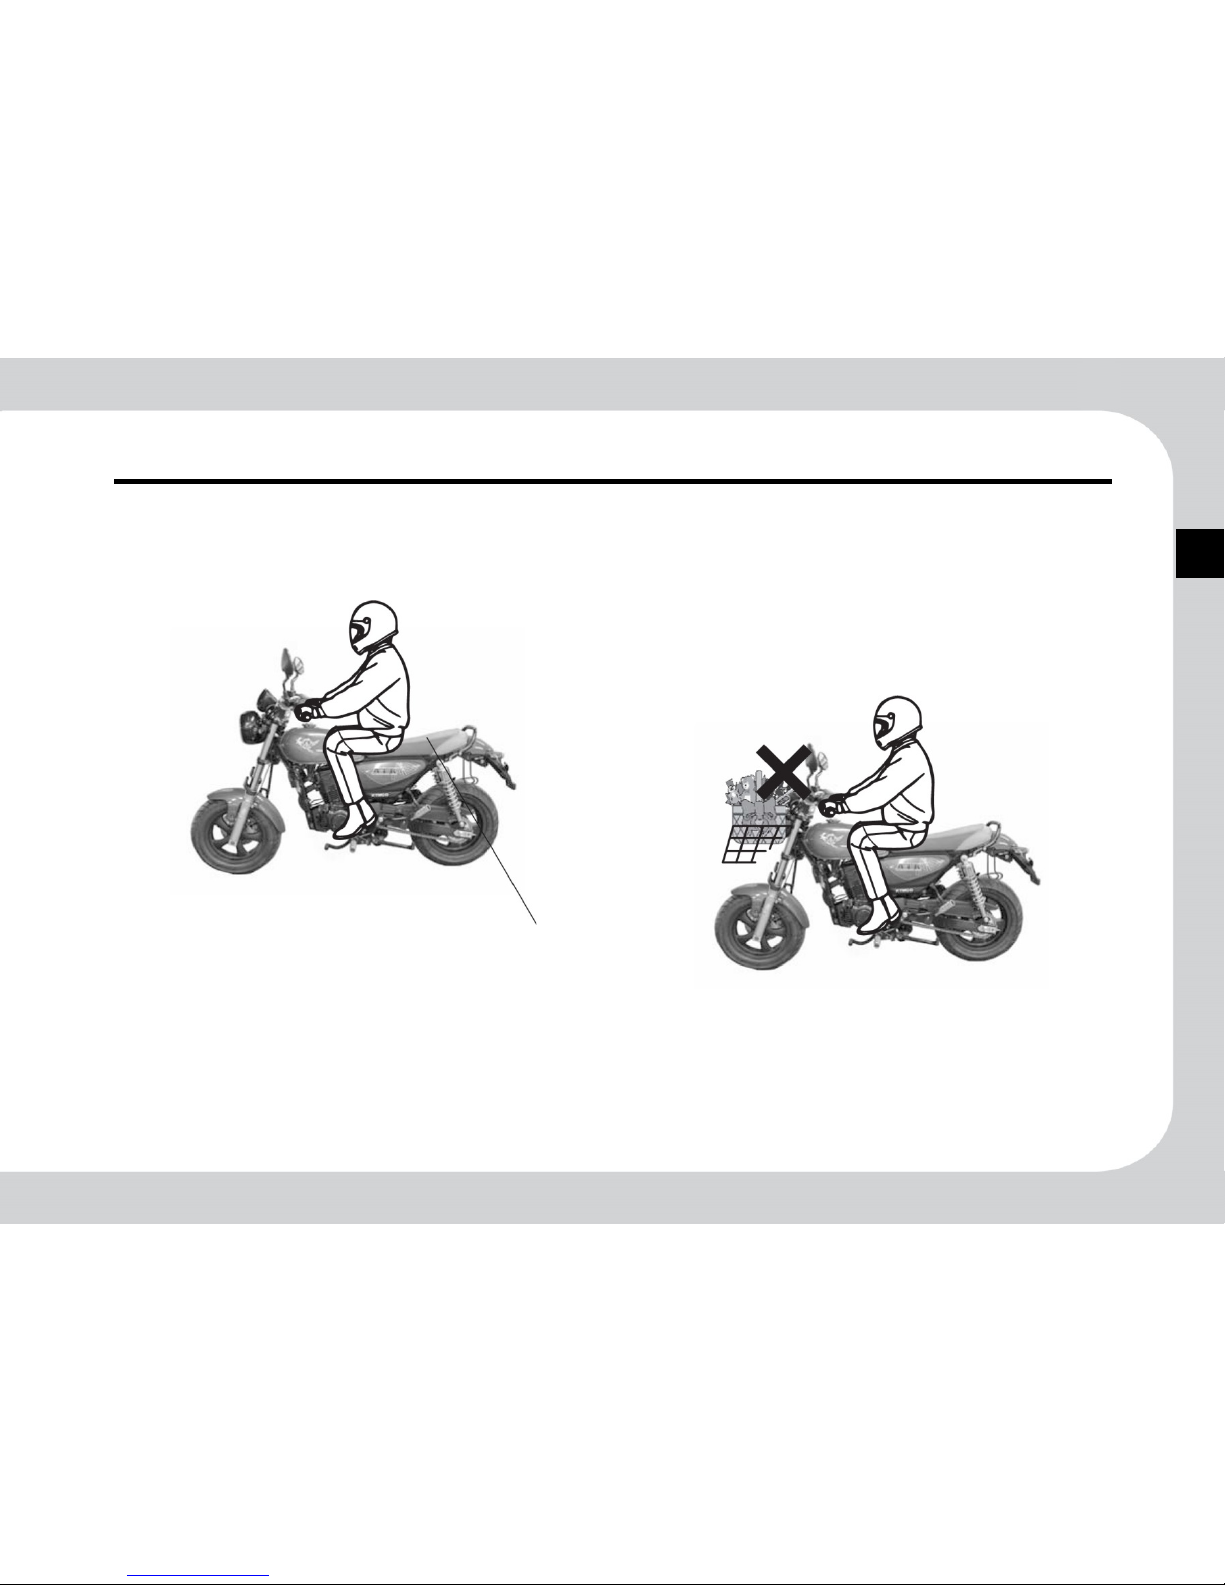
Loading
It is forbidden to install a carrying basket or bracket on
the front header. Carrying anything in front of the
vehicle will surly block the hea dlight and significant ly
affect driving safety.
Maximum loading of
front or re ar luggage
box is 5kg.


2
2. Motorcycle Parts
2-1. Right View
2-2. Left View

2-1
2
Right View
1. Headlight
2. Front RH winker
3. Steering stem lock
4. Horn
5. Head Light switch /
Starting Button
6. Tail light /Brake Light
7. Rear RH winker
8. Main Stand
9. Exhaust Muffler
10. Rear Brake Tread Lever
11.Front Brake tread Lever
※Your vehicle may differ from the picture depending on the model.
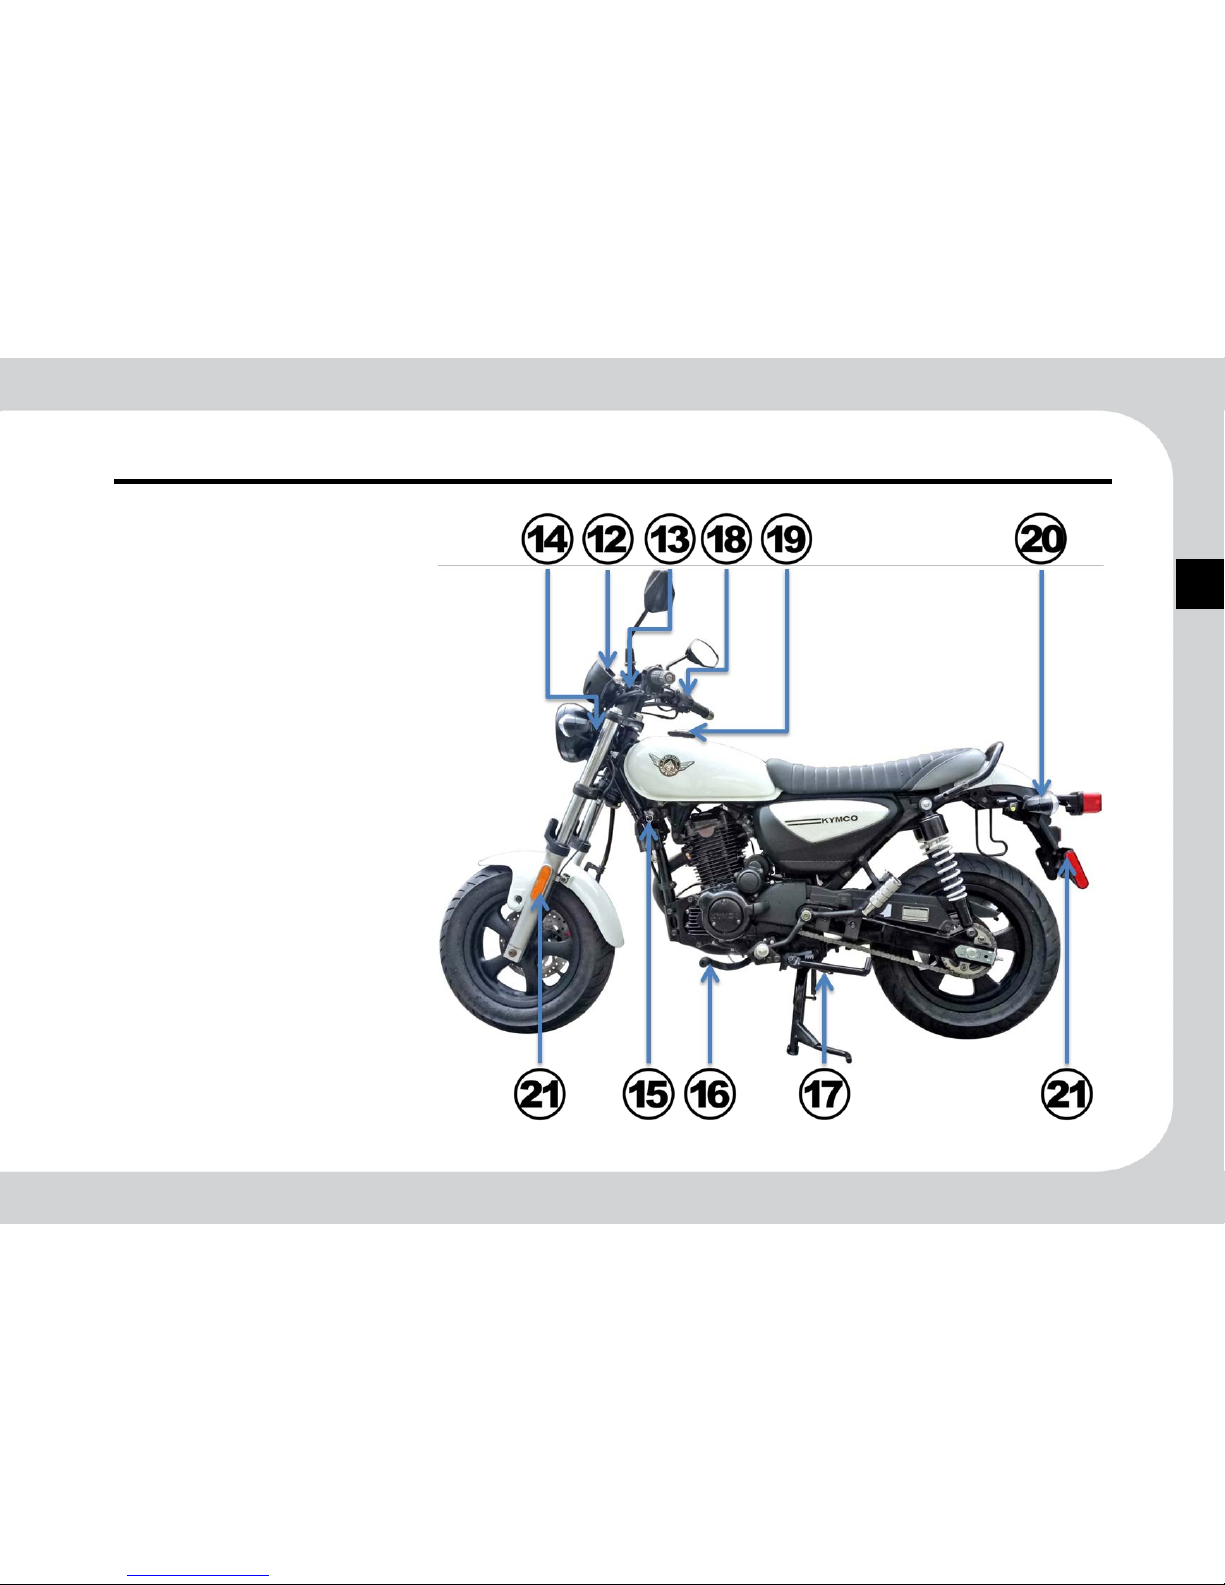
2-2
2
Left View
12. Meters
13. Clutch lever
14. Front LH winker
15. Main Switch
16. Gear Tread Lever
17. Side Stand
18. High/Low Beam Switch /
Winker Switch / Horn Button
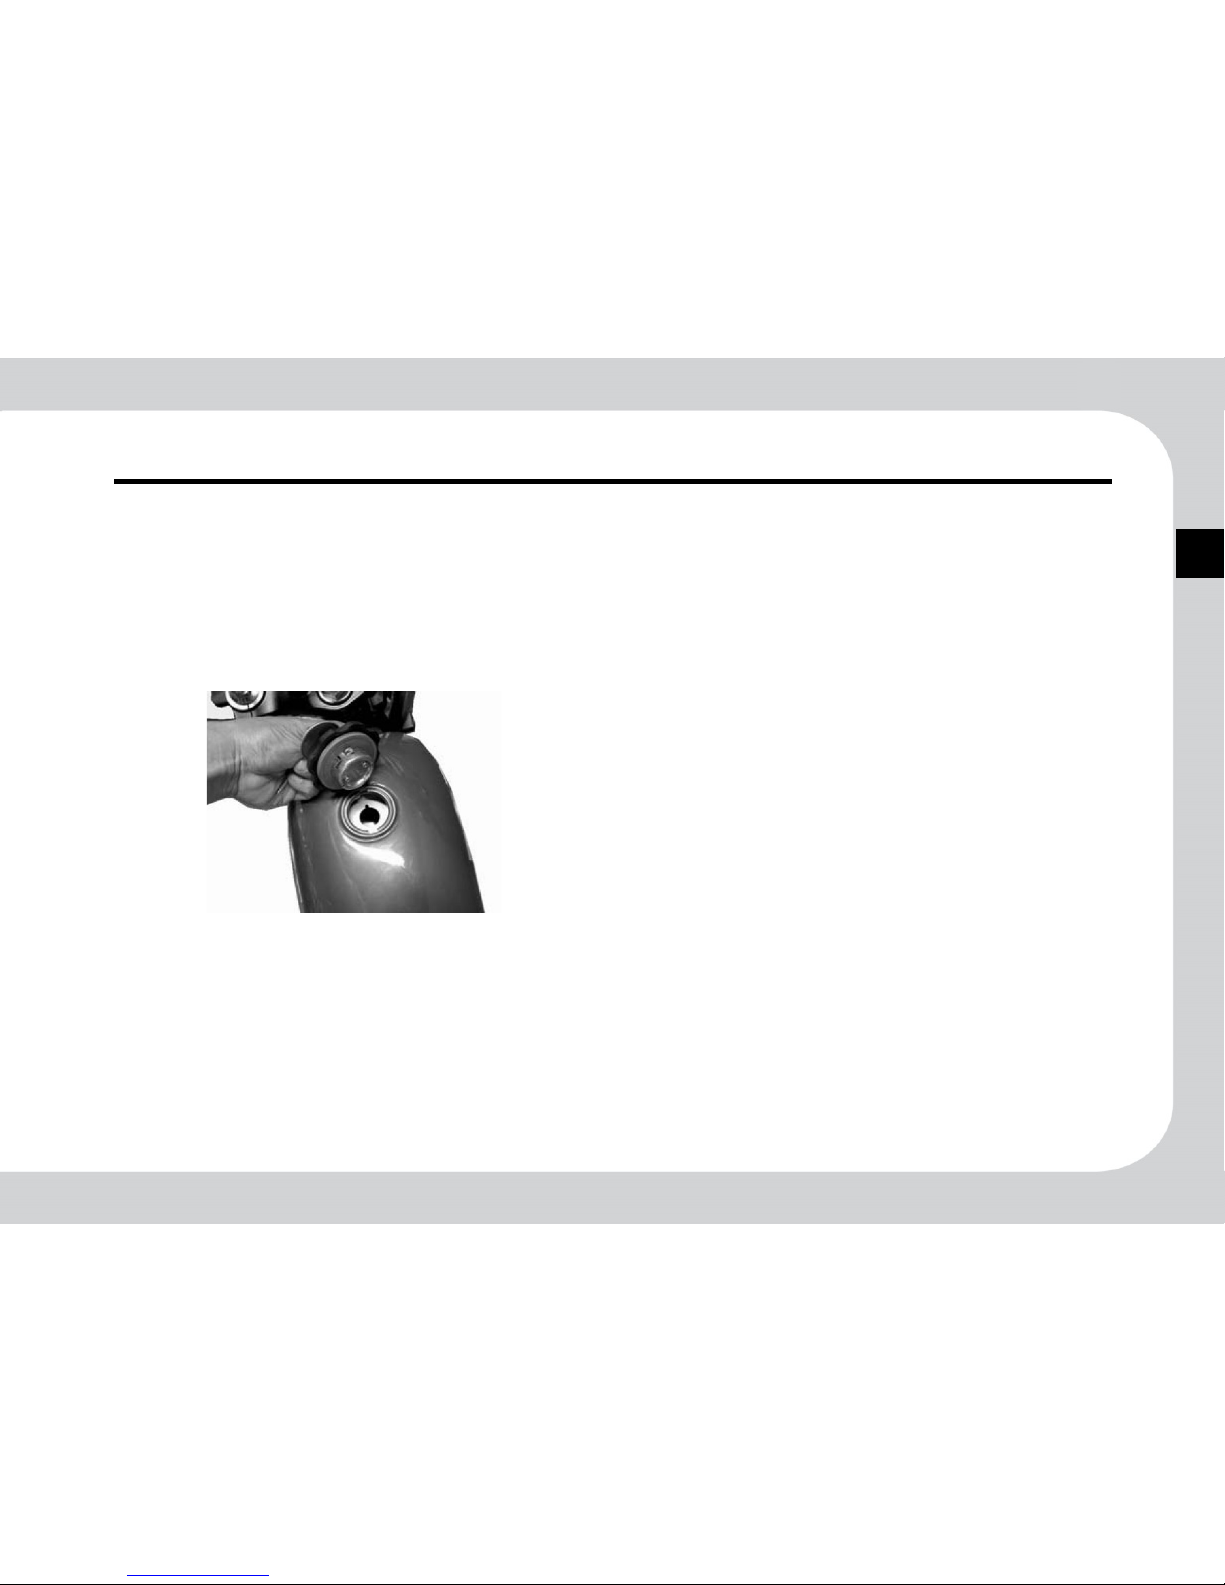
19. Tank Cap
20. Rear LH winker
21.
Reflex Reflector
※Your vehicle may differ from the picture depending on the model.

3
3. Operation of Dashboard and Controller Functions
3-1. Meters, Indicators
3-3. Main Switch
3-4. Steering Lock, Electrical Start
Button
3-5. Headlight Switch, Hi/Low
Beam Switch
3-6. Direction Light Switch, Horn
Button
3-7. Cell Phone Socket (12v)
3-1
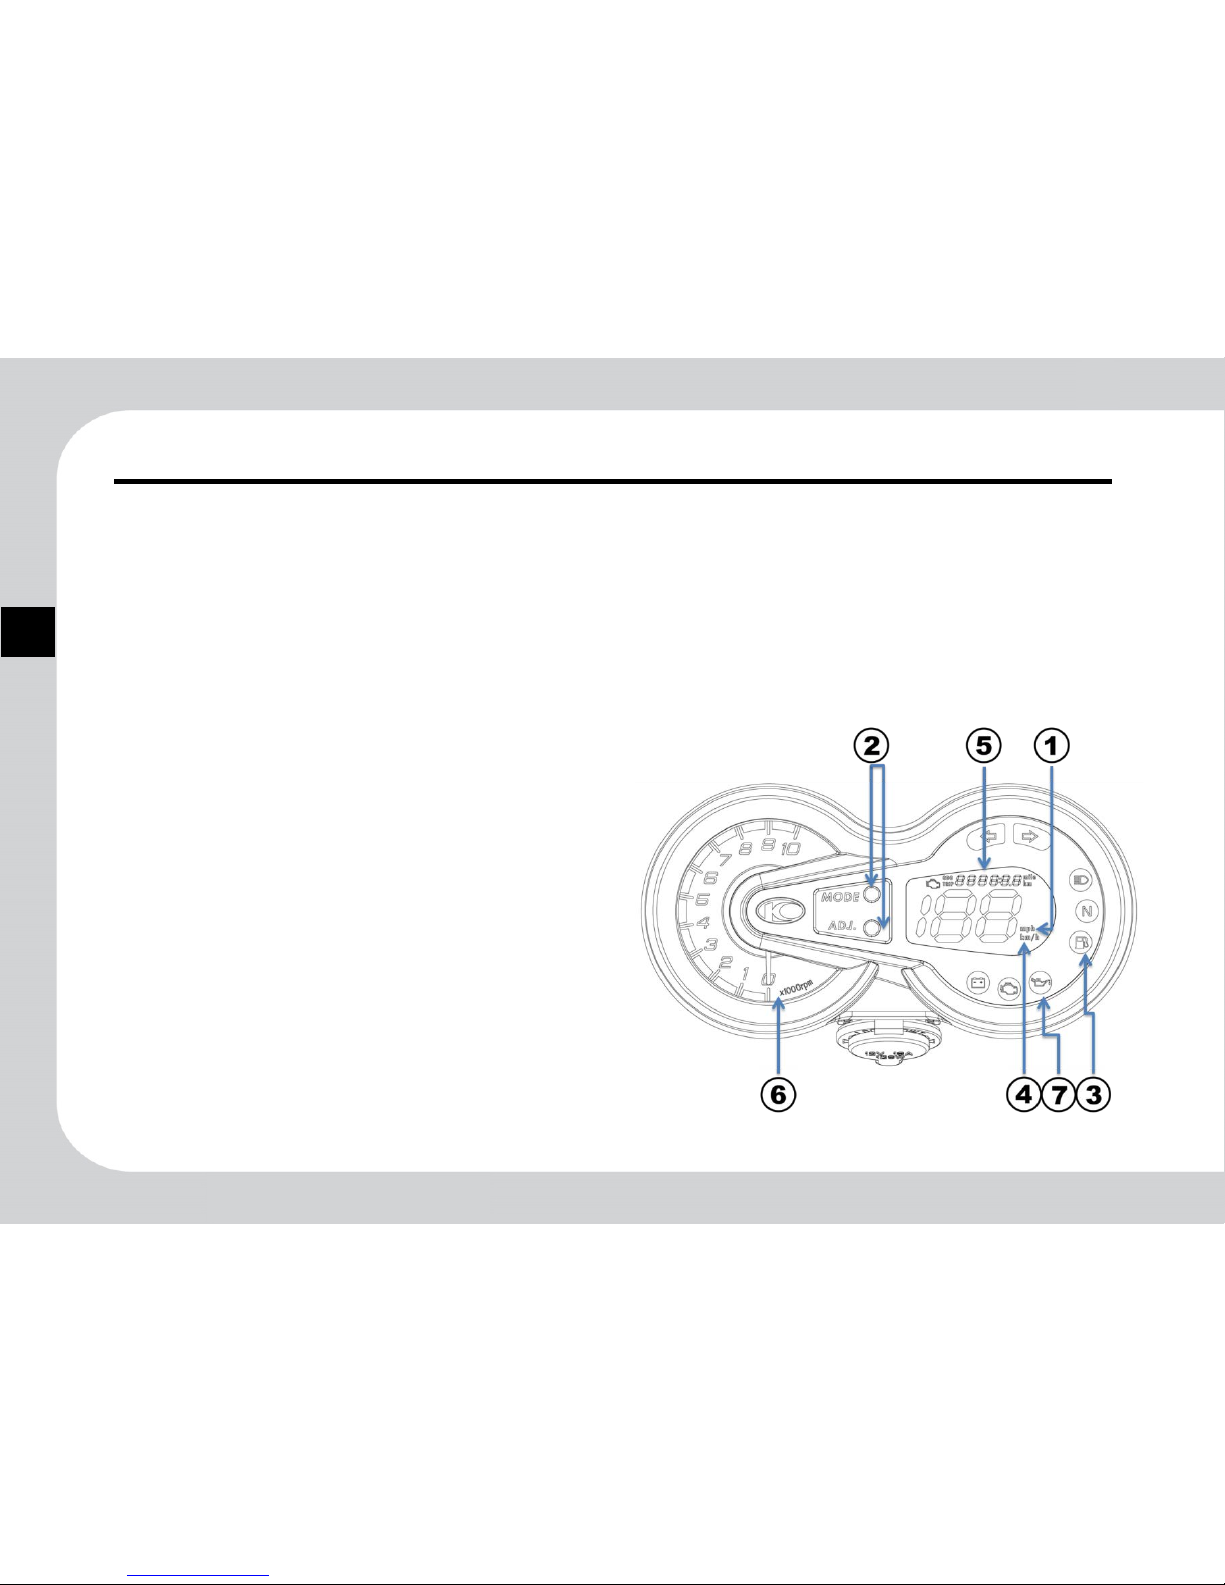
3
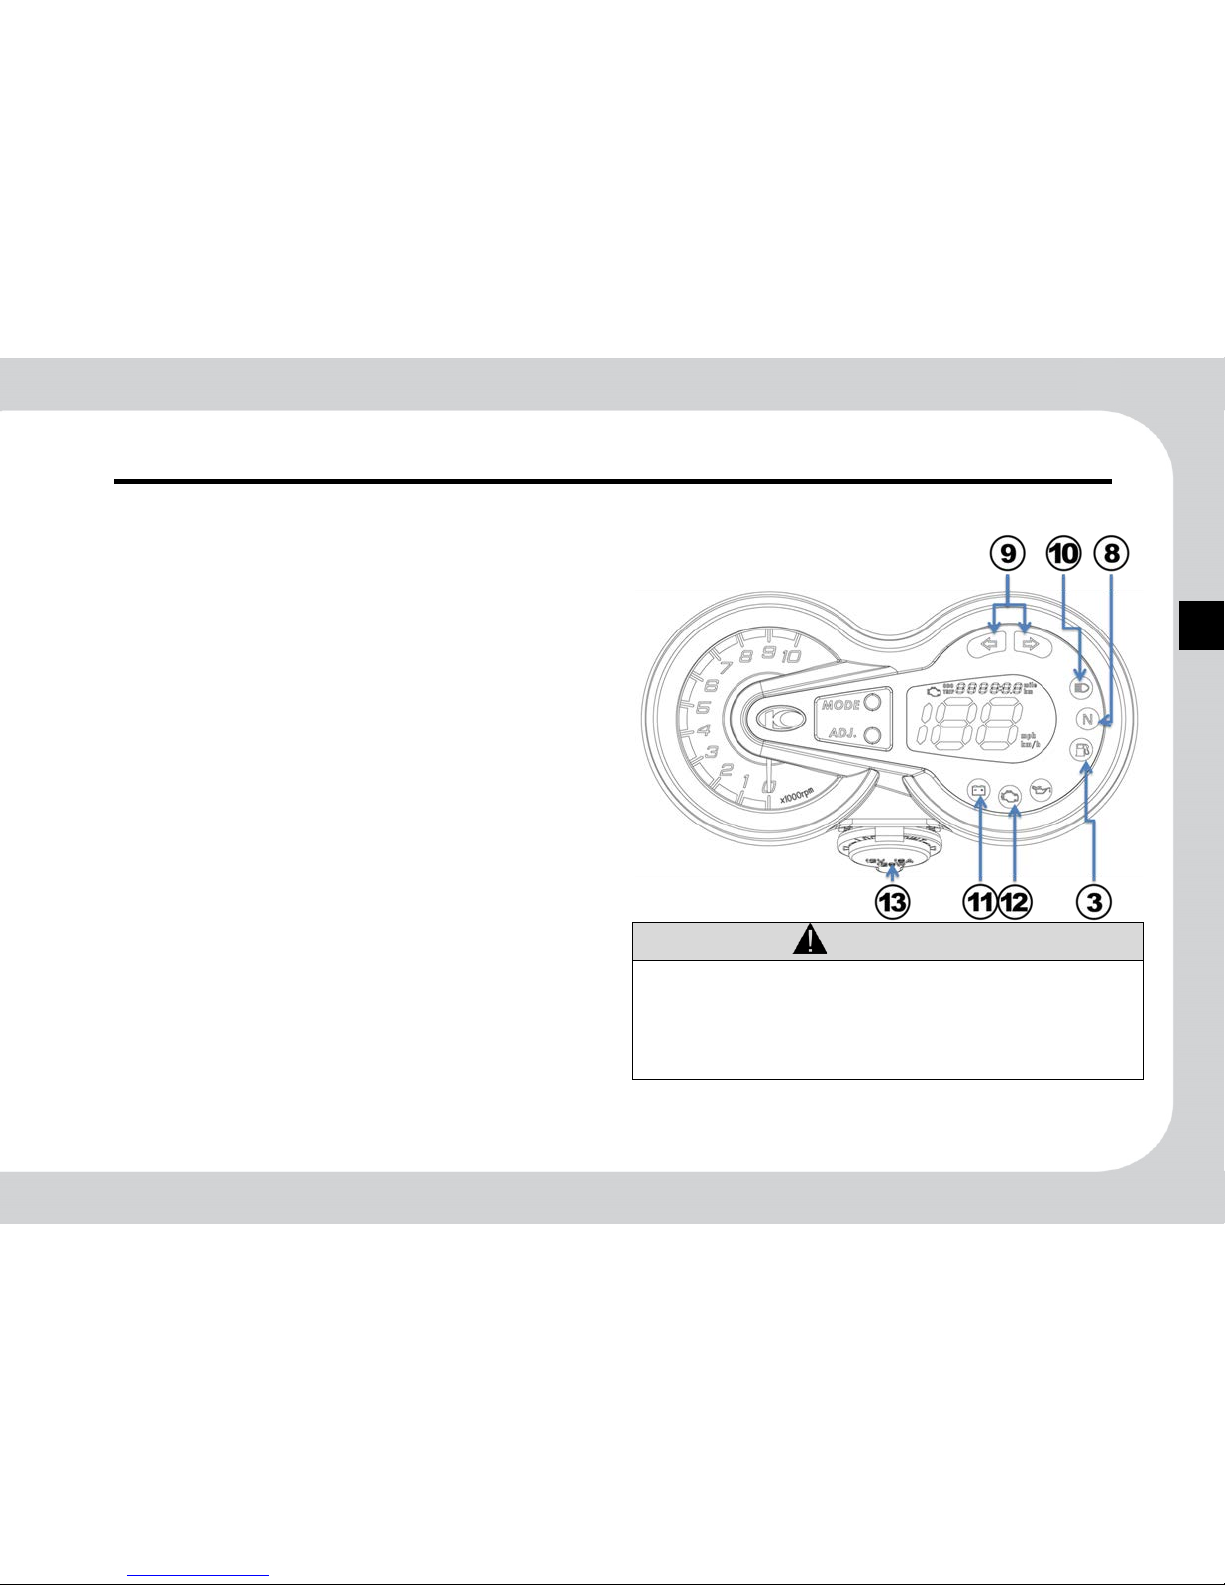
Dashboard
1.Speedometer (Mile):
Standard speed is in mile per hour (mph)
2.Adjustment Butt on:
For adjusting time and s etting odometer.
3.Fuel Replenishment Indicator:
Replenish wi th #92or #95 unleaded gasoline as soon
as possible when this indicator lights up (to prevent
from fuel pump damage caused by dry running).
4.Speedometer (Km):
Standard speed is in Km per hour (km/h).
5.Tripmeter:
Total travel in kph or mph.
*Zeroing of Travel Meter:
1. Pressing ADJ. button for about 2s to cycle among
the 3 modes: ODC→TRIP→Blank.
2. While in TRIP mode, press ADJ and MODE
buttons to zero the meter.
(EURO 4 models would not show code)
6.Odometer:
Indicates engine RPM, the reading must be multiplied
by 1000rpm.
7.Oil change indicator:
It lights up when you tra veled 2000km, ind icatin g an
oil change is required.
*Zero the oil change mileage:
1. Pressing ADJ. button for about 2s to cycle among
the 3 modes: ODC→TRIP→Blank.
2. While in Blank mode, press ADJ and MODE
buttons to zero the mileage; and the indicator will
go off.
3-2
3
8.Neutral gear indicator:
With engine in Neutral Gear, this indicator lights up
when power is switched ON.
9.LH/RH Direction Light Indicato r :
This indicator blinks when dir e c tion light is activated.
10.High Beam Indicator:
Turn on the Headlight for nighttime driving. Left
Handlebar Switch allows control o f High/Low Beam
switchover. This indicator lights up in High Beam
mode.
11.Engine Inspection Indicator:
It lights up for 2s after KEY ON and then goes off
automatically, indicating the vehicle is normal. If it
fails to light up for 2s after KEY ON, or lights up
constantly or blinks after 2s, it is indicatin g that the
vehicle is faulty; you need to go to a service center for
service.
12.Battery Low Indicator:
This indicator lights up after starting if battery power
is weak, indicating a check of charging system or
battery replacement is required. This indicator must go
off immediately after starting; if it stays lighting up
during driving, go to a KYMCO dealer for checkup.(EURO 4 models would keep lighting)
13. Cell Phone Socket (12v)
CAUTION
When Fuel Indicator on the Fuel Meter lights up,
replenish wit h # 9 2 or #95 unleaded gasoline as soon as
possible.
When Battery Indicator lights up, the battery is weak
and immediate check-up and/or recharge is required.
3-3
3
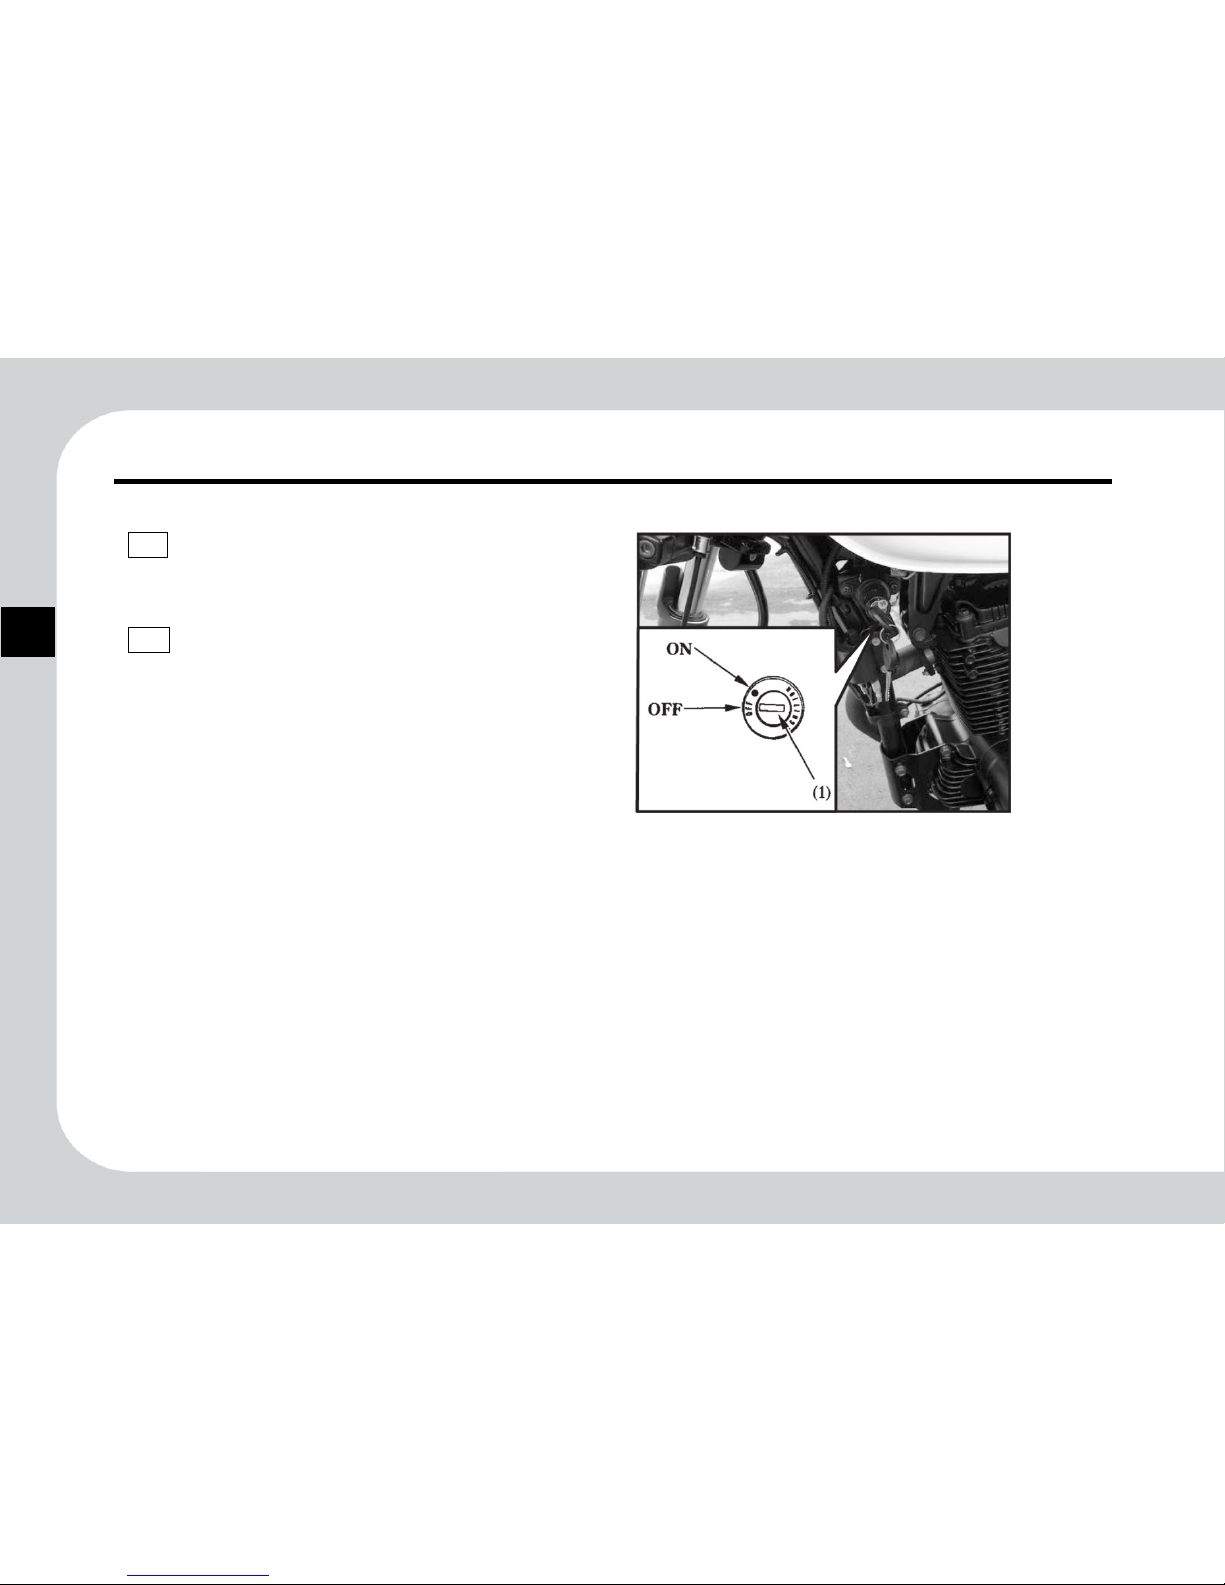
Main Switch 1
OFF
● At this position, engine electrical power is
cut off, engine stops.
● You may remove the key when stopped.
ON
● At this position, engine electrical power is
connected; you can start the engine.
● The key sta ys in when drivi ng, and cannot
be taken out.
 Loading...