

Page 1

LaserFAX 3.5
The complete stand-alone and network fax solution
Minoltafax fax machines
Develop Defax fax machines
Device Guide
Connecting office equipment to computer systems world wide
Copyright © 1998 Wordcraft International Limited
Page 2
Minoltafax 1200 and 1300 fax machines
Defax 2200 and 2300 fax machines
The fax machine is a Cl ass 1 compatible device. You should connect the fax machine to your PC
using anRS232C serial cable. You may connect the fax machine to either COM1 or COM2. Make a
note of which port you connect the fax machine to.
ITU standards for subaddressing, selective polling and file-transfer-via-fax are supported with the
fax machine.
Device configuration
On installation of LaserFAX, you will be prompted to enter details of your fax machine.
Make sure you select the correct serial port at the correct speed (19,200 bps) under Connected to.
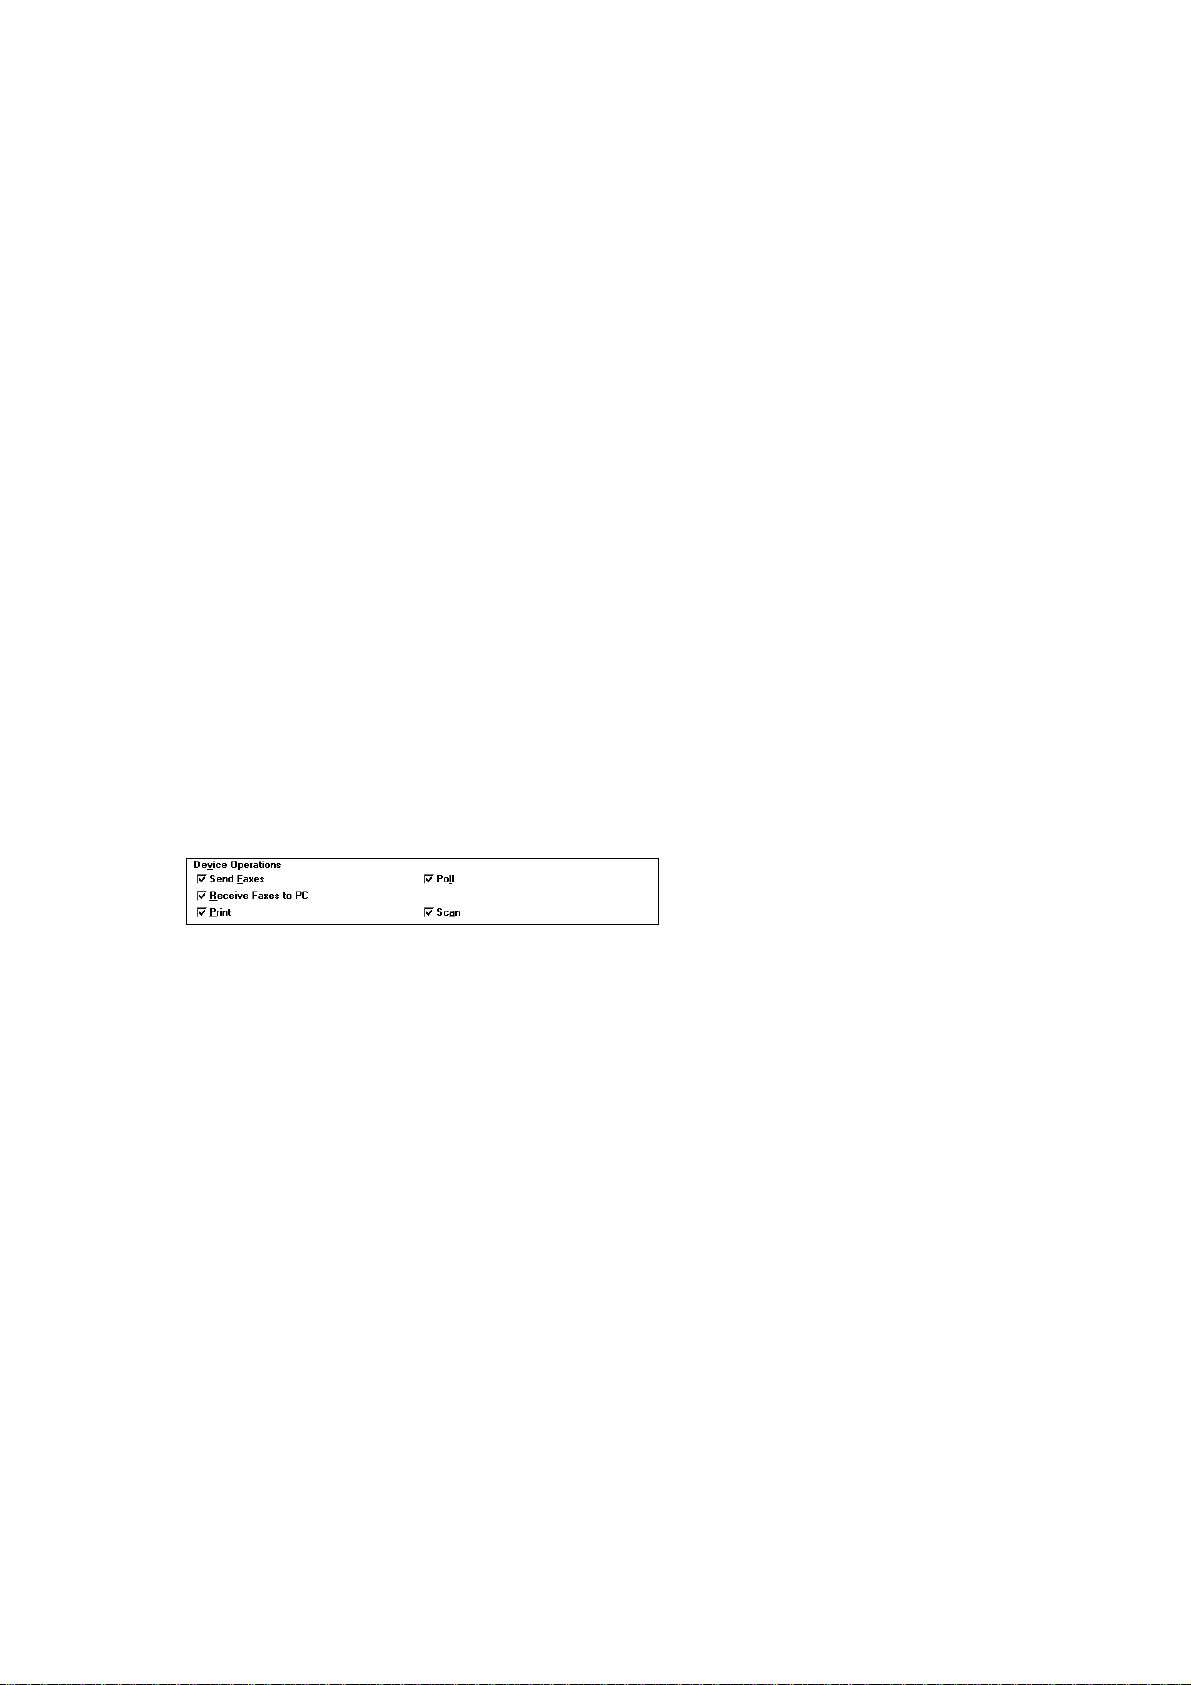
Select any of the functions available under Device Operations .
With your fax machine, all of the Device operations should be active and available.
Please see the main LaserFAX User Guide for information on all of these operations.
Setting up the Minoltafax 1200/Defax 2200
In addition to setting the speed for the COM port within the LaserFAX Configuration program (see
above), you should also ensure that the MODEM RATE setting within the fax machine is set to 2400
&19200 BPS. Todothisyoushould:
• Press the FAX MODEM/SCANNER buttononthefaxmachine.
• The LCD will now read MODE SET?
• Press the SET button.
• Press the MENU buttonuntil the LCD readsMODEM MODE.
• Press the SET buttonagain.
• The LCD will now read BAUD RATE SET?
• Press the SET buttonagain.
• Press the MENU button until the LCD reads 2400 & 19200 BPS (if it does not
already do so).
• Press the SET buttonagain.
• Press the STOP button to return to the normal display.
Setting up the Minoltafax 1300/Defax 2300
In addition to setting the speed for the COM port within the LaserFAX Configuration program (see
above), you should also ensure that the MODEM MODE setting within the fax machine is set to 2400
&19200 BPS. Todothisyoushould:
• Press the MODEM/SCANNER button on the fax machine until the LCD reads BAUD
RATE SET?
• Press the SET button.
• Press the MENU buttonuntil the LCD reads2400 & 19200 BPS.
1
Page 3

• Press the SET buttonagain.
• Press the MODEM/SCANNER buttonuntil the LCD readsMODE SET?.
• Press the SET buttonagain.
• Press the MENU buttonuntil the LCD readsMODEM MODE.
• Press the SET buttonagain.
Special note - transmission speeds
If your COM port is fitted with an 8250 UART chip, you may find that selecting 19,200 bps as the
speed for transmission of data between the fax machine and the PC will cause Hardware overrun or
Foreground activity caused operation to fail errors. If you do, then you should check that no
power or screen savers are active on the PC running the device driver or consider updating your COM
port hardware to a 16550 UART chip which has a greater capacity to cope with speed.
Resolutions supported
With your fax machine, you can use LaserFAX to transmit and receive faxes at the following
resolutions:
• Standard (200 x 100 dpi)
• Fine(200 x 200 dpi)
• Superfine (200 x 400 dpi)
• 300 x 300 dpi
• 400 x 400 dpi
Please see the main LaserFAX User Guide for information on selecting resolutions for transm itting
faxes (Appendix A).
You may also use your fax machine to scan and print faxes at the following resolutions:
• Standard (200 x 100 dpi)
• Fine(200 x 200 dpi)
Please note that when scanning using your fax machine, the resolution is set on the fax machine
itself, and not in the Scan from fax machine dialogue in LaserFAX. Use the RESOLUTION button
on the fax machine to select Standard or Fine resolution.
Monitoring the progress of your job
The Options/Notifications dialogue box contains an option to display the progress of a job in the
following ways:
• To show simply the words “In progress”
• To show a “Thermometer” whichwill turn red as more of the fax is sent
• To show a “Percentagedone” figure.
With your fax machine, you m ay select any of these options. Please note, however, that selecting
either Thermometer or Percentage done may slow down activity on your PC or network.
Special notes: Minoltafax 1300 fax machine
Power save mode:
Please note that if you want to use LaserFAX with your Mi noltafax 1300, it will be necessary to
disable Power Save mode on the fax machine (if it is enabled). Full instructions on Power Save mode
are available in the Operator's manual supplied with your fax machine.
2
Page 4

No recording paper:
Please note that if your Minoltafax 1300 runs out of recording paper, LaserFAX will not be able to
communicate with the fax machine reset. To do this you should press the PRINTER RESET button
on your Minoltafax 1300 front panel.
Parallel printer driver:
In addition to being able to connect your Minoltafax 1300 to your PC using an RS232C cable
connected to a serial (COM) port, you can also connect the fax machine to a parallel (LPT) port on
your PC using a suitable parallel cable and install the printer drivers supplied with your fax machine.
This will allow you to print directly to your Min oltafax 1300 from any of your Windows applications.
3
Page 5

Minoltafax 1800 fax machine
Defax 4800 fax machine
The fax machine comes with a 6 pin “mini-DIN” socket at the back of the fax machine. You will need
to connect your fax machine to your computer with a suitable DIN to 9 pin RS232C cable. You will
also need a 9 pin to 25 pin adapter if you wish to connect the fax machine to a 25 pin RS232C port on
a PC. You may connect to either COM1 or COM2.
The fax machine contains special commands to enable the PC to use the machine for sending faxes,
receivi ng faxes directly to your hard disk, scanning and printing. The fax machine may be used for
non-selective incoming and outgoing polling.
The ITU standards for subaddressing, selective polling and file-transfer-via-fax are not supported.
Device configuration
On installation of LaserFAX, you will be prompted to enter details of your fax machine.
Make sure you select the correct serial port at the correct speed (19,200 bps) under Connected to.
Select any of the functions available under Device Operations .
Please see the main LaserFAX User Guide for information on all of these operations.
Data rate settings
It is possible to set the speed of transmission of data between the fax machine and the PC. This
setting must be entered on both the fax machine and the PC. The settings are either 19,200 bps or
38,400 bps.
To set the speed on the fax machine you should:
• Press ENTER three times consecutively.
• Cursor right until the display reads SERVICE MODE #2.
• Press ENTER.
• Cursor left or right until the display reads RS232 BAUD RATE.
• Press ENTER.
• The current data rate setting will be shown. Cursor left or right to toggle between 19200
and 38400.
• Press ENTER when you have the setting you require displayed.
• Press STOP twice to return to your normal display readout.
To set the data rate on the PC you should:
• Double click on the LaserFAX configuration program icon.
• Select Add/Edit device and then enter the device name of your fax machine and click on OK.
• The Edit Device Details dialogue box will now appear on screen. Under the Connected to
section, select the correct COM port and the appropriate speed from the drop-down menus.
4
Page 6

• Click on OK. Exit LaserFAX and reload to implement this change.
Important note:
If you decide to use the 38,400 bps setting for transfer of information between the PC and the fax
machine, you should also ensure that you are using a COM port equipped with a 16550 UART chip.
This chip has a greater capacity to cope with speed. Running the Microsoft Diagnostics program,
MSD.EXE, from DOS willallow you to check the COM port hardware.
If you experience problems with 38,400 bps data transfer, you should consider updating your COM
port hardware, or lower the data rate setting to 19,200 bps on both the fax machine and the PC.
Resolutions supported
With the fax machine you can use LaserFAX to transmit, receive, print and scan faxes at the following
resolutions:
• Standard (200 x 100 dpi)
• Fine(200 x 200 dpi)
• Superfine (200 x 400 dpi)
In addition you willalso be able to use the fax machine for printing at 300 x 300 dpi resolution.
Please see the main LaserFAX User Guide for information on selecting resolutions for transm itting
faxes (Appendix A).
5
Page 7

Minoltafax 2500 and 3500 fax machines
Defax 6500 and 7500 fax machines
The fax machine comes with a CFP parallel interface and should be supplied with a suitable parallel
cable capable of bi-directional communication. You should connect the fax machine to any of your
parallelports (LPT). Make a note of which port you connect the fax machine to.
ITU standards for subaddressing, selective polling and file-transfer-via-fax are supported.
Device configuration
On installation of LaserFAX, you will be prompted to enter details of your fax machine.
Make sure you select the correct parallel port under Connected to.
Select any of the functions available under Device Operations .
With your fax machine, all of the Device operations should be active and available.
Please see the main LaserFAX User Guide for information on all of these operations.
Important Note - Print Received Faxes
You will notice that the Device operations section includes the Print Received Faxes option. Please
note that with the firmware in your fax machine, selecting the Print Received Faxes option willcause
all incoming faxes to be received to the fax machine's memory before being printed and then finally
being uploaded to the PC. This use of the fax machine's memory will cause any incoming information
such as subaddresses, signatures, selective polling numbers/passwords and data attachments to be
ignored.
For this reason, if you wish to automatically print copies of all received faxes on the fax machine, and
also receive faxes containing subaddresses, data attachments, etc., you should not select the Print
Received Faxes option, but instead create a Routing Table entry to print all received faxes on the
nominated fax machine or printer. Full details on Printing Received Faxes and Routing Table
entries appear in Section 6.12.1 of the main LaserFAX User Guide.
Resolutions supported
With your fax machine, you can use LaserFAX to transmit and receive faxes at the followi ng
resolutions:
• Standard (200 x 100 dpi)
• Fine(200 x 200 dpi)
• Superfine (200 x 400 dpi)
• 300 x 300 dpi
• 400 x 400 dpi
You may also use your fax machine to scan and print faxes at the following resolutions:
• Standard (200 x 100 dpi)
• Fine(200 x 200 dpi)
• Superfine (200 x 400 dpi)
Please see the main LaserFAX User Guide for information on selecting resolutions for transm itting
faxes (Appendix A).
6
Page 8

Monitoring the progress of your job
The Options/Notifications dialogue box contains an option to display the progress of a job in the
following ways:
• To show simply the words “In progress”
• To show a “Thermometer” whichwill turn red as more of the fax is sent
• To show a “Percentagedone” figure.
With your fax machine, you m ay select any of these options. Please note, however, that selecting
either Thermometer or Percentage done may slow down activity on your PC or network.
Printing and scanning options
With your fax machine, additional printing and scanning options are available.
Using the Options button from the Printer setup dialogue box, you will be able to select either the
Collating option, or alter the Print density.
Using the Options button in the Scan from fax machine dialogue box, you will be able to select the
Half tone method,orScaling percentage.
Local setup
LaserFAX with your fax machine includes a local setup option. To access the Local Setup dialogue
you should
• Select Display, Device information and double click on the entry for your fax machine in the list
or
• Double click on the CFP Device Driver icon from the desktop or taskbar.
The window which appears on screen will have a Setup button. Click on this and the following
dialogue willbe shown.
This allows you to change settings on the fax machine such as the Fax header, Date and time, Dial
method etc. The colours of the settings will change as they are edited and written back to the fax
machine.
7
Page 9

Clicking on the Full Setup button will load program called LSD (Local Setup and Diagnostics). This
is a more advanced setup program which allows you, for example, to enter values for the one-touch
and speed dial lists, and the special keys.
8
Page 10

Minoltafax 3700 fax machine
An optional PC interface is available for this machine and it may be supplied with a suitable RS232C
cable. If this is not the case, a suitable cable is available from either Wordcraft International Ltd or
your local distributor. An approved service engineer or dealership must install the interface hardware.
If your PC has a 25 pin serial port you may need a suitable 9 pin to 25 pin adapter. You should
connect the fax machine to either COM1 or COM2.
The PC interface contains the CFP interface that enables the machine to be used for printing,
scanning, sending or receiving faxes. You can use all the facilities of LaserFAX except for
subaddressing, selective polling and file-transfer-via-fax.
The default setting for transmissionof data between the fax machine and the PC is 19,200.
It is possibleto reset this rate to 9,600 on the fax machine if you experience any problems.
Please consult yourservice engineer/dealership for full instructions.
Device configuration
On installation of LaserFAX, you will be prompted to enter details of your fax machine.
Make sure you select the correct serial port at the correct speed (19,200 bps) under Connected to.
Select any of the functions available under Device Operations .
Please see the main LaserFAX User Guide for information on all of these operations.
Bulk fax reception
If you intend to receive a large number of faxes, we reccommend that you have at least 8MB RAM in
the PC running the Device driver. If you experience Hardware overrun or Foreground activity
caused operation to fail errors, then you should make sure that no power or screen saving programs
are running on the PC to which the device is connected. If problems persist, then you should consider
lowering the speed for transmission of data between the PC and the fax machine from 19,200 bps too
9,600 bps (see above). This setting should be changed on both the fax machine and the PC using the
LaserFAX Configuration program. If you still experience problems, then you should use Microsoft
MSD.EXE program to check your COM port hardware. If you are using an 8250 UART chip then
you should consi der updating to a 16550 UART chip which has a greater capacity for coping with
speed.
Resolutions supported
With your fax machine, you can use LaserFAX to transmit, receiv e, print and scan f axes at the
following resolutions:
• Standard (200 x 100 dpi)
• Fine(200 x 200 dpi)
• Superfine (200 x 400 dpi)
Please see the main LaserFAX User Guide for information on selecting resolutions for transm itting
faxes (Appendix A).
9
Page 11

The LCD memory usage display
The LCD display on the fax machine shows you what percentage of the fax machine's memory is
being used. When a job sent from the PC is complete LaserFAX will not immediately delete it - in
case the same file is part of a broadcast and is to be sent to another number. This method of
optimising the use of the PC and fax machine is one of the strengths of CFP. The fax machine is free
to clear this memory ifit needs it - for example if receiving a large fax.
Manual use of the fax machine
If you wish to use the fax machine to send faxes or to copy documents manually, you should:
• Make sure that LaserFAX is not sending, receiving, waiting to redial, etc.
• Press the “Stop” button on the fax machine before manual use to break the connection between
thefaxmachineandthePC.
• After a certain period of time, LaserFAX will reconnect with the fax machine and continue as
normal.
10
Page 12

Minoltafax 1600, 2600 and 3600 fax machines
Develop Defax 4600, 6600 and 7600 fax machines
The fax machine comes with a Class 1 serial interface and should be supplied with a suitable RS232C
cable to connect it to your PC. You should connect the fax machine to any of y our PC' s serial
communication (COM) ports. Make a note of which port you connect the fax machine to.
ITU standards for subaddressing, selective polling and file- transfer-via-fax are supported.
Please note that the fax machine's parallel port/interface is for use with printer drivers supplied by
Minolta/Develop and cannot be used for LaserFAX functions.
Device configuration
On installation of LaserFAX, you will be prompted to enter details of your fax machine.
Make sure you select the correct serial port under Connected to.
Select any of the functions available under Device Operations.
Please see the main LaserFAX User Guide for information on all of these operations.
Scanning
Scanning is initiated from the PC by using the Job, Scan menu or by clicking on the Scan button
Please note, however, that the settings in the Scan from fax machine dialog for resolution, etc. will
be i gnored. Please ensure that these settings are configured correctly on the fax machine before
clicking on the OK buttonintheScan from fax machine dialog.
Instructions on configuring these settings will appear in the fax machine user manual.
Please note that an optional TWAIN driver supplied by Minolta/Develop can be used for scanning in
various applications which supports TWAIN functions.
Resolutions supported
Scan
• Standard (200 x 100 dpi)
• Fine(200 x 200 dpi)
• Superfine (200 x 400 dpi) (not valid for MF1600)
Print
With your fax machine, you can use LaserFAX to print faxes at the following resolutions via
LaserFAX Class1 driver:
• Standard (200 x 100 dpi)
• Fine(200 x 200 dpi)
• Superfine (200 x 400 dpi)
• 400 x 400 dpi (not valid for MF2600/3600)
Please see the main LaserFAX User Guide for information on selecting resolutions for transm itting
faxes (Appendix A).
11
Page 13

Receive and Transmit
With your fax machine, you can use LaserFAX to receive and transmit faxes at the followi ng
resolutions:
• Standard (200 x 100 dpi)
• Fine(200 x 200 dpi)
• Superfine (200 x 400 dpi)
• 300 x 300 dpi
• 400 x 400 dpi
Please see the main LaserFAX User Guide for information on selecting resolutions for transm itting
faxes (Appendix A).
12
Page 14

Minoltafax Di 150f fax machine
Develop Defax D 1550 iD fax machine
An optional Class 1 PC interface is available for this machine and it may be supplied with a suitable
RS232C cable. If this is not the case, a suitable cable is available from either Wordcraft International
Ltd or your local distributor. An approved service engineer or dealership must instal l the i nterface
hardware. If your PC has a 25 pin serial port you may need a suitable 9 pin to 25 pin adapter. You
should connect the fax machine to either COM1 or COM2.
ITU standards for subaddressing, selective polling and file-transfer-via-fax are supported.
Please note that the optional Class 1 PC interface cannot be used in combination with the 2.nd line
interface.
Device configuration
On installation of LaserFAX, you will be prompted to enter details of your fax machine.
Make sure you select the correct serial port under Connected to.
Select any of the functions available under Device Operations.
Please see the main LaserFAX User Guide for information on all of these operations.
Setting up the RS-232C interface
In order for the fax machine to work in conjunction with your PC, you must first make sure that the
RS-232C interface is correctly configured. Full details on how to set up the interface appear in the
operating instructions supplied with the fax machine.
When setting up the fax machine to work with LaserFAX, you must make sure that the fax
machine is configured to use a baud rate of 19200 bps when communicating with your PC.
Printing documents on your fax machine
Details on how to prin t on your fax machine appear in the operating instructions. Please note,
however, the following differences with these instructions when printing to your fax machine using
LaserFAX:
1. It is only necessary to tell LaserFAX your Subscriber ID (TTI) once. This can be done on
installation. When the Edit Device Details dialog appears on your screen, make sure that the
Print option is selected under Device Operations and enter your Subscriber ID (TTI) in the edit
box in between of the checkboxes Print and Scan. This ID can be changed at a later stage by
running the LaserFAX Confi guration program and selecting Add/Edit Device.
Please note that this Subscriber ID (TTI) must be exactly the same as it is entered in your fax
machine.
2. Once you have entered your Subscriber ID (TTI), you should set up your fax machine as a printer
using the Print on fax devices option in the LaserFAX File menu. Full details on setting up your
fax machine as a printer appear in the main LaserFAX User Guide and Help Files. Once you have
completed this procedure, all you have to do is select the "device name on LaserFAX" printer
from any of your Windows applications.
13
Page 15

Scanning with your fax machine
Scanning with the fax machi ne is achieved by "sendin g"the fax document to the computer. To do this
you should:
Make sure your fax device is configured to Receive Faxes to PC. This can be set permanently by
running the LaserFAX Configuration program and selecting Add/Edit Device or temporarily by
selecting View, Device information from LaserFAX.
1. Place the document you wish to scan in the fax machine's paper feeder.
2. Adjust the resolution and contrast if necessary on the fax machine control panel.
3. Press the following buttons on your fax machine:
PROGRAM, I, ENTER, “SCAN”, ENTER
LaserFAX will "receive" the fax and an entry for the document will appear in your System Received
Faxes list.
Resolutions supported
Scan
• Standard (200 x 100 dpi)
• Fine(200 x 200 dpi)
• Superfine (400 x 400 dpi)
Print
With your fax machine, you can use LaserFAX to print faxes at the following resolutions via
LaserFAX Class1 driver:
• Standard (200 x 100 dpi)
• Fine(200 x 200 dpi)
• Superfine (400 x 400 dpi)
Please see the main LaserFAX User Guide for information on selecting resolutions for transm itting
faxes (Appendix A).
Receive and Transmit
Your fax machine will support sending and receiving faxes to/from the PC at the following
resolutions:
• Standard (200 x 100 dpi)
• Fine(200 x 200 dpi)
• Superfine (200 x 400 dpi)
• 300 x 300 dpi
• 400 x 400 dpi
For more information on resolutions, please see Appendix A of the main LaserFAX User Guide.
14
 Loading...