

Motors Australia
Model No.: HM-3700

BEFORE USEBEFORE USE
Before operating the unit, please read this
manual thoroughly and retain it
for future reference.
1. OPERATING FEATURES……..………………………………………..Page 03
2. GENERAL ………………………………………………….……………Page 04 to 07
3. ANTI-THEFT SECURITY CODE ………………………… ………….. Page 08 to 09
4. RADIO ………………………………………………………..…….……Page 10 to 12
5. CD PLAYER …………………………………………………..…………Page 13 to 15
6. HANDLING COMPACT DISCS …………………………………..……Pa
g
e 16
g
7. ERROR DISPLAY MESSAGES…………….. ………………..….……..Page 17
8. PRODUCT AND WARRANTY SERVICE …………………….……….Page 18
9. SPECIFICATIONS.………………………..………………...…..……….Page 19
-2 -
⑧ ⑲⑱ ①
OPERATING FEATURESOPERATING FEATURES
⑥② ⑨③ ④ ⑤ ⑩ ⑦⑪ ⑫⑮⑬⑯ ⑭ ⑰
1. POWER (ON / OFF) 11. PLAY / PAUSE
2. AUDIO SEL / Volume control 12. PTESEY 1 MEMORY (RDM – Random Mode)
3. CD Select Mode
13. PRESET 2 MEMORY (INT
–
Intro Mode)
4. MUTE 14. PRESET 3 MEMORY (RPT – Repeat Mode)
5. LOUD 15. PRESET 4 MEMORY
6. Security Code LED 16. PRESET 5 MEMORY
7. LCD (Display) 17. PRESET 6 MEMORY
8. AM/FM Band 18. CD SLOT
9. TUNE / SEEK 19. EJECT
10. BSM
-3 -
GENERALGENERAL
② ①
① POWER ON/OFF BUTTON
Press the POWER button ① for less than 3 seconds to turn the unit on or off.
When the unit is turned on, the previous mode (last memory) will appear (CD or Radio Mode).
① INITIAL VOLUME LEVEL SET UP (Volume level when Audio unit is turned On)
P
ress and hold the
POWER b
utton for more than 3 seconds.
(VOLUME “xx” Displ
ay w
ill begin flashing)
Using the Volume Up / Down Control, adjust the initial Volume Control to your desired setting.
Every time the Audio unit is turned on, the volume level will start at the initial volume level set.
(If the volume level is less than the initial volume level set, then the audio unit will remain at the lower level when turned on.
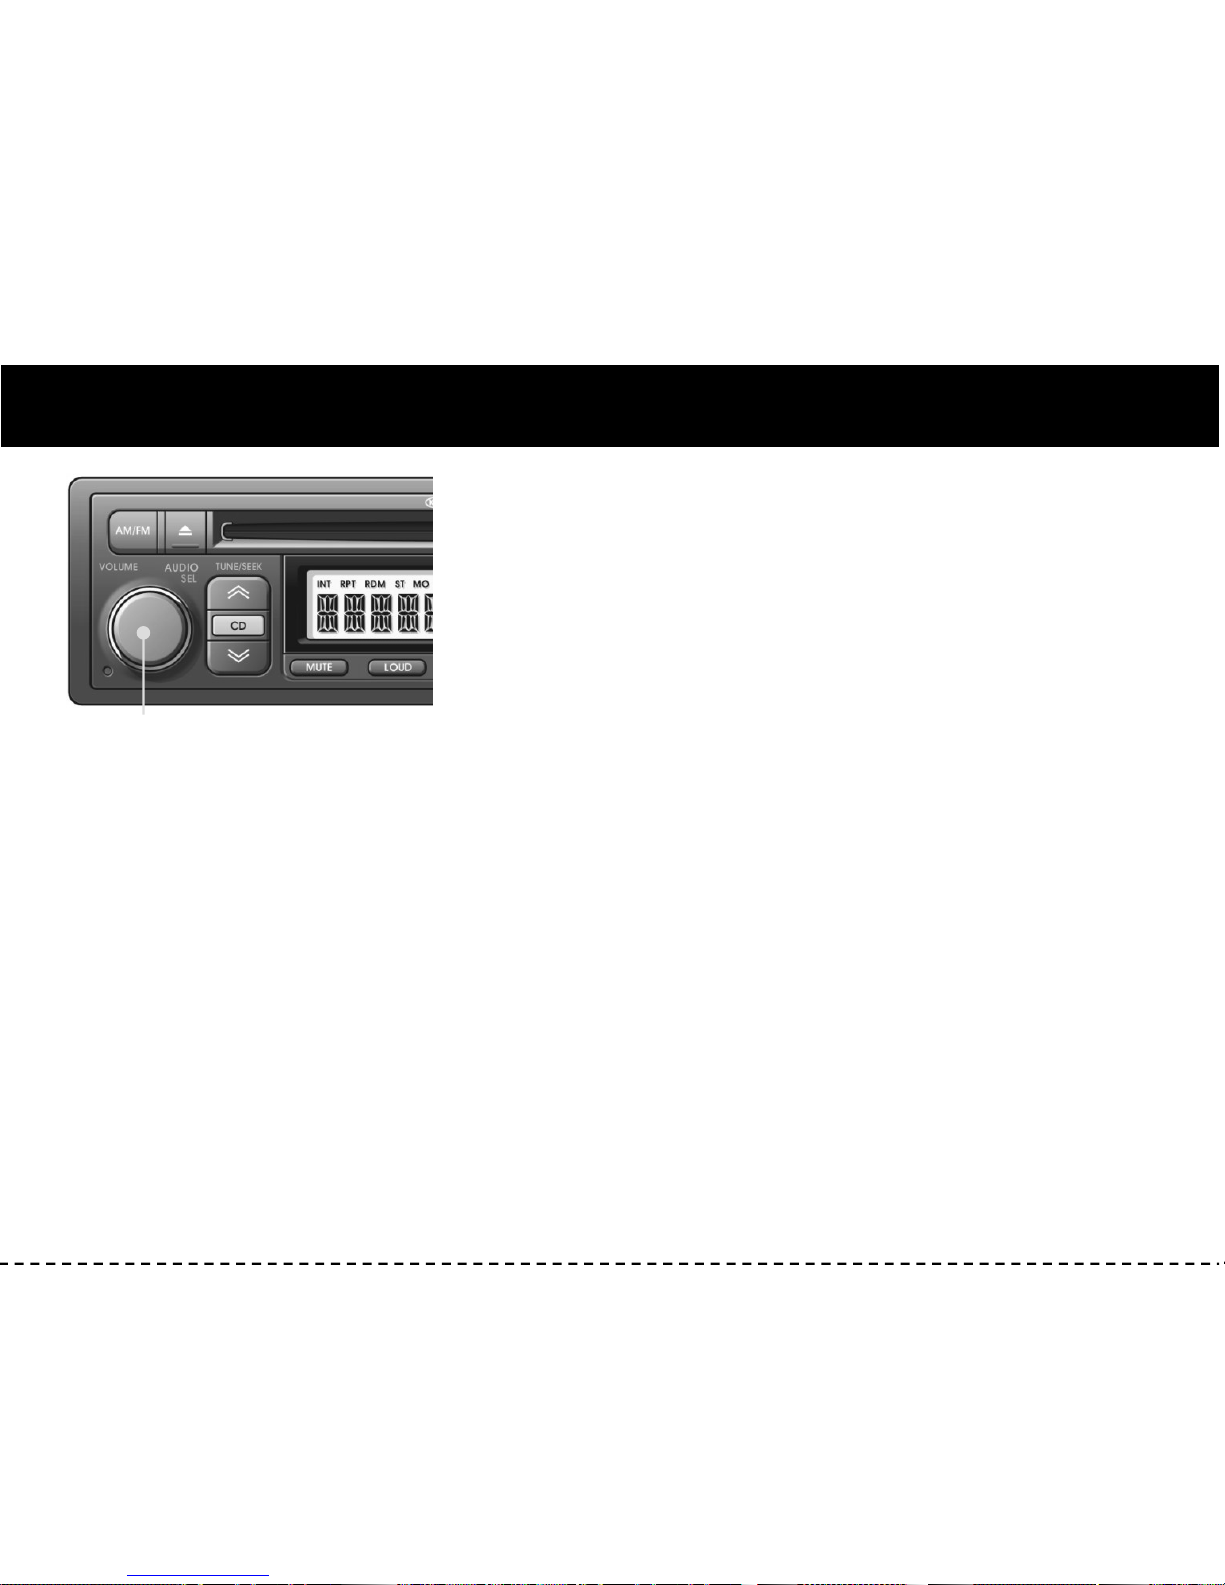
② VOLUME UP / DOWN CONTROL (Audio Select Button)
Turn the Audio Select button ② right to increase the Volume level. The Level will be shown in “ VOLUME xx” on the display
panel. Turn it left to decrease the Volume level. The volume level is shown for 5 seconds until returning to the previous mode.
-4 -
② - (1) SOUND FUNCTION SELECTION (AUDIO SELECTION)
This button is used to adjust the sound. Each time you momentarily press button ②,
the LCD dis
play
s the following modes :
GENERALGENERAL
py g
BASS → TREBLE → BAL → FADER → BEEP → VOLUME
When this button is pressed, the LCD Display shows the selected function for 5
seconds before returning back to the previous mode. On the selected function, the
②
level can be controlled by turning the button. The display will automatically
return to normal 5 seconds after the last adjustment has been made.
② - (2) BASS CONTROL
To adjust the Bass level, first select the Bass mode by pressing the Select button ② until “BASS” appears on the display panel.
Within 5 seconds of choosing the Bass mode, turn the control left or right to adjust the bass level as desired. The bass level will
be shown on the display panel from a minimum of “BASS –10” to a maximum of “BASS+10”. The display will automatically
return to the normal 5 seconds after the last adjustment has been made.
② - (3) TREBLE CONTROL
To adjust the Treble level, first select the Treble mode by pressing the Select button ② until ‘TREBLE” appears on the display
panel. Within 5 seconds of choosing the Treble mode, turn the control left or right to adjust the Treble level as desired.
The treble level will be shown on the display panel from a minimum of “TREBLE 10” to a maximum of “TREBLE 10”.
The display will automatically return to the normal 5 seconds after the last adjustment has been made.
-5 -
GENERALGENERAL
② - (4) BALANCE CONTROL
To adjust the left-right speaker Balance, first select the Balance mode by pressing
the Select button ② until “BAL” appears on the display panel.
②
Within 5 seconds of choosing the Balance mode, turn the control left or right to
adjust the balance as desired. The balance position will be shown on the display panel
from “BAL 10L” (full left) to “BAL 10R” (full right). When the level between
the left and right speakers is equal, “BAL L=R” will be shown on the display panel.
The display will automatically return to normal 5 seconds after the last adjustment
has been made.
②
-
(5) FADER CONTROL
To adjust the front-rear speaker balance, first select the Fader mode by pressing the Select button ② until the “FADER” appears
on the display panel. Within 5 seconds of choosing the Fader mode, turn the control left or right to adjust the front-rear speaker
level as desired. The fader position will be shown on the display panel from “FADER 10F” (full front) to “FADER 10R”(full rear).
When the volume level between the front and rear speaker is equal, “FADER F=R” will be shown on the display panel. The display
will automatically return to the normal 5 seconds after the last adjustment has been made.
② - (6) BEEP CONTROL
To adjust the Beep mode, first select the Beep mode by pressing the Sound button ② until “BEEP” indication appears on the
display panel. The Beep mode will be shown on the display panel from “BEEP 2ND”, “BEEP OFF”and “BEEP ON”.
The display will automatically return to the normal indication in 5 seconds after the last adjustment or when another function is
activated. Select “BEEP ON” when you wish to hear the “BEEP” sound whenever any function button is pressed.
Select “BEEP 2ND” when you wish to hear the “BEEP” sound whenever any Tuner Pre-set button and/or Tune Seek buttons
are pressed for more than 3 seconds.
-6 -
 Loading...