

Kenwood KMC-41 Service Manual
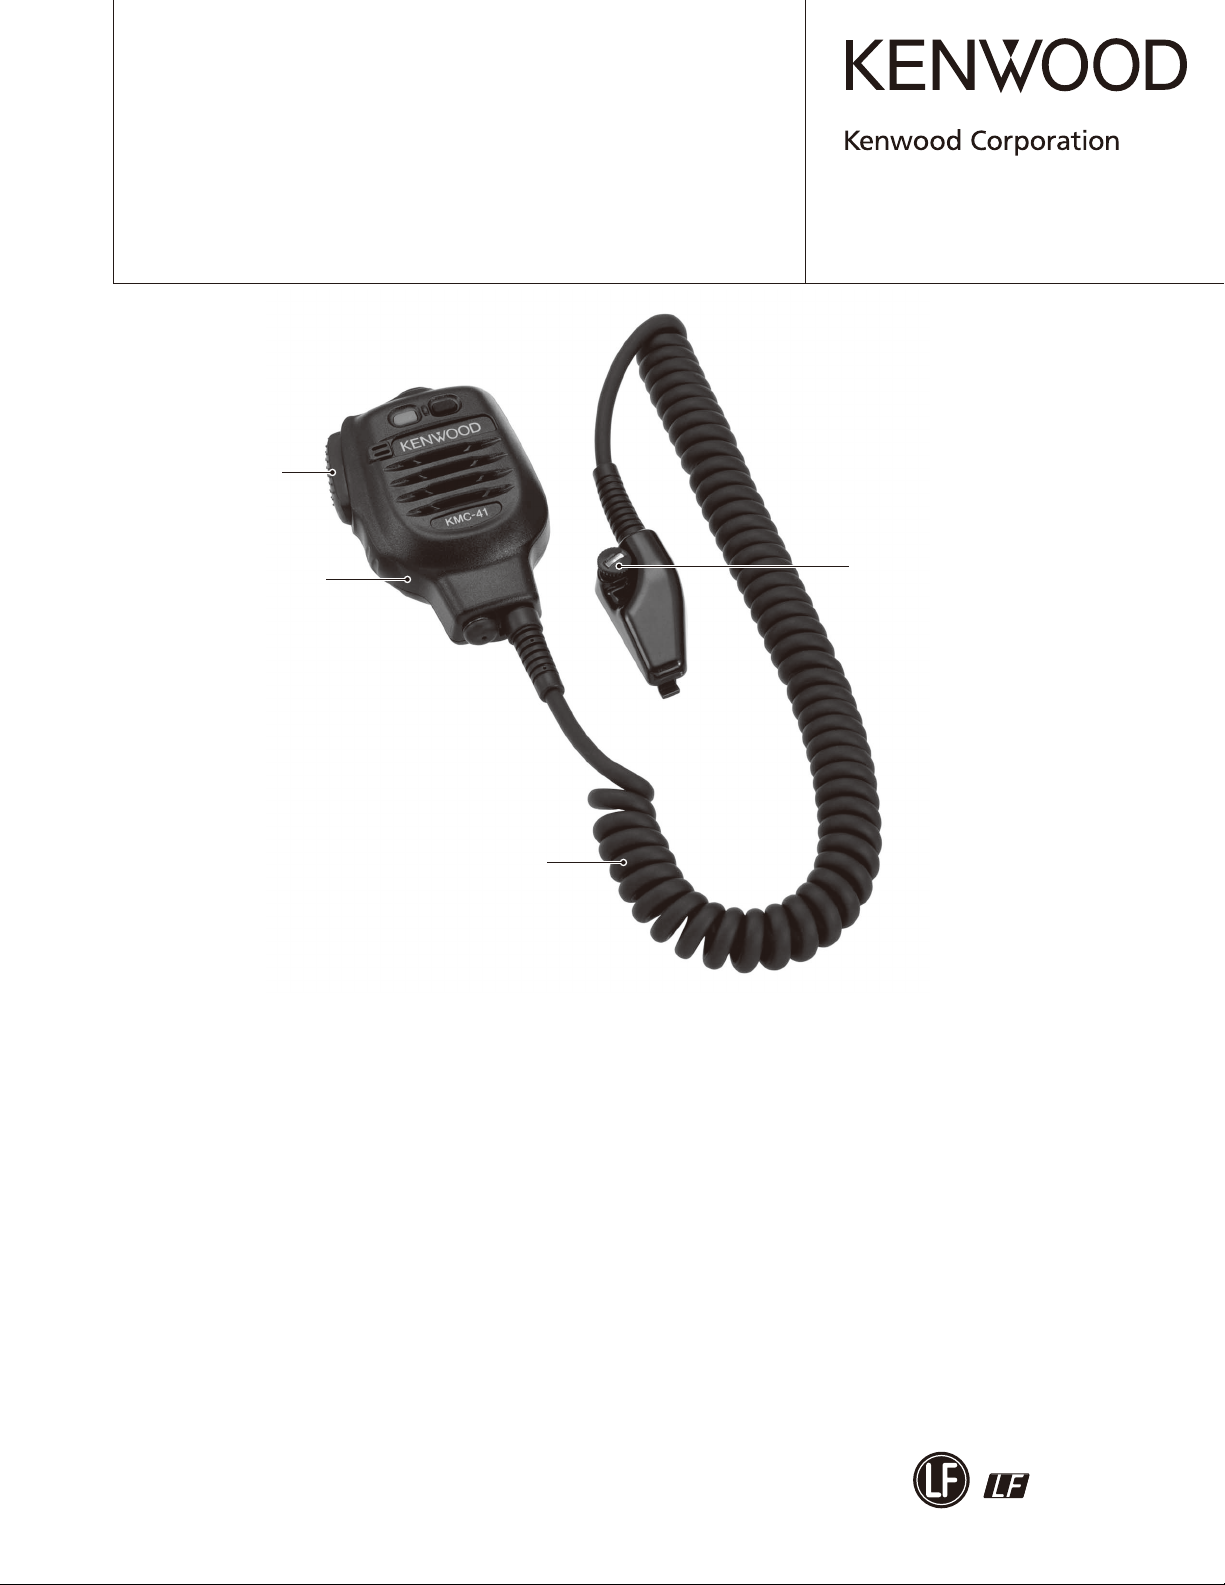
SPEAKER MICROPHONE
KMC-41
SERVICE MANUAL
Lever (PTT)
(D10-0654-08)
© 2008-3 PRINTED IN JA PAN
B51-8816-00 (N) 709
Plastic cabinet assy
(A02-4050-08)
Dressed screw (Universal)
(N08-0566-08)
Curl cable assy
(E30-7657-08)
SPECIFICATIONS
Microphone
Impedance ..............................................................................................................................2.2kΩ (MAX)
Sensitivity ....................................................................................................................–65dB±4dB at 1kHz
Speaker
Impedance .....................................................................................................................16Ω±15% at 1kHz
Rating input ........................................................................................................................................ 0.5W
Maximum input .................................................................................................................................. 1.5W
Dimensions (W x H x D) ................................. 67.8 x 91.5 x 43.3 mm (2-21/32 x 3-9/16 x 1-23/32 inches)
Weight ......................................................................................................................... Approx. 260g/9.2oz
This product complies with the RoHS directive for the European market.
This product uses Lead Free solder.
KMC-41
DISASSEMBLY FOR REPAIR
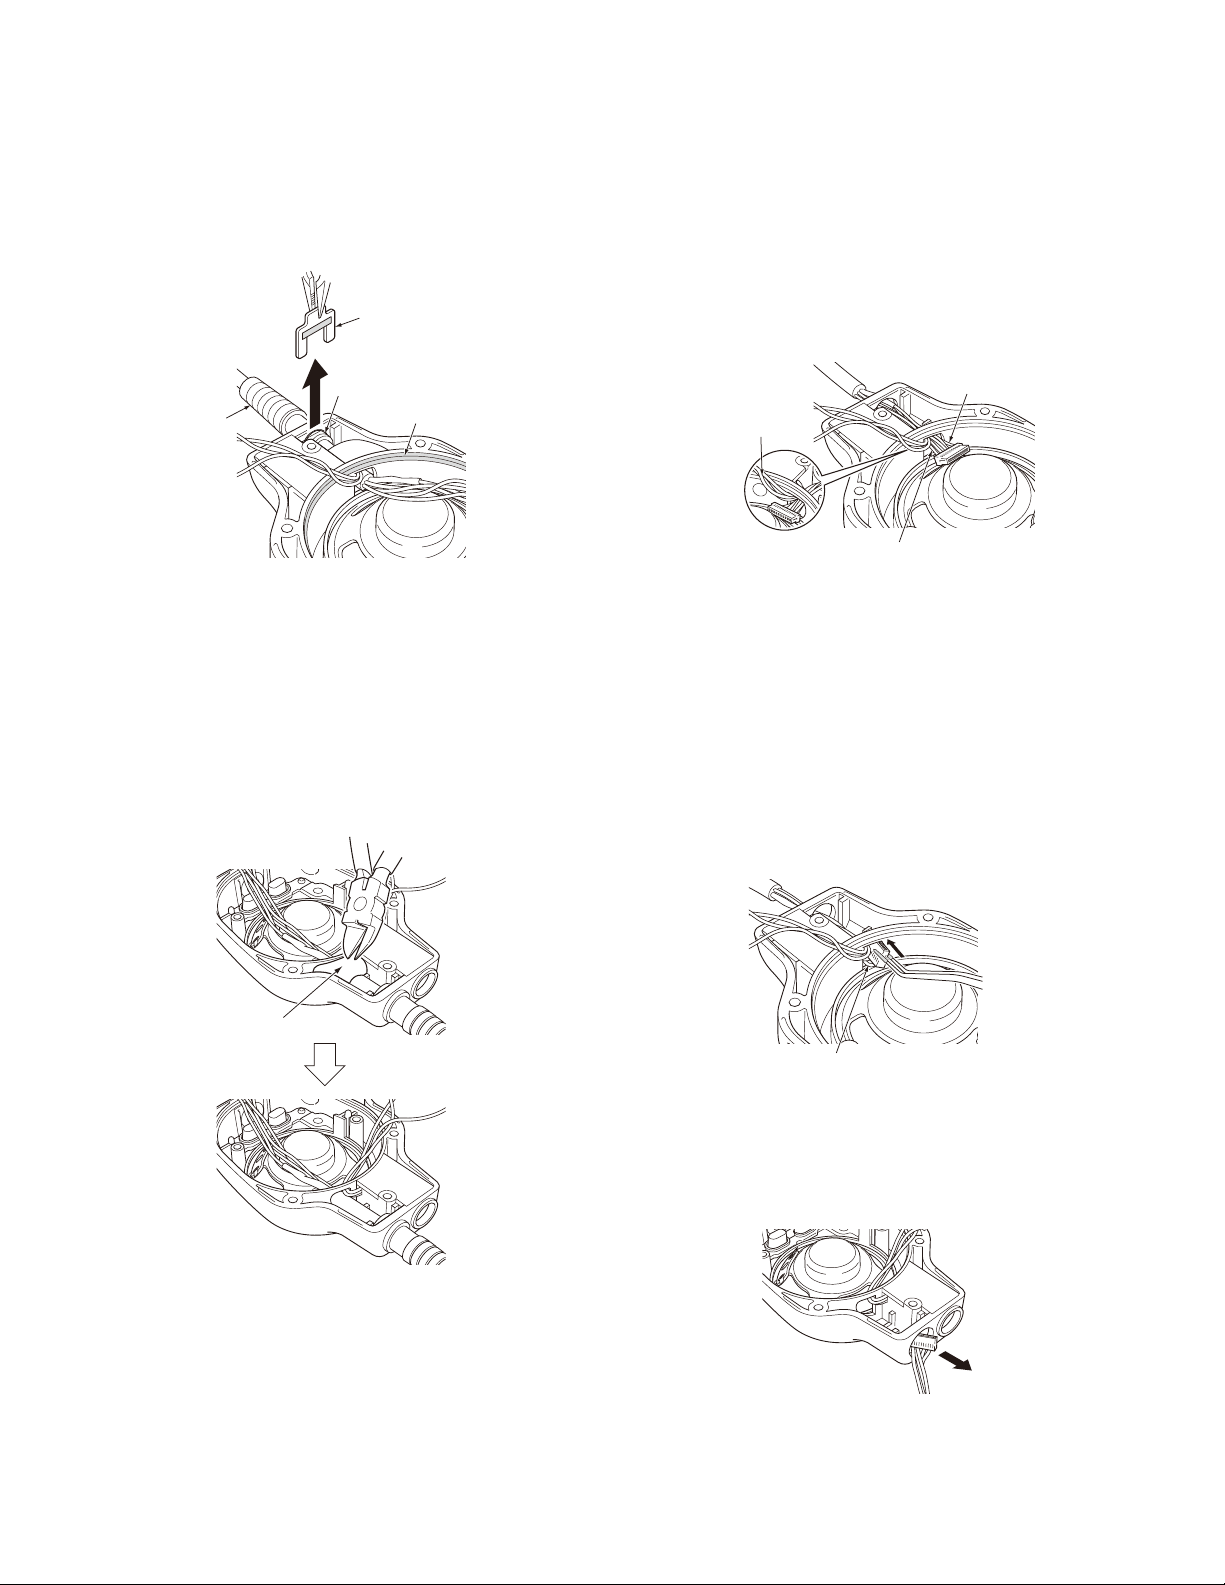
1. Removing the cable ASSY
1) Pull out the holder that is set into the fi xing bracket of
the cable ASSY, using a pair of pliers.
Holder
Fixing bracket
Cable ASSY
Fig. 1
2) Completely peel off the bond (*1) glued to the cable
ASSY, using a set of nippers.
Note: Please be careful not to damage the coating of the
cable ASSY and the waterproofi ng line of the front case.
*1: Use the following bond:
• Manufacture name: Shin-Etsu Chemical Co., Ltd.
• Bond name: Shin-Etsu silicone One-component RTV
silicone rubbers Alcohol type KE-4898-T
Waterproof line
3) Following the procedure below, pass through the connector part of the cable ASSY into the hole of the front
case (waterproof line part).
(1) Move the three lead wires soldered onto the PCB to
the upper corner of the hole.
(2) The yellow lead wire side of the connector comes in
the inside of the front case.
White lead wire
Three lead wires
Yellow lead wire
Fig. 3
(3) Push the cable ASSY to the earphone jack side with
the connector part bent as shown in the fi gure, then
hook the end of the connector (white lead wire side)
into the outside corner of the hole, using your fi nger.
(4) Pass the connector through the hole, pushing the
connector (yellow lead wire side) using a pair of tweezers or similar tool.
Note: Attach adhesive tape or rubber to the end of
the tweezers so as not to damage the connector of
the cable ASSY.
Bond
Yellow lead wire
Fig. 4
4) Pull the cable ASSY, then remove the cable ASSY from
the front case by passing the connector part through the
hole of the front case.
Fig. 2
Fig. 5
2
 Loading...