


Version
1.1
KENWOOD MULTIMEDIA NAVIGATION SYSTEM
DNN9230DAB
Easy Set-up
Guide

KENWOOD
Easy Set-up Guide
Table of Contents
Step 1:- Register On-line Kenwood’s Route Collector ........................................................... 1
Step 2:- Setting Up DNN9230DAB with Wifi Connection ...................................................... 7
Step 3:- Date/Time Set-up and Turning Off Demo Mode ...................................................... 9
Date and Time Set-up............................................................................................................................. 9
Turning Off Demo Mode ....................................................................................................................... 12
Step 4:- Owner Account Setup ............................................................................................ 13
Step 5:- Setting Up Facebook Account ................................................................................ 15
Step 6:- Setting Up Twitter Account ..................................................................................... 17
Step 7:- Setting Up Gmail Account ...................................................................................... 18
Step 8:- Setting Up Dropbox Account .................................................................................. 20
Step 9:- Setting Up RSS Feeds ........................................................................................... 26
How to add more User Accounts ......................................................................................... 29
How to switch between User Accounts ................................................................................................ 30
How to change over to Guest Account ................................................................................ 33
Use system with no Facebook, Twitter & Gmail ................................................................................... 33
How to change back from Guest Account to Owner Account .............................................................. 34
How to use Trip Planner ...................................................................................................... 36

Step
1
Step 1:- Register On-line Kenwood’s R oute
Collector
The very first thing you should do is set-up an account on Kenwood’s Route Collector website
via your computer/laptop https://www.route-collector.com/
Route Collector is necessary if you want to use features such as Facebook, Twitter, Gmail,
RSS, Dropbox and Route Planner.
1
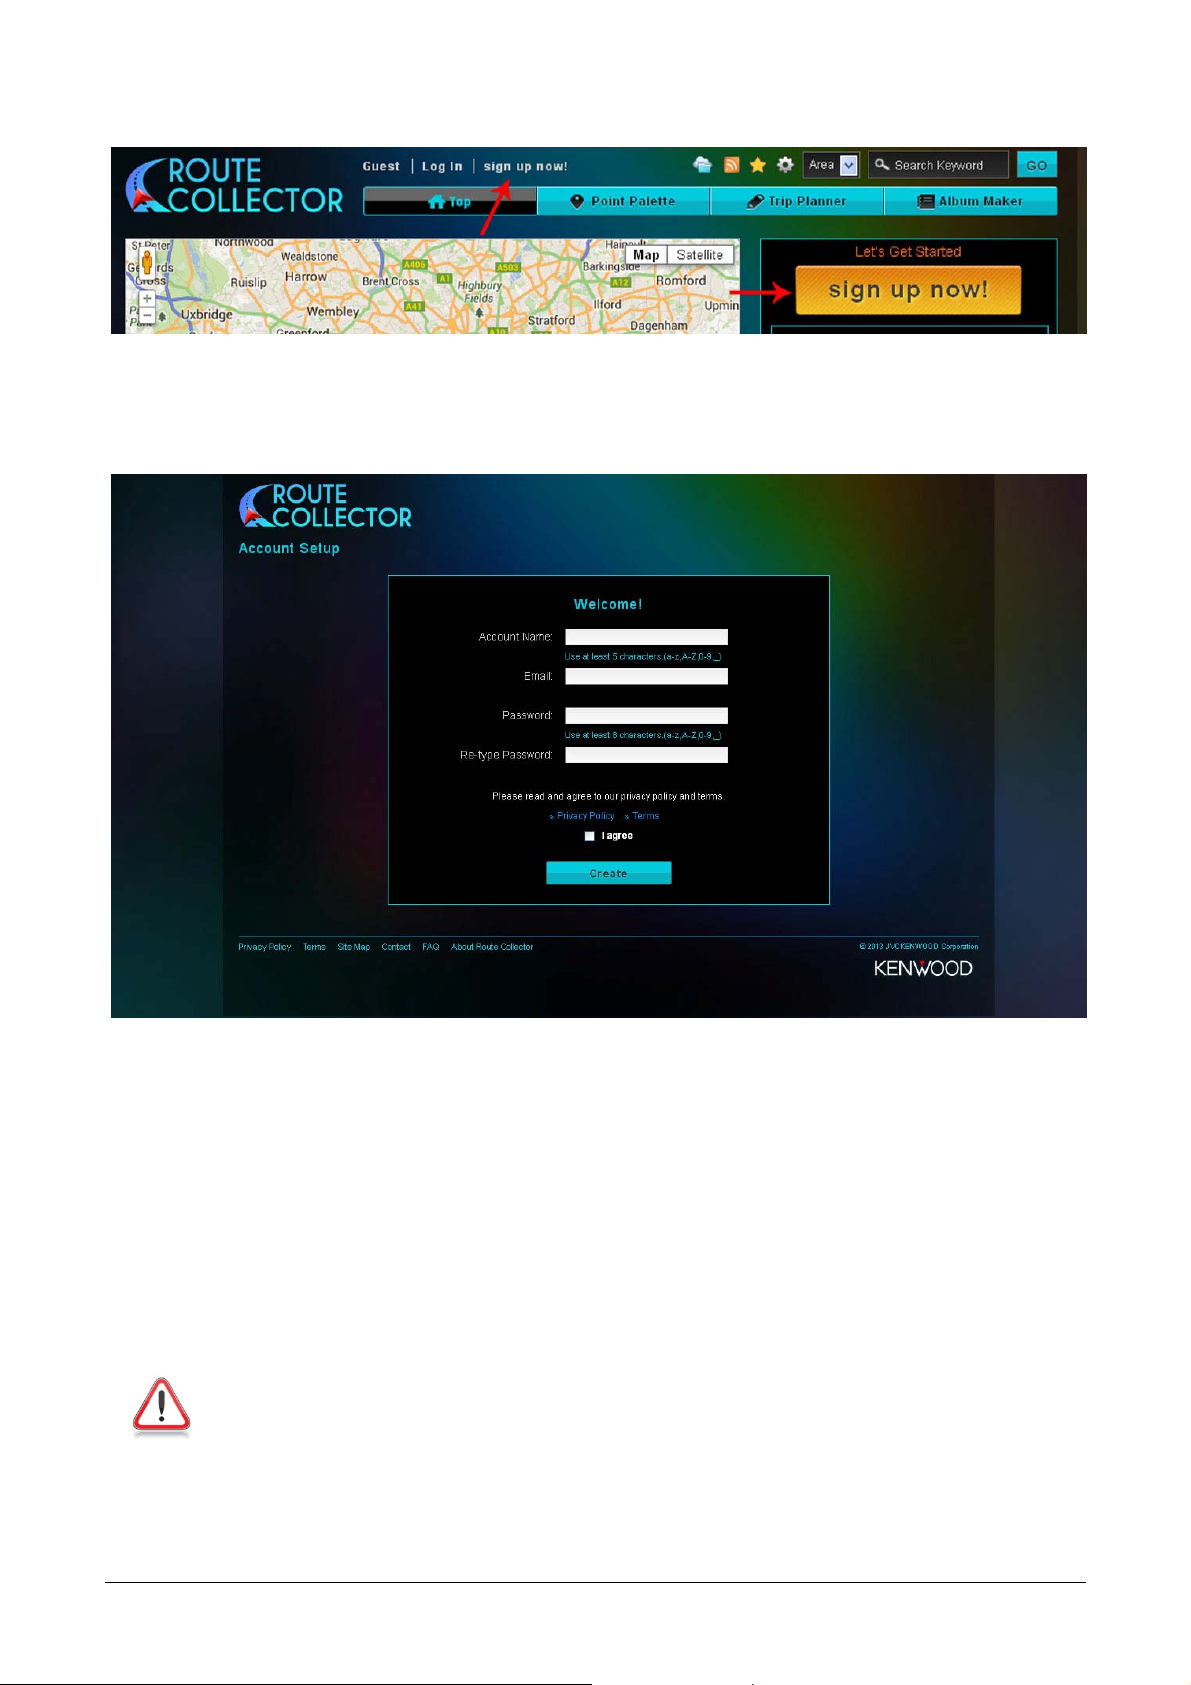
• Click on [Sign Up Now!]
• Input an Account name (Use at least 5 characters (a-z,A-Z,0-9,_))
• E-mail address (Ensure that this e-mail address has not been used before on the Route
Collector website.
• Password (Use at least 8 characters.(a-z,A-Z,0-9,_) and no spaces)
• Retype password
• Then tick [I Agree]
• Click on [Create]
NOTE: Please remember these details
2
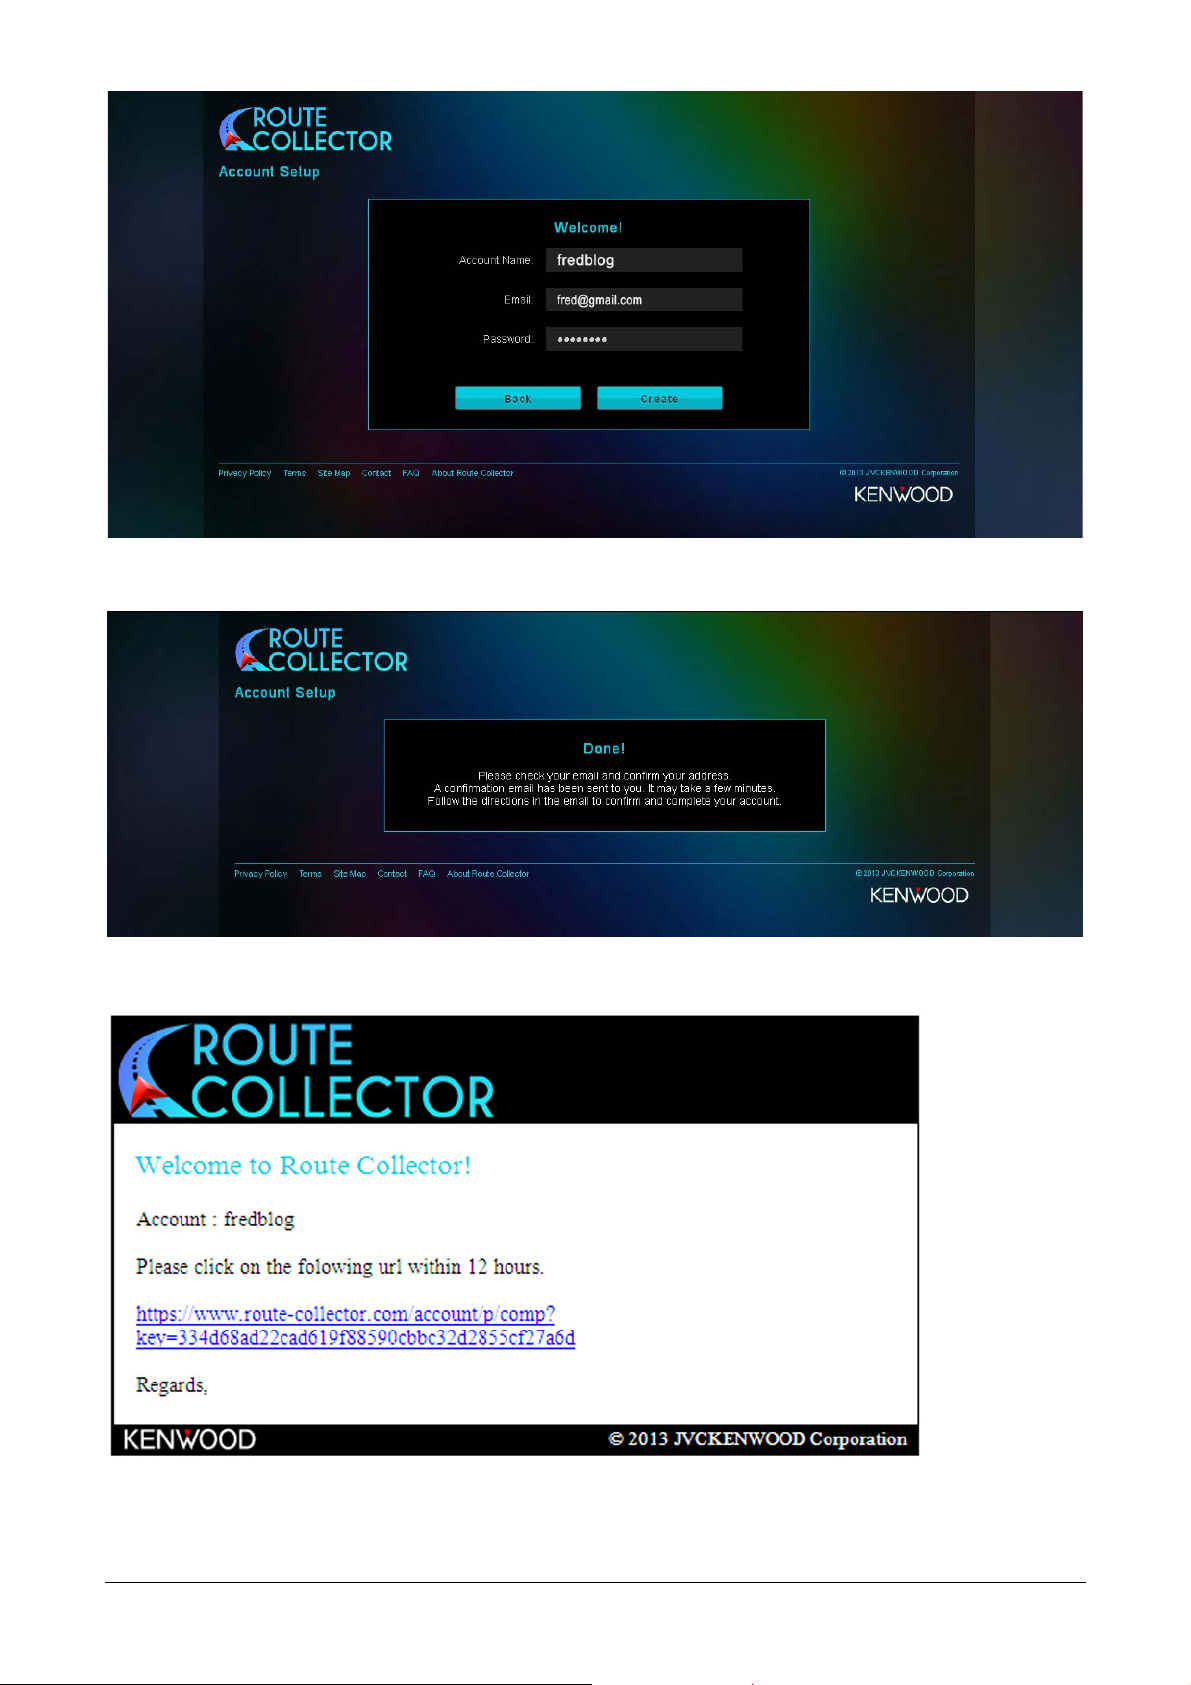
• Check that the details are correct and then click on [Create]
• Now check your e-mail inbox for a confirmation message
• Click the link in the confirmation message
3
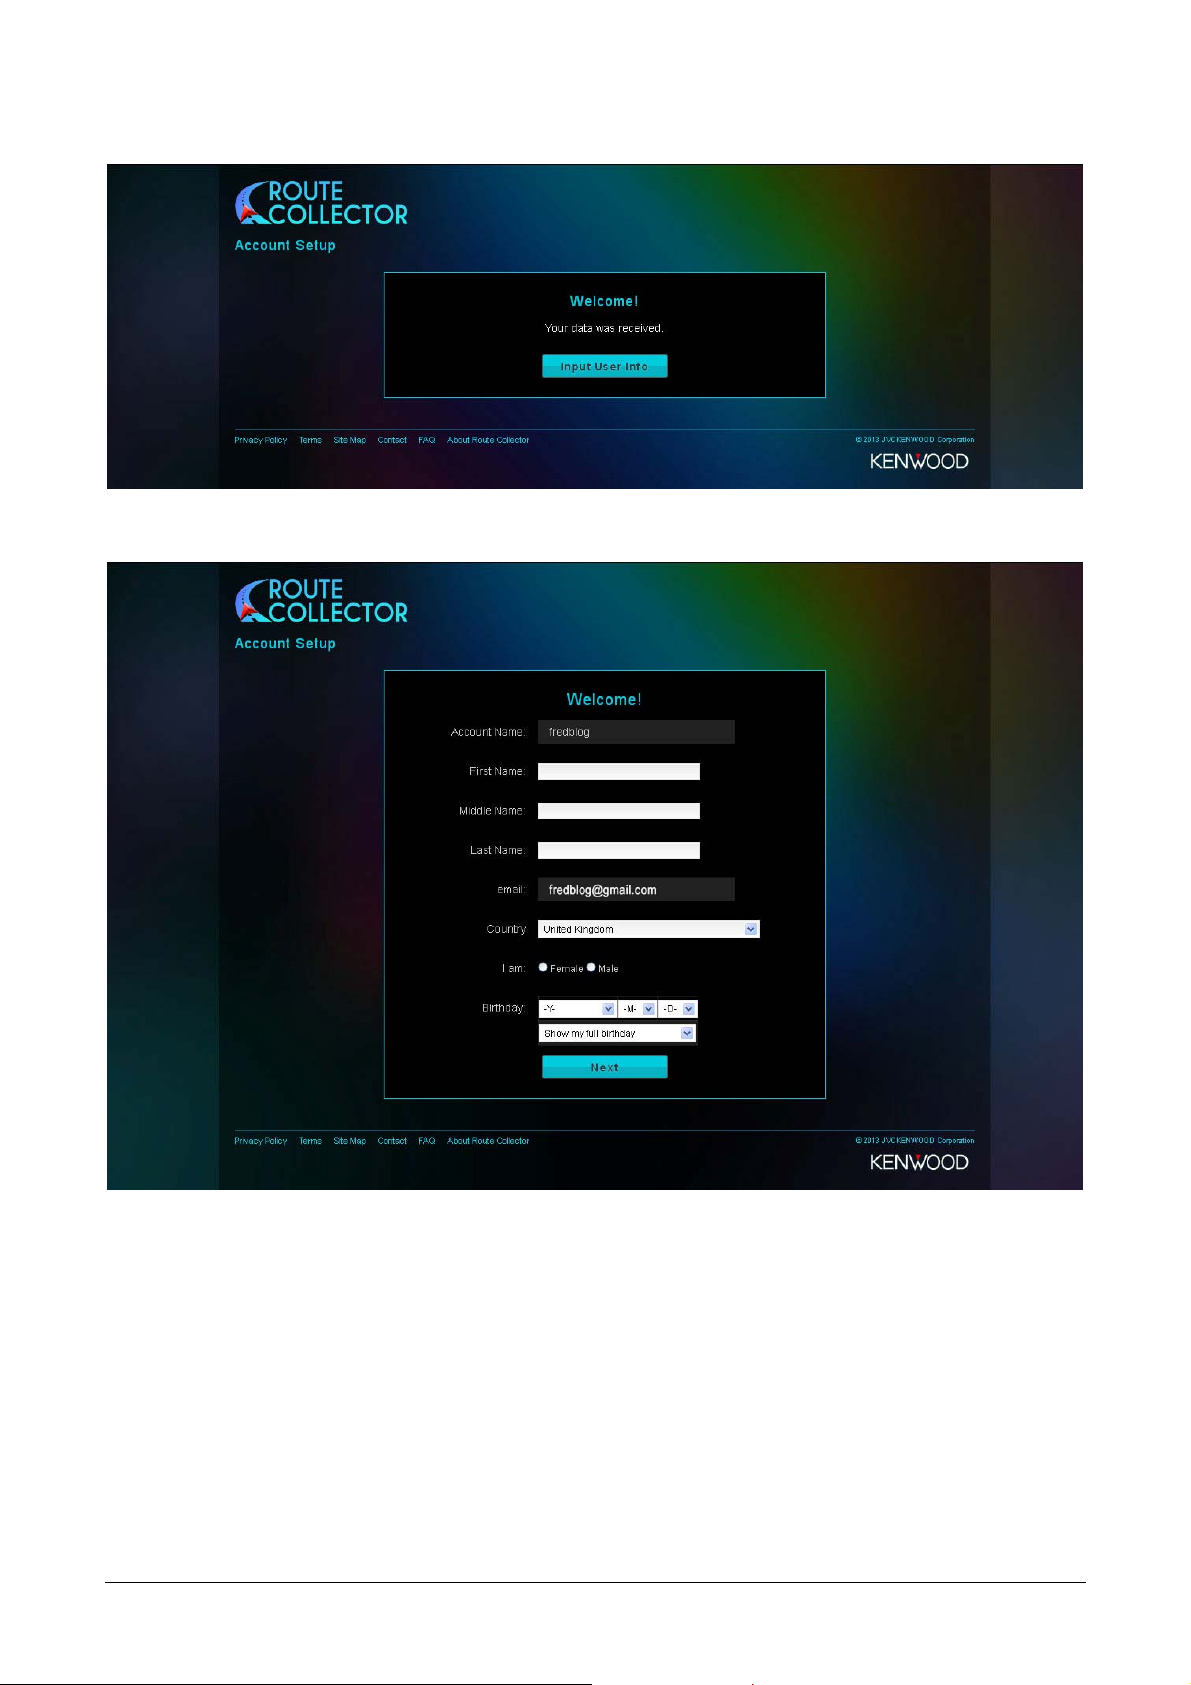
• Now click on [Input User Info]
• Fill in information (Please note that these fields are not mandatory)
• The click on [Next]
4
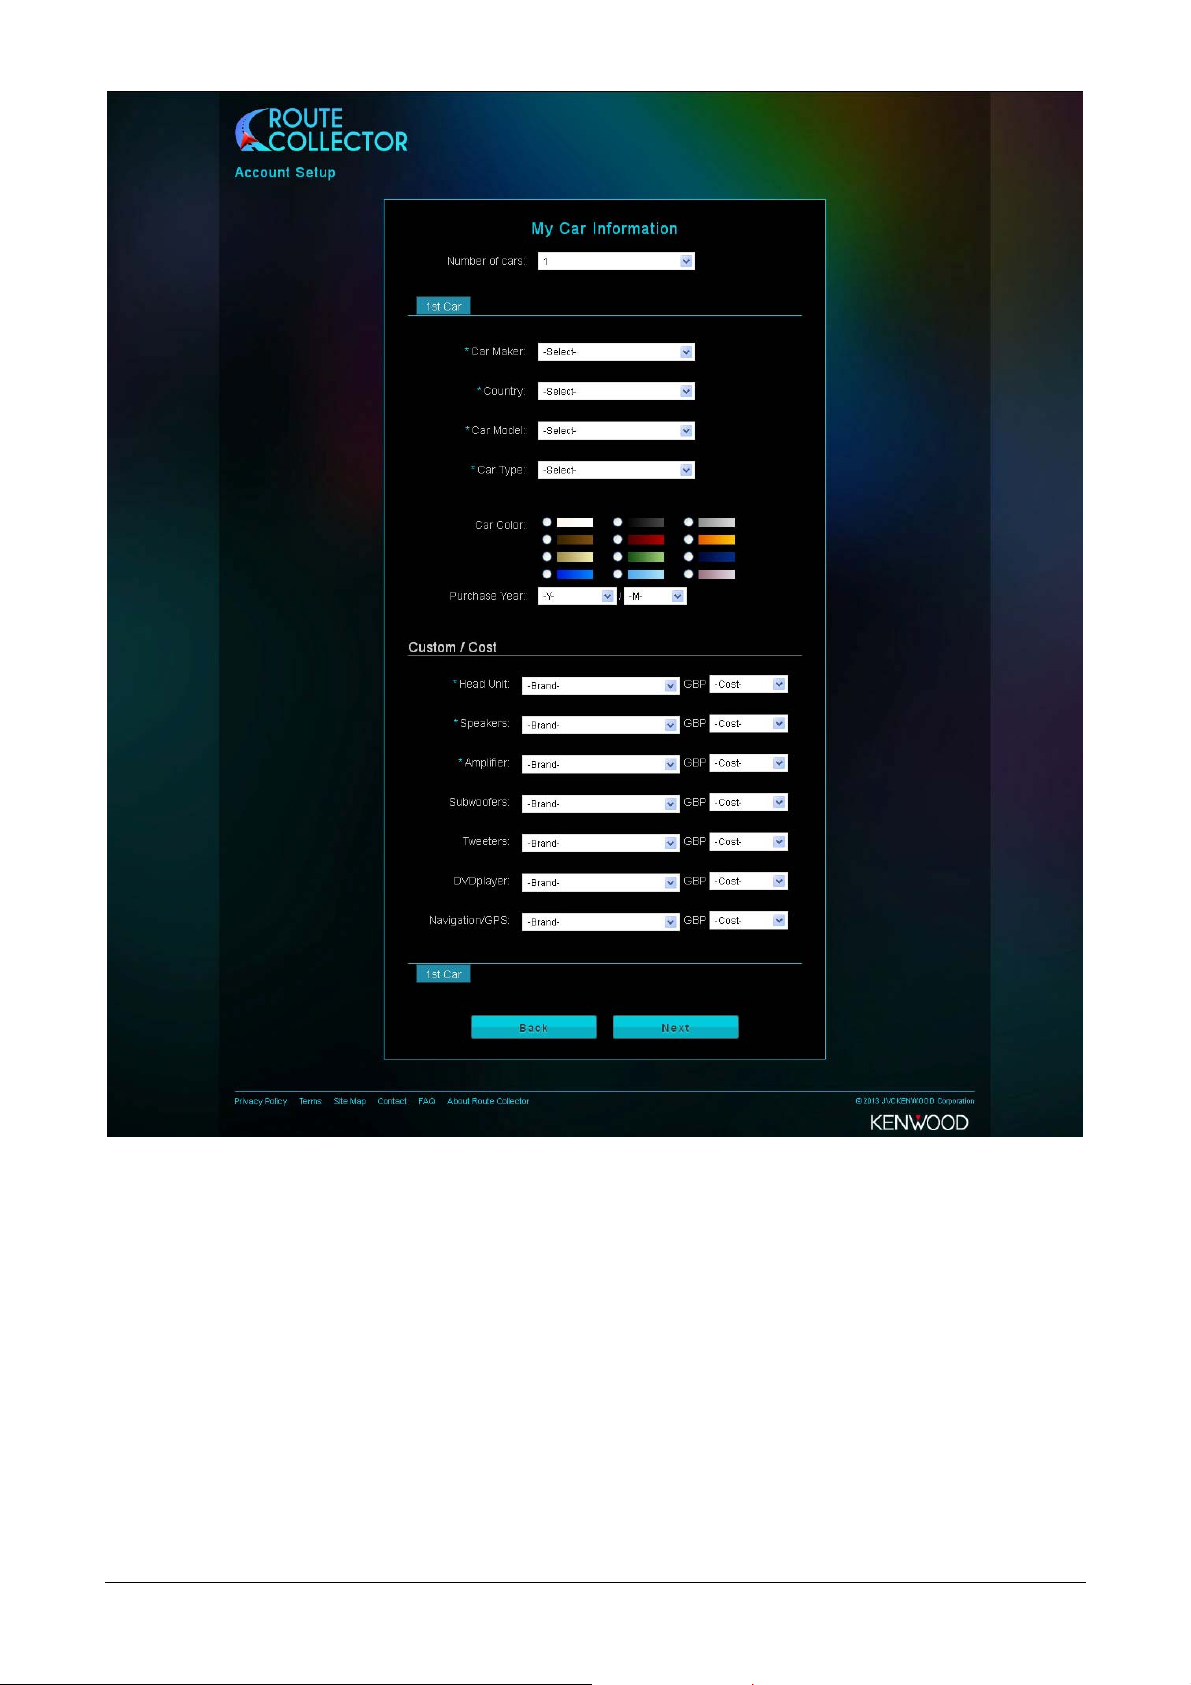
• Fill in information (Please note that these fields are not mandatory)
• The click on [Next]
5

• Check info and click [OK]
The account is now set-up. Go to Step 2 to see how to link this account onto the DNN9230DAB. (We will
explain further features on the Route Collector website later in this guide)
6
Step
2
Step 2:- Setting Up DNN9230DAB with Wifi
Connection
You will require access to the internet to set up the system. This can be done via a wireless
router or by using your phone’s/tablet’s Wifi personal hotspot. (For initial setup we recommend
using a wireless route for quicker internet access)
Before starting please ensure that you have the password for your Wifi router or phone’s/tablets personal
hotspot.
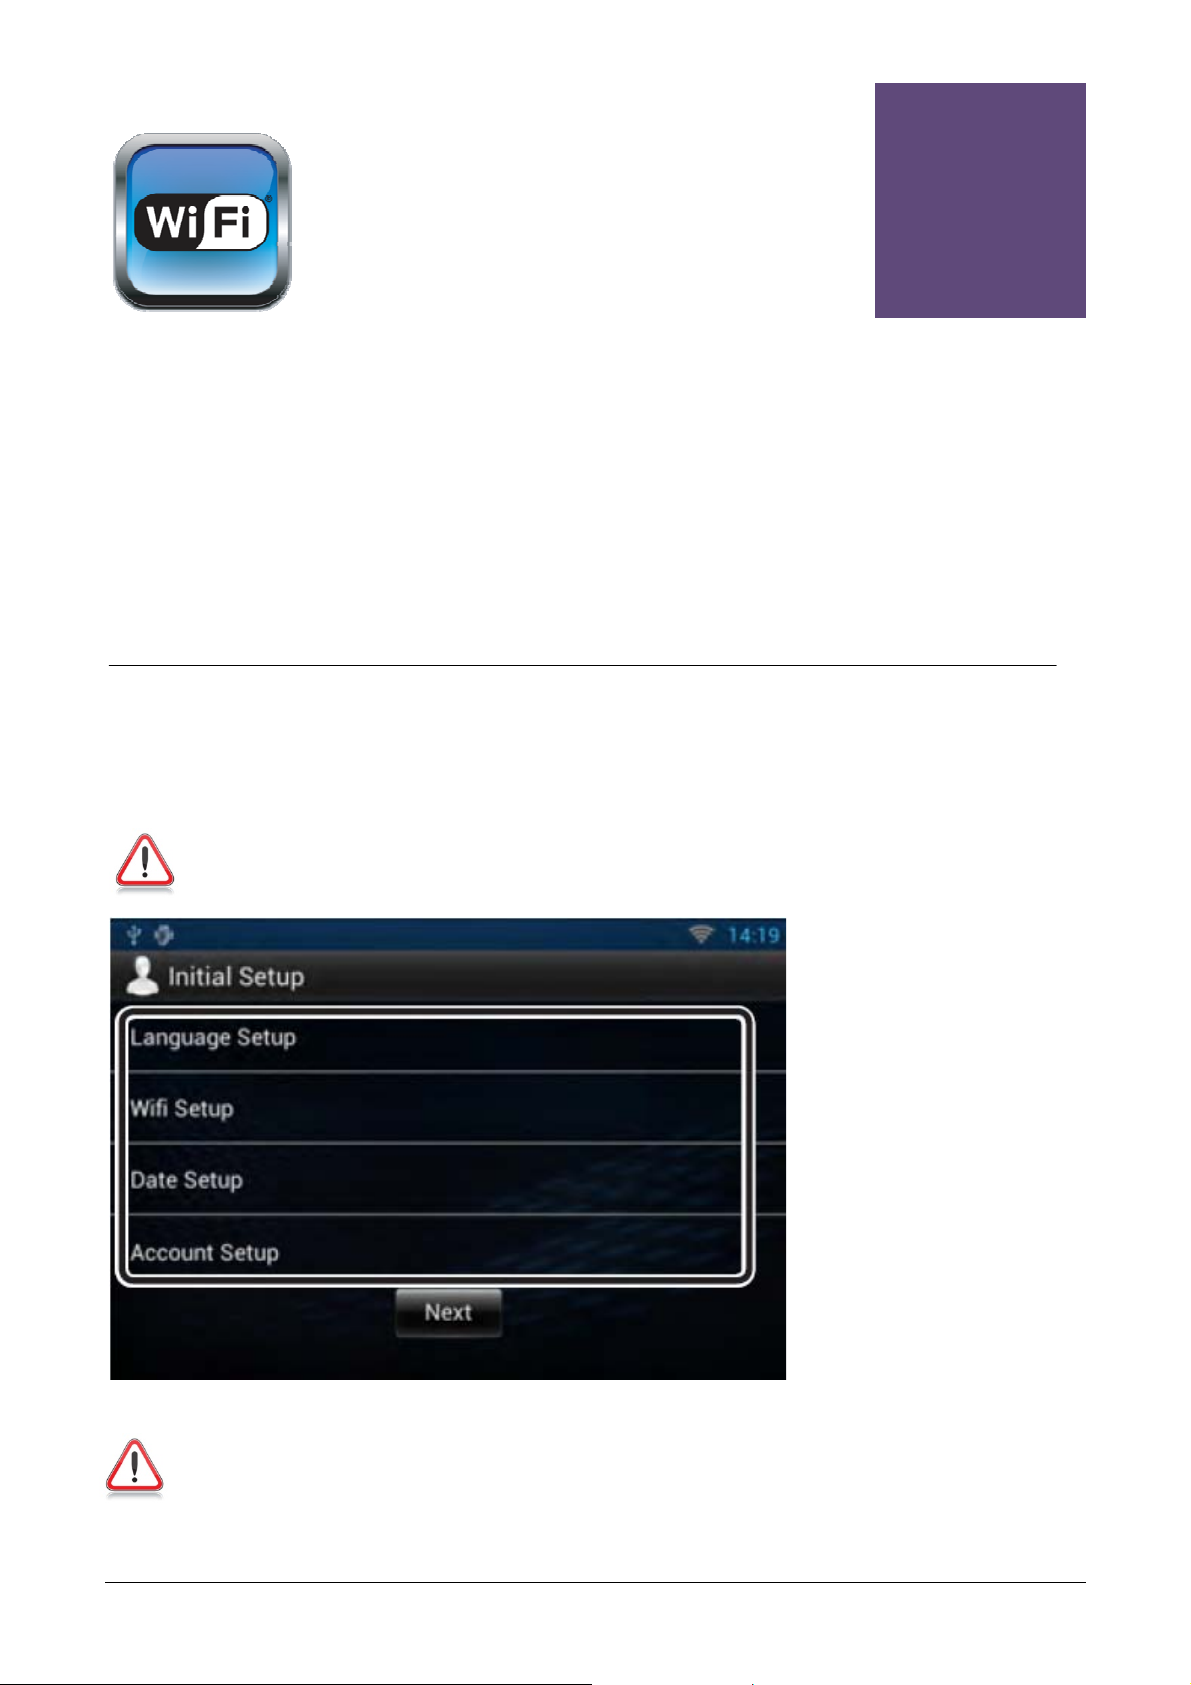
• Power on DNX9230DAB, once powered up you will see the Initial SetUp Page as below
NOTE: If you do not see this screen please select the [Menu] button hard key on the front panel and
then selecting [Setting].
• Select [Wifi Setup]
NOTE: If the demo movie starts then touch the touch-screen anywhere and this will bring you back to
the original screen you where on.
7
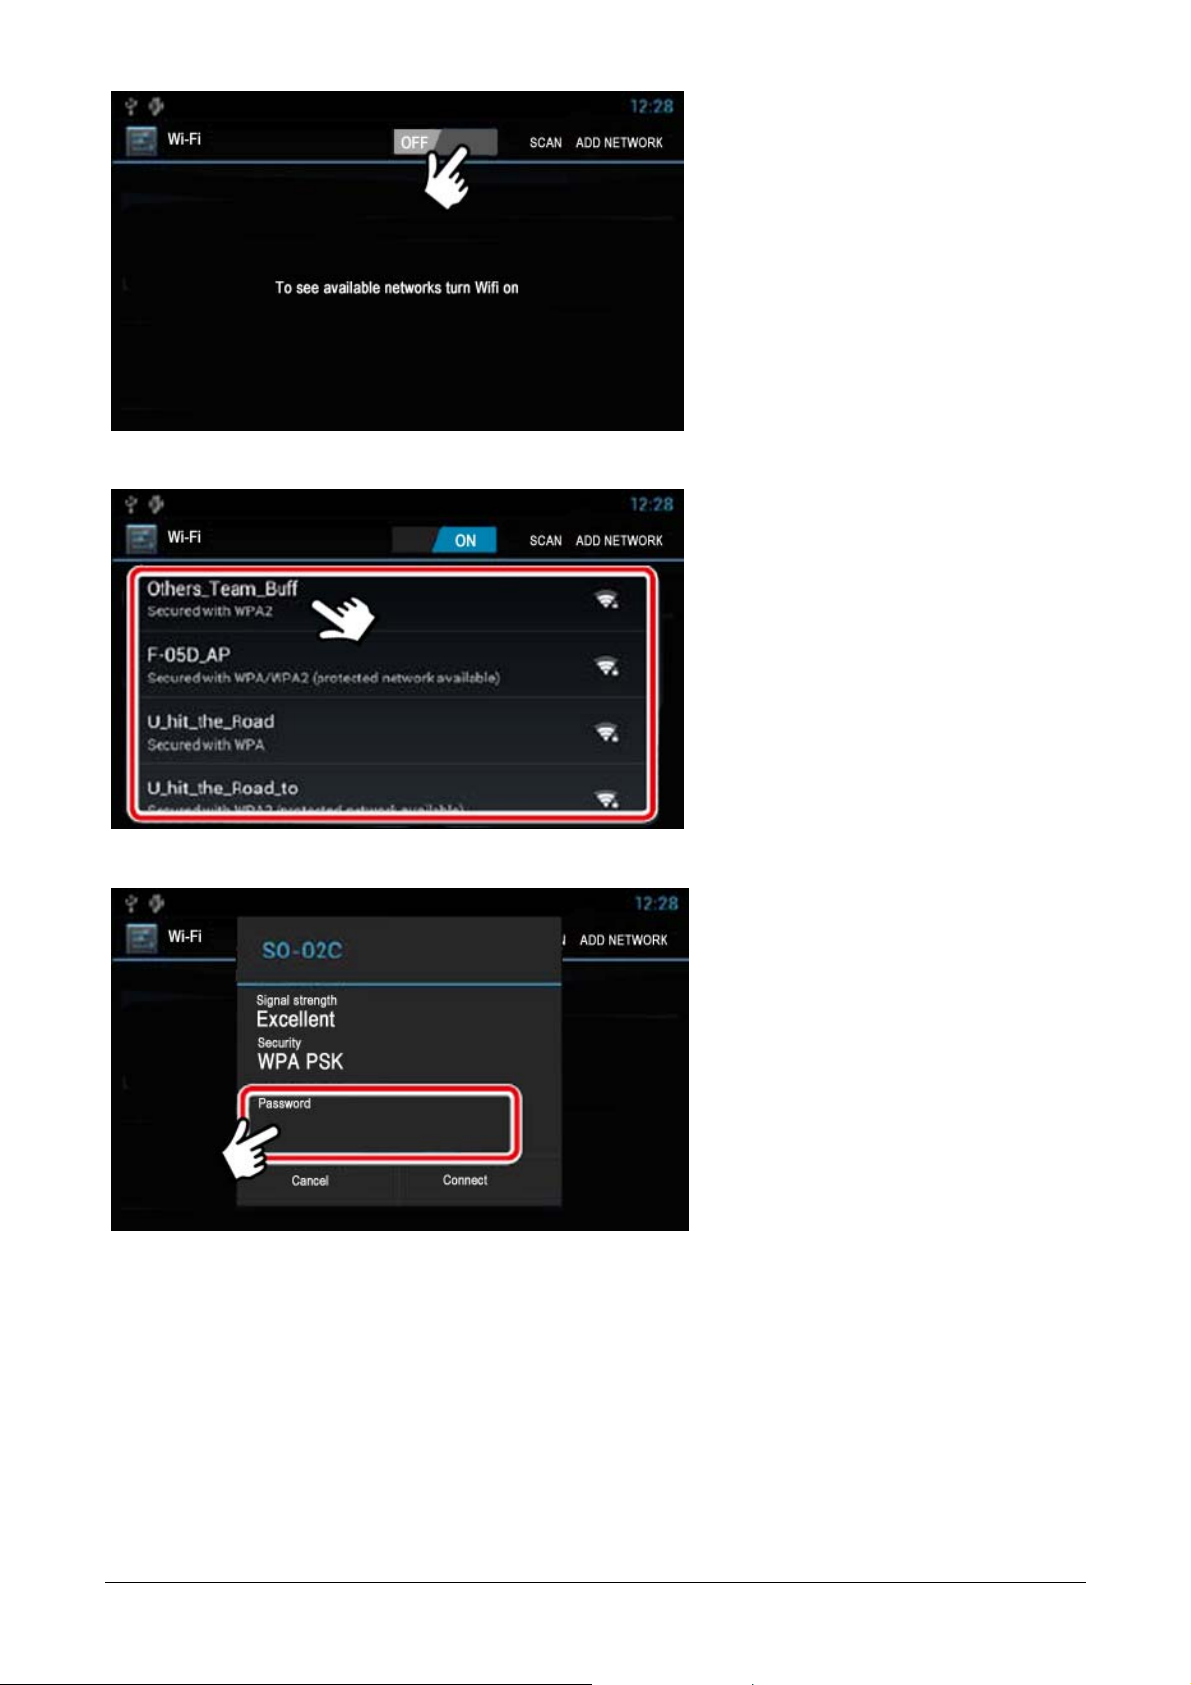
• Switch the Wifi on by touching
the screen as shown
• It will then display “Turning Wifi
on” for a few seconds
• The unit will then automatically
scan for Wifi devices
• Once the list has populated
select the Wifi device you wish to
connect with as show above
• A keyboard will appear, input the password for your router/phone/tablet then select [Done]
• Then select [Connect]
• Your selected Wireless router will then display “Connected”
• Then select the [Home] hard key button on the front of the DNN9230DAB. This will take you
back to the “Initial Setup” screen
• Touch the touch-screen as
shown
8

Step
3
Step 3:- Date/Time Set-up and T urning Off
Demo Mode
The Date & Time needs to be set-up and Demo Mode should be switched off before you
connect your Route Collector account to the DNN9230DAB and all it’s features such as
Facebook, Twitter, Gmail, RSS Feeds, Dropbox etc.
Date and Time Set-up
Setting the date and time manually is only required if there is no Navigation GPS signal and Tuner RDS
reception.
If the DNN9230DAB has the correct date and time please proceed to Turning Off Demo Mode.
• Select [Date Setup]
9

• Uncheck [Automatic date & time
NAV-SYNC]
• Select [Set Date]
• Adjust the date accordingly
• Select [Set]
10
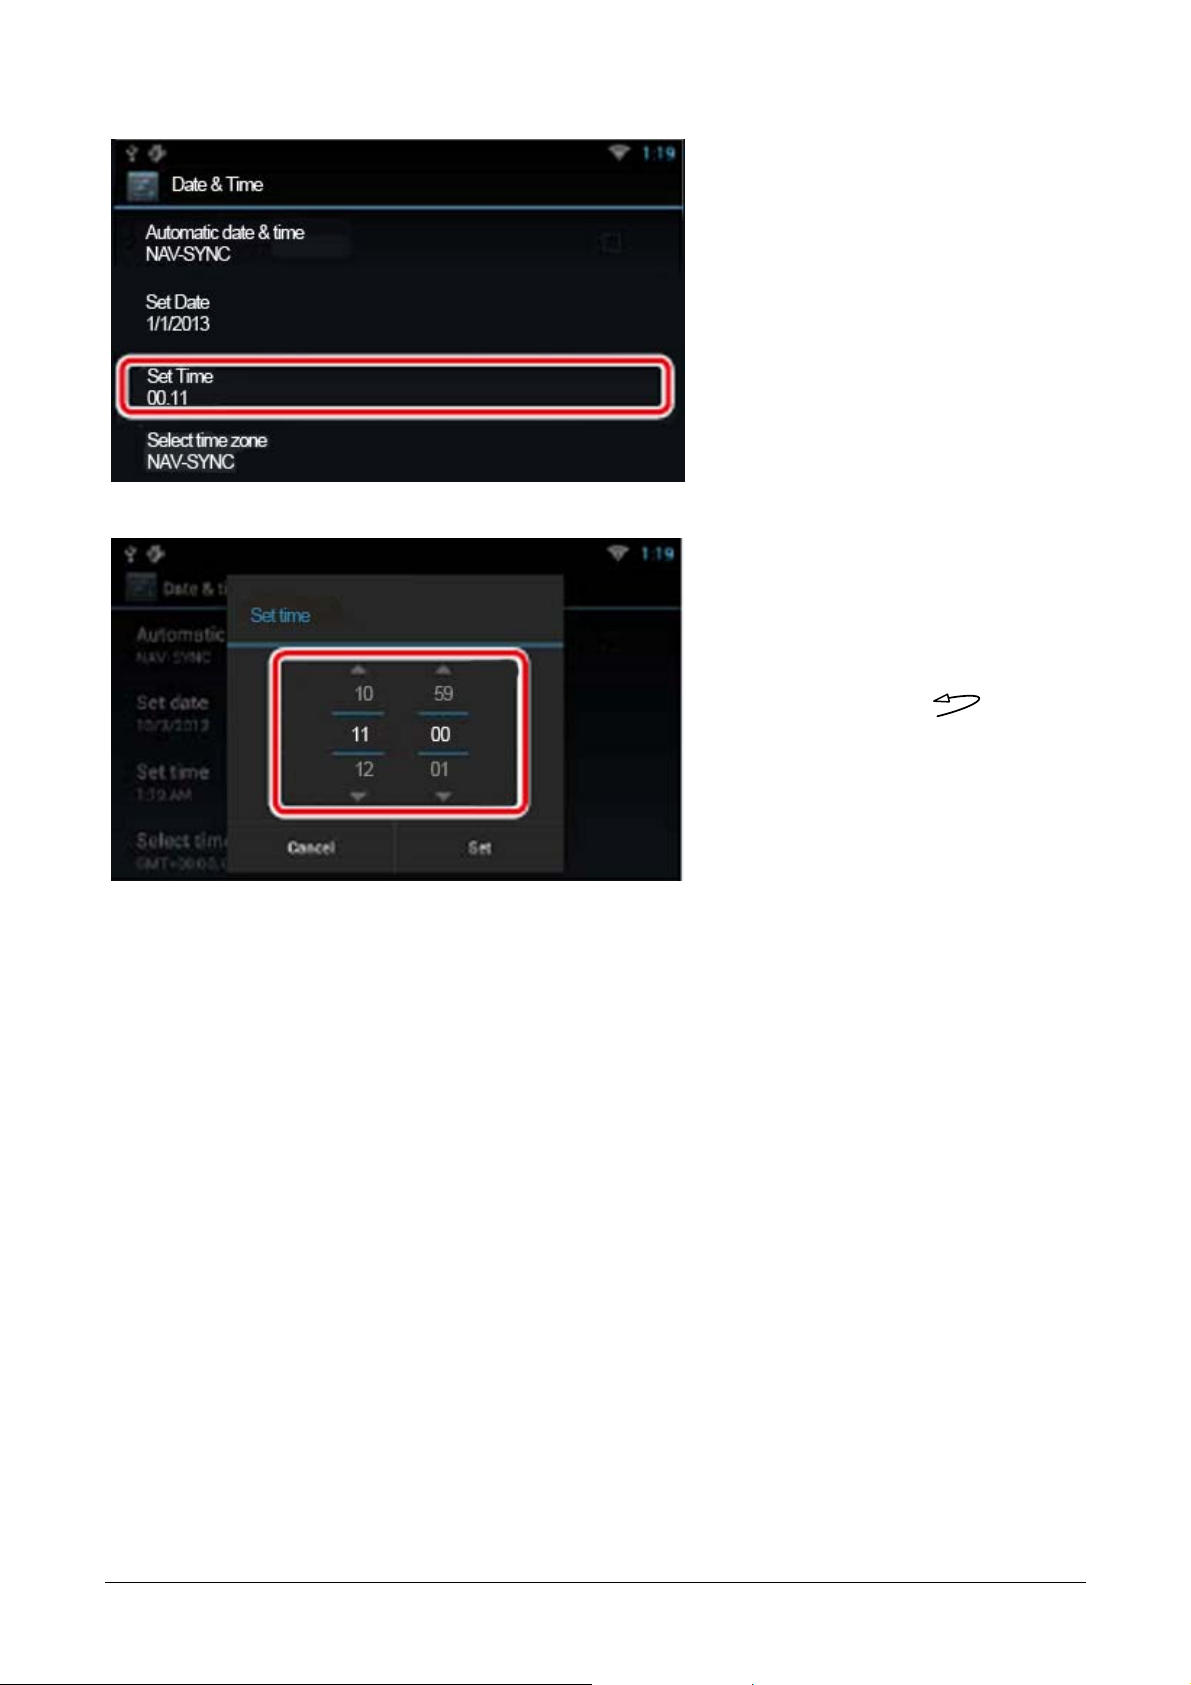
• Select [Set Time]
• Adjust the date accordingly
• Select [Set]
• Then press the [Return
arrow] button hard key on the front
of the DNN9230DAB
11

T urning Off Demo Mode
• Select [Next]
• Gently swipe the touch-screen
upwards
• Turn Demo mode [Off]
• Then select [Finish]
12

Step 4:- Owner Account Setup
NOTE: Please ensure that you have your sign in details for your Route Collector
account which you generated in Step 1 of this guide. Also, if you have just
registered your account as per Step 1 it may take an hour or so before you can link
your DNN9230DAB with your Route Collector.
Step
4
• Select [Administrator]
• Select [OK]
• Wait for the “Network History” page
to load and then press the [Menu]
button hard key on the front of the
DNX9230DAB
13

• Select [Account]
• Select [Set Owner Account]
• Now input your Route Collector Sign
in details.
• Then select [OK]
If you get an error message please
note that if you have just registered
your account as per Step 1 it may take
an hour or so before you can link your
DNN9230DAB with your Route
Collector.
• Select [Auto Login]
• Then on the next screen select
[ON] to enable “Auto Login”
• Then press the [Home] button
hard key on the front of the
DNN9230DAB
14

Step 5:- Setting Up Facebook Account
• The “Home Screen” has 4 different
screens. You can see what screen you
are on by the dots highlighted at the
top of the screen. This image shows
that you are on screen 3 the “Source
Screen”. By gently swiping the screen
with your finger back or forwards you
can see other screens.
• Go to “Home Screen 4” and select
[SNS]
Step
5
15

• Select [Facebook] icon
• Input your login details
• Then select [Log In]
Once your News Feeds have loaded you can view and listen to the posts (select the “Ear icon”). To
update feeds manually gently swipe the screen downwards.
16

Step 6:- Setting Up Twitter Account
• Select [Twitter] icon
Step
6
• Gently swipe the screen upwards
• Input your login details
• Then select [Log In]
17

Step 7:- Setting Up Gmail Account
• Select the [Envelope] icon for e-mail
Step
7
• The only form of email available on
18
this system is Gmail.
Select [Gmail]
•

• Input your Gmail login details and
then select [Done]
Once your Gmail account has sync your
Inbox will appear on the screen
19

Step
8
Step 8:- Setting Up Dropbox Account
Dropbox can be used to store music or images and then linked to your Route Collector
account. This then allows your DNN9230DAB to access these files directly.
• If you do not already have a Dropbox Account please set this up first and add some music files
into a folder in your Dropbox
• Login into your Route Collector Account
• Select the [Storage] icon as above
20

• Click on the [Dropbox] icon
• Click on [Authorize]
21

• Sign In
• Click on [Allow]
22

• You have now linked your Dropbox with your Route Collector Account
• Now you need to transfer/update your Route Collector Storage so that your music/pictures files
are also shown in the Route Collector Storage folder
• Click on the Dropbox icon as above
• Click on [Sync]
23

• Once the music/images files have been upload you will see the screen below you can then make
up playlist from this screen if you wish.
• Now you need to transfer this information from the Route Collector storage to the DNN9230DAB
24

•
• Go to the “Home Screen” by pressing
the [Home] hard key button on the
front of the DNN9230DAB. Then gently
swipe the screen to go to the 3
“Source Home” screen as shown
• Then select the [More] icon as shown
rd
• Now gently swipe your finger up to
show more of the screen
Select [Storage]
• The DNN9230DAB will automatically
now sync with your Dropbox from the
Route Collector. This may take some
time due to your internet connection
speed.
• You can manually sync by pressing the
[Refresh] icon as show in picture
25

Step
9
Step 9:- Setting Up RSS Feeds
RSS Feeds check the latest new feeds, Sports, Business, Tech News and Entertainment
• Go to the “Home Screen” by pre
the [Home] hard key button on the
front of the DNN92
swipe the screen to go to the 4
“Source Home”
• Then select the [More] icon as shown
30DAB. Then gently
screen as shown
th
ssing
• Select the [RSS] icon
26

•
• It will now load RSS categories
• Authorise it to add feeds
Now select from a RSS Category
• Add a RSS feed
27

• It will now load the content
• Once loaded select the [Return] icon
as shown
• ou can add more RSS reeds in the
Y
same way
Once complete click on the [Return]
•
icon
• lick on the [Ear] icon to hear the RSS
C
feed
• Click on [All] or th
e individual right hand
icons to see the different feeds which
you have added
28

•
•
•
How to add more User Accounts
If you have another person(s) who uses your vehicle you ca
enable them to use their own Facebook, Twitter RSS Feeds
ou can set an additional 3 more accounts on this system.
Y
• as per Step 1, Page 4 on this guide
First set up a Route Collector account
• Select [Menu] hard key button on the front panel of
the DNN9230DAB
29
n set up another account(s) to
and Gmail Accounts.
Select [Account]
The select [Account]
Input [Account] and [Password]

•
• Once loaded this page will be
displayed
Select [Lo• gin User select] just to
check that this Account is
selected
• Then press the [Home] button
hard key on the front panel of the
DNN9230DAB
How to switc h between User Accounts
• Select [Menu] hard key button on the front panel of the DNN9230DAB
Select [Account]
30

• Select [Login User select]
31

• Select the account you wish to
use
• Login with your Route Collector
password
• Then press the [Home] button
hard key on the front panel of the
DNN9230DAB
32

How to change over to Guest Account
•
•
Use system with no Facebook, Twitter & Gmail
If you do not wish someone to view your Facebook, Twitte
r and Gmail accounts. For
instants your vehicle goes in for servicing or you lend someone your vehicle. You need to
switch from your Owner Account over to Guest Account. They will then be able to use the
system with all the normal features apart from Social Media and Gmail.
• Select [Menu] hard key button on the front panel of the DNN9230DAB
Then select [Account]
• Select [Login User select]
Select [Guest]
33 34

• Once loaded this screen will be
•
•
•
displayed.
• Then press the [Ho
me] button
hard key on the front panel of the
DNN9230DAB
How to change bac k fr
om Guest Account to Owner Account
• Select [Menu] hard key button on the front panel of
the DNN92
30DAB
Then select [Account]
Select [Login User select]
Select your account

•
Select [Password]
• Input your Route Collector
Password
• Then select [Done]
• Once loaded this screen will be
displayed.
• Then press the [Home] button
hard key on the front panel of the
DNN9230DAB
35

How to use T rip Planner
Going on a trip, then plan your route out first on Trip Planner and then upload this onto your
DNN9230DAB. If you are going on a driving holiday plan your whole holiday step by step.
• Log into Route Collector
• Click on [Trip Planner]
36

• Click on [Make a New T rip Plan]
In
eparture point and destination point and select search • put your d
37

• The route will be shown on the Trip Planner screen
• Then select [Edit End]
• If you want to add a way point(s) then click on the [Icon +] marker below the [Search] button
• Input a title
• You can select a date and time if required
• Then click on [Nav Sync]
38

• Select [Next]
• An option will appear allowing you to share this route on Facebook or Twitter if you wish
• Then the route will sync with the DNN9230DAB
• Now go to your DNN9230DAB and select [Navi]
• From the [Where To?] screen
select [Apps]
39 40

• Scroll down the screen
• Then select [Trip Planner]
• Select [Yes] • It will not load the route(s)
• Select the route which you wish
• Select [Go]
to use
 Loading...