


36275708001
Kenmore 36275708001, 36275707001, 36275702001, 36275701001, 36275528001 Owner’s Manual
...
GAS RANGE
COClNA (ESTUFA) DE GAS
Models, Modelos: 72321, 72328, 72491, 72498, 72691, 72695, 73281, 73288, 73485, 75321,
75322, 75327, 75328, 75491, 75492, 75497, 75498, 75521, 75528, 75691,
75695, 75696, 75698,_5_0 _ 75702, 75707, 75708
f Ill II
i'11
o
1B3D5580P085
(SR4261) 190 JR
PrintedinMexico Sears, Roebuck and Co., Hoffman Estates, IL 60179 U.S.A. www.sears.com
Safety Instructions
Anti-Tip Device ..............................................2, 3, 35, 42
Important Safety Instructions .....................................2-6
Care & Ma.intenance
Before You Call for Service ......................................46-48
Care and Cleaning .........................................................29-35
Consumer Services ......................................Back Cover
Repair Services ....................................................Back Cover
Self-Clean Cycle ..........................................................26-28
Thermostat Adjustment ..........................................................19
WARM-N-READY Drawer ................................... 35
Warranty ..................................................................................50
Installation Instructions
Air Adjustment ........................................................................44, 45
Anti-Tip Device .....................................................................39, 46
Connect the Range to Gas ...................................40-42
Dimensions & Clearances ..........................................................37
Electrical Connections ........................................42, 43
LP ....................................................................................................46
Operation
Features of Your Range .....................................................7
Baking ......................................................................................15-18
BroilinglBroiling Guide ..........................................................22, 23
Oven Control, Clock and Timer ..............:...................11, 12
Roasting, Roasting Guide ................................................20, 21
Surface Cooking ............................................................................8-10
WARM-N-READY Drawer .....................................24, 25
En EspaSol
Instrucciones en espa_ol .........................................................51
For your convenience and future reference, please write
down your model and serial numbers in the space
provided. The model number and serial number of your
gas range can be found on a plate fastened to the front
frame behind the broiler drawer, storage drawer,
WARM-N-READY drawer, or kick panel.
MODEL NUMBER:
SERIAL NUMBER:
WARNING= If the information in this
manual is not followed exactly, a fire or
explosion may result causing property
damage, personal injury or death.
WARNING
• ALL RANGES CAN TIP
o INJURY TO PERSONS
COULD RESULT
° INSTALL ANTI-TIP DEVICES
PACKED
WITH RANGE
• SEE INSTALLATION
INSTRUCTIONS
©Sears, Roebuck and Co,.
--Do not store or use gasoline or other
flammable vapors and liquids in the
vicinity of this or any other appliance.
mWHAT TO DO IF YOU
SMELL GAS
o Do not try to light any appliance.
o Do not touch any electrical switch; do not
use any phone in your building.
• Immediately call your gas supplier from a
neighbor's phone. Follow the gas supplier's
instructions.
• If you cannot reach your gas supplier, call
the fire department.
--Installation and service must be performed
by a qualified installer, service agency or
the gas supplier.
Read all instructions before •
using this appliance.
IMPORTANT SAFETY
NOTICE
• The California Safe Drinking Water and Toxic
Enforcement Act requires the Governor of California •
to publish a list of substances known to the state to
cause cancer, birth defects or other reproductive harm,
and requires businesses to warn customers of
potential exposure to such substances..
Gas appliances cause minor exposure to four
of these substances, namely benzene, carbon
monoxide, formaldehyde and soot, caused primarily by
the incomplete combustion of natural gas or LP fuels.
Properly adjusted burners, indicated by a bluish rather
than a yellow flame, will minimize incomplete
combustion.. Exposure to these substances can be
minimized further by venting with an open window or
using a ventilation fan or hood_
- Fluorescent light bulbs and safety valves on
standing pilot ranges contain mercury, if your
model has these features, they must be recycled
according to local, state and federal codes
When You Get Your Range
• Have the installer show you the location of the
range gas shut-off valve and how to shut it off
if necessary,
• Have your range installed and properly grounded
by a qualified installer in accordance with the
Installation Instructions,, Any adjustment and service
should be performed only by qualified gas range
installers or service technicians,.
• Plug your range (electric ignition models only) into
a 120-volt grounded outlet only. Do not remove the
round grounding prong from the plug., if in doubt about
the grounding of the home electrical system, it is your
personal responsibility and obligation to have an
ungrounded outlet replaced with a properly grounded,
three-prong outlet in accordance with the National
Electrical Code. In Canada, the appliance must be
electrically grounded in accordance with the Canadian
Electrical Code. Do not use an extension cord with
this appliance_
° Do not attempt to repair or replace any part of
your range unless it is specifically recommended
in this manual. All other servicing should be referred
to a qualified technician..
Be sure all packing materials are removed from
the range before operating it to prevent fire or smoke
damage, should the packing matedal ignite.
Locate the range out of kitchen traffic path and
out of drafty locations to prevent pilot outage
(on models with standing pilots) and poor air
circulation.
After prolonged use of a range, high floor
temperatures may result and many floor coverings
will not withstand this kind of use. Never install the
range over vinyl tile or [inoteum that cannot withstand
such type of use. Never install it directly over interior
kitchen carpeting.
Be sure your range is correctly adjusted by a
qualified installer for the type of gas (natural or
LP), that is to be used_ Your range can be converted
for use with either type of gas. See the Installation
Instructions..
WARNING: Theconversionofyourrange
to LP gas must be made by a qualified LP technician
installer in accordance with the manufacturer's
instructions and all codes and requirements of the
authority having jurisdiction. Failure to follow these
instructions could result in serious injury or property
damage. The qualified agency performing this work
assumes responsibility for the conversion.
AWARNING
(_ ll ranges can tip and injury could
result. To prevent accidental tipping
of the range, attach it to the wal! and
floor by installing the Anti-Tip device
supplied..
To check if the device is installed and
engaged properly, remove the storage
drawer, broiler drawer, WARM-N-READY
drawer, or kick panel and inspect the
rear leveling lego Make sure it fits
securely into the slot_
If you pull the range out from the wall
for any reason, make sure the device is properly engaged
when you push the range back against the wall If it is
not, there is a possible risk of the range tipping over and
causing injury if you or a child stand, sit or lean on an open
door. Please refer to the Anti-Tip device information in
this manual. Failure to take this precaution could result
in tipping of the range and injury.
(continued next page)
Using Your Range
• Do not leave children alone or unattended where a
range is hot or in operation. They could be seriously
burned.
• Do not allow anyone to climb, stand or hang on the
door, storage, broiler, or WARM-N-READY drawer,
(depending on model) or cooktop. They could
damage the range and even tip it over, causing severe
personat injury..
= Let the burner grates and other surfaces cool
before touching them or leaving them where
children can reach them.
CAUTION: ITEMS OF INTEREST TO CHILDREN
SHOULD NOT BE STORED IN CABINETS ABOVE A
RANGE OR ON THE BACKSPLASH OF A RANGE--
CHILDREN CLIMBING ON THE RANGE TO REACH
ITEMS COULD BE SERIOUSLY INJURED.
° Never wear loose fitting or hanging garments while
using the appliance. Be carefui when reaching for
items stored in cabinets over the cooktop.
Flammable material could be ignited if brought
in contact with flames or hot oven surfaces and
may cause severe burns.
= Do not use water on grease fires, Never pick up a
flaming pan. Turn the controls off.. Smother a flaming
pan on a surface unit by covering the pan completely
with a well-fitting Iid, cookie sheet or flat tray_ Use a
multi-purpose dry chemical or foam-type fire
extinguisher.
• Flaming grease outside a pan can be put out by
covering it with baking soda or, if available, by using
a multi-purpose dry chemical or foam4ype fire
extinguisher.
= Flame in the oven, storage drawer, broiler drawer,
or WARM-N-READY drawer can be smothered
completely by closing the oven door or drawer and
turning the oven off or by using a multi-purpose dry
chemica_ or foam-type fire extinguishe[.
• Do not store flammable materials in an oven, range
storage drawer or broiler drawer, WARM-N-READY
drawer, or near the cooktop.
• Do not store or use combustible materials,
gasoline or other flammable vapors and liquids in
the vicinity of this or any other appliance.
• Do not let cooking grease or other flammable
materials accumulate in or near the range.
• Cook meat and poultry thoroughly--meat to at
least an INTERNAL temperature of 160°E. and poultry
to at least an INTERNAL temperature of 180°E
Cooking to these temperatures usually protects
against foodborne illness..
• For your safety, never use your appliance for
warming or heating the room.
Surface Cooking
• Always use the LtTE position (on models with
electric ignition) or the HI position (on models with
standing pilots) when igniting the top burners and
make sure the burners have ignited.
• Never leave the surface burners unattended at high
flame settings. Boiiovers cause smoking and greasy
spiltovers that may catch on fire.
• Adjust the top burner flame size so it does not
extend beyond the edge of the cookware. Excessive
flame is hazardou&
. Use only dry pot holders--moist or damp pot holders
on hot surfaces may result in burns from steam..
• Do not let pot holders come near open flames
when lifting cookware. Do not use a towel or other
bulky cloth in place of a pot holder
o To minimize the possibility of burns, ignition of
flammable materia}s and spillage, turn cookware
handles toward the side or back of the range without
letting them extend over adjacent burners..
- Always turn the surface burners to OFF before
removing cookware.
° Carefully watch foods being fried at a high flame
setting.
• Never block the vents (air openings) of the range.
They provide the air inlet and outlet that are necessary
for the range to operate properly with correct
combustion. Air openings are located in the following
places:
--Oven vent at the rear of the cooktop.
--Air intake under the broiler drawer.
--Air vent at the top of the oven door.

• Do not use a wok on models with sealed burners if
the wok has a round metal ring that is placed over
the burner grate to support the wok. This ring acts as
a heat trap, which may damage the burner grate and
burner head Also, it may cause the burner to work
improperly. This may cause a carbon monoxide level
above that allowed by current standards, resulting in a
health hazard
• Foods for frying should be as dry as possible. Frost
on frozen foods or moisture on fresh foods can cause
hot fat to bubble up and over the sides of the pan.
• Use the least possible amount of fat for effective
shallow or deep fat frying. Filling the pan too full
of fat can cause spillovers when food is added.
, If a combination of oils or fats will be used
in frying, stir together before heating or as fats
melt slowly
• Always heat fat slowly and watch as it heats.
• Use a deep-fat thermometer whenever possible to
prevent overheating fat beyond the smoking point.
• Never try to move a pan of hot fat, especially a deep
fat fryer. Wait until the fat is cool
• When using glass cookware, make sure it is designed
for top-of-range cooking.
• Use proper pan size, Avoid pans that are unstable or
easily tipped. Select cookware having flat bottoms large
enough to properly contain food and avoid boilovers
and spillovers and large enough to cover burner grates
This will both save cleaning time and prevent
hazardous accumulations of food, since heavy
spattering or spilfovers left on the range can ignite
Use pans with handles that can be easily grasped
and will remain coo!.
• Keep all plastics away from the top burners.
o Do not leave plastic
items on the
cooktop--they may
melt if left too close
to the vent.
• Do not leave any
items on the cooktop. Vent appearance and Eocation vary
The hot air from the vent may ignite flammable items
and will increase pressure in closed containers, which
may cause them to bursL
• To avoid the possibility of a burn, always be certain
that the controls for all burners are at the OFF
position and all grates are cool before attempting
to remove them.
• When flaming foods are under the hood, turn the
fan off. The fan, if operating, may spread the flames.
• If the range is located near a window, do not hang
long curtains that could blow over the top burners and
create a fire hazard
• When a pilot goes out (on models with standing
pilots), you wilt detect a faint odor of gas as your signal
to relight the pilot When relighting the pilot, make sure
the burner controls are in the OFF position, and follow
instructions in the Installation Instructions to relight
• If you smell gas, and you have already made sure the
pilots are lit (on models with standing pilots), turn off the
gas to the range and call a qualified service technician°
Never use an open flame to locate a leak.
WARM-N-READY Drawer
• The purpose of the WARM-N-READY drawer is to
hold hot cooked foods at serving temperature,
Always start with hot food; cold food cannot be
heated or cooked in the WARM-N-READY drawer.
• Do not use the WARM-N-READY drawer to dry
newspapers. If overheated, they can catch on fire..
• Do not leave paper products, cooking utensils
or food in the WARM-N-READY drawer when
not in use.
• Never leave jars or cans of fat drippings in or near
your WARM-N-READY drawer.
• Always keep wooden and plastic utensils and
canned food a safe distance away from your
WARM-N-READY drawer.
• Do not warm food in the WARM-N-READY drawer
for more than two hours.
• Do not touch the heating element or the interior
surface of the WARM-N-READY drawer. These
surfaces may be hot enough to cause burns
REMEMBER: The inside surface of the WARM-N-
READY drawer may be hot when the drawer is opened.
• Use care when opening the drawer. Open the drawer
a crack and let hot air or steam excape before removing
or replacing food.. Hot air or steam which escapes can
cause burns to hands, face and/or eyes.
• Do not use aluminum foil to line the drawer. Foil is
an excellent heat insulator and will trap heat beneath it.
This will upset the performance of the drawer and it
could damage the interior_
(continued next page)
Baking, Broiling and Roasting
• Do not use the oven for a storage area. Items stored
in the oven can ignite,
• Stand away from the range when opening the door
of a hot oven. The hot air and steam that escape
can cause burns to hands, face and eyes.
• Keep the oven free from grease buildup.
° Place the oven shelves in the desired position while
the oven is cool.
= Pulling out the shelf to the shelf-stop is a
convenience in lifting heavy foods. It is also a
precaution against burns from touching hot
surfaces of the door or oven walls. The lowest
position (R) is not designed to slide.
• Do not heat unopened food containers. Pressure
could build up and the container could burst,
causing an injury.
° Do not use aluminum foil anywhere in the oven
except as described in this manual. Misuse coutd
result in a fire hazard or damage to the range.
° Never use aluminum foil to line the oven bottom.
Improper use of foil could start a fire.
• When using cooking or roasting bags in the oven,
follow the manufacturer's directions..
• Use only glass cook-ware that is recommended for
use in gas ovens.
= Always remove broiler pan from the oven or the
broiler compartment as soon as you finish broiling.
Grease left in the pan can catch on fire if oven is used
without removing the grease from the broiler pan°
o When broiling, if meat is too close to the flame,
the fat may ignite. Trim excess fat to prevent
excessive flare-ups,_
° Make sure the broiler pan is in place correctly to
reduce the possibility of grease fires.
° If you should have a grease fire in the broiler pan,
turn the oven off and keep the broiler compartment door
closed to contain fire until it burns out°
Self-Cleaning Oven
• Do not clean the door gasket. The door gasket is
essential for a good seal, Care should be taken not
to rub, damage or move the gasket.
° Do not use oven cleaners. No commercial oven
cleaner or oven liner protective coating of any kind
should be used in or around any part of the oven.
Residue from oven cleaners wilt damage the inside
of the oven when the self-clean cycle is used°
• Before self-cleaning the oven, remove the broiler pan,
grid, the shelves and other cookware°
° IMPORTANT: The health of some birds is extremely
sensitive to the fumes given off during the Setf-Cleaning
cycle of any range. Move birds to another well
ventilated room.
• Be sure to wipe up excess spillage before starting
the self-clean cycle.
° If the self-cleaning mode malfunctions, turn the
oven off and disconnect the power supply. Have
it serviced by a qualified technician.
o Clean only parts listed in this Use and Care Manual.
= Keep the range clean and free of accumulations of
grease or spillovers, which may ignite.
SAVE THESE INSTRUCTIONS
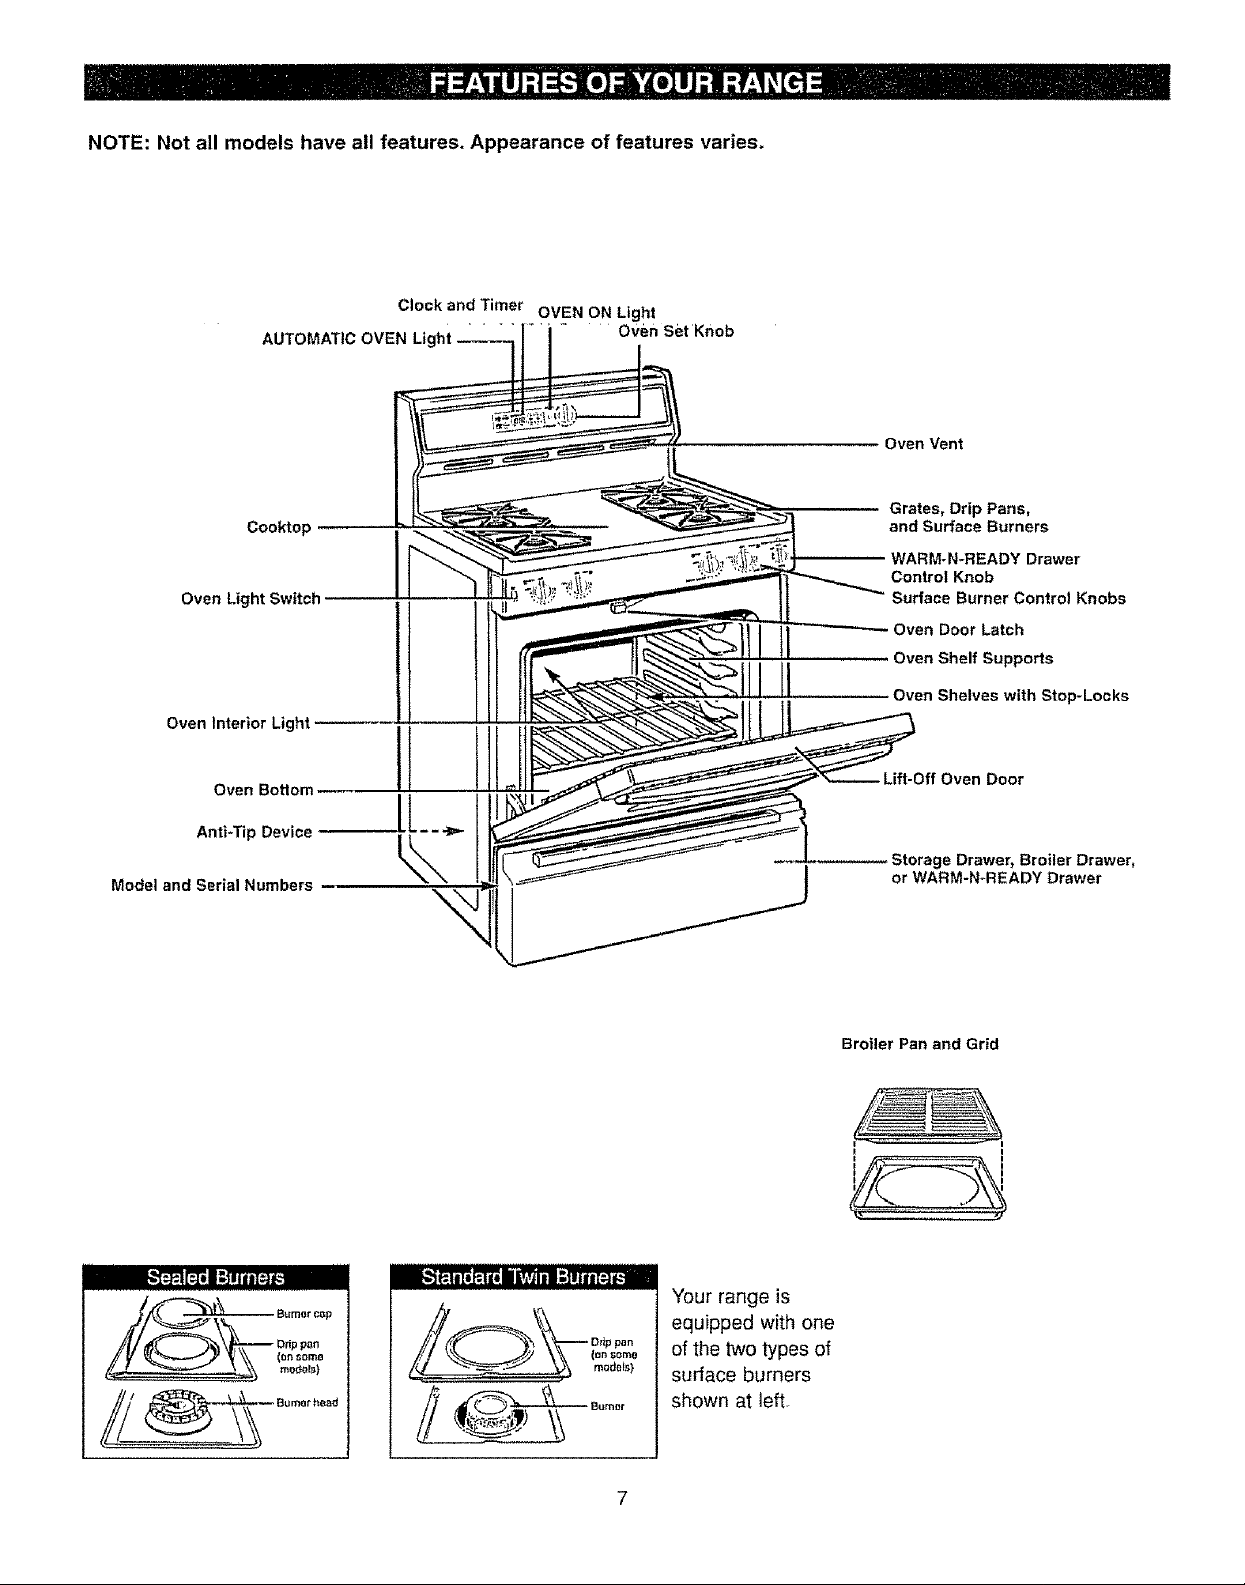
NOTE: Not all models have all features. Appearance of features varies°
Clock and Timer OVEN ON Light
AUTOMATIC OVEN Light oven set Knob
Oven Vent
Cooktop
Oven Light Switch
Oven Interior Light
Oven Bottom
Anti-Tip Device
Model and Serial Numbers
Grates, Drip Pans,
and Surface Burners
WARM-N-READY Drawer
Control Knob
Surface Burner Control Knobs
Oven Door Latch
Oven Shelf Supports
Oven Shelves with Stop-Locks
Lift-Off Oven Door
Storage Drawer, Broiler Drawer,
or WARM-N_READY Drawer
Broiler Pan and Grid
_m
/_ Bumot c_pDrip pan
(on _om8
D_ip pan
_ Burnor
Your range is
equipped with one
of the two types of
surface burners
shown at ]eft,
Lighting Instructions
Your surface burners are lighted by electric ignition,
eliminating the need for standing pilots with constantly
burning flames..
In case of a power failure, you can light the surface
burners on your range with a match.. Hold a lighted match
to the burner, then turn the knob to the LITE position.
Use extreme caution when lighting burners in this
manner,
Surface burners in use when an electrical power failure
occurs wilt continue to operate normally.
The electrode of the spark igniteris exposed, When
one burner is turned to LITE, all the burners spark.
Do not disassemble or clean around any burner while
another burner is on, An electric shock may result,
which could cause you to knock over hot cookware..
Surface Burner Controls
The knobs that turn the surface burners on and off are
located on the control panel in front of the burners..
The two knobs on the left control the left front and left
rear burners. The two knobs on the right control the right
front and right rear burners.
On ranges with sealed burners:
• The smaller burner (right rear position) will give
the best simmer results. It offers precise cooking
performance for delicate foods, such as sauces or
foods which need to cook over low heat for a tong
time. It can be turned down to a very low simmer
setting..
• The right front burner is higher powered than the
others and will bring liquids to a boil quicker
(natural gas installations only).
Before Lighting a Burner
• If drip pans are supplied with your range, they should
be used at alt times..
• Make sure all grates on the range are in place before
using any burner.
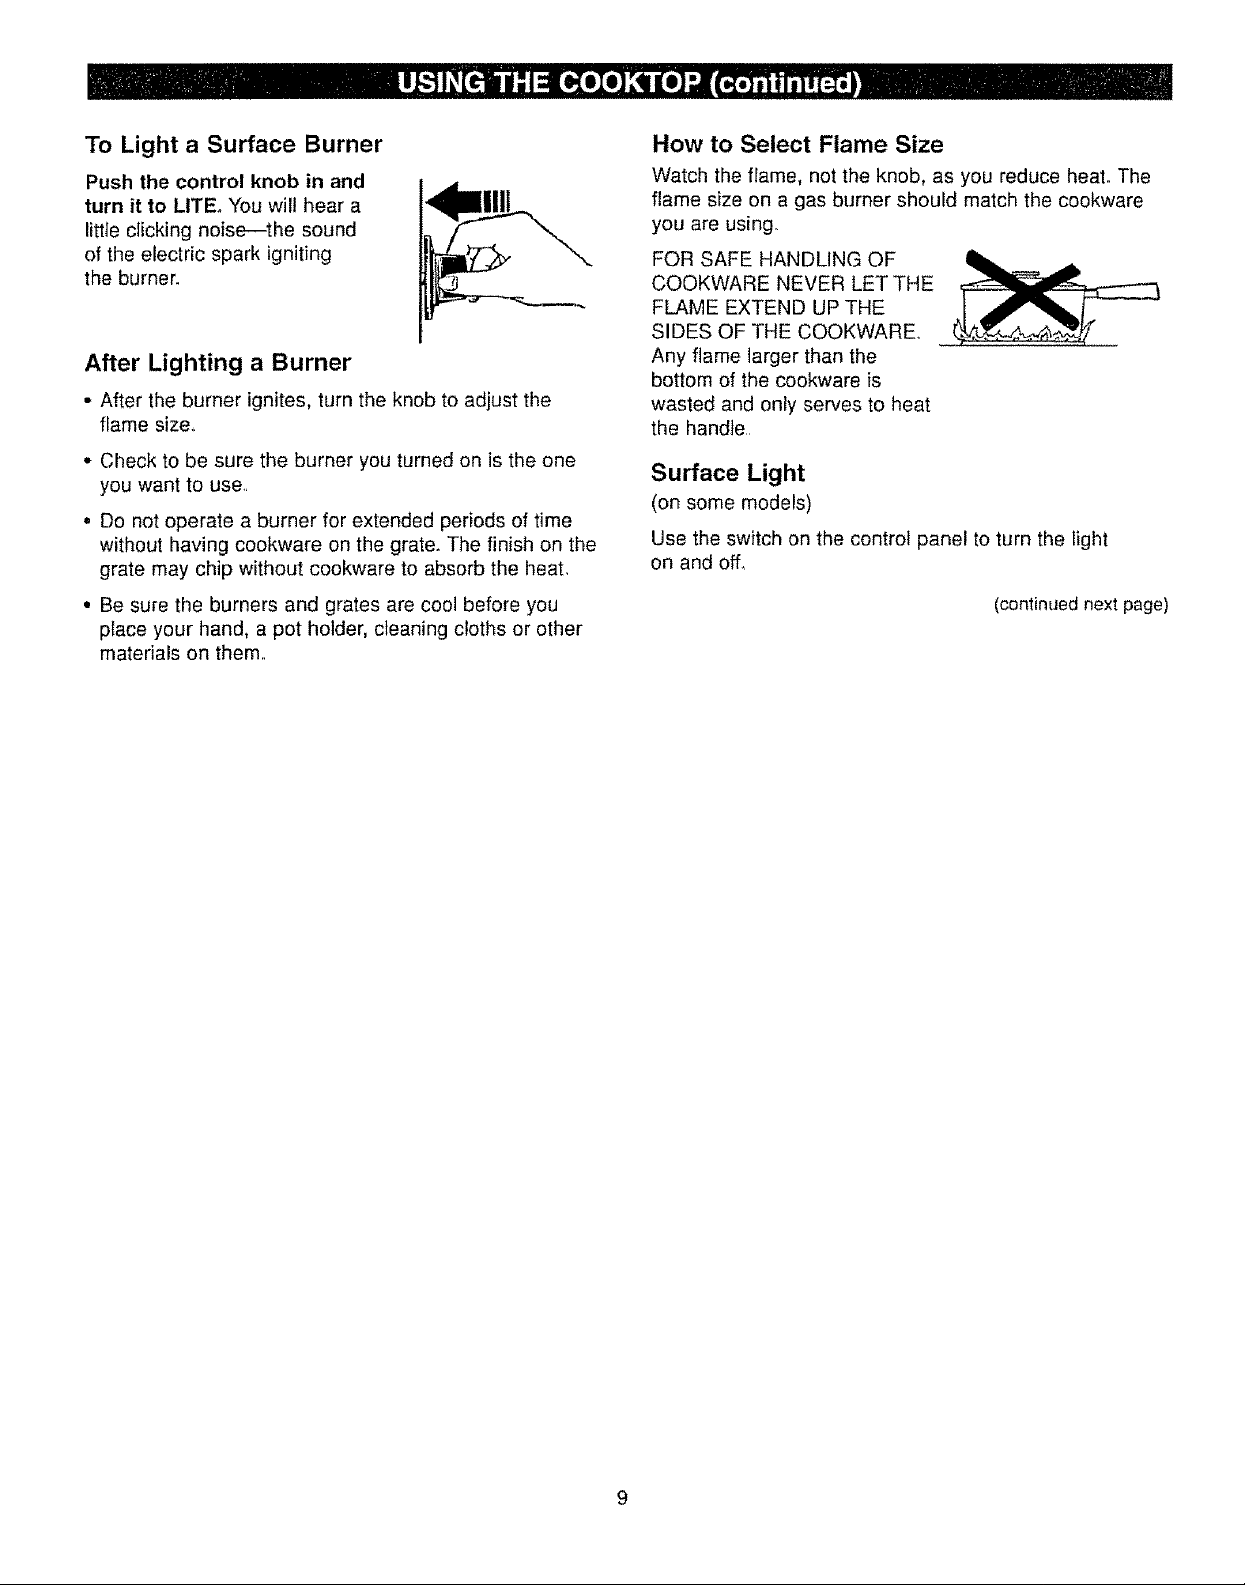
To Light a Surface Burner
Push the control knob in and
turn it to LITE. You wil! hear a
little clicking noise--the sound
of the electric spark igniting
the burner.
After Lighting a Burner
• After the burner ignites, turn the knob to adjust the
flame size,,
o Check to be sure the burner you turned on is the one
you want to use,,
• Do not operate a burner for extended periods of time
without having cookware on the grate. The finish on the
grate may chip without cookware to absorb the heat.
• Be sure the burners and grates are cool before you
place your hand, a pot holder, cleaning cloths or other
materials on them,,
How to Select Flame Size
Watch the flame, not the knob, as you reduce heat. The
flame size on a gas burner should match the cookware
you are using.
FOR SAFE HANDLING OF
COOKWARE NEVER LET THE
FLAME EXTEND UP THE
SIDES OF THE COOKWARE,,
Any flame larger than the
bottom of the cookware is
wasted and only serves to heat
the handle
Surface Light
(on some models)
Use the switch on the control panel to turn the light
on and off_
(continued next page)
Top-of-Range Cookware
Aluminum: Medium-weight cookware is recommended
because it heats quickly and evenly, Most foods brown
evenly in an atuminum skillet° Use saucepans with tight-
fitting lids when cooking with minimum amounts of water,,
Cast-Iron: If heated slowly, most skillets will give
satisfactory results ...........
Enamelware: Under some conditions, the enamel
of some cookware may melt,1Follow cookware
manufacturer's recommendations for cooking methods,,
Glass: There are two types of glass cookware---those
for oven use only and those for top-of-range cooking
(saucepans, coffee and teapots)° Glass conducts heat
very slowly.
Heatproof Glass Ceramic: Can be used for either
surface or oven cooking. It conducts heat very slowly
and cools very slowly_,Check cookware manufacturer's
directions to be sure it can be used on gas ranges°
Stainless Steel: This metal alone has poor heating
properties and is usually combined with copper,
aluminum or other metals for improved heat distribution,.
Combination metal skillets generally work satisfactorily if
used at medium heat as the manufacturer recommends.
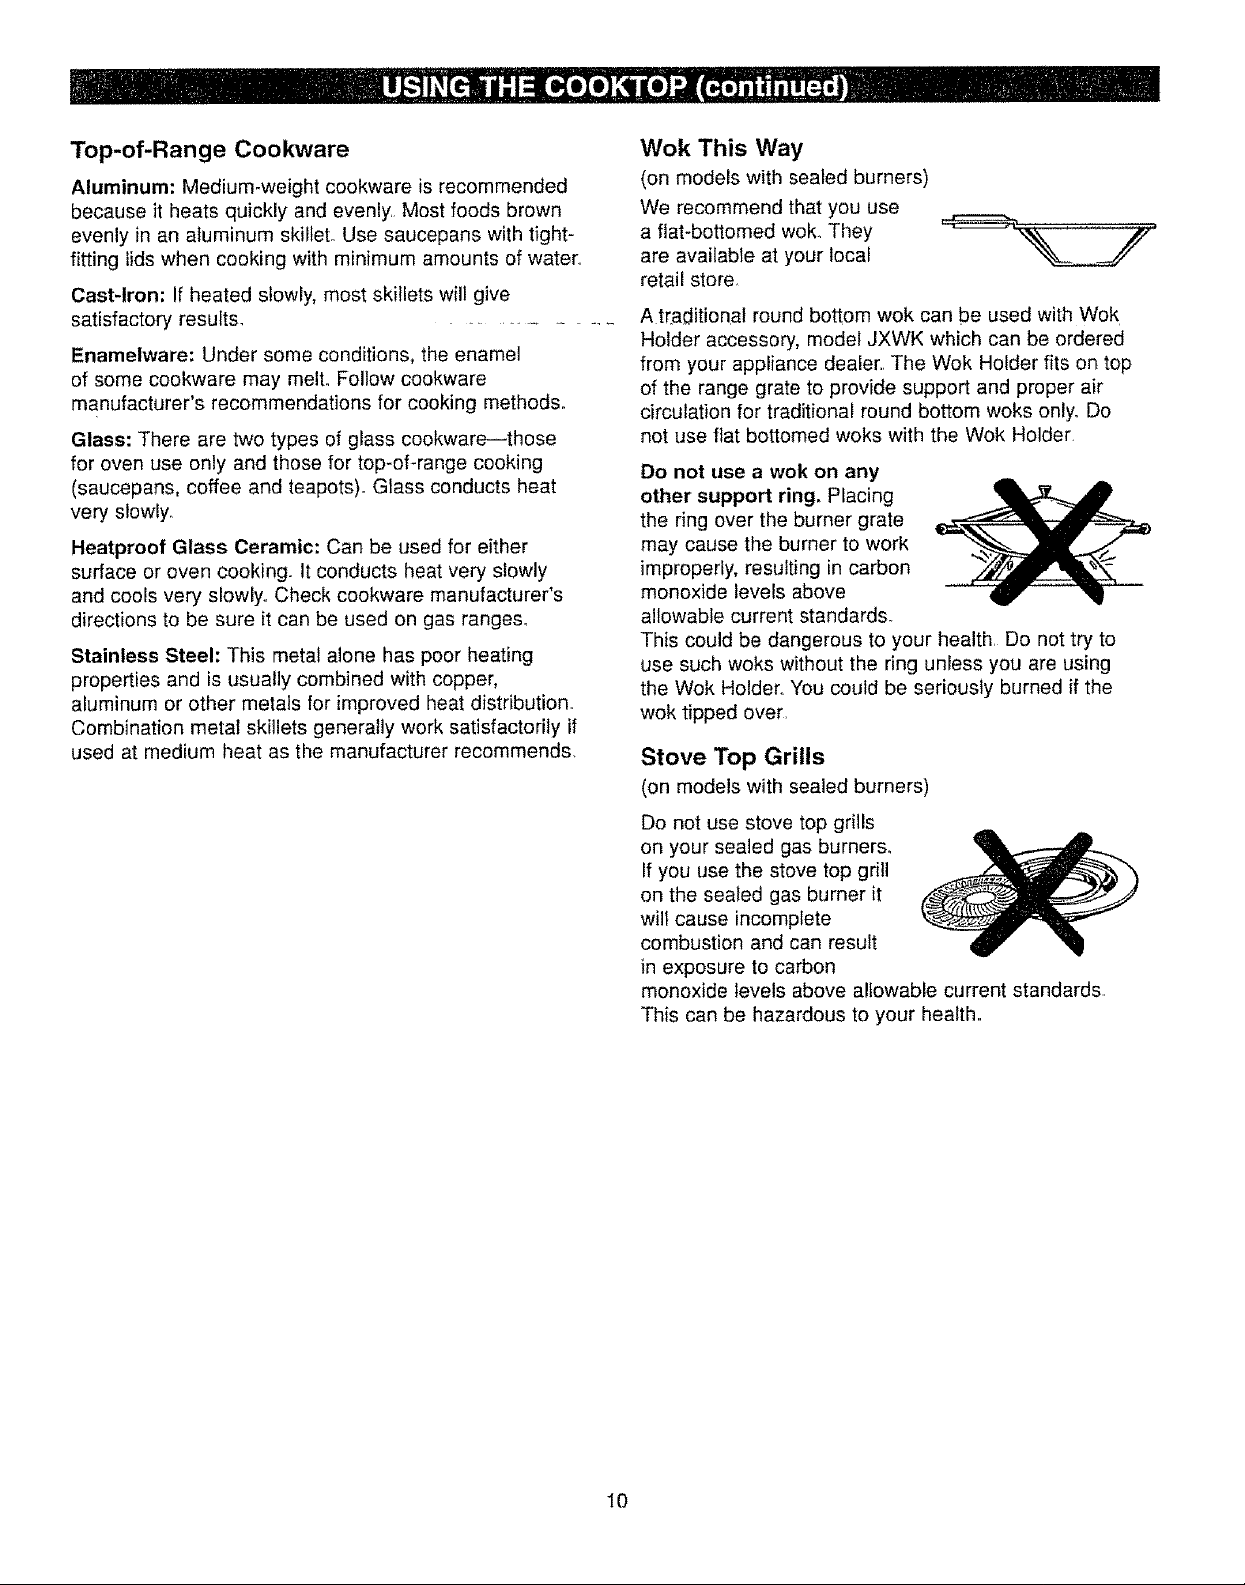
Wok This Way
(on models with sealed burners)
We recommend that you use
a flat-bottomed wok_ They
are available at your local
retail store.
A tra_titional round bottom wok can be used with Wok
Holder accessory, model JXWK which can be ordered
from your appliance dealer,,The Wok Holder fits on top
of the range grate to provide support and proper air
circulation for traditional round bottom woks only,, Do
not use flat bottomed woks with the Wok Holder.
Do not use a wok on any
other support ring, Placing
the ring over the burner grate
may cause the burner to work
improperly, resulting in carbon
monoxide levels above
allowable current standards.r
This could be dangerous to your health, Do not try to
use such woks without the ring unless you are using
the Wok Holder,, You could be seriously burned if the
wok tipped over,
Stove Top Grills
(on models with sealed burners)
Do not use stove top grills
on your sealed gas burners.
Ifyou use the stove top grill
on the seated gas burner it
wilt cause incomplete
combustion and can result
in exposure to carbon
monoxide levels above allowable current standards
This can be hazardous to your health.
10

::) ON F__.F
AUTOMATICOVEN
©
PREHEATED
$
450"
1. COOK TIME ON/OFF. Press this pad for Timed Baking
operations_
2. TIMER ON/OFF. Press this pad to select the timer
feature, The timer does not control oven operations.
The timer can time up to 11 hours and 59 minutes
To set the timer, first press the TIMER ON/OFF pad
Press the HOUR and MIN. pads to change
the time.
To cancel the timer, press the TIMER ON/OFF pad
until the display clears,
3. AUTOMATIC OVEN LIGHT. This lights anytime the
oven has been programmed.
4. DISPLAY. Shows the time of day, the times set for the
timer on automatic oven operations, and, on some
models, the oven temperature.
5. HOUR and MIN PADS, These pads allow you to set
times up to 1I hours and 59 minutes
6. TEMP RECALL. On some models, you can recall the
set temperature to the display by pressing the HOUR
or MINo I' pad_
7. CLEAN Light. Glows when the oven is in the
self-clean cycle After the self-clean cycle, the
light wilt flash, Unlatch the door and turn the
Oven Set knob to OFE
8. OVEN ON Light. Glows anytime the Oven Set knob
is not in the OFF position and is set on a temperature
or function_ The light will flash when the oven
automatically turns off to remind you to turn the
Oven Set knob to OFF.
9. Oven Set Knob. Turn this knob to the temperature or
function you want° See the Baking, Roasting, Broiling
and Self-Cleaning sections
10, START TIME ON!OFF. Press this pad and the HOUR
and MIN pads to set Automatic Start and Stop Time
11, CLOCK. To set the clock, first press the CLOCK pad°
Then press the HOUR and MIN _k or V pads to
change the time of day.
12o PREHEATED INDICATOR LIGHT. Glows when
the oven reaches your selected temperature.
(continuednextpage)
tl
Automatic Clock
The clock must be set for the automatic oven timing
functions to work properly. The time of day cannot be
changed during a Timed Baking or Self-Cleaning cycle.,
To Set the Clock:
1oPress the CLOCK pad°
--_(_ 2, Press the HOUR and MIN pads to
set the time of day,.
HOUR MtN,
@@
Timer
The timer is a minute timer only.
The timer does not control oven operations,. The
maximum setting on the timer is 11 hours and
59 minutes.
To Set the Timer:
1. Press the TIMER ON/OFF pad,.
(_(_ 2. Press the HOUR and MIN_ pads
until the amount of time you want
HOUR MIN. shows in the display. The timer will
@ @ start automaticafly within a few
seconds of releasing the pad.
To Reset the Timer:
If the display is still showing the time remaining, you may
change it by pressing the HOUR and MIN. pads until the
time you want appears in the display.
If the remaining time is not in the display, recall the
remaining time by pressing the TIMER ON/OFF pad and
then pressing the HOUR and MIN. pads untii the new
time you want shows on the display
To Cancel the Timer:
To canceI the timer, the remaining time must be in the
display,. To recall the time remaining, press the TIMER
ON/OFF pad once. To cancel the timer press the TIMER
ON/OFF pad again.
End of Cycle Tones
(on some models)
The end of cycle tone can be cleared by pressing the
TIMER ON/OFF pad or, on some models, by pressing the
COOK TIME ON/OFF pad depending on which function
you are using,
Power Outage .........
On some models, after a power outage the oven
wili automatically resume its setting once the power
is restored,
For models with a CLOCK pad, when the power is
restored the display will flash the time of day until a pad
is pressed or the knob is turne& Reset the clock to the
correct time of day.,
If the oven was in operation when the power outage
occurred, the Oven Set knob must be turned back to
OFE Then reset the knob to the way it was before the
power outage.
If your model has a COOK TIME ON/OFF pad
and your oven was set for timed baking or roasting
when the power outage occurred, the clock and all
programmed functions must be reseL To reset them, first
turn the Oven Set knob back to OFF, reset the clock,
functions and knob back to the way they were before
the power outage,
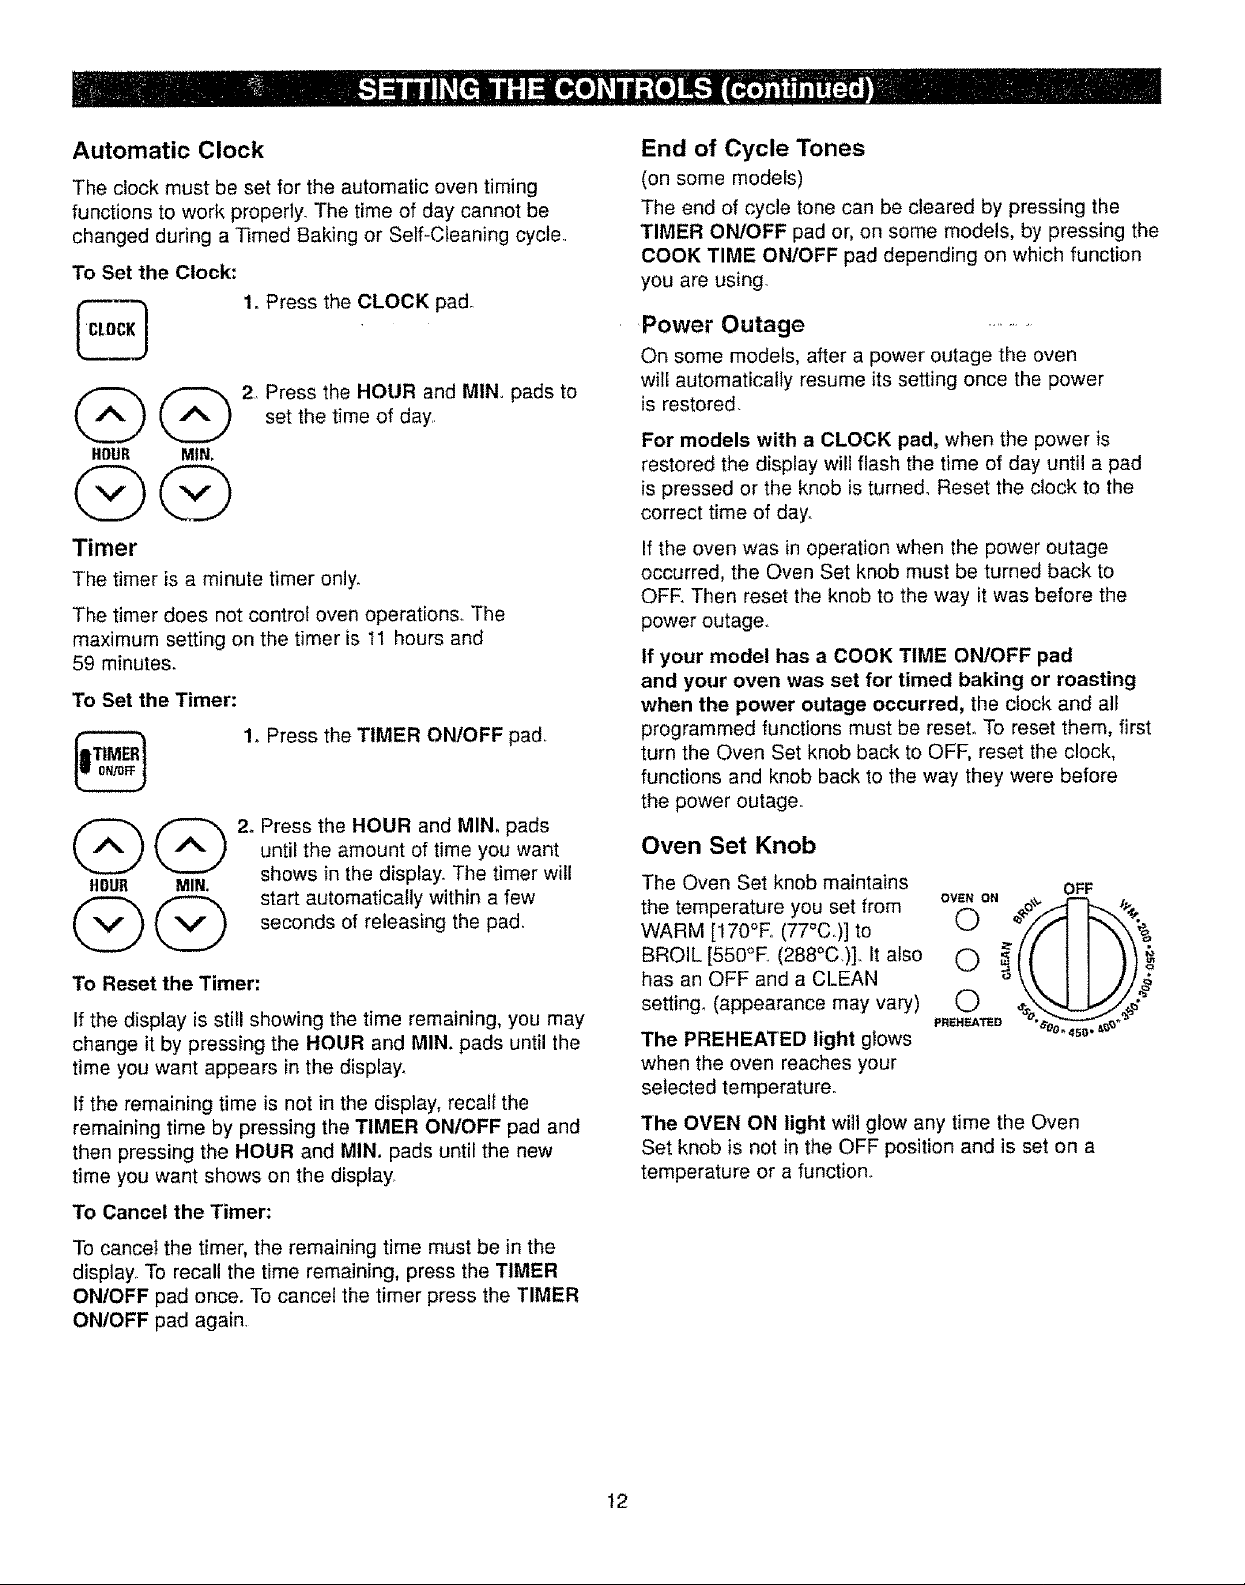
Oven Set Knob
The Oven Set knob maintains
the temperature you set from
WARM [!70°E (77°C.)] to
BROIL [550°E, (288°C.)],, It also
has an OFF and a CLEAN
setting_ (appearance may vary)
The PREHEATED light glows
when the oven reaches your
selected temperature.
OFF
PREHEATED * ,O. 45D, t,_
The OVEN ON light will glow any time the Oven
Set knob is not in the OFF position and is set on a
temperature or a function,,
12

Before Using Your Oven
Be sure you understand how to set the control properly
Practice removing and replacing the shelves while the
oven is cool. Read the information and tips on the
following pages. Keep this manual handy where you can
refer to it, especially during the first weeks of using your
new range.
Electric Ignition
The oven burner and broil burner are lighted by
electric ignition_
To light either burner, turn the Oven Set knob to the
desired temperature The burner should ignite within
30-90 seconds.
After the oven reaches the selected temperature, the
oven burner cyc}es--off completely, then on with a
full flame--to keep the oven temperature controlled
Power Outage
CAUTION: Do not make any attempt to operate the
electric ignition oven during an electrical power failure
The oven or broiler cannot be tit during a power
failure Gas witl not flow unless the glow bar is hot.
if the oven is in use when a power failure occurs, the
oven burner shuts off and cannot be re-lit until power
is restored
Oven Vents
The oven is vented through duct openings at the rear of
the cooktop See the Features section Do not biock these
openings when cooking in the oven--it is important that
the flow of hot air from the oven and fresh air to the oven
burners be uninterrupted.
• The vent openings and nearby surfaces may
become hot. Do not touch them.
Handles of pots and pans on the cook-top may
become hot if left too close to the vent.
Do not leave plastic
items on the
cooktop--they may
melt if left too close
to the vent.
Metal items will become
very hot if they are left on
the cooktop and could
cause burns.
Vent appearance and
location vary
Do not leave any items on the cooktop. The hot
air from the vent may ignite flammable items and wilt
increase pressure in closed containers, which may
cause them to burst
(continued next page)
Oven Light
Use the switch on the control panel to turn the oven light
on and off
13
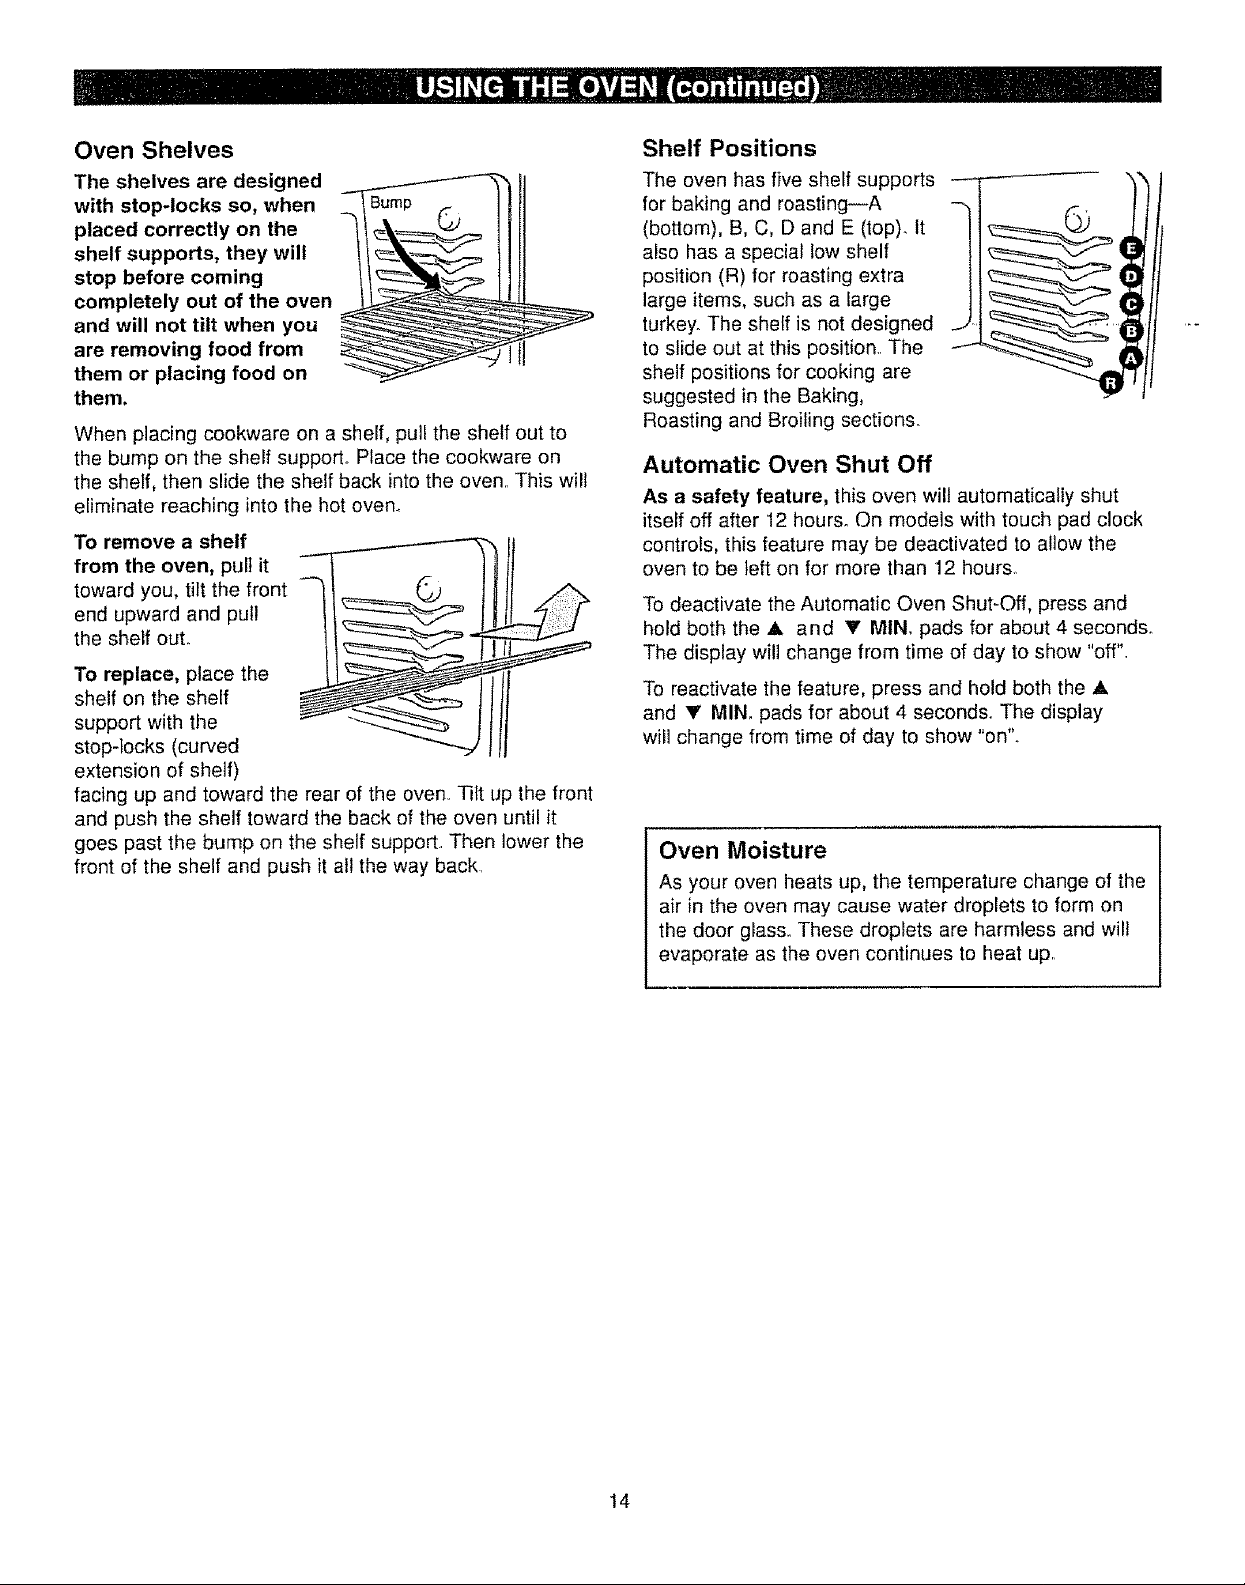
Oven Shelves
The shelves are designed
with stop-locks so, when
placed correctly on the
shelf supports, they will
stop before coming
completely out of the oven
and will not tilt when you
are removing food from
them or placing food on
them,
When placing cookware on a shelf, pull the shelf out to
the bump on the shelf support° Place the cookware on
the shelf, then slide the shelf back into the oven.. This wilt
eliminate reaching into the hot oven_
To remove a shelf
from the oven, pull it
toward you, tilt the front -m
end upward and pull
the shelf out.
To replace, place the
shelf on the shelf
support with the
stop-locks (curved
extension of shelf)
facing up and toward the rear of the oven_ Tilt up the front
and push the shelf toward the back of the oven until it
goes past the bump on the shelf support.. Then lower the
front of the shelf and push it all the way back.
Shelf Positions
The oven has five shelf supports f_f [
for baking and roasting--A --_
(bottom), B, C, D and E (top) It
also has a special low shelf
position (R) for roasting extra
large items, such as a large
turkey. The shelf is not designed -
to slide out at this positiOn.rThe --_
shelf positions for cooking are
suggested in the Baking,
Roasting and Broiling sections.
Automatic Oven Shut Off
As a safety feature, this oven will automatically shut
itself off after 12 hours° On models with touch pad clock
controls, this feature may be deactivated to allow the
oven to be left on for more than 12 hours.
To deactivate the Automatic Oven Shut-Off, press and
hold both the A and T MIN, pads for about 4 seconds.
The display will change from time of day to show "off".
To reactivate the feature, press and hold both the _k
and _r MIN. pads for about 4 seconds.. The display
will change from time of day to show "on".
Oven Moisture
As your oven heats up, the temperature change of the
air in the oven may cause water droplets to form on
the door glass_ These droplets are harmless and will
evaporate as the oven continues to heat Upr
14
Baking
Do not lock the oven door with the latch during
baking. The latch is used for self-cleaning only_
Your oven temperature is controlled very accurately
using an oven control system_ It is recommended that
you operate the oven for a number of weeks to become
familiar withyour new oven's performance. If you think
an adjustment is necessary, see the Adjust the Oven
Thermostat section°
How to Set Your Range for Baking
To avoid possible burns, place the shelves in the
correct position before you turn the oven on,
1. Close the oven door, Turn the Oven Set knob to
the temperature you desire.
2. Check the food for doneness at the minimum time on
the recipe. Cook longer if necessary.
3. Turn the Oven Set knob to OFF and then remove
the food.
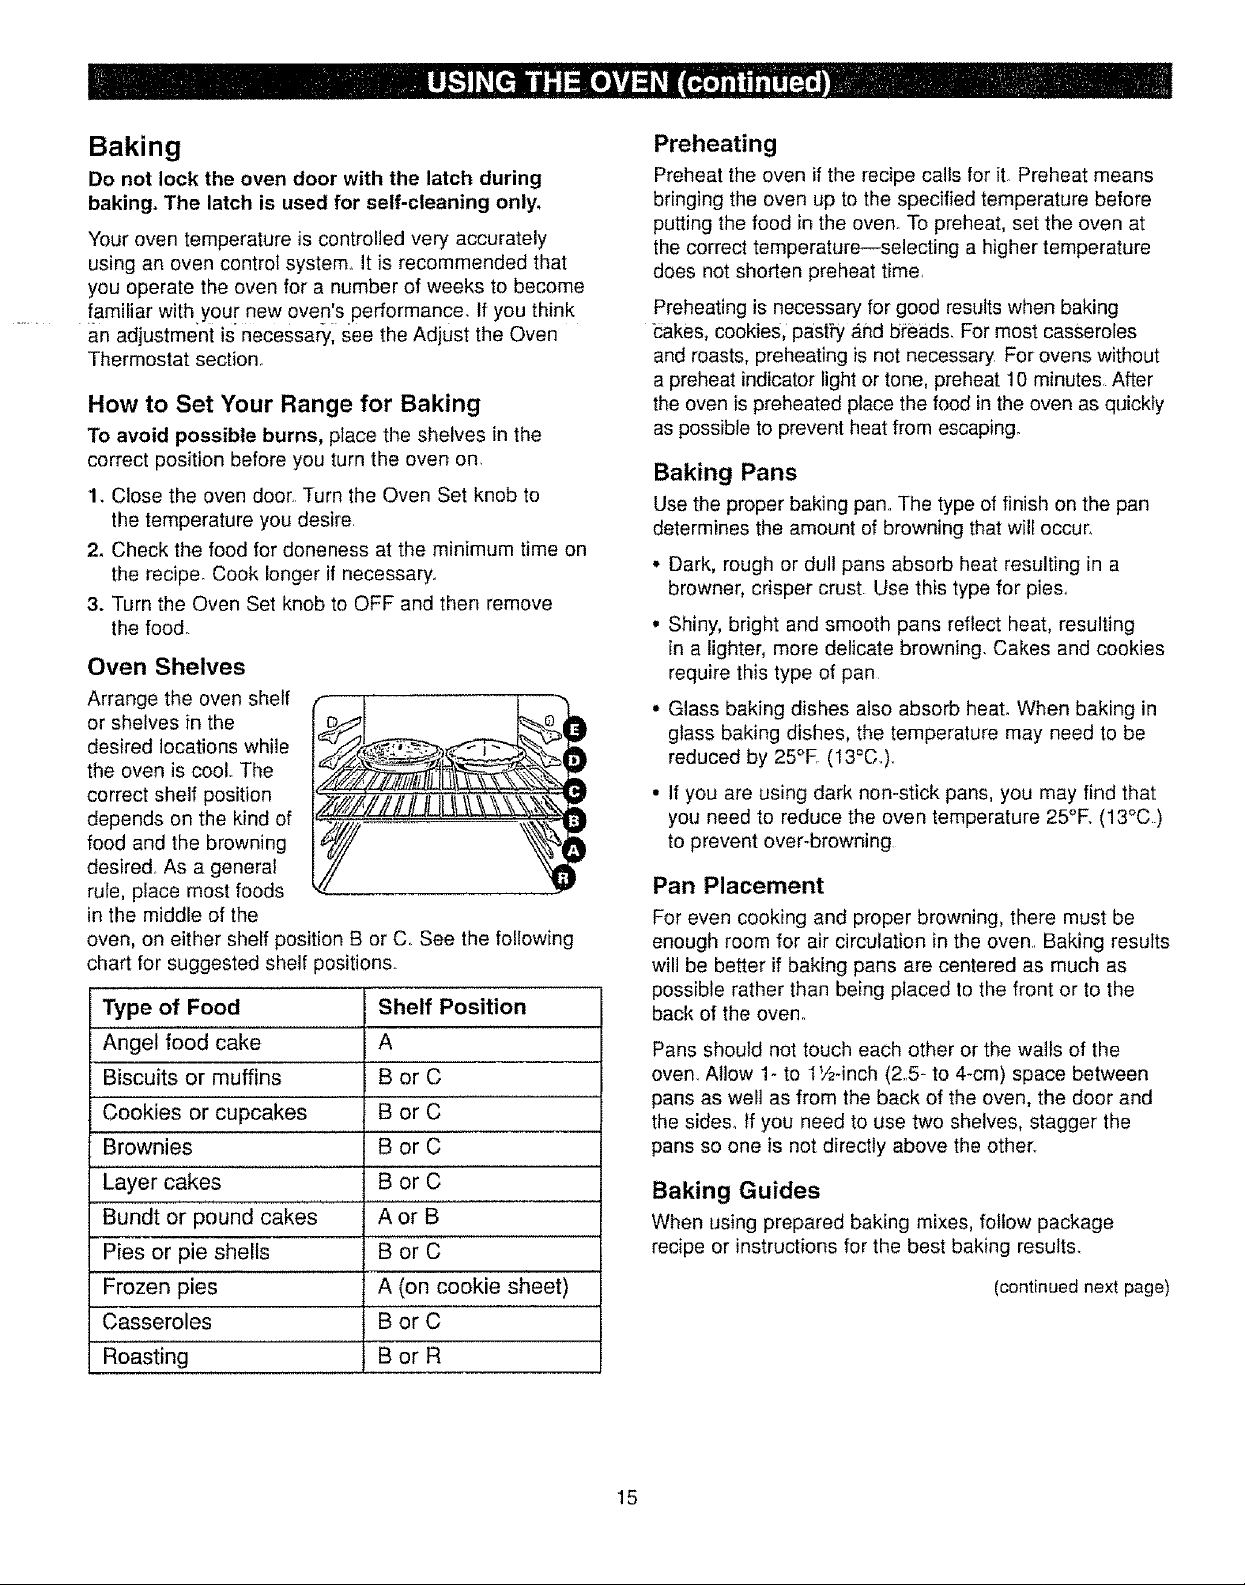
Oven Shelves
Arrange the oven shelf
or shelves in the
desired locations while
the oven is cool.. The
correct shelf position
depends on the kind of
food and the browning
desired As a general
rule, place most foods
in the middle of the
oven, on either shelf position B or C. See the following
chart for suggested shelf positions..
Type of Food
Angel food cake
Biscuits or muffins
Cookies or cupcakes
Brownies
Layer cakes
Shelf Position
A
BorC
BorC
BorC
BorC
Bundt or pound cakes A or B
Pies or pie shells B or C
Frozen pies A (on cookie sheet)
Casseroles B or C
Roasting B or R
Preheating
Preheat the oven if the recipe calls for it, Preheat means
bringing the oven up to the specified temperature before
putting the food in the oven. To preheat, set the oven at
the correct temperature--selecting a higher temperature
does not shorten preheat time,
Preheating is necessary for good results when baking
_:akes, cookies, pastf-y And breads. For most casseroles
and roasts, preheating is not necessary. For ovens without
a preheat indicator light or tone, preheat 10 minutes. After
the oven is preheated place the food in the oven as quickly
as possible to prevent heat from escaping.
Baking Pans
Use the proper baking pan. The type of finish on the pan
determines the amount of browning that will occur.
• Dark, rough or dull pans absorb heat resulting in a
browner, crisper crust Use this type for pies_
• Shiny, bright and smooth pans reflect heat, resulting
in a lighter, more delicate browning. Cakes and cookies
require this type of pan
• Glass baking dishes also absorb heat° When baking in
glass baking dishes, the temperature may need to be
reduced by 25°E (13°C_)..
• If you are using dark non-stick pans, you may find that
you need to reduce the oven temperature 25°E (13°C)
to prevent over-browning
Pan Placement
For even cooking and proper browning, there must be
enough room for air circulation in the oven,, Baking results
wilt be better if baking pans are centered as much as
possible rather than being placed to the front or to the
back of the oven°
Pans should not touch each other or the walls of the
oven. Allow 1- to 11/z-inch (2,5- to 4-cm) space between
pans as wen as from the back of the oven, the door and
the sides_ If you need to use two shelves, stagger the
pans so one is not directly above the other,.
Baking Guides
When using prepared baking mixes, follow package
recipe or instructions for the best baking results,
(continued next page)
15
 Loading...