

Page 1
LED
Display Users Guide
L
T -32N386A
32
Class
SOURCE
Page 2

CONTENTS
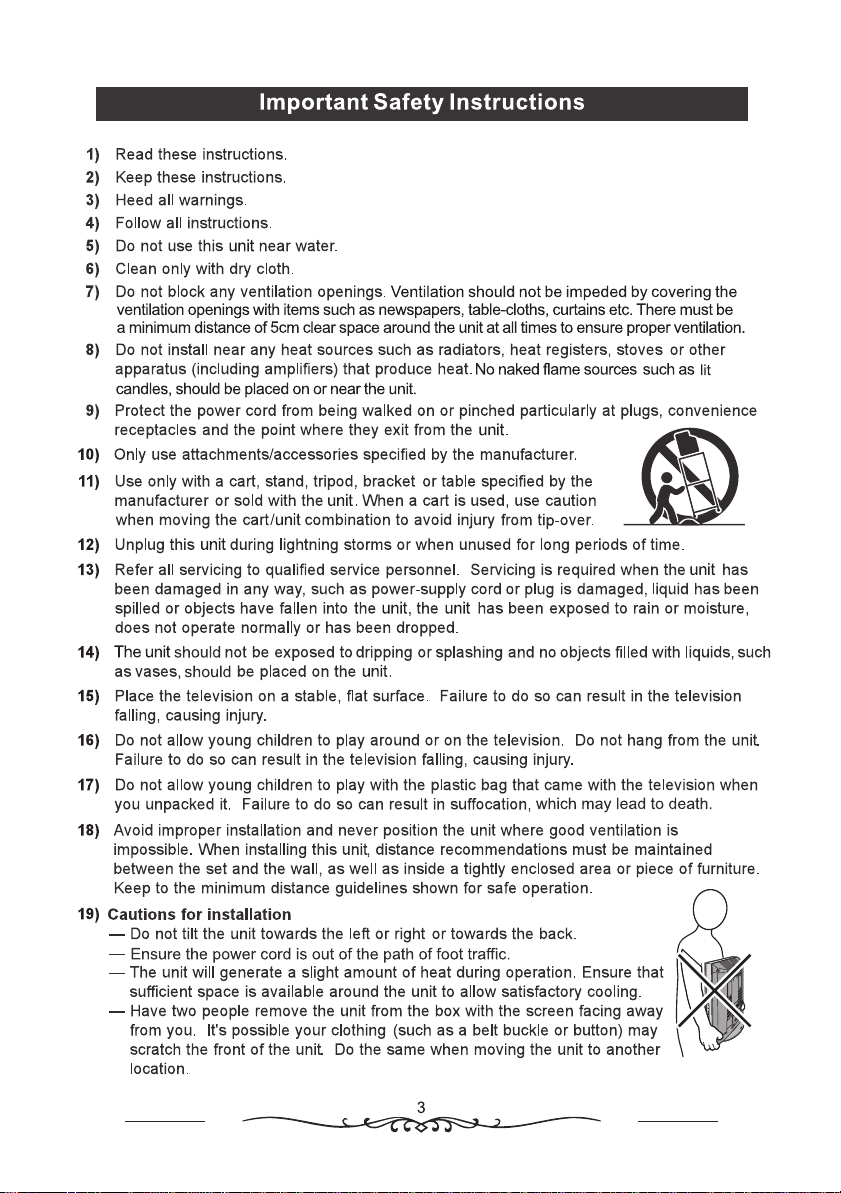
1. W
arning and Precautions ............................................................................
2. Important Safety Instructions ......................................................................
3. Connection and Preparation of TV...............................................................
3.1 Accessories ...........................................................................................
3.2 Installation of Stand ..............................................................................
3.3 Keys and Interfaces ..............................................................................
3.4 Remote Control .....................................................................................
3.5 Installation of Batteries .........................................................................
4. Basic Operation ..........................................................................................
4.1 Power ON/OFF(Optional) ....................................................................
4.2 Setting of Standby Mode ......................................................................
4.3 Selection of Input Mode ........................................................................
4.4 Menu Option Adjustment .....................................................................
4.5 Auto Installation ...................................................................................
4.6 Menu Functions ...................................................................................
4.6.1 PICTURE Function .....................................................................
4.6.2 Sound Menu ...............................................................................
4.6.3 TV Channel ................................................................................
4.6.4 Feature Function Description......................................................
4.6.5 Setup Menu ................................................................................
4.7 Multimedia ...........................................................................................
4.7.1 MEDIA Function .........................................................................
4.7.2 USB Function .............................................................................
1. PHOTO ....................................................................................
2. MUSIC .....................................................................................
3. MOVIE......................................................................................
4. eBook.......................................................................................
4.8 EPG / PVR / Timeshift .........................................................................
5. Technical Specification ..............................................................................
6. Supported Signal Modes ...........................................................................
7. Troubleshooting .........................................................................................
2
3
6
6
6
7
9
10
10
10
10
10
11
12
13
14
15
15
19
22
23
23
24
24
26
27
28
29
45
46
47
1
Page 3

Page 4
2. 2.
Page 5
Page 6
2.
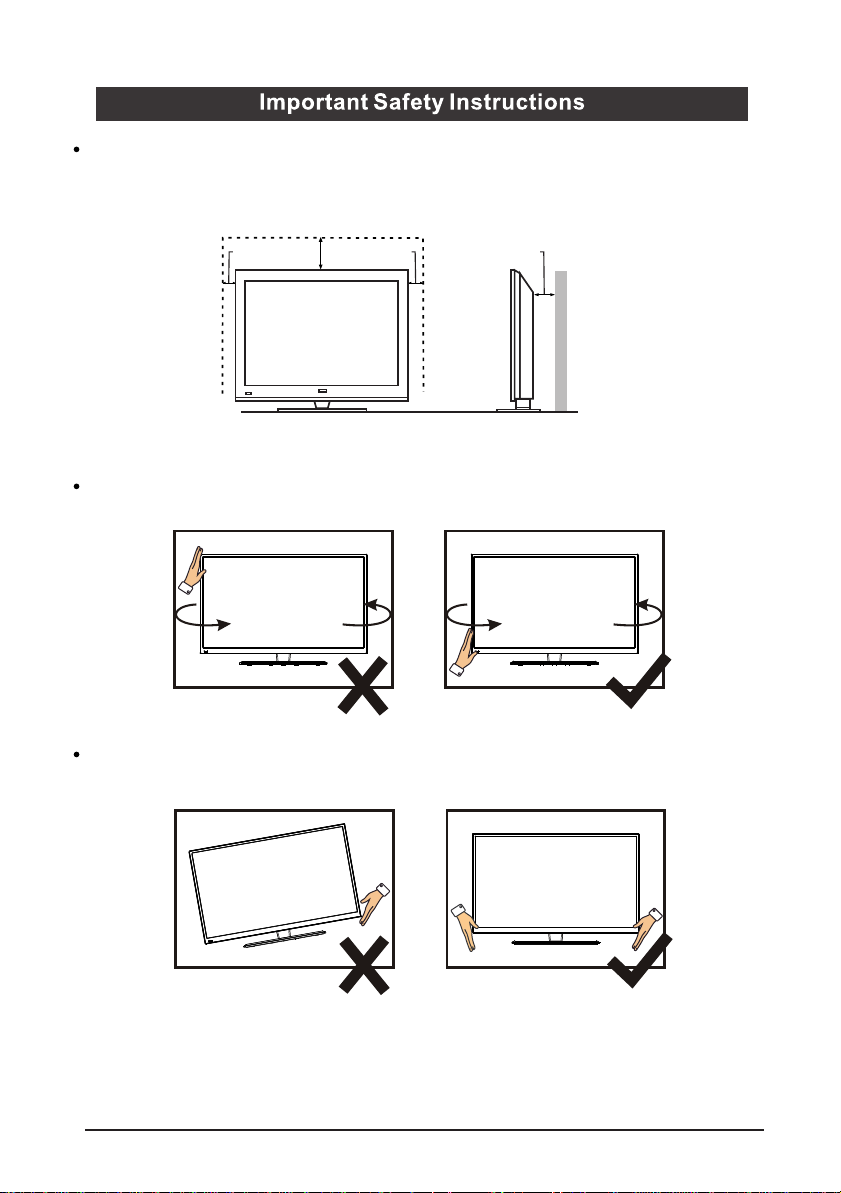
Place the TV on a firm and fla t surface, le aving a space of at l east 10cm aro und
the set and 30c m from the top of the s et to the wall or c abinet. Ens ure the TV is
positione d close to the wall t o avoid it fall ing if pushed.
10c m 30 cm 10 cm 10c m
When turnin g the TV set, d o not hold the to p side. Always hol d the bottom.
When liftin g the TV set, d o not use one han d to handle it. Al ways use two
hands.
5
Page 7
3.Connection and Preparation of TV
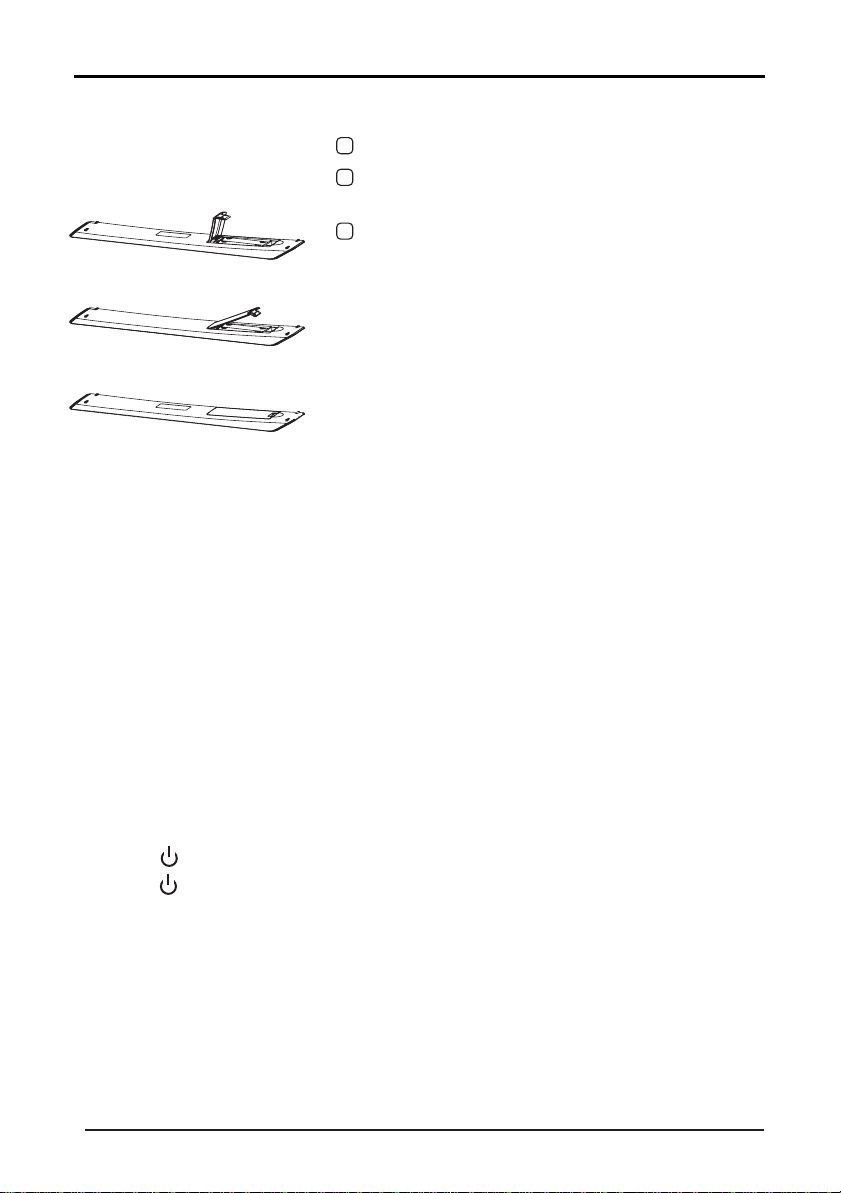
3.1 Accessories
User Manual
Remote Control
Battery(2 x AAA)
2 x Legs
4 x Leg Screws
3.2 Installation of Stand
Screw Size: BM4x10
(Big Head Machine Screw)
Screw Qty: 4PCS
1
Place a soft cloth on a table and place the TV face down on it. This is to prevent
(DTV) (Smatr)
the panel from being damaged.
2
Align each leg to the screw holes on the back of the TV.
3
Insert the 4 x provided screws (2 for each leg) and tighten them.
6
Page 8
3.3 Keys and Interfaces
ITEM
BUTTON NAME
1
2
3
4
5
6 7
FUNCTION DESCRIPTION
1
2
3
4
5
POWER INDICATOR
6
REMOTE SENSOR
7
MENU
CH+/-
VOL+/-
SOURCE
STANDBY
Press to bring up the main menu to the screen.
Press to scan through channels.
Press to increase or decrease the sound level.
Press to select the input source.
Press to switch the TV on during Standby mode or vice versa.
Shows red in standby mode and No light when the TV is switched on.
Infrared sensor for the remote control.
Pleasa Note:
The receiving range for the remote control
signal is 6 metres from the front of the
remote sensor, with a window of 30 degrees to the left or right, and 20 degrees
above or below.
7
Page 9
PC(VGA) PC AUDIO
VIDEO RL
AV IN
RF IN
HDMI
YPbPr IN
Y PrPb
COAXIAL
USB
5V 500mA
(ARC)
HDMI2
8
7
6
5
1
ITEM
BUTTON NAME
1
2
PC AUDIO
3
4 RF IN
2 3 4 5
FUNCTION DESCRIPTION
PC(VGA)
Connect to the VGA output on your Comuter.
Connect to the Audio output jack of your Computer.
AV IN
Composite input.
Connect antenna here to get TV signal.
Connect to the HDMI output jack of up to 2 external video sources
5
6
HDMI
USB
7 COAXIAL
8 YPbPr IN
(eg Bluray player/ games console)
Note: HDMI 2 port supports ARC function.
Plug in your USB memory device(eg. USB stick) to play
compatible files stored in it.
Coaxial Digital Audio ouput.
Component video input.
Pleasa Note:
Some USB memory devices, such as external hard drives and some portable hard
drives, require their own power supply to operate See also the Technical Specifications section for compatible file types and storage limits.
8
Page 10
3.4 Remote Control
1
2
4
7
8
10
11
SOU RCE
13
15
16
17
19
20
21
24
27
28
30
32
3
5
6
9
12
14
18
22
23
25
26
29
31
33
STANDBY: Press to enter or exit Standby mode.
1.
SLEEP: Press to select the sleep time.
2.
MUTE: Press to mute sound.
3.
SUB.T/CC: Press to select subtitle.
4.
TV/RADIO: Press to select TV or Radio mode.
5.
AUDIO/MTS: Press to select TV audio mode.
6.
T.SHIFT: Press to activate Timeshift function in DTV mode
7.
for delayed viewing. Please note: A USB device must be
connected for this function to be activated.
EPG: Press to show the EPG (Electronic Program Guide)
8.
menu.
REC: Press to record from DTV channels.
9.
(Note: USB memory device is required for recording.)
0-9: Press to select a channel.
10.
FAV: Press to view the favorite channel list.
11.
RECALL : Press to return to the previous channel.
12.
SOURCE: Press to select the signal source.
13.
INFO: Press to display the source and channel information.
14.
Key: Menu item selection.
15.
ENTER: Press to confirm or enter.
16.
MENU: Press to enter or exit the menu.
17.
EXIT: Press to exit the menu or selection.
18.
ASPECT: Press to change picture proportions(aspect ratio).
19.
CH+: Press to select the next channel.
20.
CH-: Press to select the previous channel.
21.
VOL+: Press to increase the volume.
22.
VOL-: Press to decrease the volume.
23.
INDEX: Press to display the index page*.
24.
MEDIA mode: Previous.
TEXT: Press to enter or exit teletext*.
25.
MEDIA mode: Press once to pause, press again to
playback.
REVEAL: Press to reveal the hidden information*.
26.
MEDIA Mode: Next.
HOLD: Press to hold the current page*.
27.
MEDIA mode: Rewind.
SIZE: Press to set the size of the characters*.
28.
MEDIA mode: Stop playback and return to file list.
SUBPAGE: Press to enter Sub Page mode*.
29.
MEDIA mode: Fast forward.
RED: Press to access the red item or page.
30.
BLUE: Press to access the blue item or page.
31.
GREEN: Press to access the green item or page.
32.
YELLOW: Press to access the yellow item or page.
33.
* Teletext functions are not available in Australia.
8
Page 11
3.5 Installation of Batteries
1 Open the back lid of the remote control.
2 Install two (AAA)1.5V batteries(included).
Ensure the correct polarity of the batteries.
3 Replace the back lid.
Note: Please remove the batteries, if the remote
control will not be in use for a long time.
If the remote control doesn't work properly,
please carry out the following checks:
- Check if the TV is turned on.
- Check that the polarity of the batteries are correct.
- Check the batteries are not drained.
- Check if the power supply is normal or the power
cord is correctly connected.
- Check there are no special fluorescent or neon
lights around.
4. Basic Operation
4.1 Power ON/OFF
Connect the power cord to the A C input. Insert the power cord into the
appropriate socket.
Note:
Do not switch on the TV immediately after switching it off. Please wait for a
minute before turning on again.
4.2 Setting of Standby Mode
- Press ( ) button to turn on the unit.
- Press ( ) button again to return to standby mode. The
power indicator turns red.
- Be sure not to keep your TV in standby mode for a long period of time.
4.3 Selection of Input Mode
This set has different signal source modes, continue pressing the
Source button to select a signal source.
10
Page 12
When selecting the signal source, the screen will display the information.
mode
TV
1 _ _:_ _
TV PAL DK Mono
When there is no signal from the selected source, a warning message will be
displayed per below.
Source button to change source.
Either change the channel i n TV mode or press
No Signal
4.4 Menu Option Adjustment
After you have installed the batteries into the remote control, you will
need to set some preferences on the TV, using the menu system.
, ,
The buttons for the menu option adjustment include: M enu,
,
Enter buttons.
- Press the Menu button to open the OSD menu, then press
the pages. The pages are displayed in the following sequence (circular display):
PICTURE
Please note: CHANNEL is only for TV mode.
Press the Menu button to display the menu system.
1
2
Press button to select the menu pages.
3
Press
4
Press
If you do not make a selection within 10 seconds, the menu will close automatically.
5
6
Press the Menu button to return or exit OSD menu.
,
,
button to select an item.
, button to adjust a setting.
SOUND
,
button to select
TIMECHANNEL
OPTION
11
Page 13

4.5 Auto Installation
If this is the first time you are turning on the TV and there are no channels in the TV memory, the “Auto
Installation” menu will appear on the screen.There are 5 setup options as below:
1: Set up the Country Setup 2: Set up the Language
Setup
Setup 3: Set up the Auto Power Off
5: Set up the Auto All/ATV/DTV
SearchSetup
Setup 4: Set up the Auto Search Air/Cable Type
Note: Choose the option 'Air' for regular channel viewing.
12
Page 14
4.6 Menu Functions
4.6.1 PICTURE Menu
This chapter will describe the function of Picture in the main menu.
1.1 Picture Menu
Open the main menu by pressing 'Menu' button on the remote control. The focus will move to the sub
items in the Picture menu by pressing down the button “RIGHT” and then functions in the Picture can be set.
The Picture menu is shown as follows:
he result of the action pressing down some button when in Picture menu:
T
Stroke
Key
KEY_UP
KEY_DOWN
KEY_LEFT Back to Main Menu.
KEY_RIGHT
KEY_ENTER
KEY_MENU Back to Main Menu.
KEY_EXIT Exit Main Menu.
Highlight the previous sub item. If it is the first button currently,
then highlight the last one in the list.
Highlight the next sub item. If it is the last button in the list
currently, then highlight the first one.
If the current focus sub item is ”Picture Mode” 、 ”Color
Temperature” 、 ”Aspect Ratio” or ”Noise Reduction”,a popup
menu will appear for user to make further choice. If not,
mainmenu will be cleaned for new “adjust menu”.
Same as KEY_RIGHT。
Acti
on
13
Page 15

4.6.2 Sound Menu
This chapter will describe the function of Sound in the main menu.
2.1 Sound Menu
Open the main menu by pressing 'Menu' button on the remote control. Now press the button “down” on the
remote. The focus will move to the sub items in the Sound menu by pressing down the button “RIGHT” and then
functions in the Sound can be set. The Sound menu is shown as follows:
The range and the default values of every sub items in Sound menu are shown in the following table:
Key
Stroke
KEY_UP
KEY_DOWN
KEY_LEFT Back to main menu
KEY_RIGHT
KEY_ENTER
KEY_MENU Back to main menu
KEY_EXIT Exit Main Menu.
Highlight the previous sub item. If it is the first button currently,
then highlight the last one in the list.
Highlight the next sub item. If it is the last button in the list
currently, then highlight the first one.
If the current focus sub item is ” Sound Mode”/” Surround” / ”
Stable Sound”,a popup menu will appear for user to make
further choice. If not, main menu will be cleaned for new “adjust
menu”.
as KEY_RIGHT.
Same
Acti
on
14
Page 16

4.6.3 TV Channel
3.1 C
hannel User Interface
Press Menu button on the remote control and press Down button two times until the Channel User Interface is
highlighted. Now press Right arrow to enter the sub-options as below:
here are following functions in this page:
T
Channel Management: Tomanage (Delete//Swap/Lock/Skip) all channels;
Favorite Management: To manage (Add/Delete) Favorite channels;
Country: To select country.
V connection:Toselect the DTV signal mode(Air/Cable)
T
Auto Search: To select auto search mode (DTV/ATV)
DTV Manual Search: To search digital channel by ent ering parameters manually(only for DTV)
ATV Manual Search: Tosearch analogue channel by entering parameters manually(only for ATV);
Note: Select 'Air' for regular channel viewing.
Function Description
3.2
3.2.1 Channel Manager
“ENTER” or “RIGHT” key on “Channel management” of “Channel” page in ATV or DTV source. The
Press
operation interface shows as follows:
15
Page 17

3.2.1.1 D
1)
2)
elete/Skip/Lock Channel
Press “UP (▲)” and “DOWN (▼)” key to select the programs to be deleted and press “RED”, “GREEN” or
“YELLOW” key to mark them as below:
After marking press “MENU” key to save the result.
3.2.1.2 S
Select the program to be swapped and press “BLUE” key, the selected program will blink. Now select another
prog
wap Channel
ram and press “BLUE” key to swap them.
3.2.2 Favorite Management
Press “ENTER” or “RIGHT” key on “Favorite management” of “Channel” page in ATV or DTV source. The
1)
operation interface shows as below:
Press “UP (▲)” and “DOWN (▼)” key to select the programs to be added into favorite list and press
2)
“RED”,“GREEN”,”YELLOW” or ”BLUE” key to mark them as below:
3) Press “MENU”key to return to “Favorite management” page and save the result.
16
Page 18

3.2.3 C
ountry
Select the country.
1)
3.2.4 A
uto Search
Air signal mode
3.2.4.1
Select “Auto Search” item to enter auto search user operation interface as below:
All Mode: Select “All” item to scan all digital channels carried by current signal mode firstly and then switch
to scan all analog channels in selected country automatically. User can skip digital search to analog search directly
by entering “EXIT” or “MENU” key and can also stop auto scan directly by entering “EXIT” or “MENU” during
analog scanning.
Digital Mode: Select “Digital” item to search all digital channels in selected country carried by current signal
mode. User can stop search directly by entering “EXIT” or “MENU” key.
Analog Mode: Select “Analogue” item to search all analogue channels in selected country carried by current
signal mode. User can stop search directly by entering “EXIT” or “MENU” key.
...
17
Page 19

3.2.5 D
igital Manual Search
Air signal mode
3.2.5.1
Select “Digital Manual Search” item to enter air channel manual search in DTV source:
Select channel number by “RIGHT” key or entering number directly. The strength and the quality shows at
the bottom. Press “ENTER” key on “Start” item to start current channel search. The manual searching UI and
auto searching UI are the same.
the
3.2.6 A
nalog Manual Search
ct “Analogue Manual Search” item to enter analogue manual search in ATV source:
Sele
C02
The various sub-options are as below:
Parameters
Analog
Channel
Current
Frequency
Search
Fine Tune Press the button “enter” to open the
Color System Auto/PAL/SECAM
Sound System BG/DK/I
how the Frequency when searched
S
Press the button “enter” to open the
Value
001-100
search sub page.
fine tune sub page.
18
Page 20

Enter these parameters and then select “Search” item to enter analog channel tune. A dialog pops up on the
left bottom:
Press
(◄) (
“Left
to search lower frequency channels and “Right
)" key to search higher frequency channels.
►
Press “MENU” key to return to “Channel-Analogue Manual Search” page and press “RED” key to save the
scanned channel to database.
User also can select“Fine Tune” item to fine tune current channel and the UI shows as the last picture.
Press
“Left
(◄)
”, “Right
(
)” key to fine tune current channel. Press “MENU” key to return to “Channel-
►
Analogue Manual Search” page and press “RED” key to save the tuned channel to database.
4.6.4 Feature Function Description
Operations in Feature Menu are shown in the following table:
Stroke
Key
KEY_UP
KEY_DOWN
KEY_LEFT Back to mainmenu
KEY_RIGHT
KEY_ENTER Same as KEY_RIGHT.
KEY_MENU Back to Main Menu.
KEY_EXIT Exit Main Menu.
Highlight the previous sub item. If it is the first button currently,
then highlight the last one in the list.
Highlight the next sub item. If it is the last button in the list
currently, then highlight the first one.
If the focused item is ”Timer”, mainmenu will be closed firstly
and then open the Timer Menu;
If the focused item is ” Hearing Impaired”, a Popup Menu will be
opened;
If not, Feature Menu will be closed firstly and then open the
corresponding sub menus.
Acti
on
19
Page 21

4.1 Lock
The Lock sub page includes three parts:Lock Channel,Parental Lock,Change Pin Code as shown in the
following picture.
1) Operations in Lock Menu are shown in the following table
ion
Opt
Channel On: turn on Lock Channel. User need to enter
Lock
Parental Lock Off: turn off Parental Lock
Change Pin Code KEY_RIGHT or KEY_ ENTER to enter the pin code
Change Pin Code
2)
password(0000)
are
locked. Also need to enter password when
user tries to change settings in items like
“reset system”/”reset database” etc.
Off: turn off Lock Channel
4-18: turn on Parental Lock and set the age level
that are permitted to watch the program.
changing page.
Value
to watch the channels which
3) Key Operation
Key
Stroke
Press the numeral buttons to enter the password. If the entered
KEY_NUM_0
~
KEY_NUM_9
KEY_MENU
KEY_EXIT
KEY_LEFT
numbers are not exactly the old password, then show a new
password-enter menu to enter again. If they are right, then it will ask
user to enter the new password that will take place of the old ones. If
the New Password is the same as the Confirm New Password, it’ll
show a success message. If not, it will ask you to enter the new
password.
Close the whole Main Menu。
Cancel pin-code-change-action and back to Child Lock Menu。
Acti
on
20
Page 22

4.2HDM
It i
I Link
s used to control HDMI link.
Range of the values of items in Clock Menu
1)
O
ption
E
nable HDMILink
A
uto PowerOn
uto Standby
A
peaker Preference
S
mplifier Support
A
RC
A
Note: Audio Return Channel (ARC) returns audio though the same HDMI channel that is used to send
video to the TV. If switched on, you won't need a separate audio cable to return sound from the TV.
ARC Feature is available on HDMI 2 port.
Key operation:
)
2
Ke
y Stroke
_UP
KEY
KEY
_DOWN
KEY
_LEFT
_RIGHT
KEY
_
TER
KEY
EN
KEY
_EXIT
_MENU
KEY
KEY
_STANDBY
O
n/Off
O
n/Off
O
n/Off
V Speakers/Amplfier
T
n/Off
O
H
ighlight the previous sub item. If it is the first button currently,
then highlight the last one in the list.
H
ighlight the next sub item. If it is the last button in the list
currently, then highlight the first one.
B
ack to Feature Menu。
pen/Close Popup Menu
O
ame as KEY_RIGHT。
S
E
xit Main Menu。
ack to Feature Menu
B
E
nter standby mode
Va
lue
Ac
tion
21
Page 23

4.6.5 Setup Menu
he Setup Menu is shown as follows
T
5.1
he range and the default values of every sub items in Setup menu are shown in the following table:
T
:
S
etup Menu Items
OS
D Timer ( 5, 10, 15, 20, 25, 30 Seconds,Never)
PC Setup “ ENTER ”
Blue Screen Off/On
Reset TV Setting “ ENTER ”
Software Upgrade
Value
“ ENTER ”
Operations in Setup Menu are shown in the following table:
Ke
y Stroke
H
KEY_UP
KEY_DOWN
KEY_LEFT Back to Main Menu.
KEY_RIGHT
KEY_ ENTER Same as KEY_RIGHT.
KEY_MENU Back to Main Menu.
ighlight the previous sub item. If it is the first button
currently, then highlight the last one in the list.
Highlight the next sub item. If it is the last button in
the list currently, then highlight the first one.
If the cursor is on ”OSD Timer” 、 “Auto SCART”, “Blue
Screen”, a popup menu will appear for user to make
further choice. If not, Setup Menu will be cleaned for
other sub menus.
Action
22
Page 24

C Setup
5.2 P
It
is only available in PC source.
Mode-Options Value
Auto
Adjust “OK”
H Position -16~16
V Position -16~16
Phase 0~31
Clock -30~30
1) Auto Adjust
2) H Position
3) V Position
4) Phase
5) Clock Manually adjust Clock
Auto Adjust the H Position
Manually adjust H Position
Manually adjust V Position
Manually adjust Phase
4.7 Multimedia
, V Position, Phase, Clock
4.7.1 MEDIA
Function
A. Support multimedia le:
Multimedia data Format
Image JPEG; BMP; PNG
Music MP3, WMA
V
ideo MPEG-1(.DAT/.MPG)
MPEG-2(.MPG/.VOB)
MPEG-4(.AVI/.MP4)
Digital movies
TXT .txt
B. Compatible USB devices:The device should be formatted in FAT or FAT32.
23
Page 25

Multimedia
4.7.2 USB Function
.
1.
Photo
1.1 Format Supported
Ty
pe
PHOTO JPEG
Progressive
BMP
PNG
GI
F
TI
FF
1.2
Function Introduction
light the “PHOTO” item in multimedia mainmenu by press “RIGHT” / “LEFT” key, then press “ENTER”
High
key enter photo page, as follow:
Key
Operation
1)
RED: Delete the focused folder/file.
GRE
EN:
2)
3) ENTER: Add/Del highlight files to play list.
4) CH+/-: Page up/Page down.
5) PLAY: Play the files in play list.
Add/De
Container Max Resolution
165370
JPEG 61648
101439
101439
l all photo files to play list.
24
Page 26

1.2.1 Playback
Press "PLAY"key to start playback.
Key Operation
1) : Same as "PLAY"key on remote, to start playing pictures in slide show mode
2) : Same as "PAUSE"key on remote, to pause the playing file
: Same as "STOP" key on remote, to stop sliding show, and return to the file browser
3)
4) : Same as "|<<" / ">>|" key on remote, to play the previous or next file directly
5) : To rotate the playing picture(
6) : To zoom the playing picture.
7) : Same as "INFO" key on remote, to display the information of the current file.
8) : To enter “Photo Setup” menu, including “Repeat Mode”, “Background Music”, “Music Source”,
”Slide Time”, “Effect”.
9) : T oenter the play list menu.
0 º、90 º、180 º、270º
).
1.2.2 Thumbnails
1). Thumbnails mode can be shown only in photo mode and highlight in file browser by press “EXIT” “Right
(►)” as follow:
2). The direction keys are to move highlight in files.
3). Press "EXIT" key ,and press “LEFT” key, exchange to photo list mode.
25
Page 27

2.
Music
2.1 Format Supported
Exit
MUSIC
2.2
High
key enter music page, as follow:
File
.mp3
.wma
.m4a/.aac
Function Introduction
light the “MUSIC” item in multimedia mainmenu by press “RIGHT” / “LEFT” key, then press “ENTER”
Audio
MP3
WMA
AAC
Operation
Key
1) RED: Delete the focused folder/file.
EN:
GRE
2)
3) ENTER: Add/Del highlight files to play list.
4) CH+/-: Page up/Page down.
5) PLAY: Playthe files in play list.
l all photo files to play list.
Add/De
2.2.1
Press
5)
6)
7)
8)
Playback
"PLAY"key to start playback.
Same as "|<<" / ">>|" key on remote, to play the previous or next file directly.
:
To switch the repeat mode, including ”Repeat 1”, ”Repeat All”, ”Repeat Dir” and ”Random” modes.
:
To switch the window between “Information” and “Play List”.
:
Same as “BLUE” key on remote, to close the panel only in “MUSIC” mode, and then it can be opened
:
by every key on remote.
Operation
Key
1):Same as "PLAY" key on remote, to start playing file,
or resume the paused file.
2)
Same as "PAUSE" key on remote, to pause the playing file
:
3)
Same as "STOP" key on remote, tostop the playing file.
:
4) :
Same as "<<" / ">>" key on remote, to play fast
backward or forward. The speed can switch to
twice, four times, eight times and sixteen times,
and displayed with “X2
、X4、X8、
X16” on screen
26
Page 28

3.MOVIE
Highlight the “MOVIE” item in multimedia mainmenu by press “RIGHT” / “LEFT” key, then press “ENTER”
key enter movie page, as follow:
Key Operation
1) RED: Deletethe focused folder/file.
GREEN:
2)
3) ENTER: Add/Del highlight files to play list.
4) CH+/-: Page up/Page down.
5) PLAY: Play the files in play list.
Add/Del all photo files to play list.
3.1 Playback
Press "PLAY"key to start playback.
Key Operation
1) : Same as "PLAY"key on remote, to start playing file, or resume the paused file.
2) : Same as "PAUSE"key on remote, to pause the playing file
: Same as "STOP" key on remote, to stop the playing file, and return to the file browser interface.
3)
4)
twice, four times, eight times and sixteen times, and displayed with “X2、X4、X8、X16” on screen
5) : Same as "|<<" / ">>|" key on remote, to play the previous or next file directly.
6) : To enter slow mode. The speed can switch to 1/2, 1/4, 1/8, 1/16, and displayed with “X1/2, X1/4, X1/8,
7)
8) : To set AB repeat, the first press sets A point, and the second press sets B point, and then play
betweenA and B repeatedly.
9) : To enter the play list menu.
10) : Same as "INFO" key on remote, to display the information of the current file.
: Same as "<<" / ">>" key on remote, to play fast backward or forward. The speed can switch to
X1/16” on screen.
: To enter step mode.
11) :Toenter “Movie Setup” menu, including “Program”, “Subtitle”, “Audio”, ”Repeat Mode”.
12)
: To enter “GO TO” function, user can input the time he want to start directly.
27
Page 29

4.
eBook
4.1 Format Supported
nly txt format eBook is supported.
O
4.2
Function Introduction
light the “eBook” item in multimedia mainmenu by press “RIGHT” / “LEFT” key,then press “ENTER” key
High
to enter eBook page, as follow:
Operation
Key
1) RED: Delete the focused folder/file.
EN:
GRE
2)
3) ENTER: Add/Del highlight files to play list.
4) CH+/-: Page up/Page down.
5) PLAY: Playthe files in play list.
4.2.1 P
layback
"PLAY"key to start playback
Press
l all photo files to play list.
Add/De
Operation
Key
“RED” To add/del bookmark.
“GREEN” To input the page number directly.
“YELLOW” To enter the “Bookmark list” page.
“BLUE” To enter the “Play list” page.
“<<” / “>>” Topage down/page up.
"EXIT" Toclose the file and return to the file browser.
28
Page 30

4.8 EPG/PVR/Timeshift
4.
8.1 EPG
1.1 EPG abstract
Press the EPG button on the remote control to open the Electronic Program Guide. The EPG shows information
about the current and upcoming programs running on each channel.
There are three modes - Daily mode, Weekly mode and Extended mode.
1.2 D
aily Mode
D
includes name, start time, end time, short content description, current date/time, etc.
If the highlighted program is not parental locked, it will be played simultaneously in the background.
isplay the information of the programs that start in a scheduled period of time in the current channel. It
Ke
y Stroke
DIRECTION KEYS
KEY
_RED
_GREEN
KEY
KEY_YELLOW
KEY_BLUE
KEY_INFO
KEY_EXIT Exit EPG.
Scroll through the channels and programs on each channel.
Change to weekly mode.
Set a reminder for the selected program.
Show the previous day's programs.
Show the next day's programs.
If the cursor lies on the right event list, change to Extended Mode by enter the key
“KEY_INFO” or back to daily mode by enter the key “KEY_RETURN”.
EPG
Daily Mode
29
Ac
tion
Page 31

eekly Mode:
1.3 W
D
isplay the information of the programs that start in a scheduled period of time in the current channel. It
includes name, start time, end time, short content description, current date/time, etc.
Focusing on different channels on the left, it displays corresponding programs in schedule of time.
If the highlighted program is not parental locked, it will be played simultaneously in the background.
Weekly Mode
EPG
Ke
y Stroke
DIRECTION KEYS
KEY
_RED
KEY_YELLOW
KEY_BLUE
KEY_INFO
KEY_EXIT
Ac
tion
Scroll through the channels and programs on each channel.
Change to daily mode.
Show the previous day's programs.
Show the next day's programs.
If
the cursor lies on the right event list, change to Extended Mode by enter the key
“KEY_INFO” or back to weekly mode by enter the key “KEY_RETURN”.
Exit EPG.
30
Page 32

xtended Mode:
1.4 E
y Stroke
Ke
KEY
_UP If the information takes more than one page, the current page rolls up a row.
_DOWN If the information takes more than one page, the current page rolls down a row.
KEY
_Exit
KEY
If it entered Extended Mode from daily mode, back to daily mode .
If it entered Extended Mode from weekly mode, back to weeklymode.
E
PG Extended Mode
tion
Ac
31
Page 33

8.2 PVR
4.
The PVR (Personal Video Recorder) function allows you to record programs on to a USB memory device.
Press the RECORD button on the remote control to activate the PVR function.
Note: A USB memory device must be connected in order to record programs.
2.1 P
VR involved Menus
P
1.
VR/Timeshift menu;
2. Partition List menu;
3. Timer menu;
4. Timer Edit menu;
5. Record List menu;
6. REC info menu;
7. Timeshit info menu.
I
nformation:PVR/Timeshift menu manages almost all the information that have relationship with PVR.
Enter the PVR/ Timeshift menu from the Feature Menu:
2.
1.1 PVR/Timeshift menu
PVR/Timeshift menu)
(
32
Page 34

F
unction list explain:
artition Select
P
uto Timeshift
A
imeshift Buffer
T
mer
Ti
ecord List
R
Key Stroke in menu:
Ke
y Stroke
DIRECTION KEYS
KEY
_ Exit
tems
Enter Partition Select menu;
isplay partition’ s infomation;
D
ormat partition function;
F
S
et default partition function;
Auto Timeshift :o ff (Stop auto Timeshift) 、Auto (Start auto Timeshift);
Set Timeshift Buf f er:auto、30Mins、1hr、2hr;
Enter Timer menu;
reengaged programs’ information;
P
Ad
d、delete preengaged programs;
Enter Record List menu;
isplay Recorders’ information;
D
P
layback Recorders.
PVR/Timeshift Function List)
(
I
Ac
tion
Scroll through the various options.
Exit all menu.
(PVR/Timeshift menu Key Stroke)
33
Page 35

2.
1.2 Partition List menu
I
nformation:Partition List menu manages the partitions connected to system.
(
Partition List menu)
Function:
a) Partitions:The list in the menu shows the partitions connected to system;
b) Partitions’ property:Total size and Free size;
c) Format Partition:Press KEY_RED to format the focus partition. Before format, there is a prompted popup
d)
Key Stroke in menu:
window to confirm;If format successfully there is a message “Format Success!”, otherwise, there is a
“Format Fail!”;
Set default partition: Press KEY_GREEN to set the focus partition as the default partition. The recorded
programs are stored in the default partition. It needs to be reset if the default partition is full in recording
progress.
Ke
y Stroke
_UP
KEY
KEY
_DOWN
KEY
_MENU
KEY
_RED
KEY
_GREEN
KEY
_ Exit
Focus on the previous option on the partition list.
Focus on the next option on the partition list.
Return to the previous menu’s focus (PVR/Timeshift menu “Partition
select” option).
Format the chosen partition.
Set the chosen partition as the default partition.
Exit all menus.
(
Partition List menu Key Stroke)
Ac
tion
34
Page 36

1.3
2.
I
nformation:
.
from this menu.
Prompted information explain:
a) CH NO. :Channel number;
b) Channel :Channel name;
c) Start : Start recording time;
d) Duration :The total recording time;
e) Date : The date of starting recording;
f) Mode : Record Mode;
g) On the left top of menu is current date and time in system.
PS:
1) These information except “g” all come from the preengaged programs in Timer Edit menu or EPG;
ress KEY_YELLOW for add or KEY_BLUE for edit to enter Timer Edit menu.
2)
P
delete the focus program,press KEY_GREEN to delete all the programs.
Key Stroke in menu:
Ke
_UP
KEY
KEY
_DOWN
KEY
_RED
KEY
_GREEN
KEY
_YELLOW
KEY
_BLUE/ KEY_ENTER Edit the chosen recording program; Enter Timer Edit menu.
_MENU
KEY
_ Exit Exit all menus.
KEY
Timer menu
Timer menu manages the programs scheduled for recording. You can add or delete programs
y Stroke
(T
imer menu)
Press KEY_RED to
Focus on the previous option on the record list.
Focus on the next option on the record list.
Delete the chosen program.
Delete all the programs.
Add recording program; Enter Timer Edit menu.
Return to the previous menu’s focus (PVR/Timeshift menu “Timer”
option).
Timer menu Key Stroke)
(
Ac
tion
35
Page 37

.4 Timer Edit menu
2.1
You can edit the programs scheduled for recoding from the Timer Edit menu.
(
Timer Edit menu)
Function explain:
a)
Recorder : (Off / On). "Off" sets a reminder for a particular program for watching; it does not record the
program. "On" schedules a program for watching and recording.
b) Type: DTV、Radio,DTV means to preengage DTV Channel program and Radio means to preengage Radio
Channel program;
c) Channel: DTV or Radio Channel programs;
d) Start Time: Start recording time; Format is hour
uration: The total recording time ; Format is
e) D
when Recorder is“On”,it can be set;
f)
Date :The date when recording starts,
ode : Once、Daily、Weekly、Month;
g) M
PS:
1) The start recording time must be reasonable (behind current system time);If the timer is repeat or not
reasonable, there will be a message ”Set timer fail!” to prompt when return;
2) The Edit function re .
inute
;
/ m
hour
inute
;PS:The status of this option is disable,only
/ m
ormat is
day
F
embles Add function except that Type and Channel can not changed again
s
onth
/ m
/ y
ear
;
36
Page 38

ey Stroke in menu:
K
Ke
y Stroke
_UP
KEY
KEY
_DOWN
_0~9
KEY
KEY
_ENTER
KEY
_MENU
_ Exit
KEY
2.
1.5 Record List menu
Focus on the previous option on the Edit list.
Focus on the next option on the Edit list.
Edit Start Time、Duration、Date.
Confirm the choice.(For popList options)
Return to the previous menu (Timer menu) and save the setting.
Exit all menus.
Timer Edit menu Key Stroke)
(
Ac
tion
nformation:
I
from this menu.
Key Stroke in menu:
Record List menu manages the Recorded programs. User can playback recorded content
Ke
y Stroke
_UP
KEY
_DOWN
KEY
_ENTER
KEY
_MENU
KEY
_ Exit
KEY
(R
Focus on the previous option on the program list.
Focus on the next option on the program list.
Play the focus program.
Return to the PVR/Timeshift menu (focus on Record List option).
Exit all menus.
ecord List menu)
(R
ecord List Key Stroke)
Ac
tion
37
Page 39

1.6 REC info menu
2.
R
EC input info menu:
This indicates that recording is in progress. It is displayed continuously until recording is stopped
(except when some other menu is selected).
REC info banner menu:
This displays information about the current recording.
Enter method:After REC start, press KEY_DISPLAY to show the REC info banner menu.
Function explain:
a) Time is equal to current REC time minus REC start time.
b) Progress bar is for current REC length compared with the disk free space when REC start.
c) MB Free is the disk instantaneous free space.
Menu shows as follows:
Key Stroke in menu:
K
ey Stroke
_PAUSE
KEY
_DISPLAY
KEY
_STOP
KEY
Start or pause recording.
Enter banner info menu.
Stop REC.
(R
EC info menu)
EC info Key Stroke)
(R
Ac
tion
1.7 Timeshift info menu
2.
imeshift input info menu:
T
This indicates that timeshift is in progress. It is displayed continuously until timeshift is stopped
(except when some other menu is selected).
Timeshift info banner menu:
Information:Timeshit info ba nner shows some c
Enter method:After Timeshift start, press KEY_DISPLAY to show the menu .
Function explain :
a) Time is equal to current play time minus current recording time.
rent Timeshift information.
ur
38
Page 40

rogress bar is for current recording length compared with the disk free space when REC start. The
b)
P
black triangular icon is for current play length compared with current recording length.
c) MB Free is the disk instantaneous free space.
d) The right red time menu has the same function with the time in info banner menu(only when info
banner menu closed it showed).
Menu shows as follows:
Key Stroke in menu:
y Stroke
Ke
_PAUSE
KEY
KEY
KEY
KEY
KEY
_DISPLAY
_STOP
_FF
_FB
(T
(T
Start or pause recording and playing.
Enter banner info menu and close time menu.
Stop Timeshit.
Playing video fast forward with speed “x2”,“x4”,“x8”,“x16”
Playing video fast behind with speed “x2”,“x4”,“x8”,“x16”
(T
imeshift info menu)
imeshift time menu)
Ac
imeshift info Key Stroke)
tion
4.
8.3 REC
T
his section is for recording flow.
3.1 RE
1. I
nformation:
a) Input:MPEG2 TS,NIM,ISO/IEC 13818-2,H.264;
C
O
utput:MPEG2 PS packet,only contain Video and Audio PID,no Teletext,Subtitle,EPG etc,the output
Video file format is “.MPG” and Audio file format is “.MP3”,the output files can be played by other
players which supports MPEG2 PS;TS packet, contain Video and Audio PID,Teletext,Subtitle etc,the
output Video file format is “.TSV” ,the output files can be played by other players which supports TS
39
Page 41

The save direction for the output files: the inserted storage device (USB/Card). If user wants to change
b)
he output direction, he can open the partition list by pressing the button “Device” and make the choice.
t
It supports 4 partitions at most;
c) The rules of naming the output files: Program name + (REC date_time(h/m/s),eg : BBC
ONE(20111023_123456).MPG. If a long-time recorded file takes more than 3.9GB, it cuts and makes a
new file named by adding an extra sequence number. eg: BBC ONE(20111023_123456)001.MPG.
2. Recording Flow:
a) Set up the working partition(default partition):
b) Press KEY_REC to start recording, when there is a program playing, it will pop up a message “Do you
want to start Recording?”. After confirmation, the system will read the speed of the storage device.
speed is too low for recording, there is a message “Device speed not enough, RECORD anyway?” if
er choose Yes, it will record constrainedly. In addition, if the speed is high enough, it initializes in the
us
first instance and starts to record later.
There is a P
Press KEY_GREEN to set the focus partition as default;
System will set the partition which is recognised first as default partition before record if user
does not set before;
Recorded files will be stored in the default partition.
(This step is same for Timeshift also)
artition list that shows the part itions conn ected t o the sys tem in P artit ion Li st men u,
If the
(C
onfirm record window)
nitializing recorder window)
(I
c) As the initialization successfully ends, a REC input info menu appears on the right top corner of the
picture and it starts to record while the program is playing in the background;
d) Press KEY_DISPLAY to get the current recording information from the Info Banner, such as current
recording time and the recording progress. The recording time depends on how much of the program
has been recorded actually;
40
Page 42

e)
I
f the signal is not stable there may be some pause;
f) The recording progress will stop when the device has no more free spaces if there is no setting about
when to end before. A
normal playback process. Otherwise the progress ends naturally when the timer is timeout. Also user
could press KEY_STOP to end recording manually;
arning message pops up, the recording process stops and it will keep on the
w
REC info and stop recording window)
(
g) System will prompt user error message and try to continue recording if there are some bad tracks in
disk.
3.2 T
imer REC
T
here are two methods to set a timer. As follows:
1. In the EPG menu user can preengage programs for watching or recording;
a) Pressing KEY_GREEN once is to preengage the program only for watching(when timeout, it jumps to
the program and only play.
b) Pressing KEY_GREEN twice is to preengage the program for recording (when timeout, it jumps to the
program and starts recording). if it is timeout in standby mode, it will power on 2 minutes in advance
and starts to record under background without powering on the panel. To watch the program, user need
to press KEY_POWER;
c) The preengaged programs can be checked in Timer menu.
ss KEY_GREEN once for reminder)
(Pre
41
Page 43

ss KEY_GREEN twice for recorder)
(Pre
2. In Timer menu, user can increase、delete preengage programs; In Timer Edit menu, user could set、modify
preengaged programs’ info rma tion;
In Timer menu: press KEY_YELLOW to get into Timer Edit menu to add a timer .Then set timer’s information
in Timer Edit menu.
Flow of setting a timer’s information:
a) Type: Set program type :DTV or RADIO;
b) Mode: Way of triggering a timer(once/daily/weekly/monthly);
c) Recorder:“ON”: preengage for watching and recording(record). “OFF”: preengage only for
watching(reminder);
d) Set the date/time and Duration time (exact to minutes);Must be reasonable (behind current time);
e) Timer: when there are some conflicts a warning message will pop up;
f) Press KEY_MENU to return to Timer menu and store the timer’s information.
imer Edit menu )
(T
3. When the timer recorder is timeout, it jumps to the very channel and starts to record the program
automatically.(if a manual recording is under process, it will stop the manual recording process and starts the
timer recorder automatically);When there is left 10s before recorder , a prompted window will pops up;
42
Page 44

(T
imer Record start prompt window )
4. If there are not any storage media, the settings fail and a warning message “no USB device” shows;
5. If target partition (default partition) is not set, it selects the first partition that the system identified
automatically.
3.3 T
imeshift
T
imeshift can record program and play the current recording program at the same time.
Note: A USB memory device must be connected for this function.
1. Set Timeshift Buffer in PVR/Timeshift menu, Timeshift Buffer means how long a recorder can be stored when
Timeshift. If Buffer is overstepped , the previous recorder stored there will be lie over; There are three modes:
auto、30Mins、1hr、2hr,“auto”means all the free spaces on the storage media;
2. In the normal playback process in DTV source, there are two ways to start timeshift:
a) Manually: press KEY_PAUSE to start Timeshift when there is no menu focused ( Stop: press
KEY_STOP ) ;
b) Automatically: set the “Auto Timeshift”option as “Auto” in PVR/Timeshift menu ( Stop: set “Auto
Timeshift”as “Off”) .
3. Before Manually T imeshift, there is a message “Do you want to start Timeshift”. After confirm,If signal is
stable, it will check whether the speed of the storage device that the user inserted is enough for Timeshift. If
the speed is not enough, a warning message will pop up to let the user make decision whether to go on. If
timeshift is force to take place, there may be some pause or mosaic. Otherwise the speed is enough for
Timeshift, it’ll take place under background and users are able to pause or move fast backward;After a
pause, users are able to pause or move fast backward;
4. After Automatically Timeshift, it will take some minutes to initialize, then it take place automatically;
(T
imeshift Play start prompt menu)
43
Page 45

(T
5. A UI (Timeshift time menu) on the right top corner shows the fallen time between the current picture and the
living broadcasting picture;
6. During the recoding progress, if the signal is missing, the recording process will take a pause until the signal
is stable again.
.4 REC Playback
3
lay videos and recorded files
P
1. The recorded Videos can be played in Record List menu , in Record manage menu or in Source Media
Movie mode;
2. When a video playing, the Info Banner menu shows the length of the video and the time that the video has
been played. Also there is a progress bar indicating the process of playing the video;
3. A playing video can move fast forward with the speed “x2”,“x4”,“x8”,“x16” or play in a normal speed by
pressing the button “fast forward”;
4. A playing video can move fast backward with the speed “x2”,“x4”,“x8”,“x16” or play in a normal speed by
pressing the button “fast backward”;
5. If it moves fast backward to the start of the video, it turns into the normal playing speed automatically;
6. When a video playing, pause the process by pressing the button “pause/play” and restart the process b y
another press again;
7. When a video playing, it can jump to the previous or the next video to play by pressing the button “previous”
8. When a video playing, user can stop the process by pressing the button “stop” and it goes back to the
9. When it comes to the end of a video, it will stop/repeat/play the next one depending on the value of Repeat
PS:The 3、4、5、6、7、8 upwards also adapt to the playback when it is recording。
or “next”;
browser in movie mode;
mode。
imeshift Play Info menu and stop prompt)
44
Page 46

5.Technical Specification
32 inch ( 81cm )
1366 X 768
200±10%
3000
176 176
Engli sh
2
8 W
1 x USB ports
60W
730x189x472mm(L x D x H)
Net Wei ght: 4.3 kg
45
Page 47

6. Supported Signal Modes
A.VGA Mode
Resolutio n Hori zonta l Frequ ency (Khz) Vertic al Freq uency ( Hz)
640 x 480
800 x 600
1024 x 768
1366x 768
31.50
35.16
37.90
48.40
47.85
Note:Use VGA connecting cord of less than 5 meters
60.00
56.25
60.00
60.00
60.00
to ensure the appropriate
picture quality.
B.YPbPr Mode
Resolutio n
480i
480p(720x48 0)
576i
576p(720x57 6)
720p(1280x7 20)
1080i
1080P(1920x 1080)
C.HDMI Mode
Horizonta l Frequency (Kh z) Vertical Freque ncy (Hz)
15.734
31.468
15.625
31.25
37.50
45.00
28.13
33.75
67.50
56.25
Memo
59.94
59.94
50.00
50.00
50.00
60.00
50.00
60.00
60.00
50.00
Resolutio n Horizontal Fr equency (Kh z) Vertical Fr equency (Hz)
480p
576p
720P
1080i
1080P(1920x 1080)
-When the sig nal received by t he display ex ceeds the all owed range, a
warning messa ge will appea r on the screen .
-You can confi rm the input sign al format ons creen.
31.468
31.25
45.00
33.75
67.50
59.94
50.00
60.00
60.00
60.00
46
Page 48

Simple Troubleshooting
I
f your TV has a main power switch (O/I switch), make sure it is
set to ON - refer to the Overview diagram for position.
Note: The main power switch, if available, is separate from the
standby button.
Make sure the standby button is also turned on.
Make s
for best performance.
47
o 1366x768
Page 49

RWXM00-E139
 Loading...