

CD RECEIVER
CD-RECEIVER
RECEPTEUR CD
CD-RECEIVER
KD-G202/KD-G201
KD-G202
ENGLISH
DEUTSCH
KD-G202
KD-G201
KD-G201
• This unit is equipped with the display demonstration. To cancel it, see page 6.
• Dieses Gerät ist mit einer Demonstrationsfunktion für das Display ausgestattet. Auf
Seite 6 wird beschrieben, wie Sie diese Demonstrationsfunktion deaktivieren können.
• Cet appareil est équipé d’une fonction de démonstration des affichages. Pour l’annuler,
référez-vous à la page 6.
• Dit toestel heeft een display-demonstratiefunctie. Zie bladzijde 6 voor het annuleren van
deze functie.
For installation and connections, refer to the separate manual.
Für den Einbau und die Anschlüsse siehe das eigenständige Handbuch.
Pour l’installation et les raccordements, se référer au manuel séparé.
Bijzonderheden over de installatie en aansluiting van het apparaat vindt u in de
desbetreffende handleiding.
INSTRUCTIONS
BEDIENUNGSANLEITUNG
MANUEL D’INSTRUCTIONS
GEBRUIKSAANWIJZING
FRANÇAIS
NEDERLANDS
GET0184-001A
[E/EX]
IMPORTANT FOR LASER PRODUCTS
1. CLASS 1 LASER PRODUCT
2. CAUTION: Do not open the top cover. There are no user serviceable parts inside the unit; leave all
servicing to qualified service personnel.
ENGLISH
3. CAUTION: Visible and invisible laser radiation when open and interlock failed or defeated. Avoid
direct exposure to beam.
4. REPRODUCTION OF LABEL: CAUTION LABEL, PLACED OUTSIDE THE UNIT.
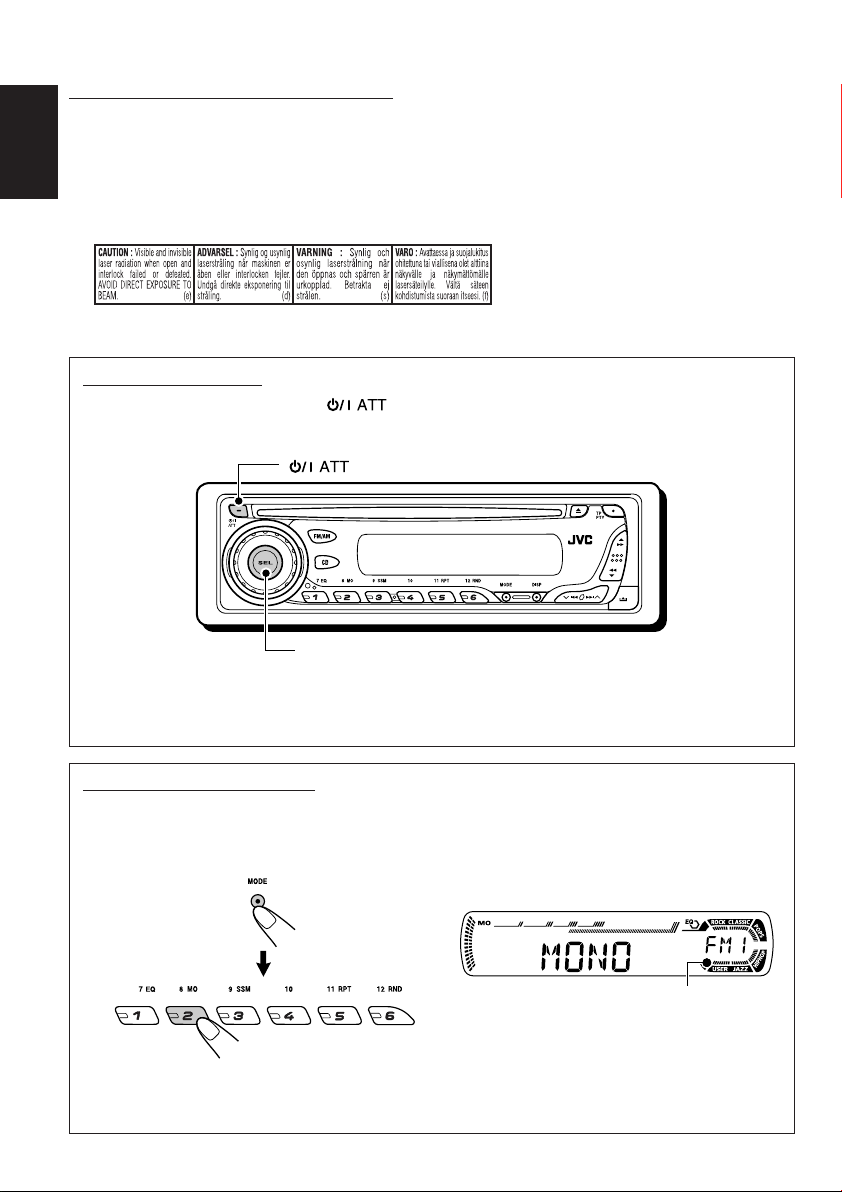
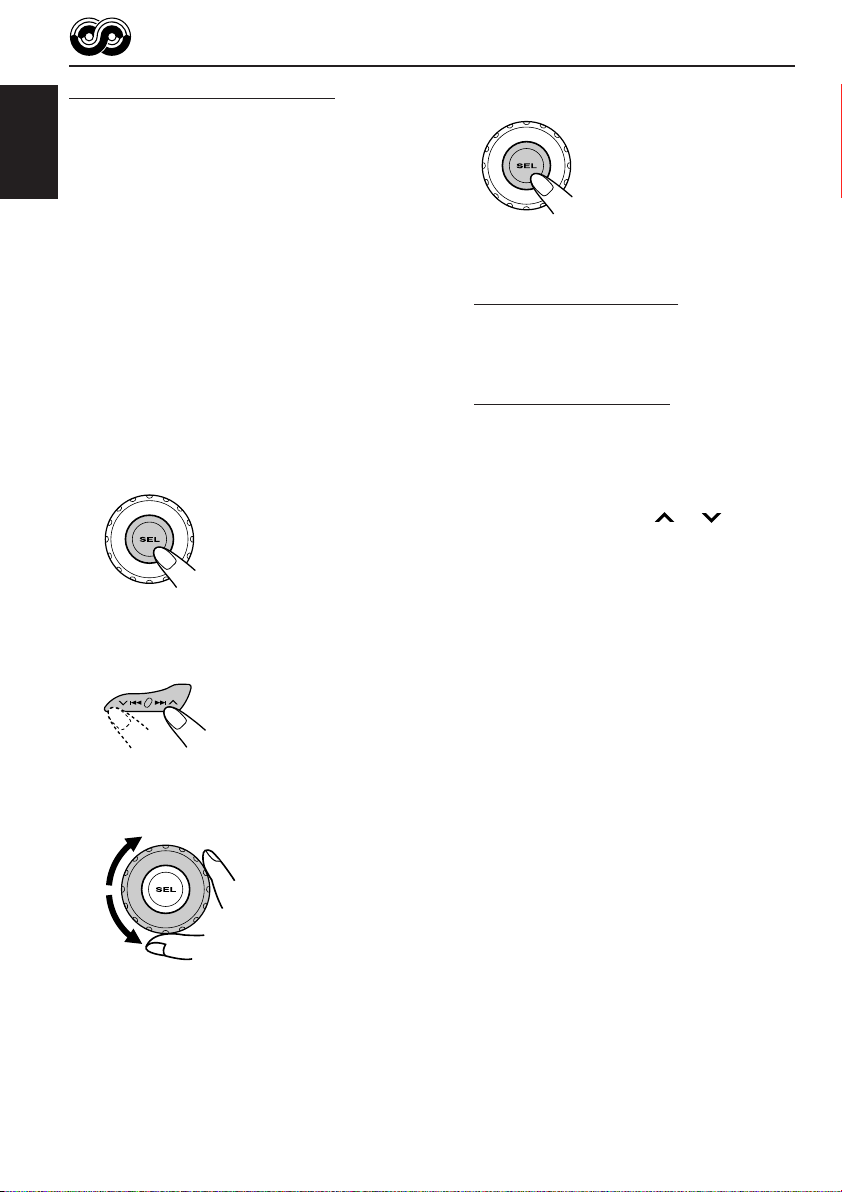
How to reset your unit
While holding SEL (select), press (standby/on attenuator) for more than 2 seconds.
This will reset the built-in microcomputer.
(standby/on attenuator)
SEL (select)
Notes:
• Your preset adjustments—such as preset channels or sound adjustments—will also be erased.
• If a CD is in the unit, it will eject when you reset the unit. Be careful not to drop the CD.
How to use the MODE button
If you press MODE, the unit goes into functions mode, then the number buttons work as different
function buttons.
Ex.: When number button 2 works as MO (monaural) button.
Time countdown indicator
To use these buttons for original functions again after pressing MODE, wait for 5 seconds
without pressing any of these buttons until the functions mode is cleared.
• Pressing MODE again also clears the functions mode.
2

Thank you for purchasing a JVC product. Please read all instructions carefully before operation,
to ensure your complete understanding and to obtain the best possible performance from the unit.
CONTENTS
How to reset your unit ............................... 2
How to use the MODE button ................... 2
LOCATION OF THE BUTTONS ............ 4
Control panel ............................................. 4
BASIC OPERATIONS ....................... 5
Turning on the power ................................ 5
Canceling the display demonstration ........ 6
Setting the clock ........................................ 7
RADIO OPERATIONS ...................... 8
Listening to the radio ................................. 8
Storing stations in memory ....................... 10
Tuning in to a preset station ...................... 11
RDS OPERATIONS ......................... 12
What you can do with RDS ....................... 12
Other convenient RDS functions and
adjustments ............................................ 17
CD OPERATIONS ........................... 19
Playing a CD ............................................. 19
Locating a track or a particular portion
on a CD .................................................. 20
Selecting CD playback modes .................. 20
Prohibiting CD ejection ............................. 21
SOUND ADJUSTMENTS ................... 22
Selecting preset sound modes
(C-EQ: custom equalizer) ....................... 22
Adjusting the sound .................................. 23
OTHER MAIN FUNCTIONS ................ 24
Changing the general settings (PSM) ....... 24
Detaching the control panel ...................... 26
TROUBLESHOOTING ...................... 27
MAINTENANCE ............................. 28
Handling discs ........................................... 28
SPECIFICATIONS........................... 29
ENGLISH
KD-G202 and KD-G201 are equipped with the steering wheel remote control function.
If your car is equipped with the steering wheel remote controller, you can operate the unit using the
controller.
• See the Installation/Connection Manual (separate volume) for connection to utilize this function.
Note:
For security reasons, a numbered ID card is provided with this unit, and the same ID number is imprinted on
the unit’s chassis. Keep the card in a safe place, as it will help the authorities to identify your unit if stolen.
BEFORE USE
*
For safety....
• Do not raise the volume level too much, as this will
block outside sounds, making driving dangerous.
• Stop the car before performing any complicated
operations.
*
Temperature inside the car....
If you have parked the car for a long time in hot or
cold weather, wait until the temperature in the car
becomes normal before operating the unit.
3

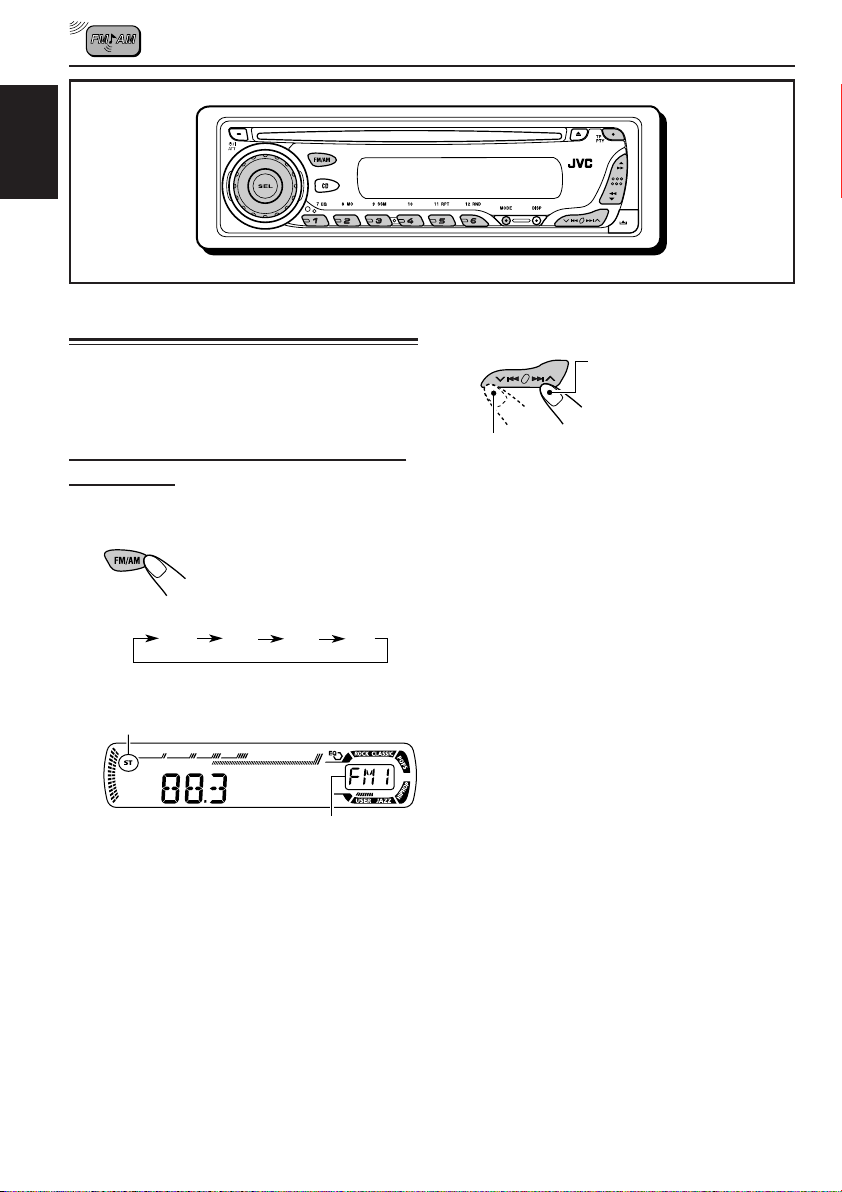
Control panel
Display window
ENGLISH
LOCATION OF THE BUTTONS
1 (standby/on attenuator) button
2 SEL (select) button
3 FM/AM button
4 CD button
5 Loading slot
6 Display window
7 0 (eject) button
8 TP PTY (traffic programme/programme type)
button
9 5 (up) button
¡ (fast-forward) button
p Control dial
q Number buttons
w EQ (equalizer) button
e MO (monaural) button
r SSM (Strong-station Sequential Memory)
button
t RPT (repeat) button
y RND (random) button
u MODE button
i DISP (display) button
o 4/¢ buttons
4
; (control panel release) button
a ∞ (down) button
1 (reverse) button
Display window
s Tuner reception indicators
MO (monaural), ST (stereo)
d RDS indicators
TP, PTY, AF, REG
f CD indicator
g RND (random disc) indicator
h RPT (repeat) indicator
j LOUD (loudness) indicator
k EQ (equalizer) indicator
l Sound mode (C-EQ: custom equalizer)
indicators
ROCK, CLASSIC, POPS, HIP HOP, JAZZ,
USER
/ Main display
z Source display
Volume level indicator
BASIC OPERATIONS
ENGLISH
1
3
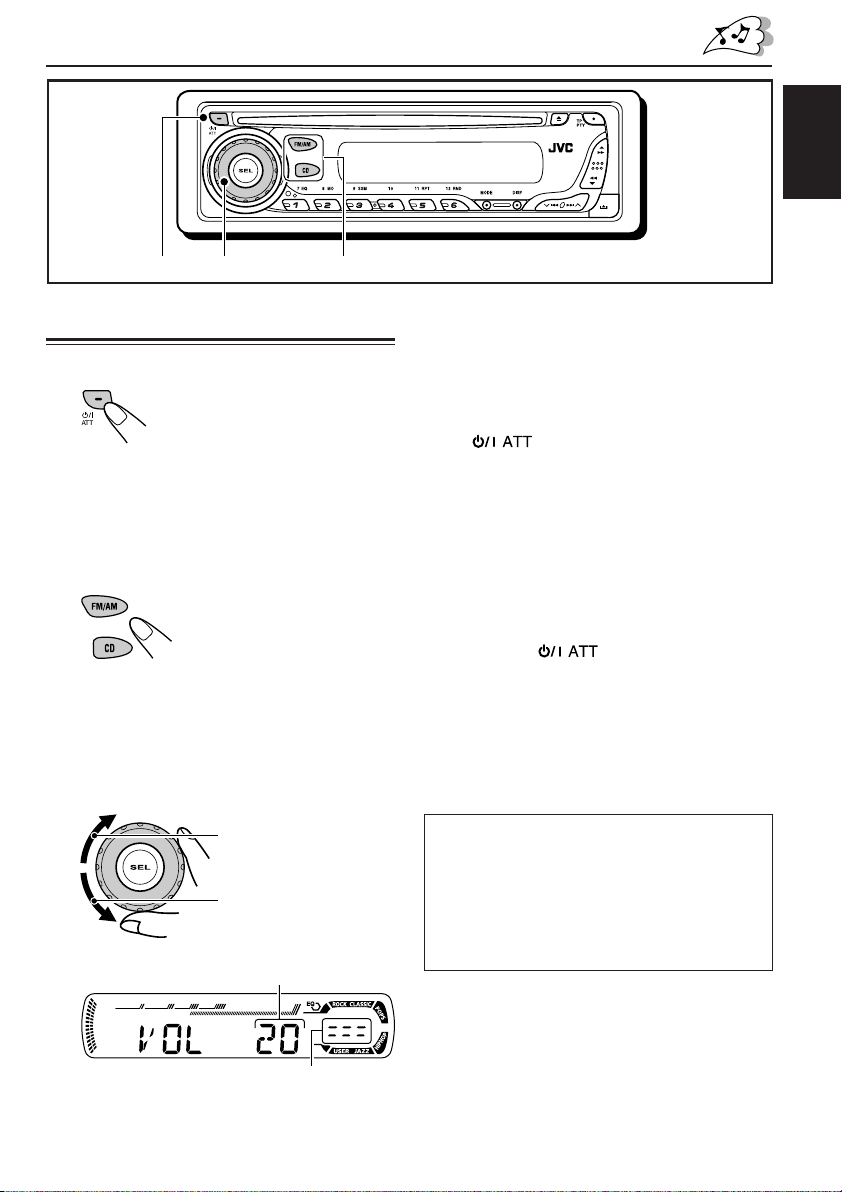
Turning on the power
1
Turn on the power.
Note on One-Touch Operation:
When you select a source in step 2 below, the
power automatically comes on. You do not have
to press this button to turn on the power.
2
Select the source.
To operate the tuner (FM or AM),
see pages 8 – 18.
To play a CD,
see pages 19 – 21.
3
Adjust the volume.
To increase the volume
To decrease the volume
Volume level appears.
2
4
Adjust the sound as you want.
(See pages 22 and 23.)
To drop the volume in a moment
Press briefly while listening to any
source. “AT T” starts flashing on the display, and
the volume level will drop in a moment.
To resume the previous volume level, press the
button briefly again.
• If you turn the control dial, you can also restore
the sound.
To turn off the power
Press and hold for more than one
second.
“SEE YOU” appears, then the unit turns off.
• If you turn off the power while listening to a
CD, CD play will start from where playback has
been stopped previously, next time you turn on
the power.
CAUTION on Volume Setting:
CDs produce very little noise compared with other
sources. If the volume level is adjusted for the
tuner, for example, the speakers may be damaged
by the sudden increase in the output level.
Therefore, lower the volume before playing a CD
and adjust it as required during playback.
Volume level indicator
5

ENGLISH
Canceling the display
demonstration
When shipped from the factory, display
demonstration has been activated, and starts
automatically when no operations are done for
about 20 seconds.
• It is recommended to cancel the display
demonstration before you use the unit for the
first time.
To cancel the display demonstration, follow
the procedure below:
1
Press and hold SEL (select) for more
than 2 seconds so that one of the
PSM items appears on the display.
(PSM: see pages 24 and 25.)
2
Select “DEMO” if not shown on the
display.
3
Select “DEMO OFF.”
DEMO OFF
4
Finish the setting.
To activate the display demonstration, repeat
the same procedure and select “DEMO ON” in
step 3.
DEMO ON
6
ENGLISH
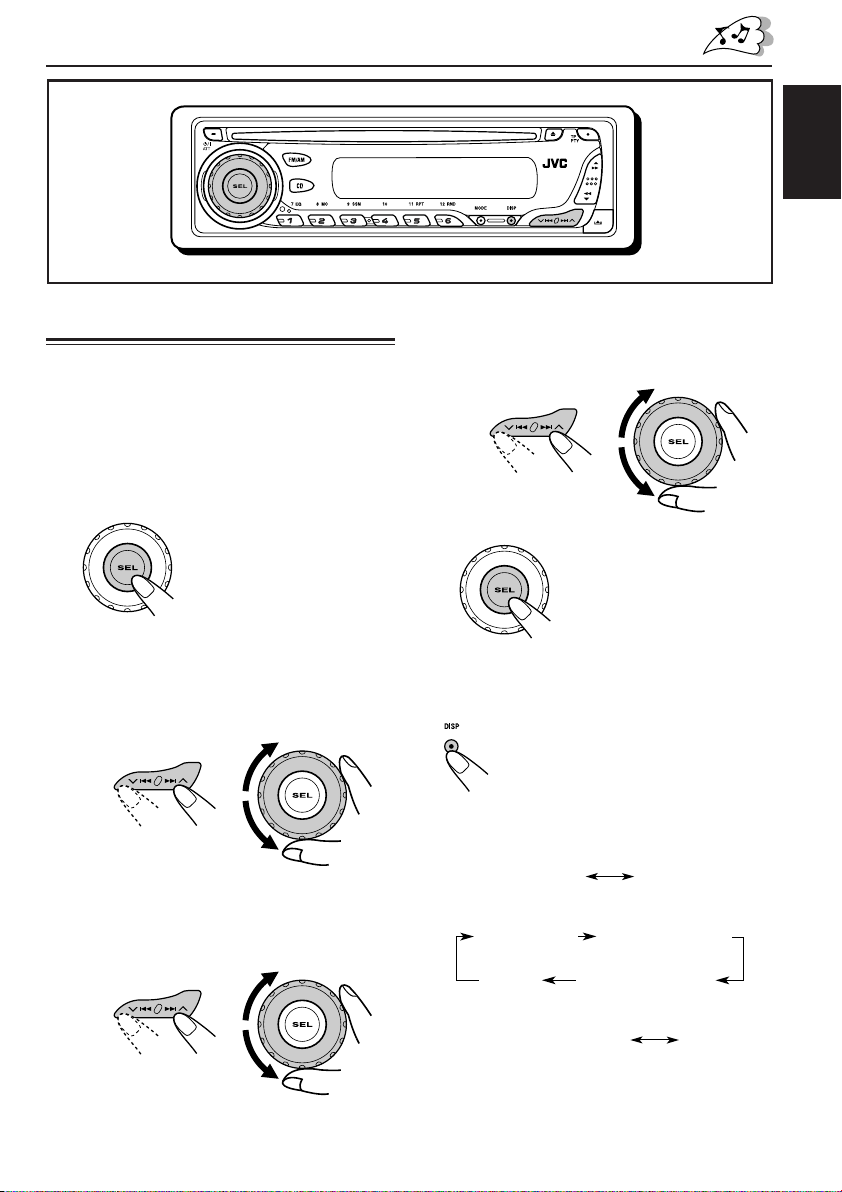
Setting the clock
You can also set the clock system to either
24 hours or 12 hours.
1
Press and hold SEL (select) for more
than 2 seconds so that one of the
PSM items appears on the display.
(PSM: see pages 24 and 25.)
2
Set the hour.
1 Select “CLOCK H” (hour) if not shown on
the display.
2 Adjust the hour.
12
3
Set the minute.
1 Select “CLOCK M” (minute).
2 Adjust the minute.
12
4
Set the clock system.
1 Select “24H/12H.”
2 Select “24H” or “12H.”
12
5
Finish the setting.
To check the current clock time or change the
display mode
Press DISP (display) repeatedly.
Each time you press the button, the
display changes as follows:
• During AM and FM non-RDS station
operation:
Frequency
• During FM RDS Station operation:
Station name
• During CD operation:
• During power off:
The power turns on and the clock time is
shown for 5 seconds, then the power turns off.
Clock
Station frequency
Programme typeClock
ClockElapsed playing time
7
ENGLISH
RADIO OPERATIONS
Listening to the radio
You can use either automatic searching or manual
searching to tune in to a particular station.
Searching for a station automatically:
Auto search
1
Select the band (FM1 – 3, AM).
Each time you press the
button, the band changes as
follows:
FM1 FM2 FM3 AM
Lights up when receiving an FM stereo
broadcast with sufficient signal strength.
Selected band appears.
Note:
This receiver has three FM bands (FM1, FM2,
FM3). You can use any one of them to listen to
an FM broadcast.
2
Start searching for a station.
To search for stations of
higher frequencies
To search for stations of lower frequencies
When a station is received, searching stops.
To stop searching before a station is
received, press the same button you have
pressed for searching.
8
Searching for a station manually:
Manual search
1
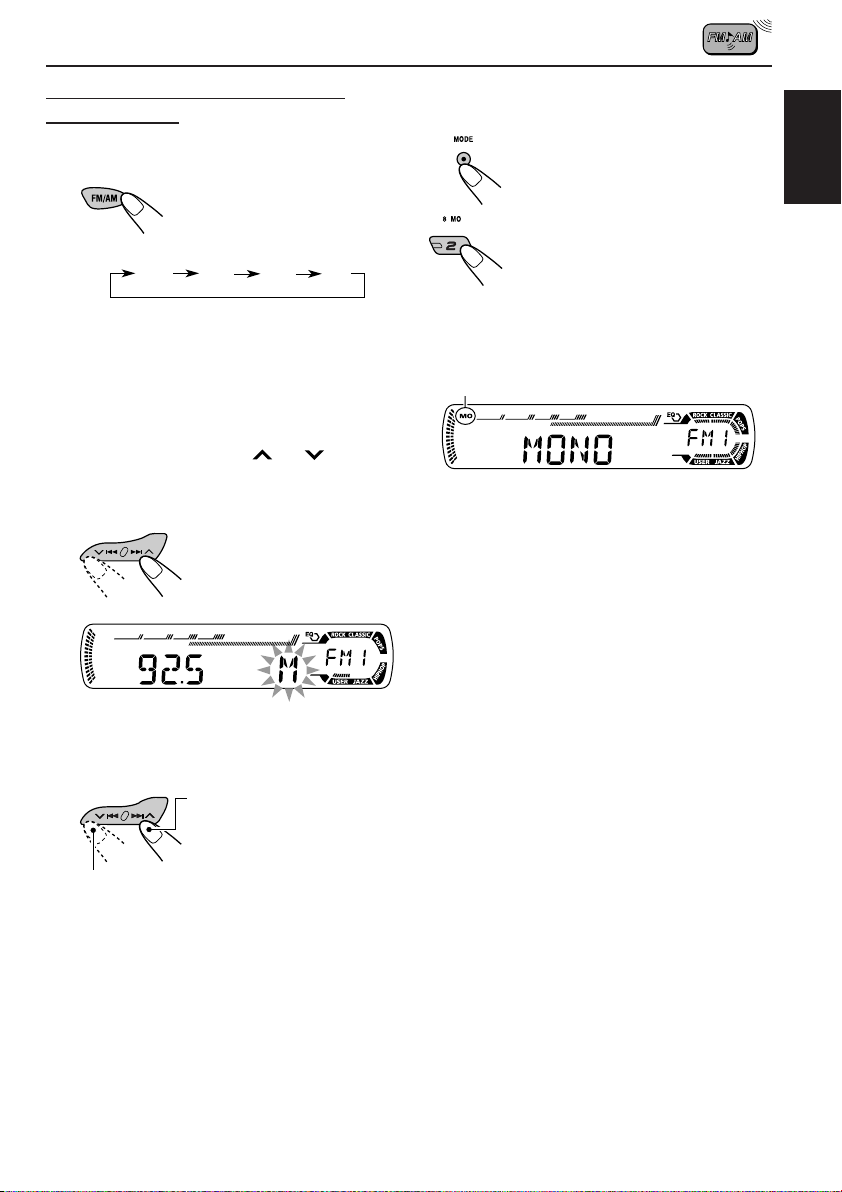
Select the band (FM1 – 3, AM).
Each time you press the
button, the band changes as
follows:
FM1 FM2 FM3 AM
Note:
This receiver has three FM bands (FM1, FM2,
FM3). You can use any one of them to listen to
an FM broadcast.
2
Press and hold ¢ or 4
until “M” (manual) starts flashing on
the display.
When an FM stereo broadcast is hard to
receive
1 Press MODE to enter the
functions mode while listening
to an FM stereo broadcast.
2 Press MO (monaural), while
“MODE” is still flashing on the
display, so that “MONO”
appears on the display.
Each time you press the button,
monaural mode turns on and off
alternately.
MO (monaural) indicator
When the MO indicator is lit on the display, the
sound you hear becomes monaural but the
reception will be improved.
ENGLISH
3
Tune in to a station you want while
“M” (manual) is still flashing.
To tune in to stations of
higher frequencies
To tune in to stations of lower frequencies
• If you release your finger from the button,
the manual mode will automatically turns
off after 5 seconds.
• If you hold down the button, the frequency
keeps changing (in 50 kHz intervals for
FM and 9 kHz for AM—MW/LW) until you
release the button.
9
Storing stations in memory
You can use one of the following two methods to
store broadcasting stations in memory.
• Automatic preset of FM stations: SSM (Strong-
ENGLISH
station Sequential Memory)
• Manual preset of both FM and AM stations
Local FM stations with the strongest signals are
searched and stored automatically in the band
number you have selected (FM1, FM2, or FM3).
These stations are preset in the number
buttons—No.1 (lowest frequency) to No.6
(highest frequency).
When automatic preset is over, the station stored
in number button 1 will be automatically tuned in.
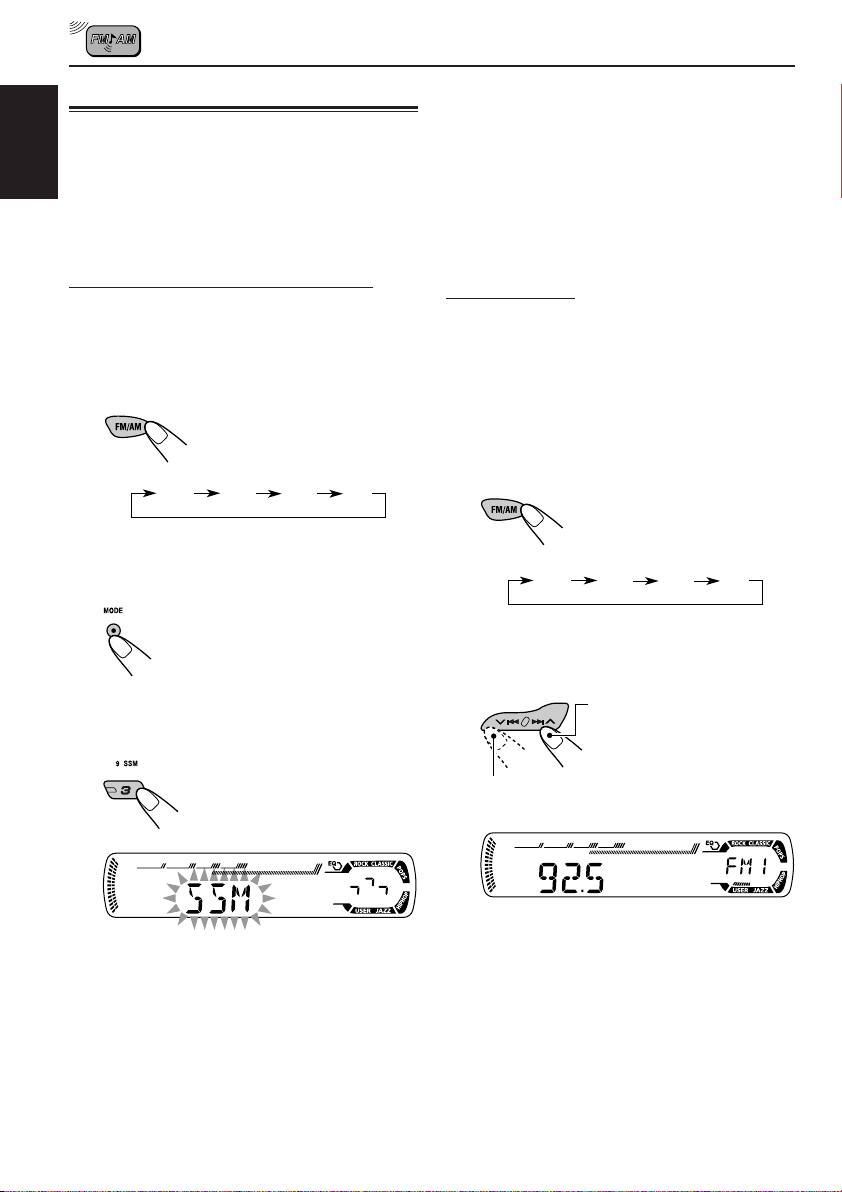
FM station automatic preset: SSM
You can preset 6 local FM stations in each FM
band (FM1, FM2, and FM3).
1
Select the FM band (FM1 – 3) you
want to store FM stations into.
Each time you press the
button, the band changes as
follows:
FM1 FM2 FM3 AM
2
Press MODE to enter the functions
mode.
3
Press and hold SSM for about
2 seconds.
Manual preset
You can preset up to 6 stations in each band
(FM1, FM2, FM3, and AM) manually.
Ex.: Storing FM station of 92.5 MHz into the
preset number 1 of the FM1 band.
1
Select the band (FM1 – 3, AM) you
want to store stations into (in this
example, FM1).
Each time you press the
button, the band changes as
follows:
FM1 FM2 FM3 AM
2
Tune in to a station (in this example,
of 92.5 MHz).
To tune in to stations of
higher frequencies
To tune in to stations of lower frequencies
10
“SSM” flashes, then disappears when
automatic preset is over.

3
Press and hold the number button
(in this example, 1) for more than
2 seconds.
Tuning in to a preset station
You can easily tune in to a preset station.
Remember that you must store stations first. If
you have not stored them yet, see “Storing
stations in memory” on pages 10 and 11.
1
Select the band (FM1 – 3, AM).
Each time you press the
button, the band changes as
follows:
ENGLISH
Preset number flashes for a while.
4
Repeat the above procedure to store
other stations into other preset
numbers.
Notes:
• A previously preset station is erased when a new
station is stored in the same preset number.
• Preset stations are erased when the power supply to
the memory circuit is interrupted (for example,
during battery replacement). If this occurs, preset
the stations again.
FM1 FM2 FM3 AM
2
Select the number (1 – 6) for the
preset station you want.
Note:
You can also use the 5 (up) or ∞ (down) button on
the unit to select the next or previous preset stations.
Each time you press the 5 (up) or ∞ (down) button,
the next or previous preset station is tuned in.
11

RDS OPERATIONS
What you can do with RDS
RDS (Radio Data System) allows FM stations to
send an additional signal along with their regular
programme signals. For example, the stations
ENGLISH
send their station names, as well as information
about what type of programme they broadcast,
such as sports or music, etc.
Another advantage of RDS function is called
“Enhanced Other Networks.” By using the
Enhanced Other Networks data sent from a
station, you can tune in to a different station of a
different network broadcasting your favorite
programme or traffic announcement while
listening to another programme or to another
source such as CD.
By receiving the RDS data, this unit can do the
following:
• Tracing the same programme automatically
(Network-Tracking Reception)
• Standby Reception of TA (Traffic
Announcement) or your favorite programme
• PTY (Programme Type) search
• Programme search
• And some other functions
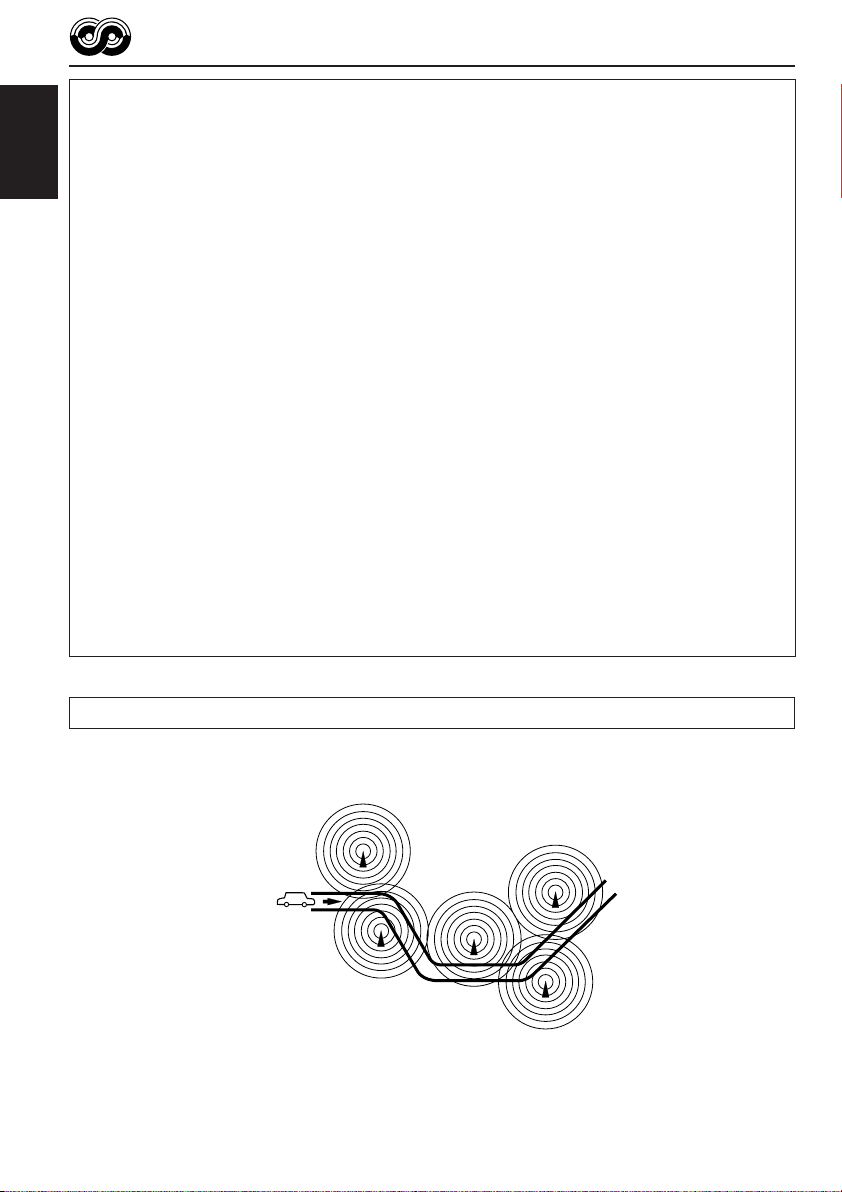
Tracing the same programme
automatically (Network-Tracking
Reception)
When driving in an area where FM reception is
not good, the tuner built in this unit automatically
tunes in to another RDS station, broadcasting the
same programme with stronger signals. So, you
can continue to listen to the same programme in
its finest reception, no matter where you drive.
(See the illustration on page 18.)
Two types of the RDS data are used to make
Network-Tracking Reception work correctly
—PI (Programme Identification) and AF
(Alternative Frequency).
Without receiving these data correctly from the
RDS station you are listening to, NetworkTracking Reception will not operate.
To use Network-Tracking Reception
You can select the different modes of networktracking reception to continue listening to the
same programme in its finest reception.
When shipped from the factory, “AF” is selected.
• AF: Network-Tracking Reception is
activated with Regionalization set to
“off.”
With this setting, the unit switches to
another station within the same
network when the received signals
from the current station become
weak. (In this mode, the programme
may differ from the one currently
received.)
The AF indicator lights up but the
REG indicator does not.
• AF REG: Network-Tracking Reception is
activated with Regionalization set to
“on.”
With this setting, the unit switches to
another station, within the same
network, broadcasting the same
programme when the received
signals from the current station
become weak.
Both the AF indicator and the REG
indicator light up.
• OFF: Network-Tracking Reception is
deactivated.
Neither the AF indicator nor the REG
indicator lights up.
AF indicator
REG indicator
12
1
Press and hold SEL (select) for more
than 2 seconds so that one of the
PSM items appears on the display.
(PSM: see pages 24 and 25.)
2
Select “AF-REG” (alternative
frequency/regionalization reception)
if not shown on the display.
3
Select the desired mode—“AF,”
“AF REG,” or “OFF.”
4
Finish the setting.
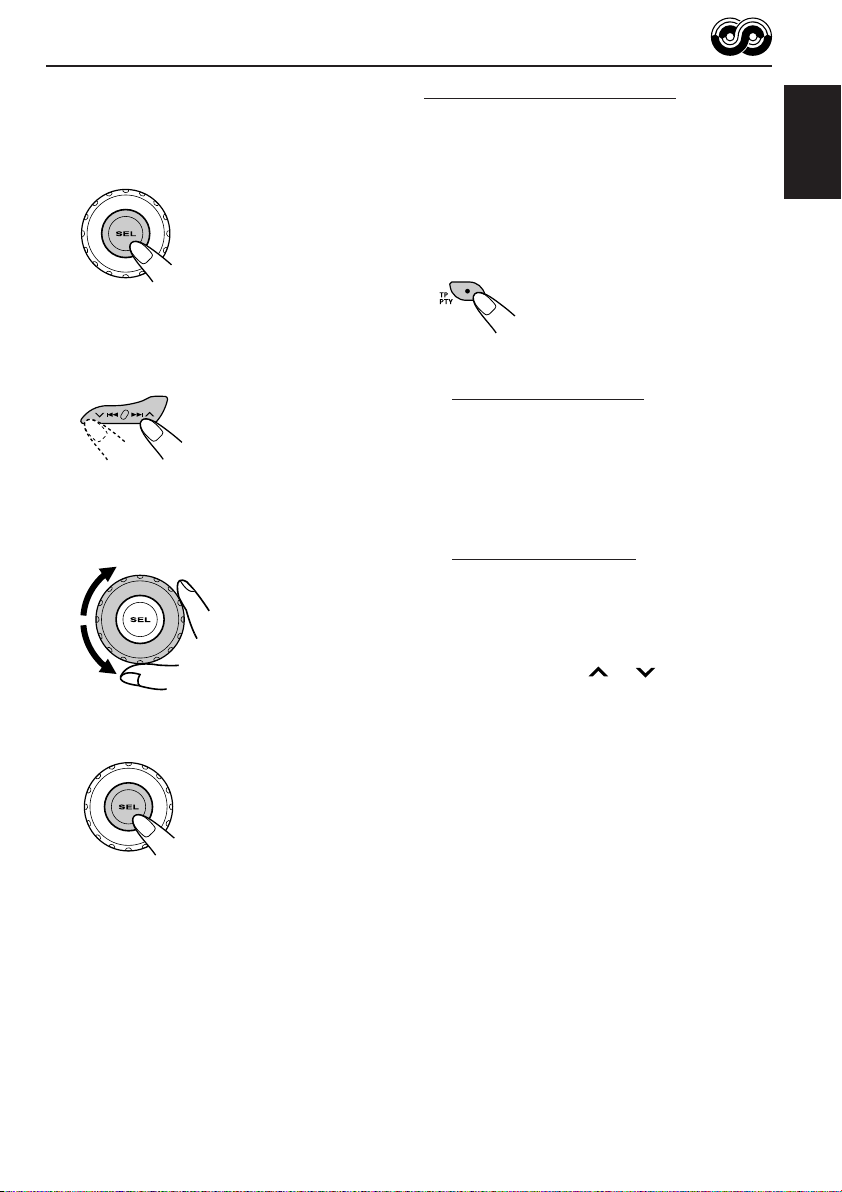
Using TA Standby Reception
TA Standby Reception allows the unit to switch
temporarily to Traffic Announcement (TA) from
the current source (another FM station or CD).
ENGLISH
• TA Standby Reception will not work if you are
listening to an AM station.
Press TP PTY to activate TA Standby Reception.
7 When the current source is FM, the TP
indicator either lights up or flashes.
• If the TP indicator lights up, TA Standby
Reception is activated.
If a station starts broadcasting a traffic
announcement, “TRAFFIC” appears on the
display, and this unit automatically tunes in to
the station. The volume changes to the
preset TA volume level (see page 17) and the
traffic announcement can be heard.
• If the TP indicator flashes, TA Standby
Reception is not yet activated since the
station being received does not provide the
signals used for TA Standby Reception.
To activate TA Standby Reception, you need
to tune in to another station providing these
signals. Press ¢ or 4 to search
for such a station.
When a station providing these signals is
tuned in, the TP indicator stops flashing and
remains lit. Now TA Standby Reception is
activated.
7 When the current source is other than FM,
the TP indicator lights up.
If a station starts broadcasting a traffic
announcement, “TRAFFIC” appears on the
display, and this unit automatically changes the
source and tunes in to the station.
To deactivate the TA Standby Reception,
press TP PTY again. The TP indicator
disappears.
13
Using PTY Standby Reception
PTY Standby Reception allows the unit to switch
temporarily to your favorite programme (PTY:
Programme Type) from the current source
ENGLISH
(another FM station or CD).
• PTY Standby Reception will not work if you are
listening to an AM station.
You can select your favorite programme type for
PTY Standby Reception.
When shipped from the factory, PTY Standby
Reception is turned off. (“OFF” is selected for
PTY Standby Reception.)
1
Press and hold SEL (select) for more
than 2 seconds so that one of the
PSM items appears on the display.
(PSM: see pages 24 and 25.)
2
Select “PTY STBY” (standby) if not
shown on the display.
4
Finish the setting.
7 When the current source is FM, the PTY
indicator either lights up or flashes.
• If the PTY indicator lights up, PTY Standby
Reception is activated.
If a station starts broadcasting the selected
PTY programme, this unit automatically
tunes in to the station.
• If the PTY indicator flashes, PTY Standby
Reception is not yet activated since the
station being received does not provide the
signals used for PTY Standby Reception.
To activate PTY Standby Reception, you
need to tune in to another station providing
these signals. Press ¢ or 4 to
search for such a station.
When a station providing these signals is
tuned in, the PTY indicator stops flashing
and remains lit. Now PTY Standby Reception
is activated.
7 When the current source is other than FM,
the PTY indicator lights up.
If a station starts broadcasting the selected
PTY programme, this unit automatically
changes the source and tunes in to the station.
14
3
Select one of the twenty-nine PTY
codes. (See page 18.)
Selected code name
appears on the display
and is stored into
memory.
To deactivate the PTY Standby Reception,
select “OFF” in step 3 on the left column. The
PTY indicator disappears.
Searching your favorite programme
You can search any one of the PTY codes.
In addition, you can store your 6 favorite
programme types in the number buttons.
When shipped from the factory, the following
6 programme types have been stored in the
number buttons (1 to 6).
To store your favorite programme types, see
below.
To search your favorite programme type, see
page 16.
3
Press and hold the number button
for more than 2 seconds to store the
PTY code selected into the preset
number you want.
ENGLISH
1
POP M
45
CLASSICS
2
ROCK M EASY M
AFFAIRS
3
6
VARIED
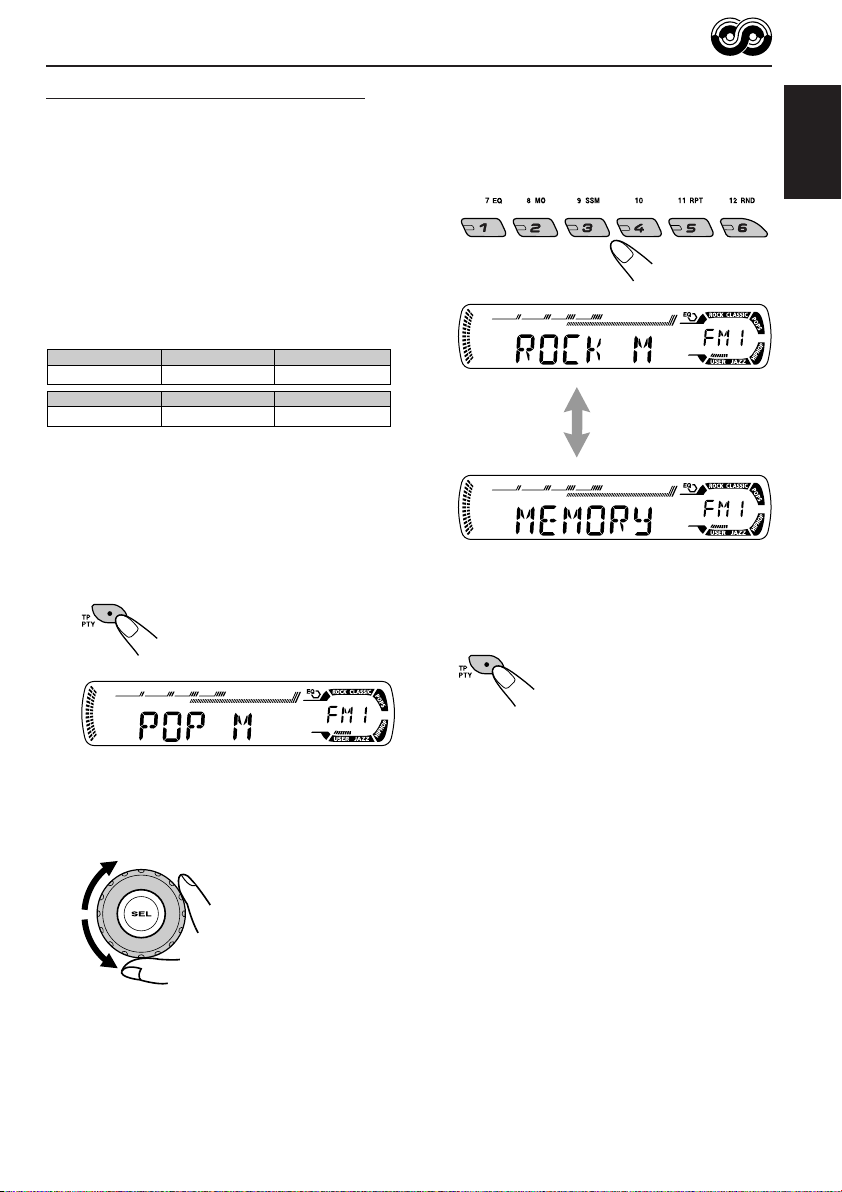
To store your favorite programme types
1
Press and hold TP PTY for more
than 2 seconds while listening to an
FM station.
The last selected PTY code appears.
2
Select one of the twenty-nine PTY
codes. (See page 18.)
Selected code name
appears on the display.
Selected PTY code and
“MEMORY” appear
alternately for a while.
4
Press and hold TP PTY for more
than 2 seconds to exit from this
mode.
15
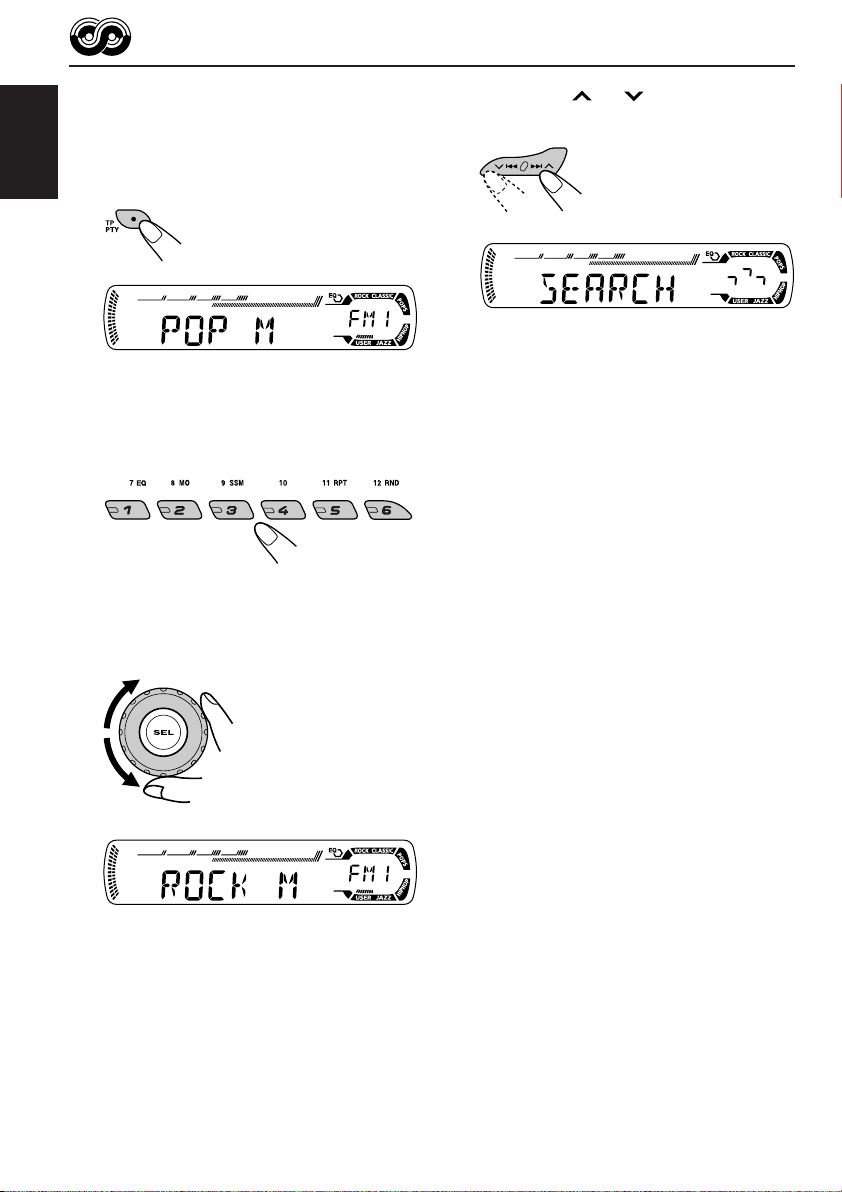
To search your favorite programme type
1
Press and hold TP PTY for more
than 2 seconds while listening to an
ENGLISH
FM station.
3
Press ¢ or 4 to start PTY
search for your favorite programme.
The last selected PTY code appears.
2
To select one of your favorite
programme type
or
To select any one of the twenty-nine
PTY codes.
Ex.: When “ROCK M” is selected
• If there is a station broadcasting a programme
of the same PTY code as you selected, that
station is tuned in.
• If there is no station broadcasting a
programme of the same PTY code as you
selected, the station will not change.
Note:
In some areas, the PTY search will not work correctly.
16

Other convenient RDS
functions and adjustments
Automatic selection of the station
when using the number buttons
Usually when you press the number button, the
preset station is tuned in.
However, when the preset station is an RDS
station, something different will happen. If the
signals from that preset station are not sufficient
for good reception, this unit, using the AF data,
tunes in to another frequency broadcasting the
same programme as the original preset station is
broadcasting. (Programme search)
• The unit takes some time to tune in to another
station using programme search.
To activate programme search, follow the
procedure below.
• See also “Changing the general settings
(PSM)” on page 24.
1 Press and hold SEL (select) for more than
2 seconds so that one of the PSM items
appears on the display.
2 Press ¢ or 4 to select
“P(Programme)-SEARCH.”
3 Turn the control dial clockwise to select “ON.”
Now programme search is activated.
4 Press SEL (select) to finish the setting.
To cancel programme search, repeat the same
procedure and select “OFF” in step 3 by turning
the control dial counterclockwise.
Setting the TA volume level
You can preset the volume level for TA Standby
Reception. When a traffic programme is received,
the volume level automatically changes to the
preset level.
• See also “Changing the general settings
(PSM)” on page 24.
1 Press and hold SEL (select) for more than
2 seconds so that one of the PSM items
appears on the display.
2 Press ¢ or 4 to select “TA V O L”
(volume).
3 Turn the control dial to set to the desired
volume.
You can set it from “VOL 00” to “VOL 30” or
“VOL 50” (depending on the amplifier gain
control setting: see page 25).
4 Press SEL (select) to finish the setting.
Automatic clock adjustment
When shipped from the factory, the clock built in
this unit is set to be readjusted automatically
using the CT (Clock Time) data in the RDS
signal.
If you do not want to use automatic clock
adjustment, follow the procedure below.
• See also “Changing the general settings
(PSM)” on page 24.
1 Press and hold SEL (select) for more than
2 seconds so that one of the PSM items
appears on the display.
2 Press ¢ or 4 to select “AUTO
ADJ” (adjustment).
3 Turn the control dial counterclockwise to select
“OFF.”
Now automatic clock adjustment is canceled.
4 Press SEL (select) to finish the setting.
ENGLISH
To reactivate clock adjustment, repeat the
same procedure and select “ON” in step 3 by
turning the control dial clockwise.
Note:
You must stay tuned to the same station for more than
2 minutes after setting “AUTO ADJ” to “ON.”
Otherwise, the clock time will not be adjusted. (This is
because the unit takes up to 2 minutes to capture the
CT data in the RDS signal.)
17
PTY codes
NEWS: News
AFFAIRS: Topical programmes expanding
ENGLISH
INFO: Programmes which impart
SPORT: Sport events
EDUCATE: Educational programmes
DRAMA: Radio plays
CULTURE: Programmes on national or
SCIENCE: Programmes on natural science
VARIED: Other programmes like comedies
POP M: Pop music
ROCK M: Rock music
EASY M: Easy-listening music
LIGHT M: Light music
CLASSICS: Classical music
OTHER M: Other music
WEATHER: Weather information
FINANCE: Reports on commerce, trading,
CHILDREN: Entertainment programmes for
on current news or affairs
advice on a wide variety of topics
regional culture
and technology
or ceremonies
the Stock Market, etc.
children
SOCIAL: Programmes on social
activities
RELIGION: Programmes dealing with any
aspect of belief or faith, or the
nature of existence or ethics
PHONE IN: Programmes where people can
express their views either by
phone or in a public forum
TRAVEL: Programmes about travel
destinations, package tours,
and travel ideas and
opportunities
LEISURE: Programmes concerned with
recreational activities such as
gardening, cooking, fishing,
etc.
JAZZ: Jazz music
COUNTRY: Country music
NATION M: Current popular music from
another nation or region, in that
country’s language
OLDIES: Classic pop music
FOLK M: Folk music
DOCUMENT: Programmes dealing with
factual matters, presented in an
investigative style
18
The same programme can be received on different frequencies.
Programme 1
broadcasting on
frequency A
Programme 1
broadcasting on
frequency B
Programme 1
broadcasting on
frequency C
Programme 1
broadcasting on
frequency E
Programme 1
broadcasting on
frequency D
 Loading...