

Page 1
DR-MV5S
QUICK
IS HERE TO HELP!
TOLL FREE: 1(800)252-5722
START
GUIDE
http://www.jvc.com
Check Accessories
RF cable
“AA” battery x 2
(For remote control)
Remote control
Audio/video cable
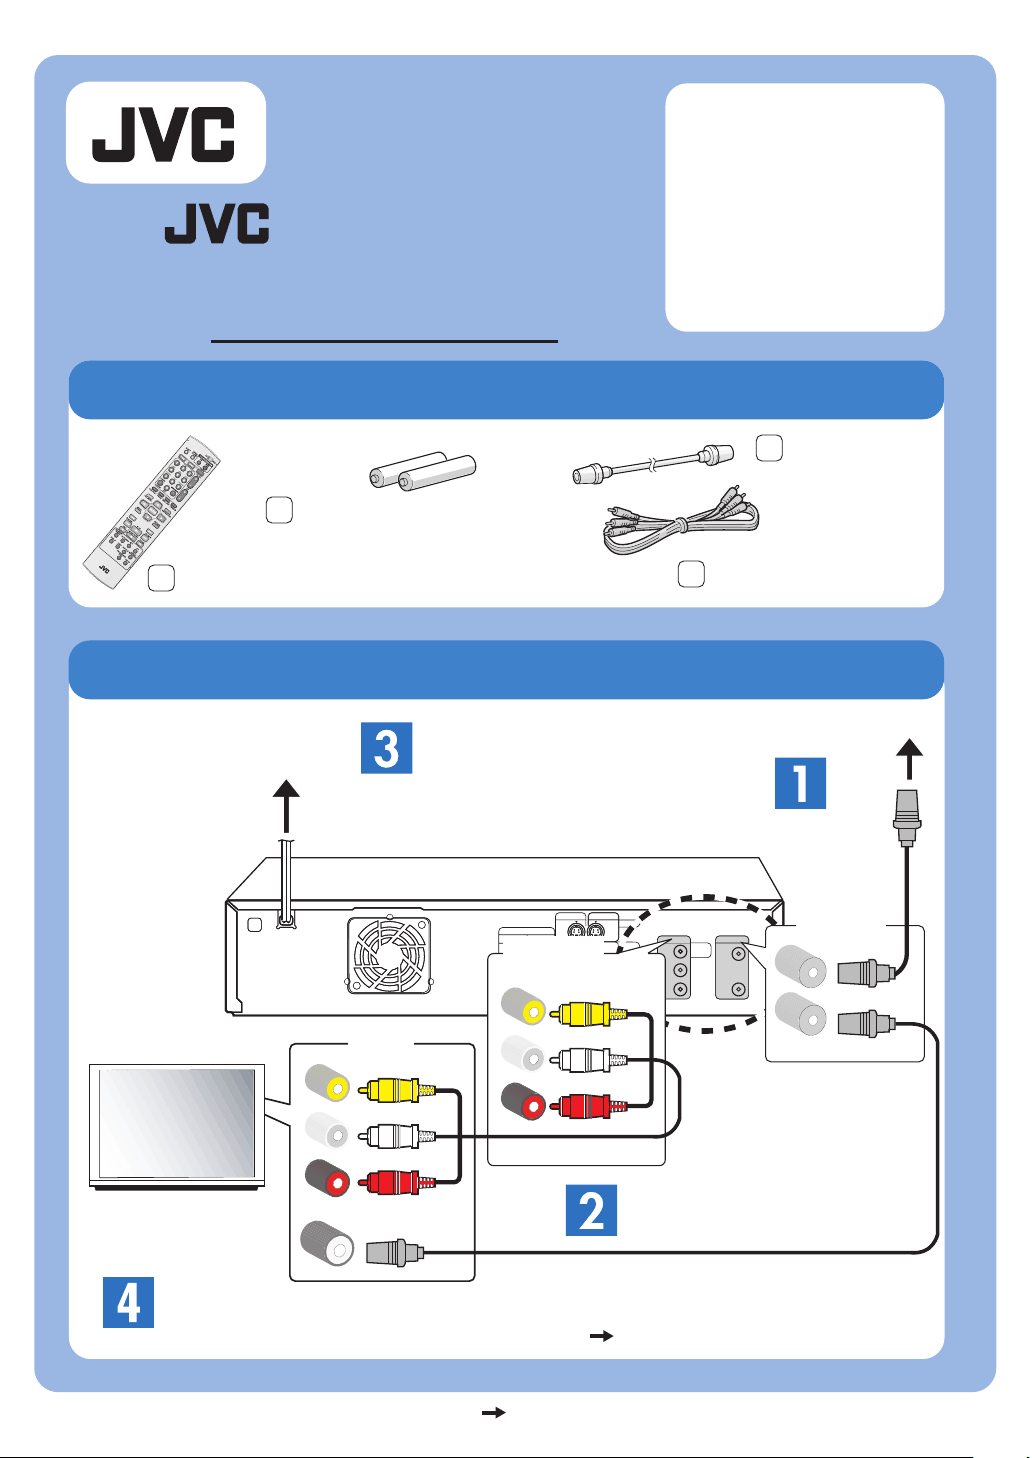
Connection Without Cable Box Or DBS Receiver
Antenna or cable
AC outlet
Plug to the
AC outlet.
Connect
the arial.
Back of unit
TV
INPUT
Video
Audio (L)
Audio (R)
RF
OUTPUT
(DVD/VCR)
Video
Audio (L)
Audio (R)
Connect your TV.
VHF/UHF
IN
OUT
With antenna or cable (no cable box), wait for clock and
channels to be set automatically. ( pg. 19, “Plug & Play Set”)
For more information, see the instruction manual. (Z pg. 16, “Composite Connection (Without
Cable Box Or DBS Receiver)”)
LPT1032-003A
0205TYH-AL-BJ
Page 2
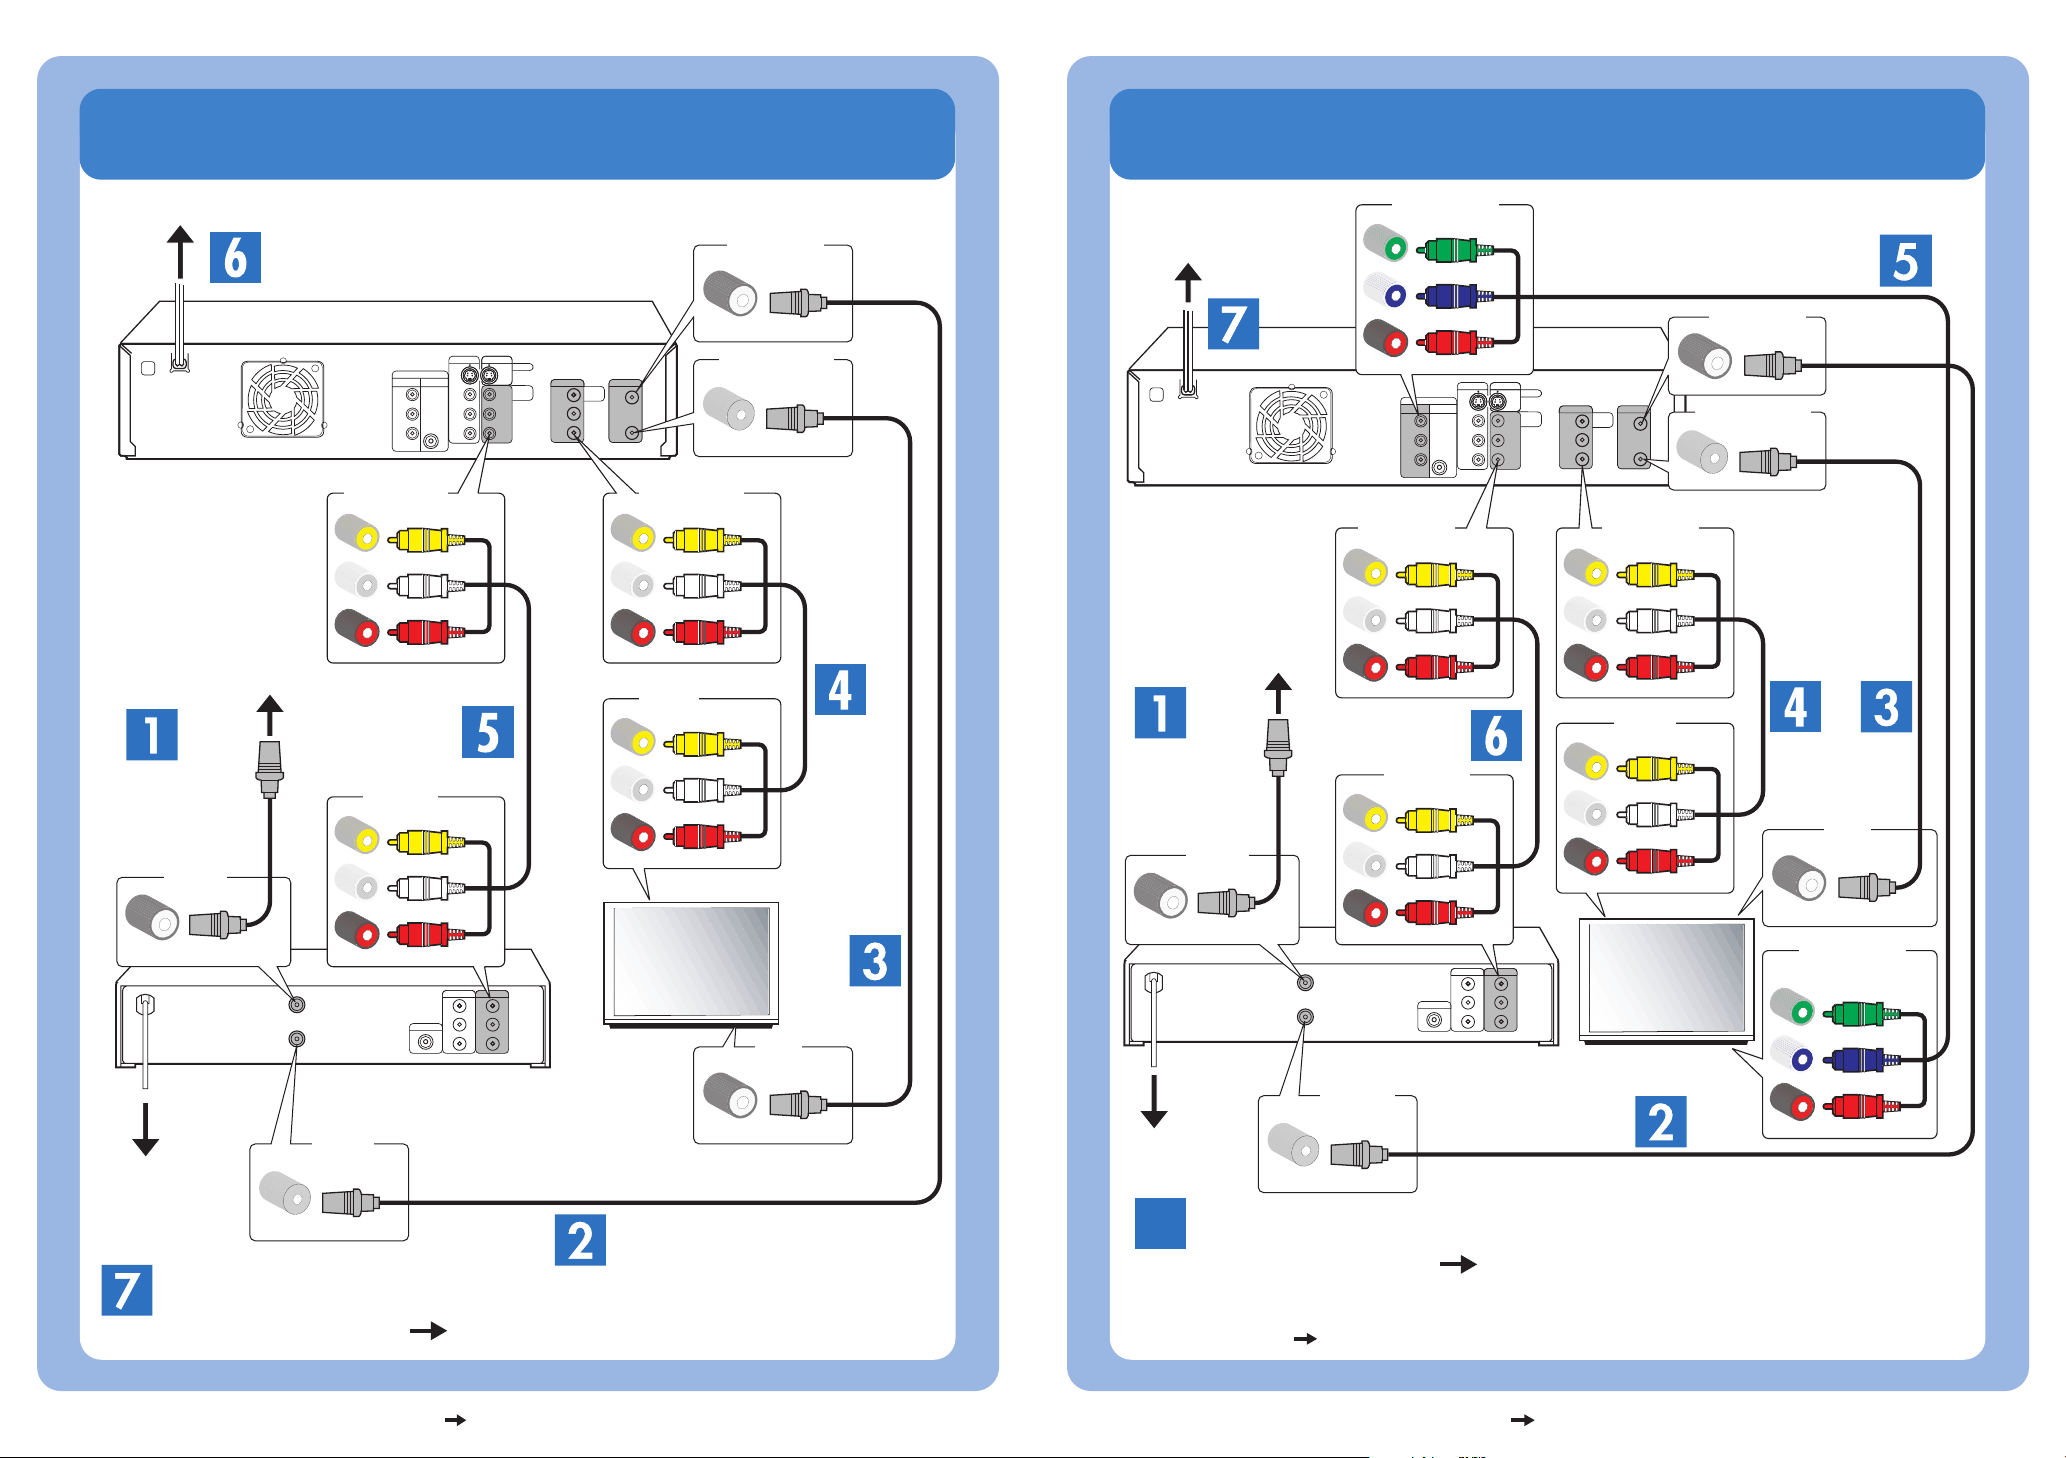
Connection With Cable Box Or DBS Receiver
(When your TV has only audio/video connectors)
Connection With Cable Box Or DBS Receiver
(When your TV has component video connectors)
AC outlet
Antenna
or cable
Connect
the arial.
RF IN
INPUT
(DVD/VCR)
Video
Audio (L)
Audio (R)
OUTPUT
Video
Audio (L)
Audio (R)
Back of unit
OUTPUT
(DVD/VCR)
Video
Audio (L)
Audio (R)
INPUT
Video
Audio (L)
Audio (R)
VHF/UHF IN
VHF/UHF OUT
AC outlet
Back of unit
Connect
the arial.
RF IN
Antenna
or cable
COMPONENT
VIDEO OUT
INPUT
(DVD/VCR)
Video
Audio (L)
Audio (R)
OUTPUT
Video
Audio (L)
Audio (R)
Y
P
PR
B
Component video cable
VHF/UHF IN
VHF/UHF OUT
OUTPUT
(DVD/VCR)
Video
Audio (L)
Audio (R)
INPUT
Video
Audio (L)
Audio (R)
COMPONENT
VIDEO INPUT
RF IN
TV
RF IN
Cable box or
DBS receiver
RF OUT
AC outlet
With antenna or cable, wait for clock and channels to be
set automatically. (Z pg. 19, “Plug & Play Set”)
For more information, see the instruction manual. (Z pg. 17, “Composite Connection (With Cable Box Or DBS Receiver)”)
Y
B
P
RF OUT
Cable box or
DBS receiver
TV
PR
AC outlet
With antenna or cable, wait for clock and channels to be
8
set automatically. (Z pg. 19, “Plug & Play Set”)
NOTE: When watching the images on the VHS deck with this connection, set to the progressive
scan mode. (Z pg. 58, “VHS Progressive Scan”)
For more information, see the instruction manual. (Z pg. 18, “Component Video Connection”)
Page 3

Recordable Discs
DVD-RAM
Editing or Live
Memory Playback
is possible.
Can be rewritten
100,000 times.
NOTE:
When you use a DVD-RW disc, format it in "VR MODE" or "VIDEO MODE".
( pg. 78, "Format A Disc")
DVD-RW
Can be rewritten
1,000 times.
BASIC PLAYBACK
Select TV input/channel first.
VHS
DVD
DVD-R
Playable on
other DVD players
or PCs
(after finalized).
Inserting Disc
or Cassette
BASIC RECORDING
VHS
Select VHS
1
STANDBY/ON
S-VIDEO VIDEO AUDIO
DVDVHS
1
REC
VHS/DVD
VHS DVDDUBBING
CH
DV IN
DVD
Select DVD
Select VHS
1
Start Playback
2
Stop Playback
3
You can dub an entire cassette on a disc will ????. Blank parts are automatically cut.)
Select DVD
1
Start Playback
2
Select Channel/
Input
2
For cable box or DBS receiver users,
see page 30 on the instruction manual.
Select Mode
(Tape Speed)
3
Stop Playback
For the recording mode, see page 30
on the instruction manual.
3
Start Recording
While holding
REC, press PLAY
NOTE:
DVD disc must be finalized to play
on most DVD players.
4
Stop Recording
5
Select Channel/
Input
2
For cable box or DBS receiver users,
see page 28 on the instruction manual.
Select Mode
3
For the recording mode, see page 29
on the instruction manual.
Start Recording
4
Stop Recording
5
While holding
REC, press PLAY
Press twice
For more information, see the instruction manual. (Z pg. 28 – 30, “Basic Recording”)For more information, see the instruction manual. (Z pg. 26, 27, “Basic Playback”)
Page 4

One-Touch Expert Dubbing
(VHS to DVD)
VHS
DVD
You can dub an entire cassette on a disc with the best image quality.
(Blank parts are automatically cut.)
Insert Blank Disc
1
and Cassette
STANDBY/ON
S-VIDEO VIDEO AUDIO
DVDVHS
VHS/DVD
DVDVHS
VHS DVDDUBBING
REC
CH
DV IN
VHSVHS DUBBINGDUBBING
Start Dubbing
2
(Tape will automatically rewind to
beginning.)
VHSVHS
Press more than 2 sec.
Stop Dubbing
3
For more information, see the instruction manual. (Z pg. 37, “One-Touch Expert Dubbing”)
 Loading...