

JABRA GN9300e User Manual
© 2008 GN Netcom A/S. All rights reserved. Jabra® is a registered
trademark of GN Netcom A/S. All other trademarks included herein
are the property of their respective owners. The Bluetooth
mark and logos are owned by the Bluetooth SIG, Inc. and any use
of such marks by GN Netcom A/S is under license. (Design and
specifications subject to change without notice).
Made in China
®
word
Jabra GN9300e
User manual
www.jabra.com
www.jabra.com

Belgique/Belgium +49 (0)8031 2651 72
Czech Republic 800 522 722
Danmark +45 45 75 99 99
Deutschland +49 (0)8031 2651 72
España +34 916 398 064
France +33 (0) 130 589 075
Italia +39 025 832 8253
Luxembourg +49 (0)8031 2651 72
Nederland +49 (0)8031 2651 72
Norge +47 32 22 74 70
Österreich +49 (0)8031 2651 72
Poland +48 12 254 40 15 / 0 801 800 550
Russia + 7 495 660 71 51
Suomi +358 9 396 811
Sverige +46 (0)8 693 09 00
United Kindom +44 (0)1784 220 172
Australia 1-800-083-140
China +86-21-5836 5067
Hong Kong 800-968-265
India 000-800-852-1185
Indonesia 001-803-852-7664
Japan +81-3-5297-7976
Malaysia 1800-812-160
New Zealand 0800-447-982
Philippines 1800-765-8068
Singapore 800-860-0019
Taiwan 0080-186-3013
Canada 1-800-489-4199
USA 1-800-826-46561

English – GN9350e/GN9330e/GN9330e USB
Guide for additional functions
Guide for additional functions ENG 1
Anleitung für zusätzliche Funktionen DE
Guide des fonctions additionnelles FR
Guía de funciones adicionales ES
21
44
66
This Guide for additional functions supplements the GN9350e/GN9330e/GN9330e USB
Guides for basic set-up and use. It provides instructions and information on the GN9350e’s/
GN9330e’s/GN9330e USB’s additional functions, features, accessories and maintenance.
The Guides for basic set-up and use provide the basic instructions for setting up and using
your GN9350e/GN9330e/GN9330e USB.
This Guide for additional functions contains information common to the GN9350e,
GN9330e and GN9330e USB. Each subchapter is clearly marked
GN9330e USB
simply have a wire-frame box and no grey fill, i.e.
, to which products they concern. When the feature does not apply, it will
GN9350e GN9330e
GN9350e GN9330e
GN9330e USB
1. Product information .................................................... 3
2. Setting up
............................................................. 4
2.1 Headset port........................................................................... 4
2.2 Default Outbound Call mode
2.3 Connecting to the GN1000 RHL (Remote Handset Lifter) (GN accessory)
2.4 LCD display
............................................................................ 5
2.4.1 Transmit volume
2.4.2 Hookswitch selection
2.4.3 Range/power selection
2.4.4 Sound mode selection
2.4.5 Protection level selection
2.4.6 Hookswitch selection (without LCD display)
2.4.7 Change default phone type.
........................................................... 4
. . . . . . . . . . . . . . 4
.................................................................. 5
............................................................. 6
........................................................... 6
............................................................ 7
......................................................... 8
...................................... 9
..................................................... 10
3. Wearing styles ........................................................ 10
3.1 Headband wearing styles ............................................................. 10
3.2 Neckband wearing styles
3.3 Ear hook wearing styles
3.4 Changing wearing styles
3.5 Receive volume button reorientation
.............................................................. 11
............................................................... 11
.............................................................. 11
.................................................. 11
81-02622 RevD
1
4. Operating the headset ................................................ 12
2
3
4.1 Making/ending calls via telephone with RHL function ................................. 12
4.2 Answering calls via telephone with RHL function
4.3 Conference calling
4.4 Emergency calling via VoIP
..................................................................... 12
............................................................ 13
4.5 Switching a call from headset to desk telephone handset
4.6 Switching a call from desk telephone handset to headset
4.7 New master headset pairing to base
4.8 Establishing a Clean Audio Mode link
. . . . . . . . . . . . . . . . . . . . . . . . . . . . . . . . . . . . . . . . . . . . . . . . . . 14
.................................................. 15
...................................... 12
............................. 14
............................. 14
1. Product information
The GN9350e/GN9330e/GN9330e USB are fully wireless, robust headset solutions. They all
share hands-free working efficiency, wireless mobility, useful features, and many customizing
and accessory options.
Below is an overview of the primary features and functions offered within each model
number:
5. Use with DECT cordless telephones ..................................... 15
6. Replacing battery pack (GN accessory)
.................................. 16
6.1 Adding extra battery charging facility.................................................. 16
6.2 Replacing battery pack
................................................................ 17
7. Audio and visual indicators ............................................ 17
7.1 Headset’s audio indicators............................................................ 17
7.2 Headset’s visual indicators
7.3 Base’s visual indicators
............................................................ 18
................................................................ 18
8. Troubleshooting ...................................................... 19
9. Maintenance, safety and disposal
...................................... 20
Comparison of features by model type
Features: GN9350e GN9330e GN9330e USB
Desk telephone connectivity • •
VoIP/ USB connectivity ** • •
GN1000 RHL enabled • •
Electronic hookswitch enabled • •
Display for set-up •
Adjustable range •
Sound refinement (DSP) •
Conference call •
On-line indicator connectivity • • •
DECT/GAP enabled* •
* not applicable for US version
** for connecting to your PC, the headsets only work with the Windows 98 (SE), Windows 2000,
Windows Vista and Windows XP operating systems.
Important: When using your GN9350e or GN9330e USB with a VoIP application, consult the
application’s user manual for complete information and instructions, or visit our web site
www.jabra.com.
2. Setting up
4
5
This section contains set-up and connection instructions for your headset’s accessories and
optional functions.
Note: Your Guide for basic set-up and use contains the primary set-up and connection instructions.
GN9350e GN9330e
GN9330e USB
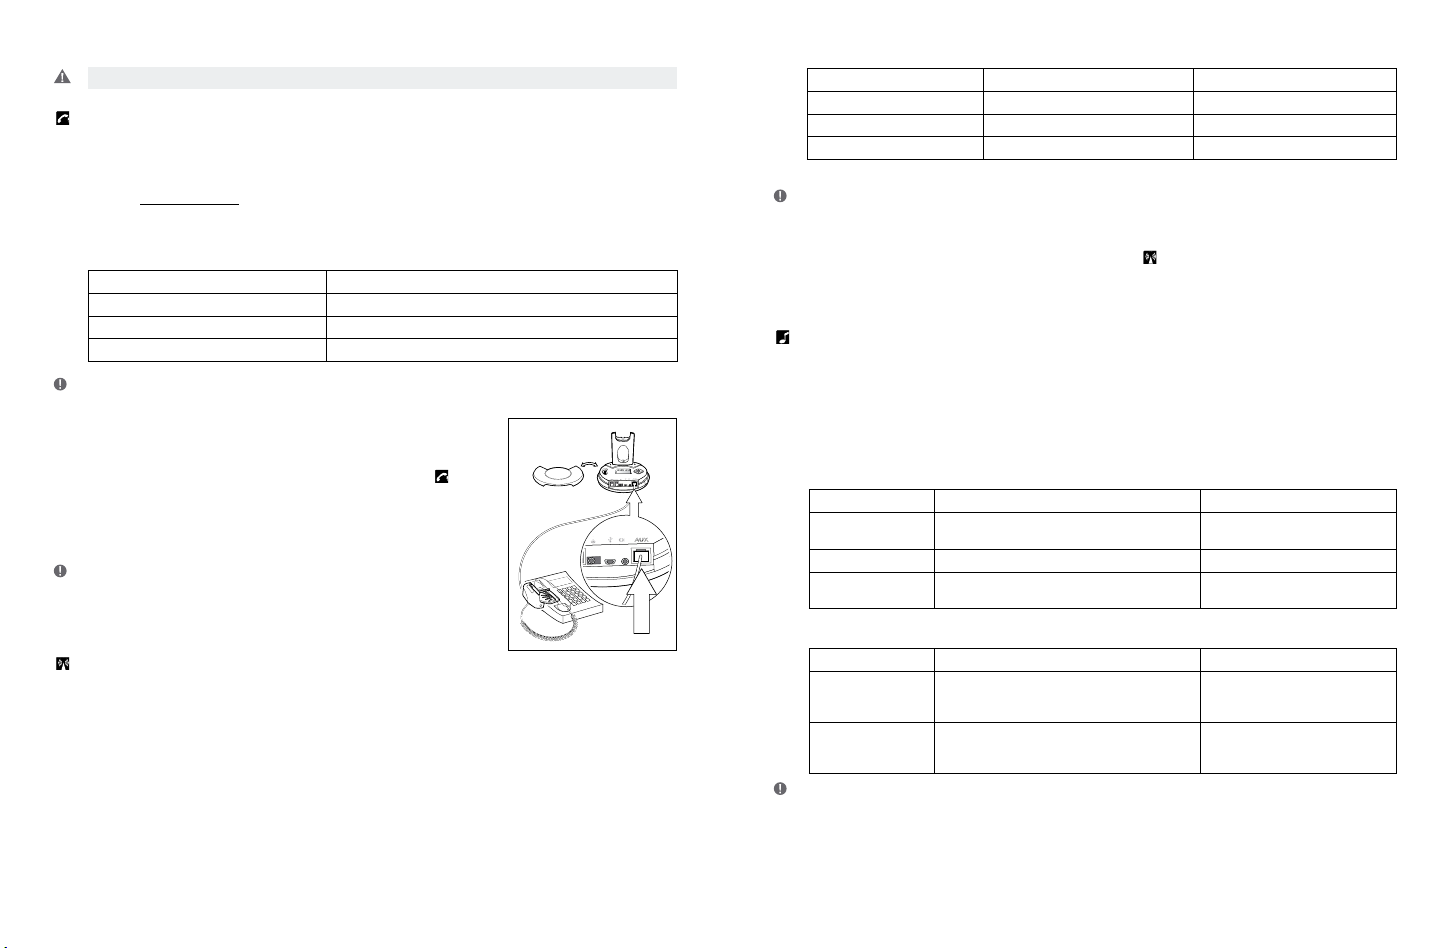
2.1 Headset port
If your telephone has a port for headset, it is recommended to leave the handset cord in the
telephone. Connect the telephone’s headset port to the telephone port on the base. This will
enable you to use the call button on your telephone, if there is one, and will limit the number
of cords coming out of your base.
Important: The ”clear dial tone switch” must be positioned correctly. See section: “Clear dial tone
adjustment” in the Quick Start Guide.
GN9350e
GN9330e GN9330e USB
2.2 Default Outbound Call mode
The base is default set for telephone use. If you want to use your VoIP application as default
calling media, press the USB
press the Telephone
GN9350e GN9330e
GN9330e USB
button for 5 seconds. If you want to change it back again,
button for 5 seconds
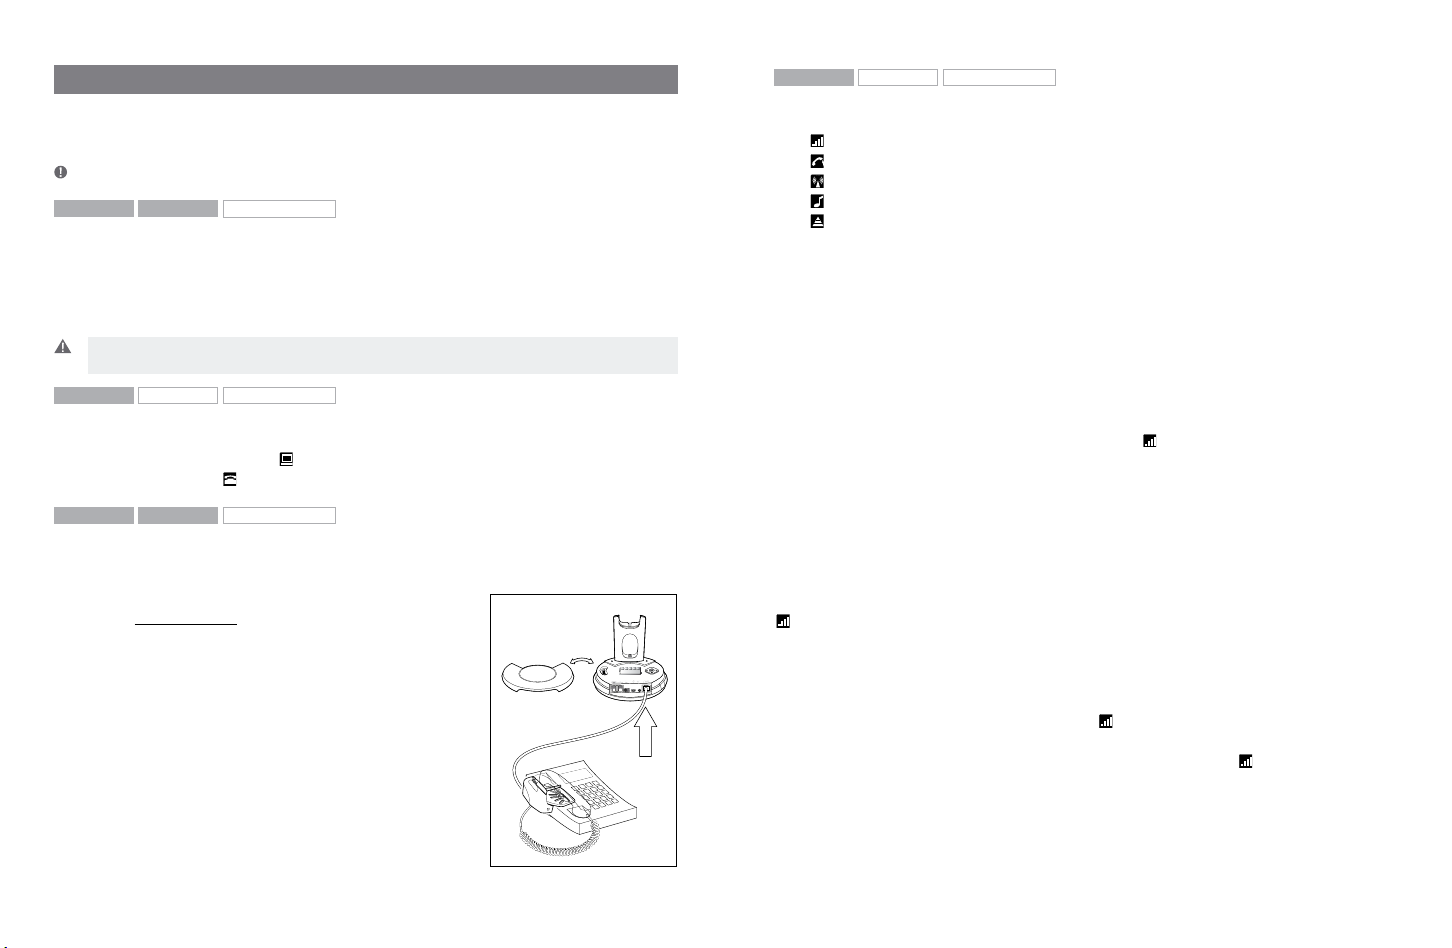
2.3 Connecting to the GN1000 RHL (Remote Handset Lifter)
(GN accessory)
You may purchase a GN1000 RHL as an accessory, which lets you answer and end telephone
calls while away from your desk. Please contact your vendor
or visit www.jabra.com for further details.
To connect your GN1000:
1. Mount the GN1000 to your telephone as described in its
user manual.
2. Plug RHL’s connection cord into headset base’s AUX port.
The GN9350e enables you to use electronic hookswitch
(EHS) to answer and end calls while away from your desk.
Feature is described in section 2.5.2.
The remote answering and ending of calls is also available on
certain softphone/VoIP applications.
GN9350e
GN9330e GN9330e USB
2.4 LCD display
Your base unit has a LCD display and display control with which you control 5 settings:
Transmit volume setting
Hookswitch selection
Range/power selection
Sound mode selection
Protection level selection (IntelliTone®)
Navigation and markers
Navigate through the LCD display’s 5 menus horizontally using the display control’s34 arrows. Within each of the 5 menus, navigate vertically with the display control’s
Press the OK button to confirm a specific choice/value within the 5 different menus. A star (*)
beside a selected choice/value indicates the current setting.
5
Default/start position
The LCD display is always on and ready to use. The permanent default/start position for the
LCD display is the leftmost transmit volume setting
this default/start position, if not operated for 30 seconds.
Within each of the 5 menus, there is also a factory-set default. This default remains until you
change it. The last selected choice/value (within each of the 5 menus) is always displayed in
the first line of its menu.
. The LCD display will always revert to
Changing the settings
2.4.1 Transmit volume
The transmit volume must be adjusted properly so your voice is heard clearly.
If you haven’t already adjusted the transmit volume during your initial setting up, do so now
by completing the following:
1. Put on headset.
2. Use
3. Make a call to someone who will act as a test person.
4. Use
5. Press OK to confirm new setting.
The transmit volume menu is the permanent default/start position for the LCD display. After
adjusting any of the other settings via the display, it will revert to the transmit volume menu
position.
to locate transmit volume menu on base display.
34
6
to scroll through 12-setting transmit volume menu until your test person
5
confirms your voice is at the appropriate volume.
6
arrows.
Important: For USB applications, the volume settings are fixed and need no adjustment.
6
7
2.4.2 Hookswitch selection
The GN9350e enables you to answer and end calls remotely by using the GN1000 RHL, or its
built-in electronic hookswitch (EHS) modes. EHS is only possible on certain telephone systems. In order to determine which telephones have the EHS feature enabled, please refer to our
website www.jabra.com. Please also refer to your telephone´s user manual for clarification.
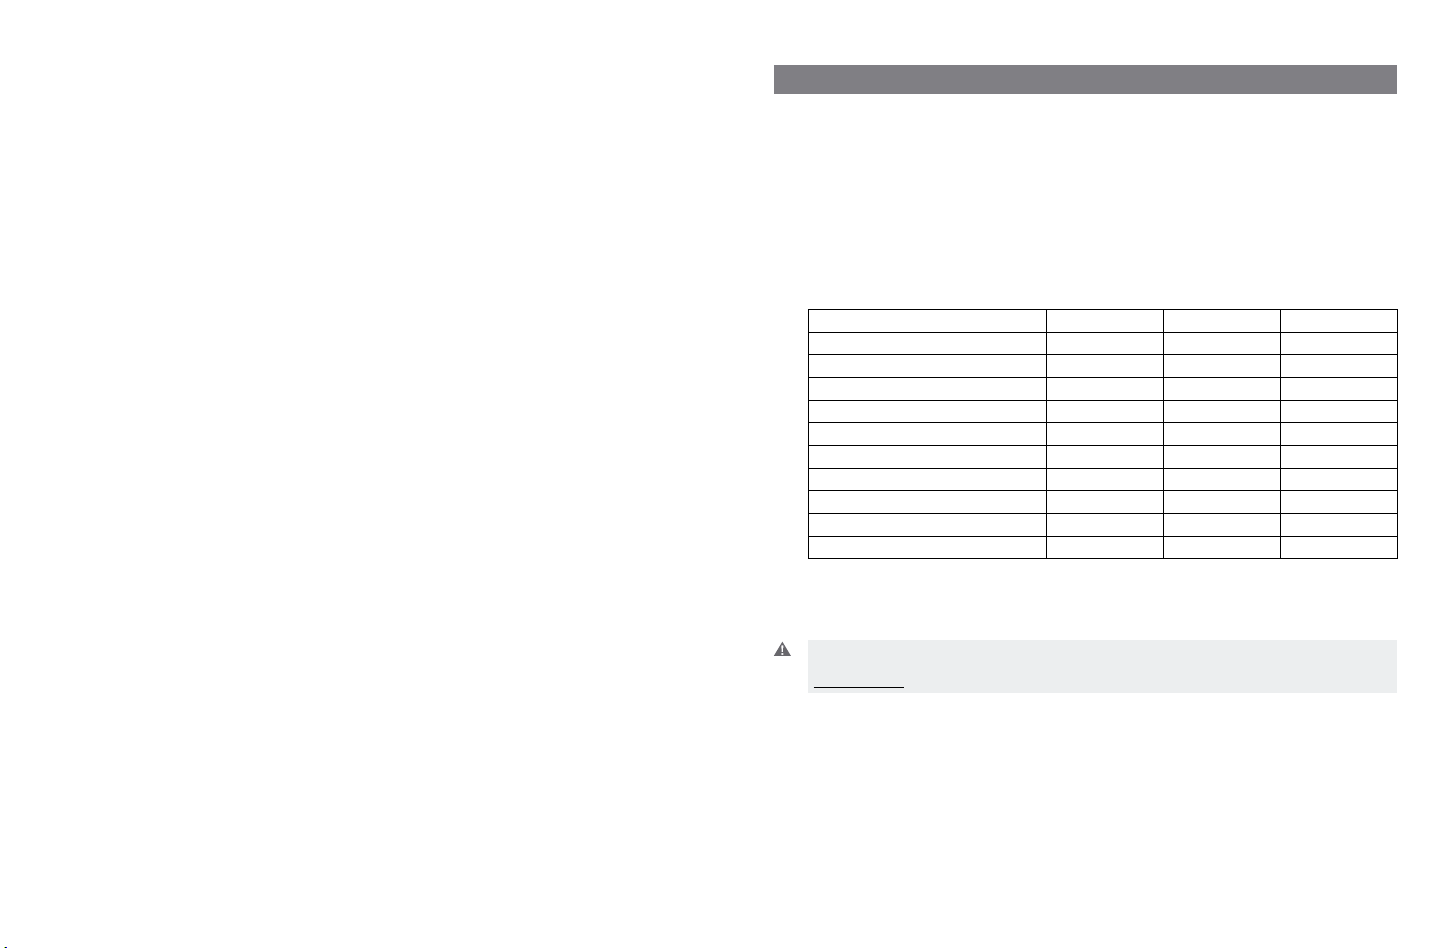
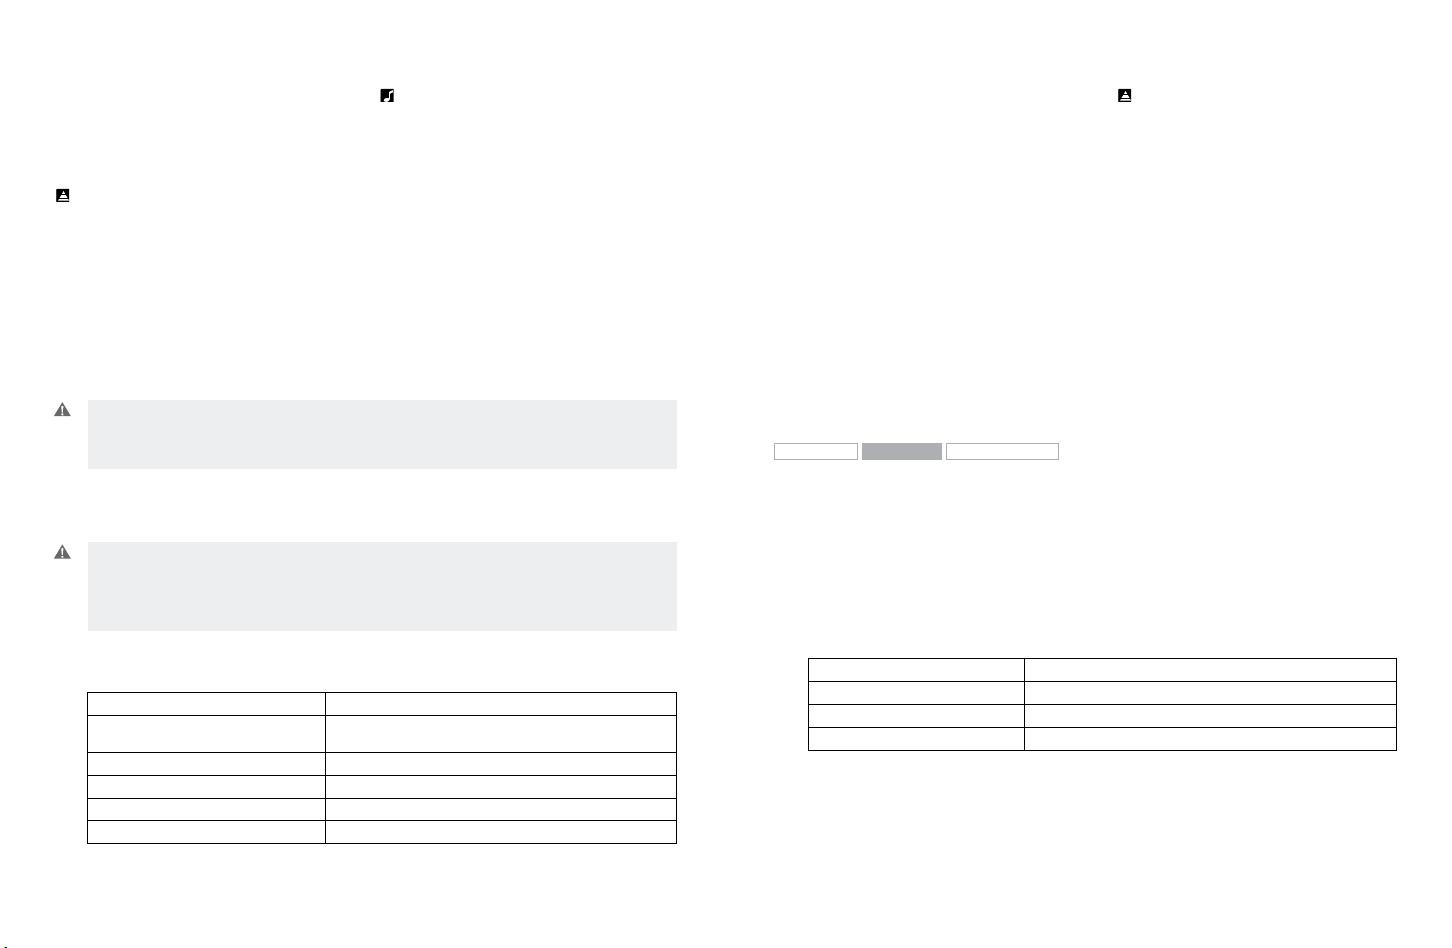
Power mode Range* DECT Range* US DECT
Normal Up to 120 m Up to 400 ft
Low Up to 60 m Up to 200 ft
Very Low (V. low) Up to 25 m Up to 80 ft
* In typical office environment
Note: The Normal power mode is the default setting .
4 modes are available
GN RHL non-EHS; works with the GN1000 RHL
DHSG e.g. Siemens and Elmeg desk telephones
AEI e.g. with Tenovis desk telephones
MSH e.g. with Alcatel desk telephones
Note: By default, the GN9350e is set to the RHL interface, which also is the correct setting if you
manually operate your handset when answering/ending calls as described in the Guide for basic set-up
and use.
To select the appropriate interface:
1. Use
to locate the hookswitch selection menu
34
on base display.
6
2. Use
to select one of the 4 interfaces from the menu.
5
3. Press OK to confirm the interface.
Note: To use the DHSG, AEI or MSH function, connect the connec-
tion cord (accessory) to your desk telephone and the AUX port of
the GN9350e.
2.4.3 Range/power selection
Your headset offers 3 range/power modes (Normal, Low and Very Low). The Normal mode
is ideal for most users. However, if you experience interference from other communication
devices during your calls, you may want to switch to the Low or Very Low modes. Changing to
Low or Very Low power modes will reduce the range of your headset.
To change the range/power mode:
1. Use 34 to locate the range/power mode menu on base display.
6
2. Use
to select one of the 3 modes from the menu.
5
3. Press OK to confirm the new mode.
2.4.4 Sound mode selection
This menu is split into two sections: “Treble/Normal/Bass” and “Fixed/Switch”. These two
sections are separated by a blank line. It is possible to choose one mode in each of the two
sections.
Your headset offers 3 treble/bass modes (Treble, Normal and Bass). You can change these to
suit your personal preferences or needs, and seperately determine the USB sound quality.
Sound mode Effect Benefits
Treble Accentuates high tones Ideal for users with slight high-
Normal Accentuates all tones evenly Ideal for all users
Bass Accentuates lower tones Ideal for users preferring a bass-
Sound mode Effect Benefits
Fixed Speech quality in headset loudspeaker as
Switch Automatically switches between wideband or
Note: The Normal mode is the default setting.
known from traditional telephones (narrowband)
narrowband sound quality. In conference call
mode, automatic switching is disabled.
frequency hearing loss
rich sound
Improved talk time in USB mode
Enhanced USB sound quality
To change the sound mode:
8
9
1. Use 34 to locate the sound mode menu on base display.
6
2. Use
to select one of the 3 modes from the menu, and choose between
5
fixed/switched from the menu.
3. Press OK to confirm the setting.
2.4.5 Protection level selection
Your headset offers a choice of 4 protection levels (plus its additional basic protection level).
These levels protect you against sudden, overly-loud sound spikes that may come from the
phone network (such as shrill telefax signals or network interference), and provide a limit to
the maximum noise exposure from the headset during your workday.
The number of hours (on average) you spend on the telephone per day determines the setting you should select. All 4 protection levels meet and exceed de facto global protection
levels, and are compliant with NIOSH standards, and EU health and safety codes of 85 dB(A).
The TT4 protection level is compliant with pertinent Australian recommendation.
Important: In some jurisdictions, applicable regulations or laws may mandate the required setting
you use. The Default level provides a protection level of 118 dB(A). Your headset protects you
against overly-loud sound spikes. If you use the telephone’s handset for calling, you will not have
this protection.
CAUTION: Loud and high-pitched noise may cause temporary or permanent damage to your hearing.
This equipment is designed to offer protection against loud and high-pitched noises and conforms to
current regulation. However, this equipment may not necessarily provide you with complete protec
tion. To reduce the potential damage to your hearing that may be caused by loud and high pitched
noise; the output level must be set to the minimum level possible for your use
To change the protection level:
1. Use 34 to locate the protection level menu on base display.
6
2. Use
to select one of the 5 modes from the menu.
5
3. Press OK to confirm the new mode.
Automatic volume adjustment and noise reduction
Your headset offers two built-in features which give you optimum sound levels and quality.
Both features operate automatically, so you need not make any adjustments to the headset.
Automatic volume adjustment
The automatic volume adjustment feature automatically sets the volume levels of all calls, so
that each call is heard at the same, consistent volume you have set. Autovolume is not enabled in protection level 0. You can also adjust the volume manually directly on the headset.
Noise reduction
The automatic noise reduction feature improves the sound quality of incoming calls by re-
moving impurities transmitted with the signal, such as background noise from your caller’s
environment.
GN9330eGN9350e
GN9330e USB
2.4.6 Hookswitch selection (without LCD)
The GN9330e enables you to answer and end calls remotely by using the GN1000 RHL, or
its built-in electronic hook switch (EHS) modes. EHS is only possible on certain telephone
systems. In order to determine which telephones have the EHS feature enabled, please refer
to our website www.jabra.com. Please also refer to your telephone’s user manual for clarification.
4 modes are available:
Protection level Criteria for selecting
Level 0 Basic protection against overly-loud sound spikes
Level 1* Less than 4 hours on telephone/day
Level 2* 4-8 hours on telephone/day
Level 3* More than 8 hours on telephone/day
Level 4 (TT4) Recommended Australian protection level (Telstra)
* Compliant with Directive 2003/10/EC of the European Parliament and Council of 6 February 2003.
[118 db(A)]. Auto volume disabled
GN RHL non-EHS; works with the GN1000 RHL
DHSG e.g. Siemens and Elmeg desk telephones
AEI e.g. with Tenovis desk telephones
MSH e.g. with Alcatel desk telephones
Note: By default, the GN9330e is set to the RHL interface, which also is the correct setting if you manually
operate your handset when answering/ending calls as described in the Guide for basic set-up and use.
To select the appropriate interface:
25 %
100 %
10
11
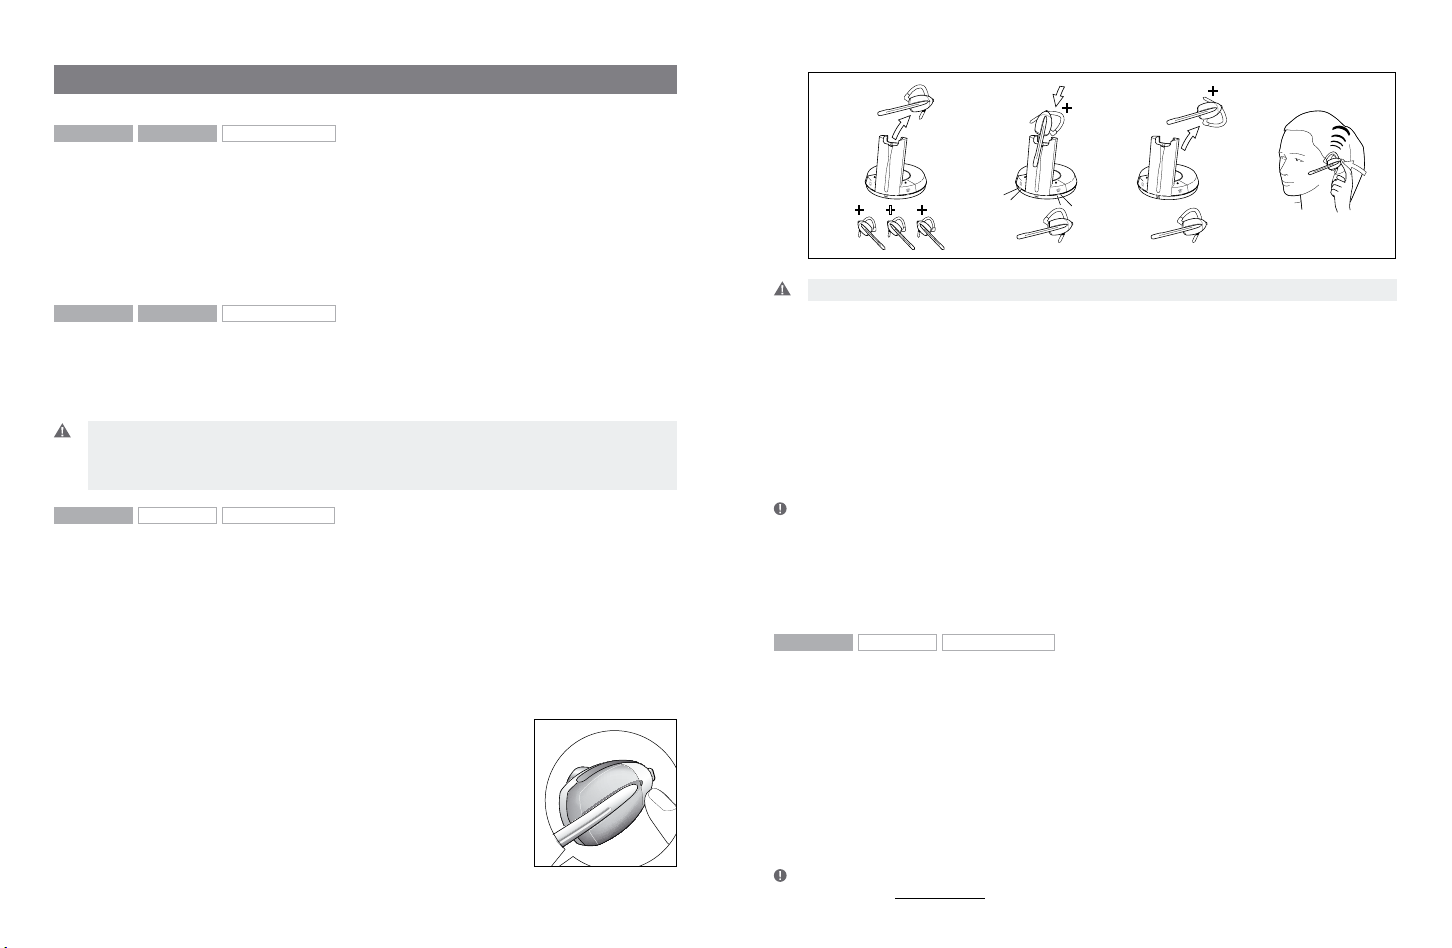
1. Place the headset in the base with its indicators facing you.
2. Press the Telephone button on the Base for 6 seconds while the
headset is in the base until the headset’s blue LED is flashing rapidly
3. Use the volume up/down button to shiftbetween the different EHS
settings – see table below.
The base unit’s 4 battery indicators show which EHS mode
the GN9330e is in.
GN RHL
DHSG
AEI
MSH
Note: If more than 15 seconds elapses without pressing the volume + or volume – button, the last
selected interface will be activated.
4. To set the EHS mode, press the Telephone button on the Base for 6 seconds until the 4
battery indicators flashes once. Now wait 5 seconds and the headset is initialized.
2.4.7 Change default phone type
You can chose to have either PC or Telephone as the default phone type
(Telephone is factory default). To change setting, press and hold the phone
type button on the base until the blue LED below the button is solid blue.
3. Wearing styles
Your headset offers headband, neckband and ear
hook wearing styles.
Note: GN9330e and GN9330e USB come with an ear
hook and a headband. Neckband is available as an
accessory.
GN9350e GN9330e
GN9330e USB
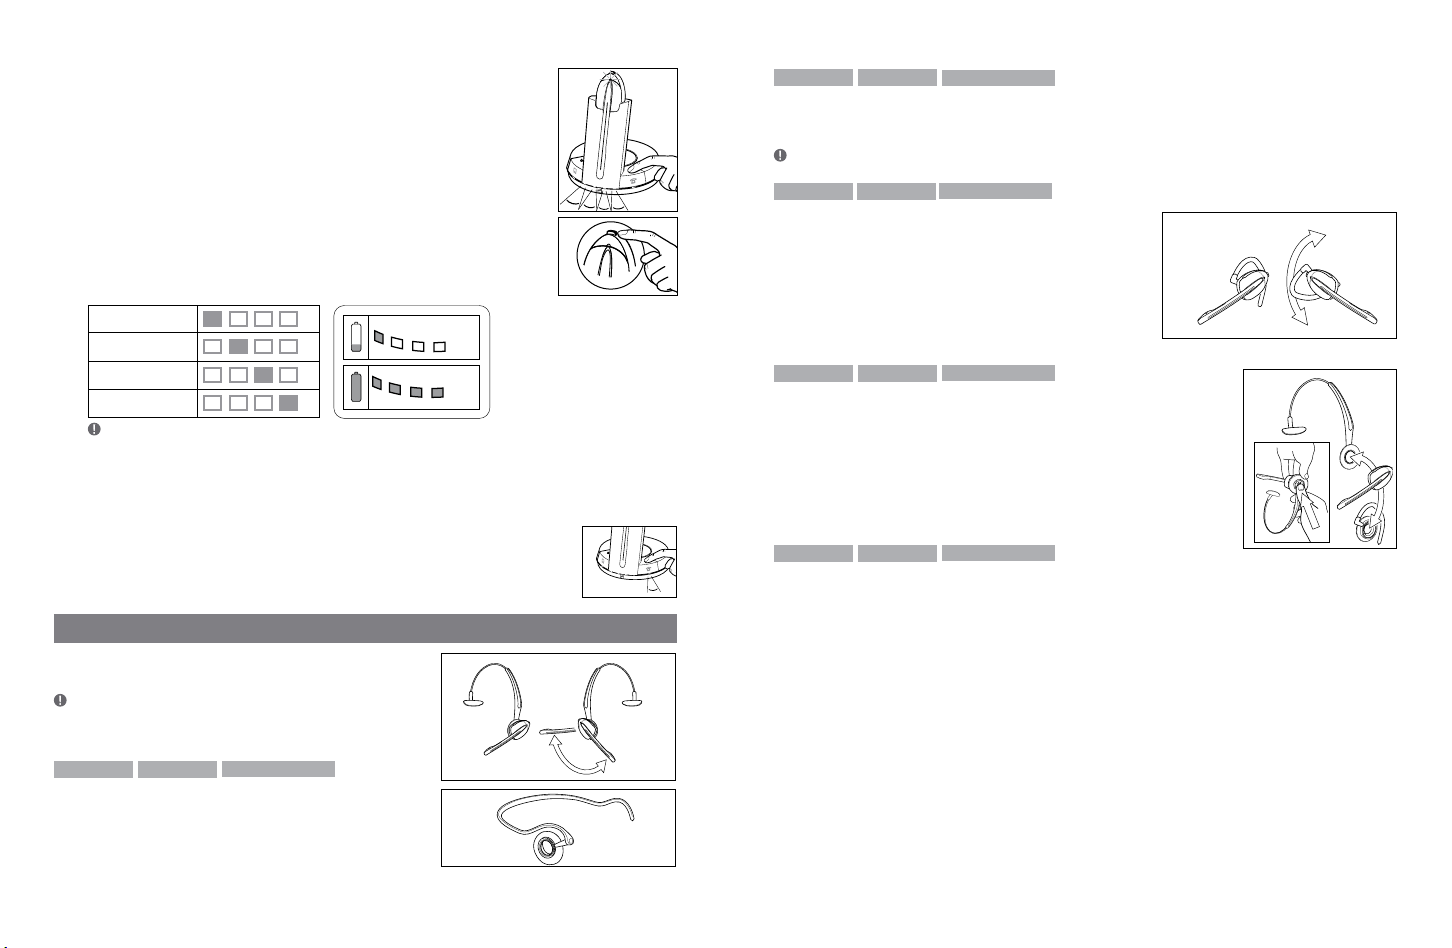
3.1 Headband wearing styles
You can choose to wear the headset on either the
left or right ear. The headset can be rotated 360˚.
Changing boom arm wearing side (headband)
1. Rotate boom arm unit 90°.
GN9350e GN9330e GN9330e USB
3.2 Neckband wearing style
With the neckband, the headset is worn on the right ear.
Note: This wearing style is available as an accessory for GN9330e and GN9330e USB.
GN9350e GN9330e GN9330e USB
3.3 Ear hook wearing styles
You can choose to wear the headset on either the
left or right ear. The headset can be rotated 360˚.
Changing ear hook wearing side
1. Flip the ear hook over.
2. Rotate the ear hook 180°.
GN9350e GN9330e GN9330e USB
3.4 Changing wearing styles
All wearing styles (headband, neckband and ear hook) are interchangeable.
To change any wearing style (for example, from headband to ear hook):
1. Unclip headset from the current wearing style.
2. Affix the new wearing style.
GN9350e GN9330e GN9330e USB
3.5 Receive volume button reorientation
By default, the headset is set-up for wearing on the right ear. This means the volume
control is pushed up to increase the volume, and pushed down to decrease the volume. If
you change the wearing ear of the headset, you may also want to change the orientation of
the volume control so that volume is still increased by pressing the volume control up.
To change the headset’s volume control button orientation:
1. Make sure there is no link between the headset and the base, (indicator on headset is not
flashing).
2. Press the headset’s mute button for 10 seconds.
–> The headset’s link indicator will light.
3. Determine how you prefer to increase volume (pushing the control either up or down).
4. Press the volume control either up or down (according to preference) until the headset’s
link indicator turns off.
2 sec
B B B
B
B
A
A
A
A
4. Operating the headset
12
13
GN9350e GN9330e
GN9330e USB
4.1 Making/ending calls via telephone with RHL/EHS function
1. Ensure telephone mode is selected.
2. Remove headset from base, or press headset’s talk button if already wearing it.
–> RHL/EHS function will activate (handset lifts/telephone line connection opens).
3. Dial desired number.
4. Replace headset in base, or press the headset’s talk button.
–> RHL/EHS function will deactivate (handset lowers/telephone line connection closes).
GN9350e GN9330e
GN9330e USB
4.2 Answering calls via telephone with RHL/EHS function
1. The telephone rings.
2. Remove headset from base, or press the headset’s talk button.
–> The call will be connected (handset lifts/telephone line connection opens).
Important: During an incoming call, your headset will automatically change to the required mode,
depending on whether the call is coming via the desk phone (telephone) or via VoIP (USB). After
the call, it will revert to the default mode you selected earlier. The initial factory-set mode is the
telephone mode.
GN9350e
GN9330e GN9330e USB
4.3 Conference calling
Conference calling lets several headsets join together for a call. The primary headset (A) + 3
extra headsets (B) can join a conference call initiated by the primary headset. (See illustration.)
Making conference calls
1. Remove primary headset from base; make sure link is established. Indicators on base and
headset are flashing.
2. Place secondary headset in primary headset’s base.
–> Primary base’s telephone and USB mode indicators, and secondary headset’s
link indicator, will light for 2 seconds.
3. Remove secondary headset from primary headset’s base.
4. After a 4-pitch tone is heard in the primary headset, press the
silver-colored talk button.
5. When the GN9350e is linked up to more than one headset
in conferencing mode the product is not TT4 compliant.
Important: Steps 2 to 4 may be repeated twice for 2 more secondary headset participants.
6. Use the primary headset’s telephone/VoIP application to dial desired number and initiate
conference call.
At any point during a call in progress, you may add secondary headsets to form a conference call.
A maximum number of 4 headsets (1 master plus up to 3 secondary) may join a conference call.
Ending conference calls for all participants
1. Place primary headset in its base, or press its talk button.
–> The conference call is now terminated for all participants.
Note: If the conference call was made via VoIP, you may need to perform additional steps to end
your call. See your VoIP application’s user instructions.
Ending conference calls for a secondary headset only
1. Place secondary headset in its own base, or press its talk button.
–> This participant is now terminated from the conference call.
GN9350e
GN9330e GN9330e USB
4.4 Emergency calling via VoIP
Your headset supports quicker emergency calling via VoIP applications (softphone).
If the headset is connected to a PC and the PC is screensaver-locked, you can still use the
headset to dial emergency services.
To call emergency services via VoIP:
1. Put on headset.
2. If the PC is on (even if screensaver-locked), press the base unit’s telephone mode button
and USB mode button simultaneously for 5 seconds.
–> The base will automatically dial the emergency services number.
Note: This emergency services feature works only with certain VoIP applications.
Please refer to www.jabra.com for more information.
1
2
GN9350e GN9330e GN9330e USB
14
15
4.5 Switching a call from headset to desk telephone handset
It’s possible to switch a call in progress from the headset to the telephone’s handset:
1. Lift the telephone’s handset to your ear.
2. Do one of the following:
• Place the headset into the charging cradle.
• Press the headset’s talk button.
• Press the base’s telephone mode button.
–> The headset’s link indicator will stop flashing to indicate that the headset-base link
has been closed.
Important: If using electronic hookswitch on your telephone, do not place the headset into
the charging cradle, and do not press the headset´s talk button or press the base´s telephone
mode button, as this will disconnect the call.
If the headset runs out of battery power, the headset-base link will remain active for up to 2
minutes to allow for battery changing.
GN9350e GN9330e
GN9330e USB
4.6 Switching a call from desk telephone handset to headset
It’s possible to switch a call in progress from the telephone’s handset to the headset:
1. Remove the headset from base, or if already out, press
the headset’s talk button. This establishes a link.
–> The headset’s link indicator will start flashing and the
call will be switched to the headset.
Note: Do not place handset before the call is over, as this will end the call.
GN9350e GN9330e
GN9330e USB
4.7 New master headset pairing to base
You may designate a new master headset for your base.
Important: Before designating a new master headset, ensure that the original headset’s link
to the base unit is closed by pressing its talk button. The telephone or USB indicator should
not flash.
To designate a new master headset:
1. Place the new master headset into the charging cradle of the base.
2. Press the base’s pairing button.
–> Both the telephone and USB mode buttons on the
base, and the headset’s link indicator, will light for
2 seconds. This indicates successful pairing of the
new master headset.
GN9350e
GN9330e GN9330e USB
4.8 Establishing a Clean Audio Mode link
In the PC phone (VoIP) use case many Unified Communication applications (e.g. Cisco IP Communicator
or Microsoft Office Communicator) deliver voice mails
in the inbox of the e-mail application (e.g. Outlook).
Further, many users have a separate application for conference calls (with or without video).
In these use case it is also very relevant to use your headset.
In situations where other applications than the PC phone application wants to use the headset (as just described), you need to
establish a Clean Audio Mode link without triggering the soft phone
hook-off command.
The Clean Audio Mode functionality is implemented as a double-tap
on the headset’s talk button.
For example, if you want to participate in a conference call or listen to a voice-mail delivered
by email, simply activate the Clean Audio Mode by double-tapping the headset’s talk button
on the headset. When ending the conference call just single tap the headset’s talk button to
close the Clean Audio Mode.
Note that you have to set the Audio Preference in the Windows operation system to the GN9330e or
GN9350e. Also, in the conference call application (e.g. Windows Live Meeting), you have to set the
Audio preferences to the GN9330e or GN9350e.
5. Use with DECT cordless telephones
GN9350e
Important: Your headset’s authentication code is 0000, which is the same code as for most DECT
cordless telephones. Your headset will only work with cordless telephones with the 0000 code.
GN9330e GN9330e USB
Your headset can also be used with DECT cordless telephones (Digital Enhanced Cordless
Telecommunication), which are GAP-compatible (Generic Access Profile). You must first pair
the headset to the base unit of the cordless telephone.
To pair your headset to your DECT cordless telephone:
16
17
1. Press and hold down the headset’s talk button and mute button (at tip of volume control)
for 5 seconds.
–> The headset’s link indicator will flash rapidly.
2. Activate the cordless telephone’s GAP mode. Consult your cordless telephone’s manual
GAP compatibility/pairing instructions.
–> The headset’s link indicator will light for 2 seconds to indicate successful pairing.
Your headset is now ready to use with your cordless telephone. Consult your cordless
telephone’s user manual for using your headset with your cordless telephone.
6. Replacing the battery pack (GN accessory)
GN9350e GN9330e GN9330e USB
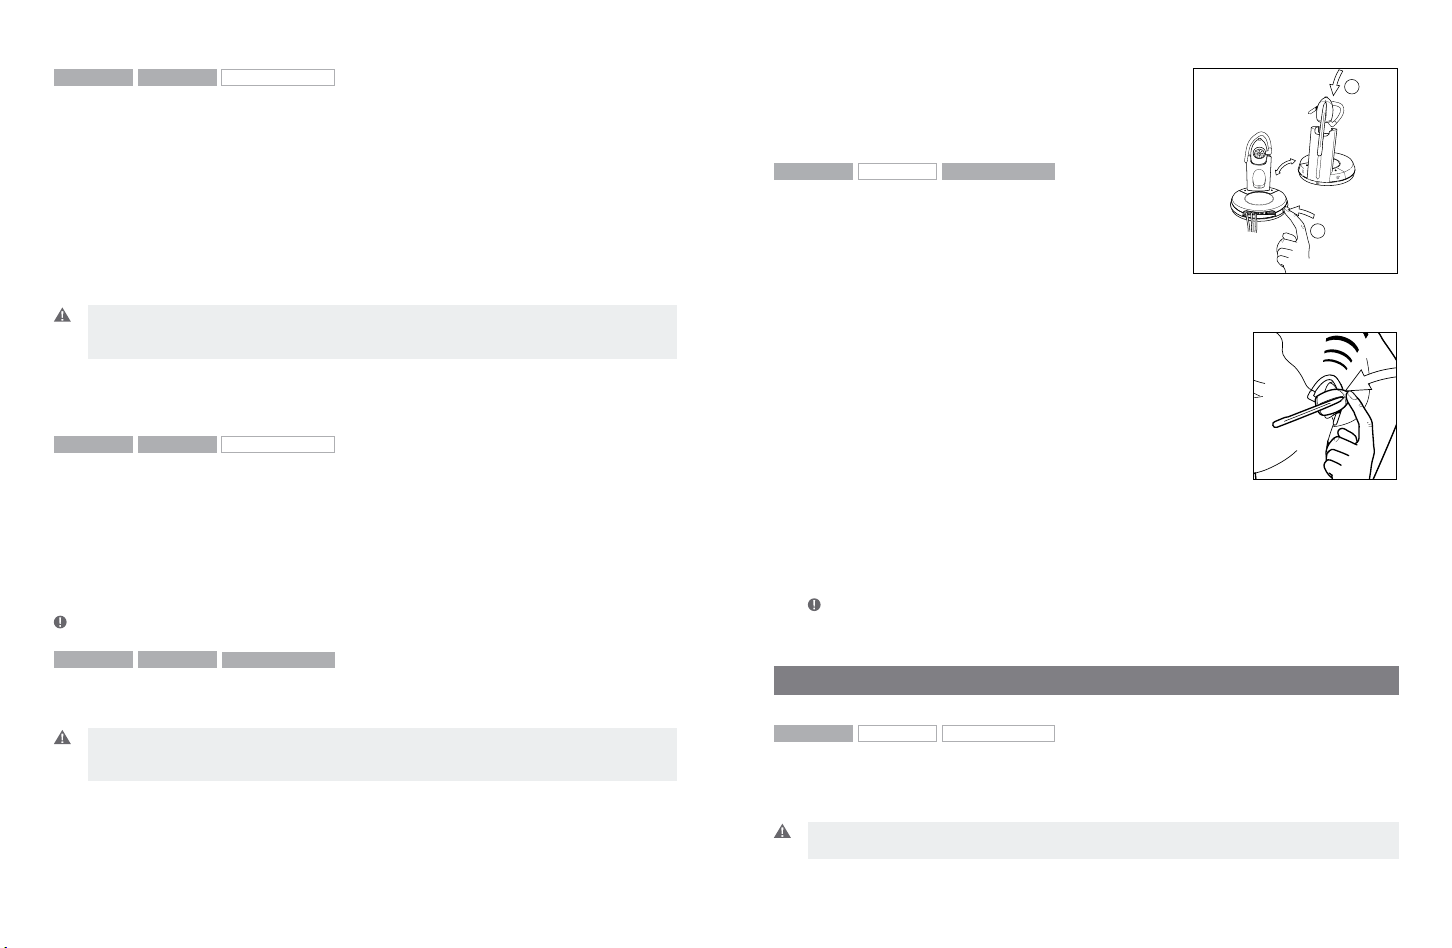
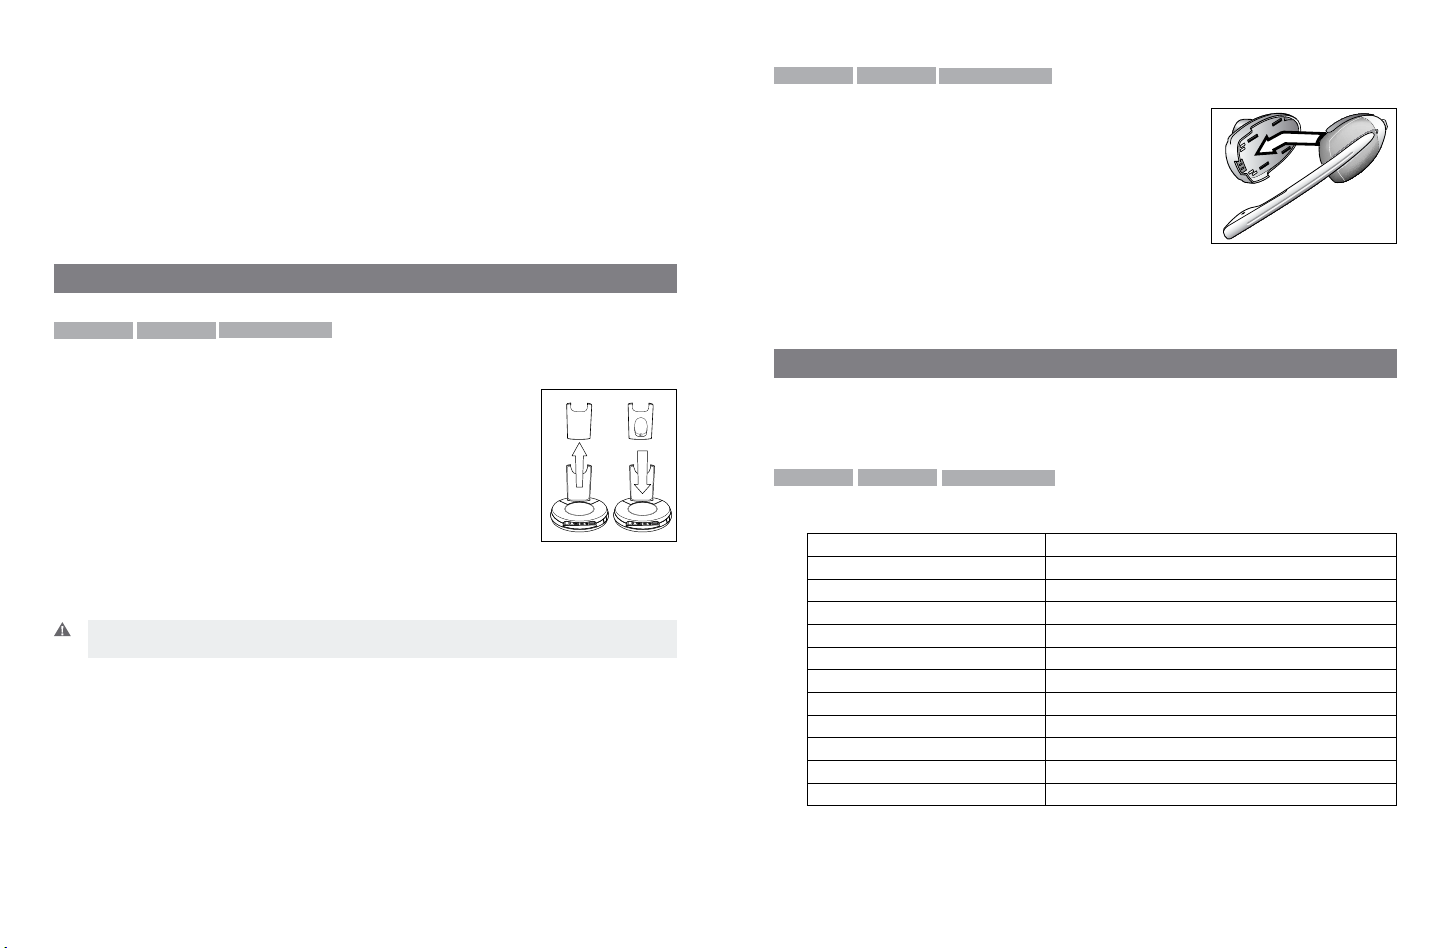
6.1 Adding extra battery charging facility
An extra battery charging facility is available as an accessory. This can be attached to your base
to allow you to charge an extra battery.
To add the extra battery charging facility cover:
1. Remove the blind cover from the base by sliding it upward until
removed.
2. Slide the extra battery charger into the base charge tower until it
clicks in place.
The extra battery can be charged in its receptor on the back of the
charge tower. An indicator above the receptor will light when the battery is placed correctly
and is charging. The indicator will turn off when battery is fully charged.
Important: During everyday use, the base’s leftmost indicator will flash when there is less than
30 minutes of talk time left.
GN9350e GN9330e GN9330e USB
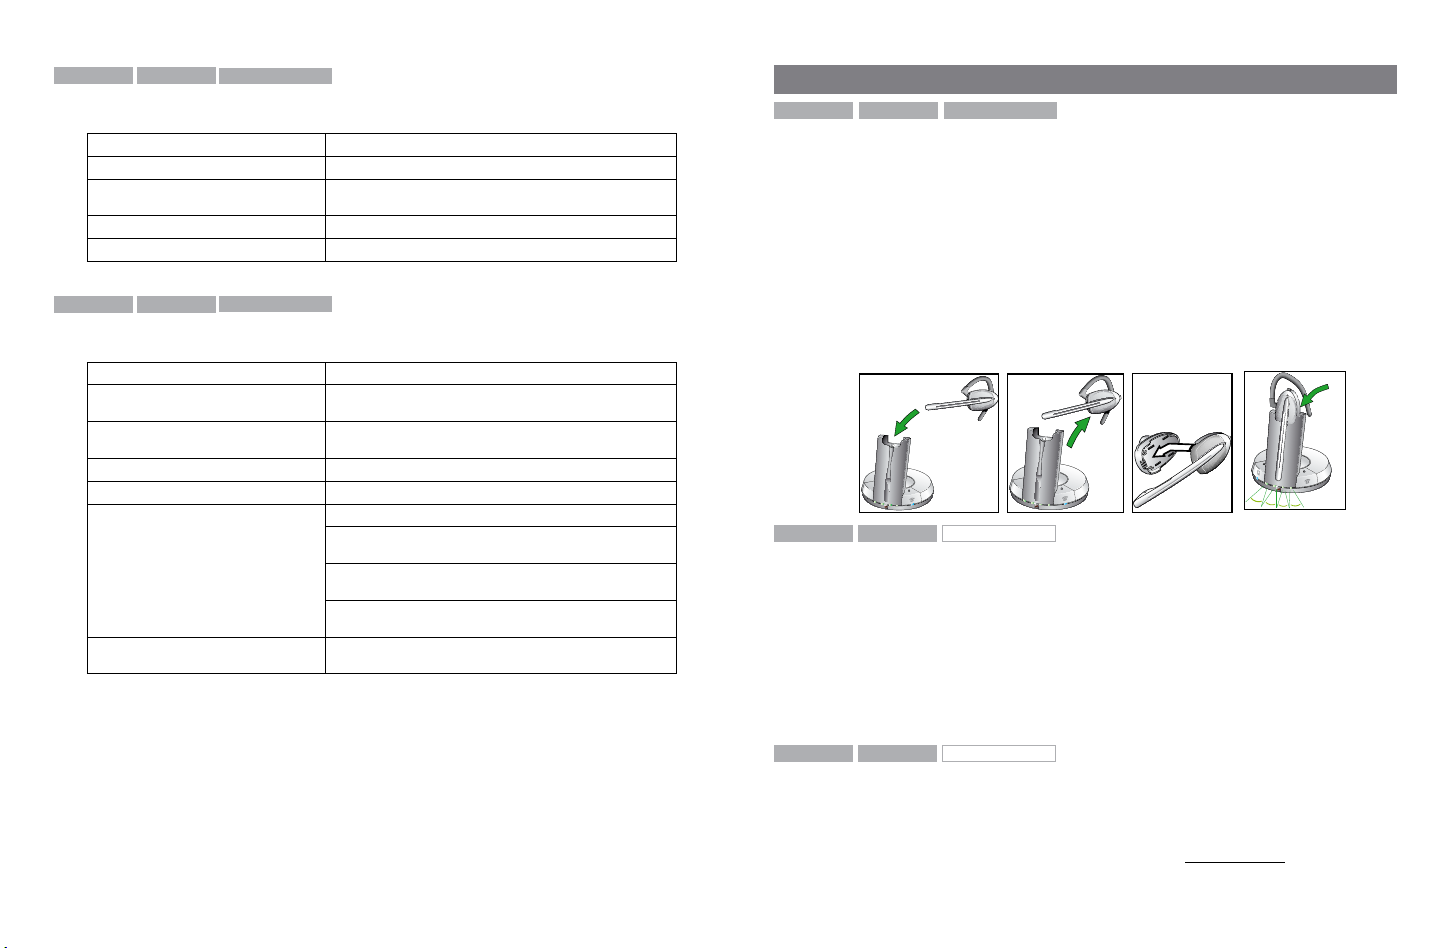
6.2 Replacing the battery pack
The headset’s battery pack can be changed when required.
To replace the battery pack on a wearing style:
1. Unclip the wearing style from the battery pack.
2. Slide the backside of the headset speaker-housing
downwards.
3. Slide the new battery pack (from the extra battery
charging facility) onto the headset.
The headset’s link indicator will light for 2 seconds to confirm successful replacement of
the battery pack.
4. Replace the wearing style.
5. Recharge the empty battery by sliding it into the extra battery charging facility.
7. Audio and visual indicators
The headset and base have audio and visual indicators that represent various functions
associated with setting up and using the product.
GN9350e GN9330e
GN9330e USB
7.1 Headset’s audio indicator
Headset action Audio indication
Low battery 5 rapid beeps + 20 second pause
Volume up/down 1 quick beep in increasing/decreasing intensity
Volume max/min reached 1 rapid shrill/low beep
Incoming call (with RHL functionality) Rapid multi-tone + 2 second pause (repeats)
Incoming call (with VoIP call) Depends on VoIP application
Conference call request 4-pitch tone
Conference call accept 1 beep
Telephone line (open/close) 1 beep
Headset out of range 3-pitch tone
Mute activation/deactivation 1 beep
Mute activated 2-pitch tone + 10 second pause (repeats)
GN9350e GN9330e GN9330e USB
18
19
7.2 Headset’s visual indicators
Visual indication Headset action
Link indicator (blue) Flashing when linked up
Lit for 2 seconds Successful pairing, including adding headsets in conference
Lit (during adjustment) Receive volume reorientation (+/-) is being adjusted
Flashing rapidly Headset in DECT/GAP mode
mode
GN9350e GN9330e GN9330e USB
7.3 Base’s visual indicators
Base action Visual indication
Telephone mode button’s indicator/
Base talk button
USB mode button’s indicator/
Base talk button
Mute functionality indicator (red) Lit when mute is activated
Battery indicator (4 green diodes) 1 indicator light = 25% of a full charge
Battery indicator (chargecradle for
additional battery, GN accessory)
Lit when in telephone mode and flashing when linked up
Lit when in USB mode and flashing when linked up
4 indicator lights = 100% full charge
Rightmost lit diode flashes when charging, leftmost diodes
are lit
Leftmost diode flashes when <30 minutes of talk time
remaining
When headset placed in cradle for charging, all diodes light
for 1 second
Lit when charging, green diode
8. Troubleshooting
GN9350e GN9330e
GN9330e USB
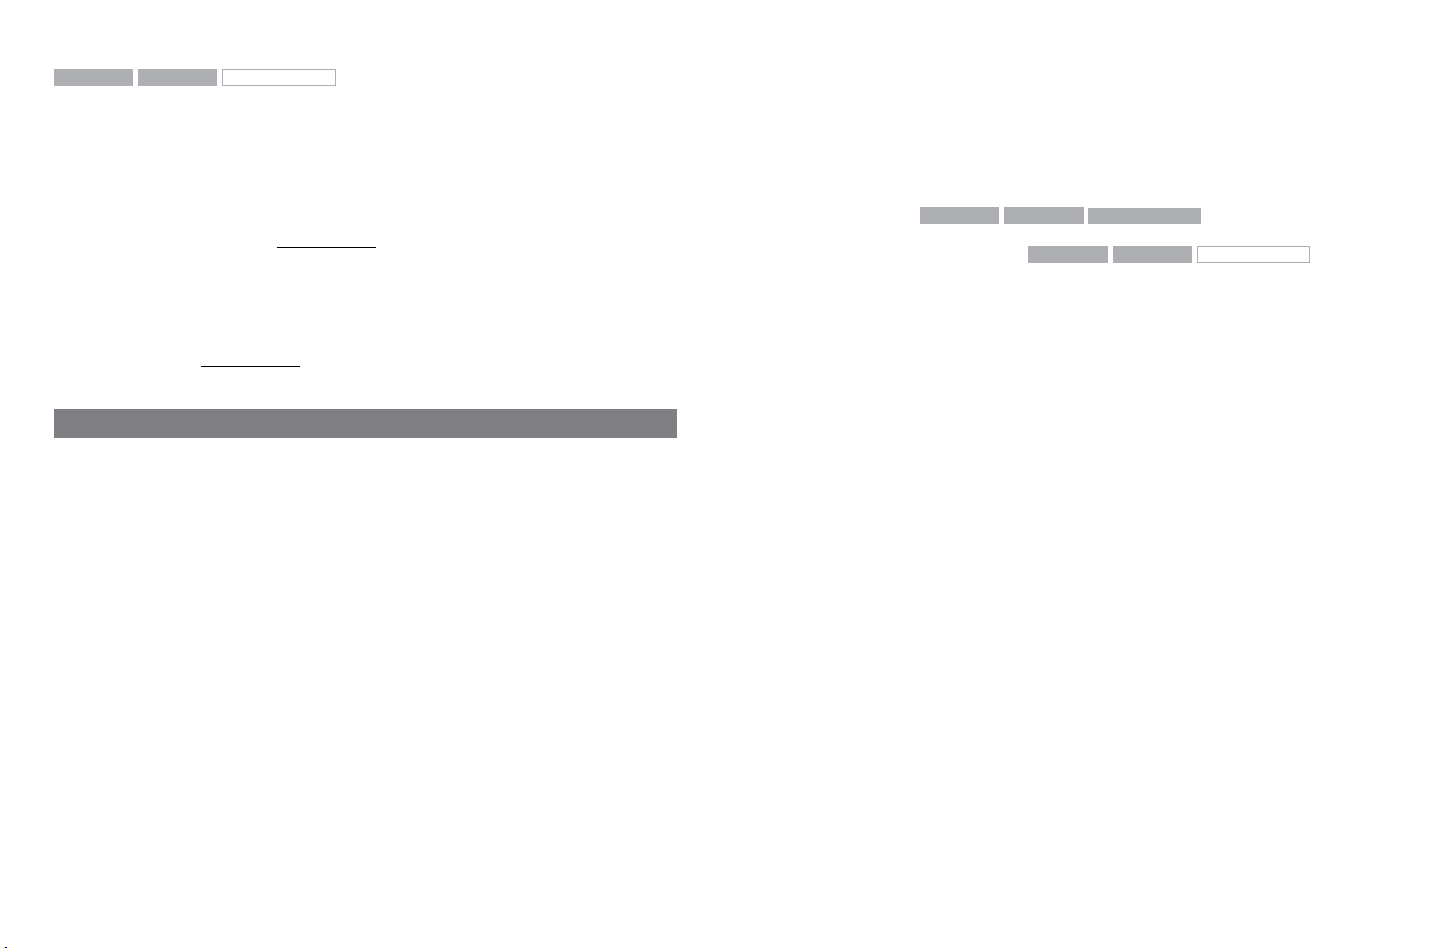
Q: How to make a reset
A:
1. Place the headset in the basestation. Then unplug the power supply cable from the base
station.
2. Remove the headset from the base station.
3. Remove the battery pack by sliding the backside of the headset speaker-housing
downwards
4. Slide the battery pack onto the headset again – the LED on the headset will turn sold
blue for 2 seconds. Then place the headset in the base station and hereafter connect the
power supply cable again.
5. The four LED’s on the base station will then flash green once. The LED on the headset will
flash blue once after 5 seconds.
1. 2. 3.
GN9350e GN9330e
GN9330e USB
4.
Q: Nothing happens when I try to adjust the clear dialtone.
A: Make sure the base is set for telephone mode and the link is established (telephone button’s indicator on base is flashing). Also ensure that the telephone is activated (handset is off
the hook or line button is pressed).
Q: I am getting a buzzing sound on my headset.
A: If the unit has been correctly set-up, your telephone may not be fully immune to the radio
signals the headset uses. To overcome this problem, move the headset base at least 30 cm away
from the telephone. On GN9350e, you may want to reduce the range of your unit instead.
GN9350e GN9330e
GN9330e USB
Q: My customers say they cannot hear me.
A: Ensure the base unit is in the correct system setting by adjusting the clear dial tone switch.
You should experience a high quality dial tone from the headset. Then call a friend and adjust
your headset’s microphone as described in the Guide for basic set-up and use. For setting
information on your telephone system, please also refer to www.jabra.com.
GN9350e GN9330e
20
21
GN9330e USB
Q: When I press the talk button, the GN1000 RHL lifts, but the call is not connected.
A: Make sure that you are using the telephone’s handset port, and not the headset port
(if your telephone has one), when using a GN1000 RHL for remote answering.
Q: I have heard there is a GN wireless headset which has no need for a
GN1000 RHL to answer calls remotely.
A: Yes, this is known as the EHS (electronic hookswitch) feature on the GN9350e, which some
telephone systems support. Check with your supplier for compatibility with your phone, and/
or consult our support site at www.jabra.com.
Q: I have moved desks at work. Is it possible to put my headset onto another base?
A: Yes, this is possible. The headset only needs to be paired to the new base. Just follow the
procedure as described in section 4.7 of this guide.
Q: My telephone should be able to operate with the EHS version of
GN, but I cannot make it work.
A: Please refer to www.jabra.com for more information, including compatibility and the correct, clear dialtone switch setting.
9. Maintenance, safety and disposal
Maintenance
The headband, boom arm and ear hook can be wiped with a dry or slightly damp cloth.
The cords and base unit can be dry-dusted as required. The leatherette ear cushion(s) can
be cleaned or replaced. When cleaning, remove them and rinse with water. Leatherette
ear cushions and ear plates can be wiped with a damp cloth, with only a little dishwashing
liquid if required. Avoid getting moisture or liquids into any button sockets, receptors or other
openings. Avoid exposing the product to rain.
Deutsch – GN9350e/GN9330e/GN9330e USB
Anleitung für zusätzliche Funktionen
Diese Anleitung ergänzt die ebenfalls beiliegenden Hinweise zum Anschluss und zur
Bedienung des GN9350e/GN9330e/GN9330e USB. Hier finden Sie Anweisungen und
Informationen zu den zusätzlichen Funktionen, Leistungsmerkmalen, zum Zubehör und zur
Wartung die das GN9350e/GN9330e/GN9330e USB gleichermaßen betreffen. In jedem Unterkapitel ist mit
che Produkte es zutrifft. Wenn eine Funktion nicht zutrifft, wird nur ein Rahmen ohne graue
Hintergrundfarbe abgebildet, z.B.:
1. Produktinformationen ....................................... 23
2. Einrichten/Konfigurieren ...................................... 24
2.1 Headsetbuchse am Telefon .......................................... 24
2.2 Standardmodus für abgehende Gespräche ............................... 24
2.3 Mit dem GN1000 RHL (Fernabnehmer – GN-Zubehör) verbinden ............... 24
2.4 LCD-Display ..................................................... 25
2.4.1 Übertragungslautstärke......................................... 26
2.4.2 Fern-Rufannahme............................................. 26
2.4.3 Auswahl von Reichweite bzw. Leistung.............................. 27
2.4.4 Auswahl des Klangmodus ....................................... 27
2.4.5 Auswahl der Gehörschutzebene .................................. 28
2.4.6 Fern-Rufannahme (ohne LCD) . . . . . . . . . . . . . . . . . . . . . . . . . . . . . . . . . . . . 30
2.4.7 Standard-Telefontyp ändern ..................................... 31
GN9350e GN9330e GN9330e USB
GN9350e GN9330e
deutlich angegeben, auf wel-
GN9330e USB
.
Children and product packaging
The packaging, including plastic bags and wrapping parts, are not toys for children. The bags
themselves or the many small parts they contain may cause choking if ingested.
Materials and allergies
The headband is made of stainless steel, which does not have a nickel-coated surface.
The stainless steel alloy has been tested for nickel release in accordance with the European
standard EN 1811:1998. According to EU Directive 94/27/EF, the nickel release must be below
0,50 μgram/cm
The leatherette ear cushion(s) do not contain vinyl.
2
/week. The release from the headband was 0,02μgram/cm2/week.
Batteries and product disposal
Do not expose batteries to heat or puncture them. Dispose of the product and/or batteries
according to local standards and regulations.
3. Tragemöglichkeiten .......................................... 31
3.1 Tragemöglichkeiten für den Überkopfbügel............................... 31
3.2 Tragemöglichkeiten für den Nackenbügel ................................ 31
3.3 Tragemöglichkeiten für den Ohrhaken .................................. 32
3.4 Tragemöglichkeiten ändern . . . . . . . . . . . . . . . . . . . . . . . . . . . . . . . . . . . . . . . . . . 32
3.5 Die Taste für die Empfangslautstärke neu ausrichten........................ 32

22
23
4. Das Headset bedienen ....................................... 33
4.1 Anrufe über ein Telefon mit RHL/EHS-Funktion tätigen bzw. beenden............ 33
4.2 Anrufe über ein Telefon mit RHL/EHS-Funktion entgegennehmen............... 33
4.3 Konferenzschaltungen.............................................. 33
4.4 Notrufe über VoIP ................................................. 35
4.5 Vom Headset auf den Handapparat des Tischtelefons umschalten . . . . . . . . . . . . . . 35
4.6 Vom Handapparat des Tischtelefons auf das Headset umschalten .............. 36
4.7 Neuer Master-Headset-Abgleich mit der Basisstation ....................... 36
4.8 Einrichten einer Clean Audio Mode-Verbindung............................ 36
5. Mit schnurlosen DECT-Telefonen verwenden ....................... 37
6. Akku austauschen (GN-Zubehör) ................................ 38
6.1 Zusätzliches Ladegerät hinzufügen . . . . . . . . . . . . . . . . . . . . . . . . . . . . . . . . . . . . 38
6.2 Akku austauschen ................................................. 38
7. Akustische und optische Signale ................................ 39
7.1 Akustische Signale des Headsets . . . . . . . . . . . . . . . . . . . . . . . . . . . . . . . . . . . . . . 39
7.2 Optische Signale des Headsets ....................................... 40
7.3 Optische Signale der Basisstation...................................... 40
8. Fehlersuche ............................................... 41
9. Wartung, Sicherheit und Entsorgung ............................. 43
1. Produktinformationen
GN9350e/GN9330e/GN9330e USB sind komplett schnurlose Headsetlösungen. Allen gemeinsam sind zusätzliche Funktionen, sowie die Möglichkeit des Freisprechens, Bewegungsfreiheit, weitere Einstellungen vorzunehmen und umfassendes Zubehör.
Hier eine Übersicht über die Hauptfunktionen der einzelnen Modelle:
Vergleich der Funktionen nach Modelltyp
Funktionen: GN9350e GN9330e GN9330e USB
Tischtelefonverbindung • •
VoIP/USB-Verbindung ** • •
GN1000 RHL Anschluss • •
Fern-Rufannahme/EHS • •
Display zur einfachen Benutzung •
Einstellbare Reichweite •
Digitale Signalprozessoren (DSP) •
Konferenzschaltung •
Online-Anzeige • • •
DECT/GAP-fähig* •
* gilt nicht für US-Version
** Headsetlösungen können mit dem PC verbunden werden. Voraussetzungen sind die Betriebssysteme
Windows 98 (SE), Windows 2000, Windows Vista und Windows XP.
Wichtig: Bei der Verwendung des GN9350e oder GN9330e USB mit einer VoIP-Anwendung
beachten Sie die umfassenden Informationen und Anweisungen im Benutzerhandbuch
oder besuchen Sie unsere Website unter www.jabra.com
 Loading...