

Page 1
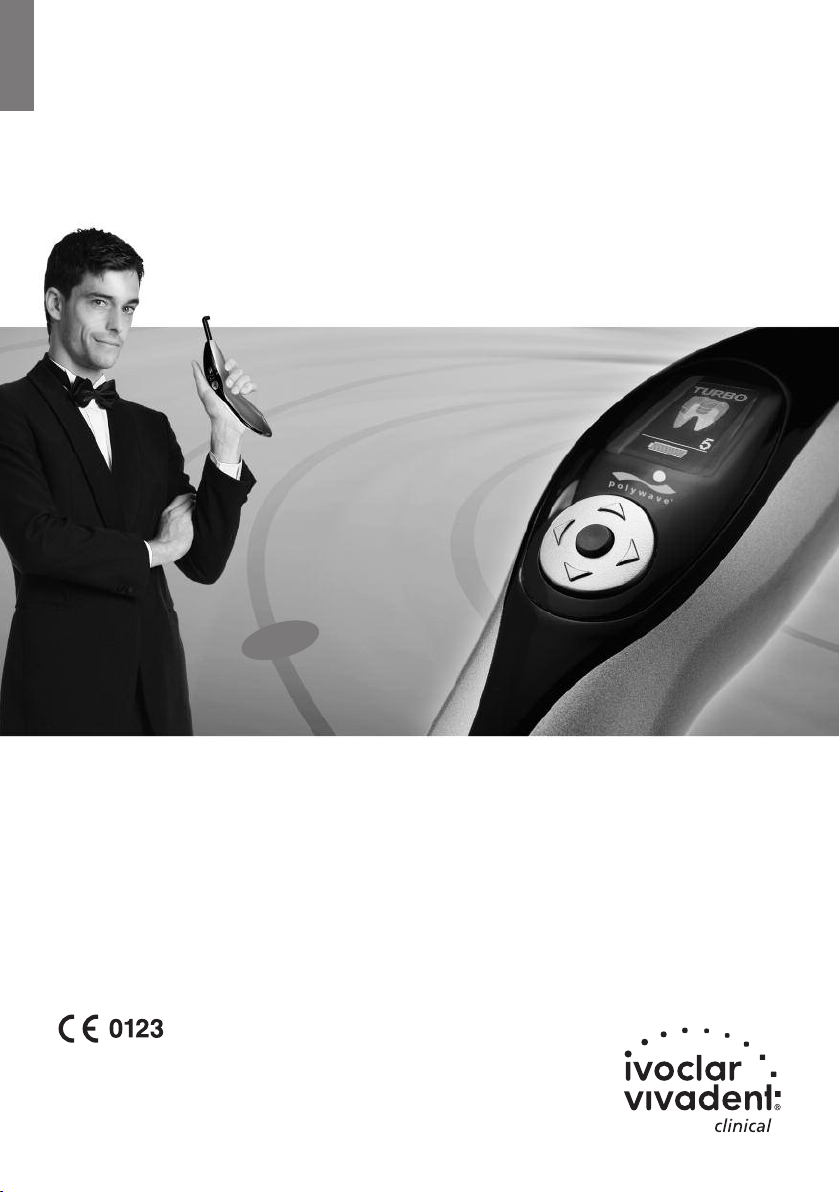
bluephase®20i
Licence to cure
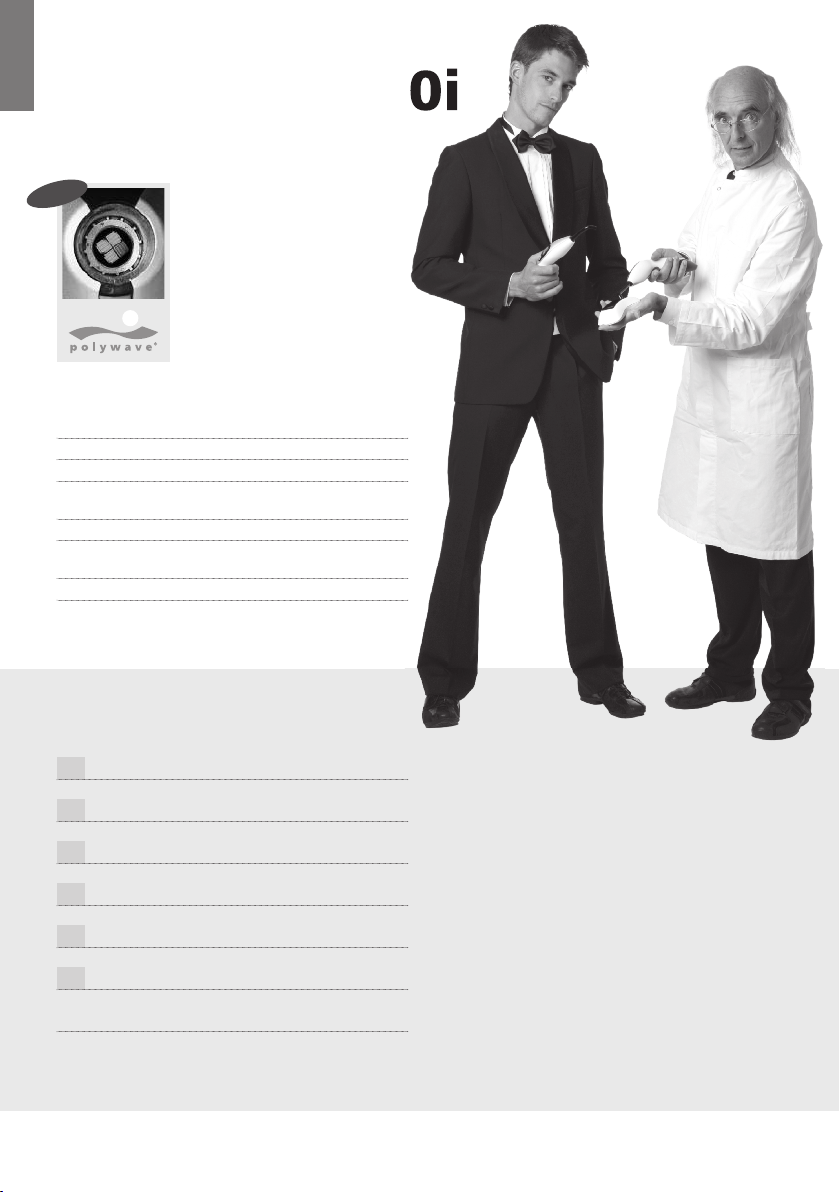
new
LED for every use
For dental use only!
Caution: U.S. Federal law restricts this device to
sale by or on the order of a licensed dentist
Made in Austria
Ivoclar Vivadent AG, FL-9494 Schaan /
Liechtenstein
Page 2
bluephase®20i
LED for every use
new
Technical data
Wavelength range: 385 – 515 nm
Light intensity: 2,000 – 2,200 mW/cm
Curing modes: Turbo, High Power, Soft Start, Low Power
Exposure time: for composites: 10 sec.
Light probe: 10>8 mm black
Power supply: Lithium polymer battery, approx. 45 min. capacity
Operating voltage: 100-240 VAC / 50-60 Hz
Warranty 3 years (battery 1 year)
Tetric EvoCeram / IPS Empress Direct: 5 sec.
(curing time); approx. 2 h charging time
2
Overview
E Operating Instructions Page 6
D Bedienungsanleitung Seite 20
F Mode d’emploi Page 34
I Istruzioni d’uso Pagina 48
Es Instrucciones de uso Pagina 62
P Instruções Operacionais Página 76
Appendix Page 90
Page 3

English
Deutsch
Francais
Italiano
Español
Português
English
Deutsch
Francais
Italiano
Español
Português
1
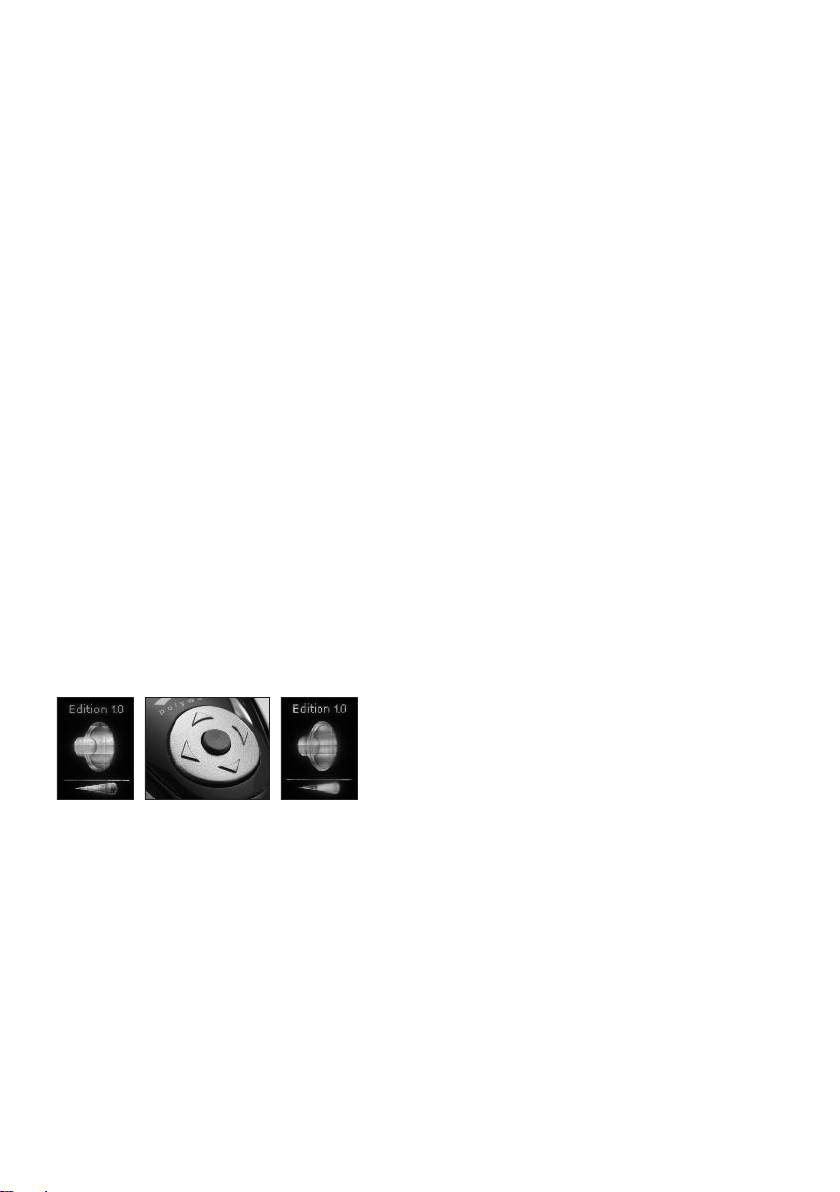
Handpiece
2
S
3
Display
4
Program selection
button
5
Time selection button
6
V
7
Power indicator
8
Charging base
9
Power cord
10
P
11
B
12
Light probe
10>8 mm
13
Anti-glare shield
14
Anti-glare cones
10
List of parts
tart button
olume button
ower pack
attery
Teile-
verzeichnis
Handstück
tarttaster
S
Display
Programmwahltaster
Zeitwahltaster
autstärketaster
L
Power-Anzeige
Ladestation
Netzkabel
etzgerät
N
kku
A
Lichtleiter 10>8 mm
Blendschutzschild
Blendschutzkegel
14
Liste des pièces
détachées
Pièce à main
outon de mise en
B
marche
Affichage
Bouton de sélection des
programmes
Bouton de sélection du
emps
t
outon de réglage du
B
volume
Indicateur de puissance
Base de chargement
Cordon d'alimentation
nité d'alimentation
U
atterie
B
Conducteur de lumière
10>8 mm
Ecran de protection
Embout de protection
occulaire
13
12
Elenco
componenti
Manipolo
asto di accensione
T
Display
Tasto di selezione
programma
Tasto di selezione
empo
t
asto volume
T
Indicatore alimentazione
Base di ricarica
Cavo di alimentazione
limentatore
A
atteria
B
Conduttore ottico
10>8 mm
Schermo antiriflesso
Coni antiriflesso
3
1
Despiece
Pieza de mano
nterruptor de puesta
I
en marcha
Pantalla
Tecla de selección de
programa
Tecla de selección de
iempo
t
ecla de volumen
T
Indicador de potencia
Base de carga
Cable eléctrico
nidad de alimentación
U
atería
B
Conducto de luz
10>8 mm
Placa antideslumbrante
Conos antideslumbrantes
2
Lista de partes
Peça de mão
otão de ligar
B
Display
Tecla de seleção do programa
Tecla de seleção do
empo
t
ecla de volume
T
Indicador de potência
Base de carga
Cabo de força
nidade de alimentação
U
ateria
B
Condutor de luz
10>8 mm
Escudo anti-ofuscante
Cone anti-ofuscante
6
5
4
11
Indicators
on the
charging base
ndicator lights up in
I
blue – the charging
base is connected to the
ower supply
p
Indicators on
the handpiece
Curing program and operating status
Selected indications and
curing time
Charging status of the
battery
Display is in stand-by
mode
Signs and
symbols
Non-permissible use
Double insulation
(Apparatus complies
with safety class II)
Protection against
electrical shock (BF type
apparatus)
7
Observe Operating
Instructions
Anzeigen der
Ladestation
nzeige leuchtet blau –
A
Ladestation ist an die
Stromversorgung ange-
chlossen
s
Anzeigen des
Handstücks
Belichtungsprogramm
bzw. Betriebszustand
Angewählte Indikation
bzw. Belichtungsdauer
Ladezustand Akku
Display ist im Stand-by
Modus
Zeichen-
erklärung
Nicht zulässige
Anwendung
Doppelt isoliert
(Gerät der Schutzklasse II)
Schutz gegen
elektrischen Schlag
(Gerätetyp BF)
Bedienungsanleitung
beachten
Indicateurs
sur la base de
chargement
es voyants s'allument
L
en bleu – la base de
chargement est reliée au
ourant électrique
c
Indicateurs
sur la pièce
à main
Programme de polymérisation, temps de poly-
érisation, état de
m
marche
Indications spécifiques
du programme de polymérisation sélectionné
Témoin de charge de la
batterie
L'écran est en mode
stand-by
Signes et
symboles
Ne pas utiliser
Double protection
(l'appareil répond aux
normes de sécurité de
classe II)
Protection contre les
décharges électriques
(type d'appareil BF)
Respecter le mode
d'emploi
Indicatori
sulla base di
ricarica
ndicatore blu illuminato
I
– la base di ricarica è
collegata alla rete
lettrica
e
Indicatori sul
manipolo
Programma di
polimerizzazione e stato
perativo
o
Indicazione selezionata
e tempo di polimerizzazione
Stato di carica della
batteria
Display in modalità
Stand-by
Segni e
simboli
Uso non previsto
Doppio isolamento (apparecchio conforme alla
Classe di sicurezza II)
Protezione da scossa
elettrica (apparecchio di
tipo BF)
Attenersi alle istruzioni
d’uso
Indicadores
en la base de
carga
ndicador se ilumina en
I
azul – la base de carga
está conectada a la red
Indicadores
en la pieza
de mano
Programa de
polimerización y estado
e funcionamiento
d
Indicaciones
seleccionadas y tiempo
de polimerización
Estado de carga de la
batería
Display en modo
stand-by
Señales y
símbolos
Uso no permitido
Doble aislamiento
(El dispositivo cumple
con la Clase de Seguridad II)
Protección frente al choque eléctrico
(aparato tipo BF)
Observar las instrucciones de uso
Indicações da
base de carga
ndicador mostra uma luz
I
azul –A base de carga
está ligada com a rede
létrica
e
Indicações da
peça de mão
Programa de cura e estado de operação
Indicação selecionada e
tempo de cura
Status de carga da bateria
Display está no modo
"stand-by"
Sinais e
símbolos
Uso não autorizado
Isolamento duplo
(o aparelho cumpre a
norma de segurança da
classe II)
Protecção contra choque
eléctrico
(aparelho tipo BF)
Observar as Instruções
de Uso
8
The apparatus must not
be disposed of in the
normal domestic waste
9
3
Das Gerät darf nicht
über den normalen
Hausmüll entsorgt
werden
Ne pas jeter l'appareil
avec les ordures
ménagères
L'apparecchio non può
essere smaltito come
normale rifiuto urbano
El aparato no se puede
eliminar con la basura
doméstica normal
O aparelho não pode ser
descartado junto com o
lixo doméstico normal
4
Page 4
Light intensity
bluephase®20i
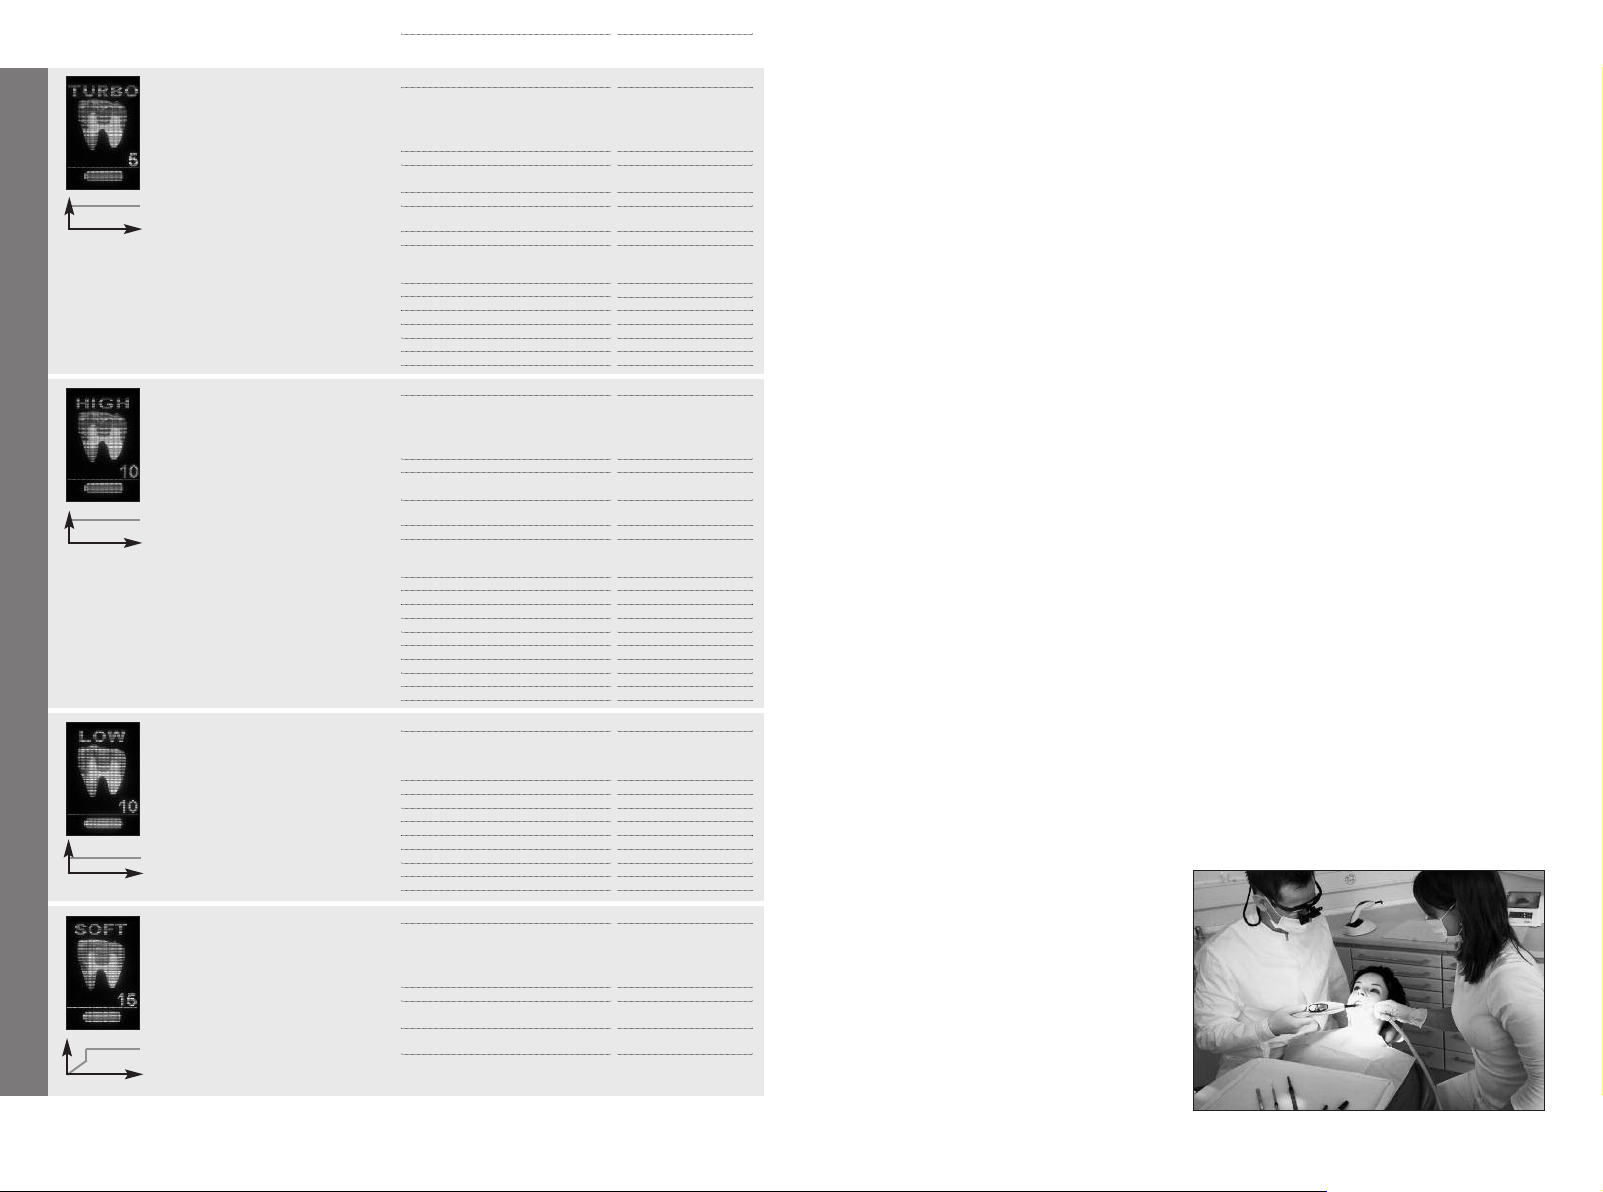
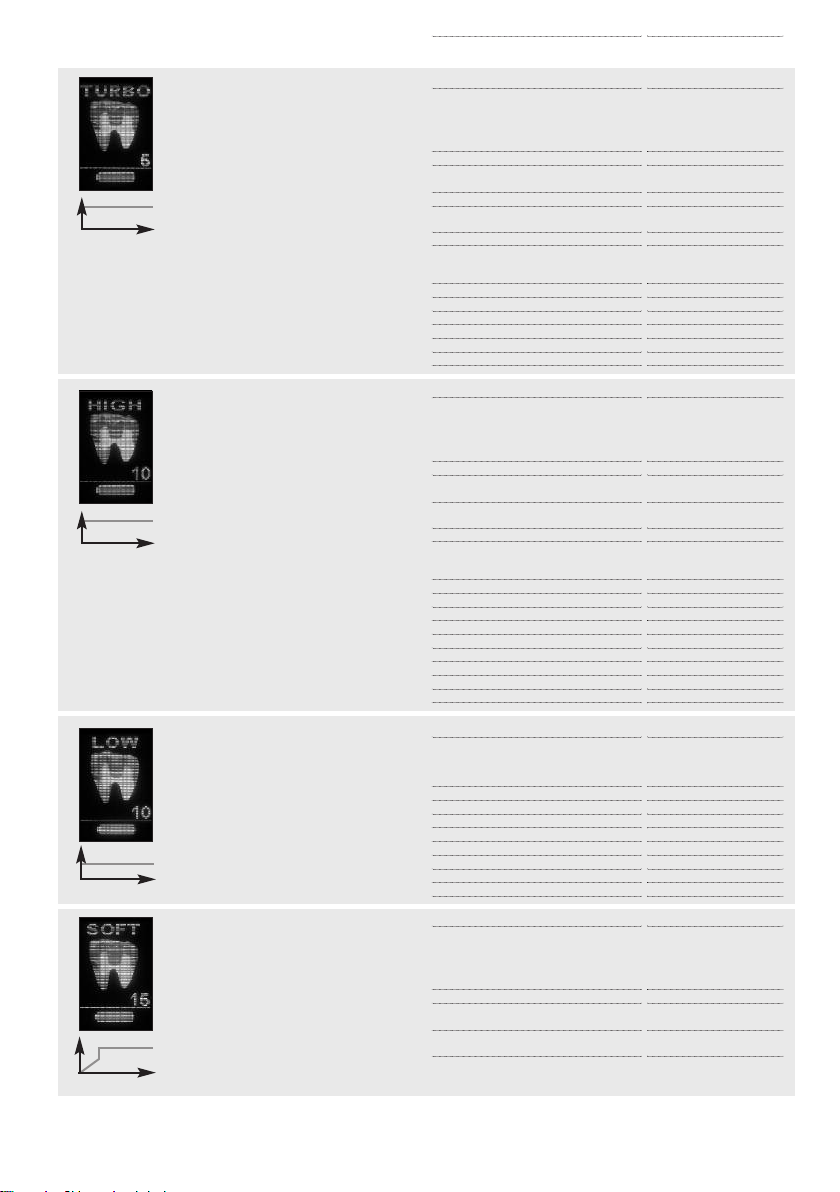
TURBO Program
Consistently high light intensity for
the polymerization of restorative and
cementation materials for direct and
indirect restorations.
2
.000 mW/cm
2
0
t [s]
HIGH POWER Program
Consistently high light intensity for
the polymerization of restorative and
cementation materials for direct and
indirect restorations.
2
1.200 mW/cm
0
t [s]
LOW POWER Program
Curing program
650 mW/cm
0
1.200 mW/cm
650 mW/cm
05
1) Applies to a maximum layer thickness of 2 mm and provided that the Instructions for Use of the respective material do not state any other recommendation (might be the case, e.g. with dentin shades)
2) Applies to a maximum layer thickness of 4 mm and provided that the Instructions for Use of the respective material do not state any other recommendation (might be the case, e.g. with dentin shades)
3) Applies to a maximum layer thickness of 3 mm 4) Applies to light-curing (use of the base past only) 5) Applies to dual-curing
Reduced light intensity with reduced
heat development for the polymerization of adhesives, liners, and restorative materials in areas near the pulp
when restoring Class V cavities.
2
t [s]
SOFT START Program
Step-by-step increase of the light
intensity with reduced shrinkage
stress and reduced heat development
for the polymerization of restorative
materials.
2
2
t [s]
Exposure time for composites
Exposure time for Tetric EvoCeram / IPS Empress Direct
Filling materials
Composite
)
1
2 mm
•
IPS Empress Direct / IPS Empress Direct Flow /
Tetric EvoCeram / Tetric EvoFlow / Tetric /
etric Basic White / Tetric N-Ceram / Tetric N-Flow
T
Heliomolar / Heliomolar HB / Heliomolar Flow / Others
2)
• 4 mm
Tetric EvoCeram Bulk Fill
etric Basic White
T
3)
Compomer
Compoglass F / Compoglass Flow
Indirect restorations / Luting materials
Variolink II Base
Variolink N Clear Veneer / Variolink Ultra 5)/
Dual Cement 5)/ Variolink II
Miscellaneous
H
Telio Add-On Flow
Telio Stains
IPS Empress Direct Color
IPS Empress Direct Opaque
Filling materials
C
• 2 mm
IPS Empress Direct / IPS Empress Direct Flow /
T
Tetric Basic White / Tetric N-Ceram / Tetric N-Flow
Heliomolar / Heliomolar HB / Heliomolar Flow / Others
•
Tetric EvoCeram Bulk Fill / Tetric Basic White
Compomer
Compoglass F / Compoglass Flow
I
Variolink II Base
Variolink N Clear Veneer / Variolink Ultra 5)/
Dual Cement 5)/ Variolink II
Miscellaneous
Helioseal / Helioseal F / Helioseal Clear
Monopaque
MultiCore Flow / Multicore HB
Heliosit Orthodontic
Telio Add-On Flow
Telio Stains
IPS Empress Direct Color
IPS Empress Direct Opaque
Adhesive
AdheSE / AdheSE One F
ExciTE / ExciTE DSC
Tetric N-Bond / Tetric N-Bond Self-Etch
Heliobond (Syntac)
Temporary materials
Telio CS Inlay/Onlay
Systemp.inlay/onlay
Fermit / Fermit N
Telio CS Link / Systemp.link
Miscellaneous
Heliosit Orthodontic
Vivaglass Liner
Filling materials
Composite
• 2 mm
IPS Empress Direct / IPS Empress Direct Flow /
Tetric EvoCeram / Tetric EvoFlow / Tetric /
Tetric Basic White / Tetric N-Ceram / Tetric N-Flow
Heliomolar / Heliomolar HB / Heliomolar Flow / Others
• 4 mm
Tetric EvoCeram Bulk Fill / Tetric Basic White
Compomer
Compoglass F / Compoglass Flow
4)
/ Variolink Veneer / Variolink N Base 4)/
5)
eliosit Orthodontic
omposite
1)
etric EvoCeram / Tetric EvoFlow / Tetric /
)
2
4 mm
3)
ndirect restorations / Luting materials
4)
/ Variolink Veneer / Variolink N Base 4)/
5)
1)
2)
3)
2,000 – 2,200 mW/cm
10 s
5 s
Curing time
5 s
2x 5 s
5 s
x 5 s
2
2x 5 s
per mm ceramic:
1x 5 s per segment
x 5 s
2
2x 5 s
5 s
5 s
2x 5 s
Curing time
0 s
1
15 s
10 s
20 s
per mm ceramic:
10 s per segment
10 s
20 s
20 s
10 s
15 s
10 s
10 s
20 s
Curing time
10 s
10 s
10 s
10 s
20 s per segment
20 s
20 s
Curing time
15 s
20 s
15 s
20 s
2
Dear Customer
Optimum polymerization is an important
requirement for all light cured materials in
order to consistently produce high quality
restorations. The polymerization light
selected also plays a decisive role in this
respect. Therefore, we would like to thank
you for having purchased bluephase
bluephase 20i is a high-quality medical device
which has been designed according to the
latest standard of science and technology in
compliance with the relevant industry standards.
These Operating Instructions will help you to
safely start up the device, make full use of its
capabilities and ensure a long service life.
Should you have any further questions,
please do not hesitate to contact us
(see addresses on the back cover).
Your
Ivoclar Vivadent Team
6
®
20i.
Page 5

Table of Contents
Safety
Intended use 8
Indications 8
Safety notes 8
Start-up
Charging base 10
Handpiece 11
Battery 11
Click & Cure corded operation 12
Operation
Selecting the curing program and the curing time 13
Cure Memory function 16
Start
Acoustic signals 16
Light intensity 16
Measuring the light intensity 16
Maintenance and cleaning
Housing 17
Light probes 17
Battery contacts 17
Disposal 17
What if … 18
Warranty /
Procedure in case of repair 19
Product specifications
Delivery form 19
Accessories 19
Technical data 19
Operating conditions 19
Transportation and storage conditions 19
English
7
Page 6

Safety
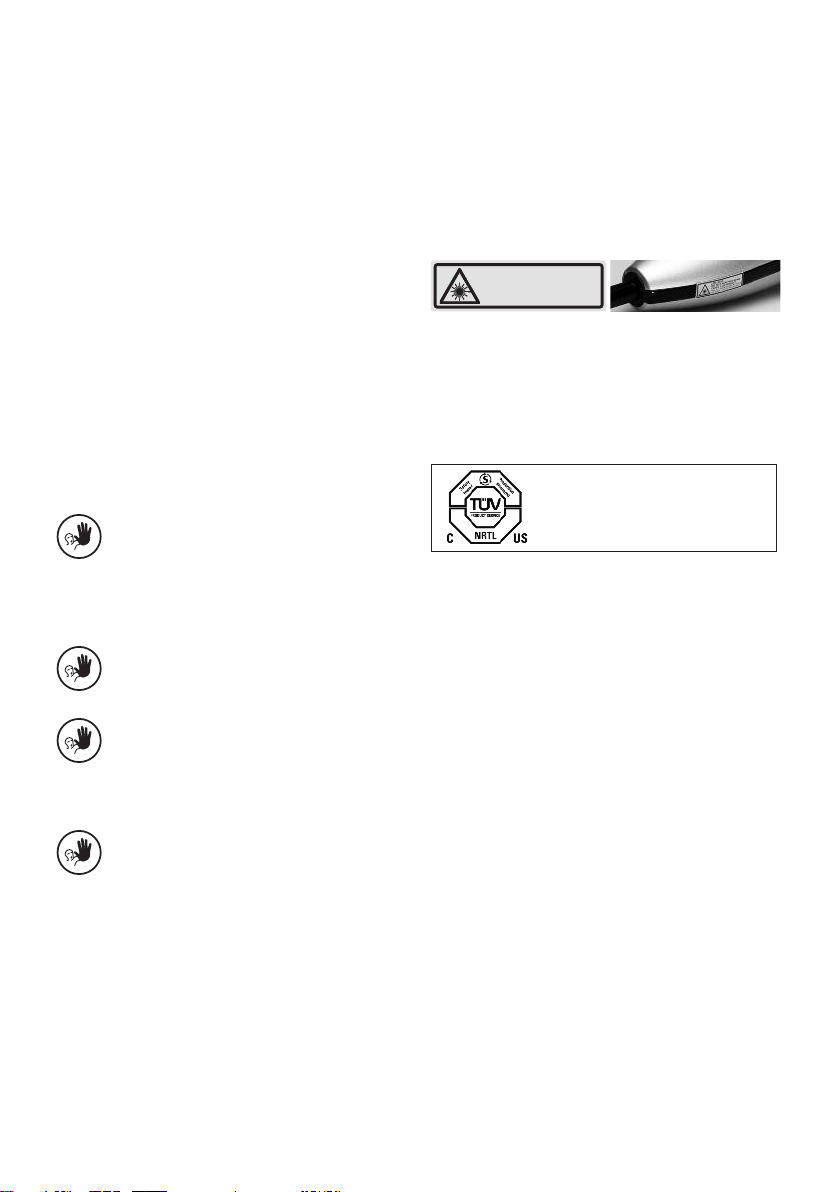
LED LIGHT
DO N OT STAR E INTO BEAM
CLAS S 2 L ED PRO DUCT
Max. 5,11 mW / Wavelength 385 - 515 nm
IEC 60 825-1:19 93+A1:19 97+A2 :2001
Intended use
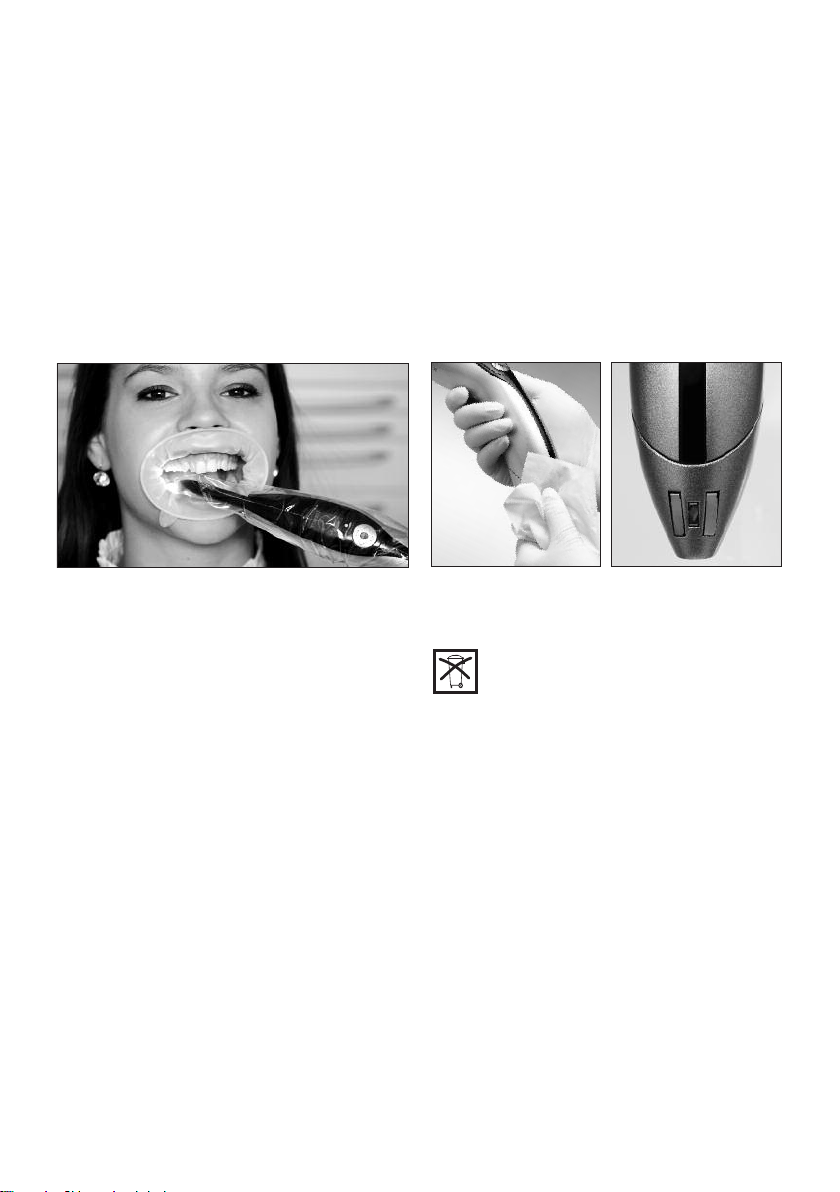
bluephase 20i is an LED polymerization light that produces
energy-rich blue light. It is used for the polymerization of
light-curing dental materials immediately at the dental unit.
The intended use also includes the observation of the notes
and regulations in these Operating Instructions.
Indication
With its “polywave” broadband spectrum, bluephase is
suitable for the polymerization of all light-curing dental
materials curing in the wavelength range of 385–515 nm.
These materials include restoratives, bonding agents/
adhe-sives, bases, liners, fissure sealants, temporary
materials as well as luting materials for brackets and
dental-lab materials such as those used in the fabrication of
ceramic inlays.
Contraindications
Materials, the polymerization of which is activated
outside the wavelength range of 385–515 nm
(no materials known to date). If you are not
sure about certain products, please ask the
manufacturer of the corresponding material.
Do not charge or use the appliance near
flammable or combustible substances.
Portable and mobile high-frequency communication devices may interfere with medical equipment. The use of mobile phones during
operation is not allowed.
Caution – The use of controls or adjustment
devices or the performance of procedures other
than those specified herein may result in hazardous radiation exposure.
Safety notes
The bluephase 20i is a medical electronic device which is
subject to IEC 601-1 (EN 60601-1) and EMC regulations. It
complies with the relevant EU regulations and is classified
as LED Class 2.
The apparatus has been shipped from the manufacturer in a
safe and technically sound condition. In order to maintain
this condition and to ensure risk-free operation, the notes
and regulations in these Operating Instructions have to be
observed. To prevent damage to equipment and risks for
patients, users and third parties, the following safety
instructions have to be observed.
NRTL (Nationally Recognized
Testing Laboratory)
Usage and liability
• bluephase 20i must only be employed for the intended
use. Any other uses are contraindicated. Liability cannot
be accepted for damage resulting from misuse or failure
to observe the Operating Instructions.
• The user is responsible for testing bluephase 20i for its
use and suitability for the intended purposes. This is particularly important if other equipment is used in the
immediate vicinity of bluephase at the same time.
• Only original spare parts and accessories from Ivoclar
Vivadent (see Accessories) should be used. The manufacturer does not accept any liability for damage resulting
from the use of other spare parts or accessories.
8
Operating voltage
Before switching on, make sure that
a) the voltage indicated on the rating plate complies with
the local power supply and
b) the unit has acquired the ambient temperature.
If the battery or power pack are used separately, e.g. during
start-up or Click & Cure corded operation, contact with
patients or third parties must be prevented. Do not touch
the exposed contacts of the battery or connection plug
(power pack).
Page 7
Assumption of impaired safety
If it is assumed that safe operation is no longer possible,
the power must be disconnected and the battery removed
to avoid accidental operation. This may be the case, for
example, if the apparatus is visibly damaged or no longer
works correctly. Complete disconnection from the power
supply is only ensured when the power cord is disconnected
from the power source.
Heat development (burn hazard)
As it is the case with all high-performance lights, the high
light intensity results in a certain heat development. Prolonged exposure of areas near the pulp and soft tissues
may result in irreversible or reversible damage. Therefore,
this high-performance curing light must only be operated by
trained professionals.
Eye protection
Direct or indirect exposure of the eyes must be prevented.
Prolonged exposure to the light is unpleasant to the eyes
and may result in injury. Therefore, using the supplied antiglare cones is recommended. Individuals who are generally
sensitive to light, who take photosensitizing drugs, have
undergone eye surgery, or people who work with the apparatus or in its vicinity for long periods of time should not be
exposed to the light of this device. Therefore, they should
wear protective goggles (orange) that absorb light below
515 nm.
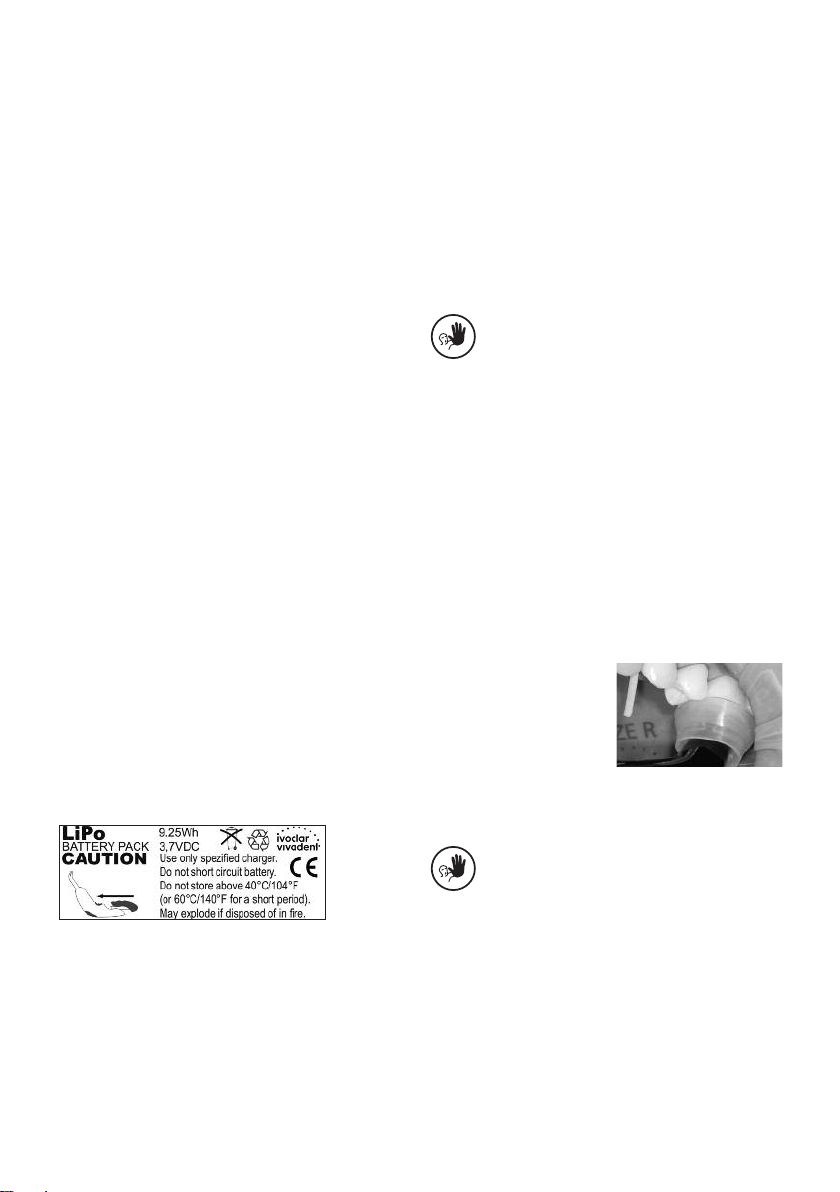
Battery
Caution: Use only original spare parts, particularly Ivoclar
Vivadent batteries and charging bases. Do not short circuit
battery. Do not store at temperatures above 40 °C / 104 °F
(or 60 °C / 140 °F for a short period). Always store batteries charged. The storage period must not exceed 6 months.
May explode if disposed of in fire.
Please note that the lithium polymer battery may react with
explosion, fire, and smoke development in case of inappropriate handling and mechanical damage. Damaged lithium
polymer batteries must no longer be used.
The recommended curing times have to be observed.
Uninterrupted curing times of more than 5 seconds in the
Turbo-Program on the same tooth surface, as well as direct
contact with the gingiva, oral mucous membrane or skin
have to be prevented. If required, polymerize in intermittent
intervals of at most 5 seconds each. Prevent heat accumulation when polymerizing with a rubber dam in place. If irradiation of soft tissue cannot be avoided, operate with
reduced light intensity (use Low Power program). Polymerize indirect restorations at intermittent intervals of 10 seconds in the High-Power program and 1x 5 seconds each in
the Turbo program or use external cooling with an air
stream.
The instructions regarding
curing programs and curing
times must be observed (see
Selecting the curing program
and the curing time). In
addition, the light emission
window must be placed
directly over the material to be cured at all times (e.g. by
holding it in place using a finger).
It is not recommended to use the High Power/Turbo
program for sensitive patients. In this case, operate with
reduced light intensity (use Low Power program).
The electrolytes and electrolyte fumes released during exlosion, fire, and smoke development are toxic and corrosive.
In case of contact with the eyes and skin, immediately rinse
with copious amounts of water. Avoid the inhalation of the
fumes. See a physician immediately in case of indisposition.
9
Page 8
Start-up
Delivery form
Check the delivery for completeness and any possible transportation damage (see Delivery form). If components are
missing or damaged, immediately contact your dealer or
your Service Center.
Charging base
Before you switch on the device, make sure that the voltage
mentioned on the rating plate complies with your local
power supply. The rating plate is attached to the underside
of the charging station.
Place the charging base on a suitable, flat table top.
Remove the protective foil from the connection plug of the
power pack. Slide the connection plug of the power pack
into the socket on the underside of the charging base. Tilt it
slightly and apply light pressure until you hear and feel it
snap into place.
Connect the power cord with the power supply and the
power pack.
The Power ON indicator on the left side of the housing
lights up in blue (see Indicators on the charging base).
10
Page 9

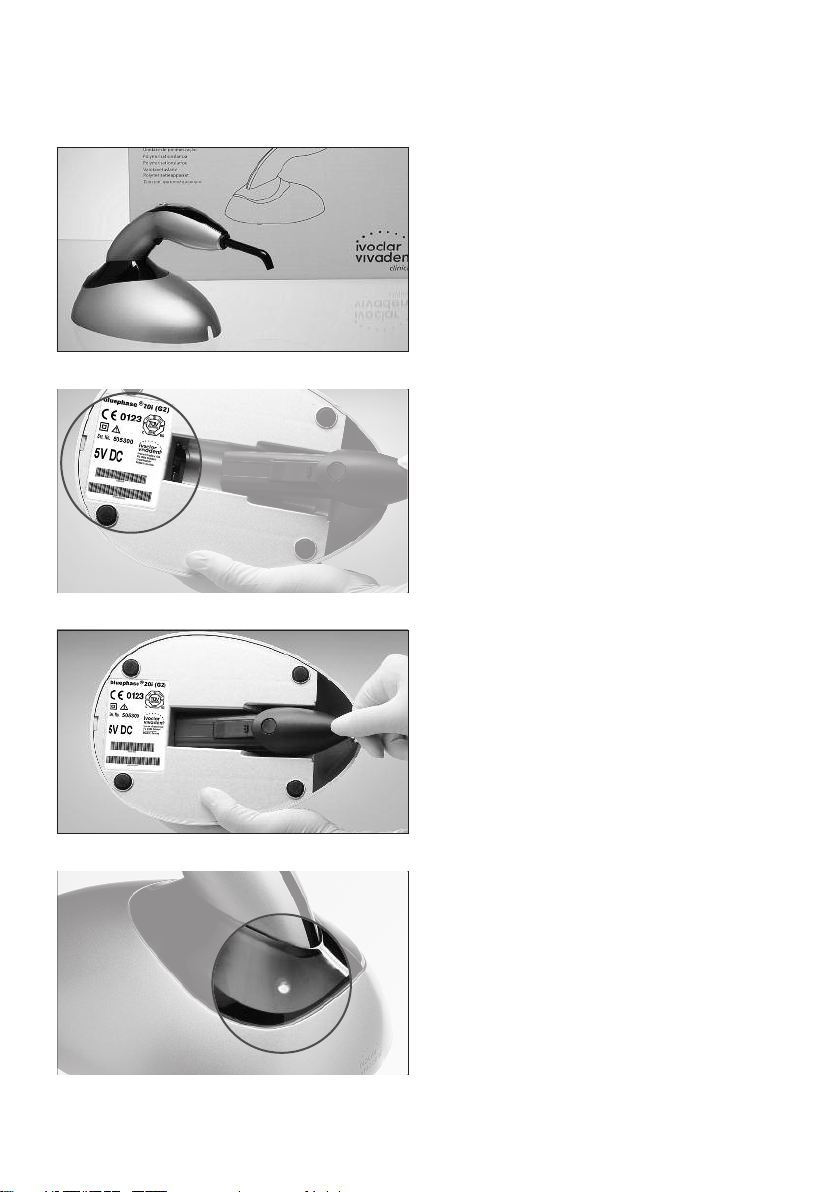
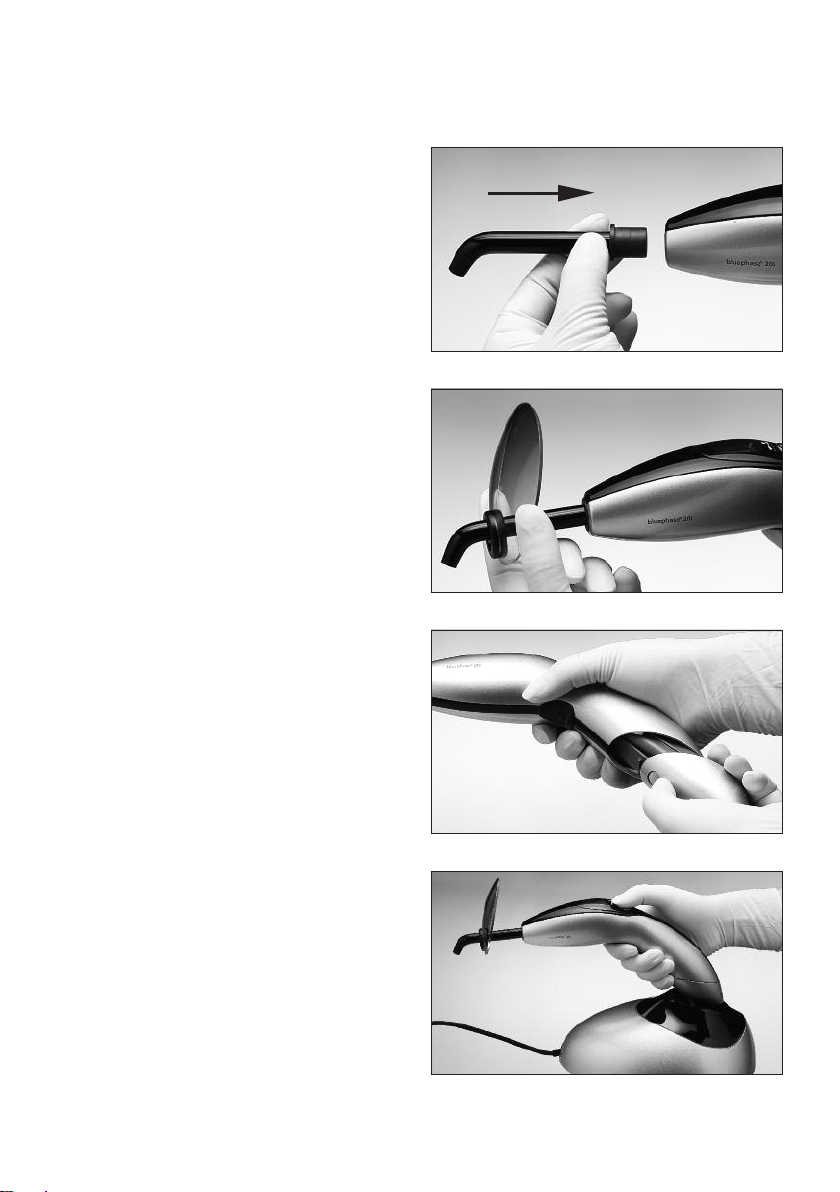
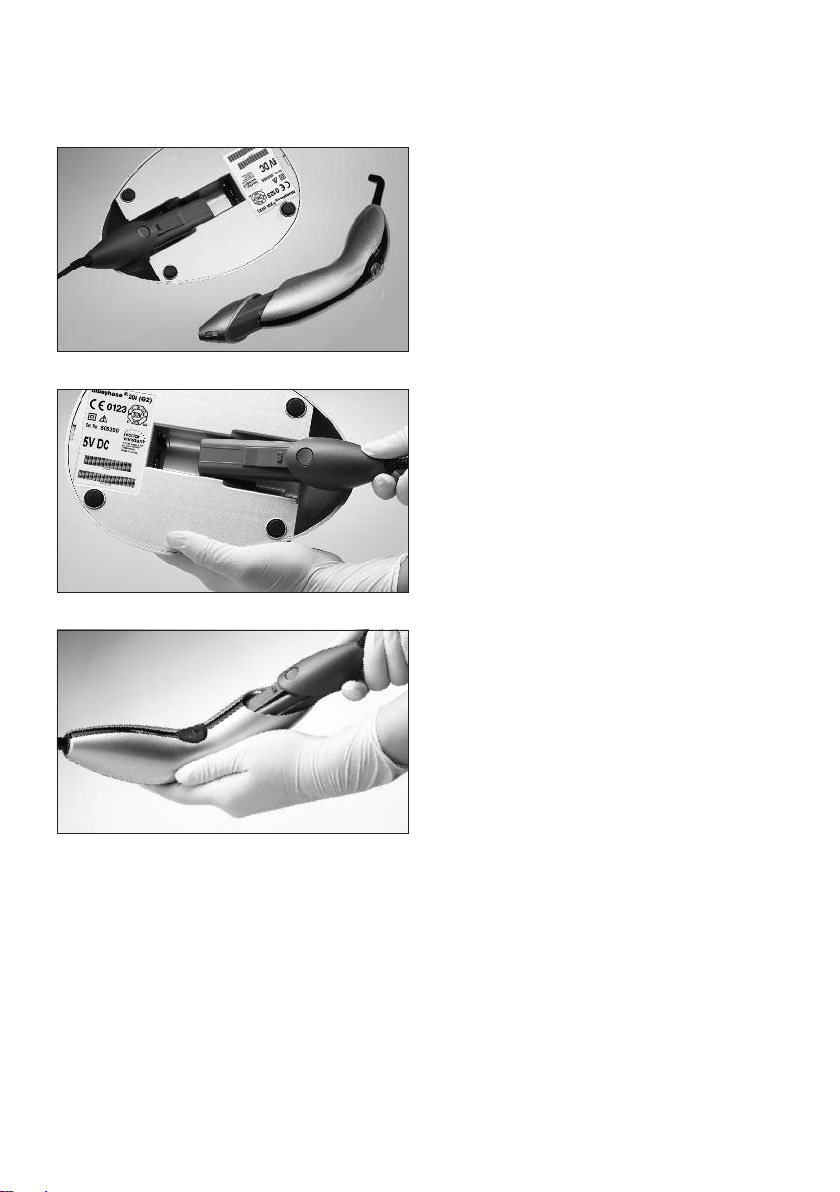
Handpiece
Before you insert the light probe, remove the protective foil
on the corresponding opening of the handpiece.
Slightly turn the light probe while attaching it to the handpiece.
After that, mount the anti-glare shield on the light probe.
Battery
We recommend fully charging the battery before the first
use.
Slide the battery straight into the handpiece until you hear
and feel it click into place.
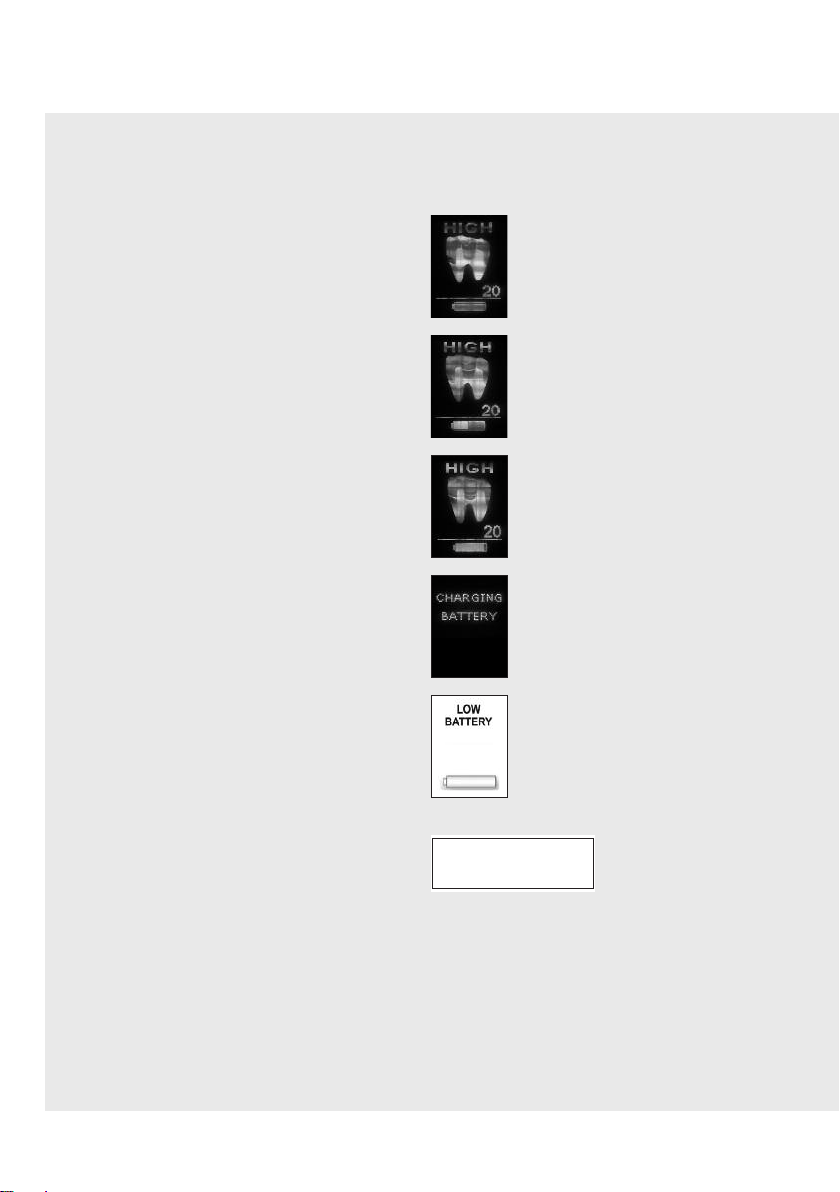
Gently place the handpiece in the corresponding cradle in
the charging base. If a sleeve is used, please remove it
before you charge the battery. If the battery is fully charged,
it features a curing capacity of approximately 45 minutes.
Tip
If possible, use the light always with a fully charged battery.
This will prolong its service life. It is therefore recommended
to place the handpiece into the charging base after each
appointment. The charging time for empty batteries is 2 hours.
11
Page 10

Start-up
Click & Cure corded operation
bluephase 20i can be used in corded operation at any time,
but particularly when the battery is completely empty.
For this purpose, remove the battery from the handpiece.
Then remove the power pack from the underside of the
charging base. Do not pull on the power cord.
Insert the connection plug straight into the handpiece until
you hear and feel it click into place.
During corded operation, the charging base cannot charge
the battery, since it is not connected to a power source.
The apparatus is only completely disconnected from the
power supply if the power cord has been pulled out of the
plug-in socket.
12
Page 11

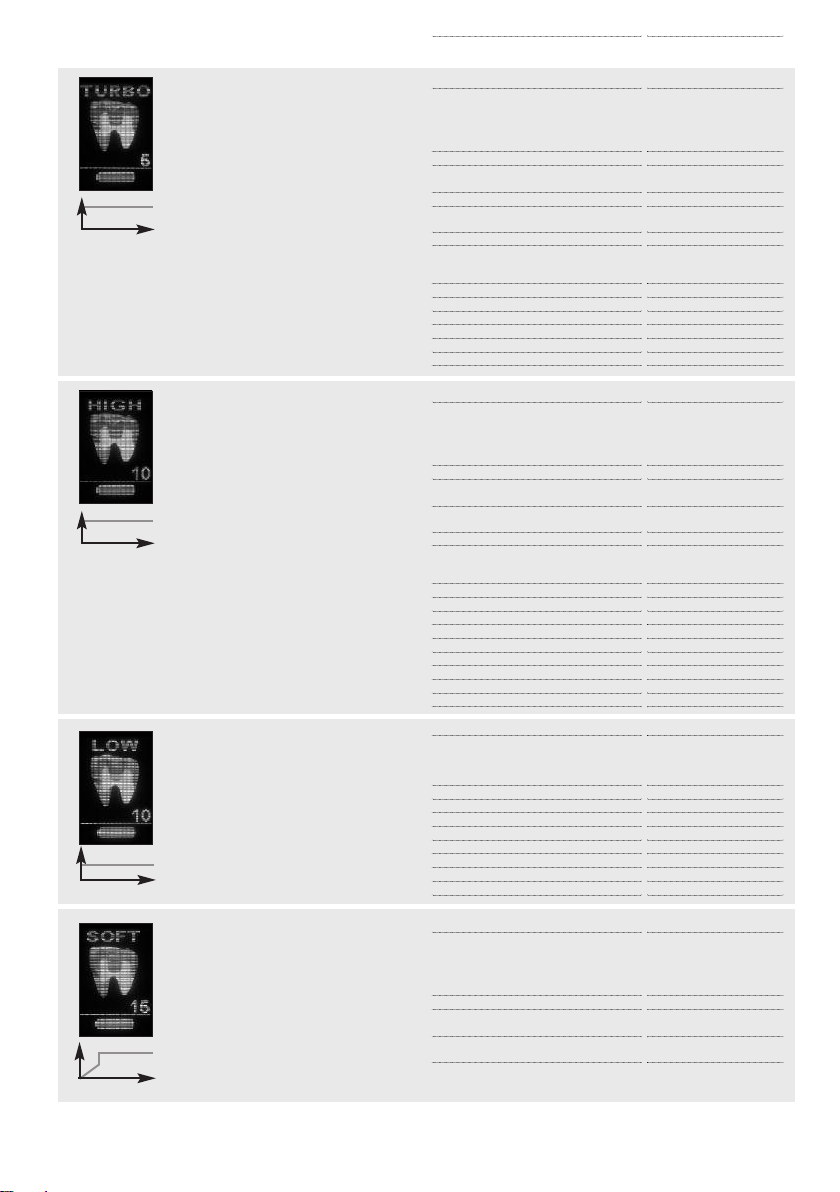
Signs and symbols
Charging status of the battery
With the handpiece switched on, the current charging status is shown on the display as follows:
Battery fully charged
(curing capacity of approximately 45 minutes).
Battery half full
Reserve (The last bar in the battery indicator is red in the
reserve mode. The battery has to be charged as soon as
possible.)
When the battery is being charged, "Charging Battery"
briefly appears in the display before the display returns to
the stand-by mode.
If the battery is completely empty, the handpiece automatically
switches to the stand-by mode. The light can no longer be
called up and the curing program and curing time can no
onger be set. However, the handpiece can be used in the
Click & Cure corded operation.
Since the battery is a consumable, it has to be replaced after its
typical life cycle has expired after 2½ years. See battery label
for the age of the battery.
S000001
04/04/09
dd/mm/yy
13
Page 12
Operation
Disinfect or autoclave contaminated surfaces of the curing
light as well as light probes and anti-glare cones before
each use.
Furthermore, make sure that the stipulated light intensity
permits adequate polymerization. For this purpose, check
the light probe for contamination and damage as well as
the light intensity at regular intervals (e.g. with the Ivoclar
Vivadent radiometer “bluephase meter”).
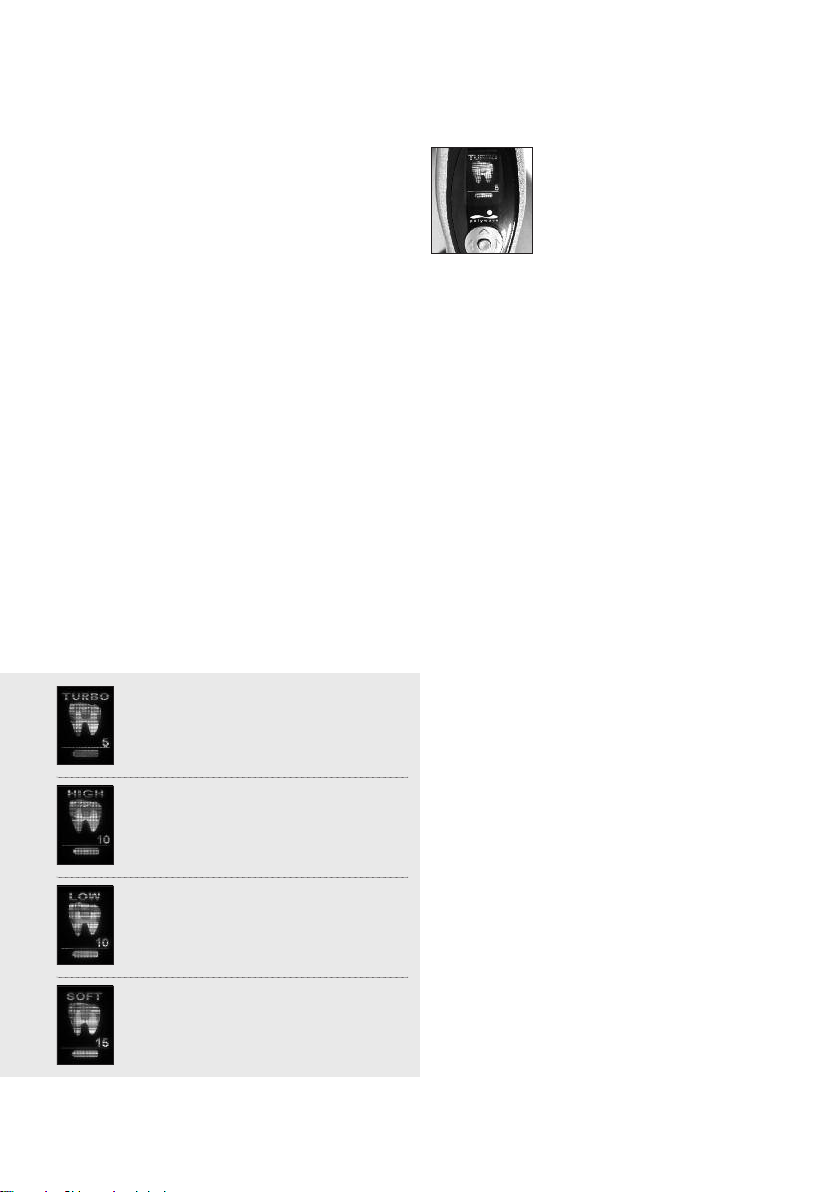
Selecting the curing program and the
curing time
The curing program and the curing time can be individually
set. bluephase 20i is equipped with the following 4 curing
programs for the different indications. The desired curing
program is selected with the program selection buttons. The
display changes accordingly (see Indicators on the handpiece). The device comes equipped with the following preset programs:
Factory settings
TURBO 5 seconds
The intended curing time is selected
using the time selection buttons. Users
may choose between 5, 10, 15, 20
and 30 seconds.
Observe the Instructions for Use of the material applied
when selecting the curing time.
The curing recommendations for composite materials apply
to all shades and, if not mentioned otherwise in the Instructions for Use, to a maximum layer thickness of 2 mm. Generally, these recommendations apply to situations where the
emission window of the light probe is placed directly over
the material to be polymerized. Increasing the distance
between the light source and the material will require the
curing time to be extended accordingly. For instance, if the
distance to the material is 8 mm, the effective light output
is reduced by approx. 50%. In this case, the recommended
curing time has to be doubled.
1) The information provided herein applies to the light
probe 10>8 mm supplied in the delivery form.
2) The information regarding heat development and burn
hazard must be taken into consideration (see Safety
notes).
HIGH 10 seconds
(High Power)
LOW 10 seconds
(Low Power)
SOFT 15 seconds
(Soft start)
14
Page 13
Curing program
2
.000 mW/cm
2
0
t [s]
2
1.200 mW/cm
0
t [s]
TURBO Program
Consistently high light intensity for
the polymerization of restorative and
cementation materials for direct and
indirect restorations.
HIGH POWER Program
Consistently high light intensity for
the polymerization of restorative and
cementation materials for direct and
indirect restorations.
Light intensity
xposure time for composites
E
Exposure time for Tetric EvoCeram / IPS Empress Direct
Filling materials
omposite
C
)
1
• 2 mm
IPS Empress Direct / IPS Empress Direct Flow /
Tetric EvoCeram / Tetric EvoFlow / Tetric /
etric Basic White / Tetric N-Ceram / Tetric N-Flow
T
Heliomolar / Heliomolar HB / Heliomolar Flow / Others
2)
• 4 mm
Tetric EvoCeram Bulk Fill
Tetric Basic White
3)
ompomer
C
Compoglass F / Compoglass Flow
Indirect restorations / Luting materials
Variolink II Base 4)/ Variolink Veneer / Variolink N Base 4)/
Variolink N Clear Veneer / Variolink Ultra
Dual Cement 5)/ Variolink II
Miscellaneous
eliosit Orthodontic
H
Telio Add-On Flow
elio Stains
T
IPS Empress Direct Color
IPS Empress Direct Opaque
Filling materials
Composite
1)
2 mm
•
IPS Empress Direct / IPS Empress Direct Flow /
Tetric EvoCeram / Tetric EvoFlow / Tetric /
Tetric Basic White / Tetric N-Ceram / Tetric N-Flow
Heliomolar / Heliomolar HB / Heliomolar Flow / Others
2)
• 4 mm
Tetric EvoCeram Bulk Fill / Tetric Basic White
3)
Compomer
Compoglass F / Compoglass Flow
ndirect restorations / Luting materials
I
Variolink II Base
Variolink N Clear Veneer / Variolink Ultra 5)/
Dual Cement 5)/ Variolink II
Miscellaneous
Helioseal / Helioseal F / Helioseal Clear
Monopaque
MultiCore Flow / Multicore HB
Heliosit Orthodontic
Telio Add-On Flow
Telio Stains
IPS Empress Direct Color
IPS Empress Direct Opaque
)
4
/ Variolink Veneer / Variolink N Base
)
5
/
5)
5)
2,000 – 2,200 mW/cm
0 s
1
5 s
Curing time
5 s
2x 5 s
5 s
2x 5 s
2x 5 s
per mm ceramic:
1x 5 s per segment
x 5 s
2
2x 5 s
s
5
5 s
2x 5 s
Curing time
10 s
15 s
10 s
20 s
)
4
/
per mm ceramic:
10 s per segment
10 s
20 s
20 s
10 s
15 s
10 s
10 s
20 s
2
LOW POWER Program
Reduced light intensity with reduced
heat development for the polymerization of adhesives, liners, and restorative materials in areas near the pulp
when restoring Class V cavities.
2
650 mW/cm
0
t [s]
SOFT START Program
Step-by-step increase of the light
intensity with reduced shrinkage
stress and reduced heat development
for the polymerization of restorative
materials.
2
1.200 mW/cm
2
650 mW/cm
05
t [s]
1) Applies to a maximum layer thickness of 2 mm and provided that the Instructions for Use of the respective material do not state any other recommendation (might be the case, e.g. with dentin shades)
2) Applies to a maximum layer thickness of 4 mm and provided that the Instructions for Use of the respective material do not state any other recommendation (might be the case, e.g. with dentin shades)
3) Applies to a maximum layer thickness of 3 mm 4) Applies to light-curing (use of the base past only) 5) Applies to dual-curing
Adhesive
AdheSE / AdheSE One F
ExciTE / ExciTE DSC
Tetric N-Bond / Tetric N-Bond Self-Etch
Heliobond (Syntac)
Temporary materials
Telio CS Inlay/Onlay
Systemp.inlay/onlay
Fermit / Fermit N
Telio CS Link / Systemp.link
Miscellaneous
Heliosit Orthodontic
Vivaglass Liner
Filling materials
Composite
1)
• 2 mm
IPS Empress Direct / IPS Empress Direct Flow /
Tetric EvoCeram / Tetric EvoFlow / Tetric /
Tetric Basic White / Tetric N-Ceram / Tetric N-Flow
Heliomolar / Heliomolar HB / Heliomolar Flow / Others
2)
• 4 mm
Tetric EvoCeram Bulk Fill / Tetric Basic White
3)
Compomer
Compoglass F / Compoglass Flow
Curing time
10 s
10 s
10 s
10 s
20 s per segment
20 s
20 s
Curing time
15 s
20 s
15 s
20 s
15
Page 14
Operation
Cure Memory function
The last settings used, together with the combination of
curing program and curing time, are automatically saved.
Start
The light is switched on by means of the start button. Once
the selected curing time has elapsed, the curing program is
automatically terminated. If desired, the light can be
switched off before the set curing time has elapsed by
pressing the start button again. The fan is activated simultaneously to the light. Once the curing time has elapsed, the
fan continues to run for a certain time to cool the apparatus. The battery must not be removed as long as the fan is
still running.
Acoustic signals
Acoustic signals can be heard for the following functions:
• Start (Stop)
• Every 10 seconds
• Program change
• Curing time change
• Connecting the battery to the charging base
• Inserting battery
• Error message
If desired, the volume of the acoustic signals can be
adjusted.
Light intensity
The light intensity is maintained at a consistent level during
operation. If the supplied 10>8 mm light probe is used, the
light intensity has been calibrated to 2,000 – 2,200 mW/cm2.
The use of a light probe other than the one provided has a
direct influence on the light intensity emitted.
In parallel-walled light probes (10 mm), the diameter is
equal at both ends. In focussing light probes (10>8 mm
light probe, Pin-Point light probe 6>2 mm), the diameter of
the rear end is larger than that of the light emission window. The incident blue light is thus bundled to a smaller
surface, which increases the light intensity emitted.
Pin-Point light probes are suitable for the polymerization of
confined areas, such as the attachment of veneers prior to
excess removal. For thorough curing, it is necessary to
change the light probe.
Measuring the light intensity
The light intensity of the bluephase 20i and the supplied
10>8 mm light probe can be checked, for instance, by
means of the bluephase meter.
If the measured value does not correspond with the expected light intensity, proceed as follows:
• Check the selected curing program
• Clean light sensor if it is contaminated
• Remove the light probe and clean the light emission
window of the handpiece with a cotton swab dipped in
alcohol
• Clean light probe if it is contaminated
(see Maintenance and cleaning)
• Replace a damaged light probe with a new one
For this purpose, press the blue volume button (see Product
overview) while the light is off and reduce the volume or
turn the acoustic signals off with the left time selection button. If you want to turn the acoustic signals back on or
increase the volume, press the blue volume button and then
the right time selection button.
16
If these measures do not improve the results, please contact
your dealer or your local Service Center.
Page 15
Maintenance and cleaning
For reasons of hygiene, it is recommended to use a
disposable protective sleeve for each patient. Contaminated
surfaces of the device and anti-glare cones must be disinfected (e.g. FD333, FD366/Dürr Dental, Incidin Liquid/Ecolab) and the light probe must be sterilized before each use,
unless disposable protective sleeves are used. Make sure
that no liquids or other foreign substances enter the handpiece, charging base and particularly the power pack during
cleaning (risk of electrical shock). Disconnect the charging
base from the power source when cleaning it.
Housing
Wipe the handpiece and handpiece holder with a customary aldehyde-free disinfecting solution. Do not clean with
highly aggressive disinfecting solutions (e.g. solutions based
on orange oil or with an ethanol content of more than 40%),
solvents (e.g. acetone), or pointed instruments, which may
damage or scratch the plastic. Clean dirty plastic parts with
a soap solution.
Light probes
Clean the light probe with a disinfectant and a soft cloth.
Carefully remove any possible material residue, such as
composite material, from the light probe with a fingernail
or a plastic spatula, for instance. Do not use sharp or pointed
instruments, since they may scratch the surface of the light
probe and thus reduce light transmission. Light probes and
anti-glare cones may be autoclaved (e.g. 121 °C, 2 bar,
15 minutes). Check light probes for damage. If a light probe
is held against a light source and certain segments appear
black, then the glass fibres are broken. In this case, the light
probe has to be replaced with a new one.
Battery contacts
For good conductivity at all times, keep the battery contacts
free from possible contamination (e.g. composite residue).
For this purpose, clean the affected contacts regularly with
disinfectant wipes (after each patient).
Disposal
The apparatus must not be disposed of in normal domestic
waste. Please visit your local Ivoclar Vivadent website for
detailed information about the disposal of the unit. Dispose
of unserviceable batteries and polymerization lights according to the corresponding legal requirements in your country.
Batteries must not be incinerated.
17
Page 16

What if …
Symbol
Causes
Electronic defect in the handpiece
or battery
Apparatus is overheated or undercooled
Electronic defect in the battery
Battery empty
Error rectification
Remove and reinsert the battery. If the error persists, replace the battery
with the power pack (Click & Cure).
If the error persists, please contact your dealer or your local Service
Center.
Allow the apparatus to cool down (or assume room temperature if it is
undercooled) and try again after a certain time.
If the error persists, please contact your dealer or your local Service
Center.
Remove and reinsert the battery. If the error continues to be displayed,
place the apparatus into the charging base. If the error persists nonetheless, replace the battery with the power pack (Click & Cure).
Please contact your dealer or your local Service Center.
Place the handpiece into the charging base. The corresponding message
(„Charging”) will be displayed. If the battery is not charged, the contacts
have to be cleaned.
If the error persists, please contact your dealer or your local Service
Center.
No display
during
charging
LED of the
charging
base is not
illuminated
18
Charging contacts contaminated
Battery in safety mode
(integrated protective circuit)
Power pack not connected or
defective
Check if the handpiece has been correctly placed into the charging base.
Clean battery contacts. Information: "Charging Battery" briefly appears in
the display before the display returns to the stand-by mode.
If cleaning the battery contacts does not resolve the problem, remove the
battery from the apparatus. Charge the battery separately from the handpiece in the charging base for approximately 10 minutes.
If the error persists, please contact your dealer or your local Service
Center.
Check the battery contacts and if the power pack is correctly positioned
in the charging base or if the power pack is connected to the power supply by means of the power cord (display on the power pack lights up in
green if it works correctly).
If the error persists, please contact your dealer or your local Service
Center.
Page 17

Warranty /
Procedure in case of repair
Product specifications
The warranty period for bluephase 20i is 3 years from the
date of purchase (battery 1 year). Malfunctions resulting
from faulty material or manufacturing errors are repaired
free of charge during the warranty period. The warranty
does not provide the right to recover any material or nonmaterial damage other than the ones mentioned. The apparatus must only be used for the intended purposes. Any
other uses are contraindicated. The manufacturer does not
accept any liability resulting from misuse and warranty
claims cannot be accepted in such cases. This is particularly
valid for:
• damage resulting from improper handling, especially
incorrectly stored batteries (see Technical data:
Transportation and storage conditions).
• damage to components resulting from wear under standard operating conditions (e.g. battery).
• damage resulting from external influences, e.g. blows,
drop to the floor.
• damage resulting from incorrect set-up or installation.
• damage resulting from connecting the unit to a power
supply, the voltage and frequency of which do not comply with the ones stated on the rating plate.
• damage resulting from improper repairs or modifications
that have not been carried out by certified Service
Centres.
In case of a claim under warranty, the complete apparatus
(handpiece, charging base, power cord and power pack)
must be returned, carriage paid, to the dealer or directly to
Ivoclar Vivadent, together with the purchase document. Use
the original packaging with the corresponding cardboard
inserts for transportation.
Repair work may only be carried out by a certified Ivoclar
Vivadent Service Center. In case of a defect that cannot be
rectified, please contact your dealer or your local Service
Center (see addresses on the reverse side). A clear description of the defect or the conditions under which the defect
occurred will facilitate locating the problem. Please enclose
this description when returning the apparatus.
Delivery form
1 Charging base, 1 Power cord, 1 Power pack, 1 Handpiece
Battery (Li-Po), 1 10>8 mm light probe, 1 Anti-glare shield,
1
3 Anti-glare cones, Sleeves, 1 Set of Operating Instructions
ccessories
A
The following accessories are available for bluephase 20i:
EF Description
R
627389 Light probe 10>8 mm, black (G2)
608538 Pin-point light probe 6/2 mm, black (G2)
51756 Anti-glare cones
5
592496 Anti-glare shield
627299 bluephase 20i charging base (G2)
27300 bluephase 20i battery (G2)
6
627298 bluephase 20i handpiece (G2)
607922 bluephase meter
608554 bluephase sleeves (G2)
Technical data
Operating voltage charging base 5 VDC
Operating voltage handpiece 3.7 VDC with battery
Power Pack 100-240 VAC / 50-60 Hz /
Operating conditions
Temperature +10 °C to +40 °C (+50 to +104°F)
Relative humidity 30 % to 75%
Ambient pressure 700 hPa to 1060 hPa
Dimensions of the charging base L=205mm; W=150mm; H=85mm
Weight of the charging base 250 g
Charging time approx. 2 h (with the battery empty)
Power supply of the handpiece Li-Po battery
Max. battery time approx. 45 min.
Light source polywave LED
Wavelength range 385–515 nm
LED-Class 2 LED LIGHT
Light intensity 2,000 - 2,200 mW/cm
Operation 6 min. on / 4 min. off (intermittently)
Dimensions of the handpiece L=260mm; W=42mm; H=120mm
Weight of the handpiece (incl. battery) 245 g
Transportation and storage conditions:
Temperature -20 °C to +60 °C (-4 to 140°F)
Relative humidity 10% to 75%
Ambient pressure 500 hPa to 1060 hPa
bluephase 20i has to be stored in closed, roofed rooms.
Protect the device from severe jarring.
Battery
• Do not store at temperatures above 40 °C / 104 °F (or 60 °C / 140 °F for a
short period). Recommended storage temperature 15-30 °C (59-86 °F).
• Always store the battery charged and
• not for longer than 6 months.
5 VDC with power pack
max. 0.4 A / Output 5 VDC
TYPE 15.2630
Manufacturer: Friwo
(with a new, fully charged battery)
DO NOT STARE INTO BEAM
CLASS 2 LED PRODUCT
Max. 5.11 mW / Wavelength 385 - 515 nm
2
19
Page 18

Liebe Kundin, lieber Kunde,
eine optimale Aushärtung ist die Basis für
eine dauerhaft hohe Versorgungsqualität aller
lichthärtenden Materialien. Hierzu trägt auch
entscheidend das gewählte Polymerisationsgerät bei. Deshalb freut es uns, dass Sie sich
für die bluephase
Hierbei handelt es sich um ein hochwertiges
Medizinprodukt, welches auf der Basis der
gültigen Normen nach dem heutigen Stand
von Wissenschaft und Technik gefertigt wird.
Die Bedienungsanleitung erklärt Ihnen, wie
Sie das Gerät sicher in Betrieb nehmen,
seinen vollen Leistungsumfang auf einfache
Weise nutzen und für eine lange Verwendung
pflegen können.
Bei Fragen stehen wir Ihnen gerne zur
Verfügung (Adressen siehe hintere Umschlagseite).
Ihr
Ivoclar Vivadent-Team
®
20i entschieden haben.
20
Page 19

Inhaltsverzeichnis
Sicherheit
Bestimmungsgemässer Gebrauch 22
Indikation 22
Sicherheitshinweise 23
Inbetriebnahme
Ladestation 24
Handstück 25
Akku 25
Kabelbetrieb Click & Cure 26
Bedienung
Wahl des Belichtungsprogramms
und der Belichtungszeit 27
Speicherfunktion Cure Memory 30
Start
Akustische Signale 30
Lichtintensität 30
Messen der Lichtintensität 30
Wartung und Reinigung
Gehäuse 31
Lichtleiter 31
Akkukontakte 31
Entsorgung 31
Was ist, wenn …? 32
Garantie /
Vorgehen bei einem Reparaturfall 32
Produktspezifikation
Lieferumfang 32
Zubehör 32
Technische Daten 32
Betriebsbedingungen 32
Transport- und Lagerbedingungen 32
Deutsch
21
Page 20
Sicherheit
LED LIGHT
DO N OT STAR E INTO BEAM
CLAS S 2 L ED PRO DUCT
Max. 5,11 mW / Wavelength 385 - 515 nm
IEC 60 825-1:19 93+A1:19 97+A2 :2001
Bestimmungsgemässer Gebrauch
Die bluephase 20i ist ein LED-Polymerisationsgerät zur
Erzeugung von energiereichem Blaulicht und dient der Polymerisation von lichthärtenden Dentalwerkstoffen unmittelbar an der zahnärztlichen Behandlungseinheit. Zum
bestimmungsgemässen Gebrauch gehört auch die Beachtung der Hinweise der vorliegenden Bedienungsanleitung.
Indikation
Die bluephase 20i eignet sich mit seinem Breitbandspektrum „polywave“ für die Polymerisation aller lichthärtenden
Dentalwerkstoffen im Wellenlängenbereich von 385–515 nm.
Hierzu zählen Füllungsmaterialien, Bondings/Adhäsive,
Unterfüllungen, Liner, Fissurenversiegler, Provisorien sowie
Befestigungsmaterialien für Brackets und zahntechnische
Werkstücke wie z.B. keramische Inlays.
Kontraindikationen
Bei Materialien deren Polymerisation ausserhalb
des Wellenlängenbereichs von 385–515 nm
aktiviert wird (derzeit sind hier jedoch keine
Materialien bekannt.) Bei fraglichen Produkten
wird empfohlen, sich diesbezüglich beim Materialhersteller zu erkundigen.
Das Gerät nicht in der Nähe leicht entflammbarer oder leicht entzündlicher Stoffe aufladen
oder verwenden.
Tragbare und mobile Hochfrequenz-Kommunikationseinrichtungen können medizinische Geräte
beeinflussen. So ist eine gleichzeitige Verwendung von Mobiltelefonen während des Betriebs
nicht zulässig.
Vorsicht – wenn andere als die hier angegebenen Bedienungs- oder Justiereinrichtungen
benutzt oder andere Verfahrensweisen ausgeführt werden, kann dies zu gefährlicher Strahlungsexposition führen.
Sicherheitshinweise
Die bluephase 20i ist ein medizinisch elektrisches Gerät,
welches der IEC 601-1 (EN 60601-1) und der EMV-Richtlinie
unterliegt. Es erfüllt die geltenden EU-Richtlinien und ist in
der LED-Klasse 2 klassifiziert.
Das Gerät hat das Werk in sicherem und technisch einwandfreiem Zustand verlassen. Um diesen Zustand zu erhalten
und einen sicheren Betrieb zu ermöglichen, sind die Hinweise
dieser Bedienungsanleitung zu beachten. Zur Vermeidung
von Schäden sowie Gefahren für Patienten, Anwender und
Dritte gehören hierzu insbesondere folgende Sicherheitshinweise:
NRTL (Nationally Recognized
Testing Laboratory)
Verwendungs- und Haftungsumfang
• Die bluephase 20i ist ausschliesslich nach dem bestimmungsgemässen Gebrauch zu verwenden. Eine andere
oder darüber hinausgehende Benutzung gilt als nicht
bestimmungsgemäss. Für Schäden, die sich aus einer
nicht bestimmungsgemässen Verwendung oder nicht
sachgemässen Handhabung ergeben, übernimmt der
Hersteller keine Haftung.
• Der Benutzer ist verpflichtet, die bluephase 20i eigenverantwortlich vor Gebrauch auf Eignung und Einsetzbarkeit
für die vorgesehenen Zwecke zu prüfen. Dies gilt insbesondere, wenn in unmittelbarer Nähe und gleichzeitig
andere Geräte betrieben werden.
• Es dürfen nur Originalersatzteile und -zubehör von Ivoclar
Vivadent eingesetzt werden (siehe Zubehör). Bei Schäden, die auf Verwendung anderer Ersatzteile sowie Zubehör zurückzuführen sind, übernimmt der Hersteller keine
Haftung.
22
Betriebsspannung
Vor dem Einschalten ist sicherzustellen, dass
a) die angegebene Spannung des Typenschildes mit der des
Versorgungsnetzes übereinstimmt und
b) das Gerät die Umgebungstemperatur angenommen hat.
Bei separater Handhabung von Akku oder Netzteil – z.B. bei
Inbetriebnahme oder Kabelbetrieb Click & Cure – ist ein
Kontakt mit Patienten oder Dritten zu vermeiden. Die freilie-
Page 21
genden elektrischen Kontakte von Akku und Verbindungsstecker (Netzgerät) sind nicht zu berühren.
Annahme beeinträchtigter Sicherheit
Wenn anzunehmen ist, dass ein gefahrloser Betrieb nicht
mehr möglich ist, so ist das Gerät von Akku- und Netzspannung zu trennen und gegen unabsichtlichen Gebrauch zu
sichern. Dies kann z.B. bei sichtbarer Beschädigung oder
eingeschränktem Betrieb der Fall sein. Eine vollständige
Trennung vom Versorgungsnetz ist nur bei aus der Steckdose gezogenem Netzkabel gewährleistet.
Augenschutz
Eine direkte oder indirekte Bestrahlung der Augen ist zu
vermeiden. Längere Bestrahlungen sind für das Auge unangenehm und können Schäden hervorrufen. Es wird deshalb
empfohlen, den mitgelieferten Blendschutz zu verwenden.
Personen, die allgemein lichtempfindlich reagieren, Medikamente wegen Lichtempfindlichkeit oder photosensibilisierende Medikamente einnehmen, eine Augenoperation
hinter sich haben oder die sich über längere Zeit mit diesem
Gerät oder in seiner Nähe arbeiten, sollten dem Licht des
Gerätes nicht ausgesetzt werden und Schutzbrillen (orange)
tragen, die Licht unterhalb einer Wellenlänge von 515 nm
absorbieren.
Akku
Vorsicht: Nur Originalteile – insbesondere Ivoclar Vivadent
Akkus und Ladestationen – verwenden. Akku nicht kurzschliessen. Nicht bei Temperaturen über 40°C / 104°F (bzw.
kurzzeitig 60°C / 140 °F) und immer geladen lagern. Die
Lagerzeit darf 6 Monate nicht übersteigen.
Explosionsgefahr bei Entsorgung in offenem Feuer.
Hohe Wärmeentwicklung
(Verbrennungsgefahr)
Wie bei allen leistungsstarken Lampen ist die hohe Lichtintensität mit einer Wärmeentwicklung verbunden. Bei längerer Bestrahlung im pulpanahen Bereich oder von Weichgewebe können irreversible oder reversible Schäden auftreten. Deshalb darf das Hochleistungspolymerisationsgerät
nur vom speziell geschulten Fachpersonal benutzt werden.
Generell sind die vorgeschriebenen Belichtungszeiten zu
beachten. Ununterbrochene Belichtungszeiten von mehr als
5 Sekunden im Turbo-Programm an derselben Zahnfläche
sowie ein direkter Kontakt mit Gingiva, Mundschleimhaut
oder Haut sind dringend zu vermeiden. Gegebenenfalls ist
in intermittierenden Intervallen von maximal je 5 Sekunden
zu belichten. Bei der Polymerisation unter Kofferdam Hitzestauung vermeiden. Bei unvermeidlicher Bestrahlung von
Weichgewebe ist mit reduzierter Lichtintensität zu belichten
(Low Power Programm verwenden).
Bei indirekten Restaurationen ist in intermittierenden Intervallen von je 10 Sekunden im High-Power-Program und je
1x 5 Sekunden im Turbo-Programm oder durch externe
Kühlung mittels Luftstrom zu arbeiten.
Die Angaben zu Belichtungsprogramm und -dauer sind
unbedingt zu beachten (siehe Wahl des Belichtungsprogrammes). Ebenso ist das
Lichtaustrittsfenster jederzeit
genau auf das zu bestrahlende Material zu positionieren (z.B. durch Fixierung mittels Finger).
Bitte beachten Sie, dass Lithium-Polymer-Akkus bei unsachgemässer Behandlung oder bei mechanischer Beschädigung
mit Explosion, Feuer und Rauchentwicklung reagieren können. Beschädigte Lithium-Polymer-Akkus durfen nicht weiter
verwendet werden.
Die bei Explosion, Feuer und Rauchentwicklung freigesetzten Elektrolyte und Elektrolytdämpfe sind toxisch und
ätzend. Bei Augen- und Hautkontakt sofort mit viel Wasser
spulen. Das Einatmen der Dämpfe vermeiden. Bei Unwohlsein Arzt aufsuchen.
Die Behandlung von sensiblen Patienten im High Power/
Turbo Programm ist nicht zulässig. In diesen Fällen ist mit
reduzierter Lichtintensität zu belichten (Low Power Programm verwenden).
23
Page 22

Inbetriebnahme
Lieferumfang
Prüfen Sie den Lieferumfang auf Vollständigkeit und eventuelle Transportschäden (siehe Lieferumfang). Falls Teile fehlen
oder beschädigt sind, wenden Sie sich bitte umgehend an
Ihren Händler oder Ihre Service-Stelle.
Ladestation
Vor dem Einschalten ist sicherzustellen, dass die angegebene Spannung des Typenschildes mit der des vorhandenen
Versorgungsnetzes übereinstimmt. Das Typenschild befindet
sich an der Unterseite der Ladestation.
Die Ladestation auf eine geeignete, ebene Tischfläche stellen. Die Schutzfolie von dem Verbindungsstecker des Netzgerätes entfernen. Den Verbindungsstecker des Netzgerätes
an der Unterseite der Ladestation schräg einsetzen und mit
leichtem Druck einstecken bis er hör- und fühlbar einrastet.
Netzkabel an das Versorgungsnetz anschliessen und mit
dem Netzgerät verbinden.
Die Power ON Anzeige auf der linken Gehäuseseite leuchtet blau auf (siehe Anzeigender Ladestation).
24
Page 23
Handstück
Vor der Montage des Lichtleiters ist die Schutzfolie an der
zugehörigen Öffnung des Handstücks zu entfernen.
Lichtleiter beim Einstecken in das Handstück leicht drehen.
Anschliessend Blendschutzschild auf Lichtleiter aufstecken.
Akku
Vor dem ersten Gebrauch muss der Akku vollständig
geladen werden!
Akku geradlinig in das Handstück einschieben bis er hörund fühlbar einrastet.
Handstück ohne Kraftaufwand in die Öffnung der Ladestation einsetzen. Falls ein Hygieneschutz verwendet wird,
muss dieser vor dem Laden des Akkus entfernt werden.
In voll geladenem Zustand hat der Akku eine Belichtungskapazität von ca. 45 Minuten.
Tipp
Nach Möglichkeit ist das Gerät stets mit vollgeladenem
Akku zu benutzen - dies dient der Verlängerung der Lebensdauer. Es wird daher empfohlen nach jedem Patienten das
Handstück in die Ladestation zu stellen. Bei leerem Akku
dauert die Aufladezeit 2 h.
25
Page 24
Inbetriebnahme
Kabelbetrieb Click & Cure
Die bluephase 20i kann jederzeit und insbesondere bei vollständig entleertem Akku im Kabelbetrieb betrieben werden.
Hierzu den Akku aus dem Handstück entnehmen. Anschliessend Netzgerät am Verbindungsstecker von der Unterseite
der Ladestation lösen. Dabei nicht am Netzkabel ziehen.
Verbindungsstecker geradlinig in das Handstück einschieben
bis er hör- und fühlbar einrastet.
Mangels Stromversorgung kann die Ladestation während
des Kabelbetriebes den Akku nicht laden.
Eine vollständige Trennung vom Versorgungsnetz ist nur bei
aus der Steckdose gezogenem Netzkabel gewährleistet.
26
Page 25
Zeichenerklärung
Akku – Ladezustand
Der jeweilige Ladezustand wird bei eingeschaltetem Handstück auf dem Display wie folgt angezeigt:
Voll geladener Akku (Belichtungskapazität von ca. 45
Minuten).
Halbvoll geladener Akku
Reserve (Im Reservemodus ist der letzte Balken in der AkkuAnzeige rot. Der Akku ist schnellstmöglich zu laden.)
Wird der Akku geladen, erscheint kurzfristig auf dem Display
„Charging Battery“ bevor das Display in den Stand-by
Modus geht.
Bei vollständig entladenem Akku geht das Handstück automatisch in den Stand-by Modus. Das Licht lässt sich nicht
mehr starten und Belichtungsprogramm sowie -zeit können
nicht mehr eingestellt werden.
Das Handstück kann jedoch im Kabelbetrieb Click & Cure
betrieben werden.
Der Akku ist ein Verschleissteil, das typischerweise nach
ca. 2½ Jahren erneuert werden muss. Das Alter des Akkus
kann dem Akkuaufkleber entnommen werden.
S000001
04/04/09
dd/mm/yy
27
Page 26
Bedienung
Vor jedem Gebrauch sind kontaminierte Oberflächen des
Gerätes sowie Lichtleiter und Blendschutz zu desinfizieren
bzw. zu autoklavieren.
Darüber hinaus ist sicherzustellen, dass die abgegebene
Lichtintensität eine ausreichende Aushärtung ermöglicht.
Dazu den Lichtleiter auf Verschmutzungen und Beschädigungen prüfen sowie die Lichtintensität regelmässig kontrollieren (z.B. mit dem Ivoclar Vivadent Radiometer
„bluephase meter“).
Wahl des Belichtungsprogrammes
und der Belichtungszeit
Belichtungsprogramm und Belichtungszeit können individuell eingestellt werden. Für unterschiedliche Anwendungen
verfügt die bluephase 20i über 4 Belichtungsprogramme.
Mit den Programmwahltastern wird das beabsichtigte
Belichtungsprogramm angewählt. Das Display verändert
sich entsprechend (siehe auch Anzeigen des Handstücks).
Das Gerät wird bei der ersten Inbetriebnahme mit folgender
Voreinstellung ausgeliefert:
Werkseinstellungen
TURBO 5 Sekunden
Die beabsichtigte Belichtungszeit wird
mit den Zeitwahltastern angewählt.
Zur Auswahl stehen 5, 10, 15, 20 und
30 Sekunden.
Bei der Wahl der Belichtungszeit ist die Gebrauchsinformation des verwendeten Materials zu beachten.
Bei Compositen beziehen sich die genannten Belichtungsempfehlungen auf sämtliche Farben und – sofern die
Gebrauchsinformation des betroffenen Materials keine
abweichende Empfehlung aufweist – auf Schichtstärken von
maximal 2 mm. Diese Empfehlungen gelten allgemein für
Belichtungen, bei denen das Lichtaustrittsfenster des Lichtleiters direkt auf dem zu bestrahlenden Material aufsitzt.
Mit zunehmendem Abstand sind die Belichtungszeiten entsprechend zu verlängern. Bei einem Abstand von 8 mm
reduziert sich die effektive Lichtintensität auf ca. 50 %, so
dass die empfohlene Belichtungszeit zu verdoppeln ist.
1) Die genannten Angaben gelten für den mitgelieferten
Lichtleiter 10>8 mm
2) Die Hinweise hinsichtlich Wärmeentwicklung und Verbrennungsgefahr sind dringend zu beachten (siehe
Sicherheitshinweise)
HIGH 10 Sekunden
(High Power)
LOW 10 Sekunden
(Low Power)
SOFT 15 Sekunden
(Soft start)
28
Page 27
Belichtungsprogramm
TURBO Programm
Konstant hohe Lichtintensität zur
Polymerisation von Füllungs- und
Befestigungsmaterialien bei direkten
und indirekten Restaurationen.
2
.000 mW/cm
2
0
t [s]
Lichtintensität
ushärtungszeit für Composites
A
Aushärtungszeit für Tetric EvoCeram / IPS Empress Direct
Füllungsmaterialien
omposite
C
)
1
• 2 mm
IPS Empress Direct / IPS Empress Direct Flow /
Tetric EvoCeram / Tetric EvoFlow / Tetric /
etric Basic White / Tetric N-Ceram / Tetric N-Flow
T
Heliomolar / Heliomolar HB / Heliomolar Flow / Andere
2)
• 4 mm
Tetric EvoCeram Bulk Fill
Tetric Basic White
3)
ompomer
C
Compoglass F / Compoglass Flow
Indirekte Restaurationen / Befestigungsmat.
Variolink II Base 4)/ Variolink Veneer / Variolink N Base
Variolink N Clear Veneer / Variolink Ultra
Dual Cement 5)/ Variolink II
Verschiedenes
eliosit Orthodontic
H
Telio Add-On Flow
elio Stains
T
IPS Empress Direct Color
IPS Empress Direct Opaque
)
5
/
5)
2,000 – 2,200 mW/cm
0 s
1
5 s
Belichtungszeit
5 s
2x 5 s
5 s
2x 5 s
2x 5 s
4)
/
per mm ceramic:
1x 5 s per segment
x 5 s
2
2x 5 s
s
5
5 s
2x 5 s
2
HIGH POWER Programm
Konstant hohe Lichtintensität zur
Polymerisation von Füllungs- und
Befestigungsmaterialien bei direkten
und indirekten Restaurationen.
2
1.200 mW/cm
0
t [s]
LOW POWER Programm
Reduzierte Lichtintensität mit verringerter Temperaturentwicklung fü r die
Polymerisation im pulpanahen
Bereich von Adhäsiven, Linern und
650 mW/cm
0
von Kavitäten der Klasse V.
t [s]
Fü llungsmaterialien bei Versorgung
2
SOFT START Programm
Stufenweise Steigerung der Lichtintensität mit reduziertem
Schrumpfungsstress und verringerter
Temperaturenwicklung für die Polymerisation von Füllungsmaterialien
2
1.200 mW/cm
2
650 mW/cm
05
t [s]
1) Gilt für Schichtstärken von maximal 2 mm und soweit die Bedienungsanleitung des betroffenen Materials keine abweichende Empfehlung aufweist (möglich z.B. bei Dentinfarben)
2) Gilt für Schichtstärken von maximal 4 mm und soweit die Bedienungsanleitung des betroffenen Materials keine abweichende Empfehlung aufweist (möglich z.B. bei Dentinfarben)
3) Gilt für Schichtstärken von maximal 3 mm 4) Gilt bei Lichthärtung (ausschliessliche Verwendung der Basepaste) 5) Gilt bei Dualhärtung
Füllungsmaterialien
Composite
1)
• 2 mm
PS Empress Direct / IPS Empress Direct Flow /
I
Tetric EvoCeram / Tetric EvoFlow / Tetric /
Tetric Basic White / Tetric N-Ceram / Tetric N-Flow
eliomolar / Heliomolar HB / Heliomolar Flow / Andere
H
)
2
• 4 mm
Tetric EvoCeram Bulk Fill / Tetric Basic White
3)
Compomer
Compoglass F / Compoglass Flow
Indirekte Restaurationen / Befestigungsmat.
Variolink II Base
Variolink N Clear Veneer / Variolink Ultra 5)/
Dual Cement 5)/ Variolink II
Verschiedenes
Helioseal / Helioseal F / Helioseal Clear
Monopaque
MultiCore Flow / Multicore HB
Heliosit Orthodontic
Telio Add-On Flow
Telio Stains
IPS Empress Direct Color
IPS Empress Direct Opaque
Adhäsive
AdheSE / AdheSE One F
ExciTE / ExciTE DSC
Tetric N-Bond / Tetric N-Bond Self-Etch
Heliobond (Syntac)
Provisorische Materialien
Telio CS Inlay/Onlay
Systemp.inlay/onlay
Fermit / Fermit N
Telio CS Link / Systemp.link
Verschiedenes
Heliosit Orthodontic
Vivaglass Liner
Füllungsmaterialien
Composite
• 2 mm
IPS Empress Direct / IPS Empress Direct Flow /
Tetric EvoCeram / Tetric EvoFlow / Tetric /
Tetric Basic White / Tetric N-Ceram / Tetric N-Flow
Heliomolar / Heliomolar HB / Heliomolar Flow / Andere
• 4 mm
Tetric EvoCeram Bulk Fill / Tetric Basic White
Compomer
Compoglass F / Compoglass Flow
)
4
/ Variolink Veneer / Variolink N Base
5)
1)
2)
3)
Belichtungszeit
10 s
5 s
1
10 s
20 s
)
4
/
pro mm Keramik:
10 s pro Fläche
10 s
20 s
20 s
10 s
15 s
10 s
10 s
20 s
Belichtungszeit
10 s
10 s
10 s
10 s
20 s pro Fläche
20 s
20 s
Belichtungszeit
15 s
20 s
15 s
20 s
29
Page 28
Bedienung
Speicherfunktion Cure Memory
Die zuletzt angewendete Einstellung wird in der Kombination Belichtungsprogramm und -zeit automatisch gespeichert.
Start
Mit dem Starttaster wird das Licht eingeschaltet. Nach
Ablauf der gewählten Belichtungszeit wird das Belichtungsprogramm automatisch beendet. Falls gewünscht, kann das
Licht vorzeitig durch nochmaliges Betätigen des Starttasters
ausgeschaltet werden. Gleichzeitig zur Lichtaktivierung
schaltet sich auch der Ventilator ein. Nach dem Beenden
der Belichtungszeit läuft dieser zur Kühlung des Gerätes
nach. Solange der Ventilator läuft, darf der Akku nicht entnommen werden.
Akustische Signale
Bei folgenden Funktionen ertönen akustische Signale:
• Start (Stop)
• Alle 10 Sekunden
• Programmwechsel
• Belichtungszeitwechsel
• Akku mit Ladestation verbinden
• Akku einsetzen
• Error-Meldung
Falls gewünscht, können die akustischen Signale in der
Lautstärke geregelt werden.
Dazu bei ausgeschaltetem Licht den blauen Lautstärketaster
(siehe Produktübersicht) drücken und mit dem linken Zeitwahltaster die Lautstärke verringern bzw. den Ton ganz ausschalten. Sollen die akustischen Signale wieder
eingeschaltet bzw. die Lautstärke erhöht werden, muss der
blaue Lautstärketaster und danach der rechte Zeitwahltaster
gedrückt werden.
Lichtintensität
Die Lichtintensität wird bei Betrieb des Gerätes konstant
gehalten. Bei Verwendung des mitgelieferten 10>8 mm
Lichtleiters wurde die Lichtintensität kalibriert auf
2.000 – 2.200 mW/cm2.
Wird ein anderer als der mitgelieferte Lichtleiter verwendet,
hat dies einen direkten Einfluss auf die abgegebene Lichtintensität.
Bei parallelwandigen Lichtleitern (10 mm) ist der Durchmesser beim Lichteintritt und der am Lichtaustrittsfenster
gleich. Bei der Verwendung von fokussierenden Lichtleitern
(10>8 mm Lichtleiter, Pin-Point Lichtleiter 6>2 mm) ist der
Durchmesser beim Lichteintritt grösser als der am Lichtaustrittsfenster. Das einfallende Blaulicht wird so auf eine
kleinere Fläche gebündelt. Dadurch erhöht sich die
abgegebene Lichtintensität.
Pin-Point Lichtleiter eigenen sich für die punktuelle Polymerisation z.B. zum Fixieren von Veneers vor der Überschussentfernung. Für die komplette Aushärtung muss der
Lichtleiter gewechselt werden.
Messen der Lichtintensität
Die Lichtintensität der bluephase 20i und des mitgelieferten
10>8 mm Lichtleiters kann z.B. mit dem bluephase meter
überprüft werden.
Falls der ermittelte Messwert nicht der erwarteten Lichtintensität entspricht:
• Gewähltes Belichtungsprogramm prüfen
• Eventuell verschmutzten Lichtsensor des Radiometers
reinigen
• Lichtleiter entfernen und die Lichtaustrittsöffnung beim
Handstück mit einem von Alkohol benetzten Wattestäbchen reinigen
• Eventuell verschmutzten Lichtleiter reinigen
(siehe Wartung und Reinigung)
• Eventuell beschädigten Lichtleiter gegen einen neuen
austauschen
Falls diese Massnahmen keinen Erfolg bringen, wenden Sie
sich bitte an Ihren Händler oder Ihre Service-Stelle.
30
Page 29

Wartung und Reinigung
Aus hygienischen Gründen wird empfohlen, bei jedem
Patienten Einmalschutzhüllen zu verwenden. Kontaminierte
Oberflächen des Gerätes und Blendschutz sind vor jedem
Gebrauch zu desinfizieren (z.B. FD333, FD366/Dürr Dental,
Incidin Liquid/Ecolab) und der Lichtleiter zu sterilisieren
sofern keine Einmalschutzhüllen verwendet werden. Bei
Reinigungsarbeiten dürfen keine Flüssigkeiten oder andere
Fremdmaterialien in das Handstück, die Ladestation und
insbesondere nicht in das Netzgerät gelangen (Stromschlaggefahr). Bei Reinigung der Ladestation ist diese von
der Netzspannung zu trennen.
Gehäuse
Handstück und Handstückhalter mit einer handelsüblichen
und aldehydfreien Desinfektionslösung abwischen. Keine
hochaggressiven Desinfektionslösungen (z.B. Lösungen auf
Basis von Orangenöl oder Lösungen mit einem Ethanolanteil von über 40%), Lösungsmittel (z.B. Aceton) oder spitze
Gegenstände verwenden, die den Kunststoff angreifen oder
verkratzen können. Verschmutzte Kunststoffteile mit Seifenlösung reinigen.
Akkukontakte
Für eine jederzeit gute Leitfähigkeit sind die Akkukontakte
frei von eventuellen Verunreinigungen zu halten (z.B. Compositerückstände). Hierzu sind die betroffenen Kontakte
regelmässig im Zuge der üblichen Wischdesinfektion (nach
jedem Patienten) zu reinigen.
Entsorgung
Das Gerät darf nicht über den normalen Hausmüll entsorgt
werden. Informationen zur Entsorgung es Gerätes finden
Sie auf der jeweiligen nationalen Ivoclar Vivadent Homepage. Unbrauchbare Akkus und Polymerisationsgeräte sind
den jeweiligen nationalen gesetzlichen Bestimmungen entsprechend zu entsorgen. Akkus nie ins Feuer werfen!
Lichtleiter
Lichtleiter mit einem Desinfektionsmittel und einem weichen Tuch reinigen. Eventuell auf den Lichtleiter gelangtes
Material wie Compositereste vorsichtig, z. B. mit Fingernagel oder Kunststoffspatel, entfernen. Keine scharfen oder
spitzen Gegenstände verwenden, diese können die Oberfläche des Lichtleiters verkratzen und damit die Lichttransmission vermindern. Lichtleitstab und Blendschutz können
autoklaviert werden (z.B. 121 °C, 2 bar, 15 Minuten). Lichtleiter auf Beschädigungen überprüfen. Erscheinen bei Halten des aus dem Handstück entnommenen Lichtleiters
gegen Licht einzelne Segmente schwarz, sind Glasfasern
gebrochen. Aufgrund der verminderten Lichttransmission ist
der Lichtleiter gegen einen neuen auszutauschen.
31
Page 30

Was ist, wenn …?
Symbol
Problemursache
Elektronikdefekt im Handstück
oder im Akku
Gerät ist überhitzt oder unterkühlt
Elektronikdefekt Akku
Akku leer
Fehlerbehebung
Akku entfernen und wieder einstecken.Wenn der Fehler bestehen bleibt,
Akku durch Netzteil (Click & Cure) ersetzen.
Falls der Fehler weiterhin bestehen bleibt, kontaktieren Sie bitte Ihren
Händler oder Ihre Service Stelle.
Gerät auskühlen lassen (bzw. bei unterkühltem Gerät auf Raumtemperatur bringen) und nach einiger Zeit nochmals versuchen.
Falls der Fehler bestehen bleibt, kontaktieren Sie bitte Ihren Händler oder
Ihre Service Stelle.
Akku entfernen und wieder einstecken.Wenn die Fehleranzeige bleibt,
Gerät in die Ladestation stellen. Falls der Fehler trotzdem bestehen bleibt,
Akku durch Netzteil (Click & Cure) ersetzen.
Bitte kontaktieren Sie Ihren Händler oder Ihre Service Stelle.
Handstück in die Ladestation stellen. Auf dem Display erscheint
„Charging“. Wird der Akku nicht geladen, müssen die Kontakte gereinigt
werden.
Falls der Fehler bestehen bleibt, kontaktieren Sie bitte Ihren Händler oder
Ihre Service Stelle.
Beim Laden
erscheint
keine
Displayanzeige.
LED der
Ladestation
leuchtet
nicht.
32
Ladekontakte verschmutzt
Akku im Sicherheitsmodus
(Integrierte Schutzschaltung)
Netzgerät nicht angeschlossen
oder Netzgerät defekt.
Kontrolle ob das Handstück richtig in die Ladestation gestellt wurde.
Akkukontakte reinigen. Zur Info.: Auf dem Display erscheint kurzfristig
„Charging Battery“ bevor das Display in den Stand-by Modus geht.
Bringt die Reinigung der Akkukontakte keinen Erfolg, sollte der Akku aus
dem Gerät entfernt werden. Anschliessend den Akku getrennt vom Handstück für ca. 10 Minuten in der Ladestation aufladen.
Falls der Fehler bestehen bleibt, kontaktieren Sie bitte Ihren Händler oder
Ihre Service Stelle.
Kontrolle ob Netzgerät in der Ladestation richtig eingesetzt ist bzw. Ladekontakte kontrollieren oder ob Netzgerät am Netz mittels Netzkabel
angeschlossen ist (Anzeige am Netzgerät leuchtet grün bei richtiger
Funktion).
Falls der Fehler bestehen bleibt, kontaktieren Sie bitte Ihren Händler oder
Ihre Service-Stelle.
Page 31

Garantie / Vorgehen
bei einem Reparaturfall
Produktspezifikation
Die Garantie für die bluephase 20i beträgt ab Kaufdatum
3 Jahre (Akku 1 Jahr). Bei auftretenden Störungen, die
durch Material und Herstellungsfehler verursacht sind,
umfasst die Garantie die kostenlose Reparatur des Gerätes.
Darüber hinaus gibt die Garantie kein Anrecht auf Ersatz
von eventuellen materiellen oder ideellen Schäden. Dabei
ist das Gerät ausschliesslich nach dem bestimmungsgemässen Gebrauch zu verwenden. Eine andere oder darüber
hinausgehende Benutzung gilt als nicht bestimmungsgemäss – für hieraus resultierende Schäden wird jede Haftung
bzw. Garantie ausgeschlossen. Hierzu zählen insbesondere:
• Schäden, die durch unsachgemässe Handhabung verursacht wurden. Insbesondere gilt dies für nicht richtig
gelagerte Akkus (siehe Technische Daten: Transport und
Lagerbedingungen).
• Schäden an Teilen, die während des normalen Betriebes
einer Abnützung unterliegen (z. B. Akku).
• Schäden durch äussere Einwirkungen, z. B. Schlag, Fall zu
Boden
• Schäden durch fehlerhafte Aufstellung bzw. Installation
• Schäden durch Anschluss an eine andere Spannung oder
Frequenz als auf dem Typenschild angegeben.
• Schäden durch unsachgemässe Reparaturen und Änderungen, die von nicht autorisierten Stellen vorgenommen
wurden
Bei einem Garantiefall ist das vollständige Gerät (Handstück, Ladestation, Akku, Netzkabel und Netzgerät) zusammen mit dem Kaufbeleg in der Original-Verpackung mit den
entsprechenden Kartoneinlagen frachtfrei an das Lieferdepot oder direkt an Ivoclar Vivadent zu schicken.
Sämtliche Reparaturarbeiten dürfen nur von einer qualifizierten Ivoclar Vivadent Servicestelle durchgeführt werden.
Bei einem Defekt, der nicht von Ihnen behoben werden
kann, wenden Sie sich bitte an Ihren Händler oder Ihre
Service-Stelle (Adressen siehe hintere Umschlagseite). Eine
klare Beschreibung des Defektes oder der Umstände, die
zum Defekt geführt haben, erleichtert die Fehlersuche. Bitte
legen Sie diese Beschreibung Ihrem Gerät bei.
Lieferumfang
1 Ladestation, 1 Netzkabel, 1 Netzgerät, 1 Handstück, 1 Akku (Li-Po),
10>8 mm Lichtleiter, 1 Blendschutzschild, 3 Blendschutzkegel, Schutzhüllen,
1
1 Bedienungsanleitung
ubehör
Z
Für Ihre bluephase 20i ist folgendes Zubehör erhältlich:
Art. Nr. Bezeichnung
27389 Lichtleiter 10>8 mm schwarz (G2)
6
608538 Lichtleiter Pin-Point 6/2 mm schwarz (G2)
551756 Blendschutz (-kegel)
92496 Blendschutzschild
5
627299 Ladestation 20i (G2)
627300 Akku bluephase 20i (G2)
27298 bluephase 20i Handstück (G2)
6
607922 bluephase meter
608554 Schutzhüllen
Technische Daten
Betriebsspannung Ladestation 5 VDC
Betriebsspannung Handstück 3.7 VDC mit Akku
Netzgerät 100–240 VAC / 50-60 Hz / max. 0.4 A /
Betriebsbedingungen
Temperatur +10 °C bis +40 °C
Relative Feuchte 30 % bis 75 %
Luftdruck 700 hPa bis 1060 hPa
Abmessungen Ladestation L=205mm; B=150mm; H=85mm
Gewicht Ladestation 250 g
Ladezeit ca. 2 h (bei leerem Akku)
Stromversorgung Handstück Li-Po Akku
Max. Akkuzeit ca. 45 Min.
Lichtquelle polywave LED
Wellenlängenbereich 385–515 nm
LED-Klasse 2 LED LIGHT
Lichtintensität 2.000 - 2.200 mW/cm
Betrieb 6 Min. ein / 4 Min. aus (Intermittierend)
Abmessungen Handstück: L=260mm; B=42mm; H=120mm
Gewicht Handstück (inkl. Akku) 245 g
Transport- und Lagerbedingungen:
Temperatur –20 °C bis +60 °C
Relative Feuchte 10 % bis 75 %
Luftdruck 500 hPa bis 1060 hPa
Die bluephase 20i in geschlossenen oder überdachten Räumen lagern.
Das Gerät keinen starken Erschütterungen aussetzen.
Akku
• nicht bei Temperaturen über 40°C / 104°F (bzw. kurzzeitig 60°C / 140°F)
lagern, empfohlen wird eine Lagerung bei 15-30 °C (59-86 °F)
• immer aufgeladen und
• nicht länger als 6 Monate lagern
5 VDC mit Netzteil
Output 5 VDC
Hersteller: Friwo
TYP 15.2630
(bei neuem, voll geladenem Akku)
DO NOT STARE INTO BEAM
CLASS 2 LED PRODUCT
Max. 5.11 mW / Wavelenght 385 - 515 nm
2
33
Page 32

Cher client,
Nous vous remercions d'avoir choisi la lampe
bluephase 20i. Une polymérisation optimale
des matériaux photopolymérisables est une
condition primordiale pour obtenir de façon
constante et reproductible des restaurations
de haute qualité. La lampe à polymériser joue
elle aussi un rôle décisif. La lampe bluephase
20i est un dispositif médical de haute qualité
correspondant aux dernières normes scientifiques et technologiques ainsi qu'aux normes
industrielles.
Ce mode d'emploi va vous permettre de
mettre en marche votre appareil en toute
sécurité, de profiter de toutes ses possibilités,
et de lui assurer une longue durée de vie.
Pour toute question supplémentaire, nous
vous remercions de nous contacter (adresse
sur le verso).
Votre équipe Ivoclar Vivadent
34
Page 33

Sommaire
Sécurité
Utilisation usuelle 36
Indication 36
Notes de sécurité 36
Première mise en marche
Base de chargement 38
Pièce à main 39
Batterie 39
Cordon d‘alimentation Click & Cure 40
Fonctionnement
Sélection du programme et du
temps de polymérisation 42
Fonction mémoire des paramètres
de polymérisation 44
Mise en marche
Signal sonore 44
Intensité lumineuse 44
Mesure de l'intensité lumineuse 44
Maintenance et nettoyage
Carters de la pièce à main 45
Embouts lumineux 45
Contacts de la batterie 45
Recyclage 45
Que faire en cas de … 46
Garantie 47
Procédure en cas de pannes 47
Spécifications produits
Livraison 47
Accessoires 47
Données techniques 47
Conditions de fonctionnement 47
Conditions de stockage et de transport 47
Déclaration de conformité 92
Français
35
Page 34

LED LIGHT
DO N OT STAR E INTO BEAM
CLAS S 2 L ED PRO DUCT
M
ax. 5,11 mW / Wavelength 385 - 515 nm
IEC 60 825-1:19 93+A1:19 97+A2 :2001
Sécurité
Usage habituel
bluephase 20i est une lampe à photopolymériser à LED de
haute performance qui produit une lumière bleue dense de
haute énergie. Elle est utilisée pour la polymérisation de
matériaux dentaires au fauteuil. L'utilisation requiert
l'observation des recommandations et réglementations du
mode d'emploi.
Indication
Grâce à son large spectre d'émission "polywave", bluephase
est particulièrement recommandée pour la polymérisation
de tous les matériaux dentaires photopolymérisables dans
une longueur d'onde de 385–515nm. Ces matériaux
incluent les produits de restauration, les bondings/adhésifs,
les bases, les liners, les matériaux de scellement de sillons
et fissures, les matériaux temporaires ainsi que les colles
pour brackets orthodontiques et les colles pour les restaurations prothétiques, tels que les inlays céramiques.
Contre indications
Les matériaux dont la polymérisation est activée
dans une longueur d'onde en dehors de
385–515 nm. (pas de matériaux connus à ce
jour) Si vous n'êtes pas sûr de certains produits,
veuillez demander au fabricant du matériau correspondant.
Ne pas charger ou utiliser cet appareil à
proximité de substances inflammables ou
combustibles.
Les téléphones portables et autres appareils de
communication HF (Haute Fréquence) peuvent
interférer avec les équipements médicaux.
L'utilisation d'un téléphone portable pendant le
fonctionnement de la lampe est interdit.
Attention – L'utilisation de dispositifs de
réglage ou de contrôle ou de procédures autres
que celles précisées dans le présent document
peut entrainer une exposition dangereuse aux
radiations.
36
Notes de sécurité
bluephase 20i a été fabriquée conformément aux Directives
IEC 601-1 (EN 60601-1) et EMC, répondant aux Directives
de l'UE, et est classée dans la catégorie 2 des LED.
Le fabricant expédie l'appareil dans des conditions de
sécurité et des conditions techniques optimales. Pour
maintenir ces conditions et assurer un usage sans risque, il
est nécessaire de respecter les recommandations et les
réglementations de ce mode d'emploi. Pour prévenir les
dommages sur l'appareil et tout risque pour les patients, les
utilisateurs et les tiers doivent respecter les instructions de
sécurité suivantes :
NRTL (Nationally Recognized
Testing Laboratory)
Manipulation et responsabilité
• bluephase 20i doit être réservée aux usages
recommandés. Tout autre utilisation est contre indiquée.
Nous rejetons toute responsabilité pour des dommages
liés à un usage inadapté ou une panne pour non-respect
du présent mode d'emploi.
• De plus, l'utilisateur est responsable de l'usage de la
lampe bluephase 20i de façon appropriée en respectant
les indications recommandées, et ce particulièrement si
d'autres équipements sont utilisés à proximité pendant le
fonctionnement de la lampe.
• N'utiliser que les pièces détachées et accessoires fournis
par Ivoclar Vivadent (voir Accessoires). Nous rejetons
toute responsabilité pour les dommages causés par
l'utilisation d'autres pièces détachées ou accessoires.
Voltage
Avant la mise en marche, assurez-vous que :
a) Le voltage indiqué sur la base est conforme à la
puissance délivrée par l'alimentation électrique et
b) Que l'appareil se trouve à température ambiante.
Si la batterie ou le cordon d'alimentation sont utilisés séparément, par exemple lors de la mise en marche ou lors de
l'opération Click & Cure raccordé au courant, les contacts
avec les patients ou les tiers doivent être évités. Ne pas
toucher les contacts accessibles de la batterie ou les
connexions électriques.
Page 35

Règles de sécurité
S'il est établi qu'il n'est plus possible d'utiliser la lampe en
toute sécurité, couper l'alimentation de l'appareil et retirer
la batterie pour éviter tout fonctionnement accidentel. Cela
peut être le cas, si par exemple, l'appareil est visiblement
endommagé ou ne fonctionne plus correctement. La déconnexion complète de l'alimentation de l'appareil est
effective uniquement lorsque le cordon d'alimentation est
déconnecté de la batterie.
Protection des yeux
Eviter toute exposition directe ou indirecte avec les yeux.
Une exposition prolongée à la lumière peut être inconfortable et provoquer des dommages. C'est pour cela, que
l'utilisation des embouts de protection oculaire est recommandée. Les personnes sensibles à la lumière, qui prennent
des médicaments photosensibles ou qui ont subi une chirurgie oculaire, les personnes qui travaillent avec l'appareil ou
à proximité pendant de longues périodes ne doivent pas
être exposées à la lumière de cette lampe et doivent porter
des lunettes de protection (orange) qui absorbent la lumière
en dessous de 515 nm.
Batterie
Attention : N'utiliser que les pièces d'origine. En particulier,
n'utiliser que les batteries et bases de chargement d'origine
Ivoclar Vivadent. Ne pas mettre la batterie en court-circuit.
Ne pas stocker la batterie à une température supérieure à
40°C (ou 60° sur une courte période). Stocker toujours les
batteries chargées. La période de stockage ne doit pas
excéder 6 mois. Ne pas brûler la batterie (risque d'explosion).
Dégagement de chaleur
(Prévention des brulures)
Comme cela est le cas avec toutes les lampes à haute performance, une haute énergie lumineuse a pour résultat un
certain dégagement de chaleur. Une exposition prolongée
sur la pulpe ou des tissus mous peut engendrer des dommages. Cette lampe à polymériser à haute performance doit
donc être utilisée uniquement par des professionnels entrainés en respectant les recommandations de polymérisation.
De plus, une polymérisation continue de plus de 5 secondes
dans le Programme Turbo sur la même zone, ainsi qu'un
contact direct sur la gencive, les muqueuses, ou la peau,
doivent être évités. Si nécessaire, polymériser par intervalles
intermittents de 5 secondes. Une protection de l'élévation
de température peut se faire avec une digue. Si l'irradiation
des tissus mous ne peut être évitée, utiliser la lampe en
réduisant l'intensité lumineuse (Programme Low Power).
Polymériser les restaurations indirectes par intervalles intermittents de 10 secondes dans le Programme High Power et
de 1x 5 secondes dans le Programme Turbo ou utiliser un
système de refroidissement tel qu'un jet d'air.
Les instructions des temps et
programmes de polymérisation doivent être respectés
(voir Choix des programmes
et temps de polymérisation).
De plus, l'embout doit tout
le temps être directement
placé sur le matériau à polymériser, (par exemple en le
tenant en place à l'aide d'un doigt).
Notez que toute flamme, explosion ou dégagement de
fumée dus à une mauvaise manipulation ou à un problème
mécanique peut provoquer une réaction de la batterie
Lithium Polymère. Les batteries Lithium Polymère endommagées ne doivent plus être utilisées.
Les electrolytes et les fumées d'électrolytes libérés par une
explosion, une flamme ou un dégagement de fumée sont
toxiques et corrosifs. En cas de contact avec les yeux ou la
Il n'est pas recommandé d'utiliser le Programme High
Power/Turbo pour les patients sensibles. Dans ce cas, utiliser
la lampe avec une intensité réduite (Programme Low
Power).
37
Page 36

Première mise en marche
Contenu
Contrôler la livraison afin de vérifier qu'il ne manque rien et
qu'aucun dommage n'est survenu lors du transport (voir
livraison). Si des composants manquent ou sont endommagés, contacter immédiatement votre revendeur ou le Service
Après-Vente.
Base de chargement
Avant de mettre en marche l'appareil, assurez-vous que le
voltage inscrit sur la base de chargement est conforme à
votre alimentation électrique. Les indications sont portées
sur la plaque d'identification qui se trouve sous la base de
chargement.
Poser la base de chargement sur une surface plate et
stable. Enlever le film de protection couvrant la prise, mettre
en place la prise de connexion au niveau du logement sous
la base de chargement. L'incliner légèrement et exercer une
légère pression jusqu'à entendre un clic.
Brancher le cordon d'alimentation sur le secteur et sur l'unité d'alimentation.
L'indicateur Power On sur le côté gauche du capot de la
base de chargement s'allume en bleu (voir voyant lumineux
sur la base)
38
Page 37

Pièce à main
Avant d'insérer la fibre optique conductrice de lumière,
retirer le film de protection sur l'ouverture de la pièce à
main.
Tourner légèrement le conducteur de lumière jusqu'à ce
qu'il soit fixé sur la pièce à main.
Positionner l'écran de protection oculaire sur la fibre
optique.
Batterie
Il est conseillé d'effectuer une charge complète de la
batterie avant la première utilisation.
Faire glisser la batterie dans la pièce à main jusqu'à
l'obtention du clic de mise en place.
Introduire la pièce à main dans son emplacement sur la
base de chargement en prenant soin d'enlever une
éventuelle house de protection. Lorsque la batterie est
pleinement chargée, son autonomie est de 45 minutes
Astuce
Si possible, utiliser la lampe avec une batterie totalement
chargée. Cela prolongera sa durée de vie. Nous recommandons de remettre la pièce à main sur la base de chargement après chaque utilisation. Le temps de charge d'une
batterie vide est de 2 heures.
39
Page 38

Première mise en marche
Cordon Click & Cure
bluephase 20i peut être branchée sur secteur à n'importe
quel moment, plus particulièrement en cas d'urgence
lorsque la batterie est vide.
Pour cela, retirer la batterie de la pièce à main, puis retirer
l'unité de chargement de son logement sous le socle de la
base de chargement. Ne pas tirer sur le cordon.
Insérer l'unité de chargement dans la pièce à main jusqu'à
entendre un clic.
Pendant que la pièce à main est connectée au courant, la
base de chargement n'alimente pas la batterie tant qu'elle
n'est pas connectée au secteur.
La lampe est totalement mise hors tension lorsque la prise
a été retirée.
40
Page 39

Signes et symboles
L'indicateur de charge de la batterie
Lorsque la pièce à main est allumée, l'indicateur de charge affiche les informations suivantes :
Batterie totalement chargée (temps de polymérisation en
continu d'environ 45 minutes).
Batterie à moitié chargée.
Réserve (lorsque la dernière barre d'affichage du niveau de
batterie est rouge, la lampe doit être chargée rapidement).
Lorsque la batterie est mise en charge, "Charging Battery"
s'affiche brièvement avant le retour en mode stand-by de
l'écran.
Si la batterie est totalement déchargée, la pièce à main se
met automatiquement en mode stand-by. La lampe ne peut
alors etre activée. Cependant la lampe peut etre utilisée en
mode Click et Cure grâce au raccordement sur secteur.
La batterie étant un consommable, elle doit etre remplacée
après 2½ ans d'utilisation. La date de fabrication est indiquée sur la batterie.
S000001
04/04/09
dd/mm/yy
41
Page 40

Fonctionnement
Désinfecter les différentes surfaces de la lampe et passer les
conducteurs de lumière et écrans de protection à l'autoclave avant chaque utilisation.
Par ailleurs, assurez-vous que l'intensité lumineuse obtenue
permet une polymérisation adéquate. Pour cela, vérifier que
le conducteur de lumière n'est ni sale ni endommagé, puis
contrôler l'intensité avec un radiomètre (par exemple "bluephase meter" Ivoclar Vivadent).
Sélection du programme et du temps de
polymérisation
bluephase 20i offre 4 programmes pour répondre à toutes
les indications. Le choix de celui-ci se fera grâce au bouton
de sélection de programme. L'affichage change en conséquence (voir "indicateurs sur la pièce à main"). La lampe
est équipée des programmes suivants (pré reglés) :
Pré réglages
TURBO 5 secondes
Le temps de polymérisation souhaité est
sélectionné en utilisant le bouton de
sélection du temps. Les utilisateurs ont
le choix entre 5, 10, 15, 20 et 30
secondes.
Reportez-vous au mode d'emploi du matériau à polymériser
pour le choix de la durée.
Les recommandations de polymérisation des matériaux
composites s'appliquent à toutes les teintes. Sauf indication
contraire dans le mode d'emploi du matériau utilisé, photopolymériser par couche de 2 mm maximum. Généralement,
ces recommandations s'appliquent dans les situations où le
conducteur de lumière est orienté directement sur le matériau à polymériser. L'augmentation de la distance entre la
source de lumière et le matériau demande d'accroître le
temps de polymérisation en conséquence. Par exemple, si la
distance avec le matériau est de 8 mm, l'intensité lumineuse réelle est réduite d'environ 50%. Dans ce cas, il convient
de doubler le temps de polymérisation.
1) Les informations fournies ci-dessus s'appliquent pour
l'utilisation de l'embout 10> 8 mm fourni.
2) Les informations concernant l'élévation de température
et la prévention du risque de brulures doivent etre prises
en considération (voir les notes de sécurité)
HIGH 10 secondes
(High Power)
LOW 10 secondes
(Low Power)
SOFT 15 secondes
(Soft start)
42
Page 41

Intensité
Programmes de polymérisation
Programme Turbo
Haute énergie régulière pour la
polymérisation de matériaux de
restauration et de collage dans le cas
de restaurations directes et indirectes.
2
.000 mW/cm
2
0
t [s]
Programme High Power
Haute énergie régulière pour la
polymérisation de matériaux de
restauration et de collage dans le cas
de restaurations directes et indirectes.
2
1.200 mW/cm
0
t [s]
Programme Low Power
Basse énergie, élévation de température réduite pour la polymérisation
des adhésifs, des liners et des
matériaux de restauration pour les
cavités de classe V dans les zones
2
650 mW/cm
0
proches de la pulpe.
t [s]
Programme Soft Start
Augmentation progressive de
l'intensité lumineuse avec une
réduction du stress de polymérisation
et de la température pour la
polymérisation des matériaux de
2
1.200 mW/cm
650 mW/cm
05
1) Valable pour une épaisseur de 2 mm maximum et dans la mesure où le mode d‘emploi du matériau utilisé n‘indique pas d‘autre recommandation (comme cela peut être le cas par exemple avec les teintes Dentine)
2) Valable pour une épaisseur de 4 mm maximum et dans la mesure où le mode d‘emploi du matériau utilisé n‘indique pas d‘autre recommandation (comme cela peut être le cas par exemple avec les teintes Dentine)
3) Valable pour une épaisseur de 3 mm maximum 4) Valable pour la photopolymérisation (utilisation de la pâte base uniquement) 5) Valable pour la polymérisation duale
t [s]
2
restauration.
Temps d'exposition pour les composites
Temps d'exposition pour Tetric EvoCeram / IPS Empress Direct
Matériaux de restaurations
Composite
1)
• 2 mm
PS Empress Direct / IPS Empress Direct Flow /
I
Tetric EvoCeram / Tetric EvoFlow / Tetric /
Tetric Basic White / Tetric N-Ceram / Tetric N-Flow
Heliomolar / Heliomolar HB / Heliomolar Flow / Autres
)
2
• 4 mm
Tetric EvoCeram Bulk Fill
etric Basic White
T
Compomère
Compoglass F / Compoglass Flow
Restaurations indirectes/
Colles
V
Variolink N Clear Veneer / Variolink Ultra
Dual Cement 5)/ Variolink II
D
Heliosit Orthodontic
Telio Add-On Flow
Telio Stains
PS Empress Direct Color
I
IPS Empress Direct Opaque
Matériaux de restaurations
Composite
• 2 mm
IPS Empress Direct / IPS Empress Direct Flow /
Tetric EvoCeram / Tetric EvoFlow / Tetric /
etric Basic White / Tetric N-Ceram / Tetric N-Flow
T
Heliomolar / Heliomolar HB / Heliomolar Flow / Autres
• 4 mm
Tetric EvoCeram Bulk Fill / Tetric Basic White
Compomère
Compoglass F / Compoglass Flow
Restaurations indirectes/
Colles
Variolink II Base
Variolink N Clear Veneer / Variolink Ultra 5)/
Dual Cement 5)/ Variolink II
Divers
Helioseal / Helioseal F / Helioseal Clear
Monopaque
MultiCore Flow / Multicore HB
Heliosit Orthodontic
Telio Add-On Flow
Telio Stains
IPS Empress Direct Color
IPS Empress Direct Opaque
Adhésifs
AdheSE / AdheSE One F
ExciTE / ExciTE DSC
Tetric N-Bond / Tetric N-Bond Self-Etch
Heliobond (Syntac)
Matériaux temporaires
Telio CS Inlay/Onlay
Systemp.inlay/onlay
Fermit / Fermit N
Telio CS Link / Systemp.link
Divers
Heliosit Orthodontic
Vivaglass Liner
Matériaux de restaurations
Composite
• 2 mm
IPS Empress Direct / IPS Empress Direct Flow /
Tetric EvoCeram / Tetric EvoFlow / Tetric /
Tetric Basic White / Tetric N-Ceram / Tetric N-Flow
Heliomolar / Heliomolar HB / Heliomolar Flow / Autres
• 4 mm
Tetric EvoCeram Bulk Fill / Tetric Basic White
Compomer
Compoglass F / Compoglass Flow
ariolink II Base
ivers
)
1
2)
1)
2)
)
3
4)
Variolink Veneer / Variolink N Base
/
5)
3)
)
4
/ Variolink Veneer / Variolink N Base
5)
3)
)
5
/
2,000 – 2,200 mW/cm
10 secondes
5 secondes
Temps de polymérisation
5 secondes
2x 5 secondes
5 secondes
x 5 secondes
2
2x 5 secondes
4)
ar mm de céramique :
/
P
1x 5 secondes par face
2x 5 secondes
2x 5 secondes
5 secondes
secondes
5
2x 5 secondes
Temps de polymérisation
10 secondes
15 secondes
10 secondes
20 secondes
)
4
/
Par mm de céramique :
10 secondes par faces
10 secondes
20 secondes
20 secondes
10 secondes
15 secondes
10 secondes
10 secondes
20 secondes
Temps de polymérisation
10 secondes
10 secondes
10 secondes
10 secondes
20 secondes par face
20 secondes
20 secondes
Temps de polymérisation
15 secondes
20 secondes
15 secondes
20 secondes
2
43
Page 42

Mise en marche
Fonction mémoire des paramètres de
polymérisation
Les derniers réglages utilisés, programme de polymérisation
et temps de polymérisation, sont automatiquement
mémorisés.
Démarrage
La lampe s'allume avec le bouton de démarrage. Une fois le
temps de polymérisation écoulé, le programme de polymérisation s'arrête automatiquement. La polymérisation peut
être interrompue avant la fin du temps complet en
appuyant sur le bouton de démarrage. Le ventilateur se
déclenche en même temps que la lumière. Une fois la polymérisation terminée, celui-ci continue à fonctionner un certain temps pour refroidir la lampe. La batterie ne doit pas
être retirée tant que le ventilateur continue de fonctionner.
Signal sonore
Un signal sonore peut être entendu au cours des fonctions
suivantes
• Mise en marche (Stop)
• Toutes les 10 secondes
• Changement de programme
• Changement du temps de polymérisation
• Mise en place de la batterie sur la base de chargement
• Insertion de la batterie
• Message d'erreur
Le volume du signal sonore peut être ajusté.
Pour cela, appuyer sur le bouton bleu (voir le descriptif produit) lorsque la lampe n'est pas en fonction, puis diminuer
ou couper le volume grâce au bouton gauche de sélection
du temps. Pour réactiver les signaux sonores ou augmenter
le volume, presser le bouton de volume bleu puis le bouton
droit de sélection du temps.
Intensité lumineuse
L'intensité lumineuse est maintenue à un niveau constant
pendant l'utilisation. Si le conducteur de lumière 10>8 mm
fourni avec la lampe est utilisé, l'intensité lumineuse est
d'environ 2000 – 2200 mW/cm2.
L'utilisation d'embouts lumineux autres que ceux fournis a
une influence directe sur l'intensité lumineuse émise.
Dans les embouts lumineux standards aux parois parallèles
(10 mm), le dia-mètre est égal aux deux extrémités. Dans
les embouts lumineux turbo rétrécis à leur extrémité
(10>8 mm, 6>2 mm Pin-Point), le diamètre de la partie
arrière est plus large que celui de la fenêtre d'émission de
lumière. La lumière bleue incidente est ainsi concentrée sur
une plus petite surface, ce qui augmente l'intensité lumineuse émise.
Les embouts lumineux Pin-Point conviennent pour la polymérisation de petites surfaces, comme par ex. la fixation de
facettes avant l'élimination des excès. Pour des polymérisations de zones plus larges, il est nécessaire de changer
l'embout lumineux.
Mesure de l'intensité lumineuse
L'intensité lumineuse de la bluephase 20i avec son conducteur de lumière 10>8 mm peuvent être contrôlés, par
exemple avec le radiomètre bluephase meter.
Si la valeur mesurée ne correspond pas à l'intensité lumineuse attendue, procéder de la façon suivante :
• Contrôler le programme de polymérisation sélectionné.
• Nettoyer le radiomètre avec un chiffon humide.
• Retirer le conducteur de lumière et nettoyer la fenêtre
d'émission de lumière de la pièce à main à l'aide d'un
coton imbibé d'alcool.
• Nettoyer si possible les conducteurs de lumières souillés
(voir “Maintenance et nettoyage”).
• Remplacer tout conducteur de lumière endommagé.
Si ces mesures n'améliorent pas le résultat, veuillez
contacter votre distributeur ou le Service Après-Vente
Ivoclar Vivadent.
44
Page 43

Maintenance et nettoyage
Pour des questions d’hygiène, il est recommandé d’utiliser
un manchon de protection jetable pour chaque patient. Les
surfaces contaminées du dispositif ainsi que les embouts de
protection oculaire doivent être désinfectés (par exemple
FD333, FD366/Dürr Dental, Incidin Liquid/Ecolab) et
l’embout lumineux stérilisé avant chaque utilisation si le
dispositif est utilisé sans manchon de protection jetable.
Assurez-vous qu'aucun liquide ni autre substance ne
pénètre dans la pièce à main ou la base de chargement
pendant le nettoyage (risque d'électrocution). Déconnecter
la base de chargement du courant lors des opérations de
nettoyage.
Carters de la pièce à main
Essuyer la pièce à main et son logement dans la base de
chargement avec une solution sans aldéhyde. Ne pas utiliser de solutions agressives (ex. solutions à base d'essence
d'orange ou contenant plus de 40% d'éthanol), de solvants
(ex. l'acétone), ou d'instruments pointus qui risqueraient
d'endommager ou d'abîmer le plastique. Nettoyer le plastique souillé avec une solution savonneuse.
Conducteurs de lumière
Nettoyer les conducteurs de lumière avec un désinfectant et
un chiffon doux. Retirer avec précaution du conducteur de
lumière tout résidu de matériau tel que du composite. Ceci
peut être fait à l'ongle ou à l'aide d'une spatule en
plastique par exemple. Ne pas utiliser d'instrument aiguisé
ou pointu, car ils risquent d'abîmer la surface du conducteur de lumière et ainsi réduire sa transmission. Les écrans
de protection et les embouts conducteurs de lumière
doivent être nettoyés à l'autoclave (ex. 121°C, 2 bars,
15 mm). Vérifier que le conducteur de lumière n'est pas
endommagé. Si le conducteur de lumière est testé avec une
source lumineuse et que certaines parties apparaissent
noircies, cela signifie que des fibres de verres sont cassées.
Il faut dans ce cas remplacer le conducteur de lumière par
un nouveau.
Contacts de la batterie
Pour une conductivité optimale, les contacts de la batterie
ne doivent pas être contaminés (ex. par des résidus de
composite). Pour cela, nettoyer-les à l'aide d'une lingette
désinfectante après chaque patient.
Recyclage
L'appareil ne doit pas être jeté avec les déchets ménagers.
Vous trouverez des informations détaillées en ce qui concerne
l'élimination de l'appareil sur le site web Ivoclar Vivadent
de votre pays. Débarrassez-vous des batteries hors d'usage
et de la lampe à polymériser selon les normes et exigences
légales dans votre pays. Les piles ne doivent pas être
incinérées.
45
Page 44

Que faire en cas de…?
Symboles
Causes
Défaut d'électronique de la base
de chargement
L'appareil a surchauffé ou a subit
une température trop basse
Défaut d'électronique de
la batterie
Batterie vide
Rectification de l'erreur
Enlever et remettre la batterie. Si l'erreur persiste, remplacer la batterie
par l'unité d'alimentation (Click et Cure). Si l'erreur persiste, contacter
votre revendeur local ou le Service Après-Vente.
Laisser refroidir l'appareil à température ambiante et réessayer plus tard.
Si l'erreur persiste, contacter votre revendeur local ou le
Service Après-Vente.
Enlever et remettre la batterie. Si l'erreur continue de s'afficher, placer
l'appareil sur la base de chargement. Si l'erreur persiste, remplacer la
batterie par l'unité d'alimentation (Click et Cure).
Si l'erreur persiste, contacter votre revendeur local ou le
Service Après-Vente.
Placer la pièce à main sur la base de chargement.
Le message "Charging" s'affichera. Si la batterie n'est pas chargée, les
contacts doivent être nettoyés.
Si l'erreur persiste, contacter votre revendeur local ou le
Service Après-Vente.
Aucun
affichage
sur l'écran
pendant la
charge
Le voyant
de la base
de chargement ne
s'allume pas
46
Contacts de chargement
(batterie/base de chargement)
souillés
Batterie en mode sécurité
(circuit de protection intégré)
Unité d'alimentation non
connectée ou défectueuse
Vérifier que la pièce à main a été placée correctement sur la base de
chargement. Information: "Charging Battery" s'affiche brièvement avant
le retour en mode stand-by de l'écran. Nettoyer les contacts de la batterie. Si ce nettoyage ne résout pas le problème, enlever la batterie de la
pièce à main et la charger seule sur la base de chargement pendant
approximativement 10 minutes. Si l'erreur persiste, contacter votre revendeur local ou le Service Après-Vente.
Vérifier les contacts de la batterie et le branchement de l'unité d'alimentation ainsi que le cordon d'alimentation (le voyant s'allume en vert si il
fonctionne correctement).
Si l'erreur persiste, contacter votre revendeur local ou le
Service Après-Vente.
Page 45

Garantie/
Procédure en cas de pannes
Spécifications du produit
La lampe bluephase 20i est garantie 3 ans à partir de la
date d'achat (batterie 1 an).
Des pannes dues à un matériel défectueux ou à des vices
de fabrication sont réparés gratuitement pendant la durée
de la garantie. Celle-ci ne couvre aucun dommage, matériel
ou non, autre que ceux mentionnés.
L'appareil doit être utilisé exclusivement pour les indications définies. Tout autre usage est contre-indiqué.
Le fabricant rejette toute responsabilité quant à un mauvais
usage de l'appareil. Aucune demande de garantie ne peut
être acceptée dans ce genre de cas. Ceci est particulièrement vrai pour :
• dommage lié à un usage inadapté, spécialement dans le
cas de batteries mal conservées (voir Batterie);
• dommage de composant lié à l'usure dans les conditions
d'utilisation normales (par exemple. Batterie);
• dommage lié à des facteurs externes, exemple un choc,
une chute sur le sol;
• dommage lié à des réglages ou à une installation
incorrecte;
• dommage survenant lors du branchement de la lampe
sur une source d'énergie dont le voltage et la fréquence
ne sont pas conformes à ceux inscrits sur le socle de la
lampe.
• dommage lié à des réparations inadaptées ou à des
modifications réalisées par des réparateurs non certifiés
En cas de réclamation sous garantie, la lampe complète
(pièce à main, base de chargement, cordon électrique, et
l'unité d'alimentation) doivent être retournés en port dû au
distributeur ou directement à Ivoclar Vivadent, avec la
facture d'achat. Utiliser le conditionnement d'origine et le
carton correspondant pour le transport.
Les réparations doivent être réalisées uniquement par un
service certifié par le Service Après-Vente Ivoclar Vivadent.
En cas de défaut ne pouvant être rectifié, veuillez contacter
votre distributeur ou le Service Après-Vente local (voir les
adresses au dos). Une description claire du défaut ou des
conditions de sa survenue pourront faciliter l'identification
du problème. Veuillez joindre ce descriptif quand vous
retournez l'appareil.
Contenu
1 Base de chargement, 1 Cordon électrique, 1 unité d'alimentation "Power pack",
Pièce à main, 1 Batterie (Li-Po), 1 Conducteur de lumière Power-Booster
1
(10>8mm), 1 écran de protection, 3 Embout de protection occulaire,
1 boîte de housses de protection, 1 Mode d'emploi
Accessoires
Les accessoires suivants sont disponibles pour la bluephase 20i :
EF Description
R
627389 Embout conducteur de lumière 10>8 mm, noir (G2)
608538 Conducteur de lumière Pin-point light 6/2 mm, noir (G2)
51756 Embout de protection occulaire
5
592496 Ecran de protection
627299 Base de chargement bluephase 20i (G2)
27300 Batterie bluephase 20i (G2)
6
627298 Pièce à main bluephase 20i (G2)
607922 bluephase meter
608554 Housses de protection
Données techniques
Voltage base de chargement 5 VDC
Voltage pièce à main 3.7 VDC avec la batterie
Unité d'alimentation 100-240 VAC / 50-60 Hz /
Power pack max. 0.4 A / Puissance 5 VDC
Conditions de fonctionnement
Température +10 °C à +40 °C (+50 à +104°F)
Humidité relative 30 % à 75%
Pression ambiante 700 hPa à 1060 hPa
Dimensions de la base L = 205 mm; l = 150 mm; H = 85 mm
de chargement
Poids de la base 250 g
de chargement
Temps de charge approx. 2 h (avec une batterie vide)
Source d'alimentation de Li-Po batterie
la pièce à main
Temps de polymérisation Maximum approx. 45 min.
Source lumineuse polywave LED
Spectre d'émission 385–515 nm
Lumière LED LED LIGHT
Energie de polymérisation 2000 - 2200 mW/cm
Fonctionne 6 min. on / 4 min. off (par intermittence)
Dimensions de la pièce L = 260 mm; l = 42 mm; H = 120 mm
à main
Poids de la pièce à main (batterie incluse) 245 g
Transport et conditions de stockage
Température -20 °C à +60 °C (-4 à 140°F)
Humidité relative 10% à 75%
Pression ambiante 500 hPa à 1060 hPa
bluephase 20i, doit être rangée en hauteur et dans une pièce fermée.
Protéger l'appareil des chocs sévères.
Batterie
• Ne pas stocker la batterie à une température supérieure à 40 °C (60 °C pour une
courte période). Température de stockage recommandée 15-30 °C (59-86 °F)
• Toujours stocker la batterie chargée
• La durée de stockage ne doit pas dépasser les 6 mois
5 VDC avec le câble d’alimentation
Fabricant: Friwo
TYPE 15.2630
(avec une batterie neuve et totalement chargée)
Ne pas regarder le faisceau
Produits LED de classe 2
Max. 5.11 mW / longueur d'onde 385 - 515 nm
2
47
Page 46

Istruzioni d’uso
Una polimerizzazione di qualità è requisito
importante per realizzare restauri d’eccellenza. Anche la lampada fotopolimerizzatrice rappresenta un elemento decisivo per il
buon esito di un restauro. La ringraziamo
pertanto di aver scelto bluephase
bluephase
®
20i è un’apparecchiatura medicale ideata secondo i criteri tecnologici e
scientifici più innovativi e conforme alle
normative ed agli standard qualitativi più
elevati.
Le presenti Istruzioni d’uso La guideranno
ad un utilizzo sicuro dell’apparecchio, per
consentirLe di utilizzare appieno ogni sua
caratteristica assicurando al contempo la
massima longevità della lampada.
Per qualsiasi informazione, non esiti a contattarci (indirizzi sul retro delle Istruzioni
d’uso).
Il suo
Ivoclar Vivadent Team
®
20i.
48
Page 47

Indice
Sicurezza
Utilizzo previsto 50
Indicazioni 50
Norme di sicurezza 51
Messa in funzione
Base di ricarica 52
Manipolo 53
Batteria 53
Modalità Click & Cure con lampada collegata
al cavo di alimentazione elettrica 54
Operazioni d’uso
Selezione del programma e del tempo
di polimerizzazione 56
Funzione Memoria di polimerizzazione 58
Avvio 58
Segnali acustici 58
Radianza 58
Misurazione della radianza 58
Manutenzione e pulizia
Alloggiamento 59
Conduttori ottici 59
Contatti batteria 59
Smaltimento 59
Cosa fare se....? 60
Garanzia /
Procedura in caso di riparazione 61
Specifiche prodotto
Confezionamento 61
Accessori 61
Dati tecnici 61
Condizioni operative 61
Condizioni di trasporto e immagazzinamento 61
Dichiarazione di conformità 90
Italiano
49
Page 48

LED LIGHT
DO N OT STAR E INTO BEAM
CLAS S 2 L ED PRO DUCT
Max. 5,11 mW / Wavelength 385 - 515 nm
IEC 60 825-1:19 93+A1:19 97+A2 :2001
Sicurezza
Utilizzo
bluephase 20i è una lampada LED fotopolimerizzante ad
alta intensità luminosa con luce blu ad elevata energia ed è
utilizzata per la polimerizzazione di materiali dentali fotopolimerizzabili direttamente alla poltrona. Le presenti istruzioni d’uso forniscono raccomandazioni e norme per un
utilizzo corretto di questo apparecchio e sono da leggere
con attenzione.
Indicazioni
bluephase 20i, con la sua banda ad ampio spettro “polywave” è particolarmente indicata per la polimerizzazione di tutti
i materiali dentali fotopolimerizzabili compresi nello spettro di
lunghezza d’onda tra 385–515 nm: materiali da restauro,
bonding/adesivi, liner, basi, sigillanti per fessure, materiali per
provvisori, cementi di fissaggio per bracket ortodontici e per
manufatti di laboratorio come p.e. inlay ceramici.
Controindicazioni
Materiali fotopolimerizzabili che non polimerizzano ad una lunghezza d’onda tra 385 –515
(attualmente non sono noti materiali di questo
tipo). In caso di dubbio, si consiglia di informarsi
presso la relativa casa produttrice.
Non ricaricare o utilizzare l’apparecchio in
prossimità di sostanze infiammabili o
combustibili.
Dispositivi portatili e mobili HF possono interferire con la strumentazione medicale. L’uso del
telefono cellulare è controindicato quando si
utilizza questo apparecchio.
Attenzione – se vengono impiegati dispositivi di
comando o regolazione diversi da quelli qui
indicati o si effettuano procedimenti diversi, si
può arrivare ad una pericolosa esposizione a
radiazioni.
50
Avvertenze di sicurezza
bluephase 20i é un apparecchio elettrico medicale sottostante alla direttiva IEC 601-1 (EN 60601-1) e EMV.
Soddisfa le vigenti Direttive EU ed é classificato nella Classe
LED 2.
L’apparecchio è inviato dal Produttore in perfette condizioni
di funzionamento e di sicurezza. Per conservare l’apparecchio in questo stato e garantire un’operatività priva di
rischi, osservare le note e le regole contenute nelle presenti
istruzioni d’uso. Per prevenire danni all’attrezzatura e rischi
a pazienti, utilizzatori e terzi, osservare le presenti istruzioni
di sicurezza.
NRTL (Nationally Recognized
Testing Laboratory)
Utilizzo e responsabilità
• bluephase 20i deve essere utilizzata esclusivamente per
le indicazioni previste. Qualsiasi altro uso è controindicato. Il Produttore non è responsabile per danni derivanti
da un utilizzo non conforme della lampada o dalla mancata osservanza delle Istruzioni d’uso.
• E’ responsabilità dell’utilizzatore provare l’idoneità nel-
l’impiego dell’apparecchio bluephase 20i per l’utilizzo e
gli scopi previsti. Ciò è di particolare importanza quando
altri strumenti vengano utilizzati nelle immediate
vicinanze nello stesso momento in cui la lampada fotopolimerizzatrice è in uso.
• Usare solo parti di ricambio e accessori originali Ivoclar
Vivadent (vedere Accessori). Il Produttore non risponde
per danni derivanti dall’uso di parti di ricambio o accessori di altra provenienza.
Voltaggio operativo
Prima dell’accensione assicurarsi che:
a) il voltaggio indicato sulla targhetta di alimentazione del-
l’apparecchio corrisponda al voltaggio della corrente
locale;
b) che la lampada fotopolimerizzatrice si trovi a temperatura
ambiente
Se la batteria o l’alimentatore vengono utilizzati separatamente, p.e. nella fase di avviamento o nella modalità Click
& Cure con apparecchiatura collegata al cavo di alimenta-
Page 49

zione elettrica, evitare il contatto con i pazienti o con terzi.
Non toccare i contatti scoperti della batteria o dell’alimentatore.
vi. In caso di contatto con gli occhi e la cute, sciacquare
immediatamente con molta acqua. Evitare di inalare i vapori.
In caso di malessere consultare il medico.
Riconoscimento di condizioni
di sicurezza insufficiente
Se si ha il sospetto che non sia più possibile operare in
sicurezza, staccare la corrente per evitare operazioni impreviste. L’uso della lampada può non risultare sicuro se, per
esempio, l’apparecchio è visibilmente danneggiato o funziona solo parzialmente. L’apparecchio è completamente spento solo se il cavo dell’alimentazione è stato staccato dalla
presa di corrente.
Protezione degli occhi
Prevenire l’esposizione diretta o indiretta degli occhi alla
luce della lampada fotopolimerizzatrice. Un’esposizione prolungata alla luce è fastidiosa e può causare danni. E’ pertanto consigliato l’uso dello schermo antiriflesso fornito con
la confezione. I soggetti sensibili alla luce, in cura con farmaci fotosensibilizzanti, o che sono stati sottoposti a interventi agli occhi, nonché i soggetti che operano con
l’apparecchiatura o in sua vicinanza per lunghi periodi di
tempo non dovrebbero esporsi direttamente alla luce della
lampada e dovrebbero indossare occhiali protettivi (arancio)
con lenti ad assorbimento luminoso di lunghezza d’onda
inferiore ai 515nm.
Batteria
Attenzione: usare solo pezzi di ricambio originali, soprattutto batterie e basi di ricarica Ivoclar Vivadent. Non mettere
in corto circuito la batteria. Non conservare la batteria a
temperature superiori a 40° C / 104°F (o brevemente 60° C /
140°F) e conservarla sempre carica. Il tempo di conservazione non deve superare i 6 mesi. Non smaltire nel fuoco,
rischio di esplosione.
Elevato sviluppo di calore
(rischio di ustioni)
Come per tutte le lampade ad alte prestazioni, la radianza
molto elevata determina uno sviluppo proporzionale di calore.
A seguito di un’esposizione diretta e prolungata della polpa o
delle mucose possono presentarsi danni irreversibili o reversibili. Pertanto questa apparecchiatura ad elevata radianza deve
essere usata solo da personale esperto e addestrato.
In generale devono essere rispettati i tempi di esposizione
prescritti. Sono assolutamente da evitare tempi di polimerizzazione ininterrotti di oltre 5 secondi nel programma Turbo
sulla stessa superficie dentale, nonché un contatto diretto
con gengive, mucose orali o cute. In casi particolari si consiglia una polimerizzazione ad intermittenza di max. 5 secondi. In caso di polimerizzazione sotto diga, evitare l’accumulo
di calore. Quando non è possibile evitare una irradiazione
delle mucose gengivali, si raccomanda di fare uso del programma ad intensità ridotta (Low Power). In caso di restauri
indiretti, si può lavorare ad intervalli intermittenti di 10 secondi ciascuno con il programma High-Power e di 1x 5 secondi
ciascuno con il programma Turbo oppure con raffreddamento esterno tramite getto d’aria.
Osservare scrupolosamente
le indicazioni relative al programma ed al tempo di polimerizzazione (cfr. “Selezione
del programma di polimerizzazione”). In ogni caso il
conduttore ottico dovrebbe
sempre essere posto il più vicino possibile sul materiale da
polimerizzare (aiutandosi a stabilizzare il conduttore con
l’indice della mano).
In considerazione che le batterie LiPo in caso di trattamento
improprio oppure in caso di danno meccanico, possono reagire con esplosione, fuoco o sviluppo di fumo. Non si devono riutilizzare batterie Li-Po danneggiate.
Gli elettroliti ed i vapori di elettrolite liberati in caso di
esplosione, fuoco e sviluppo di fumo sono tossici e corrosi-
Non è ammesso il trattamento di pazienti sensibili con il
programma High Power/Turbo. In questi specifici casi si
raccomanda l’uso del programma ad intensità ridotta
(Low Power).
51
Page 50

Messa in funzione
Confezionamento
Controllare che la confezione sia completa di ogni sua parte
e che durante il trasporto non siano stati arrecati danni
all’apparecchiatura (cfr. “Confezionamento”).
Qualora manchino delle parti o siano state danneggiate,
contattare immediatamente il proprio rivenditore o il Centro
Assistenza di fiducia.
Base di ricarica
Prima di accendere l’apparecchiatura, assicurarsi che il voltaggio indicato sulla targhetta corrisponda alla corrente
elettrica locale. La targhetta d’alimentazione dell'apparecchiatura si trova sulla parte inferiore della base di ricarica.
Porre la base di ricarica su una superficie piana. Togliere il
foglio di protezione dalle spine di collegamento della base
di ricarica. Inserire l’alimentatore nell'attacco posto sulla
parte inferiore della base di ricarica, inclinandolo leggermente ed esercitando una leggera pressione fino ad avvertire uno scatto.
Collegare il cavo d’alimentazione alla presa di corrente e
all’alimentatore.
Sul lato sinistro della base di ricarica la luce della spia
“Power On” è blu (cfr. “Spie sulla base di ricarica”).
52
Page 51

Manipolo
Prima di inserire il conduttore ottico, rimuovere il foglio
protettivo dalla corrispondente apertura sul manipolo.
Ruotare leggermente il conduttore ottico nell’inserimento
sul manipolo.
Successivamente, montare lo schermo antiriflesso sul
puntale ottico.
Batteria
Si raccomanda di caricare completamente la batteria prima
di utilizzarla la prima volta.
Inserire la batteria direttamente nel manipolo fino a sentire
uno scatto che sta per indicare il suo corretto alloggiamento.
Inserire il manipolo nell’alloggiamento della base di ricarica
senza esercitare forza. Utilizzando un foglio per protezione
igienica, é necessario rimuoverlo prima di caricare la batteria. Allo stato di carica totale, la batteria ha una capacità di
radianza di ca. 45 minuti.
Consiglio
Utilizzare possibilmente l’apparecchio con batteria completamente carica per prolungarne la durata. Si consiglia pertanto di riporre il manipolo nella base di ricarica dopo ogni
utilizzo. A batteria scarica il tempo di ricarica ammonta a 2 h.
53
Page 52

Funzione con cavo elettrico Click&Cure
La bluephase 20i può essere impiegata in qualsiasi momento ed in particolare con batteria completamente scarica, con
la funzione con cavo elettrico.
A tale scopo prelevare la batteria dal manipolo. Infine staccare l’alimentatore dalla spina di collegamento sul fondo
della base di ricarica. Prestare attenzione a non tirare il
cavo di rete.
Inserire la spina di collegamento in modo diritto nel manipolo fino a percepire uno scatto.
In mancanza di alimentazione di corrente, durante la funzione con cavo, la base di ricarica non può caricare la batteria.
Un completo distacco dalla rete di alimentazione é garantito soltanto staccando il cavo dalla presa di corrente.
54
Page 53

Spiegazione dei simboli
Stato di carica della batteria
A manipolo acceso, lo stato di carica della batteria viene visualizzato sul display come segue:
Batteria completamente carica (capacità di polimerizzazione
ca. 45 minuti).
Batteria carica a metà.
Riserva (con batteria in riserva l’ultima barra dell’indicatore
della batteria é rossa. E’ necessario caricare la batteria al
più presto.
Quando la batteria viene ricaricata, sul display appare
brevemente "Charging Battery" prima che il display passi
alla modalità Stand-by.
A batteria completamente scarica, il manipolo entra automaticamente in modalità stand-by. La luce non può più
essere richiamata e non possono più impostarsi programma
e tempo di polimerizzazione.
In ogni caso, il manipolo può essere utilizzato in modalità
“Click & Cure”, collegato direttamente al cavo di alimentazione elettrica.
La batteria é una componente soggetta ad usura, che
normalmente deve essere sostituita dopo ca. 2½ anni.
L’età della batteria può essere rilevata dall’etichetta.
S000001
04/04/09
dd/mm/yy
55
Page 54

Operatività
Disinfettare o autoclavare le superfici contaminate della
lampada fotopolimerizzatrice, il conduttore ottico e lo
schermo antiriflesso prima di ogni uso.
Inoltre, assicurarsi che l’emissione della luce consenta una
polimerizzazione adeguata. A tale scopo, controllare che il
conduttore ottico non sia sporco o danneggiato e controllare regolarmente l’emissione luminosa (p.es. con il
radiometro Ivoclar Vivadent “bluephase meter”).
Selezione del programma di polimerizzazione
Il programma e il tempo di polimerizzazione possono essere
impostati individualmente. Per diversi impieghi, bluephase
20i dispone di 4 programmi di polimerizzazione. Il programma di polimerizzazione prescelto si imposta con i tasti di
selezione dedicati. Il display cambia in base al programma
scelto (cfr. “Indicatori sul manipolo”).
Alla prima accensione, la lampada è impostata come segue:
Impostazioni di fabbrica:
TURBO 5 secondi
Il tempo di radianza si seleziona con il
tasto di selezione del tempo. Possono
essere selezionati 5, 10, 15, 20 e 30
secondi.
I tempi di polimerizzazione consigliati per materiali compositi si riferiscono a tutti i colori e per strati non superiori a
2 mm, a parte indicazioni specifiche del produttore contenute nelle istruzioni d’uso. Queste indicazioni valgono in
genere, quando durante la polimerizzazione il conduttore
ottico è direttamente posto sul materiale da fotopolimerizzare. Aumentando la distanza del conduttore ottico dal
materiale i tempi di polimerizzazione devono essere allungati in modo proporzionale. Con una distanza di 8 mm la
radianza effettiva si riduce a ca. il 50% e di conseguenza il
tempo di esposizione deve essere raddoppiato.
1) I dati indicati si riferiscono esclusivamente all’utilizzo del
conduttore ottico 10>8 mm fornito nella confezione.
2) Rispettare rigorosamente le avvertenze riguardanti lo
sviluppo di calore ed il pericolo di ustioni (vedi
avvertenze di sicurezza).
HIGH 10 secondi
(High Power)
LOW 10 secondi
(Low Power)
SOFT 15 secondi
(Soft start)
56
Page 55

Programma di polimerizzazione
Programma TURBO
Intensità luminosa costantemente
elevata per la polimerizzazione di
materiali da restauro e da fissaggio
di restauri diretti ed indiretti.
2
2.000 mW/cm
0
t [s]
Intensità luminosa
Tempo di indurimento per compositi
. di indurimento per Tetric EvoCeram / IPS Empress Direct
T
Materiali da restauro
ompositi
C
)
1
• 2 mm
IPS Empress Direct / IPS Empress Direct Flow /
etric EvoCeram / Tetric EvoFlow / Tetric /
T
Tetric Basic White / Tetric N-Ceram / Tetric N-Flow
Heliomolar / Heliomolar HB / Heliomolar Flow / Altri
2)
• 4 mm
etric EvoCeram Bulk Fill
T
Tetric Basic White
)
3
Compomeri
Compoglass F / Compoglass Flow
Materiali da restauro indiretti / Cementi
V
Variolink N Clear Veneer / Variolink Ultra 5)/
Dual Cement
D
Heliosit Orthodontic
Telio Add-On Flow
Telio Stains
IPS Empress Direct Color
IPS Empress Direct Opaque
ariolink II Base
iversi
4)
Variolink Veneer / Variolink N Base
/
)
)
5
5
/ Variolink II
2,000 – 2,200 mW/cm
10 sec.
sec.
5
Tempo di polimerizzazione
sec.
5
2x 5 sec.
sec.
5
2x 5 sec.
2x 5 sec.
4)
er mm ceramica:
/
p
1x 5 sec. per superficie
2x 5 sec.
2x 5 sec.
5 sec.
5 sec.
2x 5 sec.
2
Programma HIGH POWER
Intensità luminosa costantemente
elevata per la polimerizzazione di
materiali da restauro e da fissaggio
di restauri diretti ed indiretti.
2
.200 mW/cm
1
0
t [s]
Programma LOW POWER
Programma a radianza ridotta e
minore sviluppo di calore consigliato
per la polimerizzazione di adesivi,
liner cavitari nonché materiali da
650 mW/cm
0
trattamenti di cavità di Classe V.
t [s]
restauro in prossimità pulpare in
2
Programma SOFT START
Aumento graduale della radianza con
ridotto stress da contrazione e minore
sviluppo di calore per la polimerizzazione di materiali da restauro.
2
1.200 mW/cm
2
650 mW/cm
05
1) Vale per spessori di max. 2 mm e qualora le istruzioni d’uso del materiale impiegato non riporti indicazioni diverse (possibile p.es. per colori dentinali)
2) Vale per spessori di max. 4 mm e qualora le istruzioni d’uso del materiale impiegato non riporti indicazioni diverse (possibile p.es. per colori dentinali)
3) Vale per spessori di max. 3 mm 4) Vale per fotopolimerizzazione (uso della sola pasta base) 5) Vale per l’indurimento duale
t [s]
Materiali da restauro
Compositi
1)
• 2 mm
PS Empress Direct / IPS Empress Direct Flow /
I
Tetric EvoCeram / Tetric EvoFlow / Tetric /
Tetric Basic White / Tetric N-Ceram / Tetric N-Flow
eliomolar / Heliomolar HB / Heliomolar Flow / Altri
H
2)
• 4 mm
Tetric EvoCeram Bulk Fill / Tetric Basic White
)
3
Compomeri
Compoglass F / Compoglass Flow
Materiali da restauro indiretti / Cementi
Variolink II Base
Variolink N Clear Veneer / Variolink Ultra 5)/
Dual Cement 5)/ Variolink II
Diversi
Helioseal / Helioseal F / Helioseal Clear
Monopaque
MultiCore Flow / Multicore HB
Heliosit Orthodontic
Telio Add-On Flow
Telio Stains
IPS Empress Direct Color
IPS Empress Direct Opaque
Adesivi
AdheSE / AdheSE One F
ExciTE / ExciTE DSC
Tetric N-Bond / Tetric N-Bond Self-Etch
Heliobond (Syntac)
Materiali per provvisori
Telio CS Inlay/Onlay
Systemp.inlay/onlay
Fermit / Fermit N
Telio CS Link / Systemp.link
Diversi
Heliosit Orthodontic
Vivaglass Liner
Materiali da restauro
Compositi
• 2 mm
IPS Empress Direct / IPS Empress Direct Flow /
Tetric EvoCeram / Tetric EvoFlow / Tetric /
Tetric Basic White / Tetric N-Ceram / Tetric N-Flow
Heliomolar / Heliomolar HB / Heliomolar Flow / Altri
• 4 mm
Tetric EvoCeram Bulk Fill / Tetric Basic White
Compomeri
Compoglass F / Compoglass Flow
)
4
/ Variolink Veneer / Variolink N Base
5)
1)
2)
3)
Tempo di polimerizzazione
10 sec.
5 sec.
1
10 sec.
20 sec.
)
4
/
pro mm ceramica:
10 sec. per superficie
10 sec.
20 sec.
20 sec.
10 sec.
15 sec.
10 sec.
10 sec.
20 sec.
Tempo di polimerizzazione
10 s
10 s
10 s
10 s
20 s per superficie
20 s
20 s
Tempo di polimerizzazione
15 sec.
20 sec.
15 sec.
20 sec.
57
Page 56

Operazioni d’uso
Funzione di memoria del programma
(cure memory)
Le ultime impostazioni utilizzate, con il programma e il relativo tempo di polimerizzazione, sono salvate automaticamente.
Avvio
La lampada si accende premendo il tasto d’avvio. Trascorso
il tempo di polimerizzazione selezionato, termina automaticamente anche il programma di polimerizzazione. Se si
desidera, la lampada può essere spenta prima dello scadere
del tempo di polimerizzazione, premendo nuovamente il
tasto d’avvio. Contemporaneamente alla luce si attiva la
ventola. Terminato il tempo di polimerizzazione, essa continua a girare per un certo periodo di tempo per raffreddare
l’apparecchiatura. Non rimuovere la batteria finché la ventola è in funzione.
Segnali acustici
Con le seguenti funzioni si avverte un segnale acustico:
• Avvio (Stop)
• Ogni 10 secondi
• Cambio programma
• Cambio tempo di polimerizzazione
• Collegamento della batteria con la base di ricarica
• Inserimento della batteria
• Segnalazione di errore
Se si desidera, é possibile regolare il volume dei segnali
acustici.
A tale scopo, a luce spenta premere il tasto volume blu
(vedi elenco componenti) e ridurre o spegnere del tutto il
segnale acustico con il tasto di selezione tempo sinistro. Se
si desidera riattivare il segnale acustico oppure aumentarne
il volume, é necessario premere il tasto volume blu e il tasto
di selezione tempo destro.
Intensità luminosa
In funzione, l’intensità luminosa dell’apparecchio é
mantenuta a livello costante. Con l’uso del puntale ottico
10 > 8 mm l’intensità luminosa é stata calibrata a
2.000 – 2.200 mW/cm2.
L’utilizzo di un conduttore ottico diverso da quello fornito,
influisce sull’intensità luminosa indicata.
Nei conduttori ottici a pareti parallele (10 mm) il diametro
dell’entrata luminosa e quello dell’emissione luminosa sono
uguali. In caso di conduttori ottici focalizzanti (10>8 mm,
Pin-Point 6>2 mm) il diametro all’entrata luminosa é maggiore di quello di emissione. La luce blu viene pertanto concentrata su una superficie minore. In tal modo aumenta
l’intensità luminosa indicata.
I conduttori ottici Pin-Point sono indicati per la polimerizzazione a punti p.es. per il fissaggio di faccette prima della
rimozione delle eccedenze. Per il completo indurimento é
necessario sostituire il conduttore ottico.
Misurazione dell’intensità luminosa
L’intensità luminosa della bluephase 20i e del conduttore
ottico 10 > 8 mm può essere controllata p.es. con il
radiometro bluephase meter.
Nel caso il valore misurato non corrispondesse all’intensità
luminosa preventivata, procedere come segue:
• controllare il programma di polimerizzazione selezionato
• pulire il sensore ottico del radiometro eventualmente
sporco
• togliere il conduttore ottico e detergere il puntale ottico
probabilmente sporco con un bastoncino in cotone
imbevuto di alcol
• pulire il conduttore ottico eventualmente sporco
(cfr. “Manutenzione e pulizia”)
• sostituire l'eventuale conduttore ottico danneggiato con
uno nuovo
Se queste misure preventive non migliorano i risultati, rivolgersi al proprio rivenditore o al Centro Assistenza di fiducia.
58
Page 57

Manutenzione e pulizia
Per motivi di igiene, si raccomanda di utilizzare una guaina
protettiva monouso per ogni paziente. Le superfici contaminate dell’apparecchio e i cappucci antiriflesso devono
essere disinfettati (ad es. FD333, FD366/Dürr Dental, liquido
Incidin/Ecolab) e il conduttore ottico deve essere sterilizzato
prima di ogni utilizzo, a meno che non vengano utilizzate
guaine protettive monouso. Durante la pulizia prestare
attenzione che liquidi o altri materiali non pervengano nel
manipolo, nella base di ricarica ed in particolare nell’alimentatore (pericolo di scarica elettrica). Quando si effettua
la pulizia della base di ricarica, staccarla dalla corrente.
Alloggiamento
Pulire il manipolo e la base del manipolo con una normale
soluzione disinfettante non aldeidica. Per la detersione non
utilizzare soluzioni molto aggressive (p.es. soluzioni a base
di olio d’arancia o soluzioni con contenuto di etanolo superiore al 40%), solventi (p.es. acetone) o strumenti appuntiti
che possono danneggiare o graffiare la plastica. Pulire le
parti di plastica sporche con soluzione saponata.
Contatti della batteria
Per avere a disposizione la massima conduttività si consiglia
di mantenere sempre puliti i contatti evitando qualsiasi contaminazione (p.e. residui di composito). Pulire, quindi, regolarmente i contatti della batteria contaminati con un
batuffolo di cotone o un panno imbevuto di disinfettante
(dopo ogni paziente).
Smaltimento
L’apparecchio non deve essere smaltito nei normali rifiuti
urbani. Sulla homepage Ivoclar Vivadent si trovano informazioni dettagliate in merito allo smaltimento dell’apparecchio. Batterie inutilizzabili ed apparecchio per
polimerizzazione devono essere smaltiti secondo le disposizioni di legge nazionali. Non gettare le batterie nel fuoco!
Conduttore ottico
Detergere il conduttore ottico con un disinfettante e un
panno morbido. Rimuovere con cura ed attenzione il materiale residuo, per esempio composito, dal puntale ottico con
le unghie o una spatola in plastica. Non utilizzare strumenti
affilati o appuntiti, perché possono graffiare il terminale e la
superficie del conduttore ottico e ridurre quindi l'emissione
di luce. Il puntale ottico e lo schermo antiriflesso possono
essere autoclavati (p.es. 121°C, 2 bar, 15 minuti). Controllare che il conduttore ottico non sia danneggiato.
Verifica: tenendo un conduttore ottico contro luce, se alcuni
segmenti appaiono neri, allora alcune fibre di vetro si sono
rotte. In tal caso, il puntale ottico deve essere sostituito con
uno nuovo.
59
Page 58

Cosa fare se …?
Simbolo
Problema
Difetto dell’elettronica nel manipolo o nella batteria
Apparecchio surriscaldato o
raffreddato
Difetto elettronico della batteria
Batteria scarica
Soluzione
Togliere e reinserire la batteria. Se l’errore persiste sostituire la batteria
con la funzione a cavo elettrico (Click & Cure).
Qualora l’errore persistesse ulteriormente, contattare il rivenditore o il
Centro Assistenza di fiducia.
Attendere che l’apparecchio si raffreddi (o in caso di apparecchio troppo
freddo, che si scaldi a temperatura ambiente) e riprovare nuovamente
dopo un po’ di tempo.
Qualora l’errore persistesse ulteriormente, contattare il rivenditore o il
Centro Assistenza di fiducia
Togliere e reinserire la batteria. Se permane la segnalazione di errore,
inserire il manipolo nella base di ricarica. Se l’errore persiste ugualmente
sostituire la batteria con la funzione a cavo elettrico (Click & Cure).
Contattare il rivenditore o il Centro Assistenza di fiducia.
Posizionare il manipolo nella base di ricarica. Sul display appare „Charging“. Se la batteria non si ricarica, pulire i contatti.
Qualora l’errore persistesse ulteriormente, contattare il rivenditore o il
Centro Assistenza di fiducia.
Caricando
non appare
scritta sul
display
LED della
base di
ricarica
spento
60
Contatti imbrattati o sporchi
Batteria in modalità di sicurezza
(Collegamento di protezione
integrato)
Alimentatore non collegato
oppure difettoso
Controllare se il manipolo é stato posizionato correttamente nella base.
Detergere i contatti della batteria. Info: sul display appare brevemente
"Charging battery" prima che il displays passi alla modalità Stand-by.
Se la pulizia dei contatti della batteria non ha successo, prelevare la batteria dall’apparecchio. Quindi caricare la batteria senza il manipolo per
ca. 10 minuti nella base di ricarica. Qualora l’errore persistesse ulteriormente, contattare il rivenditore o il Centro Assistenza di fiducia.
Controllare se l’alimentatore é inserito correttamente nella base di ricarica e controllare i contatti. Controllare se l’alimentatore é collegato alla
rete con l’apposito cavo (indicatore luminoso verde in caso di corretta
funzione).
Qualora l’errore persistesse ulteriormente, contattare il rivenditore o il
Centro Assistenza di fiducia.
Page 59

Garanzia / procedura in caso
di riparazione
Specifiche prodotto
La garanzia per bluephase 20i ha validità 3 anni dalla data
d’acquisto (batteria 1 anno).
Malfunzionamenti risultanti da materiale difettoso o errori
di produzione vengono riparati gratuitamente durante l'intero periodo di garanzia. La garanzia non copre danni
materiali diversi da quelli menzionati.
L'apparecchiatura deve essere utilizzata per gli usi previsti.
L'utilizzo per scopi diversi da quelli indicati è controindicato.
Il produttore non è responsabile per utilizzi non contemplati
e la garanzia in questi casi decade, in particolare per:
• danni causati da una manipolazione impropria, in special
modo conservazione scorretta delle batterie (vedi Dati
tecnici: trasporto e condizioni di immagazzinamento);
• danni delle parti soggette a normale usura in condizioni
operative standard (p.es. batteria);
• danni causati da fattori esterni, come p.e. cadute, urti
• danni derivanti da montaggio o installazione non corretta;
• danni causati da collegamento alla rete con voltaggio
differente da quello indicato sulla targhetta;
• danni per riparazioni o modifiche improprie non eseguite
da Centri Assistenza certificati ed autorizzati.
In caso di reclamo in garanzia l’intera apparecchiatura
(manipolo, base di ricarica, batteria, cavo di alimentazione e
alimentatore) deve essere inviata al rivenditore o direttamente a Ivoclar Vivadent con la bolla d’acquisto, porto franco.
Qualsiasi riparazione dell’apparecchio deve essere eseguita
da un Centro Assistenza Ivoclar Vivadent certificato ed
autorizzato. Qualora il difetto non possa essere corretto da
Lei, contattare il proprio rivenditore o il Centro Assistenza
locale di fiducia (cfr. indirizzi sul retro delle presenti
istruzioni d'uso). Una chiara descrizione del difetto o delle
condizioni in cui si è verificato, ne faciliterà l'identificazione.
Quindi raccomandiamo di allegare sempre una descrizione
particolareggiata del difetto.
Confezionamento
1 Base di ricarica, 1 Cavo di alimentazione, 1 Alimentatore, 1 Manipolo,
Batteria (Li-Po), 1 Conduttore ottico 10>8 mm, 1 Schermo antiriflesso,
1
3 Coni antiriflesso, guaine di protezione, 1 Istruzione d’uso
ccessori
A
Per la lampada bluephase 20i sono disponibili i seguenti accessori:
Cod. Art. Descrizione
27389 Conduttore ottico 10>8 mm nero (G2)
6
608538 Conduttore ottico Pin-Point 6/2 mm nero (G2)
551756 Coni antiriflesso
92496 Schermo antiriflesso
5
627299 Base di ricarica 20i (G2)
627300 Batteria bluephase 20i (G2)
27298 bluephase 20i manipolo (G2)
6
607922 bluephase meter
608554 guaine di protezione
Dati tecnici
Voltaggio operativo della base di ricarica 5 VDC
Voltaggio operativo del manipolo 3.7 VDC con batteria
Alimentatore 100-240 VAC / 50-60 Hz / max. 0.4 A /
Condizioni operative
Temperatura +10 °C to +40 °C (+50 to +104°F)
Umidità relativa da 30 % a 75%
Pressione atmosferica 700 hPa a 1060 hPa
Dimensioni della base di ricarica L=205mm; W=150mm; H=85mm
Peso della base di ricarica 250 g
Tempo di ricarica circa 2 ore (a batteria completamente scarica)
Alimentazione del manipolo batteria Li-Po
Tempo di polimerizzaz. max. ca. 45 min.
Fonte di luce LED polywave
Lunghezza d’onda 385–515 nm
LED-Classe 2 LED LIGHT
Intensità luminosa 2.000 - 2.200 mW/cm
Operatività 6 min. on / 4 min. off (intermittenza)
Dimensioni del manipolo L=260mm; W=42mm; H=120mm
Peso del manipolo (incl. batteria) 245 g
Trasporto e condizioni di immagazzinamento
Temperatura -20 °C a +60 °C (-4 a 140°F)
Umidità relativa 10 % a 75 %
Pressione atmosferica 500hPa a 1060hPa
bluephase 20i deve essere conservata in luogo chiuso e asciutto.
Proteggere da forti scossoni.
Batteria
• Non conservare la batteria a temperature superiori a 40° C /104°F (brevemente oltre i 60°C /140°F), é consigliata una conservazione a 15-30 °C (59-86 °F)
• sempre carica
• e non oltre i 6 mesi.
5 VDC con alimentatore
Output 5 VDC
Produttore: Friwo
TYP 15.2630
(con batteria nuova completamente carica)
DO NOT STARE INTO BEAM
CLASS 2 LED PRODUCT
Max. 5.11 mW / Wavelenght 385 - 515 nm
2
61
Page 60

Estimado Cliente,
Una polimerización optima es un requisito
fundamental para que todos los materiales
fotopolimerizables puedan producir sistemáticamente restauraciones de alta calidad. En
este aspecto, la lámpara de polimerización
elegida juega un importante papel. Por ello,
nos gustaría agradecerle el haber elegido la
lámpara bluephase
producto sanitario de alta calidad que ha sido
diseñado de acuerdo con los últimos avances
de la ciencia y la tecnología en conformidad
con los más altos estandares industriales.
Estas instrucciones de uso, le ayudarán a
poner en funcionamiento el aparato con la
mayor seguridad, aprovechando todas sus
posibilidades y asegurando una larga vida
útil.
Para cualquier consulta adicional, por favor,
no dude ponerse en contacto con nosotros
(ver direcciones en contraportada).
®
20i. bluephase 20i es un
Su equipo de Ivoclar Vivadent
62
Page 61

Indice
Seguridad
Utilización prevista 64
Indicaciones 64
Notas de seguridad 65
Puesta en marcha inicial
Base de carga 66
Pieza de mano 67
Bateria 67
Click & Cure funcionamiento con cable 68
Funcionamiento
Seleccionar programa de polimerización
y tiempo de polimerización 70
Función memoria de polimerización 71
Inicio
Señales acústicas 72
Intensidad de luz 72
Medición de la intensidad de luz 72
Mantenimiento y limpieza
Carcasas 73
Conductos de luz 73
Contactos de la bateria 73
Desecho 73
Que sucede si … 74
Garantía /
Procedimiento a seguir en
caso de reparación 75
Especificaciones del producto
Formas de suministro 75
Accesorios 75
Datos técnicos 75
Condiciones de funcionamiento 75
Condiciones de almacenamiento y transporte 75
Declaración de conformidad 91
Español
63
Page 62

LED LIGHT
DO N OT STAR E INTO BEAM
CLAS S 2 L ED PRO DUCT
Max. 5,11 mW / Wavelength 385 - 515 nm
IEC 60 825-1:19 93+A1:19 97+A2 :2001
Seguridad
Utilización prevista
bluephase 20i es una lámpara de polimerización LED que
produce luz azul de alta energía. Se utiliza para la polimerización de materiales dentales fotopolimerizables directamente en la clínica dental. La utilización prevista así como
observaciones, notas y regulaciones están incluidas en estas
instrucciones de funcionamiento.
Indicaciones
Con su espectro de banda ancha gracias a la “polywave”,
bluephase es válida para la polimerización de todos los
materiales dentales fotopolimerizables, que polimericen en
un rango de longitud de onda entre 385–515 nm. En estos
materiales se incluyen, materiales de restauración, bondings, adhesivos, bases, liners, selladores de fisuras, materiales provisionales así como materiales de cementado para
brackets y para el cementado de restauraciones realizadas
en laboratorio, tales como inlays de cerámica.
Contraindicaciones
Materiales cuya polimerización se active fuera
de las longitudes de onda de entre 385–515 nm
(materiales no conocidos hasta la fecha). Si
usted no está seguro sobre algún producto, por
favor, consulte al fabricante del correspondiente
material.
No cargar ni utilizar el aparato cerca de
sustancias inflamables o combustibles.
Los dispositivos de comunicaciones portátiles y
móviles de alta frecuencia pueden interferir con
el equipamiento médico. La utilización de
teléfonos móviles durante el funcionamiento no
está permitida.
Precaución – El uso de mandos o dispositivos
de ajustes o el funcionamiento de otros procedimientos de los ya especificados pueden causar
irradiación arriesgada.
Notas de seguridad
La bluephase 20i es un aparato sanitario electrónico que
está sujeto a IEC 601-1 (EN 60601-1) y las directivas EMC.
Cumple con las directivas de la EU y está clasificada como
LED Clase 2.
El aparato ha sido enviado desde el fabricante en condiciones técnicas óptimas y de seguridad. Con la finalidad de
mantener estas condiciones y asegurar una utilización sin
riesgos, deben respetarse las notas y regulaciones descritas
en estas instrucciones de funcionamiento.
Para prevenir de daños al equipo, y riesgos para el paciente,
los usuarios y terceras personas deben respetar las siguientes instrucciones de seguridad.
NRTL (Nationally Recognized
Testing Laboratory)
Utilización y responsabilidad
• bluephase 20i debe utilizarse unicamente para el uso
previsto. Cualquier otro uso está contraindicado. No se
aceptarán responsabilidades por los daños resultantes de
un uso incorrecto o de la inobservancia de estas instrucciones de uso.
• El usuario es responsable de probar bluephase 20i para
el uso e idoneidad de la utilización prevista. Esto es particularmente importante si se utiliza otro equipo cerca del
aparato al mismo tiempo en que se está utilizando
bluephase.
• Sólo deben utilizarse piezas de repuesto y accesorios ori-
ginales de Ivoclar Vivadent (ver Accesorios). El fabricante
no acepta responsabilidad alguna del daño que pueda
resultar por utilizar piezas de repuesto o accesorios ajenos.
64
Voltaje de funcionamiento
Antes de conectar el aparato asegúrese de que:
a) el voltaje del suministro local coincide con el volatje indi-
cado en la placa de características y
b) el aparato esté a temperature ambiente.
Si la bateria o la fuente de alimentación se usan por separado, por ejemplo durante el inicio o el funcionamiento con
Page 63

cable (Click & Cure) debe evitarse el contacto con el
paciente o terceras personas. No toquen los contactos
expuestos de la bateria o el enchufe de conexión (fuente de
alimentación)
Sospecha de seguridad mermada
Si se sospecha que no se puede operar con seguridad, se
debe de desconectar el cable de electricidad y retirar la
bateria para evitar un fucionamiento accidental. Este puede
ser el caso, por ejemplo, si el aparato está visiblemente
dañado o ya no funciona correctamente. La desconexión
total del suministro de energía sólo queda asegurada cuando el cable de conexión está desconectado de la fuente de
alimentación.
Protección ocular
Debe evitarse la exposición directa o indirecta de los ojos.
Una prolongada exposición a la luz, es desagradable para
la vista y puede causar daños. Por ello, recomendamos utilizar los conos protectores antideslumbrantes incluidos. Los
individuos que por lo general, son sensibles a la luz que
toman medicación fotosensibilizante o que se han sometido
a cirugía oftalmológica, y, personas que trabajan con el
aparato o en su proximidad por largos periodos de tiempo,
no deberán exponerse a la luz de esta unidad. Por esta
razón, recomendamos llevar gafas protectoras (naranjas)
que absorban la luz por debajo de 500 nm.
Bateria
Precaución: Utilizar solo repuestos originales, especialmente
las bases de carga y baterías de Ivoclar Vivadent. No cortocircuitar la bateria. No almacenar con temperaturas por
encima de 40ºC/104ºF (o 60ºC/ 140ºF en periodos cortos).
Almacene siempre las baterias cargadas. El periodo de
almacenamiento no debe exceder los 6 meses. Puede
explotar si se coloca en el fuego.
Los electrolitos y gases de electrolitos liberados durante
explosión, fuego y desarrollo de humo son tóxicos y corrosivos. En caso de contacto con los ojos y piel lavar inmediatamente con abundante cantidad de agua. Evitar la inhalación
de humos. Acudir a un especilaista inmeditamente en caso
de indisposición.
Desarrollo de calor
(riesgo de quemaduras)
Como sucede con todas las lámparas de polimerización de
alto rendimiento, la intensidad de la luz tiene como resultado un cierto desarrollo térmico. Exposiciones prolongadas
en areas próximas a pulpa y tejidos blandos pueden producir daños irreversibles.
Por esta razón, esta lámpara de alto rendimiento sólo debe
ser utilizada por profesionales entrenados y deben observarse los tiempos de polimerización recomendados.
Deben evitarse tiempos de polimerización ininterrumpidos
de más de 5 seg con el programa Turbo en la misma superficie dental, así como contacto directo con gingiva , membrana mucosa o piel. Si se necesita, polimerice en intervalos
intermitentes de 5 seg cada uno. Evite la acumulación de
calor cuando polimerice con dique de goma puesto. La irradiación de los tejidos blandos debe evitarse, operando con
reducida intensidad de luz (utilice el Programa Low Power).
Polimerice las restauraciones indirectas en intervalos intermitentes de 10 seg con el programa High Power y 1x 5 seg
con el programa Turbo o use enfriamiento externo con
chorro de aire.
Deben ser respetadas las
instrucciones referentes a los
programas de polimerización
y los tiempos de polimerización (ver Selección de
programas de polimerización
y tiempos).
Por favor, tenga en cuenta que la bateria de polímero de
litio puede reaccionar con explosión, fuego, y producir
humo en caso de una manipulación inapropiada y daños
mecánicos. Baterias de polímero de litio dañadas, no deben
volver a utilizarse.
No se recomienda el uso del programa High Power/Turbo
en pacientes sensibles. En este caso, trabajar con intensidad
de luz reducida (utilizar el programa Low Power).
65
Page 64

Puesta en marcha
Forma de suministro
Compruebe que el equipo está completo y que no ha sufrido daño durante el transporte (ver forma de suministro). Si
falta algún componente o está dañado, contacte inmediatamente con su depósito o servicio técnico.
Base de carga
Antes de conectar el dispositivo, asegúrese de que el voltaje indicado en la placa de características coincide con el del
suministro de energía local. La placa de características está
situada en la parte inferior de la base de carga.
Colocar la estación de carga sobre una superficie lisa.
Retire la lámina protectora del enchufe de conexión de la
fuente de alimentación.Deslice la clavija de conexión del
bloque de alimentación en el zócalo de la parte inferior de
la base de carga. Inclínelo ligeramente y presione hasta que
oiga y sienta que ha encajado en su posición correcta.
Conecte el cable eléctrico con el suministro de energía y el
bloque de alimentación.
Se enciende la luz azul del indicador de Power On, situado
en el lado izquierdo de la carcasa de la base (ver indicaciones de la base de carga).
66
Page 65

Pieza de mano
Antes de insertar el conducto de luz, quite la lámina protectora de la correspondiente boquilla de la pieza de mano.
Gire ligeramente el conducto de luz, mientras lo acopla a la
pieza de mano.
Seguidamente, coloque una placa antideslumbrante en el
conducto de luz.
Batería
Recomendamos cargar la batería completamente antes de
utilizarla por primera vez.
Deslice la batería directamente en la pieza de mano hasta
que oiga un click que ha encajado.
Coloque suavemente la pieza de mano en el correspondiente hueco de la base de carga. Si se utiliza una funda, por
favor quítela antes de cargar la batería. Si la batería está
completamente cargada, tiene una capacidad de polimerización de aproximadamente 45 minutos.
Consejo
Si es posible, utilice la lámpara siempre con una batería
completamente cargada. Con ello alargará la vida útil de la
misma. Por ello recomendamos colocar la pieza de mano en
la base de carga después de cada uso. El tiempo de carga
para baterias vacias es de 2 horas.
67
Page 66

Puesta en marcha
Click & Cure Funcionamiento con cable
bluephase 20i se puede utilizar con conexión a la red en
cualquier momento, pero especialmente cuando la batería
está completamente vacía.
Para ello, retire la batería de la pieza de mano. A continuación, retire el bloque de alimentación de la parte inferior de
la carga. No retirar del cable de alimentación.
Inserte la clavija de conexión en la pieza de mano hasta
que oiga y sienta que ha encajado en su posición.
Durante el funcionamiento con cable, la base de carga no
puede cargar la batería, ya que no está conectada a una
fuente de energía.
La lámpara sólo queda totalmente desconectada del suministro de energía cuando el cable de conexión está desconectado de la fuente de alimentación.
68
Page 67

Estado de carga de la batería
Con la pieza de mano conectada, se muestra en el display el estado de carga como sigue:
Batería completamente cargada (capacidad de polimerización de aproximadamente 45 minutos).
Batería medio llena
Reserva. El indicador de la pieza de mano comienza a parpadear en el modo “reserva”. La batería debe cargarse tan
pronto como sea posible.
Cuando la bateria se está cargando, aparece brevemente en
el display "Charging Battery" antes de que la pantalla
regrese al modo stand-by.
Señales y símbolos
Si la batería está completamente vacía, la pieza de mano
cambia automáticamente a modo en espera (stand-by). La
lámpara ya no se puede volver a conectar y, ni el programa
ni el tiempo de polimerización pueden ya ajustarse. Sin
embargo, la pieza de mano se puede utilizar en modo
Click & Cure- funcionamiento con cable.
Ya que la batería es un consumible, tiene que reemplazarse
tras su típico ciclo de vida útil de 2½ años. Ver etiqueta de
la batería para comprobar vida útil.
S000001
04/04/09
dd/mm/yy
69
Page 68

Funcionamiento
Las superficies contaminadas de las lámparas de polimerización, los conductos de luz y protectores antideslumbrantes deben desinfectarse o autoclavarse antes de cada uso.
Además, asegúrese de que el rendimiento de la luz permite
una polimerización adecuada. Con este fin, revisar el conducto de luz en cuanto a contaminación y daños, así como
el rendimiento de la luz en intervalos regulares (ej. con el
radiómetro de Ivoclar Vivadent “bluephase meter”).
Seleccionar el programa y tiempo de
polimerización
El programa y tiempo de polimerización se pueden seleccionar individualmente. bluephase 20i está equipado con los
siguientes 4 programas de polimerización para las distintas
indicaciones. El programa de polimerización deseado se
selecciona con las teclas de selección de programas. El display cambia respectivamente (ver indicadores sobre la pieza
de mano). La lámpara viene equipada con los siguientes
programas por defecto:
Ajuste de fábrica
TURBO 5 segundos
El tiempo de polimerización deseado, se
selecciona utilizando los botones de
selección de tiempo. Los usuarios pueden elegir entre 5, 10, 15, 20 y 30
segundos.
Tener en cuenta las instrucciones de uso del material utilizado al seleccionar el tiempo de polimerización.
Las recomendaciones de polimerización para los materiales
de composite son aplicables a todos los colores y se aplican
con un grosor máximo de capa de 2 mm, a no ser que se
indique lo contrario en las correspondientes instrucciones
de uso. Generalmente, estas recomendaciones son aplicables en situaciones donde la ventana de emisión del conducto de luz se coloca directamente sobre el material que
se va a polimerizar. Al aumentar la distancia entre la fuente
de luz y el material, se deberá aumentar el tiempo de polimerización respectivamente. Por ejemplo, si la distancia al
material es de 8 mm, el rendimiento de la luz efectiva se
reduce en aproximadamente 50%. En este caso, el tiempo
de polimerización recomendado deberá doblarse.
1) Esta información se aplica al conducto de luz 10>8 mm,
suministrado en la presentación.
2) Se debe tener en cuenta la información relativa al
desarrollo térmico y riesgo de quemaduras (ver notas de
seguridad).
HIGH 10 segundos
(High Power)
LOW 10 segundos
(Low Power)
SOFT 15 segundos
(Inicio gradual)
70
Page 69

Intensidad de luz
Programas de polimerización
Programa TURBO
Alta intensidad constante de luz para
la polimerización de materiales de
restauración y cementos en
restauraciones directas e indirectas.
2
2.000 mW/cm
0
t [s]
Programa HIGH POWER
Alta intensidad constante de luz para
la polimerización de materiales de
restauración y cementos en
restauraciones directas e indirectas.
2
1.200 mW/cm
0
t [s]
Programa LOW POWER
Reducida intensidad de luz con
reducido desarrollo de calor para la
polimerización de adhesivos, liners y
materiales de restauración en áreas
cercanas a la pulpa en restauraciones
2
650 mW/cm
0
1.200 mW/cm
650 mW/cm
05
1) Aplicar hasta un máximo de 2 mm si en las instrucciones de uso no recomiendan ninguna otra acción (como es el caso, ej. de colores de dentina)
2) Aplicar hasta un máximo de 4 mm si en las instrucciones de uso no recomiendan ninguna otra acción (como es el caso, ej. de colores de dentina)
3) Aplicar a un grosor de capa máximo de 3mm 4) Aplicar fotopolimerización (solo en pasta base) 5) Aplicar a polimerización dual
clases V.
t [s]
Programa SOFT START
Incremento progresivo de intensidad
de luz con reducido estres de
contracción y reducido desarrollo de
calor para la polimerización de
materiales de restauración.
2
2
t [s]
Tiempo de exposición para composites
Tiempo de exposición para Tetric EvoCeram / IPS Empress Direct
Materiales de restauración
omposite
C
1)
• 2 mm
IPS Empress Direct / IPS Empress Direct Flow /
etric EvoCeram / Tetric EvoFlow / Tetric /
T
Tetric Basic White / Tetric N-Ceram / Tetric N-Flow
Heliomolar / Heliomolar HB / Heliomolar Flow / Otros
2)
• 4 mm
Tetric EvoCeram Bulk Fill
etric Basic White
T
Compómeros
Compoglass F / Compoglass Flow
Restauraciones indirectas /
Materiales de cementación
Variolink II Base 4)/ Variolink Veneer / Variolink N Base
Variolink N Clear Veneer / Variolink Ultra 5)/
Dual Cement
Otros
Heliosit Orthodontic
elio Add-On Flow
T
Telio Stains
PS Empress Direct Color
I
IPS Empress Direct Opaque
Materiales de restauración
Composite
• 2 mm
IPS Empress Direct / IPS Empress Direct Flow /
Tetric EvoCeram / Tetric EvoFlow / Tetric /
Tetric Basic White / Tetric N-Ceram / Tetric N-Flow
Heliomolar / Heliomolar HB / Heliomolar Flow / Otros
• 4 mm
etric EvoCeram Bulk Fill / Tetric Basic White
T
Compómeros
Compoglass F / Compoglass Flow
Restauraciones indirectas /
Materiales de cementación
Variolink II Base 4)/ Variolink Veneer / Variolink N Base
Variolink N Clear Veneer / Variolink Ultra 5)/
Dual Cement
Otros
Helioseal / Helioseal F / Helioseal Clear
Monopaque
MultiCore Flow / Multicore HB
Heliosit Orthodontic
Telio Add-On Flow
Telio Stains
IPS Empress Direct Color
IPS Empress Direct Opaque
Adhesivos
AdheSE / AdheSE One F
ExciTE / ExciTE DSC
Tetric N-Bond / Tetric N-Bond Self-Etch
Heliobond (Syntac)
Materiales provisionales
Telio CS Inlay/Onlay
Systemp.inlay/onlay
Fermit / Fermit N
Telio CS Link / Systemp.link
Otros
Heliosit Orthodontic
Vivaglass Liner
Materiales de restauración
Composite
• 2 mm
IPS Empress Direct / IPS Empress Direct Flow /
Tetric EvoCeram / Tetric EvoFlow / Tetric /
Tetric Basic White / Tetric N-Ceram / Tetric N-Flow
Heliomolar / Heliomolar HB / Heliomolar Flow / Otros
• 4 mm
Tetric EvoCeram Bulk Fill / Tetric Basic White
Compómeros
Compoglass F / Compoglass Flow
)
1
)
2
1)
2)
3)
)
5
/ Variolink II
3)
)
5
/ Variolink II
3)
)
5
)
5
2,000 – 2,200 mW/cm
10 seg.
5 seg.
Tiempo de polimerización
seg.
5
2x 5 seg.
5 seg.
x 5 seg.
2
2x 5 seg.
4)
/
por mm cerámica:
1x 5 seg. por segmento
2x 5 seg.
x 5 seg.
2
5 seg.
seg.
5
2x 5 seg.
Tiempo de polimerización
10 seg.
15 seg.
0 seg.
1
20 seg.
4)
/
por mm cerámica:
1x 5 seg. por segmento
10 seg.
20 seg.
20 seg.
10 seg.
15 seg.
10 seg.
10 seg.
20 seg.
Tiempo de polimerización
10 seg.
10 seg.
10 seg.
10 seg.
20 seg. por segmento
20 seg.
20 seg.
Tiempo de polimerización
15 seg.
20 seg.
15 seg.
20 seg.
2
71
Page 70

Funcionamiento
Función memoria de polimerización
Los últimos ajustes realizados, junto con la combinación del
programa y tiempo de polimerización se guardan automáticamente.
Inicio
La lámpara se conecta mediante el botón de inicio. Una vez
transcurrido el tiempo de polimerización seleccionado, el
programa de polimerización finaliza automáticamente. Si se
desea, se puede desconectar la lámpara antes de que finalice el tiempo de polimerización programado, presionando
de nuevo el botón de inicio.
El ventilador se activa simultáneamente con la lámpara.
Una vez transcurrido el tiempo de polimerización, el ventilador sigue funcionando durante algún tiempo para refrigerar
la lámpara. La batería no debe quitarse mientras el ventilador siga funcionando.
Señales acústicas
Las señales acústicas se pueden oír con las
siguientes funciones:
• Puesta en marcha (parada)
• Cada 10 segundos
• Cambio de programa
• Cambio de tiempo de polimerización
• Conexión de la batería a la base de carga
• Inserción de la batería
• Mensaje de error
Si se desea, se puede modificar el volumen de las señales
acústicas.
Para ello, mantenga presionado el botón del volumen (ver
vista general del producto) mientras la lámpara está desconectada y reduzca el volumen o desactive las señales acústica con el botón de selección de tiempo izquierdo. Si desea
volver a activar las señales acústicas o aumentar el volumen, presione el botón de volumen azul y seguidamente el
botón de selección de tiempo derecho.
Rendimiento de la luz
El rendimiento de la luz se mantiene a un nivel constante
durante el funcionamiento. Si se utiliza el conducto de luz
de 10>8 mm adjunto, el rendimiento de la lámpara se
puede calibrar en 2000 - 2200 mW/cm2.
La utilización de otros conductos de luz diferentes de los
suministrados tiene una influencia directa sobre la intensidad lumínica emitida.
En conductos de luz de paredes paralelas (10 mm), el diámetro es igual en ambos extremos. En conductos de luz que
focalizan (conducto de luz 10>8 mm, conducto Pin Point
6>2 mm), el diámetro del extremo interior es mayor que el
de la ventana de emisión de luz. Así, el haz de luz azul
incidente se reduce a una superficie más pequeña, lo que
aumenta la intensidad lumínica emitida.
Los conductos de luz Pin-Point están indicados para la polimerización de zonas reducidas, tales como la fijación de
carillas antes de la eliminación del sobrante de material.
Para una polimerización correcta completa, es necesario
cambiar el conducto de luz.
Medición de la intensidad lumínica
La intensidad lumínica de bluephase 20i y del conducto de
luz de 10>8 mm se pueden revisar, por ejemplo, con el
bluephase meter.
Si el valor obtenido no se corresponde con la intensidad
lumínica esperada, siga los siguientes pasos:
• Revise el programa de polimerización seleccionado
• Limpie el fotosensor si estuviera sucio
• Quite el conducto de luz y limpie la ventana de emisión
de luz de la pieza de mano con un paño de algodón
humedecido en alcohol.
• Limpie el conducto de luz si estuviera sucio (ver
mantenimiento y limpieza)
• Reemplace el conducto de luz dañado por uno nuevo
Si estas medidas no mejoran los resultados, por favor
póngase en contacto con el distribuidor o con su servicio
técnico.
72
Page 71

Mantenimiento y limpieza
Por motivos de higiene, se recomienda utilizar una funda de
protección desechable con cada paciente. Las super ficies
contaminadas del aparato y los conos antirreflejos deben
desinfectarse (p. ej. con FD333, FD366/Dürr Dental, Incidin
Liquid/Ecolab) y el conducto de luz debe esterilizarse antes
de cada uso a menos que se utilicen fundas de protección
desechables. Asegúrese de que no entren líquidos u otras
sustancias extrañas en la pieza de mano, soporte de la
pieza de mano y, en particular, la base de carga durante la
limpieza (riesgo de choque eléctrico). Desconecte la pieza
de mano de la fuente de alimentación cuando la limpie.
Carcasa
Limpie la pieza de mano y el soporte de la pieza de mano
con una solución desinfectante habitual sin aldehído. No
utilice soluciones desinfectantes altamente agresivas (ej.
solución de esencia de naranja o de contenido de etanol
superior a 40%), disolventes (ej. acetona) o instrumentos
punzantes para la limpieza, ya que pueden dañar o arañar
el plástico. Limpie las partes plásticas sucias con una
solución jabonosa.
Conductos de luz
Limpie los conductos de luz con un desinfectante y un paño
suave. Elimine con cuidado cualquier posible residuo de
material, tal como material de composite del conducto de
luz con las uñas o espátula de plástico, por ejemplo. No
utilice instrumentos cortantes o punzantes, ya que pueden
arañar la superficie del conducto de luz y así reducir la
transmisión de luz. Los conductos de luz y boquillas antideslumbrantes deben autoclavarse (ej. 121º, 2 bar,
15 minutos). Compruebe que los conductos de luz no
tienen daños. Si el conducto de luz se coloca frente a una
fuente de luz y algunos segmentos aparecen negros, significa que las fibras de vidrio se han roto. En dicho caso, se
debe reemplazar el conducto de luz por uno nuevo.
Contactos de la batería
Para conseguir una buena conductividad en cualquier
situación, mantenga los contactos libres de cualquier contaminación (ej. residuos de composite). Para ello, limpie los
contactos afectados de manera regular con paños desinfectantes (después de cada paciente).
Desecho
El aparato no se debe desechar con la basura doméstica
normal. Por favor, visite la página web de Ivoclar Vivadent
de su país, para información más detallada sobre la
manera de desechar las lámparas. Deseche las baterías
inservibles y lámparas de polimerización según la
correspondiente normativa legal de su país. Las baterías no
deben incinerarse.
73
Page 72

¿Qué sucede si...?
Símbolo
Causas
Defecto electrónico en la pieza de
mano o batería
El aparato se ha calentado o
enfriado en exceso
Defecto electrónico de la batería
Batería vacía
Rectificación de error
Quitar y volver a colocar la batería. Si el error persiste, reemplazar
la batería por el bloque de alimentación (Click & Cure).
Si el error persiste, por favor contacte con su distribuidor o
servicio técnico local.
Deje enfriar el aparato (o que alcance temperatura ambiente si se ha
enfriado en exceso) e inténtelo de nuevo después de un rato.
Si el error persiste, por favor contacte con su distribuidor o su servicio
técnico local.
Quitar y volver a colocar la batería. Si el error persiste, coloque el
aparato en la base de carga. Si, a pesar de ello, el error persiste,
reemplace la batería con el bloque de alimentación (Click & Cure).
Por favor contacte con su distribuidor o servicio técnico local.
Coloque la pieza de mano en la base de carga. Aparecerá el mensaje
correspondiente (“cargando”). Si la batería no carga, deben limpiarse
los contactos.
Si el error persiste, por favor contacte con su distribuidor o
servicio técnico local.
El display
no se
ilumina
durante la
carga
El LED
de la base
de carga
no está
iluminado
74
Los contactos de carga están
contaminados
Batería en modo seguridad
(circuito de protección integrado)
El bloque de alimentación no está
conectado o está defectuoso
Compruebe si la pieza de mano está correctamente colocada en la
base de carga. Información: Aparece "Charging Battery" brevemente en
el display antes que la pantalla regrese al modo stand-by. Limpie los contactos de la batería. Si con ello no se resuelve el problema, quite la batería del aparato. Cargue la batería por separado de la pieza de mano en la
base de carga durante aproximadamente 10 minutos. Si el error persiste,
por favor contacte con su distribuidor o su servicio técnico local.
Compruebe los contactos de la batería y si el bloque de alimentación
está correctamente colocado en la base de carga o si el bloque de
alimentación está conectado al suministro eléctrico mediante el cable
(si todo funciona correctamente, se enciende el piloto verde del
display del bloque de alimentación).
Si el error persiste, por favor contacte con su distribuidor o su
servicio técnico local.
Page 73

Garantía/ Procedimiento
en caso de reparación
Especificaciones del producto
La período de garantía de bluephase 20i es de 3 años a
partir de la fecha de compra (batería 1 año).
Las averías que resulten de material defectuoso o errores
de fabricación se reparan gratis durante el período de
garantía. La garantía no proporciona el derecho de reclamar
cualquier daño material o inmaterial que los exclusivamente
mencionados. La lámpara sólo se debe utilizar para los fines
previstos. Cualquier otro uso está contraindicado. El fabricante no acepta responsabilidad alguna que se derive de
un mal uso y en tales casos no se aceptan reclamaciones
de garantía. Ello es particularmente válido en los casos de:
• daños que resulten de una manipulación inapropiada,
especialmente de baterías almacenadas incorrectamente
(ver Datos Técnicos: Condiciones de transporte y almacenamiento);
• daños de componentes que resulten de desgaste debido
a condiciones de funcionamiento estándar (ej baterias)
• daños que resulten de influencias externas, p. ej., golpes,
caídas al suelo;
• daños que resulten de una puesta en marcha o instalaciones incorrectas;
• daños que resulten de conectar la lámpara a una alimentación eléctrica en el que el voltaje y frecuencia no cumplan con las indicadas en la placa de características;
• daños que resulten de reparaciones o modificaciones
indebidas que no se hayan realizado por los centros acreditados de mantenimiento.
En caso de reclamación con garantía, se debe enviar a portes pagados, el equipo completo (pieza de mano, soporte
de la pieza de mano, cable eléctrico y conducto de luz) al
distribuidor o directamente a Ivoclar Vivadent, junto con la
factura. Utilizar el embalaje original con los correspondientes separadores de cartón para el transporte.
Las reparaciones se realizan por un centro de servicio técnico autorizado por Ivoclar Vivadent. En caso de defectos que
no se puedan reparar, por favor contacte con su distribuidor
o su servicio técnico local (ver direcciones en la contraportada). Una clara descripción del defecto o condiciones en
las que se produce el mismo, ayudarán a facilitar su localización. Por favor, incluya dicha descripción cuando envíe la
lámpara.
Forma de suministro
1 base de carga, 1 cable eléctrico, 1 bloque de alimentación, 1 pieza de mano,
batería (Li-Po), 1 conducto de luz 10>8 mm, 1 placa antideslumbrante,
1
3 Conos antideslumbrantes fundas, 1 Instrucciones de uso.
Accesorios
Los siguientes accesorios están disponibles para bluephase 20i:
EF Descripción
R
627389 Conducto de luz, 10>8 mm, negro (G2)
608538 Conducto de luz Pin-point, 6/2 mm, negro (G2)
51756 Protectores antideslumbrantes cónicos
5
592496 Protectores antideslumbrantes placa
627299 bluephase 20i base de carga (G2)
27300 bluephase 20i batería (G2)
6
627298 bluephase 20i pieza de mano (G2)
607922 bluephase meter
08554 fundas
6
Datos técnicos
Voltaje de funcionamiento 5 VDC
base de carga
Voltaje de funcionamiento 3.7 VDC con batería
pieza de manto 5 VDC con bloque de alimentación
Bloque de alimentación 100-240 VAC / 50-60 Hz / max. 0.4 A /
Condiciones de funcionamiento
Temperatura +10 °C hasta +40 °C (+50 hasta +104°F)
Humedad relativa 30 % hasta 75%
Presión ambiental 700 hPa hasta 1060 hPa
Dimensiones de la base de carga L=205mm; An=150mm; Al=85mm
Peso del soporte de la base de carga
Tiempo de carga aprox 2 h (con la batería vacía)
Alimentación de la pieza de mano batería Li-Po
Tiempo máximo de la batería aprox 45 min.
Fuente de luz polionda polywave LED
Margen longitud de onda 385–515 nm
LED-Class 2 LUZ LED
Intensidad de luz 2000 - 2200 mW/cm
Funcionamiento 6 min. conectada /
Dimensiones de la pieza de mano L=260mm; An=42mm; Al=120mm
Peso de la pieza de mano (incl. batería) 245 g
Condiciones de transporte y almacenamiento
Temperatura -20 °C hasta +60 °C (-4 to 140°F)
Humedad relativa 10% hasta 75%
Presión ambiental 500 hPa hasta 1060 hPa
Almacenar bluephase 20i en habitaciones cerradas y techadas.
Proteger el equipo de fuertes vibraciones.
Batería
• No almacenar a temperaturas superiores a 40º C/104º F (o 60º C/140º F
durante un período corto).
Temperatura de almacenamiento recomendada 15-30 °C (59-86 °F)
• Almacenar la batería siempre cargada y
• por un período no superior a 6 meses
Salida 5 VDC
Fabricante: Friwo
TIPO 15.2630
250 g
(con una batería nueva, completamente cargada)
NO MIRE DIRECTAMENTE A LA LUZ
PRODUCTO LED CLASE 2
Max. 5.11 mW / longitud de onda 385 - 515 nm
4 min. desconectada (intermitentemente)
2
75
Page 74

Prezado usuário,
A perfeita polimerização é um importante
requisito para todos os materiais fotopolimerizáveis, com o objetivo de produzir, de modo
consistente, restaurações de alta qualidade.
A luz de polimerização selecionada também
tem um papel decisivo a este respeito. Deste
modo, nós gostaríamos de agradecer a compra do bluephase 20i. O bluephase 20i é um
dispositivo medicinal de alta qualidade que
foi projetado de acordo com os mais recentes
padrões da ciência e da tecnologia, e
conforme as respectivas especificações industriais.
De modo seguro, estas Instruções Operacionais proporcionam a ajuda para o início do
dispositivo, para o completo uso das suas
capacidades e para assegurar uma longa vida
útil de serviço.
Se você necessitar de qualquer informação
adicional, por favor, entre em contato
conosco (ver endereços na página reversa).
A equipe Ivoclar Vivadent.
76
Page 75

Índice
Segurança
Uso pretendido 78
Indicações 78
Notas de segurança 79
Primeiros procedimentos
Base de carga 80
Peça de mão 81
Bateria 81
Operação conjunta Click & Cure 82
Operação
Selecionando o programa de cura e
o tempo de cura 84
Função Memória de Polimerização 85
Início
Sinais acústicos 86
Performance luminosa 86
Medida da performance luminosa 86
Manutenção e limpeza
Carcaça 87
Condutores de luz 87
Contatos da bateria 87
Descarte 87
E se....? 88
Garantia /
Procedimento em caso de reparo 89
Especificações do produto
Forma de apresentação 89
Acessórios 89
Dados técnicos 89
Condições de operação 89
Condições de transporte e armazenagem 89
Declaração de Conformidade 91
Português
77
Page 76

LED LIGHT
DO N OT STAR E INTO BEAM
CLAS S 2 L ED PRO DUCT
Max. 5,11 mW / Wavelength 385 - 515 nm
IEC 60 825-1:19 93+A1:19 97+A2 :2001
Segurança
Uso pretendido
O bluephase 20i é uma luz de polimerização LED, de alta
performance, que produz luz azul de alta energia. Ele é usado para polimerizar diretamente os materiais dentais fotopolimerizáveis, a partir da unidade dental. O uso pretendido
deve também incluir a observação das notas e regras que
constam destas Instruções Operacionais.
Indicação
Com seu espectro de banda larga “polywave”, o bluephase
20i é particularmente indicado para os materiais dentais
fotopolimerizáveis que curam na faixa de comprimentos de
onda entre 385 e 515 nm. Nestes materiais podem ser
incluídos os materiais restauradores, agentes de ligação,
adesivos, bases, liners, selantes de fissuras, materiais provisórios, adesivos para brackets e materiais de laboratório
dental usados na fabricaçãode inlays de cerâmica.
Contra-indicações
Para materiais cujas polimerizações são ativadas
fora da faixa de comprimentos de onda entre
385 e 515 nm (nenhum material conhecido, até
a presente data). Se você não possui certeza
sobre certos produtos, favor solicitar informações
do fabricante do respectivo material.
Não carregar ou usar o aparelho perto de
substâncias inflamáveis ou combustíveis.
Os dispositivos de comunicação de alta
freqüência móveis ou portáteis podem interferir
com o equipamento médico. O uso de telefones
móveis, durante a operação, não é permitido.
Atenção: O uso de controles, dispositivos de
ajuste ou desempenho de procedimentos
diferentes daqueles aqui especificados, pode
resultar em perigosa exposição à radiação.
Notas de segurança
O bluephase 20i é um dispositivo médico eletrônico e foi
projetado de acordo com as directivas IEC 601-1 (EN 60601-1)
e EMC. Ele cumpre as directivas europeias e pode ser classificado como LED Classe 2.
A partir do fabricante, o aparelho é transportado de modo
seguro e em condição técnica perfeita. Com o objetivo de
conservar esta condição e assegurar a operação livre de riscos, as notas e regras destas Instruções Operacionais devem
ser obedecidas. Para evitar danos ao equipamento e riscos
para pacientes, usuários e terceiras partes, as seguintes instruções de segurança têm de ser observadas.
NRTL (Nationally Recognized
Testing Laboratory)
Uso e responsabilidade
• O bluephase 20i deve ser usado apenas para o propósito
que foi projetado. Quaisquer outros tipos de emprego
estão contra-indicados. O fabricante não aceita a responsabilidade por danos resultantes do mau uso ou de falha
na observação das Instruções Operacionais.
• Além disto, o usuário é o único responsável pelo teste do
bluephase 20i para seu uso e para os propósitos pretendidos. Isto é particularmente importante quando, ao
mesmo tempo, um outro equipamento for utilizado as
vizinhanças do bluephase 20i que está em operação.
• Usar apenas partes sobressalentes e acessórios originais
da Ivoclar Vivadent (ver Acessórios). O fabricante não
aceita qualquer responsabilidade de danos resultantes
pelo uso de outros acessórios e partes sobressalentes.
78
Voltagem operacional
Antes de ligar o aparelho, verificar se:
a) a voltagem indicada na placa de classificação está de
acordo com o suprimento local de força.
b) a unidade adquiriu a temperatura ambiente.
Quando a bateria ou a unidade de alimentação forem usadas de modo separado, p.ex., no início ou durante a operação conjunta Click & Cure, o contato com pacientes e
terceiras partes deve ser evitado. Não tocar nos contatos
Page 77

expostos da bateria ou no plugue de conexão (unidade de
alimentação).
Indicações para segurança comprometida
Se é necessário assumir que uma operação segura não
pode ser mais possível, a força deve ser desconectada e a
bateria deve ser removida, para evitar acidentes de operação. Este pode ser o caso, por exemplo, quando o aparelho
está visivelmente danificado ou quando não está trabalhando de modo correto. O aparelho somente estará completamente desconectado do suprimento de força quando o
cabo de força for puxado da tomada.
Proteção dos olhos
As exposições diretas ou indiretas dos olhos devem ser evitadas. A prolongada exposição à luz é desagradável e pode
resultar em injúria. Deste modo, o uso dos cones anti-ofuscantes disponíveis é recomendado. Os indivíduos que são
normalmente sensíveis à luz, que usam drogas foto-sensibilizantes, que foram submetidos a cirurgia nos olhos e que
trabalham com o aparelho ou em suas proximidades por
longo tempo, não devem ficar expostos à luz deste dispositivo e, com este propósito, devem usar óculos protetores
(laranja) que absorvem luz abaixo de 515 nm.
Bateria
Atenção: Empregar somente partes sobressalentes originais.
Em particular, usar apenas as originais baterias e bases de
carga da Ivoclar Vivadent. Não usar baterias de circuito curto. Não armazenar em temperatura superior a 40°C / 104°F
(ou 60°C / 140°F por período curto). Sempre armazenar as
baterias carregadas. O período de armazenagem não deve
ser maior que 6 meses. A bateria pode explodir em contato
com o fogo.
Favor observar que a bateria de polímero de lítio pode reagir com explosão, fogo e desenvolvimento de fumaça, nos
casos de manuseio impróprio e de danos mecânicos. Baterias de polímero de lítio danificadas não deveriam mais ser
usadas.
Os eletrólitos e vapores de eletrólitos liberados durante a
explosão, o fogo e a fumaça desenvolvida são tóxicos e
corrosivos. No caso de contato com os olhos e pele, lavar
imediatamente com grande quantidade de água. Evitar a
inalação da fumaça. Procurar o médico, em caso de
indisposição.
Formação de calor
(Risco de queimadura)
Como em todos os casos de luzes de alta performance, a
elevada intensidade de luz do bluephase 20i resulta em
certa formação de calor. As prolongadas exposições muito
próximas da polpa e dos tecidos moles podem provocar
danos reversíveis ou irreversíveis.
Assim, a polimerização com luz de alta performance
somente deve ser utilizada por pessoal dental especialmente treinado e os recomendados tempos de cura devem ser
observados. Os tempos contínuos de cura, maiores que
5 segundos, com o Programa Turbo, na mesma área, bem
como os contatos diretos com a gengiva, mucosa oral ou
pele, devem ser evitados. Se necessário, polimerizar em
intervalos intermitentes de 5 segundos cada um. A colocação de um dique de borracha pode evitar o acúmulo de
calor durante a cura. Quando a irradiação do tecido mole
não pode ser evitada, operar com luz de reduzida intensidade (usar Programa Low Power). Polimerizar as restaurações
indiretas com intervalos intermitentes de 10 segundos cada
um, usando o Programa High Power, ou com intervalos de
1x 5 segundos, usando o Programa Turbo, ou usando esfriamento externo com fluxo de ar.
As correspondentes recomendações de cura, relacionadas com o programa e o
tempo de cura, devem ser
observadas. Além disto, a
janela de emissão de luz
deve estar sempre apontada
diretamente para o material a ser curado (p.ex., usar um
dedo para estabilizar a luz).
Não é recomendado o emprego do Programa High
Power/Turbo em pacientes sensíveis. Nestes casos, operar
com reduzida intensidade de luz (usar o Programa Low
Power).
79
Page 78

Primeiros procedimentos
Forma de apresentação
Conferir se a entrega foi completa e verificar possíveis
danos de transporte. Se por acaso, algum componente esteja faltando ou danificado, você deve imediatamente contatar seu vendedor ou o Service Center local.
Base de carga
Antes de ligar o dispositivo, checar se a voltagem, indicada
na placa de classificação, está de acordo com o suprimento
local de força. A placa de classificação está situada no lado
inferior da unidade de alimentação.
Colocar a base de carga em cima de uma superfície plana e
adequada. Remover a folha de proteção do plugue de
conexão situado na unidade de alimentação. Encaixar o
plugue de conexão da unidade de alimentação no soquete,
situado no lado inferior da base de carga. Inclinar ligeiramente o plugue e aplicar leve pressão, até ouvir e sentir um
estalo que indica a sua correta posição.
Conectar o cabo de força com o suprimento de força e com
a unidade de alimentação.
O indicador Power On, situado no lado esquerdo da
carcaça, ilumina-se na cor azul (ver "Indicadores da base
de carga").
80
Page 79

Peça de mão
Antes de inserir o condutor de luz, remover a lâmina protetora da respectiva abertura da peça de mão.
Virar ligeiramente o condutor de luz, para prendê-lo à peça
de mão.
A seguir, montar o escudo anti-ofuscante no condutor de luz.
Bateria
Nós recomendamos o carregamento total da bateria, antes
do primeiro uso.
Deslizar a bateria diretamente para o interior da peça de
mão, até ouvir e sentir um estalo que indica a sua correta
posição.
Colocar a peça de mão no correspondente descanso, situado na base de carga. Se uma capa foi usada, favor removêla antes de carregar a bateria. Quando está completamente
carregada, a bateria apresenta uma capacidade de polimerização (cura) de aproximadamente 45 minutos.
Informação
Se possível, sempre utilizar a luz com a bateria totalmente
carregada. Isto prolonga sua vida útil. É também recomendado colocar a peça de mão na base de carga, depois de
cada uso. O tempo de carregamento para baterias vazias é
de 2 horas.
81
Page 80

Início
Operação conjunta Click & Cure
O bluephase 20i pode ser utilizado na operação conjunta
em qualquer momento, mas, particularmente, quando a
bateria está totalmente vazia.
Para este propósito, remover a bateria da peça de mão.
A seguir, remover a unidade de alimentação da face inferior
da base de carga. Não retirar o cabo de força.
Inserir o plugue de conexão diretamente na peça de mão,
até ouvir e sentir um estalo que indica a correta posição.
Durante a operação ligada, a base de carga não poderá
carregar a bateria, nem efetuar a medida de luz, porque
não está conectada ao suprimento de força.
O aparelho somente estará completamente desconectado
do suprimento de força quando o cabo de força for retirado
do plugue do soquete.
82
Page 81

Sinais e símbolos
Status de carga da bateria
Com a peça de mão ligada, o atual status de carga da bateria é reproduzido no display da seguinte maneira:
Bateria totalmente carregada (capacidade de cura de
aproximadamente 45 minutos).
Bateria semi-carregada.
Reserva (A última barra do indicador da bateria fica vermelha, no modo reserva. A bateria precisa ser carregada tão
logo que seja possível)
Quando a bateria está sendo carregada a informação:
"Charging Battery" aparece brevemente no display, antes
do display retornar ao modo "stand-by".
Quando a bateria está completamente vazia, a peça de mão
vai automaticamente para o modo stand-by. A luz não pode
ser acesa, e o tempo de cura e o programa de cura não
podem ser fixados. A luz não pode ser mantida por longo
tempo, programa de cura e tempo de cura não podem
ser fixados e o aparelho vai para o modo stand-by.
Entretanto, a peça de mão pode ser usada na operação conjunta Click & Cure.
Desde que a bateria é um consumível, ela deve ser trocada
depois do seu típico ciclo de vida, que expira após 2½ anos.
Ver a etiqueta para conferir a idade da bateria.
S000001
04/04/09
dd/mm/yy
83
Page 82

Operação
Antes de cada uso, desinfetar ou autoclavar as superfícies
contaminadas da luz de polimerização, dos condutores de
luz e dos cones anti-ofuscantes.
Além disto, verificar se o rendimento luminoso permite a
adequada polimerização. Para este propósito, checar a possível presença de sujeira ou de dano no condutor de luz e
verificar a intensidade luminosa, em intervalos regulares de
tempo (p.ex., com o radiômetro bluephase da Ivoclar Vivadent).
Selecionando o programa de polimerização e
o tempo de polimerização
O programa de polimerização (cura) e o tempo de polimerização (cura) podem ser individualmente fixados. O bluephase 20i está equipado com os 4 seguintes programas de
cura para diferentes aplicações. O desejado programa de
cura é selecionado com os botões de seleção de programas.
As alterações são exibidas pelo display (ver "Indicadores da
peça de mão"). O dispositivo vem equipado com os seguintes programas pré-fixados:
Ajustes de fábrica
TURBO 5 segundos
O pretendido tempo de cura é selecionado usando os botões de de seleção
de tempo. Os usuários podem escolher
entre 5,10,15, 20 e 30 segundos.
Observar as Instruções de Uso do material aplicado quando
selecionar o tempo de cura.
As recomendações de cura para compósitos aplicam-se
para todas as cores, quando não houver citação em contrário nas Instruções de Uso, e para camadas de espessura
máxima de 2mm. De modo geral, estas recomendações são
aplicadas para situações onde a janela de emissão do condutor de luz é colocada diretamente sobre o materil a ser
polimerizado. O aumento da distância entre o condutor de
luz e o material exigirá, de modo correspondente, a extensão do tempo de cura. Por exemplo, se a distância para o
material é 8 mm, a efetiva performance luminosa é reduzida de aprox. 50%. neste caso, o recomendado tempo de
cura deve ser dobrado.
1) A informação aqui prevista aplica-se ao condutor de luz
de 10>8 mm, fornecido na forma de apresentação.
2) A informação em relação ao desenvolvimento de calor e
ao risco de queimadura deve ser levada em consideração
(ver notas de Segurança).
HIGH 10 segundos
(High Power)
LOW 10 segundos
(Low Power)
SOFT 15 segundos
(Soft start)
84
Page 83

Intensidade de luz
empo de exposição para compósitos
Programas de Cura
Programa TURBO
Alta e consistente intensidade de luz
para a polimerização de materiais de
restauração e de cimentação para
restaurações diretas e indiretas.
2
2.000 mW/cm
0
0
0
05
1) Aplicar camadas com espessura máxima de 2 mm e verificar se as Instruções de Uso do respectivo material não registram outra recomendação (poderá ser o caso, p.ex., com as cores de dentina).
2) Aplicar camadas com espessura máxima de 4 mm e verificar se as Instruções de Uso do respectivo material não registram outra recomendação (poderá ser o caso, p.ex., com as cores de dentina).
3) Aplicar camadas com espessura máxima de 3 mm. 4) Aplicar fotopolimerização (usar somente a pasta base). 5) Aplicar polimerização dual.
.200 mW/cm
1
650 mW/cm
1.200 mW/cm
650 mW/cm
[s]
t
Programa HIGH POWER
Alta e consistente intensidade de luz
para a polimerização de materiais de
restauração e de cimentação para
restaurações diretas e indiretas.
2
t [s]
Programa LOW POWER
Reduzida intensidade de luz com
reduzido desenvolvimento de calor
para a polimerização de adesivos,
forradores e materiais restauradores
em áreas próximas da polpa, quando
2
da restauração de cavidades de
classe V.
t [s]
Programa SOFT START
Acréscimo passo a passo da
intensidade de luz, com reduzido
“stress” de contração e reduzido
desenvolvimento de calor para a
polimerização de materiais
2
restauradores.
2
t [s]
T
Tempo de exposição para Tetric EvoCeram
Materiais de restauração
Compósitos
)
1
2 mm
•
IPS Empress Direct / IPS Empress Direct Flow /
Tetric EvoCeram / Tetric EvoFlow / Tetric /
etric Basic White / Tetric N-Ceram / Tetric N-Flow
T
Heliomolar / Heliomolar HB / Heliomolar Flow / Outros
2)
• 4 mm
Tetric EvoCeram Bulk Fill
Tetric Basic White
3)
Compómeros
ompoglass F / Compoglass Flow
C
Restaurações indiretas /
Materiais de Cimentação
ariolink II Base
V
Variolink N Clear Veneer / Variolink Ultra 5)/
Dual Cement 5)/ Variolink II
erschiedenes
V
Heliosit Orthodontic
Telio Add-On Flow
Telio Stains
IPS Empress Direct Color
IPS Empress Direct Opaque
Materiais de restauração
Compósitos
• 2 mm
IPS Empress Direct / IPS Empress Direct Flow /
Tetric EvoCeram / Tetric EvoFlow / Tetric /
Tetric Basic White / Tetric N-Ceram / Tetric N-Flow
Heliomolar / Heliomolar HB / Heliomolar Flow / Outros
4 mm
•
Tetric EvoCeram Bulk Fill / Tetric Basic White
Compómeros
Compoglass F / Compoglass Flow
R
Materiais de Cimentação
Variolink II Base
Variolink N Clear Veneer / Variolink Ultra 5)/
Dual Cement 5)/ Variolink II
Diversos
Helioseal / Helioseal F / Helioseal Clear
Monopaque
MultiCore Flow / Multicore HB
Heliosit Orthodontic
Telio Add-On Flow
Telio Stains
IPS Empress Direct Color
IPS Empress Direct Opaque
Adhesive
AdheSE / AdheSE One F
ExciTE / ExciTE DSC
Tetric N-Bond / Tetric N-Bond Self-Etch
Heliobond (Syntac)
Materiais provisórios
Telio CS Inlay/Onlay
Systemp.inlay/onlay
Fermit / Fermit N
Telio CS Link / Systemp.link
Diversos
Heliosit Orthodontic
Vivaglass Liner
Materiais de restauração
Compósitos
• 2 mm
IPS Empress Direct / IPS Empress Direct Flow /
Tetric EvoCeram / Tetric EvoFlow / Tetric /
Tetric Basic White / Tetric N-Ceram / Tetric N-Flow
Heliomolar / Heliomolar HB / Heliomolar Flow / Outros
• 4 mm
Tetric EvoCeram Bulk Fill / Tetric Basic White
Compómeros
Compoglass F / Compoglass Flow
)
4
Variolink Veneer / Variolink N Base
/
1)
)
2
3)
estaurações indiretas /
)
4
/ Variolink Veneer / Variolink N Base
1)
2)
3)
/ IPS Empress Direct
5)
5)
2,000 – 2,200 mW/cm
0 seg.
1
5 seg.
Tempo de cura
5 s
2x 5 s
5 s
2x 5 s
x 5 s
2
)
4
ro mm cer
/
p
1x 5 s por segmento
2x 5 s
2x 5 s
5 s
5 s
2x 5 s
Tempo de cura
10 s
15 s
10 s
20 s
)
4
/
pro mm cerâmica:
10 seg. por segmento
10 seg.
20 seg.
20 seg.
10 seg.
15 seg.
10 seg.
10 seg.
20 seg.
Tempo de cura
10 seg.
10 seg.
10 seg.
10 seg.
20 seg. por segmento
20 seg.
20 seg.
Tempo de cura
15 seg.
20 seg.
15 seg.
20 seg.
2
ica:
â
m
85
Page 84

Operação
Função Memória de Polimerização
Os últimos ajustes utilizados, com as combinações entre
programas de cura e tempos de cura, são automaticamente
salvos.
Início
A luz é acesa por intermédio do botão de ligar. No display,
o indicador muda de programa de polimerização para tempo (transcorrido) de polimerização. Vencido o tempo de cura
selecionado, o programa de polimerização é automaticamente terminado. Se desejado, a luz pode ser desligada,
antes do decurso do tempo de cura fixado, pressionando
novamente o botão de ligar. O ventilador é ativado simultaneamente com a luz. Terminado o tempo de polimerização,
o ventilador continua a funcionar, por certo tempo, para
esfriar o aparelho. A bateria não pode ser removida
enquanto o ventilador ainda estiver funcionando.
Sinais acústicos
Os sinais acústicos podem ser ouvidos para as seguintes
funções:
• Início (Parada)
• Cada 10 segundos
• Mudança de programa
• Mudança de tempo de cura
• Conexão da bateria na base de carga
• Inserção da bateria
• Mensagem de erro
Se desejado, os sinais acústicos podem ser ajustados.
Performance Luminosa
A performance luminosa (intensidade de luz) é mantida em
nível consistente durante a operação. Quando o fornecido
condutor de luz de 10>8 mm é utilizado, a performance
luminosa está calibrada em 2.000 - 2.200 mW/cm2.
O uso do condutor de luz diferente daquele que foi fornecido tem uma influência direta na intensidade de luz emitida.
Nos condutores de luz de paredes-paralelas (10 mm), o diâmetro é igual nas duas extremidades. Nos condutores de
focagem de luz (condutor de luz 10>8 mm, condutor de luz
Pin-Point 6>2 mm), o diâmetro da extremidade traseira do
condutor é maior que aquele da janela de emissão de luz.
Deste modo, a luz azul incidente será empacotada em uma
superfície menor. Isto promove o aumento da intensidade
da luz que será emitida.
Os condutores de luz Pin-Point são adequados para a cura
em áreas confinadas, como na fixação de facetas, antes da
remoção dos excessos. Para completar a polimerização,
entretanto, será necessário trocar o condutor de luz.
Medida da performance luminosa
As performances luminosas do bluephase 20i e do condutor
de luz 10>8 mm, fornecido pelo Kit, podem ser checadas
por meio do medidor bluephase.
Quando o valor medido não corresponder à esperada performance luminosa, proceder da seguinte forma:
• Checar o programa de polimerização selecionado.
• Limpar o sensor de luz, se ele estiver contaminado.
• Remover o condutor de luz e limpar a janela de emissão
de luz da peça de mão com algodão embebido de álcool.
• Limpar possíveis sujeiras nos condutores de luz
(ver „Manutenção e limpeza“).
• Limpar o condutor de luz, se ele estiver contaminado.
• Substituir o condutor de luz danificado por um novo.
Para tal propósito, pressionar o botão azul de volume (ver
Vista Geral do Produto) e, enquanto a luz estiver apagada,
reduzir o volume, e ajustar os sinais acústicos com o botão
esquerdo de seleção de tempo. Quando desejar o retorno
dos sinais acústicos ou aumentar o volume, pressionar o
botão azul de volume e, em seguida, o botão direito de
seleção de tempo.
86
Se estas medidas não derem resultados, por favor, contatar
seu vendedor ou o Service Center local.
Page 85

Manutenção e limpeza
Por motivos de higiene, é recomendado usar uma luva protetora descartável para cada paciente. As superfícies contaminadas do dispositivo e os cones anti-ofuscantes devem
ser desinfetados (p.ex., FD333, FD366/Dürr Dental, Incidin
Liquid /Ecolab) e o condutor de luz deve ser esterilizado
antes de cada uso, a não ser quando as luvas protetoras
descartáveis tenham sido usadas. Durante a limpeza, os
líquidos e outras substâncias estranhas não devem penetrar
na peça de mão ou no suporte da peça de mão (risco de
choque elétrico). Assim sendo, para a limpeza, desconectar
a peça de mão do suprimento de força.
Carcaça
Esfregar a peça de mão com um desinfetante comum, livre
de aldeído. Não usar soluções agressivas (soluções contendo óleo de laranja ou soluções com mais de 40% de etanol), solventes (p.ex., acetona) ou instrumentos pontudos,
para evitar danos ou arranhaduras no plástico. Limpar as
partes sujas do plástico com solução de sabão.
Condutores de luz
Limpar os condutores de luz com pano macio e um desinfetante. Remover, cuidadosamente, qualquer resíduo de materiais, como compósitos, usando as unhas ou uma espátula
de plástico. Nunca empregar instrumentos afiados ou pontudos, que poderão arranhar a superfície do condutor de luz
e, assim, reduzir a transmissão de luz. Os condutores de luz
e os cones anti-ofuscantes podem ser autoclavados (p.ex.,
121°C, 2 bar, 15 minutos). Checar os danos nos condutores
de luz. Se certos segmentos aparecerem pretos, quando o
condutor de luz for colocado contra uma fonte de luz, as
fibras de vidro estão quebradas. Neste caso, o condutor de
luz deve ser substituído por um novo.
Contatos da bateria
Para ótima e constante condutividade, conservar os contatos da bateria livres de possíveis contaminações (p.ex., resíduos de compósitos). Para este propósito, de modo regular,
limpar os contatos afetados esfregando com desinfetantes
(após cada paciente).
Descarte
O aparelho não pode ser descartado no lixo normal doméstico. Por favor, visite o website local da Ivoclar Vivadent
para obter informações mais detalhadas sobre a disponibilidade da unidade. Descartar baterias e luzes de cura imprestáveis de acordo com os correspondentes requisitos legais
vigentes em seu país. As baterias não podem ser incineradas.
87
Page 86

E se .... ?
Símbolo
Causas
Defeito eletrônico na peça de mão
ou na bateria
Aparelho está super-aquecido ou
super-esfriado
Defeito eletrônico na bateria
Bateria descarregada
Retificação de erro
Remover e reinserir a bateria. Se o erro persistir, substituir a bateria com
a unidade de alimentação (Click & Cure). Se o erro persistir, contatar seu
vendedor ou o Service Center local.
Esperar o aparelho esfriar (ou assumir a temperatura ambiente, quando
estiver em temperatura inferior) e, depois de certo tempo, tentar novamente. Se o erro persistir, contatar seu vendedor ou o Service Center
local.
Remover e reinserir a bateria. Se o erro continuar a ser mostrado no display,persistir, colocar o aparelho na base de carga. Se, no entanto, o erro
continuar, substituir a bateria com a unidade de alimentação (Click &
Cure). Por favor, contatar seu vendedor ou o Service Center local.
Posicionar a peça de mão na base de carga. A respectiva mensagem
(“Charging”) será mostrada no display. Se a bateria não estiver sendo
carregada, os contatos devem ser limpos. Quando o erro persistir, contatar seu vendedor ou o Service Center local.
Não aparece
no display
durante o
carrega-
mento
LED da
base de
carga não é
iluminado
88
Contatos de carga contaminados
Bateria em modo segurança
(circuito protetor integrado)
Unidade de alimentação não
conectada ou com defeito
Checar se a peça de mão foi corretamente colocada na base de carga.
Limpar os contatos da bateria. Informação: "Charging Battery" aparece
brevemente no display, antes do display retornar ao modo "stand-by".
Se a limpeza dos contatos da bateria não resolver o problema, remover a
bateria do aparelho. Carregar a bateria, separada da peça de mão, na
base de carga por aproximadamente 10 minutos. Se o erro persistir, contatar seu vendedor ou o Service Center local.
Verificar os contatos da bateria, checar se a unidade de alimentação está
corretamente posicionada na base de carga e verificar também se a unidade de alimentação está conectada ao suprimento de força, através do
cabo de força (o display, sobre a unidade de alimentação, acende em verde quando ela está trabalhando de modo correto). Se o erro continuar,
contatar seu vendedor ou o Service Center local.
Page 87

Garantia / Procedimento em
caso de reparo
Especificações do produto
O período de garantia do bluephase 20i é de 3 anos, a partir da data de compra (bateria, 1 ano).
Os funcionamentos incorretos decorrentes de material
defeituoso ou erros de fabricação são reparados, livres de
taxa, durante o período de garantia. A garantia não provê o
direito de recuperar quaisquer materiais ou outros danos
não-materiais diferentes daqueles que foram mencionados.
O aparelho deve ser utilizado somente para os propósitos
projetados. Todos os outros usos são contra-indicados. O
fabricante não aceita responsabilidade por danos resultantes do uso impróprio e, nestes casos, as reivindicações de
garantia não serão levadas em conta. Isto é particularmente
válido para:
• danos resultantes de manipulação imprópria, especialmente a incorreta armazenagem das baterias (ver Dados
Técnicos: Condições de transporte e armazenagem);
• danos de componentes resultantes do uso fora das condições padrões de operação;
• danos resultantes de influências externas, p.ex., pancadas e quedas no chão;
• danos resultantes de incorretas instalação e de operação;
• danos resultantes da conexão da unidade com
suprimento de força, voltagem e freqüência que não são
compatíveis com as estipuladas na placa de classificação;
• danos resultantes de impróprios reparos que não foram
feitos por qualificados Service Centers.
No caso de reivindicação sob garantia, o aparelho completo
(peça de mão, base de carga, bateria, cabo de força e unidade de alimentação) deve ser enviado ao vendedor ou
diretamente para a Ivoclar Vivadent, acompanhado da nota
de compra. Empregar a embalagem original para o transporte, com os respectivos encartes de papelão.
O trabalho de reparo deve ser conduzido somente por qualificado Service Center Ivoclar Vivadent. Em caso de um
defeito que não possa ser retificado, por favor, contatar o
seu vendedor ou o seu Service Center local (ver endereços
na página reversa). A clara descrição do defeito, ou das
condições sob as quais ele ocorreu, vão facilitar a localização do problema. Neste sentido, por favor incluir esta descrição, quando retornar o aparelho.
Forma de apresentação
1 Base de carga, 1 Cabo de força, 1 Unidade de alimentação, 1 Peça de mão,
Bateria (Li-Po), 1 Condutor de luz 10>8 mm, 1 Escudo anti-ofuscante,
1
3 Cone anti-ofuscante, Capas, 1 Conjunto de Instruções Operacionais.
cessórios
A
Para o bluephase 20i, estão disponíveis os seguintes acessórios:
REF Descrição
27389 Condutor de luz 10>8 mm, preto (G2)
6
608538 Condutor de luz Pin-point 6/2 mm, preto (G2)
551756 Cones anti-ofuscantes
92496 Escudo anti-ofuscante
5
627299 Base de carga bluephase 20i
627300 Bateria bluephase 20i (G2)
27298 Peça de mão bluephase 20i (G2)
6
607922 Medidor bluephase
608554 Capas
Dados técnicos
Voltagem de operação
da Base de carga 5 VDC
Voltagem de operação 3.7 VDC com bateria
da Peça de mão 5 VDC com unidade de alimentação
Unidade de alimentação 100-240 VAC / 50-60 Hz /
Condições de Operação
Temperatura +10 °C a +40 °C (+50 ta+104°F)
Umidade relativa 30 % a 75%
Pressão ambiental 700 hPa até 1060 hPa
Dimensões da Base de carga L=205mm; W=150mm; H=85mm
Peso da Base de carga 250 g
Tempo de carregamento aprox. 2 h (com a bateria vazia)
Suprimento de força da peça de mão Bateria Li-Po
Máx. tempo de bateria aprox. 45 min.
Fonte de luz LED polywave
Faixa de comprimentos de onda 385–515 nm
LED-Class 2 LUZ LED
Performance luminosa 2,000 - 2,200 mW/cm
Operação 6 min. ligado / 4 min. desligado
Dimensões da Peça de mão L=260mm; W=42mm; H=120mm
Peso da Peça de mão (com bateria) 245 g
Condições de transporte e armazenagem
Temperatura -20 °C a +60 °C (-4 a140°F)
Umidade relativa 10% a 75%
Pressão ambiental 500 hPa até 1060 hPa
O bluephase 20i deve ser armazenado em ambientes fechados e cobertos.
Proteger o dispositivo contra severas vibrações.
Bateria
• Não armazenar em temperaturas superiores a 40°C / 104°F (ou 60° C /140°F
por um curto período). A temperatura de armazenagem recomendada é de
15-30 °C (59-86 °F)
• Sempre armazenar a bateria carregada e
• nunca por período superior a 6 meses.
máx. 0.4 A / Potência 5 VDC
Fabricante: Friwo
TIPO 15.2630
(com bateria nova, totalmente carregada)
NÃO OLHAR FIXAMENTE PARA A RADIAÇÃO
PRODUTO LED CLASSE 2
máx. 5.11 mW / comp. de onda 385 - 515 nm
(de modo intermitente)
2
89
Page 88

Appendix
Guidance and manufacturer's declaration - electromagnetic emission
T
he bluephase 20i is intended for use in the electromagnetic environment specified below. The customer or the user of the bluephase 20i should
assure that it is used in such an environment.
Emission test
RF emissions CISPR 11
RF emissions CISPR 11
Harmonic emissions IEC 61000-3-2
oltage fluctuations / flicker emissions
V
IEC 61000-3-3
Guidance and manufacturer's declaration - electromagnetic immunity
The bluephase 20i is intended for use in the electromagnetic environment specified below. The customer or the user of the bluephase 20i should assure
that it is used in such an environment.
Immunity test
Electrostatic
discharge (ESD)
IEC 61000-4-2
Electrical fast
transient/burst
IEC 61000-4-4
Surge
IEC 61000-4-5
Voltage dips, short
interruptions and
voltage variations on
power supply input
lines
IEC 61000-4-11
Power frequency
(50/60 Hz) magnetic
field IEC 61000-4-8
NOTE: UTis the a.c. mains voltage prior to application of the test level.
IEC 60601 test level
± 6 kV contact
± 8 kV air
± 2 kV for power supply lines
± 1 kV for input/output lines
± 1 kV line - line
± 2 kV line - earth
<5 % U
T
(>95 % dip in UT) for 0.5 cycle
40 % U
T
(60 % dip in UT) for 5 cycles
70 % U
T
(30 % dip in UT) for 25 cycles
<5 % U
T
(>95 % dip in UT) for 5 sec
3 A/m
Compliance
Group 1
Class B
Class A
omplies
C
Compliance level
± 6 kV contact
± 8 kV air
± 2 kV for power supply lines
± 1 kV for input/output lines
± 1 kV line - line
no prot. earth
<5 % U
T
(>95 % dip in UT) for 0.5 cycle
40 % U
T
(60 % dip in UT) for 5 cycles
70 % U
T
(30 % dip in UT) for 25 cycles
<5 % U
T
(>95 % dip in UT) for 5 sec
30 A/m
Electromagnetic environment - guidance
The bluephase 20i uses RF energy only for its internal function. Therefore, its RF emissions are very low and
re not likely to cause any interference in nearby electronic equipment.
a
The bluephase 20i is suitable for use in all establishments, including domestic establishments and those
directly connected to the public low-voltage power supply network that supplies buildings used for domestic purposes.
P < 75W (pass without test)
P < 75W (pass without test)
Electromagnetic environment - guidance
Floors should be concrete or ceramic tile. If floors are covered with synthetic material,
the relative humidity should be at least 30%.
Mains power quality should be that of typical commercial or dental environment.
Mains power quality should be that of typical commercial or dental environment.
Mains power quality should be that of typical commercial or dental environment. If the
user of the bluephase 20i requires continued operation during power mains interruptions,
it is recommended that the bluephase 20i be powered from an uninterruptible power
supply or battery.
Power frequency magnetic fields should be at levels characteristic of a typical location in
a typical commercial or dental environment.
90
Page 89

Guidance and manufacturer's declaration - electromagnetic immunity
T
he bluephase 20i is intended for use in the electromagnetic environment specified below. The customer or the user of the bluephase 20i should assure
that it is used in such an environment.
Immunity test
Conducted RF
IEC 61000-4-6
Radiated RF
EC 61000-4-3
I
IEC 60601 test level
3 V
rms
150 kHz to 80 MHz
3 V/m
0 MHz to 2.5 GHz
8
Compliance level
10 V
10 V/m
Electromagnetic environment - guidance
Portable and mobile RF communications equipment should not be used closer to any part
of the bluephase 20i, including cables, than the recommended separation distance caculated from the equation applicable to the frequency of the transmitter.
ecommended separation distance
R
d = 0.35 P
d = 0.35 P 80 MHz to 800 MHz
d = 0.70 P 800 MHz to 2.5 GHz
where P is the maximum output power rating of the transmitter in watts (W) according to
he transmitter manufacturer and d is the recommended separation distance in meters (m).
t
ield strengths from fixed RF transmitters, as determined by an electromagnetic site
F
a
survey,
should be less than the compliance level in each frequency range.
Interference may occur in the vicinity of equipment marked with the following symbol:
b
NOTE 1: At 80 MHz and 800 MHz, the higher frequency range applies.
NOTE 2: These guidelines may not apply in all situations. Electromagnetic propagation is
affected by absorption and reflection from structures, objects and people.
a
Field strengths from fixed transmitters, such as base stations for radio (cellular/cordless)
telephones and land mobile radios, amateur radio, AM and FM radio broadcast and TV
broadcast cannot be predicted theoretically with accuracy. To assess the electromagnetic
environment due to fixed RF transmitters, an electromagnetic site survey should be considered. If the measured field strength in the location in which the bluephase 20i is used
exceeds the applicable RF compliance level above, the bluephase 20i should be observed to
verify normal operation. If abnormal performance is observed, additional measures may be
necessary, such as reorienting or relocating the bluephase 20i.
b
Over the frequency range 150 kHz to 80 MHz, field strength should be less than 10 V/m.
Recommended separation distances between portable and mobile RF communications
equipment and the bluephase 20i
The bluephase 20i is intended for use in the electromagnetic environment in which radiated RF disturbances are controlled.
The customer or the user of the bluephase 20i can help prevent electromagnetic interference by maintaining a miminum distance between portable
and mobile RF communications equipment (transmitters) and the bluephase 20i as recommended below,
according to the maximum output power of the communication equipment.
Rated
maximum
output power
of transmitter
W
0.01
0.1
1
10
100
For transmitters rated at a maximum output power not listed above, the recommended
separation distance d in metres (m) can be determined using the equation applicable to
the frequency of the transmitter, where P is the maximum output power rating of the
transmitter in watts (W) according to the transmitter manufacturer.
NOTE 1: At 80 MHz and 800 MHz, the separation distance for the higher frequency
range applies.
NOTE 4: These guidelines may not apply in all situations. Electromagnetic propagation is
affected by absorption and reflection from structures, objects and people.
Separation distance according to
frequency of transmitter
m
150 kHz to
80 MHz
d = 0.4 P
0.04
0.13
0.40
1.3
4.0
80 MHz to
800 MHz
d = 0.4 P
0.04
0.13
0.40
1.3
4.0
800 MHz to
2.5 GHz
d = 0.7 P
0.07
0.22
0.70
2.2
7.0
91
Page 90

92
Page 91

Ivoclar Vivadent – worldwide
voclar Vivadent AG
I
Bendererstrasse 2
FL-9494 Schaan
Liechtenstein
Tel. +423 235 35 35
Fax +423 235 33 60
ww.ivoclarvivadent.com
w
Ivoclar Vivadent Pty. Ltd.
1 – 5 Overseas Drive
P.O. Box 367
oble Park, Vic. 3174
N
ustralia
A
el. +61 3 979 595 99
T
Fax +61 3 979 596 45
www.ivoclarvivadent.com.au
voclar Vivadent Ltda.
I
lameda Caiapós, 723
A
Centro Empresarial Tamboré
CEP 06460-110 Barueri – SP
Brazil
Tel. +55 11 2424 7400
Fax +55 11 3466 0840
www.ivoclarvivadent.com.br
Ivoclar Vivadent Inc.
2785 Skymark Avenue, Unit 1
Mississauga
Ontario L4W 4Y3
Canada
Tel. +1 905 238 5700
Fax +1 905 238 5711
www.ivoclarvivadent.com
Ivoclar Vivadent Marketing Ltd.
Rm 603 Kuen Yang
International Business Plaza
No. 798 Zhao Jia Bang Road
Shanghai 200030
China
Tel. +86 21 5456 0776
Fax +86 21 6445 1561
www.ivoclarvivadent.com
Ivoclar Vivadent Marketing Ltd.
Calle 134 No. 7-B-83, Of. 520
Bogotá
Colombia
Tel. +57 1 627 33 99
Fax +57 1 633 16 63
www.ivoclarvivadent.com
voclar Vivadent SAS
I
B.P. 118
F-74410 Saint-Jorioz
France
Tel. +33 450 88 64 00
Fax +33 450 68 91 52
ww.ivoclarvivadent.fr
w
Ivoclar Vivadent GmbH
Dr. Adolf-Schneider-Str. 2
D-73479 Ellwangen, Jagst
ermany
G
el. +49 (0) 79 61 / 8 89-0
T
ax +49 (0) 79 61 / 63 26
F
www.ivoclarvivadent.de
voclar Vivadent Marketing
I
India) Pvt. Ltd.
(
03/504 Raheja Plaza
5
15 B Shah Industrial Estate
Veera Desai Road, Andheri (West)
Mumbai, 400 053
India
Tel. +91 (22) 2673 0302
Fax +91 (22) 2673 0301
www.ivoclar-vivadent.in
Ivoclar Vivadent s.r.l.
Via Isonzo 67/69
40033 Casalecchio di Reno (BO)
Italy
Tel. +39 051 611 35 55
Fax +39 051 611 35 65
www.ivoclarvivadent.it
Ivoclar Vivadent K.K.
1-28-24-4F Hongo
Bunkyo-ku
Tokyo 113-0033
Japan
Tel. +81 3 6903 3535
Fax +81 3 5844 3657
www.ivoclarvivadent.jp
Ivoclar Vivadent Ltd.
12F W-Tower, 1303-37
Seocho-dong, Seocho-gu,
Seoul 137-855
Republic of Korea
Tel. +82 (2) 536 0714
Fax +82 (2) 596 0155
www.ivoclarvivadent.co.kr
voclar Vivadent S.A. de C.V.
I
Av. Insurgentes Sur No. 863,
Piso 14, Col. Napoles
03810 México, D.F.
México
Tel. +52 (55) 50 62 10 00
ax +52 (55) 50 62 10 29
F
www.ivoclarvivadent.com.mx
Ivoclar Vivadent Ltd.
12 Omega St, Albany
O Box 5243 Wellesley St
P
uckland, New Zealand
A
el. +64 9 914 9999
T
Fax +64 9 814 9990
www.ivoclarvivadent.co.nz
voclar Vivadent Polska Sp. z o.o.
I
l. Jana Pawla II 78
A
00-175 Warszawa
Poland
Tel. +48 22 635 54 96
Fax +48 22 635 54 69
www.ivoclarvivadent.pl
Ivoclar Vivadent Marketing Ltd.
Derbenevskaja Nabereshnaya 11,
Geb. W
115114 Moscow
Russia
Tel. +7 495 913 66 19
Fax +7 495 913 66 15
www.ivoclarvivadent.ru
Ivoclar Vivadent Pte. Ltd.
171 Chin Swee Road
#02-01 San Centre
Singapore 169877
Tel. +65 6535 6775
Fax +65 6535 4991
www.ivoclarvivadent.com
Ivoclar Vivadent S.L.U.
c/ Emilio Muñoz Nº 15
Entrada c/ Albarracin
E-28037 Madrid
Spain
Tel. + 34 91 375 78 20
Fax + 34 91 375 78 38
www.ivoclarvivadent.es
voclar Vivadent AB
I
Dalvägen 14
S-169 56 Solna
Sweden
Tel. +46 (0) 8 514 93 930
Fax +46 (0) 8 514 93 940
ww.ivoclarvivadent.se
w
Ivoclar Vivadent Liaison Office
: Tesvikiye Mahallesi
Sakayik Sokak
isantas’ Plaza No:38/2
N
at:5 Daire:24
K
4021 Sisli – Istanbul
3
Turkey
Tel. +90 212 343 08 02
ax +90 212 343 08 42
F
ww.ivoclarvivadent.com
w
Ivoclar Vivadent Limited
Ground Floor Compass Building
Feldspar Close
Warrens Business Park
Enderby
Leicester LE19 4SE
United Kingdom
Tel. +44 116 284 78 80
Fax +44 116 284 78 81
www.ivoclarvivadent.co.uk
Ivoclar Vivadent, Inc.
175 Pineview Drive
Amherst, N.Y. 14228
USA
Tel. +1 800 533 6825
Fax +1 716 691 2285
www.ivoclarvivadent.us
Ausgabedatum: 07/2011
627166/0711/WE1/H
 Loading...