

Ironman Fitness 315-00036 User Manual
Ironman Fitness
4009 Distribution Dr.
Suite 250
Garland, Texas 75041
ironmanfitness.com
CAUTION!
Please read the precautions and instructions in this manual before
using this equipment. Please save this manual for future reference.
QUESTIONS?
Call Our Toll Free
Ironman Fitness Helpline
1-888-340-0482
OWNER’S MANUAL
Ironman and M-dot are registered trademarks of World Triathlon Corp., used here by permission.
315-00036
07/05 Rev B
1
IRONMAN FITNESS is committed to quality products
that demonstrate our commitment to excellence!
IRONMAN RECUMBENT BIKE
Model: 400R
Questions?
Please call if:
• you need assistance about operating your exercise bike
• parts are missing
• parts become worn or need to be replaced
1-888-340-0482
Monday-Friday
8:30am-5:30pm Central Time
Please have the following information available:
• Name
• Model
• Part Number
• Description
• Serial Number
Before You Start
Thank you for purchasing an IRONMAN exercise bicycle!
This quality product you have chosen was designed to
meet your needs for cardiovascular exercise.
Prior to assembly, remove components from the box and
verify that all the listed parts were supplied. Assembly
instructions are described in the following steps and illustrations.
Important Safety Information
WARNING!
1) Before using this exercise bicycle or starting any exercise program, consult your physician. This is especially
important for persons over the age of 35 and/or persons
with pre-existing health problems. IRONMAN FITNESS
assumes no responsibility for personal injury or property
damage sustained by or through the use of this product.
2) To reduce the risk of electrical shock, burns, fire or other
possible injuries to the user, it is important to review
this manual and the following precautions before operation.
Safety Precautions and Tips
It is the owner's responsibility to ensure that all users of this
exercise bike have read the Owner's Manual and are familiar with warnings and safety precautions.
• This exercise bike has a maximum user capacity of 300
pounds.
• The IRONMAN Bike should only be used on a level surface and is intended for indoor use only. It should not be
placed in a garage, patio or near water. IRONMAN recommends an equipment mat be placed under the bicycle to
the protect the floor or carpet and for easier cleaning.
• Wear comfortable, good-quality walking or running shoes
and appropriate clothing. Do not use this exercise bike
with bare feet, sandals, socks or stockings!
• Always examine your exercise bike before using to ensure
all parts are in working order.
• Do not leave children unsupervised near or on the exercise bicycle.
• Never operate the exercise bicycle where oxygen is being
administered or where aerosol products are being used.
• Never insert any object or body parts into any opening.
• Service to your IRONMAN Exercise Bike should only be
performed by an authorized service representative, unless
authorized and/or instructed by an IRONMAN technician.
Failure to follow these instructions will void the warranty.
2 3
Assembly of IRONMAN
400R Recumbent Bike
REMOVE ALL SECURITY TAPE AND
WRAPPING BEFORE BEGINNING
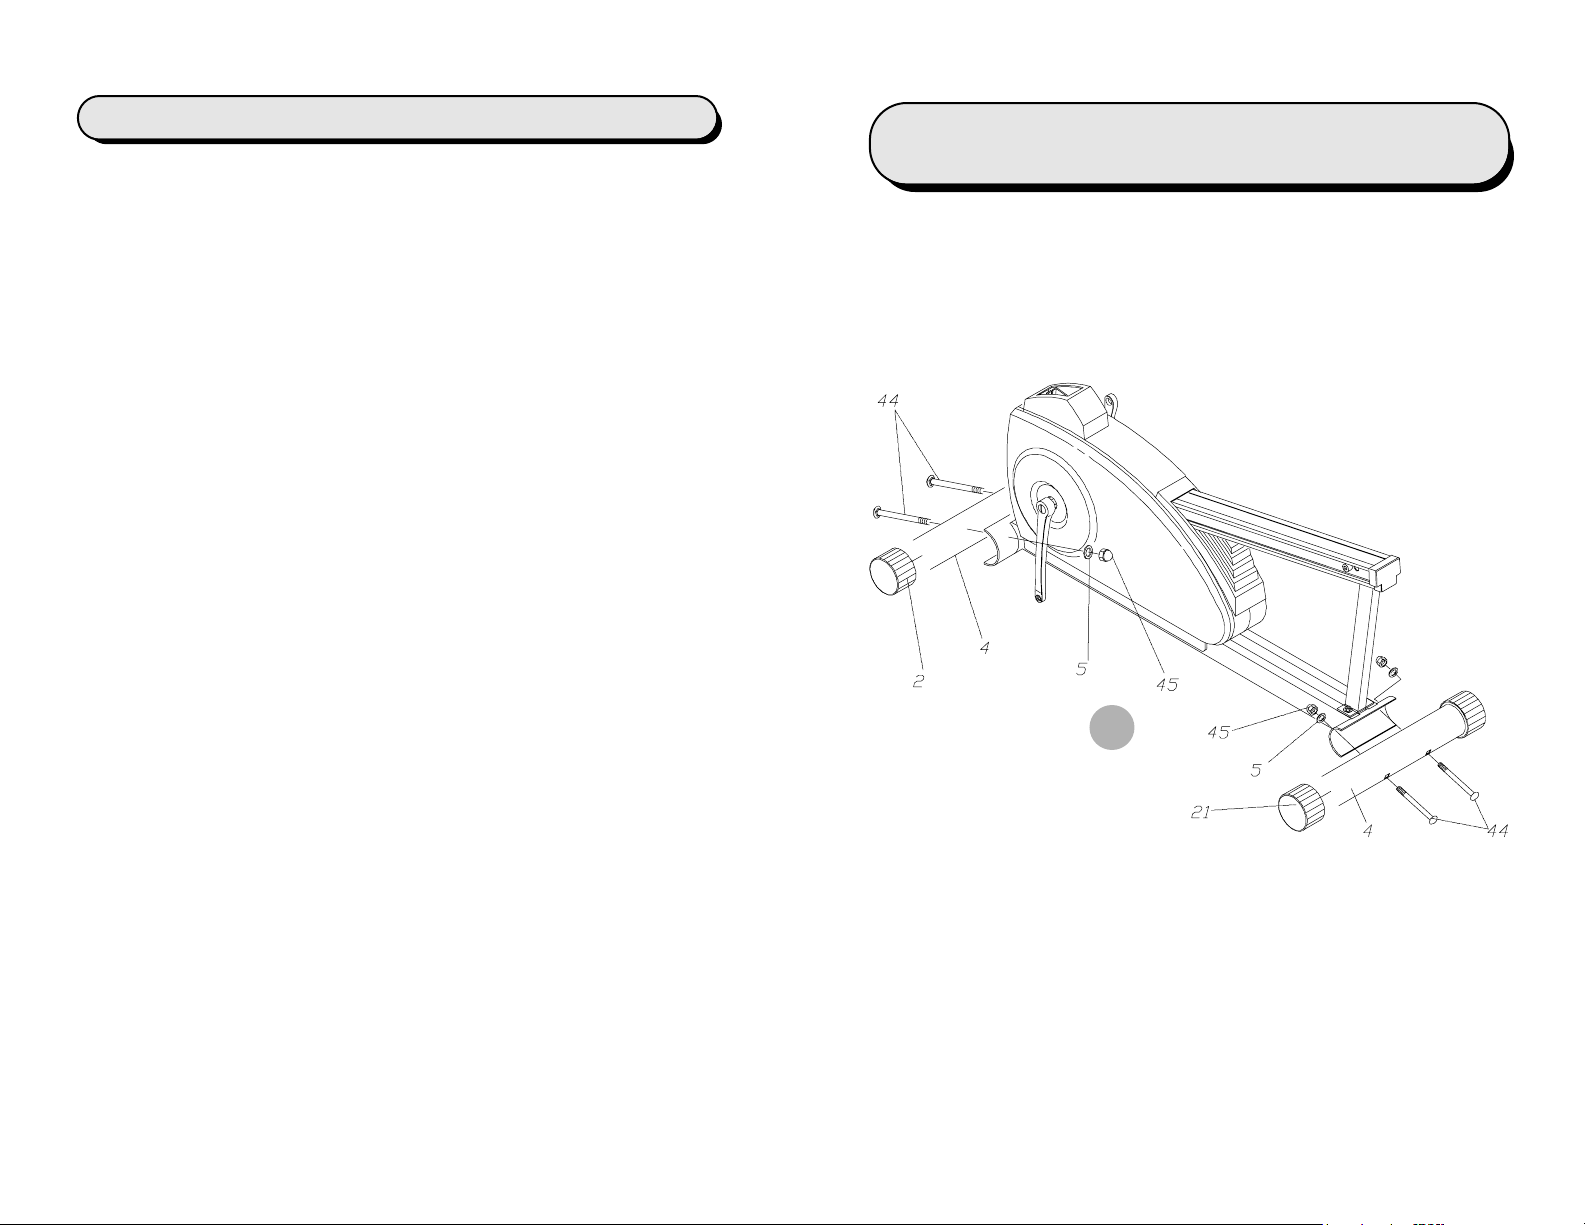
1
1. Attach foot tubes (4) to the frame by using the carriage
bolts (44), flat washers (50) and cap nuts (45) provided.
Make sure the foot tube with wheels is assembled onto
the front of the unit.
4 5
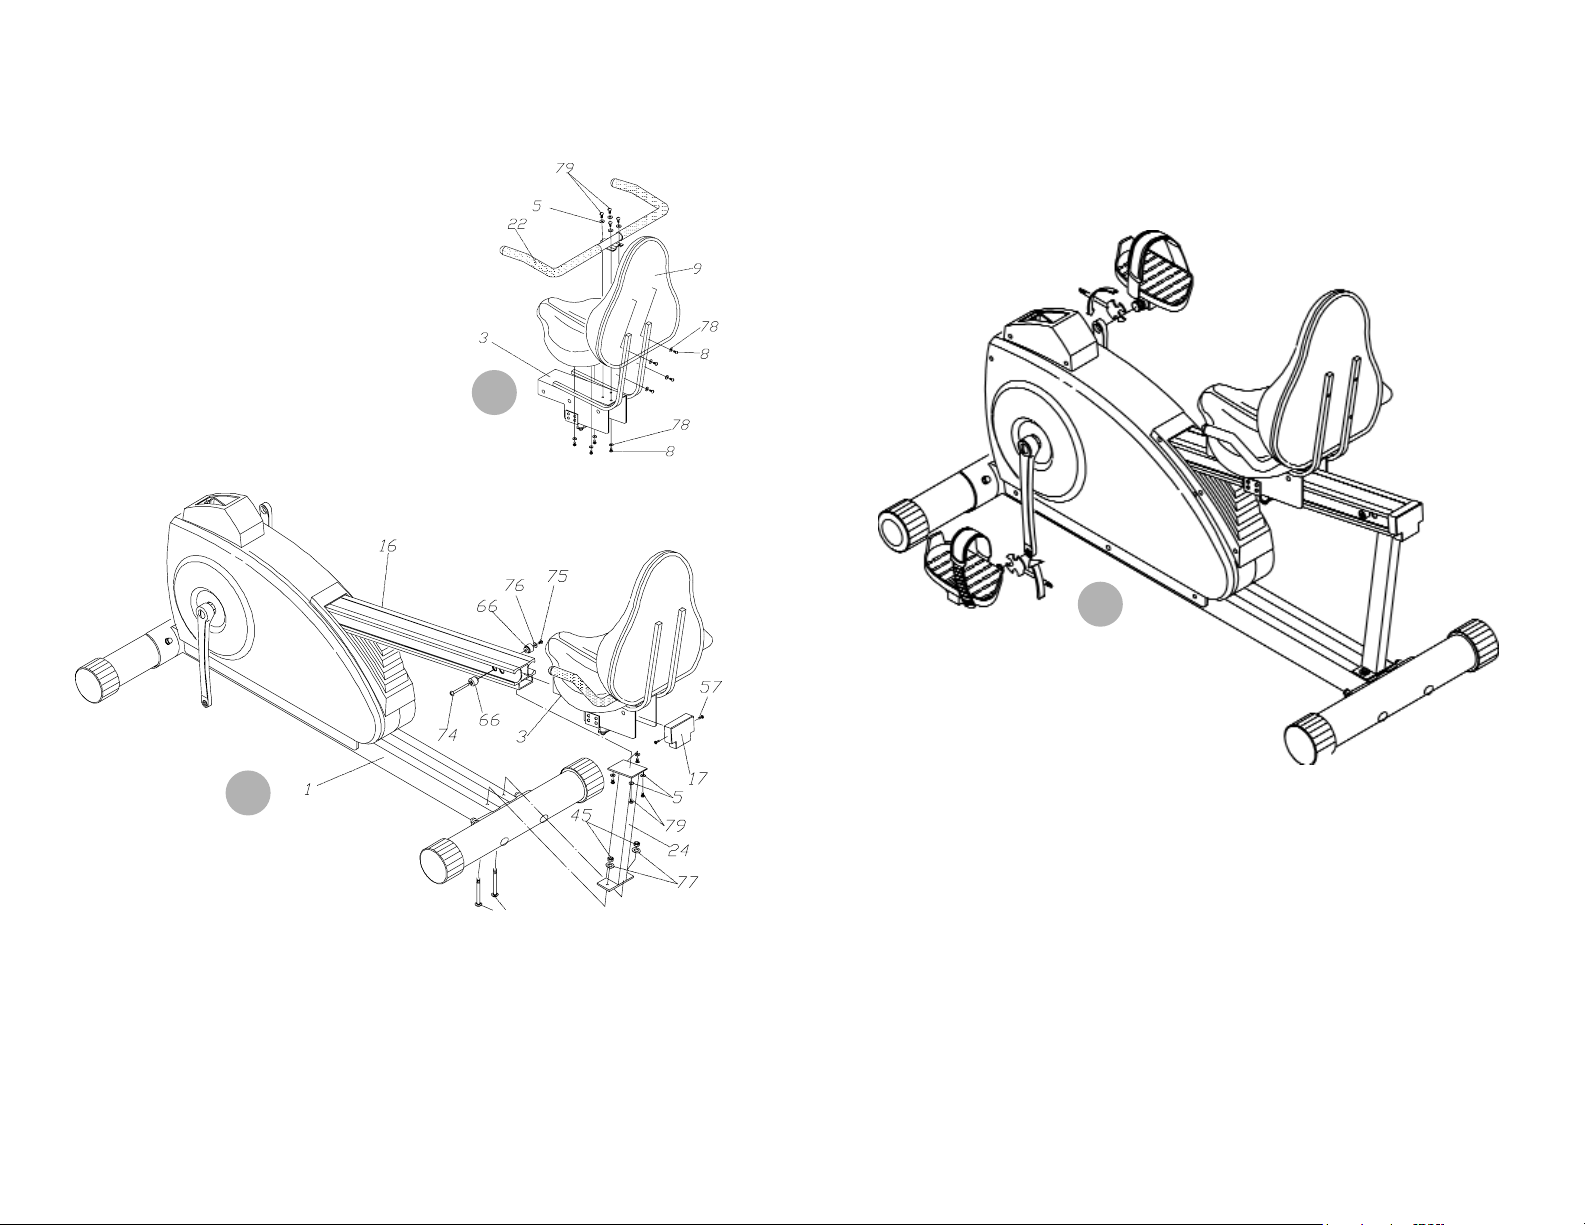
2b. First remove the support tube (24) from the main frame
(1). Slide the assembled seat carriage onto the carriage tube (16). Re-assemble the support tube (24).
Attach the end cap (17) with screws (57) and rear carriage tube rubber stopers (66) with bolts (74, 75) and
washer (76).
2a. Attach the rear handlebar (22)
to the seat carriage (3) with the
flat washers (50) and screws
(79) provided. Connect the seat
cushions (9,10) to the seat carriage (3) with the washers (78)
and screws (80).
2b
2a
3. Attach pedals (30, 31). Axles of pedals are branded “L”
and “R.” The pedal marked “R” goes on the right hand
side of the bike and the one marked “L” on the left hand
side. Tighten the left pedal by turning counter-clock-
wise and the right pedal by turning clockwise.
3
 Loading...