


p
DPC-7.9 HDMI Setup Guide
HDMI carries audio and video via a single cable. An HDMI connection can:
• Carry high-definition video digitally (1080p/1080i/720p up conversion)
• Carry Dolby Digital and DTS surround sound digitally
• Make hookup quick and easy because audio, video, and control signals are carried by a single cable
•Keep the rear of your equipment neat and tidy because there’s less cabling
Connecting to a TV
Signal flow
HDMI cable
• Some TVs support only 2-channel PCM audio.
• If there’s no sound, try changing the following settings:
1. Change the Digital/HDMI Audio Out setting to
PCM.
2. Change the Linear PCM Out setting to Down
Sample On.
HDMI
IN
Audio
Digital/HDMI Audio Out
Linear PCM Out
Dynamic Range Control
Audio
Digital/HDMI Audio Out
Linear PCM Out
Dynamic Range Control
HDTV,
projector
All
√ PCM
Off
√ Down Sample On
Down Sample Off
Connecting to an AV Receiver
Signal flow
HDMI cable
AV receiver
HDMI
IN
HDMI
HDMI
IN
Don’t forget to make the necessary settings on your
AV receiver, including:
• HDMI video input and output settings
• HDMI audio input and output settings
• Input source settings (i.e., is the HDMI IN assigned to
the DVD input source?)
Refer to your AV receiver’s instruction manual for
details.
After the DPC-7.9 and the other component have
been turned on and an HDMI link established
between them, “HDMI OUT” will appear on the
display. While the link is being established, “HDMI
OUT” will flash on the display. If a link cannot be
established (e.g., the HDMI cable is disconnected or
the other component is not turned on), “HDMI
STDBY” will appear on the display.
HDTV,
projector
En
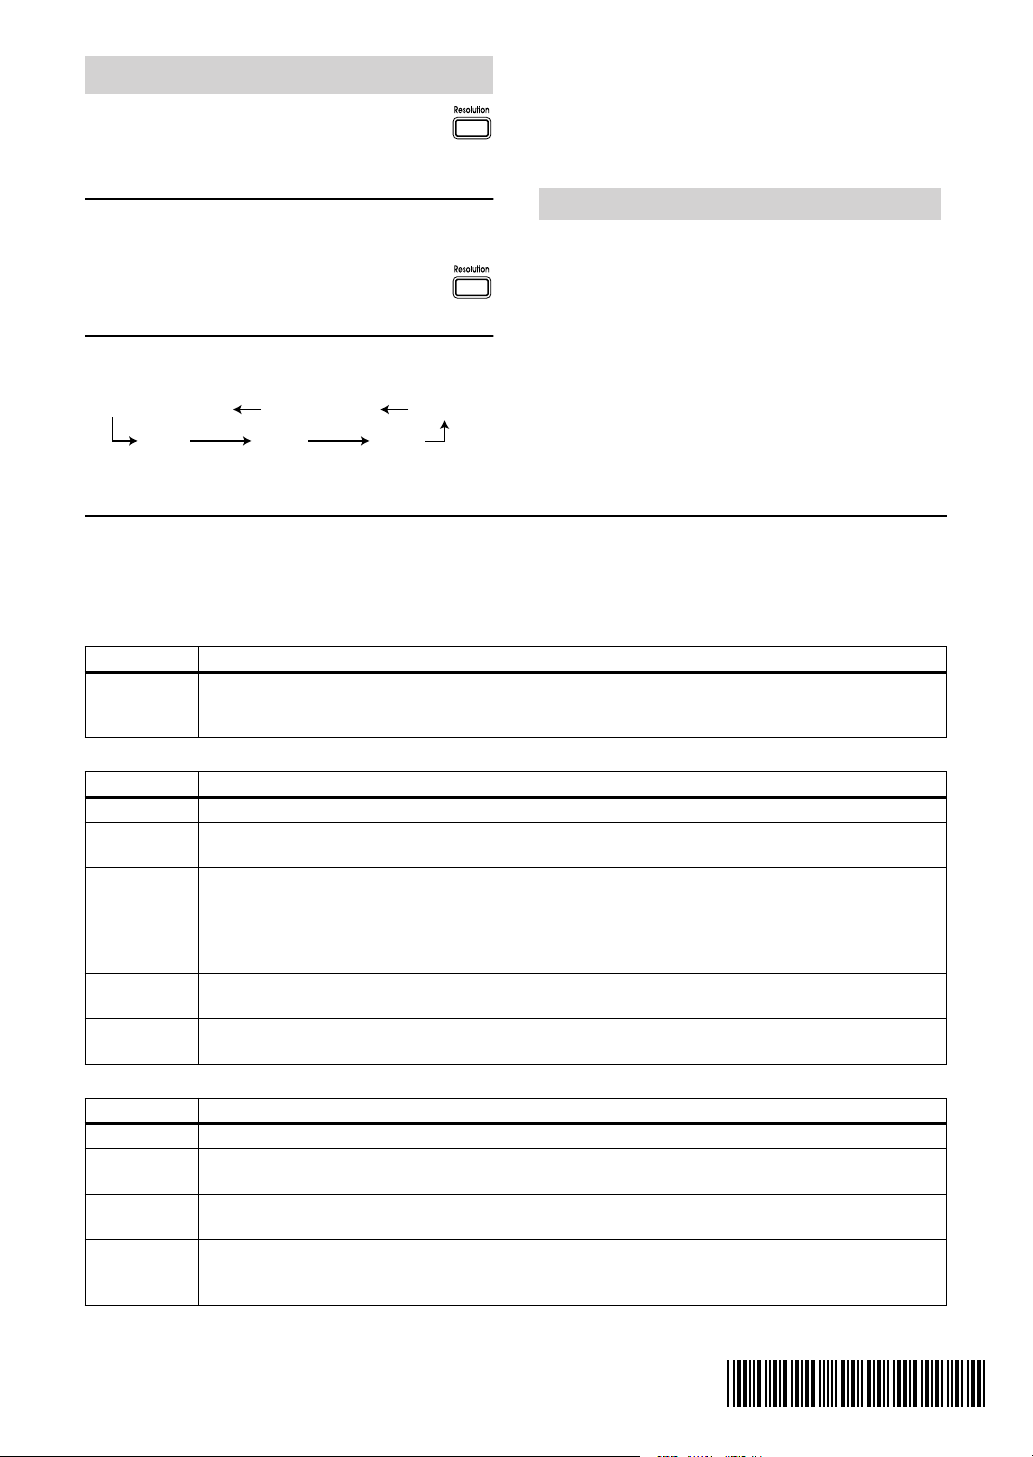
What to Do if There’s No Sound or Picture
Press the remote controller’s [Resolution]
button. When “HDMI OFF” appears on
the display, press the button again to
If you select a resolution that’s not supported by your
TV, vertical lines may appear on your TV and the picture
will not be displayed correctly. In this case, press the
[Resolution] button repeatedly to find a resolution at
which the picture is displayed correctly.
select “HDMI ON.”
If HDMI is already on, the currently selected resolution
(e.g., 480p) will be displayed.
Try pressing the remote controller’s [Resolution] button repeatedly to select
another resolution.
If you want to use HDMI with 720p or 1080i, make sure
that your TV supports these resolutions.
480p (480p/576p)
480i (480i/576i)
1080i 1080p720p
AUTO
Using RIHD
To use RIHD, make sure CEC is enabled on your other
CEC-compatible AV components (e.g., TV or AV receiver).
On the DPC-7.9, make sure the HDMI Control, Power
Control, and Direct Change settings are all set to On.
About RIHD-compatible Components
The TVs listed below (in no particular order) are compatible with RIHD.
•Panasonic TVs that support VIERA LINK
•Toshiba TVs that support CE-LINK
Components other than those listed here may also provide
linked operation if they support the CEC part of the HDMI
standard, however, operation cannot be guaranteed.
You can check the status of the HDMI connection by pressing and holding down the DPC-7.9’s [Display] button for 10
seconds until a message ID appears on the display. Look up the message ID in the following tables and check the HDMI
connections and settings on both the DPC-7.9 and the connected component. The page numbers in parentheses refer to
the DPC-7.9 Instruction Manual.
HDMI connection and HDMI-related settings status
Displayed ID Message
MSG ID 001
MSG ID 005
MSG ID 015
No picture from the HDMI connection
Displayed ID Message
MSG ID 002 The HDMI Output Setting is set to Off. Change it to On (page 46).
MSG ID 003
MSG ID 004
MSG ID 005
MSG ID 006
MSG ID 007
MSG ID 008
MSG ID 009
No sound from the HDMI connection
Displayed ID Message
MSG ID 010 The DPC-7.9’s Digital/HDMI Audio Out setting is set to Off. Change the setting to All or PCM (page 47).
MSG ID 011
MSG ID 014
MSG ID 012
MSG ID 013
MSG ID 016
MSG ID 017
Tu rn the DPC-7.9 and the connected component off, then turn them on again. Make sure that the connected component is working properly and that the DPC-7.9’s HDMI settings are configured suitably for
that component.
The HDMI cable may not be connected properly. Check the connection. Also, make sure the HDMI input
on the TV or AV receiver is correctly configured to received HDMI.
Make sure the HDMI input on the TV or AV receiver is correctly configured to received HDMI.
The connected component may not support HDCP. Make sure the connected component supports HDCP.
Tu rn the DPC-7.9 and the connected component off, then turn them on again.
The DPC-7.9 may be connected to the other component’s DVI jack. Some TVs may not properly receive
the video output by the DPC-7.9. Also, with a DVI connection, there will be no sound.
The DPC-7.9’s HD Resolution setting is set to 720p or 1080i. If your TV doesn’t support these resolutions,
select another resolution (page 25).
The connected component may not be receiving the HDMI signal properly.
Tr y selecting another resolution on the DPC-7.9 (page 25).
The connected component may not support 96 kHz PCM. Set the DPC-7.9’s Linear PCM Out setting to
Down Sample On (page 47).
The connected component may not support Dolby Digital. Set the DPC-7.9’s Digital/HDMI Audio Out
setting to PCM (page 47).
The connected component may not support DTS.
The DPC-7.9 cannot play the DTS format audio or soundtrack. On your DVD-Video disc’s audio setup
menu, select an audio format other than DTS.
For more information, refer to the manuals for the DPC-7.9 and the other component.
SN 29344791
(C) Copyright 2008 ONKYO CORPORATION Japan. All rights reserved.
I0807-1
* 2 9 3 4 4 7 9 1 *
 Loading...