

Page 1

Common Interface
User's Manual
Digital Satellite Receiver
Page 2

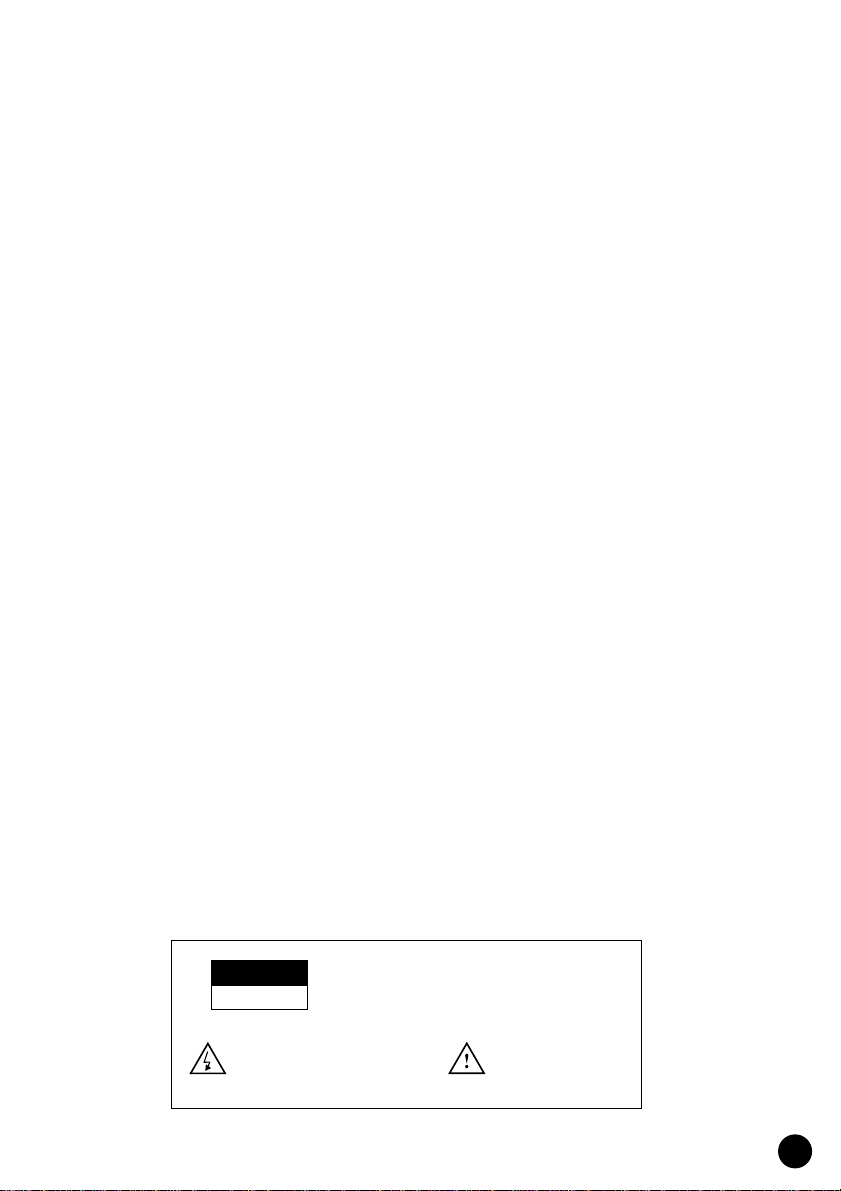
Warning!
Please do not insert metal or alien substance in hole for Module and Smart Card.
In this case, it is possible that life span of STB is damaged.
Page 3

CONTENTS
Safety 1
STB Connection 2
Remote Control Unit (RCU) 3
Guide of Functions
4
Guide of Main Menu 7
System Setting 7
Organising Channels 9
Parental Control 10
Status 10
Channel Searching 10
Common Interface 13
Specification 14
Trouble Shooting Guide 16
Page 4
Safety
WARNING
RISK ELECTRIC SHOCK
DO NOT OPEN
TO REDUCE THE RISK OF ELECTRIC SHOCK, DO NOT
REMOVE COVER (OR BACK). NO USER SERVICEABLE
PARTS INSIDE. REFER SERVICING TO QUALIFIED
SERVICE PERSONNEL.
This symbol indicates "dangerous
voltage" inside the product that
presents a risk of electric shock
or personal injury.
This symbol indicates
important instructions
accompanying the
product.
This STB has been manufactured to satisfy the international safety standards.
Please read the following recommended safety precautions carefully.
MAINS SUPPLY
: 190 ~ 260V AC 50/60Hz.
OVERLOADING : Do not overload wall outlets, extension cords or adapters as
this can result in fire or electrical shock.
LIQUIDS : Keep liquids away from the STB.
SMALL OBJECTS : Coins or other small objects must be kept away from the STB
as they can fall through the ventilation slots of the STB
and cause serious damage.
CLEANING : Disconnect the STB from the wall socket before cleaning it.
Use a cloth lightly dampened with water (no solvents) to clean
the exterior of the STB.
VENTILATION : Do not block the STB’s ventilation slots.
Ensure that a free airflow is maintained around the STB.
NEVER stand the STB on soft furnishings or carpets.
Do not use or store the STB where it is exposed to direct
sunlight or near a heater.
NEVER stack other electronic equipment on top of the STB.
ATTACHMENTS : Do not use any attachments that are not recommended as
these may cause hazards or damage the equipment.
CONNECTION TO THE SATELLITE DISH LNB :
Disconnect the STB from the mains before connecting or
disconnecting the cable from the satellite dish.
FAILURE TO DO SO CAN DAMAGE THE LNB.
CONNECTION TO THE TV or VCR SET :
Disconnect the STB from the mains before connecting or
disconnecting the cable from the satellite dish.
FAILURE TO DO SO CAN DAMAGE THE TV or VCR SET.
EARTHING : The LNB cable MUST BE EARTHED to the system earth for
the satellite dish.
The earthing system must comply with SABS 061.
LOCATION : Locate the STB indoor place properly to prevent lightening,
raining and direct sunlight.
1
Page 5

STB Connection
TV
VCR
LNB IN
RF OUT
RF IN
VIDEO
AUDIO
L
R
LNB OUT
RS-232
TV SCART
VCR SCART
0/12V OUT
50mA
RF IN RF OUT
SATELLITE DISH
SCART SCART RF IN
TV ANTENNA
POWER
Max. power consumption : 35 W
Power supply : 230V 50Hz
RISK OF ELECTRIC SHOCK
DO NOT OPEN
CAUTION
Introduction
There are several ways of connecting the STB to your existing TV/Audio system.
Some of the methods enable you to listen to music in stereo sound of CD like
quality.
Consult your local supplier for assistance in setting up an Video/Audio
configuration best suited to your unique requirements.
Hints to Quality TV System Configurations
●
Connect cables via Audio/Video Outputs/Inputs or SCART connector instead
of RF connectors, where possible.
●
Use an appropriate, correctly installed antenna system.
●
Ensure that the system is properly earthed and protected against lightning.
●
Connect the STB to high quality stereo TV and Hi-Fi equipment.
Note : When Video/Audio Input Outputs or SCART connector are available
a “Video” mode may need to be selected in place of a “TV” mode
on the VCR and the TV.
Connection
1. Switch off the mains supply in the STB before connecting or disconnecting
the LNB.
Connect the TV antenna connector into the RF IN socket on the STB.
2. Use the flylead supplied with the STB to connect the RF OUT socket
on the STB to the RF IN (aerial) connector on the VCR.
3. Use the flylead supplied with the VCR to connect the RF OUT socket
on the VCR to the RF IN (aerial) connector on the TV.
4. Connect the coaxial cable from the LNB into the socket marked LNB IN
on the STB.
The connector on the LNB IN should be turned until it is finger tight.
5. Connect the power plug of the STB into the mains wall socket and switch
the power on.
Note : As the SCPC channel is a weak signal it is important that the satellite dish is
installed precisely to receive it, or moving pictures may be displayed with
picture break up errors.
2
CAUTION
DISCONNECT THE IRD
FROM THE MAINS BEFORE
CONNECTING OR
DISCONNECTING THE LNB.
Page 6
Remote Control Unit (RCU)
Switch between normal mode and standby mode
Select TV or SAT Service
Select audio service
Display the main menu on the screen or
return to on the screen from a submenu
Return to the previous menu and the screen
( display mode )
Display the Subtitle Information
Audio mute
Use to select the TV or Audio channels and
enter the channel information & PIN code.
Display the programme information box
on the screen or remove it
View programme information,
schedule and reservation facilities
Display and alter the UHF setting in menu
Select previously viewed channel
Use to reserve a programme in the TV Guide
Select programme in TV Guide and item
in submenu. Display Channel List on the screen
Use to page Up/Down in Channel List &
Organising Channels
Use to select parameter of submenu and
move highlight bar for selecting submenu
in main menu & TV Guide
EXIT MENU
UHF
RECALL
TV
GUIDE
TV/SAT AUDIO
OK
P
VOL VOL
P
Pg Up Pg Dn
123
456
90
EXIT
MENU
UHF
RECALL
TV
GUIDE
TV/SAT
AUDIO
OK
Use to select TV or Audio channels and to
control volume on screen
P
VOL VOL
P
Pg Up Pg Dn
Select language for soundtrack and
Dual/Mono function.
It depends on broadcaster
0 9
UP
DOWN
LEFT RIGHT
78
We designed the most friendly shape to use. You can operate every function
of our STB using the RCU. Please read this section to help your understanding
of the STB’s functions.
3
Page 7

Guide of Functions
TV Guide
Using the TV GUIDE key on the RCU, will give the
description of the programme information. You can
view the programme schedules from -12 to 72 hours.
If you want to know more detail on a programme, refer
to information box. Move the Highlight bar using the
ARROW keys on the RCU and the contents in
information box will change according to highlighted
programme.
The items displayed in the programme box are as
follows:
●
Service number and name
●
Title of programme
●
A brief description of the programme
●
Start and end times
●
Local time
Programme Reservation : It is possible to reserve a
future programme. To reserve a future programme,
select the required programme using the ARROW keys
then press key. The reserved programme box will
change background colour.
A reserved programme will automatically change (or
display) the channel at the starting time of the
programme.
To cancel the reservation, select the reserved
programme, then press key one more.
Information Box
Press i key, to view the programme information on the
screen. Supplies the detailed content about the
channels being viewed.
A signal level is shown between the channel name and
programme information.
When a channel has subtitles and/or teletext, it will be
displayed as symbol( , ) in information box for your
convenience.
4
Page 8

Subtitle
To enable and select the language of subtitle, press
key. Select the required language with the UP/DOWN
key, then press OK key on the required language for
display.
Some broadcasters do not provide subtitles.
However, you will be able to confirm in the information
box whether subtitles are available or not. If subtitles
are provided, the symbol is shown at the bottom in
the information box.
Teletext
You will be able to confirm in the information box
whether teletext is supported from the broadcaster or not.
If teletext is provided, the symbol is shown at the
bottom in the information box.
To view teletext, use your TV remote control.
( Not supplied on the STB’s RCU ) because the teletext
service is controlled by the television.
Soundtrack
12 : 00
12 : 00
Some broadcasters supply multiple language
Soundtracks. To select the language of Soundtrack,
press key.
Use the UP/DOWN keys to select the required
language and press OK key to select it.
In addition, you are able to choose either only the left
sound or right sound of Dual/Mono of soundtrack
using the LEFT or RIGHT key.
Channel List
While you are viewing a channel, press OK key and
you can view the channel List.
Select the required channel using UP/DOWN or
PgDn/PgUp keys and press OK key to select the
required channel.
5
Page 9

To download new software
The software upgrade function allows the STB to be
upgraded when new functions become available.
Common Interface Module (CIM)
and Smart Card
You can enjoy not only scrambled channels using the
CIM but also free channels by our STB.
If you want to watch the pay TV programme, you must
use the CIM. This STB is currently able to support four
kinds of CIM( Viaccess, Nagravision, CONAX,
CryptoWorks ).
Common Interface Module and Smart Card is
dependant on the service provider.
Your required CIM is supplied by your service provider
or distributor.
Note : If you do not use the CIM, you can only
watch the free TV programme.
6
Page 10

Guide of Main Menu
This section introduces the Main Menu structure
of STB. It requires a Personal Identification
Number( PIN ) code for Organising Channels,
Parental Control and Automatic Search in order
to protect the registered channels from someone
else. The
help to search programme channels.
System Setting
Language Setting
Use to select the Menu and Audio language.
Menu Language
You are able to select the language for the menu
and OSD( On-Screen Display ).
It supports English, German, Italian and so on.
Audio Language
Some service providers broadcast with one or
more alternative language soundtracks. You can
select your preferred Audio language in this
submenu.
AUTO
function in Channel Searching
Time Setting
Time Adjustment
If your time zone is different from that of the service
provider, you can adjust to your local time. It changes
in steps of 30 minutes intervals.
Wake up Time (Automatic switch on time)
To set a wake up time, you can enter the 4 digits of
hours and minutes using the 0~9 number keys.
After setting, the STB is automatically turned on at the
set time. If DISABLE is selected, the STB will not
automatically turn on.
7
Page 11

Sleep time (Automatic switch off time)
To set a sleep time, you can enter the 4 digits of hours
and minutes. After setting, the STB is automatically
turned off at the set time.
If DISABLE is selected, the STB will not automatically
turn off.
A/V Output Setting
Used to configure the Audio/Video output parameters,
including setting the type of A/V output on the SCART,
RF and RCA connector.
The Video output can be set for RGB, Composite video
(CVBS) or S-VHS depending on the function of TV
when you have connected to the SCART.
You can select Stereo or Mono Audio output.
If you have a widescreen TV, the aspect ratio setting in
screen mode should be adjusted to 16:9 to allow the
STB to automatically switch to widescreen format for a
widescreen programme. Otherwise, set to 4:3
UHF Setting
Used to select the UHF TV output settings, adjusting
the UHF channel, the PAL sound mode and channel
offset. The UHF tuning on the TV may need to be
altered after changing the UHF output channel on the
STB.
Info. Box Setting
The brightness and display duration of the information
box is set here. The duration can be set in the region
of 0 to 20 seconds.
If you enter 5 seconds, information box is displayed for
5 seconds after a channel change. Selecting duration
of 0 seconds, prevents the Info. Box from being
displayed when changing channel or pressing i key.
8
Page 12

Organising Channels
This submenu allows the user to rearrange or delete
channels that have been registered during channel
searching.
To access the submenu, you need to insert the PIN
code. Refer to Parental Control section.
This is to prevent the channels from being altered by
someone else.
You can also view registered number of TV channels,
Audio channels, channel’s registered number and
channel informations.
Note: To restore the deleted channels, you must try the
Channel Searching again.
Organising Bouquets
This submenu lists the channels and discribes channel
information( Frequency, Symbol Rate, FEC and
Polarization ) of each bouquet.
You can delete any un-required bouquets using the
DELETE or the ALL DELETE function.
The bouquet is a list of channels grouped by the
broadcaster.
Function Box
Bouquet Name Box
Organising TV Channels
Use to reorganise the TV channels using the MOVE,
SKIP, DELETE or LOCK functions.
You can use the PgUp/PgDn key to move the highlight
bar through the list faster. Refer to help message in
this submenu about a using method of each function.
Organising Audio Channels
Use to reorganise the Audio channels using the MOVE,
SKIP, DELETE or LOCK functions.
You can use the PgUp/PgDn key to move the highlight
bar through the list faster. Refer to help message in
this submenu about a using method of each function.
Channel List Box
9
Page 13

Parental Control
You are able to control the viewing of certain
programmes by age classification and change the PIN
code.
The factory setting of the PIN code is .
Note: This PIN code is also used for the Organising
Channels and Automatic Search menus.
0 0 0 0
Censorship Classifications
You can restrict the viewing of certain programmes by
setting the age limit from the options using the
RIGHT/LEFT keys.
Change PIN
Use to change the PIN Code. You can insert the
wanted 4 digits using the 0~9 number keys on the
RCU.
Status
Signal detection can be used to help the alignment of
the satellite dish and to view the strength and quality
of signal from satellite. The signal quality is more
important than signal strength in digital systems.
STB status describes important diagnostic and version
information of STB for a technician. You may be asked
to confirm some of this information to helpline person.
Channel Searching
Use to register wanted channels. Searching time is
faster than another STB.
You can search the ASTRA1 and HOTBIRD channels
without Antenna Setting using the Automatic Search.
Note: Check the signal level or channel information
when channel searching fail.
10
Page 14

Antenna Setting
More than one satellite antenna may be connected to
the STB. It can store the characteristics of at least 8
different antenna configurations using the this sub
menu. Press OK after Antenna Setting and go to
Manual Search.
Antenna Alternative of ASTRA1 and HOTBIRD is
decided the factory setting as following;
Antenna Alternative of ASTRA1 is 7.
Antenna Alternative of HOTBIRD is 8.
So you can set Antenna Alternative for other satellite
from 1 to 6. It is mean that to search a ASTRA1 and
HOTBIRD channels, you do not need to adjust the
Antenna Setting’s item because it is automatically
decided by function of Automatic Search.
Antenna Alternative : Select an antenna alternative
from 1 to 8.
Satellite Name : Select a satellite name of LNB
configuration.
LNB Frequency : Select a LNB frequency or type on
the dish - Universal, 5150, 9750,
10600, 11475, User( Use to enter
another alternative ).
22 Khz Tone : To support the universal LNB.
-Enable, Disable.
0/12 Volt Switch : It is possible automatically switch
between two LNBs.
DiSEqC Input Selection : It is possible to connection
up to 4 LNBs. Select DiSEqC 1,2,3
and 4 according to LNB’s connected
configuration of DiSEqC.
Refer to right table.
Matrix Option S/W Satellite position S/W
A
B
C
D
a
a
b
b
a
b
a
b
Manual Search
Use to search for channels using the frequency,
polarisation, symbol rate and FEC of known
transponders. This submenu includes signal level as
graphic bar shape so that you can view the status of
antenna.
Antenna Alternative : Select the number of the
Antenna Setting.
11
Page 15

Frequency : Input a frequency of wanted transponder
using the 0~9 number keys on the RCU.
Symbol Rate : Input a symbol rate of transponder
using the 0~9 number keys.
Polarization : Select the type of polarization -
( Horizontal, Vertical, Circular left or
Circular right. )
For your convenience, there is also
included an AUTO function.
FEC(Forward Error Correction) :
Select the type of FEC. For your
convenience, there is included an AUTO
function - 1/2, 2/3, 3/4, 5/6, 7/8,
Auto.
Network Search : Use to scan other associated
transponder frequencies of similar
channels during the search.
Automatic Skip : Use to skip the scrambled channels.
This is search only free channels.
Note : If you want to watch the required bouquet
information( Frequency, Symbol Rate and
so on ), enter the Manual Search on the
screen of the channel or the Organising
Bouquets.
Advanced Search
Use to search for channels under test for which you
have PID codes( Video, Audio, and PCR code ).
For your convenience, there is included an AUTO
function.
Video PID : You can enter not only Decimal code but
also ‘Hex’ code.
Audio PID : You can enter not only Decimal code but
also ‘Hex’ code.
PCR PID : You can enter not only Decimal code but
also ‘Hex’ code.
In case of need to insert a ‘Hex’ Code.
1. Select the ‘Hex’ position using the LEFT/RIGHT keys.
2. Press OK then appears to Code Input Box.
3. Select the required ‘Hex’ Code by ARROW/OK keys.
12
Page 16

SMATV Search
Use to search for channels when using SMATV
equipment.
L-Band Frequency : Input a frequency of L-Band
(950 ~ 2150 MHz).
Symbol Rate : Input a symbol rate of signal.
FEC : Select the type of FEC.
Automatic Search
Use a simple and easy method to search the channels
of ASTRA1 and/or HOTBIRD satellite.
To access the submenu, you need to insert the PIN
code. Refer to Parental Control.
This prevents the channels from being altered by
someone else.
If you have a undesired channels stored, can be
removed using the Organising Channels menu.
Note: You can confirm the channel-searching status
from the Search Progression indication.
If channels do not appear on the screen
despite of increased Search Progression,
you should check the antenna alignment or LNB
frequency again.
Common Interface
Access the information and menus of Common
Interface Module.
You must exactly match the CIM, Smart Card and STB
for a good operation.
13
Page 17

Specification
Items Specification
Power
Input frequency
CPU
RAM
Flash Memory
EEPROM
SCART
Data service
RCA
LNB power
Modulation/FEC type
DiSEqC Bus
Tone Switching
RF Modulator
Specification
Video compression
Aspect ratio
On-screen display
EPG
190 ~ 260V AC 50/60Hz
950 ~ 2150 MHz
MIPS
2Mbyte
1Mbyte
16Kbyte
1 RS-232C, 19KBPS, 9P DSUB
2 SCART ; 1 VCR, 1 TV
2 left and right Audio/Video
Switchable 13.5/18V (400mA max)
QPSK/Multiple convolutional coding (DVB compliant)
DiSEqC Ver 1.0 Supported
22KHz
UHF ch21 ~ 69 with PAL I/B/G
MPEG-2/DVB Compliant SI
MP@ML in MPEG-2
4:3 and 16:9 with pan vector
16 colours
supported
PC card slot 2 PCMCIA type I/II supported Common Interface
MCPC/SCPC supported
LNB Selector (Control output) 0/12V
IRD Specification
14
Page 18

Items
Channel Processing
Video Specification
MPEG Audio
RF Modulator
Specification
Input Frequency Range
Tuning System
Tuning Step Size
Modulation
Inner FEC
Input Signal Data Rate
Outer FEC
IF Bandwidth
Connector Type
950 ~ 2150 MHz
PLL Digital Synthesis channels
125KHz max
QPSK (DVB Specification)
rates is 1/2, 2/3, 3/4, 5/6, 7/8 (DVB Specification)
Reed Solomon coding RS (204,188,t=8) DVB compliant
2 to 31Ms/s
36MHz
F Type (IEC 169 - 24 female)
Items Specification
Specification
TV system
Video Decoding
Multiple video resolutions
Meets ETR 154 amended in ALM-95-021
PAL I, G or B
ISO/IEC 13818-2, MP@ML
704 pixels x 576lines x 25 frames per second
544 pixels x 576lines x 25 frames per second
480 pixels x 576lines x 25 frames per second
352 pixels x 576lines x 25 frames per second
Items Specification
Features
Connector
Channel Range
Preset Channel
Input and lossless RF bypass supported
IEC coaxial female 9.5 mm. (IEC 169-2)
CCIR UHF E21-E69 adjustable
channel 38 (or TBD)
Items Specification
Operation Modes
Sampling rates
Resolution
Mono, dual, stereo and joint stereo audio
32, 44.1 and 48KHz
18 bit digital to analogue converters
15
Page 19

Trouble Shooting Guide
Symptoms Check Points
About STB
About Error Message on screen
Does not display any message
on the front panel or STB
does not work.
Check the main power cable and main power
switch on the rear panel.
Check Standby mode is On or Off.
Picture does not appear Check the video output port (SCART & CINCH) is
firmly connected to TV or VCR.
No Sound Refer to "Picture does not appear".
Remote Control does not
operate
Check the battery exhausted.
No or Bad signal Check the LNB cable and dish position.
Service is not running or
scramble / No access to the
service slot.
Check whether the CI module and smart card are
correctly inserted.
Check whether the CI module, smart card and
receiving stream are same.
Please check the card /
No right for this service /
No smart card in slot and
please insert your card
(when using the CAM)
Check the insert status of smart card.
Check program viewing right using the smart card.
Check whether Smart Card is appropriate.
Check the volume level of TV or STB.
Check Mute is On or Off.
Check that LNB cable is well connected from dish
to STB.
Check the LNB
- If LNB has problems, change to new LNB.
Check the SAT/TV/VCR status of STB by RCU.
Check the bright level of TV.
Check the signal level
- If you have weak level, adjust the dish
16
 Loading...