

Humanscale ML1 User Manual
Humanscale
MEDLINK LITE USER MANUAL

HUMANSCALE MEDLINK MEDICATION
DISTRIBUTION SYSTEM
This user manual contains information on the installation and operation
of Humanscale’s MedLink medication distribution system and associated
MedLink Lite control software. Read all instructions completely before
using MedLink.
TABLE OF CONTENTS
Introduction
1.1 About Humanscale Healthcare 3
1.2 Contact Information 3
1.3 Introduction to Medlink 4
1.4 About the T 7TM Point-Of-Care Technology Cart 4
Setting up MedLink
2.1 About the MedLink drawer system 5
2.2 Unpacking and assembly 6
2.3 Installing Shelves 6
2.4 Installing Dividers 7
2.5 Inserting and removing Cassettes 7
2.6 Inserting Drawers 8
Initial Software Configuration
3.1 Enabling MedLink Lite 9
3.2 Accessing MedLink Lite settings 11
3.3 Changing MedLink Lite settings 11
3.3.1 Drawer open timeout 12
3.3.2 Enable Open All 12
3.3.3 Enable swipe logout 12
3.3.4 Auto logout timeout 13
3.3.5 Change MedLink PIN 13
Operating Instructions
5.1 Login and first use 16
5.2 Labeling drawers 17
5.2.1 Patient drawers 17
5.2.2 Storage drawers 18
5.3 Opening individual drawers 19
5.3.1 Opening a patient drawer 19
5.3.2 Opening a storage drawer 20
5.3.4 Opening storage drawers while
a patient drawer is open 21
5.4 Opening all drawers 21
5.5 Ejecting cassettes 23
Legal Notices
6.1 Legal Notice 24
Drawer Locking System Explained
4.1 Electronic locking 14
4.2 Mechanical override key lock 15
2

INTRODUCTION
1.1 ABOUT HUMANSCALE HEALTHCARE
Humanscale Healthcare designs and manufactures ergonomic products for easier use of today’s technology and creates a
safer and more comfortable and efficient environment for the caregiver. As part of the Humanscale Corporation, a world leader
in ergonomic design, Humanscale Healthcare brings to the healthcare market a unique understanding of the importance of
ergonomics in the workplace.
Humanscale’s products for office and healthcare environments are designed to improve the health and quality of work life,
and follow the belief that if a design solves a functional problem as simply and elegantly as possible, the resulting form will
be timeless. Humanscale Healthcare applies that same design approach to ergonomic solutions that are created to improve
the caregiving experience for caregivers and patients alike. Humanscale Healthcare’s products include the ViewPoint™ series
of technology wall stations and the TouchPoint™ line of mobile technology carts.
For more information about Humanscale Healthcare, please visit www.humanscalehealthcare.com or call 1-800 -400-0625.
1.2 CONTACT INFORMATION
Humanscale
5675 DTC Boulevard
Suite 100
Greenwood Village, CO 80111
1-800-400-0625
E-mail: info@humanscale.com
Website: www.humanscale.com
3

1.3 INTRODUCTION TO MEDLINK
Secures medication delivery.
Enhances patient safety.
Improves workflow.
Nurses are driven to care — yet poor workflows, constant interruptions and mounting workloads make it both difficult and
stressful for them to do their jobs. This cognitive overload can result in mistakes and interfere with patient care and safety,
especially when it comes to medication administration, which is a complex, multi-step process. While mistakes can happen
at any step, administration errors account for 26% to 32% of total medication errors, most of which are administered by
nurses.
MedLink, our next generation in smart point-of-care solutions, secures medication delivery while enhancing patient safety.
MedLink is expertly designed to reduce human error and supports a closed-loop medication system.
1.4 ABOUT THE T7TM POINT-OF-CARE TECHNOLOGY CART
At the core of MedLink is T7 — part of the revolutionary TouchPoint line of mobile technology cards. Built with the
caregiver’s workflow in mind, T7 addresses the challenges faced by existing medical cards by offering optimal ergonomic
positioning with minimal ( and often automatic) adjustments.
To reduce the risk of injuries and change the way caregivers interact with point-of-care technology, the T7 provides simple,
quick adjustments that encourage medical caregivers to work in safe postures. Its compact footprint makes the T7 easy to
maneuver and prevents parts from sticking out and breaking. Accommodating PCs, tablets and laptops, the T7 facilitates
mobile computing in healthcare environments.
4

Setting up MedLink
2.1 ABOUT THE MEDLINK DRAWER SYSTEM
The MedLink drawer system consists of:
• The Housing: is permanently attached to the T7 cart. The housing is modular and there may be a second housing fitted
under the first to create a high capacity medication cart.
• Cassettes: are removable from the housing and are interchangeable from cart to cart.
• Drawers: are where medication is placed and fit into the cassettes. There are 3 sizes of drawers: small, medium and
large.
• Shelves: are used to compartmentalize cassettes depending on the required drawer layout.
• Dividers: can be placed into the drawers to create multiple compartments within a single drawer.
• Override Keys: are used to unlock and gain access to the drawers in the event of a system or power failure. The keys
are not used during normal operation and should be held by a manager or supervisor to prevent unauthorized use.
The below image shows the various MedLink components.
5

2.2 UNPACKING AND ASSEMBLY
If you have purchased a new T7 cart with MedLink, the cart will arrive with the MedLink housing pre-installed on the cart.
The MedLink cassettes will be located in the housing. Remove the cassettes from the housing and remove and discard any
protective packaging.
If you have purchased a MedLink drawer system to retrofit to an existing T7 cart the MedLink housing must be installed on the
T7 cart by a Humanscale representative or an authorized service technician.
MedLink drawers, shelves and dividers are shipped in a separate box. Before continuing you should locate the appropriate
drawer and shelf components.
2.3 INSTALLING SHELVES
Before inserting drawers into a cassette, you must first insert shelves to configure your required drawer layout. Cassettes
maybe reconfigured at any time if the layout requirements change.
1. To insert a shelf, hold the cassette in place on a flat surface with one hand. With the other hand, insert the shelf so that the
slots on sides of the shelf slide over the locating pins on the inside side walls of the cassette.
2. Ensure the rear snap features are aligned with the locating holes on the inside rear wall of the cassette.
3. When the slot and snap features are aligned with the locating features inside the cassette, push the shelf firmly into the
cassette. The shelf should click into place.
4. The shelf can be removed by reversing this process. Pull the shelf firmly outwards, ensuring you are pulling outwards
parallel to the shelf. The rear locating features will disengage and you can slide the locking slot clear of the pin.
6

2.4 INSTALLING DIVIDERS
Dividers may be used to subdivide a small or medium drawer into smaller compartments. This may be useful if you want to separate
medication by type or by time of day when it is due to be administered. Dividers should not be used to subdivide a drawer into
separate compartments for more than one patient. Each drawer should be linked to only one patient for safety purposes.
Dividers are simply slotted into the drawers using the alignment ribs on the inside of the drawers.
Dividers may be inserted either way up, but when the cutouts are positioned facing upwards, it allows packaged syringes to be
laid flat on top of the dividers.
2.5 INSERTING AND REMOVING CASSETTES
Once a cassette is configured with the required shelf layout it can be inserted into the housing. Slide the cassette into an
available location on the housing and push it fully into place.
Push the cassette handle into the housing until it locks into place. The cassette is now installed and should be controllable via
the MedLink software.
During normal operation cassettes may be electronically ejected through the MedLink software. When the cassette is ejected,
the cassette handle will pop out. Pulling the handle outwards will allow the cassettes to be removed from the housing.
7
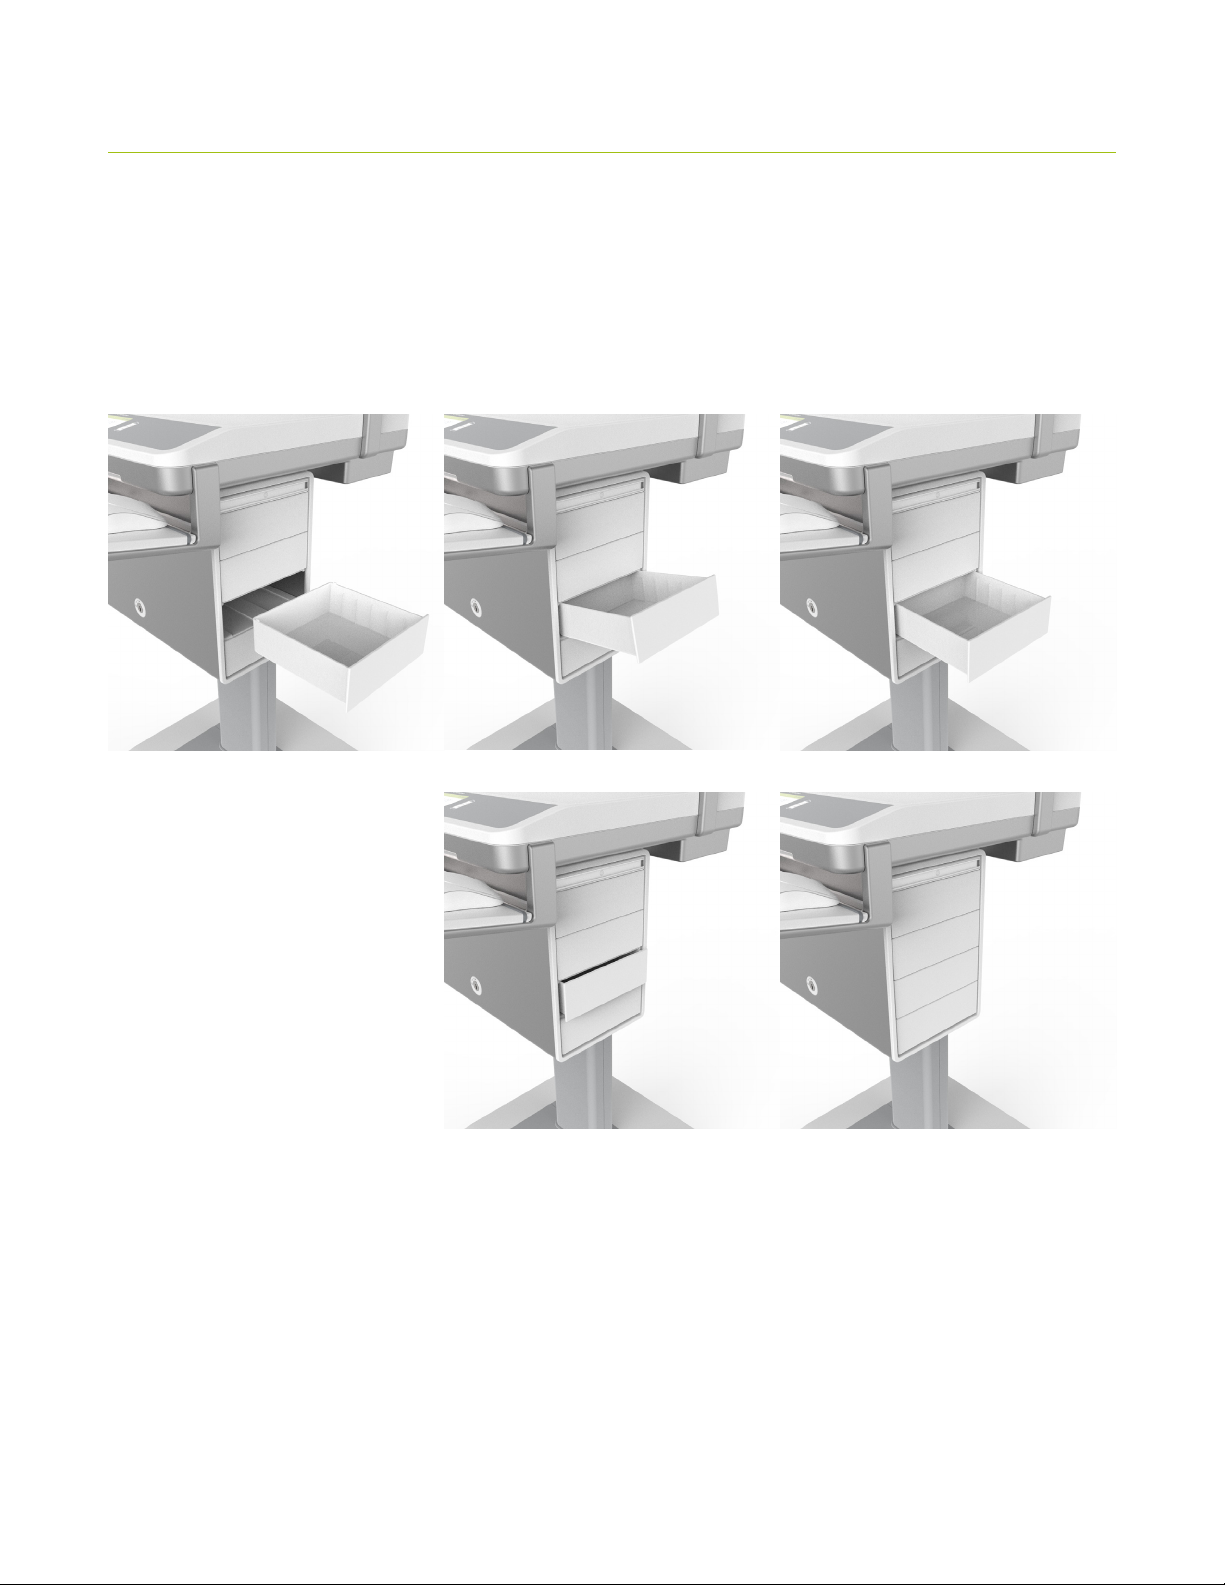
2.6 INSERTING DRAWERS
Once a Cassette is configured with the required shelf layout, drawers may be inserted. Through electronic software labelling
each drawer can be assigned to an individual patient, or as a storage drawer for non patient-specific supplies.
1. When inserting drawers, they must be tilted backwards slightly to ensure the tabs at the rear of the drawer clear the
underside of the shelf.
2. Once the back of the drawer is inserted, the drawer can be tilted back to a horizontal angle and pushed all the way in.
When the drawer is fully inserted, you should hear a click. This is the locking mechanism engaging.
8
 Loading...