


2PU6100
Table of contents
 Loading...
Confidential
For review only
HTC Vive PRE (Developer Edition)

2 Contents
Confidential
For review only
Contents
Unboxing
About Vive 4
Vive headset 4
Link box 10
Vive controllers 11
Vive base stations 13
Getting started
Setting up Vive for the first time 16
What is the play area? 16
Choosing the play area 16
Setting up the play area 17
Exploring Vive 19
Troubleshooting and FAQs
General 21
Tracking 22
Setup 22
Trademarks and copyrights
3 About this guide
Confidential
For review only
About this guide
In this user guide, we use the following symbols to indicate useful and important information:
This is a note. A note often gives additional information, such as what happens when you choose
to do or not to do a certain action. A note also provides information that may only be applicable
to some situations.
This is a tip. A tip gives you an alternative way to do a particular step or procedure, or lets you
know of an option that you may find helpful.
This indicates important information that you need in order to accomplish a certain task or to
get a feature to work properly.
This provides safety precaution information, that is, information that you need to be careful
about to prevent potential problems.
4 Unboxing
Confidential
For review only
Unboxing
About Vive
With Vive™, you can look and move around a room-scale virtual environment. Because your
physical location is tracked, you can explore and interact within immersive fantasy worlds.
About Vive PRE (Developer Edition)
Vive PRE includes the headset, controllers, and base stations that you need to start creating
interactive VR experiences.
In-box items may vary from the consumer version. Do not disassemble any of the hardware as it
could injure you or damage the product.
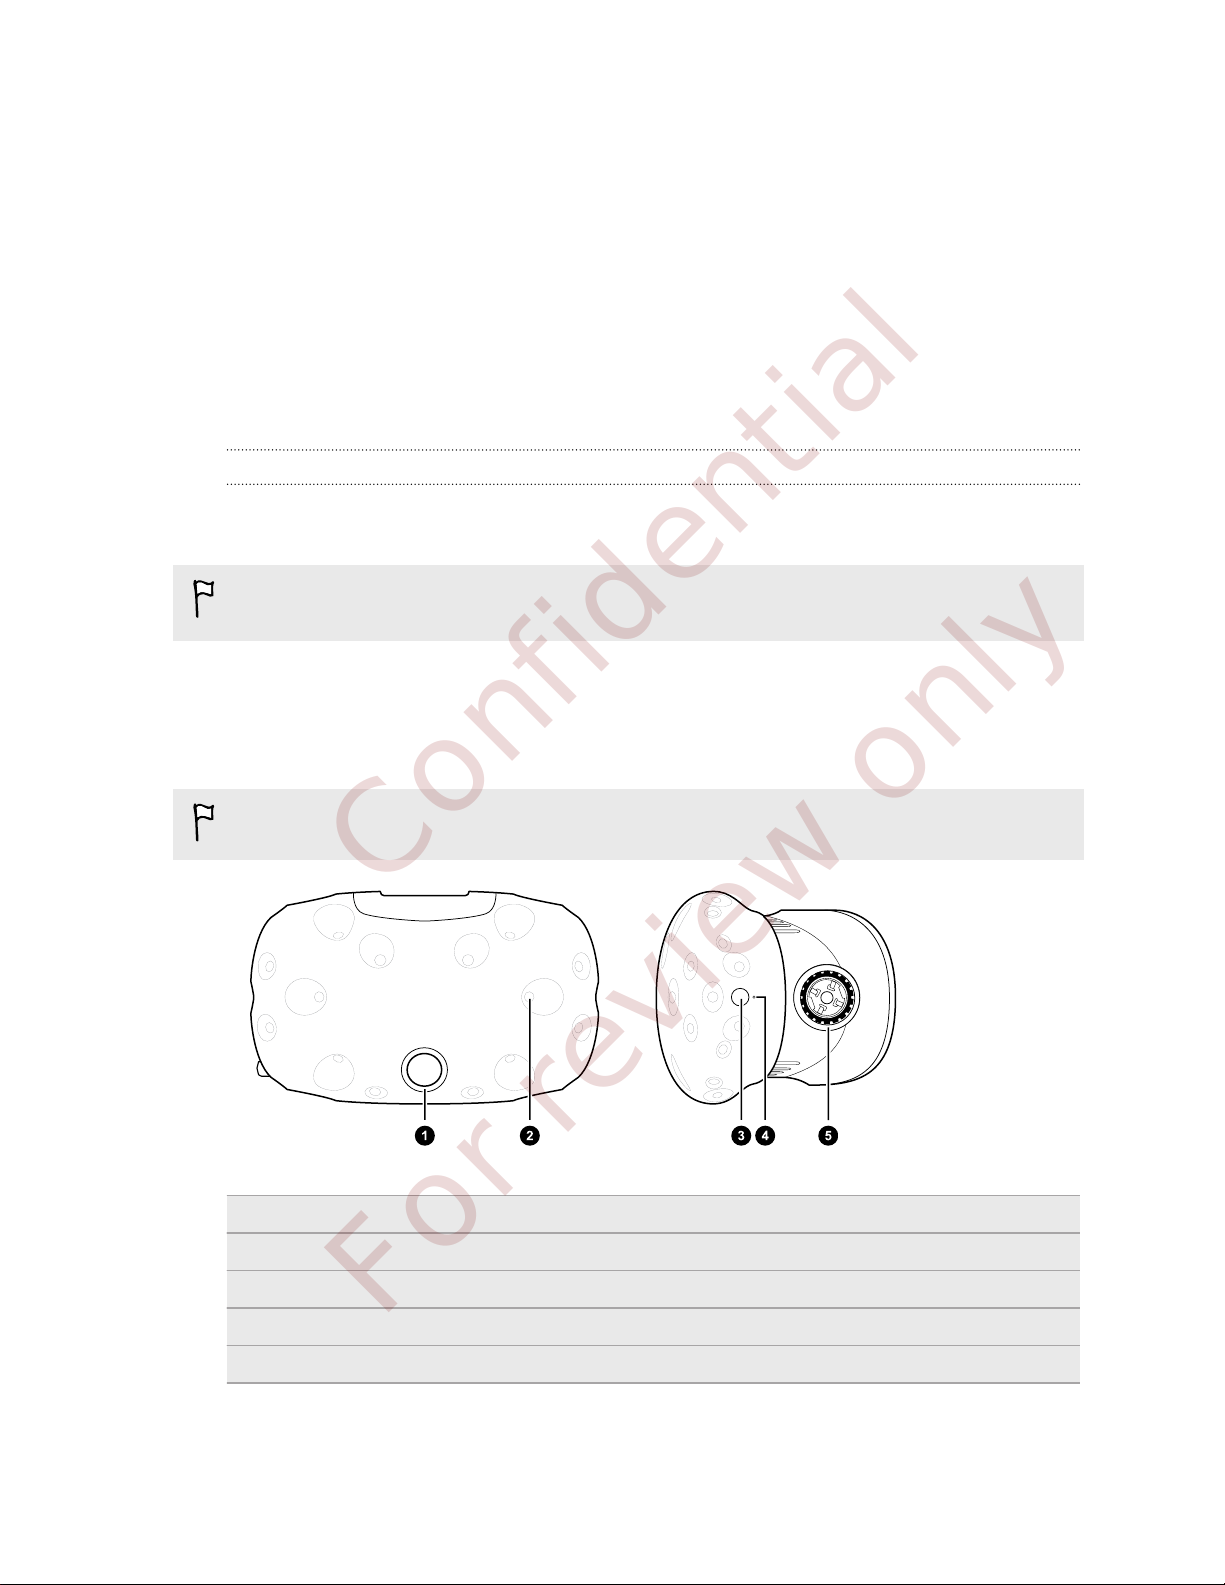
Vive headset
The headset is your window to the VR environment.
Do not cover the sensors on the headset as these are tracked by the base stations.
1 Camera lens
2 Tracking sensor
3 Camera button
4 Status light
5 Lens distance knob
5 Unboxing
Confidential
For review only
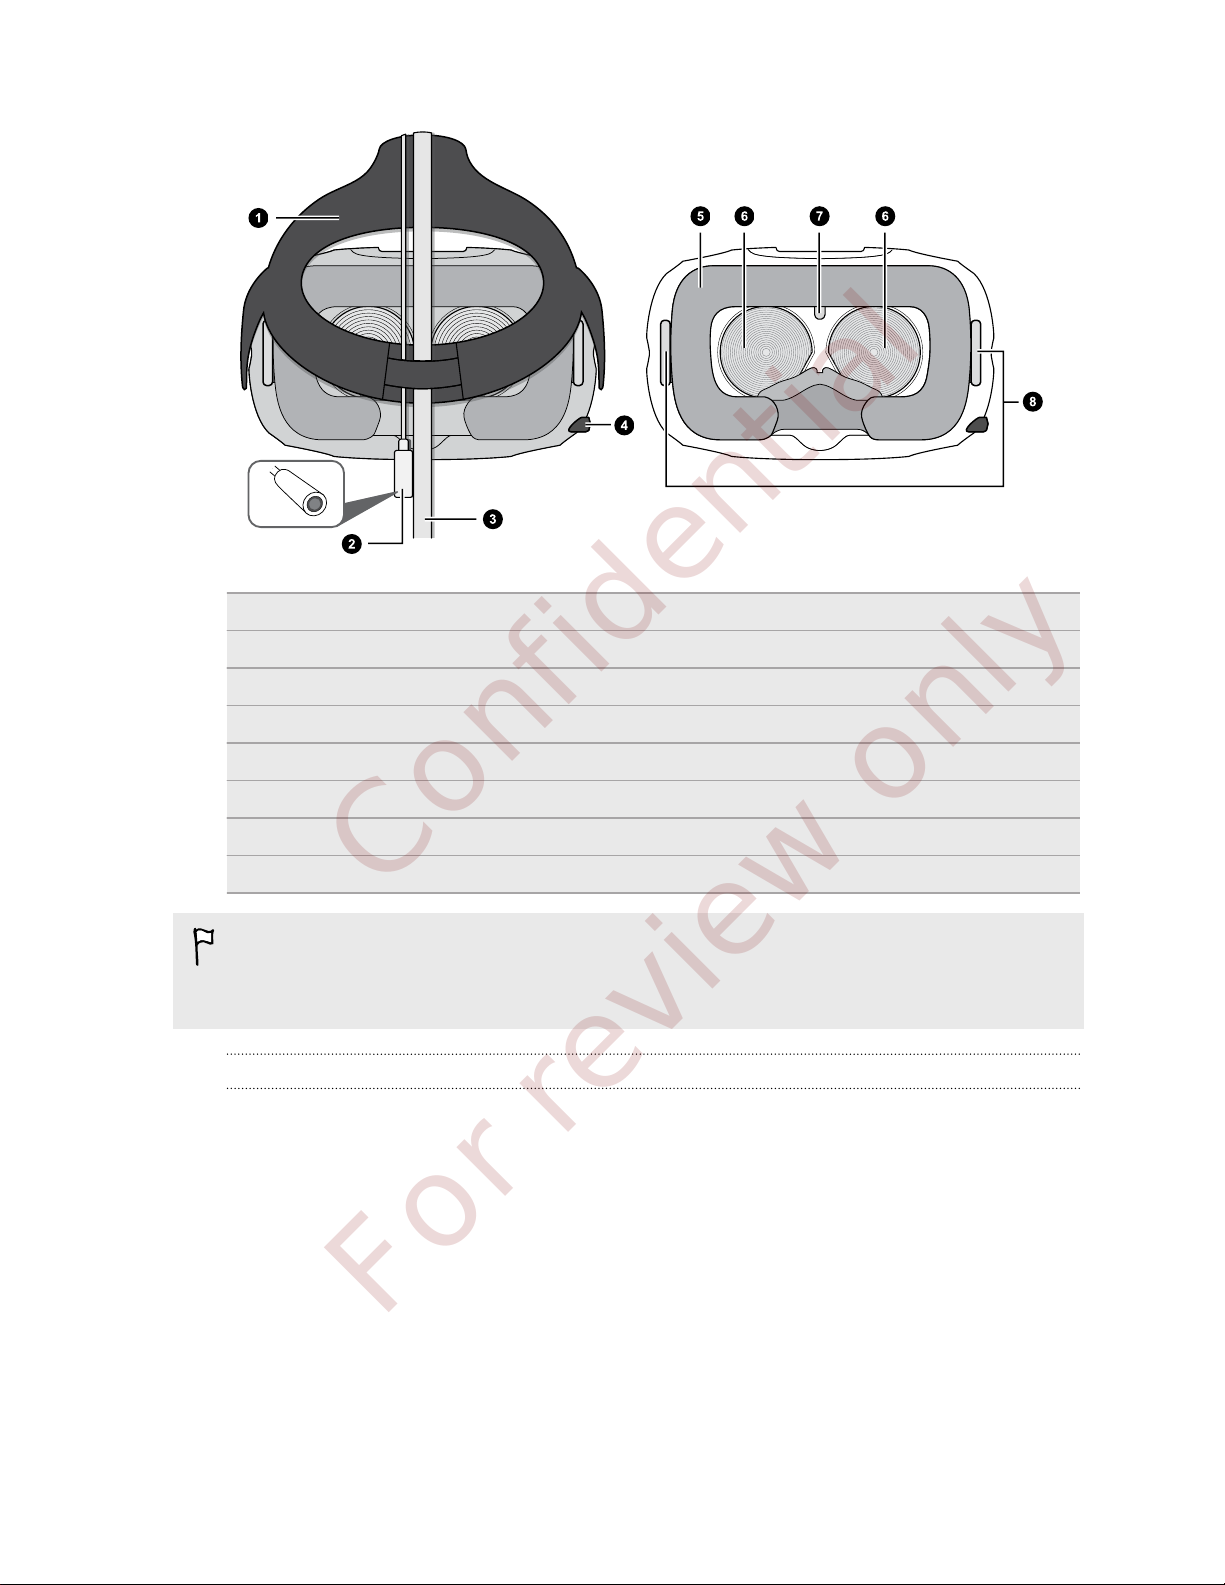
1 Strap
2 Audio cable
3 3-in-1 headset cable
4 IPD (interpupillary distance) knob
5 Face cushion
6 Lenses
7 P-sensor
8 Lens distance knobs
§ Only use the cleaning cloth provided in the box to wipe the lenses.
§ Do not cover the P-sensor.
Putting the headset on
1. Pull the headset down over your eyes.
2. Slide the straps around the back of your head, and adjust them so that the headset fits snugly
and comfortably.
6 Unboxing
Confidential
For review only
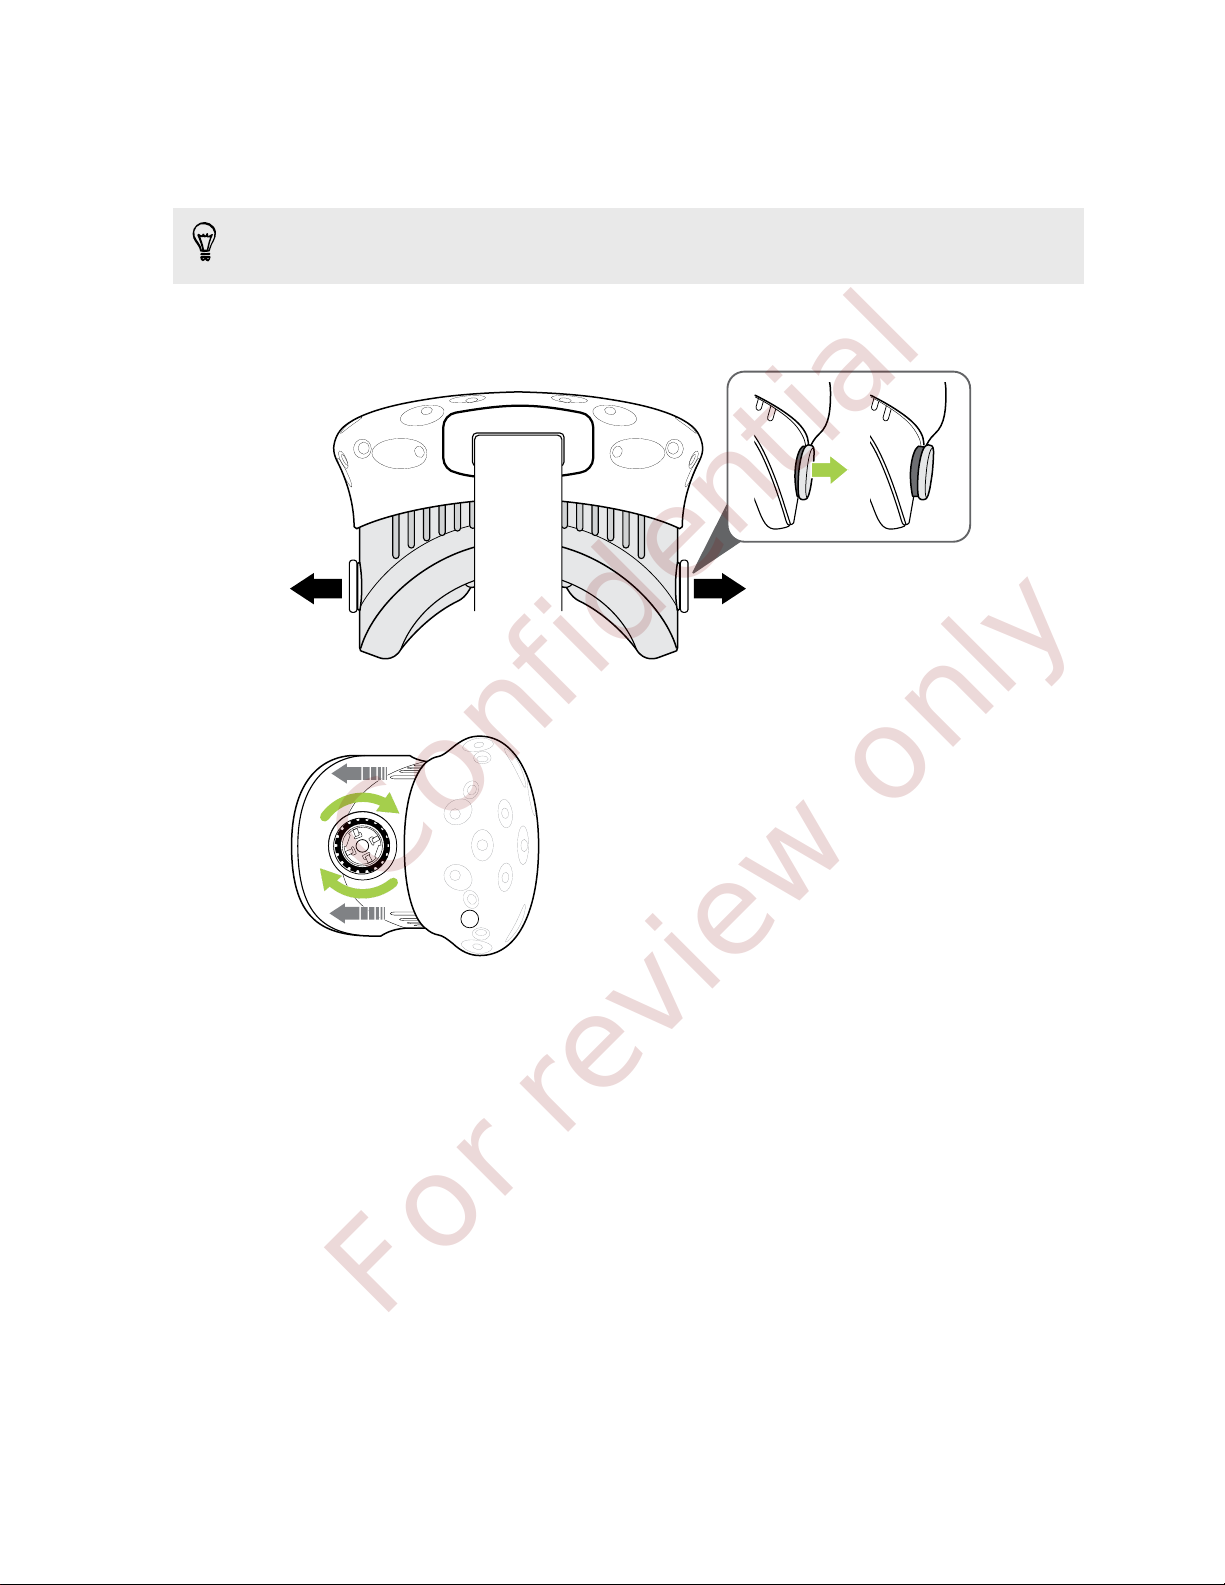
Adjusting the lens distance on the headset
The closer the lenses are to your eyes, the better the field of view.
If you need to wear prescription glasses while using Vive, adjust the lens distance for space to fit
your glasses in.
1. Pull out each lens distance knob to unlock it.
2. Rotate both lens distance knobs to adjust the lens further or closer to your face.
3. After you're done adjusting, push each knob to lock it back in.

7 Unboxing
Confidential
For review only
Using the IPD knob on the headset
Interpupillary distance (IPD) is the distance between the center of the pupils in your eyes. A quick
way to get an estimate is by facing a mirror and holding a millimeter ruler against your brow. Use
this measurement as a guide to adjust the distance between the lenses of the headset so that you'll
have a better viewing experience.
To change the distance between the lenses, rotate the IPD knob.
As you adjust the IPD, you'll see information about the current distance between the lenses.
Loading...