

Start Here
USB cable users: Do not connect the USB cable until this
guide instructs you to or the software may not install
1
Use this guide to set up the hardware and connect the HP All-in-One to either your computer or a working
network. If you have problems during setup, see Troubleshooting later in the guide.
properly.
2
ab
3
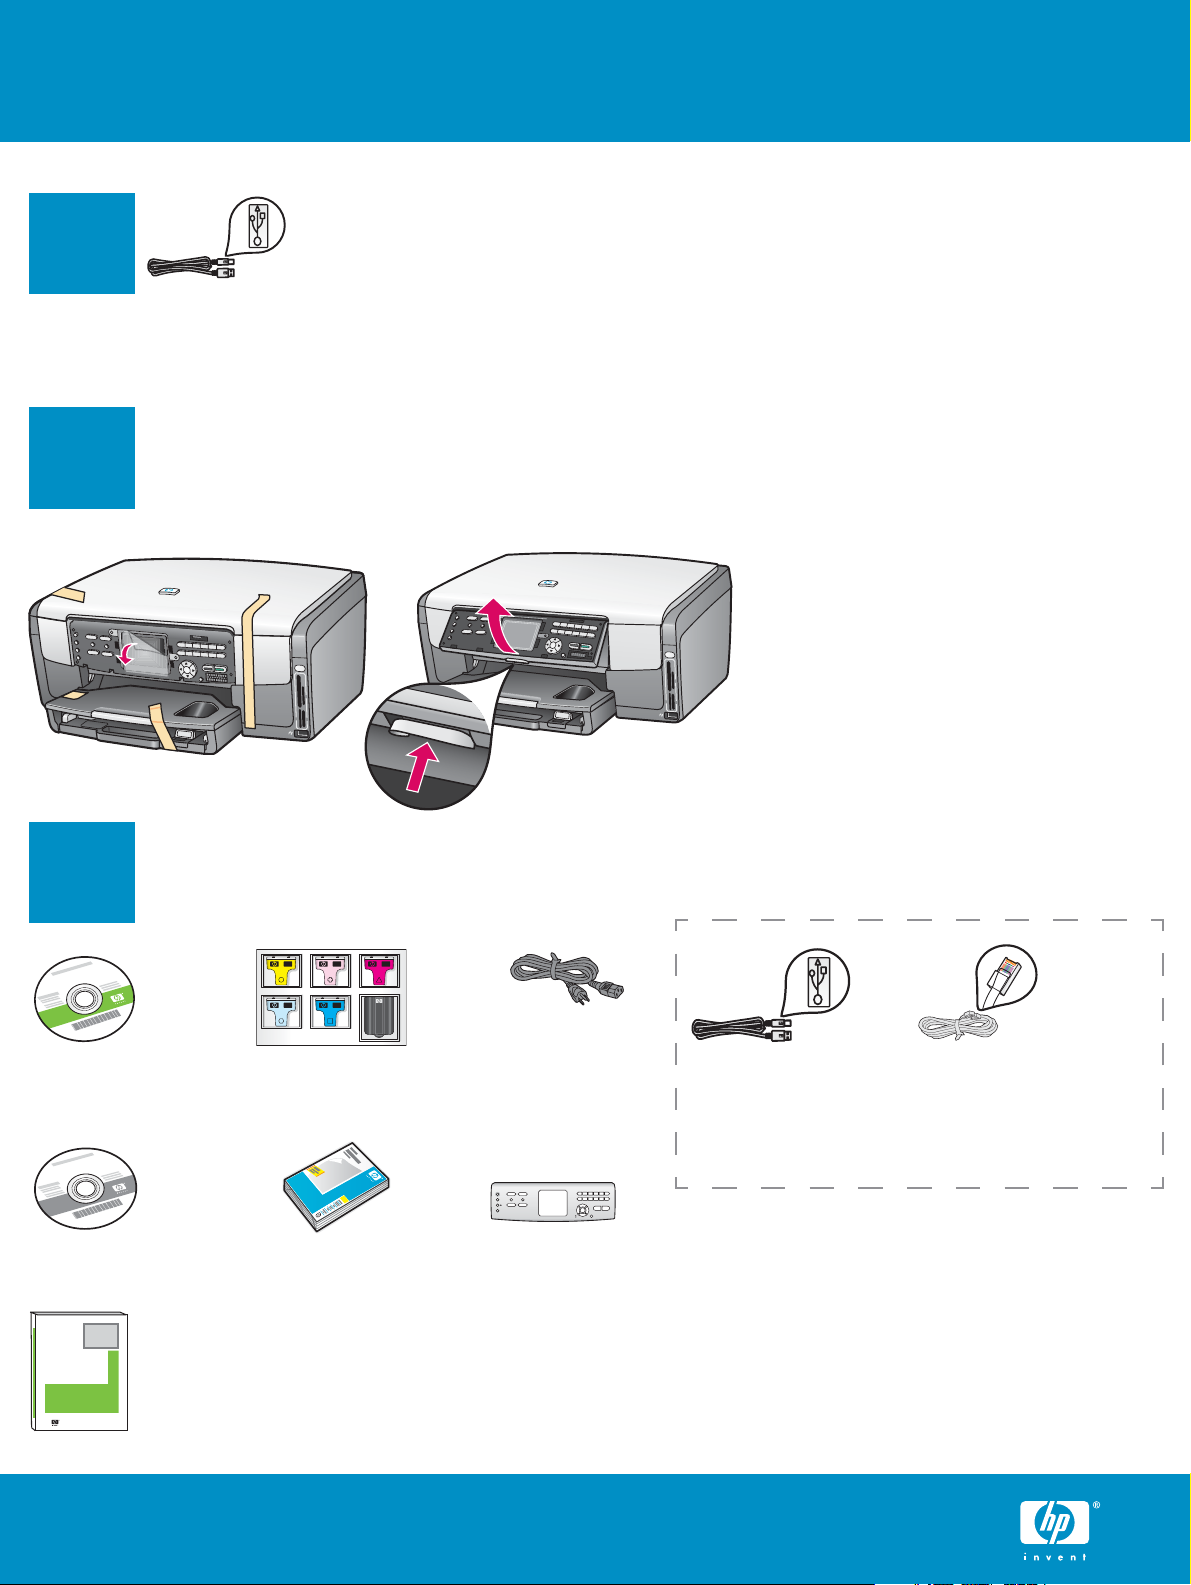
Remove all tape and lift display
Locate components
a Remove all tape. For best
viewing, remove the protective
fi lm from the color graphics
display.
b Lift the display.
Windows CD
Macintosh CD
HP Photosmart 2600/2700 series all-in-one
HP Photosmart 2600/2700 series all-in-one
User Guide
User Guide
User Guide on CD
HP Photosmart 3200 All-in-One series Setup Guide
ink cartridges power cord Ethernet cable*USB cable*
4 x 6 in
(10 x 15 cm)
photo paper
control panel
faceplate (may
be pre-attached)
* Purchased separately.
The contents of your box may differ.
Additional network equipment specifi ed later
in guide.

Attach the control panel faceplate
4
a Lift the lid.
The control panel faceplate must be attached for the HP All-in-One to work!
5
(if not attached)
b Position the control panel faceplate
over the buttons on the device.
Load paper trays
c Press down fi rmly on all edges of the
overlay to secure it. Make sure all buttons
are visible and not blocked.
Main tray:
a
Load plain white paper in the bottom paper tray. Plain paper is needed for alignment.
Photo paper tray:
Load the 4 x 6 in (10 x 15 cm) photo paper with the glossy side down in the photo tray located underneath
the output tray. (If paper is tabbed, make sure the tab is towards you.)
b c
fge
d
h
2 • HP All-in-One
i
Tip: Pull out, and then fl ip the
paper tray extender to catch
pages.

6
Connect the power cord
USB cable users: Do not connect the USB
cable until instructed later in this guide.
7
On
8
Press the On button and confi gure
a After you press the On button, the blue light fl ashes, and
then becomes solid. This may take up to a minute.
b Wait for the language prompt before continuing. Use the
arrow keys to select your language, press OK , and then
confi rm. Use the arrow keys to select your country/region,
press OK , and then confi rm.
Open the access door
ab
HP All-in-One • 3
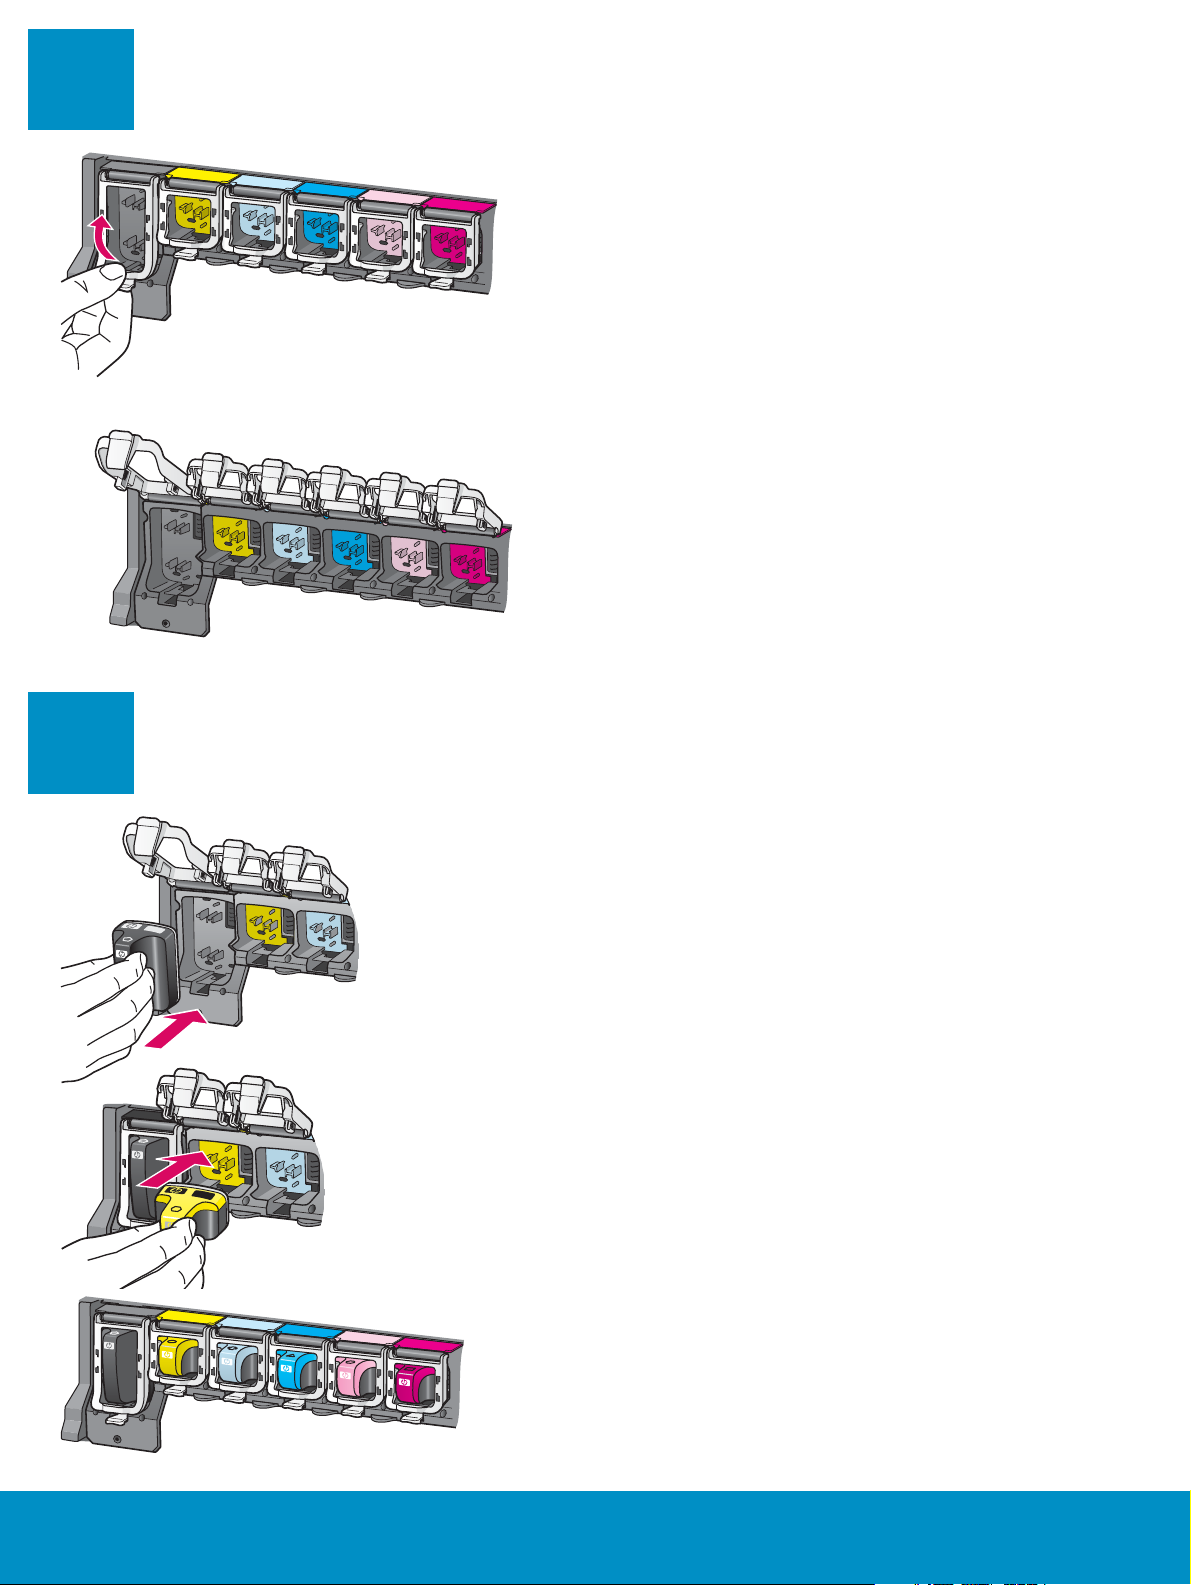
9
Lift latches inside of the device
a
b
a Squeeze the bottom of each latch to release it, and then lift
the latch.
b Lift all six latches.
10
a
b
c
Insert all six ink cartridges
Match the color and pattern of the ink cartridge to the color
and pattern on the print carriage.
a Push the black ink cartridge into the fi rst slot on the left.
Close the latch.
b Repeat with each of the color ink cartridges.
c Make sure each latch is secure.
4 • HP All-in-One
 Loading...