

Page 1
Gas Detec on
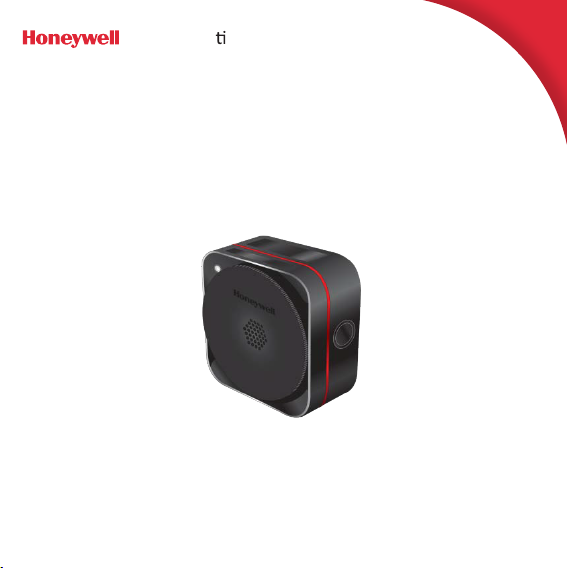
Sensepoint XCL
Fixed Gas Detector
Quick Start Guide
Page 2

Sensepoint XCL
Fixed Gas Detector
Quick Start Guide
Read and understand the Sensepoint XCL Operating Instructions before installing, operating or servicing this product.
These are available for download from the Honey well Analytics website. Visit www.honeywellanalytics.com.
1 Safety
Installation must be in accordance with the recognized standards of the appropriate auth ority in the country and locality
concerned.
2 Analog (mA) Output Versions
1) +24 V DC or 24 V AC 2) 0 V or 24 V AC
3) 4 to 20 mA 4) Common
3 Modbus RTU Output Versions
4 Relay Output
5 Securing the Back Box to a Wall
1. There are four screw positions in the rear of the back box for mounting purposes.
2. Secure the back box in its mounting position with suitable fixings appropriate to the
3. There are four cable entry knock-outs on three of the sides and rear face of the back
1) +24 V DC or 24 V AC 2) 0 V or 24 V AC
3) A 4) B
1) Normally closed (NC) 2) Common
3) Normally open (NO)
Punch the required screw positions or drill using a 4 mm drill.
mounting surface. Do not over-tighten.
box. Drill or punch the entri
es as required.
2
Page 3

6 Cable Connections
1. Fit suitable cable glands (included) or conduit fittings to the opened cable entries.
2. Feed the cable through the cable gland.
3. Turn over the detector module and locate the terminal blocks on the back. Remove the
terminal blocks, pulling them toward the center of the module.
4. Connect the cable to the appropriate terminal block, referring to section 2 to 4
depending on the version. Strip and insert the end of each wire into the corresponding
terminal hole, and tighten the terminal screw, using a flat-blade terminal screwdriver
until the wire is secured.
5. Replace the terminal blocks in their correct positions.
7 Ground Connections
Effective grounding is crucial to ensure stable Modbus communications and to limit the effects of radio frequency
interference. Ground points are provided inside the back box. In order to prevent false readings or alarms as a result of
ground loops, ensure that the shield of all cables are grounded at a single point, preferably at the controller.
Consideration should also be given to how conduit, glands and the internal earth plate are also grounded.
NOTE
Any earth regime must avoid earth loops.
8 Securing the Detector Module to the Back Box
1. Remove the front cover from the detector module to expose the retaining screws as
follows:
a) Pull the flap on the bottom side to open it.
b) To unlock the front cover, insert a thin, straight tool, such as a small screwdriver,
into the hole to the right of the tube spigot.
c) While applying slight pressure to the tool, turn the cover counterclockwise until it
stops, and then lift it out.
3
Page 4

2. Position the detector module onto the back box ensuring that the Status Indicator is in
the top left-hand corner when viewed from the front.
3. Tighten the four retaining screws using a No. 2 Phillips screwdriver to secure.
4. Where used, tighten the sealing nut of the cable gland to secure the cable. Refer to the
cable gland manufacturer’s instructions.
5. Replace the front cover by placing it into the detector module and rotate it clockwise
until it locks into position.
9 Remote Gassing Connect ion
If the gas detector is installed in an inaccessible location, such as overhead on a ceiling, connect a tube to the gas
detector for bump test.
10 Status Indicator
The detector features an external visual status indicator on its front face.
11 Connecting to a Detector via Bluetooth (Bluetooth versions only)
To pair your smartphone with a specific detector, follow these steps:
1. Download Sensepoint App from Google Play Store. Install and launch the app.
2. Create and register a user account, and log on with the created account information.
3. To associate with one or more gas detectors, scan the QR code on the sheet included in the box or enter its
Activation Key.
4. Complete the installation of the detectors.
5. On the app’s home screen, tap DETECTORS to scan for available detectors.
6. Select a detector from the detector list to pair with it.
7. Look for the detector whose Status Indicator is flashing blue.
8. Tap Confirm Detector to pair with that detector. Otherwise, tap Return to list to select one of the others.
Normal: The indicator is lit GREEN when the concentration of the target gas is within normal range.
The Normal indication can also be set to Confidence Flash
Alarm: RED flashes rapidly when the gas concentration is beyond the alarm-level threshold.
Fault: YELLOW
Bluetooth pairing: BLUE flashes when Bluetooth® pairing between the gas detector and a
Bluetooth connected: Steady BLUE
flashes rapidly when the gas detector is in a fault state.
smartphone is in progress.
• For a temporary connection, open the flap on the bottom side and
connect suitable tubing compatible with the gas type of the sensor to
the tube spigot.
• For a permanent connection, remove the flap, connect the tube
connector (available separately) to the spigot, and then connect a tube
to the tube connector. Secure the tube using a cable tie or small jubilee
clip, taking care not to over-tighten it.
or Off.
is lit when a Bluetooth connection is established.
4
Page 5

For more information, please refer to the Sensepoint App manual.
Inrush current
Less than 850 mA
Outer knock-out
M25 or ¾ NPT
© 2017 Honeywell Analytics
When a Bluetooth® connection is established, the detector’s reading is displayed on the app interface with the gas type
and other information.
12 Specifications
Physical specification
Dimension 113 mm × 113 mm × 59 mm (4.4 × 4.4 × 2.3 in)
Weight 500 g (1.1 lb)
Power supply
DC input voltage (nominal) 24 V DC†
AC input voltage (nominal) 24 V AC‡, 50/60 Hz
Maximum power consumption
mA Versions < 1.2 W (toxic), < 1.7 W (flammable)
Modbus versions < 0.7 W (toxic), < 1.2 W (flammable)
Relay versions Additional 0.6 W
Outputs§
Analog output 0 to 22 mA sink or source (configurable)
Digital output Modbus RTU
Relay output 2 × dry contact relays for fault and alarm signalling. Rated at 5 A @ 24 V DC, 5 A @ 240 V AC
Operating Environment
Operating temperature −20 to 50°C (−4 to 122 °F)
Storage temperature 0 to 30°C (32 to 86 °F)
Humidity 0 to 99% (non-condensing)¶
Atmospheric pressure 90 to 110 kPa
Ingress protection IP65 / Type 4 (in accordance with NEMA 250)
Installation category II (UL/CSA/IEC/EN 61010-1)
Pollution degree 2 (UL/CSA/IEC/EN 61010-1)
Cable Gland
Inner knock-out M20 or ½ NPT
Gas Test Tubing
Inner diameter 4 or 6 mm
Outer diameter 6 or 8 mm
†
mA versions: 11 to 32 VDC, Modbus versions: 9 to 32 VDC
‡
20 to 27 VAC
§
Dependent on version
¶
Flammable catalytic versions: 10 to 90% RH. Operating the detector outside of this range may result drift and a
decrease detector accuracy.
3017M5000_1 HAA170019
5
Page 6

Find out more
instructions:
www.hon eywella nalytics.co m
Contact Honeywell Analytics:
Americas
Honeywe ll Analy tics, I nc.
405 Barcl ay Blvd.
Lincolnsh ire, IL 60069
USA
Tel: +1 847 95 5 8200
Toll fr ee: +1 800 538 0363
Fax: +1 847 95 5 8210
detectg as@Honey well.co m
Europe, Middle East, Africa
Life Sa fety Dist ribution GmbH
Javastr asse 2
8604 Hegna u
Switzer land
Tel: +4 1 (0)44 943 4300
Fax: +4 1 (0)44 943 439 8
gasdete ction@ho neywell. com
sia Pacific, India
A
Honeywe ll Anal ytics Asia Pacific, Co ., Ltd.
7F Sang Am IT To wer
434 World cup Buk- ro, Mapo-gu
Seoul 0 3922
South K orea
Tel: +8 2 (0)2 6909 0300
Fax: +8 2 (0)2 2025 038 8
India T el: +91 124 47527 00
China T el: +86 10 5885 87 88 3000
analytics .ap@hone ywell.c om
www.hon eywell. com
Copyrig ht © 2016 Honeywe ll Analy tics Co. , Ltd.
All rig hts rese rved.
For full operating
 Loading...