

Honeywell Hwm910, Dh975 Owner's Manual
WARM MOISTURE HUMIDIFIER
Model HWM-910 Series
HUMIDIFICATEUR À VAPEUR CHAUDE
Série de modèle HWM-910
HUMEDECEDOR DE HUMEDAD RECALENTADO
Modelo del Serie HWM-910
* Output dependent on room temperature and humidity.
* Le rendement est fonction de la température et du degré d’humidité d’une pièce.
* La extracción depende de la temperatura y humedad de la habitación.
OWNER’S MANUAL


When using electrical appliances, basic precautions should
always be followed to reduce the risk of fire, electric shock, and
injury to persons, including the following:
1. Always place this humidifier on a firm, flat and level surface. This humidifier
may not work properly on an uneven surface.
2. Place this humidifier in an area where it is not accessible to children.
3. Do not place the humidifier near any heat sources such as stoves, radiators,
and heaters.
4. Before using the humidifier, check the power cord for any signs of damage. If
the cord is found to be damaged,
DO NOT USE and return the humidifier to the
manufacturer under the warranty agreement for repair.
5. This appliance has a polarized plug (one blade is wider than the other). To
reduce the risk of shock, this plug is intended to fit only one way in a
polarized outlet. If the plug does not fit fully in the outlet, reverse the plug. If it
still does not fit, contact a qualified electrician.
DO NOT attempt too defeat this
safety feature.
6. To disconnect the humidifier, first turn controls to the OFF position, then grip the
plug and pull it from the wall outlet. Never pull by the cord.
7. A loose fit between the AC outlet (receptacle) and plug may cause overheating
and a distortion of the plug. Contact a qualified electrician to replace loose or
worn outlet.
8. The humidifier should always be unplugged and emptied when not in operation
or while being serviced or cleaned.
9. Never tilt or attempt to move the humidifier while it is operating or filled with
water.
UNPLUG the humidifier before moving.
10. This humidifier requires regular cleaning. Refer to the CLEANING instructions
provided. Never clean the humidifier in any manner other than as instructed in
this manual.
11. Turn the humidifier OFF if the relative humidity exceeds 60%, or if you notice
moisture on the inside of your windows. For proper humidity reading use a
hygrometer, which is available in many hardware and department stores or by
ordering one from the manufacturer (see Care Products).
12.
DO NOT touch the steam vapor. Steam can cause burns.
13.
DO NOT block the mist grille. This will damage the humidifier.
IMPORTANT SAFETY
INSTRUCTIONS
READ AND SAVE THESE SAFETY
INSTRUCTIONS BEFORE USING THIS
HUMIDIFIER
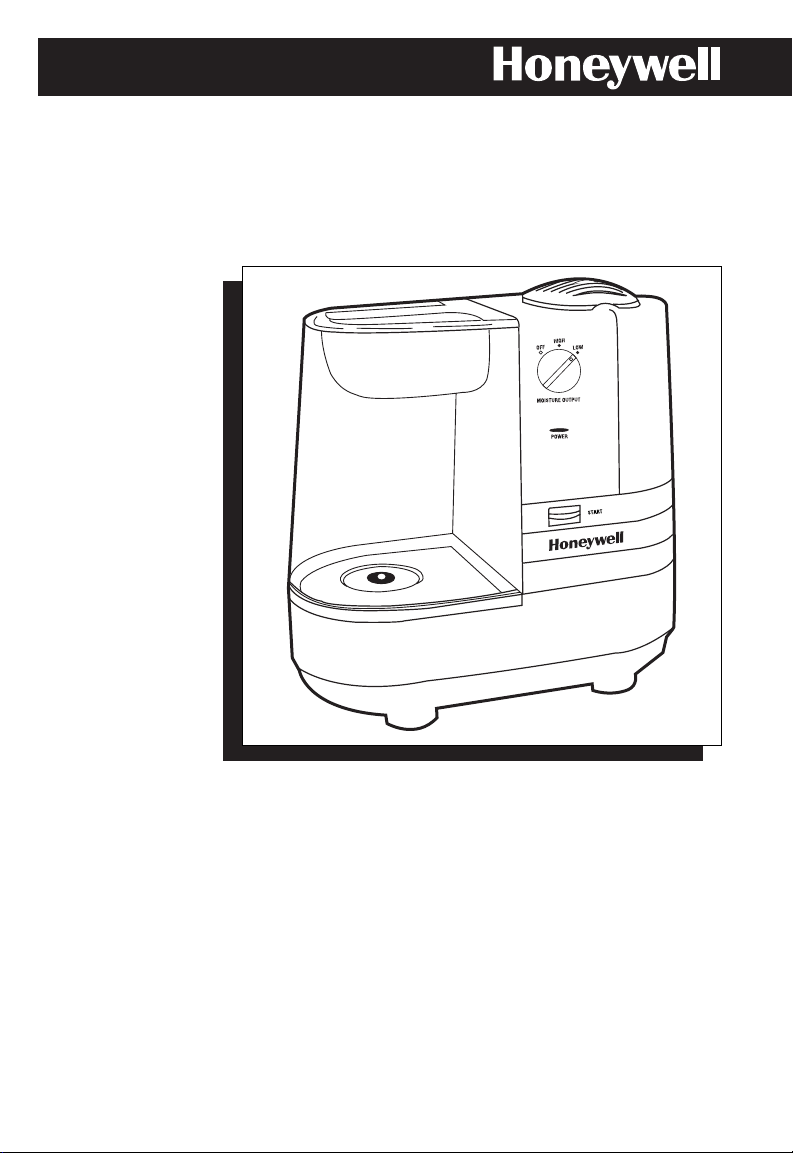
Thank you for purchasing a Honeywell Natural Warm Moisture®Humidifier. If you
would like more information on our full line of products, please visit our website at:
www.honeywell.com/yourhome.
HOW DOES IT WORK?
Water passes into the Power Unit where it is heated and purified. The Warm
Moisture system then pulls the air through the top vent and spreads
invisible
moisture-balanced air into the room.
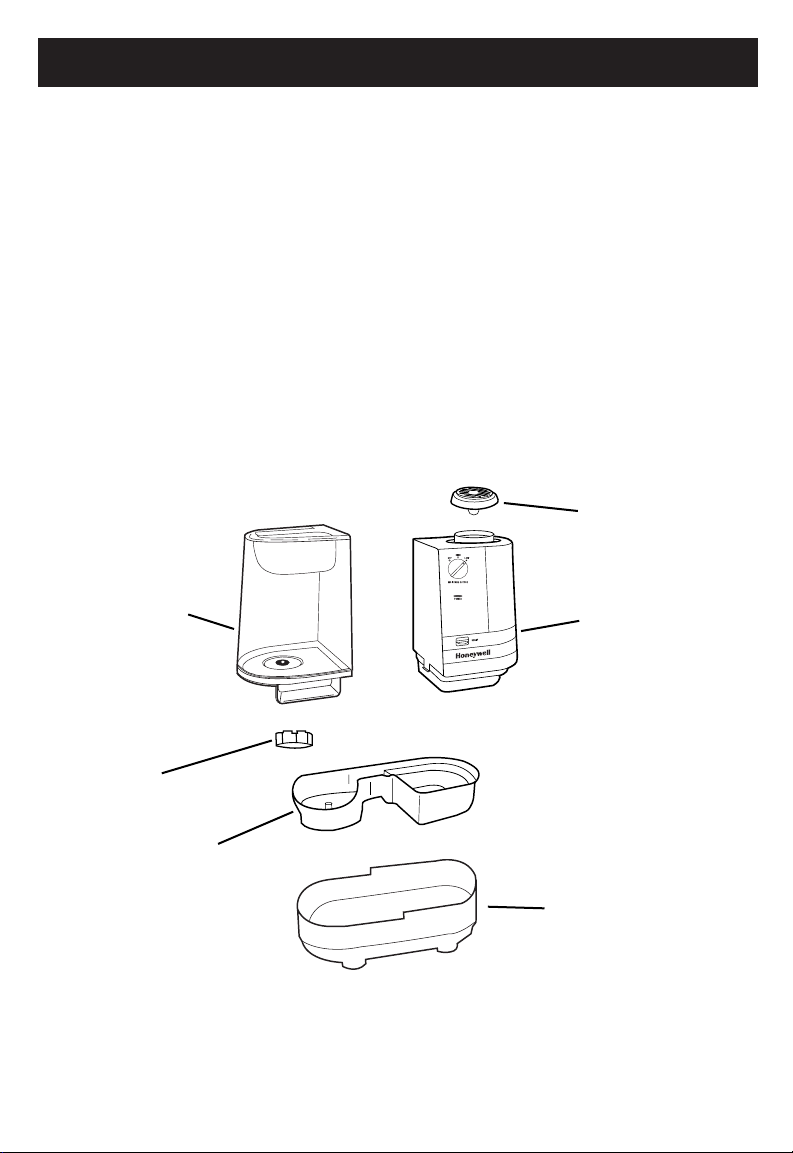
MODELS - HWM910 and HWM910C:
Your humidifier is made up of these parts:
INTRODUCTION
Water Tank
Power Unit
Base
Fill Cap
Grille with
Medicine
Cup
Removable Tray
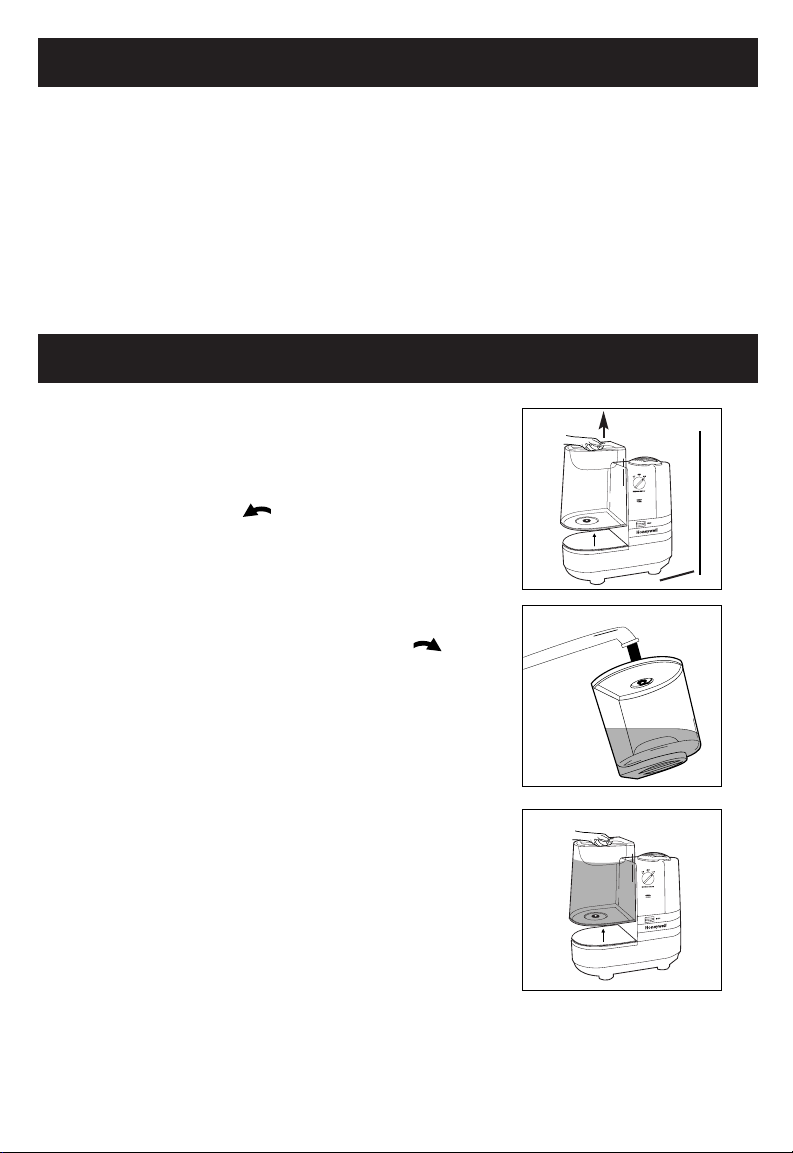
SETUP
• Remove the water tank by grasping the handle and
pulling straight up. Set aside (Fig. 1).
• Turn the Water Tank upside down so that the Fill Cap
is facing up; unscrew the Fill Cap by turning it
counter-clockwise and set aside.
•
Fill the Water Tank with COOL tap water (Fig. 2). Distilled
water is not necessary as the water is purified by the
heating element.
DO NOT USE HOT WATER. Doing so
may damage the humidifier.
• Replace the fill cap by turning it clockwise .
DO NOT OVER TIGHTEN.
NOTE: WHEN CARRYING THE FILLED WATER TANK,
PLEASE USE THE HANDLE AND PLACE YOUR OTHER
HAND UNDER THE TANK FOR ADDITIONAL SUPPORT.
•
Turn the Water Tank right side up. Position the tank into
the humidifier and push it into place (Fig. 3).
• Some water will flow into the Removable Tray when the
filled tank is properly in place.
• Once the filled tank has been positioned, do not attempt
to move the humidifier. If it has to be moved, unplug the
humidifier and remove the water tank first.
CAUTION: DO NOT POUR WATER INTO THE
GRILLE ON TOP OF THE HUMIDIFIER (Fig. 3).
DOING SO MAY DAMAGE THE HUMIDIFIER OR
CAUSE PERSONAL INJURY.
NOTE: We recommend that the humidifier be disinfected prior to first use. Please
see WEEKLY CLEANING instructions.
• Select a firm, level, flat location - at least six inches (15 cm) from any wall for
proper air flow (Fig. 1). Place the humidifier on a water-resistant surface, as
water can damage furniture and some flooring.
Honeywell will not accept responsibility for property damage caused by water
spillage.
Fig. 1
➡
Fig. 2
Fig. 3
WALL
6"
FILLING
POWER
CAUTION: DO NOT PLUG IN THE HUMIDIFIER WITH WET HANDS AS AN
ELECTRICAL SHOCK COULD OCCUR.
• Plug the filled humidifier into a polarized 120V outlet. DO NOT FORCE THE
POLARIZED PLUG INTO THE OUTLET; it will only fit one way.
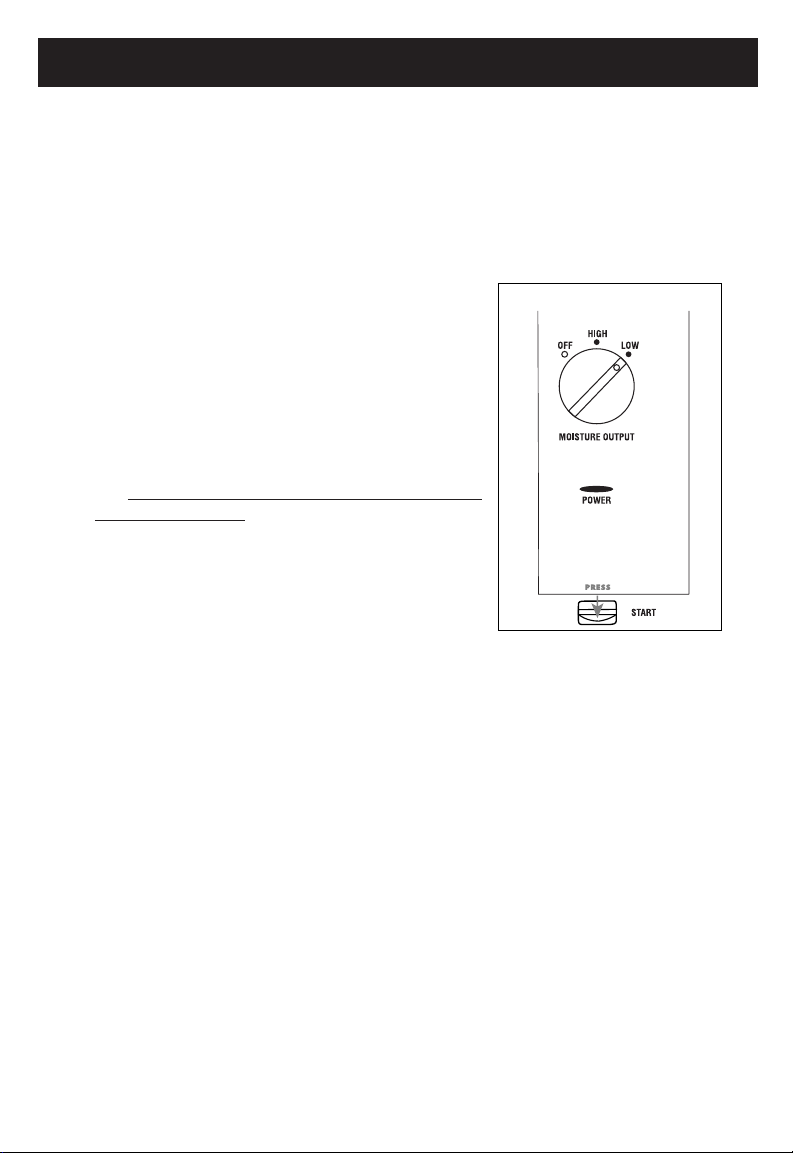
HUMIDITY CONTROL
1. Set the Power Knob to the desired position (Fig. 4).
HIGH: For fast humidifying.
LOW: For more gradual humidification.
NOTE: You will not hear a difference when turning the
humidifier from High to Low.
2. Press down and release the Start lever to TURN ON
the humidifier.
NOTE: Allow 5-10 minutes for the humidifier to begin
producing moisture.
3. THE START LEVER MUST BE PRESSED EVERY TIME
THE WATER TANK IS REMOVED FROM THE BASE
OR REFILLED.
Fig. 4
OPERATION
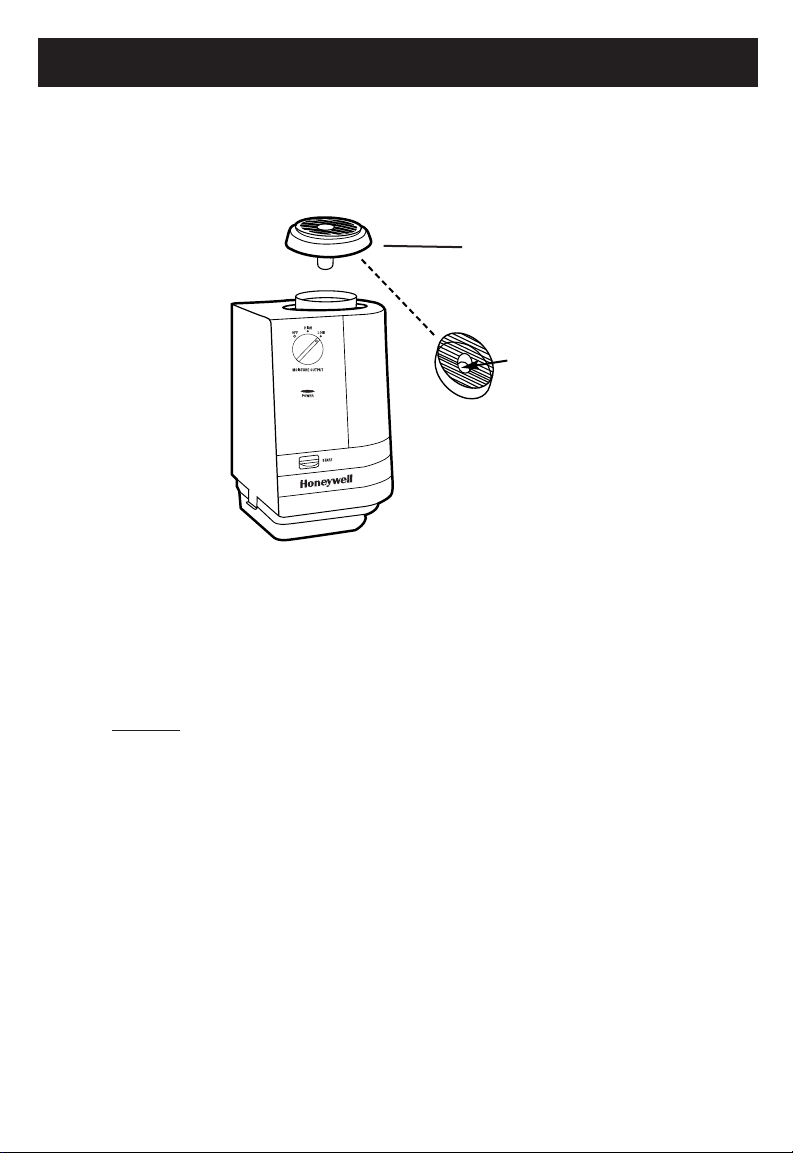
MEDICINE CUP:
A medicated vapor can be distributed into the air by using the Medicine Cup at the
top of the Power Unit (Fig. 5).
FEATURES
TO ADD MEDICINE TO THE MEDICINE CUP
1. Turn the humidifier OFF and allow at least 10 minutes for the unit to cool.
2. Lift the Grille with Medicine Cup from the Power Unit (Fig. 5).
3. Fill the cup halfway with liquid medicine.
4. Carefully
place Grille with Medicine Cup back into the Power Unit.
5. After use, remove the Grille with Medicine Cup and clean with warm water or
in the dishwasher. Replace the clean, dry Grille with Medicine Cup into the
Power Unit.
WARNING: DO NOT use any liquid medicines other than those specifically
recommended for use with a steam vaporizer or warm humidifier. DONOT pour
medicine directly through the Grille opening or add it to the Water Tank.
Honeywell assumes no responsibility for consequences resulting from the uses of
medicine in this humidifier.
Grille with
Medicine Cup
Place medicine
here
STEP ONE:
SCALE REMOVAL
REMOVABLE TRAY:
1. Fill the Removable Tray (Fig. 6) with
either:
• 1 cup (8 oz.) undiluted white vinegar
or
• Use DuraRinse®Humidifier Cleaner,
Part No. AC-816, following bottle
instructions.
2. Let solution stand for 20 minutes.
3. With the vinegar or DuraRinse
®
in the
Removable Tray clean all interior
surfaces with a soft cloth or brush to
help remove scale.
4. Rinse the Removable Tray thoroughly
with water to remove scale and
cleaning solution.
STEP TWO:
DISINFECTING
WATER TANK/REMOVABLE TRAY
1. Fill the Water Tank with:
• 1 teaspoon of household bleach
and
• 1 gallon of water.
Pour some of this solution into the
Removable Tray.
2. Let solution stand for 20 minutes.
3. Rinse with water until the odor of
bleach is gone.
NOTE: THE USE OF OTHER WATER
TREATMENT PRODUCTS, CHEMICALS,
SOAPS, DETERGENTS OR ABRASIVE
CLEANSERS NOT RECOMMENDED IN THE
MANUAL MAY CAUSE DAMAGE TO THE
HUMIDIFIER OR AFFECT PERFORMANCE.
We recommend cleaning the humidifier weekly, more often if you have hard water
or notice a build-up of impurities or detect unpleasant odors.
Cleaning involves two steps SCALE REMOVAL and DISINFECTING. Be sure to
perform these in the proper order to avoid harmful chemical interactions.
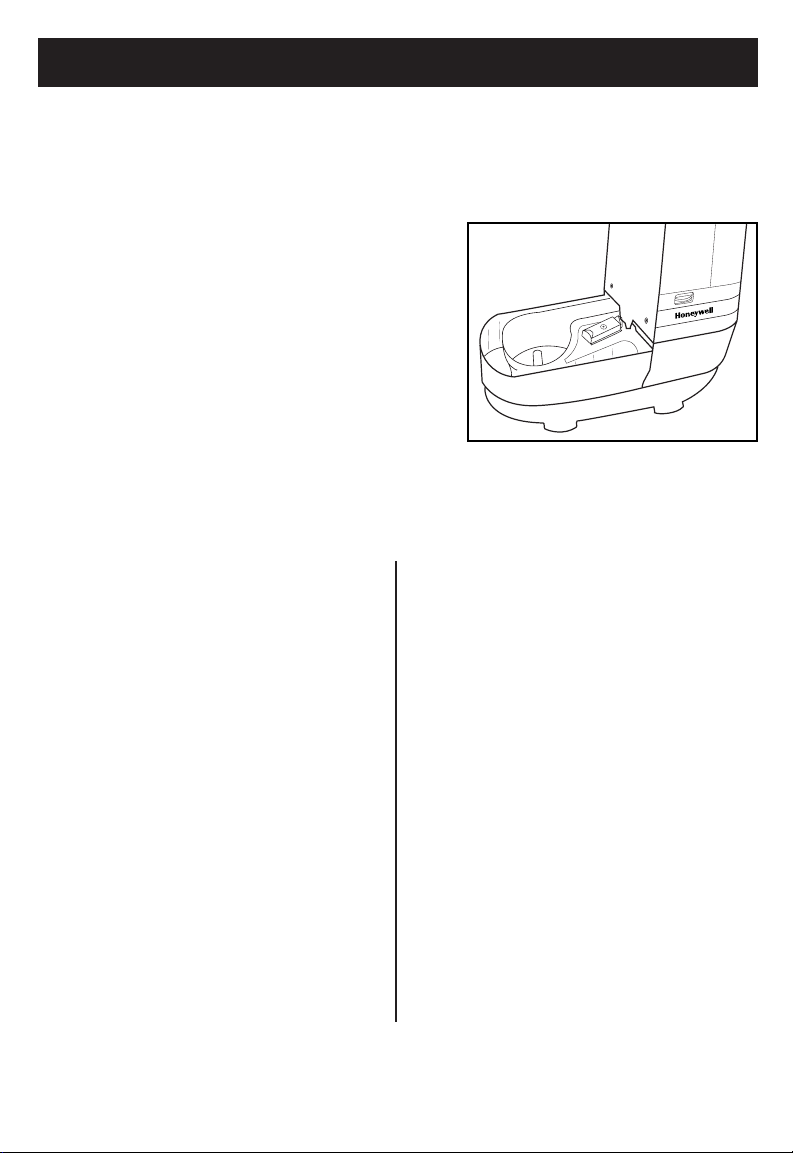
• First, turn off and unplug the humidifier. Wait at
least 10 minutes for the unit to cool.
• Remove the Water Tank.
• To remove the Power Unit, pull the Latch to
release (found under the Water Tank) and lift the
Power Unit (Fig. 6). Turn upside-down to check
condition of heating element. If build-up of
minerals is heavy, follow the CLEANING THE
HEATING ELEMENT instructions. Set the Power
Unit aside.
• Empty any water from the Base and Removable Tray.
WEEKLY CLEANING
Fig. 6
If the unit stops producing mist, even while there is water in the tank, the mineral
build-up may need to be removed from the heating element of the Power Unit.
How often you perform this special maintenance depends upon the hardness of the
water you are using and how quickly mineral deposits form on the interior surfaces
of the humidifier.
DO NOT clean the heating element under running water. Doing so may cause
damage or personal injury.
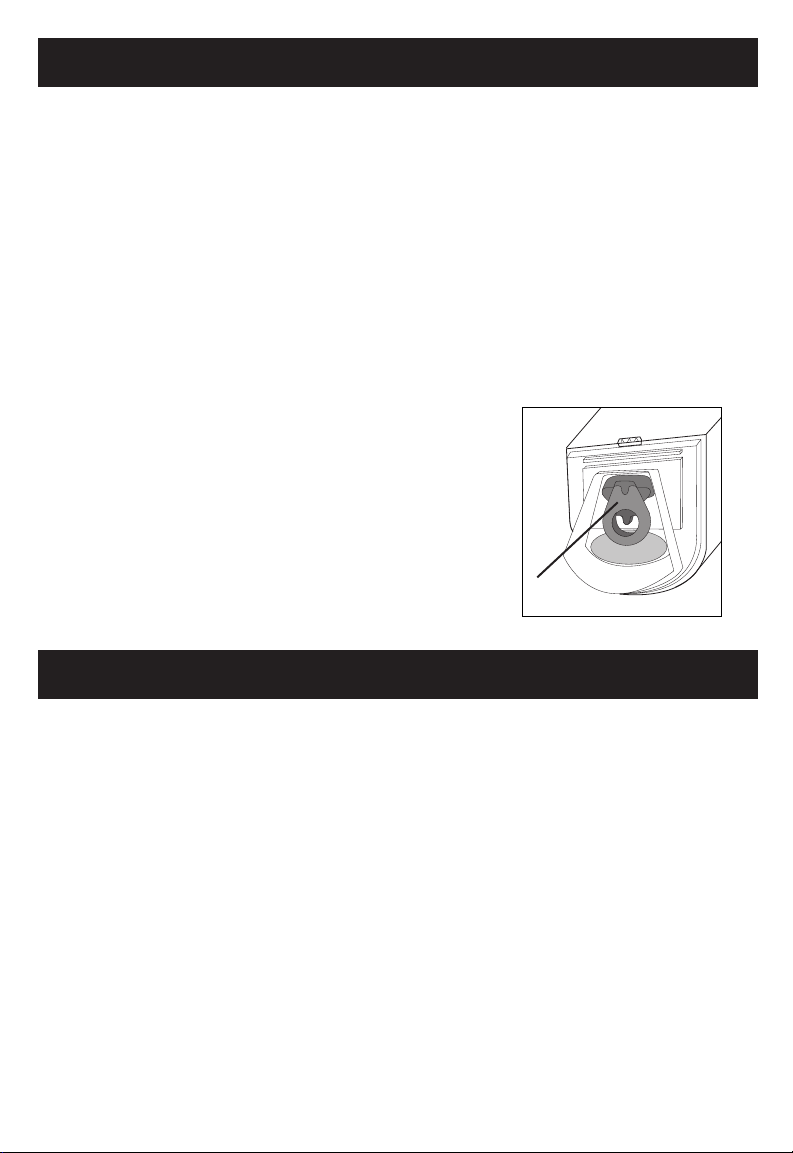
1. Unplug the humidifier. Allow at least 10 minutes for the unit to cool.
2. The heating element is on the bottom of the Power Unit. To access it, remove
the Power Unit by pulling on the Latch (found under the Water Tank) and lifting
the Power Unit (Fig. 6).
3. Turn it upside down. BE SURE IT HAS COOLED
SUFFICIENTLY.
4. Use a non-metallic brush or a soft, dry cloth to wipe
the outer surfaces of the heating element (Fig. 7).
Some deposit may remain, but should not interfere
with the operation of the unit.
END-OF-THE-SEASON CARE AND STORAGE
• Follow WEEKLY CLEANING instructions when the humidifier will not be used for at
least one week or more, or at the end of the season.
• Dry the humidifier completely before storing. DO NOT store with water inside the
Removable Tray, Base, or Water Tank.
• Pack the unit in its original carton and store in a cool, dry location.
• Before next use, remember to clean the humidifier.
CLEANING THE HEATING ELEMENT
Fig.7
Heating
Element
PRICE
If your local retailer is out of stock, replacement parts and care products may be ordered
directly. You can call 1-800-332-1110 to order with a MasterCard, Visa or Discover or fill
out the form below and mail it along with a check or money order (sorry no COD’s
accepted) to:
Honeywell
Consumer Service Center
250 Turnpike Road
Southborough, MA 01772
Please allow four to six weeks for delivery.
Massachusetts residents please add 5% Sales Tax.
Item Item No. Qty. U.S. CAN Total
Water Tank HWM-910-1 A $ 14.99 $ 21.75
Tank Cap HWM-910-2 A 5.00 7.25
Removable Tray HWM-910-3 15.00 21.75
Grille with Medicine Cup HWM-910-4 A 5.00 7.25
Power Unit HWM-910-5 A 20.00 29.00
DuraRinse®Humidifier Cleaner (32 oz.) AC-816 5.00 7.25
HAC555 19.99 29.00
SUBTOTAL
MA Residents add 5% Sales Tax / CAN Residents only add 7% GST
Shipping and Handling (US res. add $4.95 / CAN res. add $7.25)
TOTAL ENCLOSED
Name Check or Money Order Enclosed
Address Credit Card No.
Exp. Date
Day Time Phone Signature
03
0
5
0
1
0
0
D
R
Y
C
O
M
F
O
R
T
D
A
M
P
%
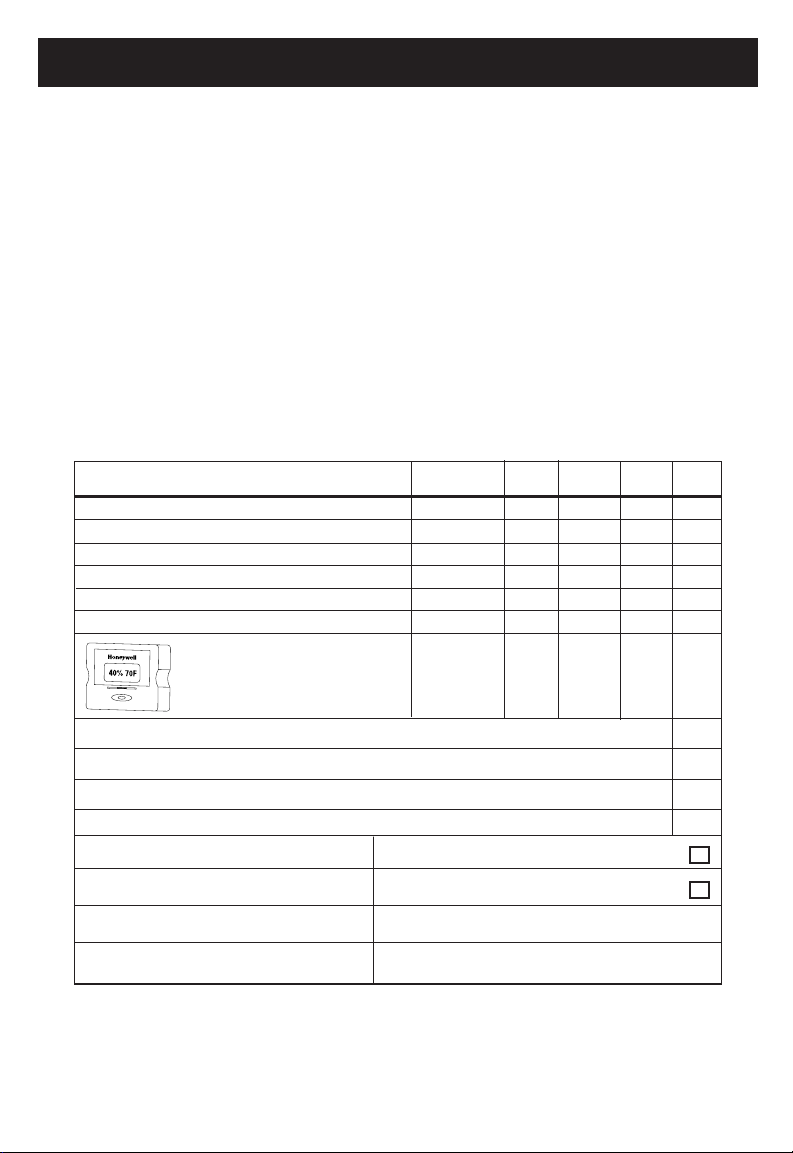
Digital Hygrometer and
Thermometer (F°/C°)
Measure room temperature and humidity
level. Free standing; can be used
anywhere in the room.
CARE PRODUCTS

Models HWM-910 Series are rated 2.30 Amps at 120V, 60 Hz.
NOTE: IF YOU EXPERIENCE A PROBLEM WITH YOUR HUMIDIFIER’S POWER UNIT,
PLEASE SEE THE WARRANTY FOR INSTRUCTIONS. PLEASE DO NOT ATTEMPT TO
OPEN OR REPAIR THE HUMIDIFIER YOURSELF. DOING SO WILL VOID THE
WARRANTY AND COULD CAUSE DAMAGE OR PERSONAL INJURY. IF THE
PROBLEM PERSISTS, PLEASE CONTACT THE CONSUMER SERVICE CENTER.
ELECTRICAL RATINGS
CUSTOMER ASSISTANCE
Mail questions or comments to:
Honeywell
Consumer Service Center
250 Turnpike Road
Southborough, MA 01772
e-mail: service@honeywell.com
Please be sure to specify model number.
Call us toll-free at:
1-800-332-1110
Or visit our website at:
www.honeywell.com/yourhome
 Loading...