


559-734-7451 800-367-5480 FAX 559-734-7460
INSTALLATION INSTRUCTIONS
REAR STABILIZER BAR
Thank you for purchasing a quality Hellwig Product.
PLEASE READ THIS INSTRUCTION SHEET COMPLETELY BEFORE STARTING YOUR INSTALLATION
TORQUE TABLE
BOLT THREAD DIAMETER : 3/8” = 20-30 ft. lbs. – 7/16” = 35-45 ft. lbs. – 1/2” = 50-70 ft. lbs. – 9/16” = 70-90 ft. lbs.
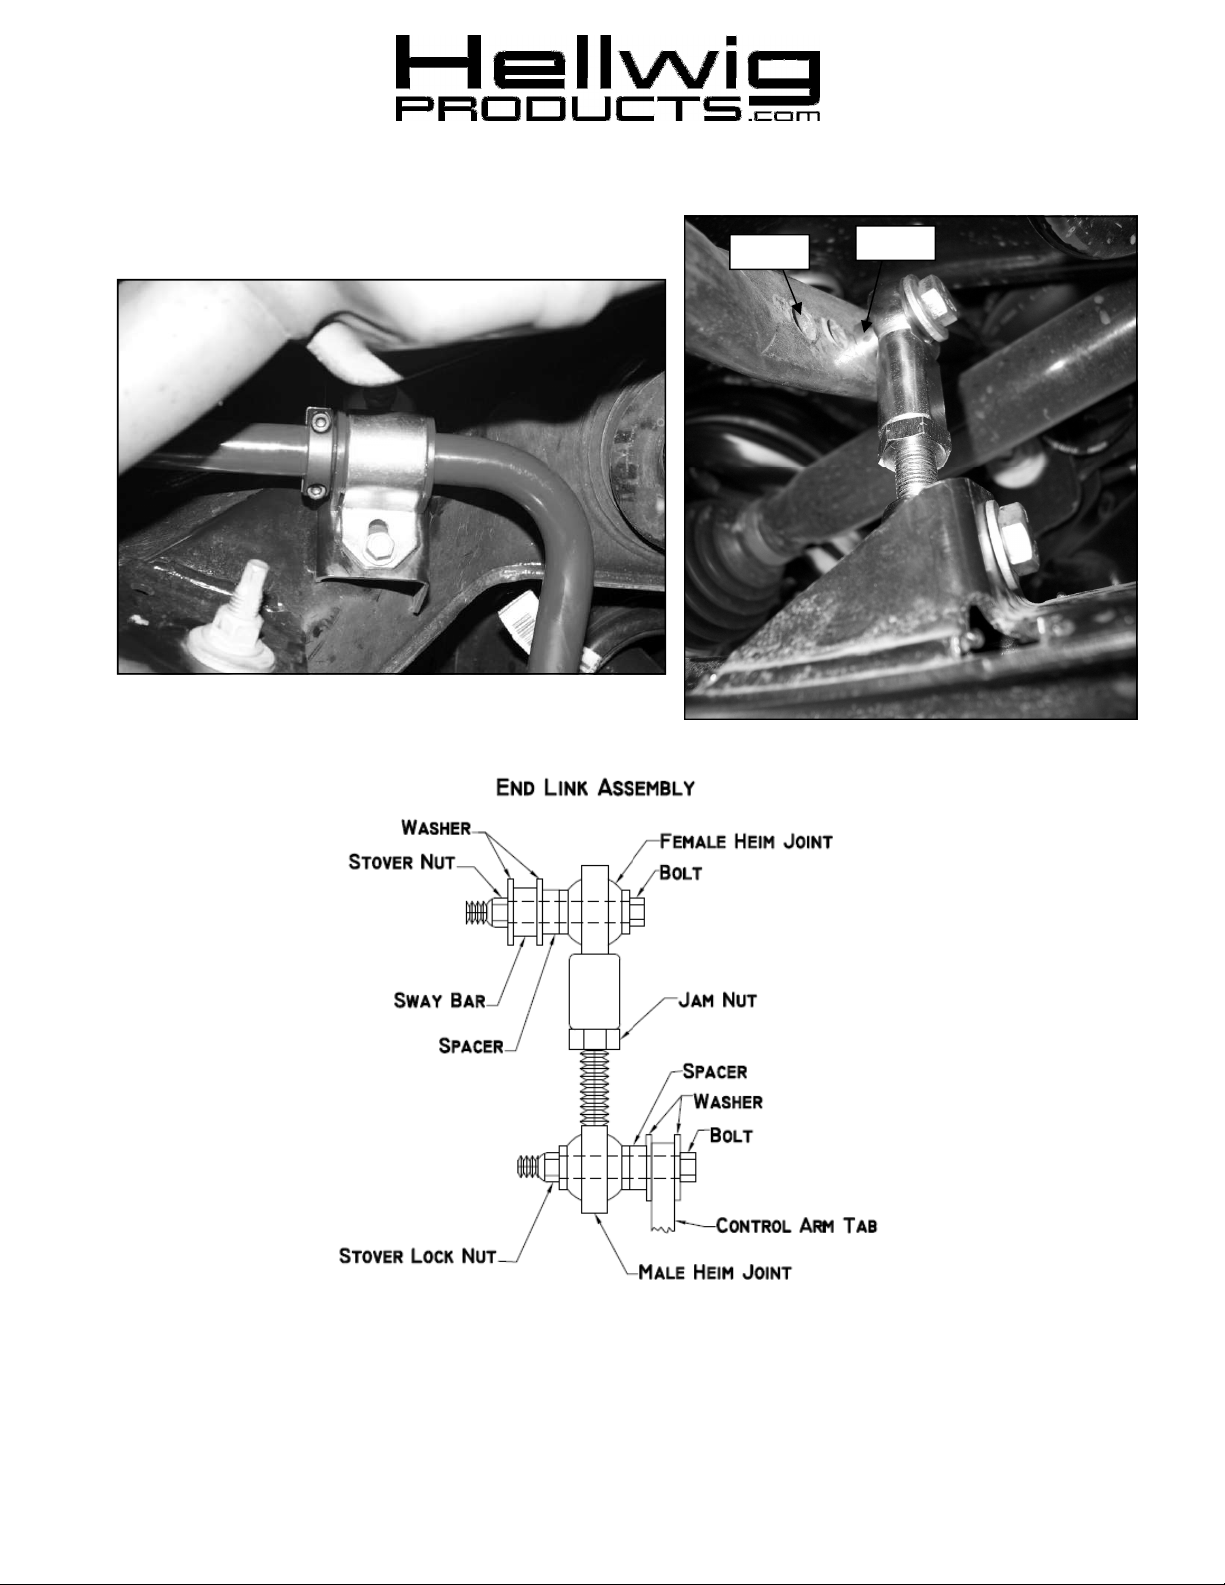
1.
Raise vehicle and place on jack stands. Make sure vehicle is secure and stable before
proceeding to next step.
2. Remove the factory end links and sway bar by maneuvering it away from the subframe
and exhaust. Depending on which rear bar your vehicle has, it may be necessary to remove the wheel on one side to slide out the factory sway bar. Make sure to keep the factory hardware since some of it will be reused in the install.
3. Lubricate inside of D-bushings using supplied lubricant and install on sway bar with
supplied U-plates.
4. Attach U-plates to subframe using factory hardware and with the sway bar arms pointing
forward.
5. Put the jam nut on the male rod end and then screw the rod ends together to make the
end link. Leave loose at this time.
6. Adjust the end link length so the sway bar arms are parallel to the ground and tighten
jam nut.
7. Bolt the end link with the female side up to both the sway bar and the tab on the control
arm using the bolts, washers, small spacer and lock nuts provided. The sway bar has
three holes, initially bolt the end link to the furthest out, softest hole.
8. Center sway bar on vehicle and attach collar clamps to sway bar inboard of the frame
bushings to keep sway bar centered in use.
9. Bounce the vehicle. Check for clearance on all undercarriage components. Drive the vehicle and recheck your installation - check for clearance on wires, exhaust, fuel and
brake lines.
10. After one week of driving check your installation. Recheck on a regular basis thereafter.
11. Once you have driven the vehicle and become used to its new handling characteristics,
you can move the end link to one of the other holes to fit your driving style. The further
in the stiffer the bar will be.
ATTENTION INSTALLER: BE SURE THAT THE CUSTOMER RECEIVES THIS INSTRUC-
TION SHEET, ALL IMORTANT NOTE CARDS AND THE WARRANTY FORM
55825 ( R-55825 ) 7/24/2012
559-734-7451 800-367-5480 FAX 559-734-7460
Stiffest
Softest
55825 ( R-55825 ) 7/24/2012
 Loading...