


Stove
Assembly:
Parts required for this step:
- Stove pieces (6)
Storage
PN 6686270000
1. Lay back panel flat on floor.
2. Press side panels into grooves on back panel.
3. Press grooves on front panel onto side panels.
4. Set upright, and |
side |
place shelf inside |
|
stove. |
|
5. Place top on stove |
|
and push down |
|
firmly. |
|
Quick, simple storage!
© 2007 Hasbro. All Rights Reserved. TM & ® denote U.S. Trademarks.
© 2007 Worlds Apart Ltd. All rights Reserved.
top
shelf back
side
front
Visiti it

 .com
.com
Questions? Call 1-800-PLAYSKL
™
A Part of the Dream Town™ Collection
Adult assembly required.
WARNING:
KEEP ALL FLAME
AND HEAT SOURCES
AWAY FROM THE
ROSE PETAL
COTTAGE FABRIC.
This Cottage meets theammability requirements of
CPAI-84. The fabric may burn if left in continuous contact with any ame source. The application of any foreign substance to the Cottage fabric may render the ame resistant properties ine ective.
Stove front and Cottage door contain magnets.
AG ES 3+
Thanks for purchasing the ROSE PETAL Cottage. Please read and retain these instructions.
68601
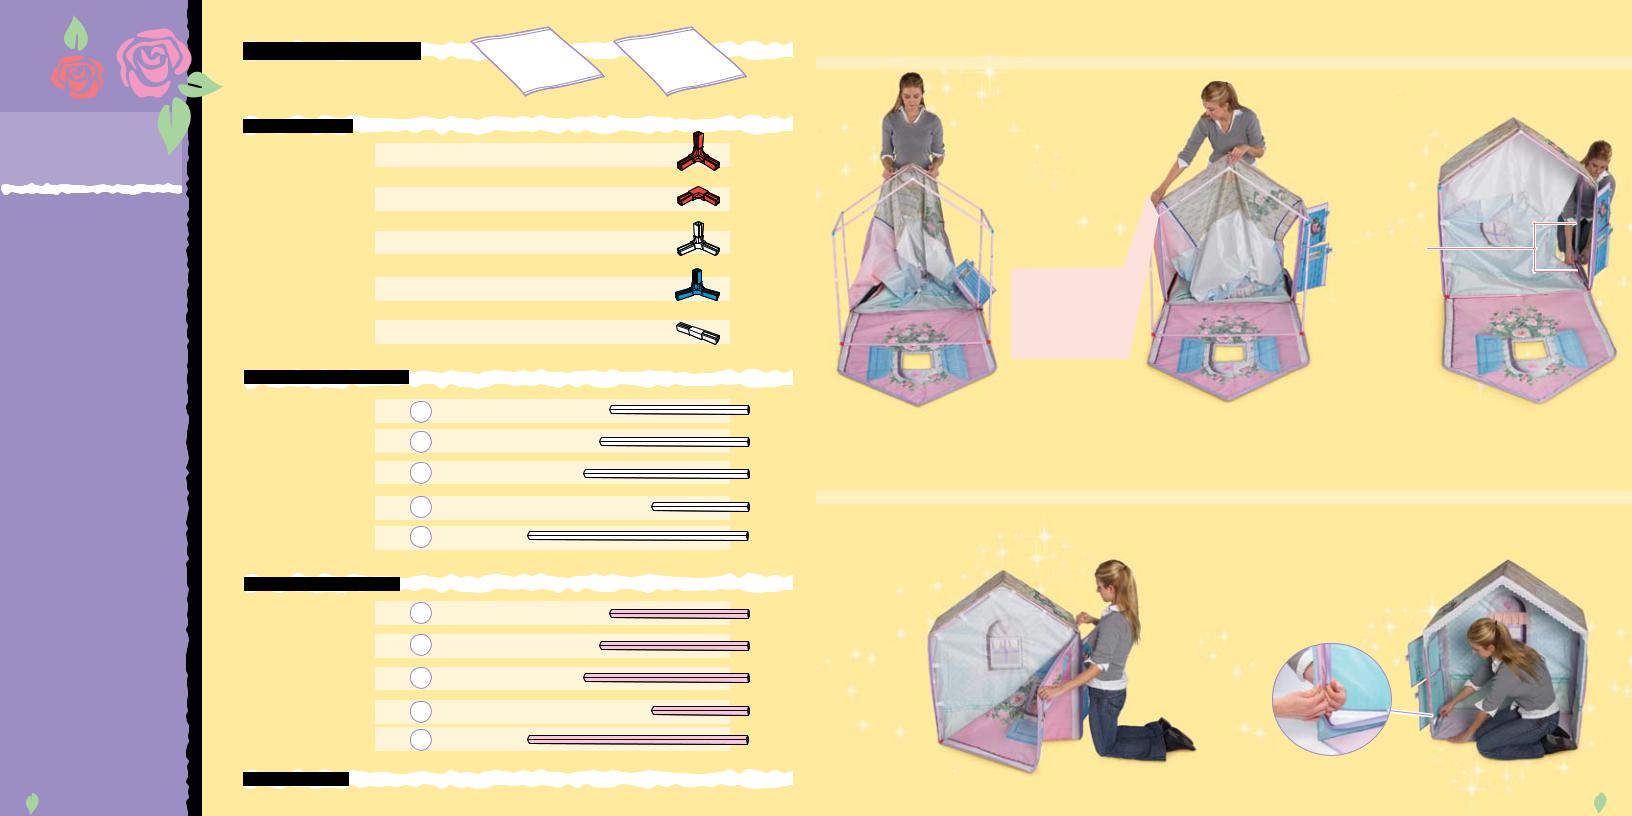
Includes:
1
2x Fabric Cottage Covers
CHIMNEY
30x Connectors
4 x front corner connectors (red)
4 x back corner connectors (red)
4 x roof peak connectors (white)
8 x top corner connectors (blue)
10 x straight connectors (white)
19x White Frame Tubes
4 x #1
5 x #2
2 x #6
4 x #7
4 x #8
19x Pink Frame Tubes
9 x #1
1 x #2
1 x #3
4 x #4
4 x #5
6x Stove Pieces
DOOR
7. Holding the roof peak in place, slide one side of the cover over the front of the frame.
8. Holding the peak in place, move to the other side of the frame. Slide that side of the cover over the frame.
Do not pull the cover all the way onto the frame at this time.
12. Zip up rear wall.
9. Work your way around the frame, sliding each corner of the cover on evenly.
Ensure that the red connectors slide in between zipper halves along the red seams.
13. Zip up door.
14. Adjust window hook-and-loop fastener attachments.
15. Be sure to align the fasteners for window.
6
 Loading...