

Page 1
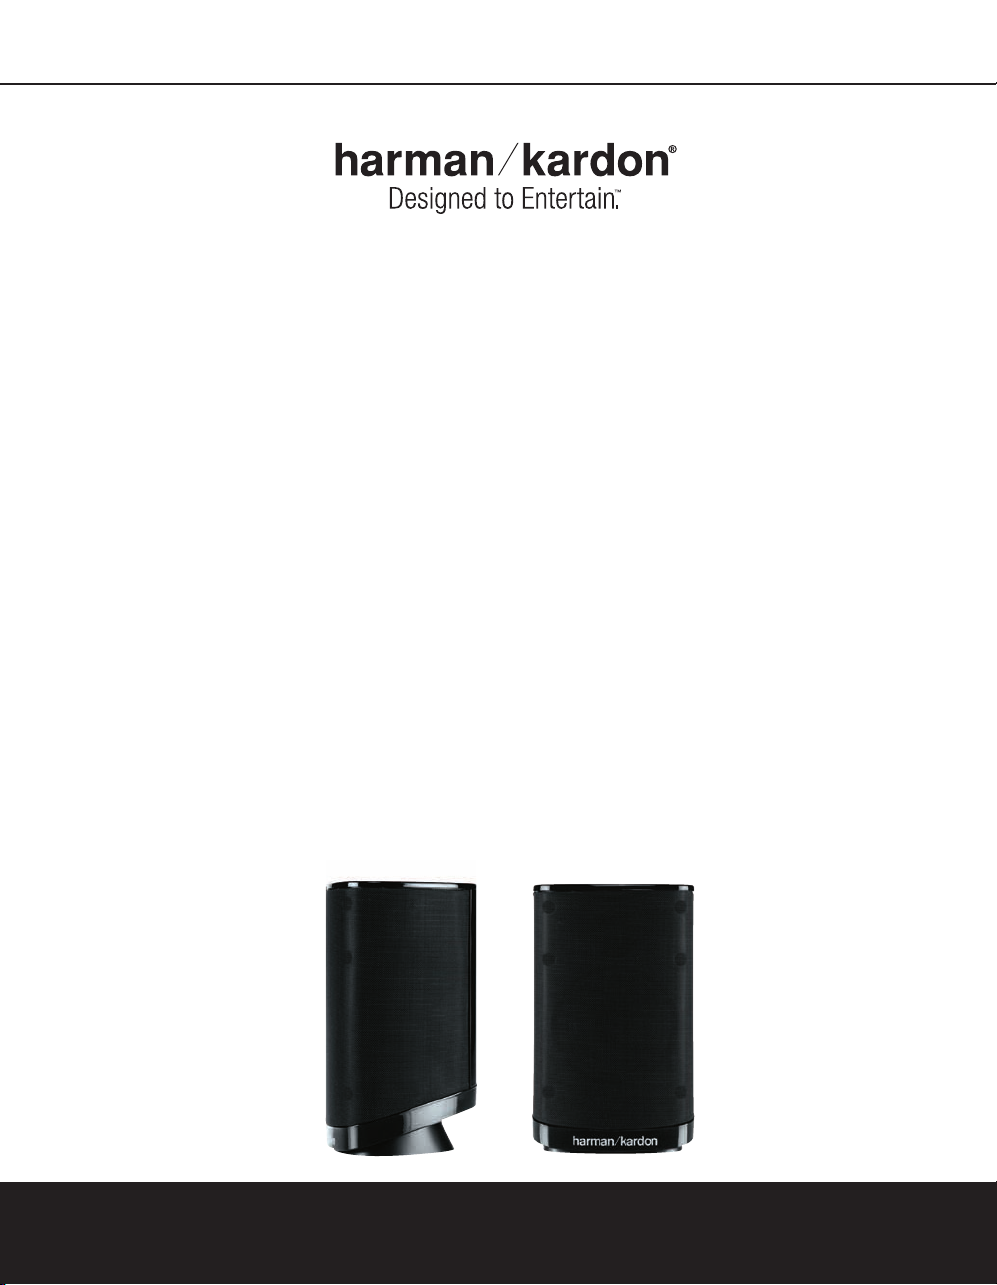
HKS 6
LOUDSPEAKERS
OWNER’S MANUAL
Page 2
INTRODUCTION
2 Introduction
3 Speaker Placement
3 Color-Coding System
4 Mounting Options
5 Speaker Connections
5 Connection Guide
5 Configuring Your Receiver
or Processor
6 Troubleshooting
7 Specifications
Introduction
Thank you for purchasing the Harman Kardon
HKS 6 loudspeakers, with which you are
about to begin many years of listening enjoyment. The HKS 6 has been custom-designed
to provide high-fidelity audio reproduction of
your favorite music and movie selections.The
HKS 6 loudspeakers are suitable for upgrading almost any 5.1 home theater system to
7.1 channels when used with a 7.1-channel
receiver or processor and any necessary
additional amplifiers.
To obtain maximum enjoyment from your new
speakers, we urge you to take a few minutes
to read through this manual. This will ensure
that connections to your receiver or amplifier
are made properly. In addition, a few minutes
spent understanding the setup options will
enable you to take advantage of all the power
and refinement the HKS 6 is able to deliver.
If you have any questions about this product,
its installation or operation, please contact
your dealer, the best local source of information.
Features
The HKS 6 is a pair of 2-way satellite
speakers for use in a home theater system.
The HKS 6 speakers are identical to the
satellites in the Harman Kardon HKTS 15
system, and are designed to be used with
the HKTS 15 in a complete 7.1-channel
home theater. Color-coded speaker cables
are included to facilitate installing the
speakers in the surround back left and
right positions.
Harman Kardon invented the high-fidelity
®
receiver more than 50 years ago.The
HKS 6 is a perfect complement to a
Harman Kardon receiver or any home
theater system.
n Matched Pair of Loudspeakers for
Use in Multichannel Applications
n Speakers Are Magnetically Shielded
for Flexible Placement Near Video
Monitors
n Three-Inch Driver
n One-Half-Inch Dome Tweeter
n Metal-Wire-Mesh Grille
n Elegant Cabinet With Black-Lacquer
Finish Includes Shelf Stands
n Includes Wall-Mount Brackets and
Color-Coded Speaker Cables
n May Be Used With Optional Floor
Stands
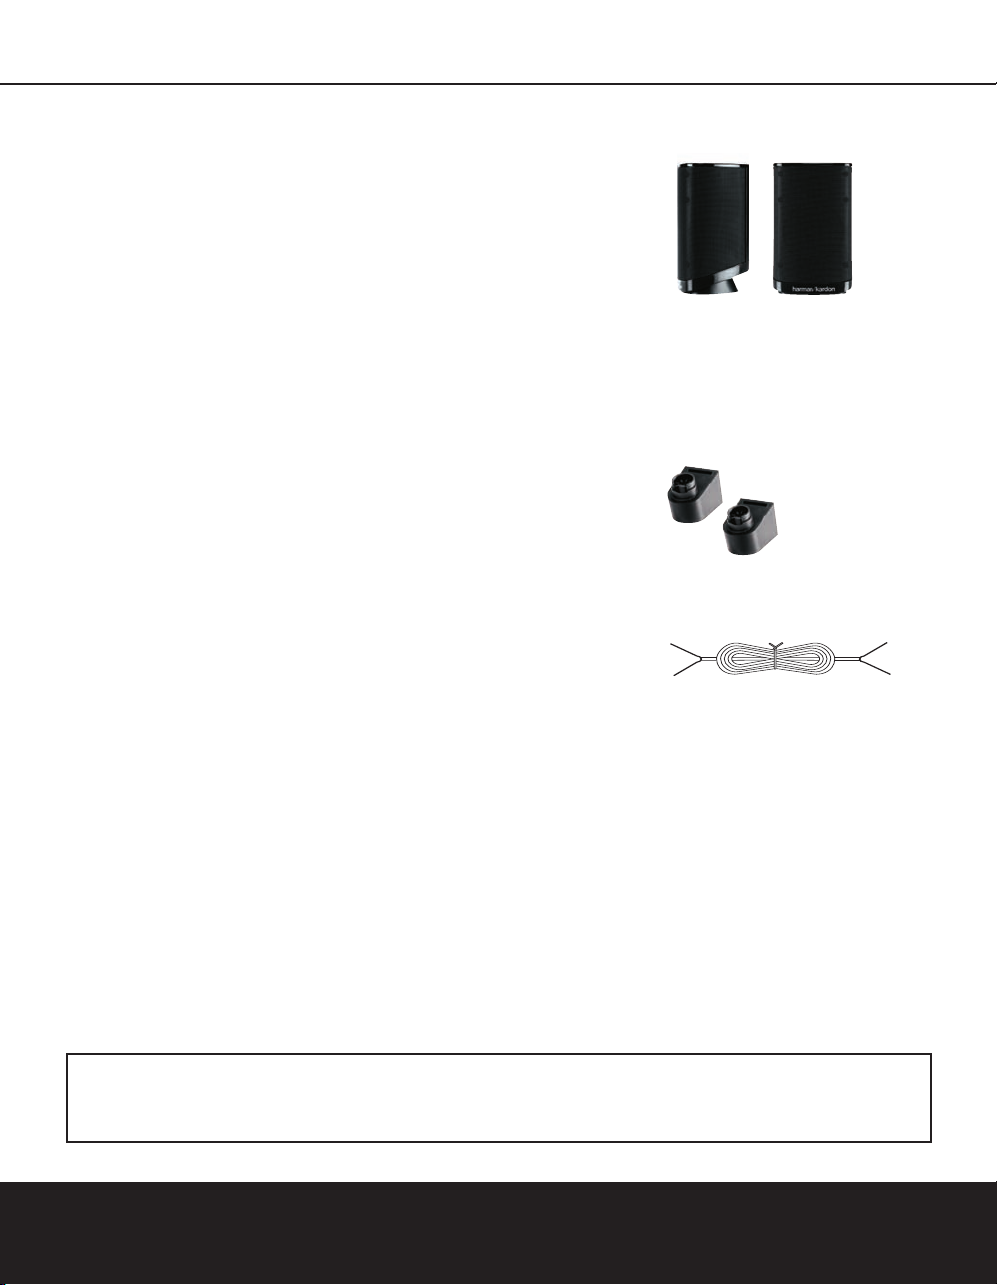
Included
• Two satellites for left/right front, surround
or surround back channels, shown with
included shelf stands
• Two leatherette coasters
Two wall-mount brackets
Two 40' speaker cables for connection
from receiver or amplifier to speakers
Please register your product on our Web site at www.harmankardon.com. Note: You’ll need the serial number of your
new home theater speaker system. At the same time, you can choose to be notified about our new products and/or
special promotions.
2 INTRODUCTION
Page 3
Color-Coding System
Center Speaker
Video Screen
F
ront Right
Speaker
Front Left
Speaker
Side Surround
Left Speaker
Back Surround
Left Speaker
Side Surround
Right Speaker
Back Surround
Right Speaker
90°
1
50°
90°
150°
30° 30°
he HKS 6 and the HKTS 15 use the
T
channel color-coding system established
by the Consumer Electronics Association to
make setting up your home theater speaker
system as easy as possible.Your system
includes a set of colored stickers that may
be placed near the speaker terminals of
each of the
included speaker wires have colored bands
at each end to assist you in connecting them
correctly. Use the brown sticker and cable for
the surround back left speaker, and the tan
sticker and cable for the surround back right
speaker. Although the wires included with
your HKS 6 speakers are color-coded for the
surround back left and right channels, they are
interchangeable with the wires supplied with
the HKTS 15 system.
satellite speaker is used for any of the front
or rear positions. (The center speaker and
powered subwoofer of the HKTS 15 are
already color-coded.)
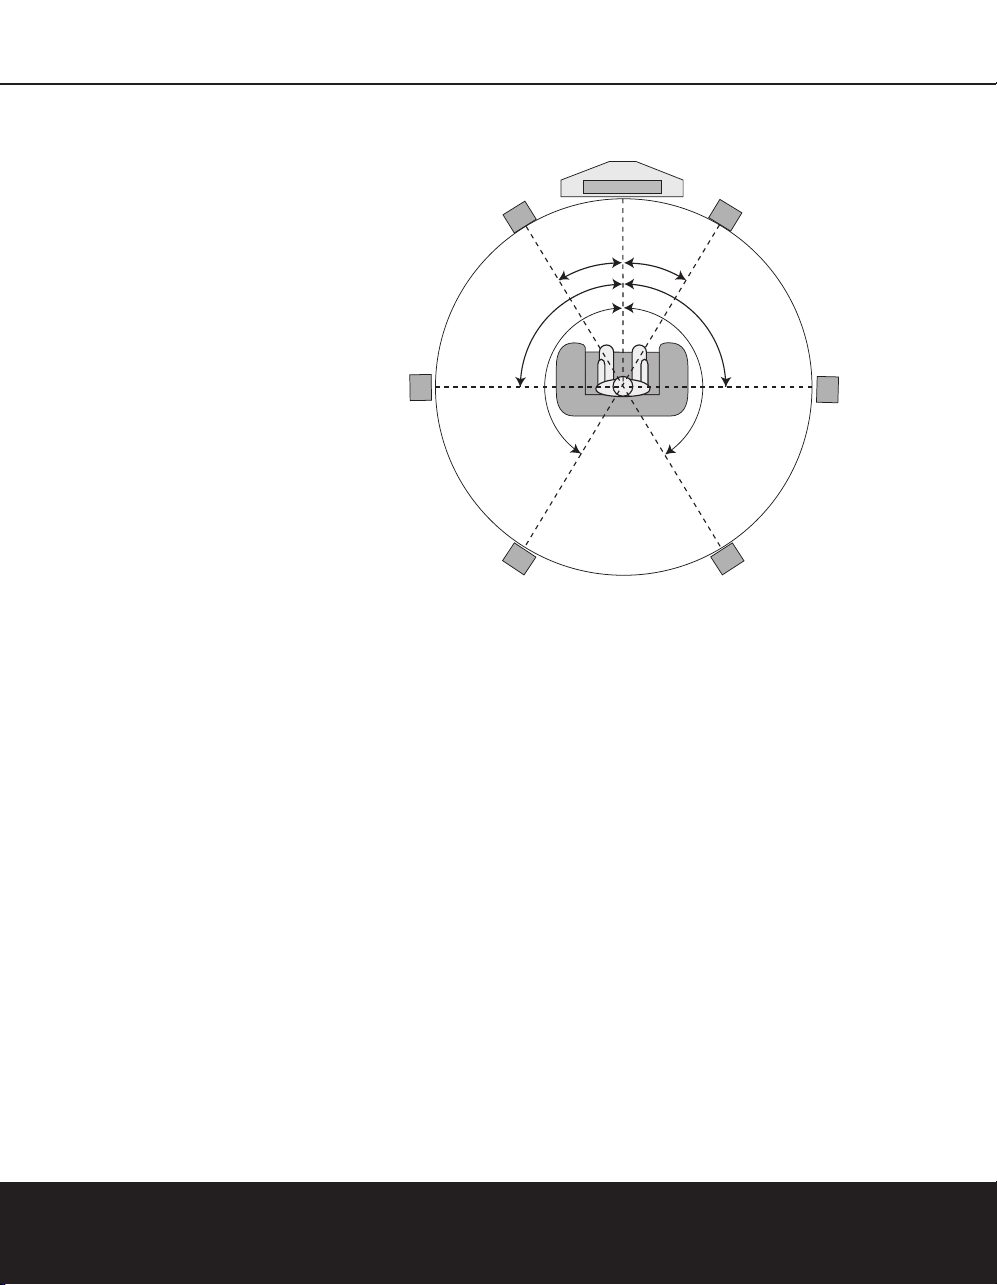
Before you begin to connect cables, it is
important to set up your speakers in their
correct locations in the room.
Optimally, the speakers should be placed
in a circle with the listening position at its
center. The distance from the listening
position to the video display forms the radius
of the circle.
The speakers should be angled so that they
directly face the listening position.
The front left and right speakers are placed
along the circle
the center speaker or video display and
angled toward the listener.
When used as a stereo pair, the speakers
should be placed the same distance from
each other as they are from the listener
satellite speakers. In addition, the
It doesn’t matter which
about 30 degrees from
,
.
It is best to place the front left/right and
center speakers as close to the same height
as possible, preferably about the same
height as the listener’s ears. In any event, the
center speaker should be no more than two
feet above or below the left/right speakers.
When the HKS 6 speakers are used
to upgrade an HKTS 15 system to a 7.1channel system, the side surround speakers
should be placed even with and facing the
listening position, 90 degrees from the
center speaker. The HKS 6 speakers are
then placed in the left and right surround
back speaker positions, 150 degrees from
the center speaker.
When setting up your system,
refer to the
diagram above instead of the diagram in the
HKTS 15 owner’s guide.
SPEAKER PLACEMENT
The subwoofer’s location is less critical, since
low-frequency sounds are omnidirectional.
Placing the subwoofer close to a wall or in
a corner will reinforce the low fre
and may create a “boomy” sound.
wish to experiment over time by placing
the subwoofer where the listener normally
sits and then walking around the room until
the low frequencies sound best. Place the
subwoofer in that spot.
quencies,
You may
SPEAKER PLACEMENT 3
Page 4

MOUNTING OPTIONS
W
all Plate
Remove
Stand
15mm
or 1/2"
W
all
23mm
or 3/4"
(M6–1.25P
o
r 1/4"–20)
Wall Plate
Remove
S
tand
1
5mm
or 1/2"
Wall
W
all Plate
Wires to Speaker
Terminal Cover
Overhead
View
Wire
From
Wall
Plate
2
3mm
o
r 3/4"
(
M6–1.25P
or 1/4"–20)
Wall
23mm
or 3/4"
(M6–1.25P
or 1/4"–20)
Wall
Wall Plate
2
3mm
o
r 3/4"
(M6–1.25P
or 1/4"–20)
Wall Plate
The satellite speakers may
be placed on a shelf. Place
each satellite speaker on
one of the supplied coasters
for added stability and to
protect your furniture.
Wall-Mounting
Unscrew the bolt that attaches the black
shelf stand to the bottom of the speaker.
Store the stand and bolt in a safe place
in case they are needed for a future
installation.
Mount the wallbracket attachment
plate on the wall in
the desired location.
If possible, position
the speakers so that the mounting screws
(not included; use size #8) may be
installed directly into a wooden wall stud.
If that is not possible, use optional wall
anchors that are rated to support at least 25
pounds.
The customer is responsible for
proper selection and use of mounting hard-
, available through hardware stores, to
ware
properly and safely wall-mount the speakers.
Referring to the speaker connection instructions on Page 5, thread the appropriate
speaker cable through the opening in the
bottom of the wall plate, and then through
the back of the bracket as shown in the
diagram. The bracket has two openings on
top: a round screw hole, and an
arc-shaped
he satellite speakers
T
may also be wallmounted using the
supplied brackets.
opening in front of it. The speaker
cable
should be threaded through the arc-shaped
opening, not the screw hole.
Attach the bracket to the wall plate by inserting the tab at the top of the wall plate into
the slot on top of the bracket and snapping
the bracket onto the wall plate.
Thread the cable through the round opening
in the terminal cover, and then insert the
speaker wires into the terminals on the
underside of the speaker, remembering to
observe the correct polarity (see Page 5).
Place the terminal cover over the opening
on the underside of the speaker so that it fits
flush against the speaker and covers the terminals, with its round opening exposing the
threaded insert.
The bracket fits through the
round opening in the terminal cover.
Insert the supplied bracket bolt up through
the bottom of the bracket and terminal
cover, and screw it into the threaded insert
on the underside of the speaker. The bolt
should be snug, but not so tight as to
prevent the bracket from pivoting.
The wall-mounted speaker may be pivoted
from side to side; however, the bracket is
not designed to tilt up or down, and
attempting to tilt it will damage the bracket
and possibly the wall, which would not be
covered by your warranty.
4 MOUNTING OPTIONS
Page 5

Connection Guide
Front-, Surround- or Surround Back-Channel
Receiver/Amplifier Output
Left Right
+
–
+
–
– + – +
Left Speaker Right Speaker
SPEAKER CONNECTIONS
IMPORTANT NOTE:
Before making speaker
connections, be certain that your receiver
or audio power amplifier is turned off and,
preferably, unplugged from its AC power
source.
Speakers and electronics terminals have
corresponding (+) and (–) terminals. Most
manufacturers of speakers and electronics,
including Harman Kardon, use red to
denote the (+) terminal and black for
the (–) terminal.
The (+) lead of the speaker wire is noted
with a stripe. It is important to connect
speakers identically: (+) on the speaker
(+) on the amplifier and (–) on the speaker
to (–) on the amplifier. Wiring “out of phase”
results in thin sound, weak bass and a poor
stereo image.
With the advent of multichannel surround
sound systems, connecting all of the speakers
in your system with the correct polarity
Newer Harman Kardon receivers conform to
the new CEA
®
standard and therefore use a
color other than red for the (+) terminal to
remains equally important in order to preserve
the proper ambience and directionality
program material.
indicate some speaker positions: e.g., blue
for surround left positive (+). However, the
black terminal will always be the negative (–)
connection. Please see the owner’s guide
for your Harman Kardon receiver for further
details.
To connect the supplied speaker wires to
the satellite speaker terminals located on
the bottom of each speaker, press the red or
black tab, insert the bare end of the wire into
the hole, and release the tab. Gently tug on
the wire to make sure that it is fully inserted.
Although the HKS 6 speakers may be placed
in the front, side surround or surround back
positions, the speaker wires provided with the
system have been color-coded brown for the
surround back left speaker and tan for the
surround back right speaker. When used with
the HKTS 15 system, it is recommended that
you maintain the color-coding system for all
cables to simplify setup
each wire in a channel pair (e
and to ensure that
,
.g., front left and
right) is the same length as its partner.
both
to
of the
Configuring Your Receiver or
Processor
Many receivers and processors feature programmable bass-management capability,
which allows the component to output the
lowest frequencies (the bass information)
exclusively to a separate subwoofer speaker,
or to a main speaker that is capable of handling low frequencies, or sometimes to both.
During the setup process you will be asked
to specify whether the speaker for a given
channel is “Large” or “Small.” The terms
“Large” and “Small” do not refer to physical
size, but to the size of the frequency range
the speaker is capable of handling. When
configuring your receiver or processor for
the channels where HKS 6 speakers are
being used, select “Small.”
SPEAKER CONNECTIONS 5
Page 6

TROUBLESHOOTING
YMPTOM SOLUTION
S
If there is no sound from • Check that the receiver/amplifier is on and a source is playing.
any of the speakers: • Check all wires and connections between receiver/amplifier and speakers. Make sure all wires are
connected. Make sure none of the speaker wires are frayed, cut or punctured, and that no wires
are touching each other.
• Review proper operation of your receiver/amplifier.
If there is no sound coming from • Check the “Balance” control on your receiver/amplifier.
one speaker: • Check all wires and connections between receiver/amplifier and speakers. Make sure all wires
are connected. Make sure none of the speaker wires are frayed, cut or punctured, and that
no wires are touching each other.
®
• In Dolby
• In Dolby Digital or DTS mode, check the speaker and channel output levels and adjust if needed.
• Turn off all electronics and switch the speaker in question with one of the other speakers that
Digital or DTS®mode, make sure that the receiver/processor is configured so that the
speaker in question is enabled.
is working correctly.Turn everything back on, and determine whether the problem is in the
same place: i.e., the speaker that was working previously now has no sound and the speaker
that was not working now sounds fine; or whether it has moved: i.e., the speaker that was
not working still has no sound and the speaker that was working is still fine. If the problem is in
the same place, the source of the problem is most likely with your receiver or amplifier, and you
should consult the owner’s manual
followed the speaker, consult your dealer for further assistance or, if that is not possible,
visit our Web site at www.harmankardon.com for further information.
for that product for further information. If the
problem has
If the system plays at low volumes but • Check all wires and connections between receiver/amplifier and speakers. Make sure all wires
shuts off as volume is increased: are connected. Make sure none of the speaker wires are frayed, cut or punctured, and that
no wires are touching each other.
• If more than one pair of main speakers is being used, check the minimum impedance
requirements of your receiver/amplifier.
If there is low (or no) bass output: • Make sure the polarities (+ and –) of the left and right speaker inputs are connected properly.
• Consider adding a powered subwoofer to your system.
If there is no sound from the • Check all wires and connections between receiver/amplifier and speakers. Make sure all wires
surround speakers: are connected. Make sure none of the speaker wires are frayed, cut or punctured, and that
no wires are touching each other.
• Review proper operation of your receiver/processor and its surround sound features.
• Make sure the movie or TV show you are watching is recorded in a surround sound mode.
If it is not, check to see whether your receiver/processor has other surround modes you may use.
• In Dolby Digital or DTS mode, make sure your receiver/processor is configured so that the
surround speakers are enabled.
• Review the operation of your DVD player and the jacket of your DVD to make sure that the
DVD features the desired Dolby Digital or DTS mode, and that you have properly selected that
mode using both the DVD player’s menu and the DVD disc’s menu.
6 TROUBLESHOOTING
Page 7

HKS 6 SPECIFICATIONS
Recommended Power
0 – 80 Watts
1
mpedance
I
8 Ohms nominal
Sensitivity
86dB @ 1 Watt/1 meter
Frequency Response
110Hz – 20kHz (–6dB)
Tweeter
One 1/2" dome, video-shielded
Midrange
One 3" driver, video-shielded
Dimensions (Product) (Shipping)
Height: 6-9/16" (167mm) 6-1/8" (156mm)
Width: 3-15/16" (100mm) 11-5/16" (287mm)
Depth: 3-5/8" (92mm) 10" (253mm)
Weight
1.65 lb (0.74kg) 5.1 lb (2.3kg)
Care and Cleaning
The loudspeaker enclosures may be cleaned by gently wiping with a soft cotton or microfiber cloth.
Do not use water or any liquid cleaners.
Features, specifications and appearance are subject to change without notice.
Harman Kardon is a registered trademark, and Designed to Entertain is a trademark, of Harman International Industries, Incorporated.
CEA is a registered trademark of the Consumer Electronics Association.
Dolby is a registered trademark of Dolby Laboratories.
DTS is a registered trademark of DTS, Inc.
SPECIFICATIONS 7
Page 8

250 Crossways P
516.255.HKHK (4545) F
©2006 Har
®
All rights reser
Printed 10/06
ark Drive,Woodbury, New York 11797
ax: 516.682.3523
man International Industries, Incorporated.
ved.
Part No. 406-000-05547-E
 Loading...