

Page 1

“MyVoice 600”
Bluetooth®Headset
00
137495
Operating Instructions
Bedienungsanleitung
Instrucciones de uso
Руководство по эксплуатации
Gebruiksaanwijzing
Manual de instruções
GB
D
E
RUS
NL
P
Page 2

A
3
2
1
5
6 4
B
C
Page 3

G Operating instruction
Controls and Displays
1. Multi-Function Key
2. Charging Socket
3. Status LED
4. Microphone
5. [VOLUME +] button
6. [VOLUME -] button
Thank you for choosing aHama product.
Take your time and read the following instructions and information
completely.Please keep these instructions in asafe place for
futurereference. If you sell the device, please pass these operating
instructions on to the new owner.
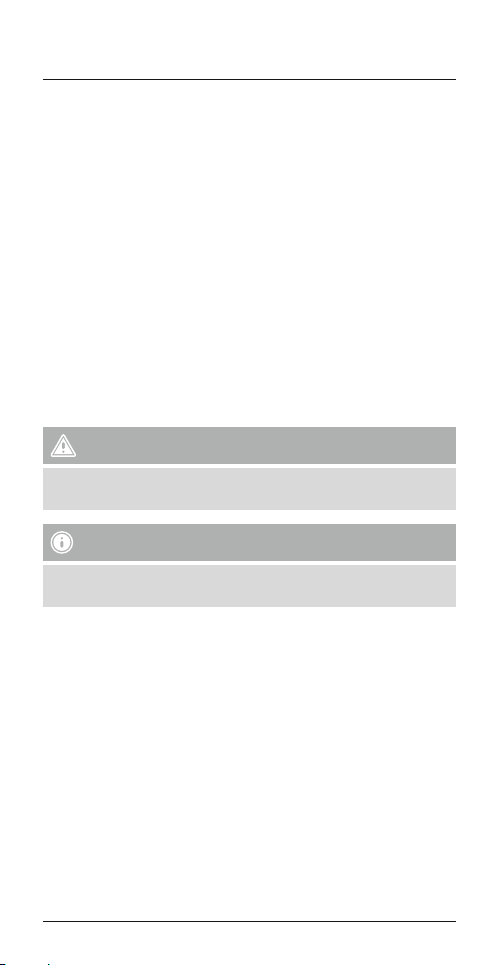
1. Explanation of Warning Symbols and Notes
Warning
This symbol is used to indicate safety instructions or to draw your
attention to specichazards and risks.
Note
This symbol is used to indicate additional information or important
notes.
2. Package Contents
• 1x MyVoice 600
• 1x USB charging cable (B)
• 2x Ear hooks (two sizes) (C)
• These operating instructions
3. Safety Notes
• The product is intended for private, non-commercial use only.
• Protect the product from dirt, moistureand overheating, and only
use it in adry environment.
• Do not allow yourself to be distracted by the product, for example
when driving avehicle or operating sports equipment. Always pay
attention to the surrounding tracand your environment.
• Do not drop the product and do not expose it to any major shocks.
• Do not operate the product outside the power limits given in the
specications.
Bluetooth
®
headset (A)
2
Page 4

• Do not open the device or continue to operate it if it becomes
damaged.
• Since the battery is integrated and cannot be removed, you will
need to dispose of the product as awhole. Do this in compliance
with the legal requirements.
• Dispose of packaging material immediately according to locally
applicable regulation.
• Do not modify the product in any way.Doing so voids the warranty.
Warning –Rechargeable battery
• Only use suitable charging devices or USB connections for
charging.
• As arule, do not charge devices or USB connections that are
defective and do not try to repair them yourself.
• Do not overcharge the product or allow the battery to completely
discharge.
• Avoid storing, charging or using batteries in extreme
temperatures.
• We suggest to fully charge the item for at least one time in two
months
4. Getting Started
• The headset is equipped with arechargeable battery.The battery
must be fully charged beforeusing the device for the rst time.
• Ensurethat the headset is switched off beforecharging it.
• Begin charging by connecting the included USB charging cable to
the charging socket (2) as well as to the USB connection of aPC/
laptop.
• Alternatively,you can charge the headset using asuitable USB
charger.Please refer to the operating instructions for the USB
charger used.
• The status LED (3) lights up constantly in redduring the charging
process.
• Charging the battery fully may take up to 2hours.
3
Page 5

Warning
Do not use the headset while it is charging.
• If the battery is fully charged, the status LED (3) will go out.
• Disconnect all cable and mains connections after use.
Note
If you have not used the item for afew month, it may take 15-30
minutes for the status LED (3) to redwhen charging.
5.Operation
Switching the headset on/off
• Turn On:
With the device off,press and hold the multi-function key (1) for
3seconds until you hear ashort tone. The LED indicator (3) lights
up blue and avoice says, ‘Power On’.
• Turn Off:
With the device on, press and hold the multi-function key (1) for
5seconds until you hear along tone. The LED indicator (3) briey
lights up redand avoice says, ‘Power Off’.
The rst time the device is turned on, pairing is automatically started
–see 5.1
Bluetooth
®
pairing.
5.1. Bluetooth®pairing
Note –Pairing
• Make surethat your
and
Bluetooth
®
is activated.
Bluetooth
-capable terminal device is on
®
• Formoreinformation, please refer to the operating instructions
of your terminal device.
• The headset and the terminal device should not be any further than
1metreaway from each other.The smaller the distance, the better.
• Ensurethe headset is off.
• Device off: Press and hold the multifunction button (1) for
approximately 5seconds until the status LED (3) begins to
alternate between redand blue and you hear avoice say,‘Pairing’.
The headset is searching for a
Bluetooth
®
connection.
4
Page 6

• Device on: Press and hold the multifunction button (1) for
approximately 3seconds until the status LED (3) begins to
alternate between redand blue and you hear avoice say,‘Pairing’.
The headset is searching for a
• Open the
until MyVoice 600 appears in the list of
Bluetooth
•
• Select MyVoice 600 and wait until the headset is listed as
connected in the
Note –
Bluetooth
®
devices found.
Bluetooth
Bluetooth
®
settings on your terminal device and wait
®
settings on your terminal device.
®
password
Bluetooth
®
connection.
Bluetooth
®
devices found.
If your terminal device requests apasswordtoestablish the
connection, enter 0000.
Note
If pairing was successful, the status LED (3) ashes blue slowly.A
voice says, ‘Connected’.
• Youcan now use the headset.
®
5.2. Automatic
Bluetooth
connection
(after successful pairing)
Note
• Make surethat your
and
Bluetooth
®
is activated.
Bluetooth
®
-capable terminal device is on
• Formoreinformation, please refer to the operating instructions
of your terminal device.
• Make surethat the headset is switched on.
• After the headset and terminal device have been paired, a
connection is established automatically.
• Youcan now use the headset.
Note
• If pairing was successful, the status LED (3) ashes blue slowly.
Avoice says, ‘Connected’.
• It may be necessary to change the settings on your terminal
device to enable it to automatically connect to the paired
headset.
5
Page 7

Note -Connection impaired
After the headset and terminal device have been paired, a
connection is established automatically.Ifthe
connection is not established automatically,check the following:
• Check the
whether MyVoice 600 is connected. If not, repeat the steps
listed under 5.1
Bluetooth
Bluetooth
®
settings of your terminal device to see
®
pairing.
Bluetooth
®
• Check whether obstacles areimpairing the range. If so, move the
devices closer together.
• The performance can also be affected by aweak battery.
5.3. Multi-pairing
• The headset can be paired with two terminal devices at once so
that, for example, you can use aprivate and abusiness mobile
phone simultaneously.
• To begin with, activate
Bluetooth
®
only on the rst terminal device
that you wish to pair.
• Pair the rst terminal device with the headset as described in 5.1
Bluetooth
®
Pairing.
• Switch off the headset as described in 5Operation (Switching
off).
• Activate
• Continue as decribed in 5.1
Bluetooth
®
on the second terminal device.
Bluetooth
®
Pairing.
• Once the second terminal device is connected, open the Bluetooth
settings on the rst terminal device and select MyVoice 600.
• Now both terminal devices areconnected to the headset.
5.4. Hands-free function
Note
• Note that support for certain key functions may vary depending
on your terminal device.
• Formoreinformation, please refer to the operating instructions
of your terminal device.
Youcan use the headset as ahands-free set for your mobile phone.
6
Page 8

Making acall
• Dial the number directly on your terminal device to make acall.
Voice-activated dialing
• Please check if your mobile phone supports voice dialing function.
• Hold the multifunction button (1) for approximately 2seconds.
Then you can hear ashort beep.
• The mobile phone’svoice control willbeactivated.
• Start acall as described in your mobile phone’soperating
instructions.
• Say the name of person you wish to call.
• If the voice tags arepaired to the related phone number stored in
your mobile phone, the number will be dialed.
Accepting calls
• Press the multifunction button (1) once to answer an incoming
call.
Rejecting an incoming call
• Brieypress the multifunction button (1) twice to reject an
incoming call. Youwill hear ashort tone.
Ending acall
• During acall, press the multifunction button (1) once to end the
call.
Redial
• Brieypress the multifunction button (1) twice to callthe last
number.
• Youwill hear ashort beep.
7
Page 9

5.5. Volume control
• Press the [VOLUME -] button (6) to reduce the volume.
• Press the [VOLUME +] button (5) to increase the volume.
5.6. Audio playback
• Press and hold [VOLUME -] button (6) to skip to the previous title.
• Press and hold [VOLUME +] button (5) to skip to the next title.
5.7. Disconnecting the headset
• Switch the headset off.
• Disconnect the headset via the
Bluetooth
®
settings on your
terminal device.
5.8. Battery level
• If the battery level is low (<25%), avoice says "low battery,
please charge" and the status LED (3) ashes slowly.
• Charge the headset as described in 4. Getting Started.
Note
However,the talk and standby times may vary when used with
different mobile phones or other compatible
Bluetooth
®
devices,
usage settings, usage styles and environments.
6. Care and Maintenance
Only clean this product with aslightly damp, lint-free cloth and do
not use aggressive cleaning agents. Make surethat water does not
get into the product.
8
Page 10

7. Warranty Disclaimer
Hama GmbH &CoKGassumes no liability and provides no
warranty for damage resulting from improper installation/mounting,
improper use of the product or from failuretoobserve the operating
instructions and/or safety notes.
8. Service and Support
Please contact Hama Product Consulting if you have any questions
about this product.
Hotline: +49 9091 502-115 (German/English)
Further support information can be found here:
www.hama.com
9. Technical Data
®
Headset
®
v5.0
®
Bluetooth
Supported proles
Frequency of
transmissions
technology
Bluetooth
Bluetooth
Bluetooth
A2DP V1.3, AVRCP V1.6,
®
HFP V1.7, HSP V1.2
2402 –2480 MHz
Range <10m
Battery
Battery type 3,7 Vlithium polymer
Min. Capacity 90 mAh
Input max. 5V 65mA
Charging time ~2.5 –3h
Standby ~180 h
Music Play Time ~6h
Talk Time ~7h
9
Page 11

10. Recycling Information
Note on environmental protection:
After the implementation of the European Directive 2012/19/
EU and 2006/66/EU in the national legal system, the
following applies: Electric and electronic devices as well as
batteries must not be disposed of with household waste.
Consumers areobliged by law to return electrical and electronic
devices as wellasbatteries at the end of their service lives to the
public collecting points set up for this purpose or point of sale.
Details to this aredened by the national law of the respective
country.This symbol on the product, the instruction manual or the
package indicates that aproduct is subject to these regulations. By
recycling, reusing the materials or other forms of utilising old devices/
Batteries, you aremaking an important contribution to protecting our
environment.
11. Declaration of Conformity
Hereby,Hama GmbH &CoKGdeclares that the radio
equipment type [00137495] is in compliance with Directive
2014/53/EU.The full text of the EU declaration of conformity
is available at the following internet address:
www.hama.com-> 00137495-> Downloads.
Frequency band(s) 2402 –2480 MHz
Maximum radio-frequency power
transmitted
3.82mW E.I.R.P.
10
Page 12
D Bedienungsanleitung
Bedienungselemente und Anzeigen
1. Multifunktionstaste
2. Ladebuchse
3. Status-LED
4. Mikrofon
5. [VOLUME +]-Taste
6. [VOLUME -]-Taste
Vielen Dank, dass Sie sich für ein Hama Produkt entschieden haben!
Nehmen Sie sich Zeit und lesen Sie die folgenden Anweisungen
und Hinweise zunächst ganz durch. Bewahren Sie diese
Bedienungsanleitung anschließend an einem sicheren Ort auf,um
bei Bedarf darin nachschlagen zu können. Sollten Sie das Gerät
veräußern, geben Sie diese Bedienungsanleitung an den neuen
Eigentümer weiter.
1. Erklärung von Warnsymbolen und Hinweisen
Warnung
Wirdverwendet, um Sicherheitshinweise zu kennzeichnen oder um
Aufmerksamkeit auf besondereGefahren und Risiken zu lenken.
Hinweis
Wirdverwendet, um zusätzlich Informationen oder wichtige
Hinweise zu kennzeichnen.
2. Packungsinhalt
• 1x
• 1x USB-Ladekabel (B)
• 2x Ohrbügel (zwei Größen) (C)
• diese Bedienungsanleitung
3. Sicherheitshinweise
• Das Produkt ist für den privaten, nicht-gewerblichen
Haushaltsgebrauch vorgesehen.
• Schützen Sie das Produkt vor Schmutz, Feuchtigkeit und
Überhitzung und verwenden Sie es nur in trockenen Umgebungen.
• Lassen Sie sich auf der Fahrt mit einem Kraftfahrzug oder
Sportgerät nicht durch Ihr Produkt ablenken und achten Sie auf die
Verkehrslage und IhreUmgebung.
Bluetooth
®
-Headset MyVoice600 (A)
11
Page 13

• Lassen Sie das Produkt nicht fallen und setzen Sie es keinen
heftigen Erschütterungen aus.
• Betreiben Sie das Produkt nicht außerhalbseiner in den technischen
Daten angegebenen Leistungsgrenzen.
• Öffnen Sie das Produkt nicht und betreiben Sie es bei
Beschädigungen nicht weiter.
• Der Akku ist fest eingebaut und kann nicht entfernt werden,
entsorgen Sie das Produkt als Ganzes gemäß den gesetzlichen
Bestimmungen.
• Entsorgen Sie das Verpackungsmaterial sofort gemäß den örtlich
gültigen Entsorgungsvorschriften.
• Nehmen Sie keine Veränderungen am Gerät vor.Dadurch verlieren
sie jegliche Gewährleistungsansprüche.
Warnung –Akku
• Verwenden Sie nur geeignete Ladegeräte oder USB-Anschlüsse
zum Auaden.
• Verwenden Sie defekte Ladegeräte oder USB-Anschlüsse generell
nicht mehr und versuchen Sie nicht, diese zu reparieren.
• Überladen oder tiefentladen Sie das Produkt nicht.
• Vermeiden Sie Lagerung, Laden und Benutzung bei extremen
Temperaturen.
• Laden Sie bei längerer Lagerung regelmäßig (mind. vierteljährig)
nach.
4. Inbetriebnahme
• Das Headset verfügt über einen wieder auadbaren Akku. Vorder
ersten Anwendung muss der Akku vollständig aufgeladen werden.
• Stellen Sie sicher,dass das Headset vor dem Auaden ausgeschaltet
ist.
• Starten Sie den Ladevorgang, indem Sie das beiliegende USBLadekabel an die Ladebuchse (2) und an den USB-Anschluss eines
PCs/Notebooks anschließen. Alternativ können Sie das Headset
über ein geeignetes USB-Ladegerät laden. Beachten Sie hierzu die
Bedienungsanleitung des verwendeten USB-Ladegeräts.
• Die Status-LED (3) leuchtet während des Ladevorgangs dauerhaft
rot.
• Es kann bis zu 2Stunden dauern, bis der Akku vollständig geladen
ist.
12
Page 14

Warnung
Verwenden Sie das Headset nicht während des Ladevorgangs!
• Ist der Akku vollständig geladen, erlischt die Status-LED (3).
• Trennen Sie anschließend alle Kabel- und Netzverbindungen.
Hinweis
Wenn Sie das Gerät einige Monate lang nicht verwendet haben,
kann es 15-30 Minuten dauern, bis die Status-LED (3) beim
Ladevorgang rotleuchtet.
5.Betrieb
Ein-/ Ausschalten des Headsets
• Einschalten:
Halten Sie im ausgeschalteten Zustand die Multifunktionstaste
(1) 3Sekunden lang gedrückt, bis Sie einen kurzen Signalton hören.
Die LED-Anzeige (3) leuchtet blau auf und die Sprachinformation
„Power On“ ertönt.
• Ausschalten:
Halten Sie im eingeschalteten Zustand die Multifunktionstaste
(1) 5Sekunden lang gedrückt, bis Sie einen langen Signalton
hören. Die LED-Anzeige (3) leuchtet kurz rotauf und die
Sprachinformation „Power Off“ ertönt.
Beim ersten Einschalten wirdautomatisch das Pairing gestartet –
siehe 5.1.
5.1.
Bluetooth
Bluetooth
®
Erstverbindung (Pairing).
®
Erstverbindung (Pairing)
Hinweis –Pairing
• Stellen Sie sicher,dass Ihr
eingeschaltet ist und dass
Bluetooth
Bluetooth
-fähiges Endgerät
®
aktiviert ist.
®
• Beachten Sie hierzu die Bedienungsanleitung Ihres Endgerätes.
• Das Headset und das Endgerät sollten nicht weiter als 1Meter
voneinander entfernt sein. Je geringer der Abstand, desto besser.
• Vergewissern Sie sich, dass das Headset ausgeschaltet ist.
• Gerät aus: Drücken und halten Sie die Multifunktionstaste
(1) ca. 5Sekunden, bis die Status-LED (3) abwechselnd rotund
blau aueuchtet und die Sprachinformation „Pairing“ ertönt. Das
Headset sucht nach einer
Bluetooth
®
Verbindung.
13
Page 15

• Gerät an: Drücken und halten Sie die Multifunktionstaste
(1) ca. 3Sekunden, bis die Status-LED (3) abwechselnd rotund
blau aueuchtet und die Sprachinformation „Pairing“ ertönt. Das
Headset sucht nach einer
• Öffnen Sie auf Ihrem Endgerät die
warten Sie bis in der Liste der gefundenen
Bluetooth
®
Verbindung.
Bluetooth
®
Einstellungen und
®
Bluetooth
Geräte
MyVoice600 angezeigt wird.
• Wählen Sie MyVoice 600 aus und warten Sie bis das Headset
als verbunden in den
Bluetooth
®
Einstellungen Ihres Endgerätes
angezeigt wird.
Hinweis –
Bluetooth
®
Passwort
Manche Endgeräte benötigen für die Einrichtung der Verbindung
mit einem anderen
Bluetooth
®
Gerät ein Passwort.
• Geben Sie für die Verbindung das Passwort 0000 ein, wenn Sie
zur Eingabe von Ihrem Endgerät aufgefordert werden.
Hinweis
Wenn die Kopplung erfolgreich war,blinkt die blaue Status-LED
(3) langsam. Es ertönt die Sprachinformation „Connected“.
• Sie können das Headset nun verwenden.
5.2. Automatische
Bluetooth
®
Verbindung
(nach bereits erfolgtem Pairing)
Hinweis
®
• Stellen Sie sicher,dass Ihr
eingeschaltet ist und dass
Bluetooth
Bluetooth
-fähiges Endgerät
®
aktiviert ist.
• Beachten Sie hierzu die Bedienungsanleitung Ihres Endgerätes.
• Vergewissern Sie sich, dass das Headset eingeschaltet ist.
• Nach einer erfolgreichen Erstverbindung erfolgt die Verbindung
automatisch.
• Sie können das Headset nun verwenden.
14
Page 16

Hinweis
• Wenn die Kopplung erfolgreich war,blinkt die blaue Status-LED
(3) langsam. Es ertönt die Sprachinformation „Connected“.
• Gegebenenfalls müssen Sie die Einstellung auf dem Endgerät
vornehmen, um die automatische Verbindung mit dem
gekoppelten Headset zuzulassen.
Hinweis -Verbindung beeinträchtigt
Nach einer erfolgr
automatisch. Sollte sich die
automatisch wiederherstellen, prüfen Sie die folgenden Punkte:
• Kontrollieren Sie in den
eichen Erstverbindung erfolgt die V
Bluetooth
Bluetooth
®
Verbindung nicht
®
Einstellungen des
Endgerätes, ob MyVoice 600 verbunden ist. Wenn nicht,
wiederholen Sie die unter 5.1.
Bluetooth
erbindung
®
Erstverbindung
genannten Schritte.
• Kontrollieren Sie, ob Hindernisse die Reichweite beeinträchtigen.
Wenn ja, positionieren Sie die Geräte näher zueinander.
• Auch bei schwacher Batterie kann die Leistung beeinträchtigt
sein.
5.3. Multipairing
• Sie können das Headset mit zwei Endgeräten gleichzeitig koppeln,
um diese, z.B. privates und geschäftliches Mobiltelefon, parallel
nutzen zu können.
• Aktivieren Sie
Bluetooth
koppeln möchten.
• Koppeln Sie das erste Endgerät –wie in 5.1.
®
zunächst nur am ersten Endgerät, das Sie
®
Bluetooth
Pairing
(Erstverbindung) beschrieben –mit dem Headset.
• Schalten Sie das Headset –wie in 5. Betrieb (Ausschalten)
beschrieben –aus.
• Aktivieren Sie auch beim zweiten Endgerät
• Gehen Sie weiter wie in 5.1.
Bluetooth
®
Pairing
Bluetooth
®
.
(Erstverbindung) beschrieben, vor.
• Nach erfolgreicher Verbindung des zweiten Endgerätes öffnen Sie
auf dem zuerst verbundenen Endgerät die
Bluetooth
®
Einstellungen
und wählen Sie MyVoice600 aus.
• Es sind beide Endgeräte mit dem Headset verbunden.
15
Page 17

5.4. Freisprechfunktion
Hinweis
• Beachten Sie, dass die Unterstützung einiger Funktionen von
Ihrem Endgerät abhängig ist.
• Beachten Sie hierzu die Bedienungsanleitung Ihres Endgerätes.
Es besteht die Möglichkeit, das Headset wie eine
Freisprecheinrichtung für Ihr Mobiltelefon zu verwenden.
Anruf tätigen
• Wählen Sie die Nummer direkt über Ihr Endgerät, um einen Anruf
zu tätigen.
Sprachwahlfunktion
• Prüfen Sie, ob Ihr Mobiltelefon Sprachwahl unterstützt.
• Halten Sie die Multifunktionstaste (1) für ca. 2Sekunden
gedrückt. Sie hören einen kurzen Signalton.
• Auf Ihrem Mobiltelefon wirddie Sprachsteuerung geöffnet.
• Um einen Anruf zu tätigen, gehen Sie wie in der
Bedienungsanleitung Ihres Mobiltelefons beschrieben vor.
• Nennen Sie den Namen der Person, die Sie anrufen möchten.
• Wenn die Spracheinträge mit der zugehörigen Telefonnummer,die
auf Ihrem Mobiltelefon gespeichert ist, gekoppelt sind, wirddie
Nummer gewählt.
Anruf entgegennehmen
• Drücken Sie einmal die Multifunktionstaste (1), um einen
eingehenden Anruf anzunehmen.
Eingehenden Anruf abweisen
• Zum Ablehnen eines eingehenden Anrufs drücken Sie zwei Mal kurz
die Multifunktionstaste (1). Sie hören einen kurzen Signalton.
Gespräch beenden
• Drücken Sie während des Gesprächs einmal die
Multifunktionstaste (1), um den Anruf zu beenden.
16
Page 18

Wahlwiederholung
• Drücken Sie zweimal kurz die Multifunktionstaste (1), um die
Nummer des letzten Anrufs anzurufen.
• Sie hören einen kurzen Signalton.
5.5. Lautstärkeregelung
• Drücken Sie die [VOLUME -] -Taste (6), um die Lautstärke zu
reduzieren.
• Drücken Sie die [VOLUME +] -Taste (5), um die Lautstärke zu
erhöhen.
5.6. Audio-Wiedergabe
• Halten Sie die [VOLUME -] -Taste (6) gedrückt, um zum
vorherigen Titel zu wechseln.
• Halten Sie die [VOLUME +] -Taste (5) gedrückt, um zum nächsten
Titel zu wechseln.
5.7. Trennen des Headsets
• Schalten Sie das Headset aus.
• Trennen Sie das Headset über die
Bluetooth
®
Einstellungen Ihres
Endgerätes.
5.8. Akkukapazität
• Bei niedrigem Akkustand (<25 %) erfolgt die Sprachansage "low
battery,please charge",und die Status-LED (3) blinkt langsam.
• Laden Sie das Headset –wie in 4. Inbetriebnahme beschrieben
–auf.
Hinweis
Die verfügbareGesprächs- bzw.Standby-Zeit hängt jedoch vom
jeweils verwendeten Mobiltelefon oder sonstigen kompatiblen
Bluetooth
®
-Geräten sowie von den Benutzereinstellungen,
Benutzerpräferenzen und jeweiligen Umgebungsbedingungen ab.
6. Wartung und Pflege
Reinigen Sie dieses Produkt nur mit einem fusselfreien, leicht
feuchten Tuch und verwenden Sie keine aggressiven Reiniger.Achten
Sie darauf,dass kein Wasser in das Produkt eindringt.
17
Page 19

7. Haftungsausschluss
Die Hama GmbH &CoKGübernimmt keinerlei Haftung oder
Gewährleistung für Schäden, die aus unsachgemäßer Installation,
Montage und unsachgemäßem Gebrauch des Produktes oder
einer Nichtbeachtung der Bedienungsanleitung und/oder der
Sicherheitshinweise resultieren.
8. Service und Support
Bitte wenden Sie sich bei Fragen zum Produkt gerne an die HamaProduktberatung.
Hotline: +49 9091 502-115 (Deu/Eng)
WeitereSupportinformationen nden sie hier: www.hama.com
9. Technische Daten
®
Bluetooth
®
Unterstützte Prole
Frequenz für die
®
Bluetooth
-Übertragugnen
Bluetooth
Technologie
A2DP V1.3, AVRCP V1.6,
HFP V1.7, HSP V1.2
2402 –2480 MHz
Bluetooth
Headset
®
v5.0
Reichweite <10m
Akku
Batterietyp 3,7 VLi-Polymer
Min. Kapazität 90 mAh
Stromaufnahme max. 5V 65mA
Auadezeit ~2,5 –3h
Ruhezustand ~180 h
Musikzeit ~6h
Gesprächszeit ~7h
18
Page 20

10. Entsorgungshinweise
Hinweis zum Umweltschutz:
Ab dem Zeitpunkt der Umsetzung der europäischen
Richtlinien 2012/19/EU und 2006/66/EG in nationales Recht
gilt folgendes: Elektrische und elektronische Geräte sowie
Batterien dürfen nicht mit dem Hausmüllentsorgt werden.
Der Verbraucher ist gesetzlich verpichtet, elektrische und
elektronische Geräte sowie Batterien am Ende ihrer Lebensdauer an
den dafür eingerichteten, öffentlichen Sammelstellen oder an die
Verkaufsstelle zurückzugeben. Einzelheiten dazu regelt das jeweilige
Landesrecht. Das Symbol auf dem Produkt, der Gebrauchsanleitung
oder der Verpackung weist auf diese Bestimmungen hin. Mit der
Wiederverwertung, der stoichen Verwertung oder anderen Formen
der Verwertung von Altgeräten/Batterien leisten Sie einen wichtigen
Beitrag zum Schutz unserer Umwelt.
11. Konformitätserklärung
Hiermit erklärt die Hama GmbH &CoKG, dass der
Funkanlagentyp [00137495] der Richtlinie 2014/53/EU
entspricht. Der vollständige Text der EUKonformitätserklärung ist unter der folgenden Internetadresse
verfügbar:
www.hama.com-> 00137495-> Downloads.
Frequenzband/
Frequenzbänder
Abgestrahlte maximale
Sendeleistung
2402 –2480 MHz
3,82mW E.I.R.P.
19
Page 21

E Instrucciones de uso
Elementos de manejo eindicadores
1. Tecla multifunción
2. Hembrilla de carga
3. LED de estado
4. Micrófono
5. Tecla [VOLUME +]
6. Tecla [VOLUME -]
Le agradecemos que se haya decidido por un producto de Hama.
Tómese tiempo yléase primerolas siguientes instrucciones e
indicaciones. Después, guarde estas instrucciones de manejo en un
lugar seguroparapoder consultarlas cuando sea necesario. Si vende el
aparato, entregue estas instrucciones de manejo al nuevo propietario.
1. Explicación de los símbolos de aviso ydelas indicaciones
Aviso
Se utiliza paracaracterizar las indicaciones de seguridad opara
llamar la atención sobrepeligros yriesgos especiales.
Nota
Se utiliza paracaracterizar informaciones adicionales o
indicaciones importantes.
Contenido del paquete
2.
• 1auriculares
• 1cable de carga USB (B)
• 2auriculares con gancho de oreja (dos tamaños) (C)
• Estas instrucciones de manejo
Bluetooth
®
MyVoice600 (A)
3. Instrucciones de seguridad
• El producto es paraeluso doméstico privado, no comercial.
• Proteja el producto de la suciedad, la humedad yel
sobrecalentamiento yutilícelo sólo en recintos secos.
• Durante los desplazamientos con un vehículo oaparato deportivo,
no se distraiga con el producto ypreste atención al tráco yasu
entorno.
• No deje caer el producto ni lo someta asacudidas fuertes.
• No opereelproducto fueradelos límites de potencia indicados en
los datos técnicos.
20
Page 22

• No abraelproducto ynolosiga operando de presentar deterioros.
• La pila recargable está montada de forma ja ynosepuede retirar,
deseche el producto como una unidad yenconformidad con los
reglamentos locales.
• Deseche el material de embalaje en conformidad con las
disposiciones locales sobreeldesecho vigentes.
• No realice cambios en el aparato. Esto conllevaría la pérdida de
todos los derechos de la garantía.
Aviso –Batería
• Utilice solo cargadores adecuados oconexiones USB para
efectuar la carga.
• No siga utilizando cargadores oconexiones USB defectuosos y
no intente repararlos.
• No sobrecargue ni descargue el producto en profundidad.
• Evite el almacenamiento, la carga yeluso en condiciones de
temperaturaextrema.
• En caso de almacenamiento prolongado, realice una recarga
regularmente (mín. trimestralmente).
Puesta en funcionamiento
4.
• El headset incorporauna batería recargable. La batería debe haberse
cargado completamente antes del primer uso.
• Asegúrese de que el headset está apagado antes de proceder asu
carga.
• Inicie el proceso de carga conectando el cable de carga USB adjunto a
la hembradecarga (2) yalpuerto USB de un PC/ordenador portátil.
• Alternativamente, puede cargar el headset utilizando un cargador USB.
Para ello, tenga en cuenta las instrucciones de manejo del cargador
USB utilizado.
• El LED de estado (3) se ilumina en rojo de forma continua durante
el proceso de carga.
• Pueden transcurrir hasta 2horas hasta que la batería esté
totalmente cargada.
21
Page 23

Aviso
No utilice los auriculares durante el proceso de carga!
• Una vez cargada completamente la batería, el LED de estado (3) se
apaga.
• Seguidamente, interrumpa todas las conexiones por cable ydered.
Nota
Si no ha utilizado el dispositivo durante varios meses, pueden
transcurrir hasta 15-30 minutos hasta que el LED de estado (3)
se ilumine en rojo durante el proceso de carga.
5.Funcionamiento
Encendido yapagado de los auriculares
• Encendido:
Con el dispositivo apagado, mantenga pulsada la tecla
multifunción (1) durante 3segundos hasta que se oiga un breve
tono de señal. El indicador LED (3) se ilumina en azul ysuena la
indicación de voz «Power On» (Encendido).
• Apagado:
Con el dispositivo encendido, mantenga pulsada la tecla de
multifunción (1) durante 5segundos, hasta que oiga un tono de
señal largo. El indicador LED (3) se ilumina brevemente en rojo y
suena la indicación de voz «Power Off» (Apagado).
En el primer encendido se inicia automáticamente el proceso
de vinculación –véase 5.1. Primer encendido
Bluetooth
®
(«Pairing», [Vinculación]).
5.1.
Conexión inicial
Bluetooth
®
(vinculación)
Nota –Vinculación
• Asegúrese de que su terminal compatible con
encendido ydeque se ha activado
• Asegúrese de que su terminal compatible con
visible paraotros dispositivos
Bluetooth
Bluetooth
®
.
Bluetooth
®
Bluetooth
®
.
está
®
está
• Entreelheadset yelterminal no debería haber más de 1metrode
separación. Cuanto menor sea la distancia entreellos, mejor.
• Cerciórese de que los auriculares están apagados.
22
Page 24

• Dispositivo apagado: Pulse ymantenga pulsada la tecla
multifunción (1) durante aprox. 5segundos hasta que el LED
de estado (3) se encienda alternando los colores rojo yazul yse
escuche la indicación de voz «Pairing» (Vincular). Losauriculares
están buscando una conexión
bluetooth
®
.
• Dispositivo encendido: Pulse ymantenga pulsada la tecla
multifunción (1) durante aprox. 3segundos hasta que el LED
de estado (3) se encienda alternando los colores rojo yazul yse
escuche la indicación de voz «Pairing» (Vincular). Losauriculares
están buscando una conexión
• En el terminal, abralaconguración
se muestre
MyVoice600
en la lista de los dispositivos
bluetooth
Bluetooth
®
.
®
yesperehasta que
Bluetooth
encontrados.
• Seleccione
MyVoice600
como conectado en la conguración
Nota –Contraseña
yesperehasta que el altavoz se muestre
Bluetooth
Bluetooth
®
®
de su terminal.
®
Algunos terminales requieren una contraseña paralaconguración
de la conexión con otrodispositivo
Bluetooth
®
.
• Introduzca, paralaconexión con el headset, la contraseña 0000
si el terminal lo requiriese.
Nota
Si la vinculación se ha realizado correctamente, el LED de estado
(3) parpadea lentamente en azul. Se escucha la indicación de voz
«Connected» (Conectado).
• Ahorapuede utilizar los auriculares.
5.2. Conexión
Bluetooth
®
automática
(una vez realizada la vinculación)
Nota
• Asegúrese de que su terminal compatible con
encendido ydeque se ha activado
Bluetooth
Bluetooth
®
®
está
.
• Observe también las instrucciones de uso de su terminal.
• Cerciórese de que los auriculares están encendidos.
• Una vez que se han conectado por primeravez con éxito, pasarán a
conectarse de forma automática.
• Ahorapuede utilizar los auriculares.
23
Page 25

Nota
• Si la vinculación se ha realizado correctamente, el LED de
estado (3) parpadea lentamente en azul. Se escucha la
indicación de voz «Connected» (Conectado).
• De ser necesario, puede que deba realizar los ajustes necesarios
en el terminal parapermitir la conexión automática con los
auriculares vinculados.
Nota -Fallo en la conexión
La conexión se establece de forma automática tras el
establecimiento correcto de la conexión inicial. De no establecerse
la conexión
Bluetooth
siguientes puntos:
• Compruebe, en la conguración
®
de forma automática, compruebe los
Bluetooth
®
del terminal, si
MyVoice600 se ha conectado.
De no ser así, repita los pasos indicados en 5.1. Conexión
inicial
Bluetooth
®
.
• Verique la presencia de obstáculos que puedan afectar al
alcance. De haberlos, reduzca la separación entrelos dispositivos.
• El rendimiento también puede verse afectado por una carga baja
de la pila.
5.3. Multivinculación
• Puede vincular los auriculares simultáneamente con dos terminales,
como pueden ser p. ej. un teléfono móvil de negocios yuno
privado, parapoder utilizar los dos de forma paralela.
• En primer lugar,active el
bluetooth
®
únicamente en el primer
terminal que desee vincular.
• Vincule el primer terminal, como se describe en 5.1. Vinculación
bluetooth
®
(Primeraconexión), con los auriculares.
• Apague los auriculares, como se describe en 5. Funcionamiento
(Apagado).
• Ahora, active el
• Continúe como se describe en 5.1. Vinculación
bluetooth
®
también en el segundo terminal.
bluetooth
®
(Primeraconexión).
• Una vez conectado correctamente el segundo terminal, abra
los ajustes de
bluetooth
seleccione MyVoice
®
primeroenelterminal conectado y
640
.
• Losdos terminales se conectan con los auriculares
24
Page 26

5.4. Función de manos libres
Nota
• Tenga en cuenta que la compatibilidad con algunas de las
funciones depende de su terminal.
• Tenga en cuenta también las instrucciones de uso de su terminal.
Es posible utilizar los auriculares como dispositivo manos libres para
su teléfono móvil.
Realizar una llamada
• Marque el númerodirectamente desde su terminal pararealizar una
llamada.
Función de marcación por voz
• Compruebe si su teléfono móvil es compatible con la marcación
por voz.
• Mantenga pulsada la tecla multifunción (1) durante aprox. 2
segundos. Oirá un breve tono de señal.
• Se abrirá seguidamente el control por voz de su teléfono móvil.
• Para realizar una llamada, proceda como se describe en las
instrucciones de uso de su teléfono móvil.
• Diga el nombredelapersona alaque desea llamar.
• Si la entrada de voz está correctamente vinculada con el númerode
teléfono correspondiente guardado en su teléfono móvil, procederá
amarcarse el número.
Contestar una llamada
• Pulse una vez la tecla de multifunción (1) paraaceptar una
llamada entrante.
Rechazar una llamada entrante
• Para rechazar una llamada entrante, pulse brevemente dos veces la
tecla multifunción (1). Oirá un breve tono de señal.
Finalizar una llamada
• Durante la conversación, pulse una vez la tecla de multifunción
(1) para nalizar la llamada
25
Page 27

Rellamada
• Pulse dos veces la tecla de multifunción (1), brevemente, para
llamar al númerodelaúltima llamada.
• Oirá un breve tono de señal.
5.5. Regulación de volumen
• Pulse la tecla [VOLUME -] (6) parabajar el volumen.
• Pulse la tecla [VOLUME +] (5) parasubir el volumen.
5.6. Reproducción de audio
• Mantenga pulsada la tecla [VOLUME -] (6) paracambiar al título
anterior.
• Mantenga pulsada la tecla [VOLUME +] (5) paracambiar al título
siguiente.
5.7. Desconexión del headset
• Apague el headset.
• Desconecte el headset mediante los ajustes de
Bluetooth
®
de su
terminal.
5.8. Capacidad de la batería
• Si la batería está baja (<25 %) se emite el mensaje de voz «low
battery,please charge»yel LED de estado (3) parpadea
lentamente.
• Cargue los auriculares como se describe en 4. Puesta en
funcionamiento.
Nota
El tiempo de conversación oenstandby disponible depende,
no obstante, del teléfono móvil uotros dispositivos
bluetooth
®
compatibles empleados, así como de los ajustes ylas preferencias
del usuario ylas condiciones del entorno correspondientes.
6. Mantenimiento ycuidado
Limpie este producto sólo con un paño ligeramente humedecido que
no deje pelusas ynoutilice detergentes agresivos. Asegúrese de que
no entreagua en el producto.
26
Page 28

7. Exclusión de responsabilidad
Hama GmbH &CoKGnose responsabiliza ni concede garantía
por los daños que surjan por una instalación, montaje omanejo
incorrectos del producto opor la no observación de las instrucciones
de manejo y/o de las instrucciones de seguridad.
8. Servicio ysoporte
Si tiene que hacer alguna consulta sobreelproducto, diríjase al
asesoramiento de productos Hama.
Línea directa: +49 9091 502-115 (Alemán/Inglés)
Encontrar más información de soporte aquí: www.hama.com
9. Datos técnicos
®
®
v5.0
Tecnología
Bluetooth
®
Perles compatibles
Frecuencia paralas transmisiones
Bluetooth
®
Auriculares
Bluetooth
Bluetooth
A2DP V1.3, AVRCP V1.6,
HFP V1.7, HSP V1.2
2402 –2480 MHz
Alcance <10m
Batería
Batería 3,7 V, polímerodelitio
Capacidad mín. 90 mAh
Consumo de corriente max. 5V 65mA
Tiempo de carga ~2,5 –3h
Estado de reposo ~180 h
Tiempo de reproducción ~6h
Tiempo de llamadas ~7h
27
Page 29

10.
Instrucciones para desecho yreciclaje
Nota sobrelaprotección medioambiental:
Después de la puesta en marcha de la directiva Europea
2012/19/EU y2006/66/EU en el sistema legislativo nacional,
se aplicaralosiguiente: Losaparatos eléctricos yelectrónicos,
así como las baterías, no se deben evacuar en la basura
doméstica. El usuario está legalmente obligado allevar los aparatos
eléctricos yelectrónicos, así como pilas ypilas recargables, al nal de
su vida útil alos puntos de recogida comunales oadevolverlos al
lugar donde los adquirió. Losdetalles quedaran denidos por la ley
de cada país. El símbolo en el producto, en las instrucciones de uso o
en el embalaje hace referencia aello. Gracias al reciclaje, al reciclaje
del material oaotras formas de reciclaje de aparatos/pilas usados,
contribuye Usted de forma importante alaprotección de nuestro
medio ambiente.
11. Declaración de conformidad
Porlapresente, Hama GmbH &CoKG, declaraque el tipo de
equipo radioeléctrico [00137495] es conforme con la
Directiva 2014/53/UE. El texto completo de la declaración UE
de conformidad está disponible en la dirección Internet siguiente:
www.hama.com-> 00137495-> Downloads.
Banda obandas de frecuencia 2402 –2480 MHz
Potencia máxima de
radiofrecuencia
3,82mW E.I.R.P.
28
Page 30

R Руководство по эксплуатации
Органы управления ииндикации
1. Многофункциональная кнопка
2. Разъем питания/зарядки
3. Светодиодный индикатор
4. Микрофон
5. Кнопка [VOLUME +]
6. Кнопка [VOLUME -]
Благодарим за покупку изделия фирмы Hama.
внимательно ознакомьтесь снастоящей инструкцией. Храните
инструкцию внадежном месте для справок вбудущем. Вслучае
передачи изделия другому лицу приложите иэту инструкцию.
1. Предупредительные пиктограммы иинструкции
Внимание
Данным значком отмечены инструкции, несоблюдение
которых можетпривести копасной ситуации.
Примечание
Дополнительная или важная информация.
2. Комплект поставки
•
• Зарядный кабель USB (B), 1 шт.
• Дужка (два размера)(С), 2 шт.
• Настоящая инструкция
3. Техника безопасности
• Изделие предназначено толькодля домашнегоприменения.
• Беречь от грязи, влаги иисточников тепла. Эксплуатировать
• Эксплуатация изделия не должна отвлекать от вождения
• Не ронять. Беречь от сильных ударов.
• Соблюдатьтехнические характеристики.
• Изделие не открывать. Запрещается эксплуатировать
• Аккумулятор замене не подлежит. Утилизацию продукта
®
Bluetooth
тольковсухих условиях.
автомобиля, атакжеотдорожногодвижения иокружающих
условий.
неисправное изделие.
-гарнитура MyVoice 600 (A), 1 шт.
29
Page 31

производить целиком согласно нормативам.
• Утилизировать упаковку всоответствии сместными нормами.
• Запрещается вносить изменения вконструкцию.
Впротивном случае гарантийные обязательства аннулируются.
Внимание. Техникабезопасности
• Применять толькосоответствующие зарядные устройства.
• Запрещается эксплуатировать иремонтировать неисправные
устройства.
• Не подвергатьаккумуляторы глубокой разрядкеи
перезарядке.
• Беречь от высоких температур при хранении, заряде и
эксплуатации.
• При длительном хранении заряжать не режеодного раза в
три месяца.
4. Ввод вэксплуатацию
• Для питания гарнитуры предусмотрен аккумулятор. Перед
вводом гарнитуры вэксплуатацию необходимо полностью
зарядить аккумулятор.
• Перед началом заряда отключите гарнитуру.
• Чтобы начать заряд аккумулятора, подключите кабель
USB pазъем зарядногоустройства (2) икразъему USB
компьютера.
• Гарнитуру такжеможно заряжать через зарядное устройство
USB. Соблюдайте инструкции по эксплуатации устройств
• Во время зарядки светодиодный индикатор (3) непрерывно
светится красным.
• Аккумулятор полностью заряжается до 2 часов.
Внимание
Не используйте гарнитуру во время зарядки!
• После полной зарядки аккумулятора светодиодный индикатор
(3) выключится.
• По окончании работы отключите всекабельные исетевые
соединения.
30
Page 32

Примечание
Если устройство не эксплуатировалось несколькомесяцев,
светодиодный индикатор (3) при зарядкеможет
включиться через 15–30 минут.
5.Эксплуатация
Включение ивыключение гарнитуры
• Включение:
Удерживайте многофункциональную кнопку (1) втечение 3
секунд ввыключенном состоянии, пока не прозвучит короткий
сигнал. Светодиодный индикатор (3) начнет светиться
синим ипрозвучит сообщение Power On (Питание включено).
• Выключение:
Удерживайте многофункциональную кнопку (1) втечение 5
секунд во включенном состоянии, пока не прозвучит длинный
сигнал. Светодиодный индикатор (3) начнет светиться
красным на короткое время ипрозвучит сообщение Power Off
(Питание выключено).
При первом включении автоматически запускается сопряжение
– см. 5.1. Первое соединение по технологии
Bluetooth
®
(сопряжение)
®
Первое соединение
5.1.
Bluetooth
(Pairing)
Примечание - Согласование
• Включите устройство воспроизведения иактивируйте на нем
• Через интерфейс
Bluetooth
®
.
Bluetooth
®
убедитесь, чтоустройство
воспроизведения обнаруживается другими устройствами.
• Гарнитура иустройство должны располагаться не дальше
1 метра друг от друга. Чем меньше дистанция между
устройствами, тем увереннее связь.
• Убедитесь, чтогарнитура выключена.
• Устройство выключено: Нажмите иок.5секунд удерживайте
многофункциональную кнопку (1), пока светодиодный
индикатор (3) не начнет попеременно мигатькрасным и
синимине прозвучит сообщение Pairing (Сопряжение).
Гарнитура начнет поиск сигнала
Bluetooth
®
.
31
Page 33

• Устройство включено: Нажмите иок.3секунд удерживайте
многофункциональную кнопку (1), пока светодиодный
индикатор (3) не начнет попеременно мигатькрасным и
синимине прозвучит сообщение Pairing (Сопряжение).
Гарнитура начнет поиск сигнала
• Откройте настройки
ивспискевыберите устройство
• Выберите
появится вспискеподключенных устройств по протоколу
Bluetooth
MyVoice600
®
.
Примечание -
Bluetooth
®
Bluetooth
на устройстве воспроизведения
MyVoice600
иподождите, пока гарнитура не
®
Bluetooth
®
.
.
Для установки соединения снекоторыми устройствами может
потребоваться пароль
Bluetooth
®
.
• Для подключения кгарнитуре введите пароль по умолчанию
(0000), если потребуется.
Примечание
Если согласование прошло успешно, светодиодный
индикатор (3) начнет медленно мигатьсиним светом.
Прозвучит сообщение Connected (Подключено).
• Гарнитура готова кработе.
5.2. Автоматическое соединение по протоколу
Bluetooth
после согласования
Примечание
• Включите устройство воспроизведения иактивируйте на нем
Bluetooth
®
.
• Подробнее смотрите инструкцию по эксплуатации
устройства.
• Убедитесь, чтогарнитура включена.
• После первогосоединения устройства вдальнейшем будут
подключаться автоматически.
• Гарнитура готова кработе.
®
32
Page 34

Примечание
• Если согласование прошло успешно, светодиодный
индикатор (3) начнет медленно мигатьсиним светом.
Прозвучит сообщение Connected (Подключено).
• При необходимости, чтобы разрешить автоматическое
подключение гарнитуры, выполните соответствующие
настройки на устройстве.
Примечание - Повторное соединение
После первогосоединения вдальнейшем устройства будут
подключаться автоматически. Если соединение
автоматически не устанавливается, проверьте следующее:
• Внастройках
Bluetooth
®
устройства воспроизведения
Bluetooth
®
проверьте наличие соединения сустройством MyVoice 600.
При отсутствии соединения повторите операцию из главы 5.1.
«Согласование устройство по протоколу
Bluetooth
®
».
• Следует учитывать, чтопрепятствия влияютнарадиус
соединения. При наличии препятствий уменьшите дистанцию
между устройствами.
• Разряженная батарея такжеотрицательно влияет на качество
соединения.
5.3. Параллельное подключение
• Гарнитуру можно подключить кдвум устройствам
одновременно, например, для параллельногоиспользования с
личным ирабочим телефонами.
• Активируйте
Bluetooth
®
сначала тольконаодном конечном
устройстве.
• Подключите первое конечное устройство кгарнитуре, как
описано вп.5.1. «Первое соединение по технологии
Bluetooth
®
(сопряжение)».
• Выключите гарнитуру, как описано вп.5. «Работа
(Выключение)».
• Активируйте
Bluetooth
• Порядок действий см. вп.5.1. «Согласование устройств по
протоколу
Bluetooth
• После успешногоподключения второгоустройства откройте
настройки
Bluetooth
®
на втором конечном устройстве.
®
(первое соединение)».
®
на первом конечном устройстве и
выберите MyVoice 600.
• Оба конечных устройства подключены кгарнитуре.
33
Page 35

5.4. Громкая связь
Примечание
• Совместимость функций зависит от устройства
воспроизведения.
• Подробнее смотрите инструкцию по эксплуатации
устройства.
Гарнитуру можно применять вкачестве устройства громкой связи
для мобильноготелефона.
Разговор сабонентом
• Наберите номер абонентанателефоне.
Речевой набор
• Убедитесь вналичии на телефоне функции речевогонабора.
• Нажмите иудерживайте многофункциональную кнопку
(1) втечение примерно 2 секунд. Устройство подаст короткий
звуковой сигнал.
• На мобильном телефоне откроется меню управления голосом.
• Наберите номер, как описано винструкции квашему
мобильному телефону.
• Назовите имя абонента.
• Если функция речевогонабора настроена правильно, телефон
выполнит набор номера.
Ответ на входящий звонок
• Чтобы ответить на звонок, нажмите многофункциональную
кнопку (1).
Отмена входящего звонка
• Для отмены входящегозвонка дважды коротконажмите
многофункциональную кнопку (1). Устройство подаст
короткий звуковой сигнал.
Завершение разговора
• Чтобы завершить разговор, во время разговора нажмите
многофункциональную кнопку (1) один раз.
34
Page 36

Повтор набора номера
• Чтобы повторить набор последнегонабранногономера,
дважды коротконажмите многофункциональную кнопку
(1).
• Устройство подаст короткий звуковой сигнал.
5.5. Регулировка громкости
• Нажмите кнопку [VOLUME –] (6) для уменьшения громкости.
• Нажмите кнопку [VOLUME +] (5) для увеличения громкости.
5.6. Воспроизведение звука
• Нажмите иудерживайте кнопку [VOLUME –] (6) для переходак
предыдущей записи.
• Нажмите иудерживайте кнопку [VOLUME +] (5) для переходак
следующей записи.
5.7. Отключение гарнитуры
• Выключите гарнитуру.
• Отключите гарнитуру через настройки
Bluetooth
®
устройства
воспроизведения.
5.8. Емкость аккумулятора
• При низком заряде аккумулятора (<25 %) прозвучит сообщение
«low battery,please charge»,(Низкий заряд аккумулятора,
зарядите) и светодиодный индикатор (3) будет медленно
мигать.
• Зарядите аккумулятор, как описано вп.4. «Вводв
эксплуатацию».
Примечание
Время работы врежиме разговора ивждущем режиме
зависит от сопряженногопо
Bluetooth
®
устройства, атакжеот
настроек устройств иусловий эксплуатации.
6. Уход итехобслуживание
Чистку изделия производить толькобезворсовой слегка влажной
салфеткой. Запрещается применять агрессивные чистящие
средства. Следите за тем, чтобы вустройство не попала вода.
35
Page 37

7.
Отказ от гарантийных обязательств
Компания Hama GmbH &CoKGне несет ответственность
за ущерб, возникший вследствие неправильногомонтажа,
подключения ииспользования изделия не по назначению, а
такжевследствие несоблюдения инструкции по эксплуатации и
техники безопасности.
8.
Отдел техобслуживания
По вопросам ремонтаили замены неисправных изделий
обращайтесь кпродавцу или всервисную службукомпании
Hama.
Горячая линия отдела техобслуживания:
+49 9091 502-115 (немецкий, английский)
Подробнее смотрите здесь:www.hama.com
9. Технические характеристики
®
-гарнитура
®
Bluetooth
v5.0
2402 –2480 MHz
Стандарты
Bluetooth
Поддерживаемые протоколы
Частота передачи по
Bluetooth
Bluetooth
®
A2DP V1.3, AVRCP V1.6,
HFP V1.7, HSP V1.2
®
Дальность действия <10m
Аккумулятор
Аккумуляторная батарея Литий-полимерный 3,7 В
Мин. емкость 90 mAh
Токпотребления max. 5V 65mA
Время зарядки ~2,5 –3h
Ждущий режим ~180h
Время воспроизведения ~6h
Время разговора ~7h
36
Page 38

10. Инструкции по утилизации
Охрана окружающей среды:
Смоментапереходанациональногозаконодательства на
европейские нормативы 2012/19/EU и 2006/66/EU
действительно следующее: Электрические иэлектронные
приборы, атакже батареи запрещается утилизировать с
обычным мусором. Потребитель, согласно закону, обязан
утилизировать электрические иэлектронные приборы, атакже
батареи иаккумуляторы после их использования вспециально
предназначенных для этого пунктах сбора, либо впунктах
продажи. Детальная регламентация этих требований
осуществляется соответствующим местным законодательством.
Необходимость соблюдения данных предписаний обозначается
особым значком на изделии, инструкции по эксплуатации или
упаковке. При переработке, повторном использовании
материалов или при другой форме утилизации бывших в
употреблении приборов Вы помогаете охране окружающей
среды. Всоответствии спредписаниями по обращению с
батареями, вГермании вышеназванные нормативы действуют
для утилизации батарей иаккумуляторов.
11. Декларация производителя
Настоящим компания Hama GmbH &CoKGзаявляет, что
радиооборудование типа [00137495] отвечает
требованиям директивы 2014/53/ЕС. Сполным текстом
декларации осоответствии требованиям ЕС можно ознакомиться
здесь:www.hama.com -> 00137495 -> Downloads.
Диапазон/диапазоны частот 2402 –2480 MHz
Максимальная излучаемая
мощность
3,82mW E.I.R.P.
37
Page 39

N Gebruiksaanwijzing
Bedieningselementen en weergaven
1. Multifunctionele toets
2. Laadpoort
3. Status-LED
4. Microfoon
5. [VOLUME +]-toets
6. [VOLUME -]-toets
Hartelijk dank dat uvoor een product van Hama heeft gekozen.
Neem de tijd om de volgende aanwijzingen en instructies volledig
door te lezen. Bergdeze gebruiksaanwijzing vervolgens op een goede
plek op zodat uhem als naslagwerk kunt gebruiken. Op zodat uhem
als naslagwerk kunt gebruiken. Mocht uhet toestel verkopen, geeft u
dan ook deze gebruiksaanwijzing aan de nieuwe eigenaar.
1. Verklaring van waarschuwingssymbolen en instructies
Waarschuwing
Wordtgebruikt voor veiligheidsinstructies of om de aandacht te
trekken op bijzonderegevaren en risico‘s.
Aanwijzing
Wordtgebruikt voor extrainformatie of belangrijke informatie.
2. Inhoud van de verpakking
• 1x
• 1x USB-oplaadkabel (B)
• 2x oorbeugels (twee maten) (C)
• deze bedieningsinstructies
3. Veiligheidsinstructies
• Het product is bedoeld voor niet-commercieel privegebruik in
huiselijke kring.
• Bescherm het product tegen vuil, vocht en oververhitting en gebruik
het alleen in droge omgevingen.
• Laat uzich op weg met een motorvoertuig of sporttoestel niet door
uw product aeiden en let op de verkeerssituatie en uw omgeving.
• Laat het product niet vallen en stel het niet bloot aan zware
schokken of stoten.
Bluetooth
®
-headset MyVoice600 (A)
38
Page 40

• Gebruik het product niet buiten de in de technische gegevens
vermelde vermogensgrenzen.
• Open het product niet en gebruik het niet meer als het
beschadigd is.
• De accu is vast ingebouwd en kan niet worden verwijderd, voer het
product derhalve als één geheel af overeenkomstig de wettelijke
voorschriften.
• Het verpakkingsmateriaal direct en overeenkomstig de lokaal
geldende afvoervoorschriften afvoeren.
• Verander niets aan het toestel. Daardoor vervalt elke aanspraak op
garantie.
Waarschuwing –accu
• Gebruik alleen geschikte laadapparatuur of USB-aansluitingen
voor het opladen.
• Gebruik defecte laadapparatuur of USB-aansluitingen niet meer
en probeer ze niet te repareren.
• Het op te laden product niet overladen of diepontladen.
• Opbergen, opladen en gebruiken bij extreme temperaturen
vermijden.
• Indien de accu’sgedurende langeretijd worden opgeborgen,
dienen ze ten minste elke 3maanden te worden opgeladen.
4. Inbedrijfstelling
• De headset beschikt over een oplaadbareaccu. Vóór het eerste
gebruik dient de accu volledig te worden opgeladen.
• Controleer of de headset is uitgeschakeld voordat met het opladen
wordt begonnen.
• Start het opladen door de meegeleverde USB-oplaadkabel op de
laadpoort (2) en op de USB-aansluiting van een pc/notebook aan
te sluiten.
• Alternatief kan de headset via een geschikt USB-laadtoestel
worden opgeladen. Neem hiervoor de bedieningsinstructies van het
gebruikte USB-laadtoestel in acht.
• Het statusledje (3) brandt tijdens het opladen constant rood.
• Het kan max. 2uur duren totdat de accu volledig is opgeladen.
Waarschuwing
Gebruik de headset niet tijdens het opladen!
• Zodradeaccu volledig is opgeladen gaat de status-LED (3) uit.
• Aansluitend alle kabel- en netwerkverbindingen scheiden.
39
Page 41

Aanwijzing
Indien het toestel gedurende enige maanden niet werdgebruikt,
dan kan het 15-30 minuten duren totdat de status-LED (3)
tijdens het opladen rood gaat branden.
5.Gebruik en werking
Headset in-/uitschakelen
• Inschakelen:
Houd in een uitgeschakelde toestand de multifunctionele toets
(1) gedurende 3seconden ingedrukt totdat ueen korte signaaltoon
hoort. De ledindicator (3) gaat blauw branden en de gesproken
informatie „Power On“ weerklinkt.
• Uitschakelen:
Houd in een ingeschakelde toestand de multifunctionele toets
(1) gedurende 5seconden ingedrukt totdat ueen lange signaaltoon
hoort. De ledindicator (3) licht kort rood op en de gesproken
informatie „Power Off“ weerklinkt.
Bij de eerste maal inschakelen wordt automatisch de pairing gestart
– zie 5.1. De eerste maal een
Bluetooth
®
-verbinding tot
stand brengen (pairing/koppelen).
5.1. De eerste maal een
Bluetooth
®
-verbinding tot stand
brengen (pairing/koppelen)
Aanwijzing –pairing/koppelen
• Controleer of uw
Bluetooth
en of de
Bluetooth
®
-geschikt eindtoestel is ingeschakeld
®
-functie is geactiveerd.
• Lees hiervoor de bedieningsinstructies van uw eindtoestel.
• De headset en het eindtoestel dienen niet meer dan 1meter van
elkaar te zijn verwijderd. Hoe dichter bij elkaar,des te beter.
• Controleer of de headset is uitgeschakeld.
• Apparaat uit: Houd de multifunctionele toets (1) gedurende
ca. 5seconden ingedrukt, totdat het statusledje (3) afwisselend
rood en blauw knippert en de gesproken informatie „Pairing“
weerklinkt. De headset zoekt naar een
Bluetooth
®
verbinding.
• Apparaat aan: Houd de multifunctionele toets (1) gedurende
ca. 3seconden ingedrukt, totdat het statusledje (3) afwisselend
rood en blauw knippert en de gesproken informatie „Pairing“
weerklinkt De headset zoekt naar een
Bluetooth
®
verbinding.
40
Page 42

• Open op uw eindtoestel de
in de lijst van gevonden
Bluetooth
Bluetooth
-instellingen en wacht totdat
®
-apparatuur MyVoice 600
®
wordt weergegeven.
• Selecteer MyVoice 600 en wacht totdat de headset als
“verbonden” in de
Bluetooth
®
-instellingen van uw eindtoestel
wordt weergegeven.
Aanwijzing –
Bluetooth
®
-password
Sommige toestellen hebben voor het tot stand brengen van de
verbinding met een ander
Bluetooth
®
-toestel een passwor
dnodig.
• Voer voor de verbinding het password 0000 in, indien uw
eindtoestel de invoer van een passwordverlangt.
Aanwijzing
Indien de koppeling succesvol was, knippert het statusledje (3)
langzaam. De gesproken informatie „Connected“ weerklinkt.
• Ukunt de headset nu gebruiken.
5.2. Automatische
Bluetooth
®
-verbinding
(na een reeds uitgevoerde pairing)
Aanwijzing
®
• Controleer of uw
en of de
Bluetooth
Bluetooth
-geschikt eindtoestel is ingeschakeld
®
-functie is geactiveerd.
• Lees hiervoor de bedieningsinstructies van uw eindtoestel.
• Controleer of de headset is ingeschakeld.
• Nadat de eerste verbinding succesvol tot stand is gebracht wordt de
verbinding normaliter steeds weer automatisch uitgevoerd.
• Ukunt de headset nu gebruiken.
Aanwijzing
• Indien de koppeling succesvol was, knippert het statusledje (3)
langzaam. De gesproken informatie „Connected“ weerklinkt.
• Eventueel dient udeinstelling op het eindapparaat uit te voeren
om de automatische verbinding met de gekoppelde headset toe
te staan.
41
Page 43

Aanwijzing -verbinding stagneert
Nadat de eerste verbinding succesvol tot stand is gebracht wordt
de verbinding normaliter steeds weer automatisch uitgevoerd.
Indien de
Bluetooth
®
-verbinding echter niet wederom automatisch
tot stand wordt gebracht, dan dienen de hieronder vermelde
punten te worden gecontroleerd:
• Controleer in de
Bluetooth
MyVoice600 is verbonden. Is dit niet het geval, dan herhaalt u
de onder 5.1. De eerste maal een
®
-instellingen van uw eindtoestel of
Bluetooth
®
-verbinding
tot stand brengen (pairing/koppelen) vermelde stappen.
• Controleer of obstakels het bereik negatief beïnvloeden. Indien
dit het geval is, dan plaatst udetoestellen dichter bij elkaar.
• Ook kan bij een zwakke accu het zendvermogen beperkt zijn.
5.3. Multi-pairing
• Ukunt de headset tegelijkertijd met twee eindtoestellen koppelen
om deze parallel te kunnen gebruiken, bijv.ingeval van privé en
zakelijk gebruikte mobiele telefoons.
• Activeer
Bluetooth
®
allereerst op het eerste eindtoestel dat uwilt
koppelen.
• Koppel het eerste eindtoestel met de headset, zoals in 5.1. De
eerste maal een
Bluetooth
®
-verbinding tot stand brengen
(pairing/koppelen) is beschreven.
• Schakel de headset uit, zoals in 5. Gebruik en werking/
Uitschakelen is beschreven.
• Activeer ook bij het tweede eindtoestel
• Ga verder zoals in 5.1. De eerste maal een
Bluetooth
®
-verbinding tot stand brengen (pairing/
Bluetooth
®
.
koppelen) is beschreven.
• Na een succesvolle verbinding van het tweede eindtoestel opent u
op het als eerste verbonden eindtoestel de
Bluetooth
®
-instellingen
en selecteert u MyVoice600.
• Beide eindtoestellen zijn met de headset verbonden.
42
Page 44

5.4. Handsfree-functie
Aanwijzing
• Let erop dat de ondersteuning van enige functies afhankelijk is
van uw eindtoestel.
• Lees hiervoor de bedieningsinstructies van uw eindtoestel.
De mogelijkheid is aanwezig om de headset als een handsfreevoorziening voor uw mobiele telefoon te gebruiken.
Telefoneren
• Kies het nummer direct op uw eindtoestel om een telefoongesprek
tot stand te brengen
Spraakkiezen-functie
• Controleer of uw mobiele toestel spraakkiezen ondersteunt.
• Houd de multifunctionele toets (1) gedurende ca. 2seconden
ingedrukt. Uhoort een korte signaaltoon.
• Op uw mobiele telefoon wordt de spraakbesturing geopend.
• Om een telefoongesprek te starten, volgt udebedieningsinstructies
van uw mobiele telefoon.
• Noem de naam van de persoon die uwenst te bellen.
• Indien de spraakvermeldingen met het bijbehorende
telefoonnummer,welke op uw mobiele toestel is opgeslagen, zijn
gekoppeld, dan wordt het nummer gekozen.
Telefoongesprek aannemen
• Druk eenmaal op de multifunctionele toets (1) om een
binnenkomend gesprek aan te nemen.
Binnenkomend gesprek weigeren
• Om een binnenkomend gesprek te weigeren, drukt utweemaal kort
op de multifunctionele toets (1). Er klinkt een korte signaaltoon.
Gesprek beëindigen
• Druk tijdens het gesprek eenmaal op de multifunctionele toets
(1) om het gesprek te beëindigen.
43
Page 45

Herhaling van laatst gekozen nummer
• Druk tweemaal kort op de multifunctionele toets (1) om het
nummer van het laatste gesprek te kiezen.
• Uhoort een korte signaaltoon.
5.5. Volumeregeling
• Druk op de [VOLUME -]-toets (6) om het geluidsniveau te
verlagen.
• Druk op de [VOLUME +]-toets (5) om het geluidsniveau te
verhogen.
5.6. Audioweergave
• Houd de [VOLUME -]-toets (6) ingedrukt om naar de vorige titel
over te schakelen.
• Houd de [VOLUME +]-toets (5) ingedrukt om naar de volgende
titel over te schakelen.
5.7. Headset scheiden
• Schakel de headset uit.
• Verbreek de verbinding met de headset via de
Bluetooth
®
-instellingen van uw eindtoestel.
5.8. Accucapaciteit
• Bij een geringe accucapaciteit (<25 %) volgt de gesproken
mededeling "low battery,please charge"enhet statusledje (3)
knippert langzaam.
• Laad de headset op zoals in 4. Inbedrijfstelling is beschreven.
Aanwijzing
De beschikbaregespreks- resp. stand-by-tijd is echter steeds
afhankelijk van de mobiele telefoon die wordt gebruikt of
van anderecompatibele
Bluetooth
®
-apparatuur evenals van
de gebruikersinstellingen, gebruikersvoorkeuren en van de
desbetreffende omgevingsomstandigheden.
6. Onderhoud en verzorging
Reinig dit product uitsluitend met een pluisvrije, licht vochtige doek
en maak geen gebruik van agressieve reinigingsmiddelen.
Let erop dat er geen water in het product binnendringt.
44
Page 46

7. Uitsluiting van garantie en aansprakelijkheid
Hama GmbH &CoKGaanvaardt geen enkele aansprakelijkheid
of garantieclaims voor schade of gevolgschade, welke door
ondeskundige installatie, montage en ondeskundig gebruik van het
product ontstaan of het resultaat zijn van het niet in acht nemen van
de bedieningsinstructies en/of veiligheidsinstructies.
8. Service en support
Neem bij vragen over het product contact op met de afdeling
Productadvies van HAMA.
Hotline: +49 9091 502-115 (Duits/Engels)
Meer support-informatie vindt uhier: www.hama.com
9. Technische specificaties
®
headset
®
v5.0
®
Bluetooth
technologie
Ondersteunde proelen
Frequentie voor de
®
Bluetooth
-datatransfers
Bluetooth
Bluetooth
A2DP V1.3, AVRCP V1.6,
HFP V1.7, HSP V1.2
2402 –2480 MHz
Bereik <10m
Accu
Accutype 3,7 VLithium-Polymer
Min. Capaciteit 90 mAh
Stroomverbruik max. 5V 65 mA
Oplaadtijd ~2,5 –3h
Standby ~180 h
Muziektijd ~6h
Gesprekstijd ~7h
45
Page 47

10. Aanwijzingen over de afvalverwerking
Notitie aangaande de bescherming van het milieu:
Tengevolge van de invoering van de Europese Richtlijn
2012/19/EU en 2006/66/EU in het nationaal juridisch
systeem, is het volgende van toepassing: Elektrische en
elektronische apparatuur,zoals batterijen mag niet met het
huisvuil weggegooid worden. Consumenten zijn wettelijk verplicht om
elektrische en elektronische apparaten zoals batterijen op het einde
van gebruik in te dienen bij openbareverzamelplaatsen speciaal
opgezet voor dit doeleinde of bij een verkooppunt. Verdere
specicaties aangaande dit onderwerp zijn omschreven door de
nationale wet van het betreffende land. Dit symbool op het product,
de gebruiksaanwijzing of de verpakking duidt erop dat het product
onderworpen is aan deze richtlijnen. Door te recycleren, hergebruiken
van materialen of anderevormen van hergebruiken van oude
toestellen/batterijen, levert ueen grote bijdrage aan de bescherming
van het milieu.
11. Conformiteitsverklaring
Hierbij verklaar ik, Hama GmbH &CoKG, dathet type
radioapparatuur [00137495] conform is met Richtlijn
2014/53/EU.Devolledige tekst van de EUconformiteitsverklaring kan worden geraadpleegd op het volgende
internetadres:
www.hama.com-> 00137495-> Downloads.
Frequentieband(en) 2402 –2480 MHz
Maximaal radiofrequent
vermogen
3,82mW E.I.R.P.
46
Page 48

O Manual de instruções
Elementos de comando eindicadores
1. Botão multifunções
2. Tomada de carregamento
3. LED de estado
4. Microfone
5. Botão [VOLUME +]
6. Botão [VOLUME -]
Agradecemos que se tenha decidido por este produto Hama!
Antes de utilizar oproduto, leia completamente estas indicações e
informações. Guarde, depois, estas informações num local seguropara
consultas futuras. Se transmitir oproduto paraumnovo proprietário,
entregue também as instruções de utilização.
1.
Descrição dos símbolos de aviso edas notas
Aviso
Éutilizado paraidenticar informações de segurança ou chamar a
atenção paraperigos eriscos especiais.
Nota
Éutilizado paraidenticar informações adicionais ou notas
importantes.
Conteúdo da embalagem
2.
• 1microauscultadores
• 1cabo de carregamento USB (B)
• 2arosdeorelha (dois tamanhos) (C)
• Estas instruções de utilização
Bluetooth
®
MyVoice600 (A)
3. Sicherheitshinweise
• Oproduto está previsto apenas parautilização doméstica
enão comercial.
• Proteja oproduto contrasujidade, humidade esobreaquecimento e
utilize-o somente em ambientes secos.
• Não se distraia com oproduto durante acondução de veículos
ou ao utilizar aparelhos desportivos etenha sempreatenção ao
trânsito eaomeio circundante.
• Não deixe cair oproduto nem osubmeta achoques fortes.
• Não utilize oproduto forados limites de desempenho indicados nas
47
Page 49

especicações técnicas.
• Não abraoproduto nem outilize caso este esteja danicado.
• Abateria está instalada de forma xa enão pode ser removida.
Elimine oproduto completo de acordo com alegislação em vigor.
• Elimine imediatamente omaterial da embalagem em conformidade
com as normas locais aplicáveis.
• Não efectue modicações no aparelho. Perdados direitos de
garantia.
Aviso –Bateria
• Utilize apenas carregadores adequados ou ligações USB para
efetuar ocarregamento.
• De modo geral, não utilize carregadores ou ligações USB que
apresentem danos, nem tente reparar os mesmos.
• Não submeta oproduto aumcarregamento excessivo ou aum
descarregamento completo.
• Evite guardar,carregar eutilizar abateria sob temperaturas
extremas.
• No caso de um período de armazenamento prolongado,
carregue abateria regularmente (pelo menos, trimestralmente).
4. Inbetriebnahme
• Os auscultadores dispõem de uma bateria recarregável. Antes da
primeirautilização, abateria tem de ser totalmente carregada.
• Certique-se que os auscultadores estão desligados antes do
carregamento.
• Inicie oprocesso de carregamento, conectando ocabo de
carregamento USB juntamente fornecido à tomada de
carregamento (2) eàligação USB de um PC/Notebook.
• Alternativamente pode carregar os auscultadores através de um
carregador USB adequado. Para tal, consulte omanual de instruções
do carregador USB utilizado.
• O LED de estado (3) acende-se permanentemente avermelho
durante oprocesso de carregamento.
• Pode demorar até 2horas paraque abateria que totalmente
carregada.
48
Page 50

Aviso
Não utilize os microauscultadores durante oprocesso de
carregamento!
• Quando abateria estiver totalmente carregada, oLED de estado (3)
apaga-se.
• Desligue posteriormente todas as ligações de cabos eàrede
elétrica.
Nota
Se não tiver utilizado oaparelho durante alguns meses,poderá
demorar 15-30 minutos até que o LED de estado (3) se acenda a
vermelho durante oprocesso de carregamento.
5.Operação
Ligar/desligar os microauscultadores
• Ligar:
Em estado desligado, mantenha o botão multifunções (1)
premido durante 3segundos até ouvir um sinal acústico breve. O
LED de indicação (3) acende-se aazul eouve-se ainformação de
voz "Power On".
• Desligar:
Em estado ligado, mantenha o botão multifunções (1) premido
durante 5segundos até ouvir um sinal acústico prolongado. O LED
de indicação (3) acende-se brevemente avermelho eouve-se a
informação de voz "Power Off".
Durante aprimeiraligação, oemparelhamento éiniciado
automaticamente –ver 5.1. Primeiraligação
Bluetooth
®
(emparelhamento).
®
5.1. Primeira ligação
Bluetooth
(emparelhamento)
Nota –Emparelhamento
• Certique-se de que oseu dispositivo
Bluetooth
que o
• Certique-se de que oseu dispositivo
paraoutros dispositivos
®
está ativado.
Bluetooth
®
Bluetooth
Bluetooth
.
®
está ligado e
®
está visível
• Os auscultadores eodispositivo não devem estar amais de 1metro
de distância um do outro. Quanto menor adistância, melhor.
49
Page 51

• Certique-se de que os microauscultadores estão desligados.
• Aparelho desligado: Prima emantenha o botão multifunções
(1) premido durante cerca de 5segundos até o LED de estado (3)
acender alternadamente avermelho eazul eouvir ainformação
de voz "Pairing".Osmicroauscultadores procuram uma ligação
®
Bluetooth
.
• Aparelho ligado:Prima emantenha o botão multifunções (1)
premido durante cerca de 3segundos até o LED de estado (3)
acender alternadamente avermelho eazul eouvir ainformação
de voz "Pairing".Osmicroauscultadores procuram uma ligação
®
Bluetooth
• Abraomenu de denições
aguarde até alista de dispositivos
MyVoice600
• Selecione
apresentados como ligados nas denições
.
.
MyVoice600
®
Bluetooth
eaguarde até que os auscultadores sejam
no seu dispositivo nal e
®
Bluetooth
encontrados apresentar
Bluetooth
®
do seu
dispositivo nal.
Nota –Palavra-passe
Bluetooth
®
Alguns dispositivos requerem aintrodução de uma palavra-passe
paraestabelecer aligação aoutrodispositivo
Bluetooth
®
.
• Para estabelecer aligação aos auscultadores introduza apalavrapasse 0000 se tal lhe for solicitado pelo seu dispositivo nal.
Nota
Em caso de emparelhamento bem-sucedido, o LED de estado
azul (3) pisca lentamente. Ouve-se ainformação de voz
"Connected".
• Agora, pode utilizar os microauscultadores.
®
5.2. Ligação
Bluetooth
automática (após emparelhamento
já efetuado)
Nota
• Certique-se de que oseu dispositivo
Bluetooth
que o
®
está ativado.
Bluetooth
®
está ligado e
• Para tal, consulte omanual de instruções do seu dispositivo.
• Certique-se de que os microauscultadores estão ligados.
• Após uma primeiraligação bem-sucedida, aligação érealizada
automaticamente.
50
Page 52

• Agora, pode utilizar os microauscultadores.
Nota
• Em caso de emparelhamento bem-sucedido, o LED de estado
azul (3) pisca lentamente. Ouve-se ainformação de voz
"Connected".
• Poderá ser necessário congurar odispositivo parapermitir a
ligação automática aos microauscultadores emparelhados.
Aviso -Ligação afetada
Após uma primeiraligação bem-sucedida, aligação érealizada
automaticamente. Caso aligação
estabelecida automaticamente, verique os seguintes aspetos:
• Nas denições
Bluetooth
®
do dispositivo, verique se
Bluetooth
®
não seja
MyVoice600 está ligado. Caso tal não se verique, repita os
passos indicados no ponto 5.1. referentes àprimeiraligação
Bluetooth
®
.
• Verique se existem obstáculos aafetar oalcance. Caso existam,
coloque os dispositivos mais próximos um do outro.
• Odesempenho também pode car prejudicado quando abateria
está fraca.
5.3. Multi-emparelhamento
• Os microauscultadores podem ser emparelhados simultaneamente
com dois dispositivos parapoder utilizá-los paralelamente como,
por exemplo, telemóvel privado eprossional.
• Em primeirolugar,ative o
Bluetooth
®
apenas no primeiro
dispositivo com oqual deseja estabelecer oemparelhamento.
• Estabeleça oemparelhamento do primeirodispositivo com os
microauscultadores como descrito no ponto 5.1. Primeiraligação
Bluetooth
®
(emparelhamento).
• Desligue os microauscultadores –como descrito no ponto 5.
Funcionamento (desligar).
• Ative afunção
• Continue oprocedimento como descrito no ponto 5.1. Primeira
Bluetooth
ligação
• Após aligação bem-sucedida com osegundo dispositivo, abra
no primeirodispositivo emparelhado as denições
®
Bluetooth
®
(emparelhamento).
também no segundo dispositivo.
Bluetooth
®
e
selecione MyVoice 600.
• Agora, ambos os dispositivos estão emparelhados com os
microauscultadores.
51
Page 53

5.4. Função de alta-voz
Nota
• Tenha em atenção que osuporte de algumas funções depende
do seu dispositivo.
• Para tal, consulte omanual de instruções do seu dispositivo.
Existe apossibilidade de utilizar os micr
sistema mãos-livres paraoseu telemóvel.
Fazer uma chamada
• Marque onúmerodetelefone diretamente no seu dispositivo para
fazer uma chamada.
Função da marcação por voz
• Verique se oseu telemóvel suporta amarcação por voz.
• Mantenha o botão multifunções (1) premido durante cerca de 2
segundos. Ouve-se um sinal acústico breve.
• No seu telemóvel éaberto ocomando por voz.
• Para fazer uma chamada, proceda como descrito no manual de
instruções do seu telemóvel.
• Pronuncie onome da pessoa paraaqual deseja telefonar.
• Se os registos de voz com os respetivos números de telefone
(gravados no seu telemóvel) estiverem emparelhados, onúmeroé
marcado.
Atender uma chamada
• Prima o botão multifunções (1) uma vez paraatender uma
chamada recebida.
oauscultador
es como um
Rejeitar uma chamada
Para rejeitar uma chamada recebida, prima o botão multifunções
(1) duas vezes brevemente. Ouve-se um sinal acústico breve.
Terminar uma chamada
• Durante achamada, prima o botão multifunções (1) uma vez
paraterminar achamada.
52
Page 54

Repetição de marcação
• Prima o botão multifunções (1) duas vezes brevemente para
marcar onúmerodaúltima chamada.
• Ouve-se um sinal acústico breve.
5.5. Regulação do volume de som
• Prima o botão [VOLUME -] (6) parareduzir ovolume.
• Prima o botão [VOLUME +] (5) paraaumentar ovolume.
5.6. Reprodução de áudio
• Mantenha o botão [VOLUME -] (6) premido parasaltar paraa
faixa anterior.
• Mantenha o botão [VOLUME +] (5) premido parasaltar paraa
faixa seguinte.
5.7. Desligar os auscultadores
• Desligue os auscultadores.
• Desligue os auscultadores através das congurações
Bluetooth
®
seu dispositivo nal.
5.8. Capacidade da bateria
• Se abateria estiver fraca (<25%) ouve-se aindicação de voz "low
battery,please charge" (Bateria fraca, carregar p.f.) eoLED de
estado (3) pisca lentamente.
• Carregue os microauscultadores como descrito no ponto 4.
Colocação em funcionamento.
Nota
Otempo de conversação ou standby disponível depende, no
entanto, do respetivo telemóvel utilizado ou dos outros dispositivos
Bluetooth
®
compatíveis, bem como das denições do utilizador,
das preferências do utilizador edas condições ambientais
correspondentes.
do
6. Manutenção econservação
limpe oproduto apenas com um pano sem apos ligeiramente
humedecido enão utilize produtos de limpeza agressivos. Certique-se
de que não entraágua paradentrodoproduto.
53
Page 55

7. Exclusão de garantia
AHama GmbH &CoKGnão assume qualquer responsabilidade
ou garantia por danos provocados pela instalação, montagem ou
manuseamento incorrectos do produto enão observação do das
instruções de utilização e/ou das informações de segurança.
8. Contactos eapoio técnico
Em caso de dúvidas sobreoproduto, contacte oserviço de assistência ao
produto da Hama.
Linha de apoio ao cliente: +49 9091 502-115 (alemão/inglês)
Para mais informações sobreosserviços de apoio ao cliente, visite: www.
hama.com
9.
Especificações técnicas
Tecnologia
Bluetooth
®
Perssuportados
Frequência paraastransmissões
Bluetooth
®
Microauscultadores
Bluetooth®v5.0
A2DP V1.3, AVRCP V1.6,
HFP V1.7, HSP V1.2
2402 –2480 MHz
Bluetooth
Alcance <10m
Bateria
Bateria Polímeros de lítio de 3,7 V
Capacidade mín. 90 mAh
Consumo de energia max. 5V 65mA
Tempo de carregamento ~2,5 –3h
Hibernação ~180h
Tempo em reprodução de música ~6h
Tempo em conversação ~7h
®
54
Page 56

10. Indicações de eliminação
Nota em Protecção Ambiental:
Após aimplementação da directiva comunitária 2012/19/EU
e2006/66/EU no sistema legal nacional, oseguinte
aplica-se: Os aparelhos eléctricos eelectrónicos, bem como
baterias, não podem ser eliminados juntamente com olixo
doméstico. Consumidores estão obrigados por lei acolocar os
aparelhos eléctricos eelectrónicos, bem como baterias, sem uso em
locais públicos especícos paraeste efeito ou no ponto de venda. Os
detalhes paraeste processo são denidos por lei pelos respectivos
países. Este símbolo no produto, omanual de instruções ou a
embalagem indicam que oproduto está sujeito aestes regulamentos.
Reciclando, reutilizando os materiais dos seus velhos aparelhos/
baterias, esta afazer uma enorme contribuição paraaprotecção do
ambiente.
11. Declaração de conformidade
O(a) abaixo assinado(a) Hama GmbH &CoKGdeclaraque o
presente tipo de equipamento de rádio [00137495] está em
conformidade com aDiretiva 2014/53/UE. Otexto integral da
declaração de conformidade está disponível no seguinte endereço de
Internet:
www.hama.com-> 00137495-> Downloads.
Banda(s) de frequências 2402 –2480 MHz
Potência máxima transmitida 3,82mW E.I.R.P.
55
Page 57

Hama GmbH &CoKG
86652 Monheim /Germany
www.hama.com
®
"The
Bluetooth
ownedbythe Bluetooth SIG, Inc. andany useofsuchmarks by
Hama GmbH &CoKGisunder license. Other trademarks and
tradenames are thoseoftheirrespective owners."
Alllistedbrandsare trademarks of thecorrespondingcompanies.
Errors andomissions excepted,and subjecttotechnicalchanges.
Ourgeneralterms of deliveryand paymentare applied.
wordmarkand logosare registeredtrademarks
00137495/01.19
 Loading...