


C O L O R T E L E V I S I O N
M W 8 2 - 2 6 9 9 N I C / F T
V

Contents
If the dealer has already installed the TV set and |
|
made adjustments, then begin on page 7 of this |
|
instruction manual. |
|
Safety, installation and connections |
3 |
Safety precautions . . . . . . . . . . . . . . . . . . . |
. . . . 3 |
Example of connections . . . . . . . . . . . . . . . |
. . . . 3 |
Preparations and |
|
assigning program positions |
4-6 |
Inserting batteries in the remote control . . |
. . . . 4 |
Switching the set on and off . . . . . . . . . . . . |
. . . . 4 |
The DIALOG CENTER as a user guide . . . . . |
. . . . 4 |
Assigning program positions with the |
|
Automatic Tuning System ATS . . . . . . . . . |
. . . . 5 |
Deleting programmes . . . . . . . . . . . . . . . . . |
. . . . 5 |
Sorting programmes . . . . . . . . . . . . . . . . . |
. . . . 5 |
Limiting program position selection . . . . . . |
. . . . 5 |
Manual tuning of TV programmes . . . . . . . |
. . . . 6 |
The remote control, short description |
|
for TV operation |
7 |
Sound tuning |
8 |
Calling up the » Sound « menu . . . . . . . . . . |
. . . . 8 |
Stereo width . . . . . . . . . . . . . . . . . . . . . . . . |
. . . . 8 |
Sound (Stereo-/two-tone, mono) . . . . . . . . |
. . . . 8 |
Treble, bass, balance . . . . . . . . . . . . . . . . . |
. . . . 8 |
Picture tuning |
8 |
Calling up the » Picture « menu . . . . . . . . . |
. . . . 8 |
Contrast . . . . . . . . . . . . . . . . . . . . . . . . . . . |
. . . . 8 |
Picture sharpness . . . . . . . . . . . . . . . . . . . . |
. . . . 8 |
Brightness and colour contrast . . . . . . . . . |
. . . . 8 |
Switching the picture format to 16:9 . . . . . |
. . . . 9 |
Videotext operation |
10-13 |
Short description of videotext . . . . . . . . . . |
. . . 10 |
TOP-FLOF text operation . . . . . . . . . . . . . . . |
. . . 11 |
Normal videotext operation . . . . . . . . . . . . |
. . . 11 |
Enlarging the videotext page . . . . . . . . . . . |
. . . 11 |
Page-freeze for multi-page displays . . . . . . |
. . . 12 |
Calling up sub-pages directly . . . . . . . . . . . |
. . . 12 |
Answer release . . . . . . . . . . . . . . . . . . . . . . |
. . . 12 |
» Page catching « – select certain videotext |
|
pages directly and call up . . . . . . . . . . . . . . |
. . . 12 |
Bridging waiting times . . . . . . . . . . . . . . . . |
. . . 13 |
Comfort functions |
14-15 |
Special functions . . . . . . . . . . . . . . . . . . . . |
. . . 14 |
TV on with . . . . . . . . . . . . . . . . . . . . . . . . . |
. . . 14 |
Picture/sound scale . . . . . . . . . . . . . . . . . . |
. . . 14 |
Station name . . . . . . . . . . . . . . . . . . . . . . . |
. . . 14 |
Equalizing the volume . . . . . . . . . . . . . . . . . |
. . . 14 |
Sleep Timer . . . . . . . . . . . . . . . . . . . . . . . |
. . . 14 |
Displaying the programme position number |
. . . 14 |
Parental lock . . . . . . . . . . . . . . . . . . . . . . |
. . . 15 |
Decoder selection . . . . . . . . . . . . . . . . . . . . |
. . . 15 |
Manually adjusting the colour norm . . . . . . |
. . . 15 |
Selecting a blue screen . . . . . . . . . . . . . . . . |
. . . 15 |
Selecting a black screen . . . . . . . . . . . . . . . |
. . . 15 |
Sat . . . . . . . . . . . . . . . . . . . . . . . . . . . . . . . . |
. . . 15 |
Service code . . . . . . . . . . . . . . . . . . . . . . . . |
. . . 15 |
Connection possibilities |
|
and operations |
16-17 |
AUDIO/VIDEO connections . . . . . . . . . . . . . |
. . . 16 |
Connecting a decoder or |
|
satellite receiver . . . . . . . . . . . . . . . . . . . . . |
. . . 16 |
Connecting a video recorder or |
|
SET TOP box . . . . . . . . . . . . . . . . . . . . . . . |
. . . 16 |
Copying video tapes |
|
via the TV set . . . . . . . . . . . . . . . . . . . . . . . |
. . . 17 |
Connecting a camera recorder . . . . . . . . . . . |
. . . 17 |
Connecting headphones . . . . . . . . . . . . . . . |
. . . 17 |
Technical data |
18 |
Correcting problems yourself |
19 |
Environmentally relevant information is mar- |
|
ked using this symbol. |
|
Notes on the environment by |
|
Grundig |
|
Technology and ecology combine into a convincing |
|
overall concept with this TV set. Ecologically high- |
|
quality materials are used exclusively. The housing |
|
contains a high amount of recyclable parts from |
|
used plastics and the surface colours used are |
|
water-based, partly recycled. Wherever possible, |
|
painting of individual housing parts has been omit- |
|
ted. Due to the optimized housing construction, |
|
flame protection materials have been omitted. The |
|
number of plastic types has been reduced through |
|
and through in order to ensure high-quality recy- |
|
cling when the set is put out of use – all larger |
|
plastic parts are marked. For optimum re-use, this |
|
TV set has been constructed in such a way as to |
|
make dismantling very easy. |
|
2

|
|
|
Safety and installation |
Dear customer |
|||
|
|
|
In order that you may enjoy the entertainment of |
|
|
||
|
|
|
this high-quality comfortable TV set for a long time |
|
|
|
|
! |
it is very important that you observe the following |
||
points when installing the set. |
|||
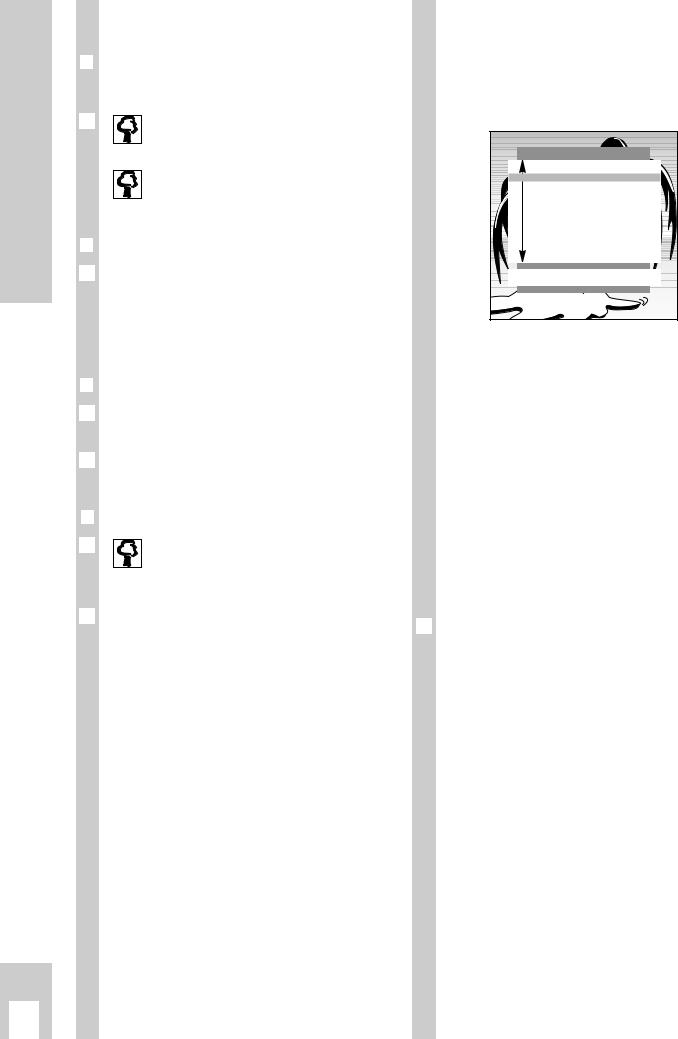
The ideal position for viewing is 5 times the diago- |
|||
nal width of the screen.
External lights in the direction of the screen have a negative influence on picture quality.
|
5 x |
! |
Sufficient space inside cabinets in a corresponding |
|
location. |
10 |
10 |
cm |
cm |
20 |
Golf |
20 cm |
|
cm |
|


! Do not place any covers on the ventilation slits.
! Heat could build up inside the set.
|
Heat building up inside the set causes danger and |
|
has a negative influence on the life expectancy of |
! |
the set. From time to time, have a specialist remove |
the particles which have collected inside the set. |
|
Do not damage the mains supply cable. |
|
|
“The appliance may only be operated using the |
! |
mains cable set supplied. It prevents mains interfe- |
rence and is an integral part of the device approval”. |
|
Do not set up any magnetic fields (e.g. loud- |
|
! |
speakers) near the set. |
Make sure that no liquids or external objects pene- |
|
! |
trate the appliance (danger of short circuits). |
Clean the screen with a soft damp cloth only. Use |
|
! |
only clear water. |
Avoid damage by lightning by removing the mains |
and aerial cables.
Even if the set is switched off, damage can occur due to lightning striking the mains supply and/or the aerial cable.
! |
Opening and maintenance of the set may be carried |
! |
out only by authorized service personnel. |
This TV set is designed to receive and reproduce |
picture and sound signals.
Any other use is expressly prohibited.
Connections
Example of connections (TV set and video recorder)
AV1 |
|
|
|
|
EURO - AV 2 |
L |
AUDIO |
|
L |
|
|
O |
I |
EURO - AV 1 |
U |
|
|
T |
N |
|
R |
R |
|
Safety, installation and connections
3
Preparations
!
1
1
1
Preparations |
|
The DIALOG CENTER as a user |
|||
Inserting batteries in the remote control |
guide |
|
|
||
The DIALOG CENTER and the individual pages of |
|||||
|
|
||||
Observe polarity in the battery case. |
|
the user guide display the possible functions and |
|||
|
|
the buttons on the remote control with which these |
|||
When the batteries are spent a |
prompt |
functions may be activated. |
|||
» Battery « will appear on the screen. |
|
|
|
|
|
|
|
|
DIALOG CENTER |
||
Spent batteries must always be removed. |
|
LANGUAGE SELECTION |
|||
Dispose of spent batteries in an |
environ- |
|
SLEEP TIMER |
||
mentally safe manner. |
|
|
PARENTAL LOCK |
||
|
|
SPECIAL FUNCTIONS |
|||
|
|
|
PROGRAM SORT |
||
Switching the set on |
|
|
MANUAL TUNING |
||
|
|
AUTOMATIC TUNING SYSTEM |
|||
|
|
|
|||
|
|
|
SERVICE |
|
|
Press button ü on the set. |
|
|
OK |
TXT |
|
If the display lights up, then the set is in standby. |
|
|
|
||
Use number buttons 1 – AV 0 or the P |
|
|
|
||
button on the remote control to switch the TV set |
Button symbols and dialogue lines display possible |
||||
on completely. |
|
||||
|
operating steps. |
|
|||
|
|
|
|||
Switching the set to standby |
|
The characters on the screen are symbols for |
|||
|
the following buttons on the remote control: |
||||
Press button A on the remote control. |
|
Symbol |
Button |
Function |
|
The set is not switched off completely. |
|
|
Pp |
Selects lines or functions |
|
The set can be switched back on using the remote |
|
|
step by step on a page. |
||
|
|
Changes settings. |
|||
control. |
|
F E |
|||
Switching the set off completely |
|
|
h |
Calls up the DIALOG CENTER |
|
|
|
|
(h and G) and switches |
||
If you are not using the set for a longer |
|
|
back from the pages to the |
||
|
|
DIALOG CENTER. |
|||
period of time (e.g. at night), then switch the |
OK |
G |
Confirms functions. |
||
set off completely. |
|
||||
|
|
¢TXT |
|
||
This saves energy. |
|
TXT |
Exit settings. |
||
Press button ü on the set. |
|
Please memorize these buttons, they are required |
|||
|
|||||
repeatedly for the following operating steps!
4

Assigning programme positions with the automatic tuning system ATS
|
The set is equipped with the automatic programme |
|
After searching, the set switches to program posi- |
|||||||
|
position search system ATS which carries out pro- |
|
tion 1 and the page » SORT « appears. |
|||||||
|
gramme position assignment for you. |
|
|
|
|
|
||||
|
You start the automatic search and may afterwards |
|
SORT |
|||||||
|
sort the programmes in a sequence of your choice. |
|
|
P 01 |
||||||
|
You may also delete programmes which have been |
|
|
|||||||
|
|
|
P 02 |
|||||||
|
found more than once or those with bad reception |
|
|
P 03 |
||||||
|
|
|
P 05 |
|||||||
|
from the programme list. |
|
|
|
|
|
|
P 04 |
||
|
|
|
|
|
|
|
P 07 |
|||
|
|
|
|
|
|
|
|
|
|
P 06 |
|
|
|
|
|
|
|
|
|
|
P 08 |
1 |
After |
switching |
on |
the |
set |
the |
page |
|
|
P 09 |
|
|
P 10 |
||||||||
|
|
|
||||||||
|
» LANGUAGE SELECTION « appears. |
|
|
|
OK |
Sort |
||||
|
|
|
|
AUX |
Delete |
|||||
|
|
|
|
|
|
|
|
|
|
Return |
|
|
|
|
|
|
|
|
|
TXT |
TV |
|
|
LANGUAGE SELECTION |
|
|
|
|
|
|
||
|
|
D |
Deutsch |
|
|
|
|
|
|
|
|
|
DK Dansk |
|
|
|
|
|
|
|
|
|
|
E |
Español |
|
|
|
|
|
|
|
|
|
F |
Français |
|
|
|
|
Deleting programmes |
||
|
|
GB English |
|
|
|
|
||||
|
|
FIN Suomi |
|
|
|
|
|
|
|
|
|
|
GR Hellas |
|
|
|
|
1 |
Select the programme to be deleted with button p, |
||
|
|
I |
Italiano |
|
|
|
|
|||
|
|
N |
Norge |
|
|
|
|
|||
|
|
NL Nederlands |
|
|
|
|
|
P. |
|
|
|
|
P |
Portugues |
|
|
|
|
|
|
|
|
|
S |
Svenska |
|
|
|
|
|
|
|
|
|
TR Türkçe |
|
|
|
|
|
Delete the programme with the -button. |
||
|
|
|
|
|
|
|
|
2 |
||
|
|
OK |
|
|
|
|
|
|
|
|
|
|
|
|
|
|
|
|
|
To delete more programmes, repeat, beginning |
|
|
|
|
|
|
|
|
|
|
with step 1 . |
|
|
A selection can be made from several languages for |
|
|
|
|
|
||
|
|
|
|
|
||||
|
the dialogue between you and the TV. |
Sorting programmes |
||||||
|
The user guide displays appear in the selected |
|||||||
|
language. |
1 |
Select the programme which is to be re-sorted by |
|||||
|
|
|
|
|||||
2 |
Select the dialogue language with button p or P |
|
|
pressing button p, P. |
||||
|
|
|
|
|
||||
|
and confirm with the G button. |
2 |
Mark the programme with the G button. |
|||||
|
|
|
|
|||||
3 |
Select the country with the por button Pand con- |
3 |
Select a new programme position with button p, |
|||||
|
firm with the G button. |
|||||||
|
If you do not find your country in the list, then se- |
|
|
P. |
||||
|
|
|
|
|
|
|||
|
lect » Others « and confirm with the G button. |
4 |
Save the setting with the G button. |
|||||
|
|
|
|
|||||
|
The page » AUTOMATIC TUNING SYSTEM « appears. |
|
|
To sort more programmes, repeat, beginning with |
||||
|
|
|
|
|
|
|||
|
|
|
|
|
|
step 1 . |
||
|
|
|
|
|
|
|||
|
|
|
|
|
|
|||
|
|
|
|
|
|
|
|
|
|
5 |
Exit setting by pressing ¢. |
|
|
TXT |
|
Pages » AUTOMATIC TUNING SYSTEM «, » SORT « |
|
AUTOMATIC TUNING SYSTEM |
(under » Programme sorting «) and » LANGUAGE |
|
|
|
|
■ |
|
SELECTION « can also be called up directly from the |
|
|
» DIALOG CENTER «. |
OK |
Start |
|
Settings
The page » AUTOMATIC TUNING SYSTEM « can also be called up directly from the » DIALOG CENTER «.
Depending on the number of programs received, this activity can take one minute or longer.
5

Settings
Limiting the programme position selection
The ATS search saves all programmes it has found and automatically “locks” the first position to which no program is assigned. In this way, when programme positions are selected step by step (“zapping“), using buttons p, P only programmes which have been found can be selected.
You may also enter this limit manually, in the example the “lock” has been activated as of programme position 6.
1Press the h button and then G.
The page » DIALOG CENTER « will appear on the screen.
2Select the line » MANUAL TUNING « using button por Pand confirm with G.
3Select programme position 6 on the » MANUAL TUNING « page with the F or E button.
4Select the line called » C/S «, then select »Channel « using F or E.
5Select the line called » Channel «, then select » 00 « using 0 … 9.
6Save this setting with Gand exit using button ¢TXT .
Now only the first 5 channel positions can be switched through in rapid sequence with the p or P button.
All single digit channel positions – as well as the
“blocked” – can continue to be selected using the digit buttons 0 … 9.“All” channel positions can be selected using the digit buttons if a two digit channel position is blocked.
Setting TV programmes manually
1Press the h button and then the G button. The page »DIALOG CENTER« appears.
2Select the line »MANUAL TUNING« with the p or Pbutton and confirm with the G button.
MANUAL TUNING |
|
|
Program |
01 |
|
C/S |
Channel |
Channel |
C 34 |
Finetun. |
00 |
Standard |
automatic |
|
OK |
Memorize |
0 – 9 |
TXT |
Direct channel input
1Select the programme position with the digit buttons 0 … 9 or with the F or E button.
2Select the line »C/S« with the p or P button. Select »channel« or »s-channel« with the F or E button.
3Select the line »Channel« with the por Pbutton.
Enter the desired channel number with the digit buttons 0 … 9 or with the F or E button.
4Select the line »Standard« witht the por Pbutton. Select the required setting with the For Ebutton.
5Fine-tune the picture if necessary. To do this select
the line »Finetun.« with button p or P. Alter fine tuning with buttons F or E.
6 Store setting with the G button.
To set more programmes, repeat the procedure
starting at point 1 .
7 End setting with the ¢TXT button.
Automatic search
1Select the line »Channel« with the por Pbutton.
2Start the automatic station search with the »blue« button.
3Select the line »Programme« with button por P. Select the channel position, at which you would like
to save the channel once found, with the numeric buttons 0 … 9 (01 – 99).
The colour and sound standards are allocated auto-
matically. If the colour and/or sound not correct, select the line »Standard« with button por P. Select the required setting with the F or E button.
4 |
Fine-tune the picture if necessary. To do this select |
|
the line »Finetun.« with button p or P. |
|
Alter fine tuning with buttons F or E. |
5 |
Store setting with the G button. |
To set more programmes, repeat the procedure starting at point 1 .
6 End setting with the ¢TXT button.
6
 Loading...