

Page 1

Maxwell
#asic
Page 2

Contents
Contents
Overview . . . . . . . . . . . . . . . . . . . . . . . . . . . . . . . . . . . . . . . . . . . . . . . . . . . . . . . . . . . . . . . . . . . . . . . . . . . . . 3
Keys . . . . . . . . . . . . . . . . . . . . . . . . . . . . . . . . . . . . . . . . . . . . . . . . . . . . . . . . . . . . .
Connections . . . . . . . . . . . . . . . . . . . . . . . . . . . . . . . . . . . . . . . . . . . . . . . . . . . . . . . . . . .
Illustration in the user guide . . . . . . . . . . . . . . . . . . . . . . . . . . . . . . . . . . . . . . . . . . . . . . . . . .
Safety precautions . . . . . . . . . . . . . . . . . . . . . . . . . . . . . . . . . . . . . . . . . . . . . . . . . . . . . . .
Using the telephone . . . . . . . . . . . . . . . . . . . . . . . . . . . . . . . . . . . . . . . . . . . . . . . . . . . . . . . . . . . . . . . . . . 8
Getting to know your telephone . . . . . . . . . . . . . . . . . . . . . . . . . . . . . . . . . . . . . . . . . . . . . . . . . . . . .
Making calls . . . . . . . . . . . . . . . . . . . . . . . . . . . . . . . . . . . . . . . . . . . . . . . . . . . . . . . . . . .
Call lists . . . . . . . . . . . . . . . . . . . . . . . . . . . . . . . . . . . . . . . . . . . . . . . . . . . . . . . . . . .
Message Centre . . . . . . . . . . . . . . . . . . . . . . . . . . . . . . . . . . . . . . . . . . . . . . . . . . . . . . . . .
Voice mails . . . . . . . . . . . . . . . . . . . . . . . . . . . . . . . . . . . . . . . . . . . . . . . . . . . . . . . . . . . . .
Directories . . . . . . . . . . . . . . . . . . . . . . . . . . . . . . . . . . . . . . . . . . . . . . . . . . . . . . . . . . . . .
Door interphone . . . . . . . . . . . . . . . . . . . . . . . . . . . . . . . . . . . . . . . . . . . . . . . . . . . . . . . .
Settings . . . . . . . . . . . . . . . . . . . . . . . . . . . . . . . . . . . . . . . . . . . . . . . . . . . . . . . . . . .
Basic settings . . . . . . . . . . . . . . . . . . . . . . . . . . . . . . . . . . . . . . . . . . . . . . . . . . . . . . . . . .
Configuring other settings with the Web configurator . . . . . . . . . . . . . . . . . . . . . . . . . . . . . . . . . . 36
Status of the telephone . . . . . . . . . . . . . . . . . . . . . . . . . . . . . . . . . . . . . . . . . . . . . . . . . . . . . .
Appendix . . . . . . . . . . . . . . . . . . . . . . . . . . . . . . . . . . . . . . . . . . . . . . . . . . . . . . . . . . .
Service (Customer Care) . . . . . . . . . . . . . . . . . . . . . . . . . . . . . . . . . . . . . . . . . . . . . . . . . . . . . . . . . . . . .
Manufacturer's advice . . . . . . . . . . . . . . . . . . . . . . . . . . . . . . . . . . . . . . . . . . . . . . . . . . . . . . . .
Menu tree . . . . . . . . . . . . . . . . . . . . . . . . . . . . . . . . . . . . . . . . . . . . . . . . . . . . . . . . . . .
Display icons . . . . . . . . . . . . . . . . . . . . . . . . . . . . . . . . . . . . . . . . . . . . . . . . . . . . . . . . . . .
Index . . . . . . . . . . . . . . . . . . . . . . . . . . . . . . . . . . . . . . . . . . . . . . . . . . . . . . . . . . . . . . . . . . . . . . . . . . . . . . . . 55
. . . . . . . . . . . . . . . . . . . . . . 3
. . . . . . . . . . . . . . . . 5
. . . . . . . . . . 6
. . . . . . . . . . . . . 7
. . . 8
. . . . . . . . . . . . . . . 12
. . . . . . . . . . . . . . . . . . . . 21
. . . . . . . . . . . . . . 23
. . . . . . . . . . . . . . . 24
. . . . . . . . . . . . . . . 25
. . . . . . . . . . . . . . 29
. . . . . . . . . . . . . . . . . . 30
. . . . . . . . . . . . . . . 30
. . . . . . . . . 46
. . . . . . . . . . . . . . . . 47
. . 47
. . . . . . . . . 47
. . . . . . . . . . . . . . . . . 53
. . . . . . . . . . . . . . . 54
If the telephone is connected to a telephone system, the telephone system can have a
bearing on the telephone functions or block or add to them.
Further information: User guide for the telephone system
This guide is aimed at telephone users.
Information for administrators: wiki.gigasetpro.com
2
Page 3

Keys
10
13
1 2 3 4
9
12
11
6
7
14
8
5
15
Keys
Overview
p. 16
1 Display keys Activate the display key functions p. 8
2 Volume keys Depending on the operating mode: Adjust the volume
of the speaker, receiver, headset or ringtone
3 Star key Display special characters when inputting text p. 11
Activate/deactivate the ringtone p. 15
4 Hash key Switch text mode (upper/lower case letters, digits) p. 11
Lock/unlock the keypad p. 11
3
Page 4

Keys
5 Status LED Status display for incoming calls
Flashes: Incoming call
Lights up: Call in progress
6 Control key Scroll through lists and entries. In idle status: p. 9
Open the call list p. 21
Open the menu p. 10
Open the directory p. 25
7 Do Not Disturb key Activate/deactivate Do Not Disturb (DND) p. 15
Lights up: "Do Not Disturb" function is activated
8 Message Centre Open call and message lists p. 21
Flashes: New message in the Message Centre
9 Consultation call key Initiate/end consultation call; put participant on hold p. 18
10 End/back key Cancel function;
go back one menu level (press briefly);
return to idle status (press and hold)
11 Conference call key Initiate conference call p. 19
12 Handsfree key Activate/deactivate speakers p. 16
Start dialling p. 12
Lights up: Call is being made via the speaker
(handsfree mode)
13 Headset key Make call via headset p. 15
Start dialling p. 12
Lights up: Call is being made via the headset
14 Mute key Activate/deactivate microphone (mute) p. 16
Lights up: The microphone is muted
15 Microphone Microphone of the handsfree unit
p. 10
4
Page 5

Connections
1 2 3 4 5 6
1 Expansion module with function keys
2 LAN (PoE)
3
4 Receiver
5 Headset with RJ11 plug
6 Power adapter
PC; a PC can also be connected to the telephone instead of to the local network,
the telephone establishes the network connection
Connections
5
Page 6

Illustration in the user guide
Illustration in the user guide
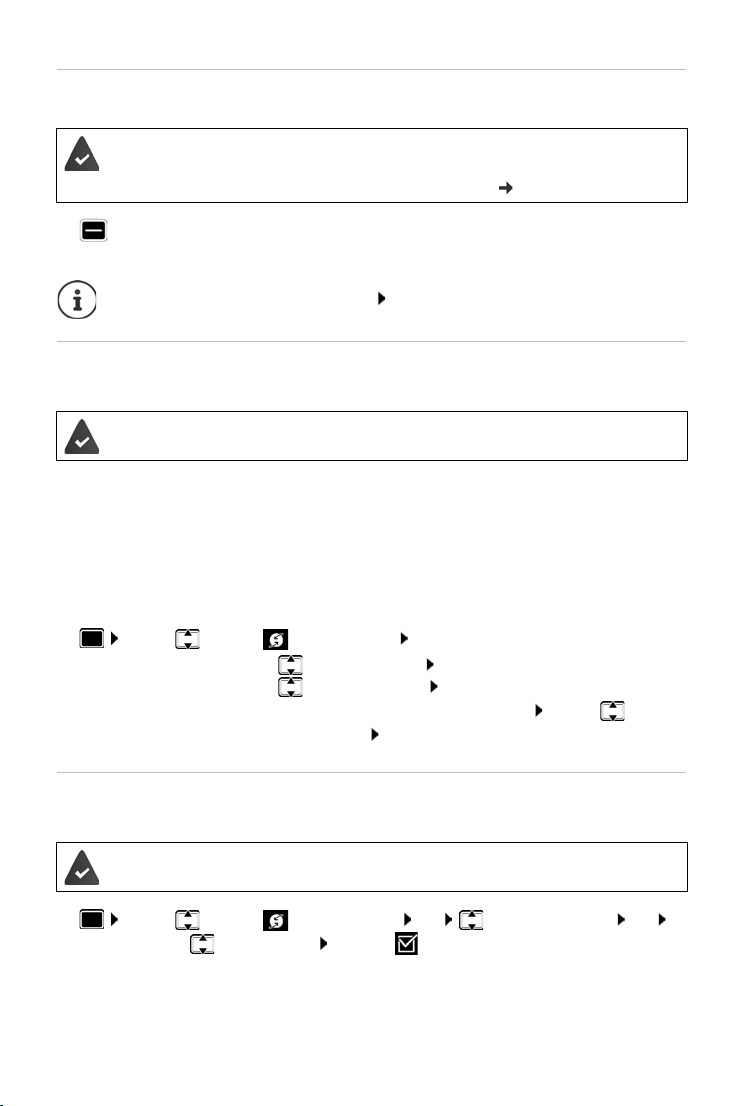
Icons
Important information regarding function and appropriate handling or functions
that could generate costs.
Prerequisite for carrying out the following action.
Additional helpful information.
Keys
Handsfree key Do not disturb key
Headset key Message key
End/Back key / Volume keys
Conference call key Hash key
Consultation call key Star key
Mute key – Digit/letter keys
/ Control key rim / centre
OK, Back, Select, Save, . . . Display keys
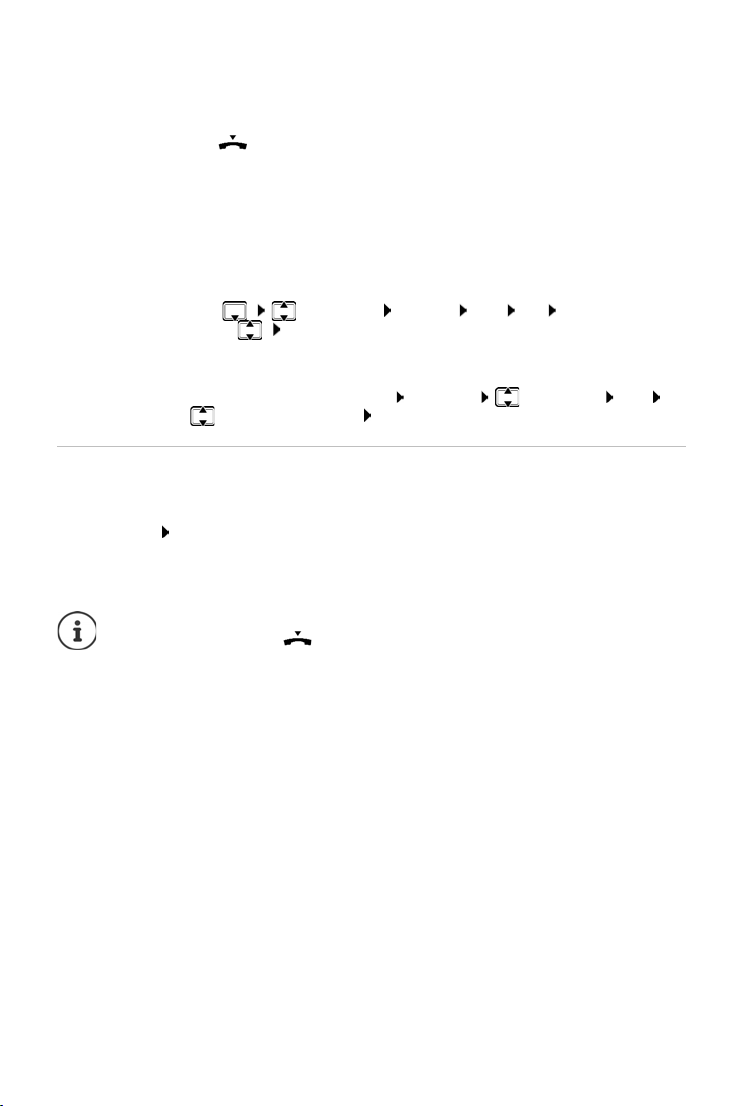
Procedures
Example: Setting the display language
¤ . . . use to select Settings OK Language OK . . . use to select
the language Select ( = selected)
Step Follow this procedure
¤ Press the centre of the Control key in idle status.
The main menu opens.
¤
¤ OK
¤ Language
¤ OK
Navigate to the icon using the Control key .
Press OK to confirm. The submenu Settings opens.
Select the Language entry using the Control key .
Press OK to confirm. The submenu Language opens.
¤ Press the Control key to select the language required.
¤ Select Press the Display key Select to highlight the entry.
The selected option is indicated with .
6
Page 7

Safety precautions
Safety precautions
Read the safety precautions and the user guide before use.
Comprehensive user guides for all telephones and telephone systems as well as
for accessories can be found online at gigasetpro.com
thereby help to save paper while providing fast access to the complete up-to-date
documentation at any time.
The device cannot be used in the event of a power failure. In case of a power failure it
is also not possible to make emergency calls.
Emergency numbers cannot be dialled if the keypad/display lock is activated.
Do not use the devices in environments with a potential explosion hazard
(e.g. paint shops).
The devices are not splashproof. For this reason do not install them in a damp
environment such as bathrooms or shower rooms.
Use only the power adapter indicated on the device.
Remove faulty devices from use or have them repaired by our Service team, as these
could interfere with other wireless services.
To connect the phone to the local network and PC only use shielded cables.
in the Support c ategory. We
7
Page 8

Getting to know your telephone
4
5
2
3
01.04.2018
12:15
415
Redial Select Line
10 Ben
1
Back OK
Current display key
functions
Display keys
Using the telephone
Getting to know your telephone
Display
Display in idle status (example):
1 Name of the standard connection, possibly abbreviated (is allocated by the
administrator e. g. extension and/or name of the telephone user)
2Display key functions p. 8
3 Status icons p. 54
4 Message display: New messages on the answer machine p. 24
Missed calls p. 21
5 Date and time p. 30
Setting/modifying display colours: p. 32
Setting date and time: p. 30
Activating/deactivating screensaver: p. 41
p. 12
Display keys
The display keys perform a range of functions depending on the operating situation.
8
Page 9

Getting to know your telephone
Control key
The Control key enables you to navigate the menus and input fields, and also
to call up certain functions depending on the situation.
In the description below, the side of the Control key (up, down, right, left) that you have to press
in the different operating situations is marked in black, e. g. for "press right on the Control
key" or for "press the centre of the Control key".
In idle status
Open the main menu
Open the call lists
Open the directory assigned to the key Briefly press
Open the list of available directories Press and hold
In submenus and lists and selection fields
Select/confirm function
Scroll one line upwards/downwards Briefly press
Scroll the list upwards/downwards Press and hold
In input fields
Moves the cursor up/down line by line Briefly press
Moves the cursor to the left/right one character at a time Briefly press
Moves the cursor rapidly to the left/right Press and hold
During a conversation
Open the directory Briefly press
Open the list of available online directories Press and hold
9
Page 10

Getting to know your telephone
Menu
Settings
OKBack
Settings
Date + Time
Audio Settings
OKBack
Menu navigation
The functions of the telephone are displayed in a menu that consists of several levels.
Menu overview p. 53
Main menu
In idle status: Press the centre of the Control key .
The function selected from the display menu is
yed with an icon.
displa
Arrows indicate whether there are more menu entries:
above, below, above and below
¤ . . . Use the Control key to select a submenu
¤ Press the Display key OK
or
¤ Press the Control key
Submenus
The functions in the submenus are displayed as lists. The
selected function is highlighted.
¤ . . . Use the Control key to select a function
¤ Press the Display key OK
or
¤ Press the Control key
If not all the functions can be displayed, arrows are shown below.
Displaying more list entries: . . . scroll in the direction of the arrow with the Control key
Returning to the previous menu level
¤ Press the Display key Back
or
¤ press the End key briefly
Returning to idle status
¤ Press and hold the End key
If a key is not pressed, after 3 minutes the display will automatically change to idle
status.
Settings which have not been saved or confirmed are rejected.
10
Page 11

Getting to know your telephone
Edit Entry
Surname:
abc
Pa|
...........................................................
abc2дбавгз
Entering text
Input position
¤ Use to select an entry field. A field is activated when the cursor is blinking inside it.
¤ Use to move the position of the cursor.
Correcting incorrect entries
Delete characters to the left of the cursor:
Entering letters/characters
Multiple letters and digits are assigned to each key
bet
ween and and the key. As soon
as a key is pressed, the possible characters are displayed
at the bottom of the display.
The selected character is highlighted.
Select letters/digits:
¤ Press the key briefly several times in succession
Switch between lower case, upper case and digit entry mode:
¤ Press the Hash key . . . the mode set is displayed at the bottom on the right
When editing a directory entry, the first letter and each letter following a space is
automatically in upper case.
Entering special characters:
¤ Press the Star key . . . the available special characters are displayed . . . use to
navigate to the character you want OK
Locking/unlocking the keypad
The keypad lock prevents any accidental use of the telephone.
Locking the keypad:
Unlocking the keypad:
Changing the keypad lock PIN with the Web configurator: p. 36
If a call is indicated on the handset, the
accept the call. It then locks again when the call is finished.
It is not possible to call emergency numbers either when k
11
¤ Press and hold . . . the following icon appears on the
display
¤ Press and hold . . . use to enter the keypad lock PIN
(default setting: 1234) OK
keypad automatically unlocks and you can
eypad lock is activated.
Page 12

Making calls
Making calls
The phone is connected to the LAN.
At least one VoIP connection has been set up and assigned to the telephone.
VoIP connections are set up by the administrator with the Web configurator or
assigned using a PABX.
Up to four VoIP connections (call numbers) can be assigned to the telephone. The first
connection to be set up is the standard send connection. The name of the standard
send connection is displayed in idle status at the top left of the display header
( p. 8).
No connection available: the following icon is shown in the display
Information about the telephone connections and the standard send connection:
Web configurator p. 46
Making a call
¤ . . . use to enter a number lift the handset
or
¤ lift the handset . . . use to enter a number Dial
Use + as a prefix for calls abroad: Press and hold key
Calls are initiated via the standard send connection if you do not select another option. To use
another VoIP connection:
¤ Select Line . . . use to select required connection Dial . . . use to enter the
number Dial
Using the speaker to make calls:
Using the headset to make calls:
You can switch over at any time during the conversation.
In the following instructions, the icon also always stands for or .
When entering the call number:
Deleting incorrectly entered numbers to the left of the cursor:
Transferring a number to the local directory: ¤ ( p. 25)
Cancel dialling:
Incoming call during number entry:
Accept the call:
Reject the call:
12
¤ End
¤ Accept
¤ Reject
¤ Press the Handsfree key
or: Enter the number Press
¤ Press the Headset key
¤
Page 13

Making calls
Dialling from the directory
¤ . . . use to open the directory select entry lift the handset
or
¤ . . . use to select Contacts OK select entry lift the handset
More than one number in the directory entry: . . . use to select a number OK
Dialling from the redial list
The redial list contains the most recently dialled numbers.
¤ In idle status press Redial select entry lift the handset
or
¤ . . . use to open the call lists Outgoing select entry lift the handset
Dialling from a call list
The call lists contain the most recent accepted, outgoing and missed calls ( p. 21). If the
number is saved in the directory, the name is displayed.
¤ . . . use to open the call lists select a list (All, Accepted, Missed, Outgoing)
select entry lift the handset
or
¤ . . . use to select Call Lists select a list OK select an entry
lift the handset
The list of new missed calls can also be opened by pressing the Message key .
Dialling with quick dial keys
Keys 1 to 4 on the phone can be assigned a phone number, that is then dialled with one
keypress.
Assign quick dial key from the Web configurator: p. 41.
¤ Press and hold q uick dia l key – . . . Th e nu mber sav ed fo r the key is di all ed, t he
handsfree function or the headset is enabled
13
Page 14
Making calls
Dialling a number using a function key
Dialling numbers with one press of a function key.
An expansion module is connected and a function key is assigned a quick dial
.
number
Assigning numbers to function keys: Web configurator ( p. 42).
¤ Press the function key . . . the number saved for the function key is dialled, the handsfree
function is activated
Increase the number of function keys: Connect another expansion module
Ringback
Asking for a ring back when the line of a participant you have called is busy.
ABX or the provider supports this function.
The P
Initiating ringback
¤ Ringback . . . the ringback request is registered
When the other participant's line is free, the ringback is initiated. The telephone rings,
Ringback is displayed in the header.
There can be an active ringback on each line.
Cancelling ringback
¤ . . . use to select Select Services OK
An active call:
Multiple active calls:
¤ Cancel Ringback OK
¤ Active Ringbacks OK . . . Connections for which
ringback is active are denoted as such . . . Use to select
a connection OK
Anonymous calling
Withhold Calling Line Identification. The number is not shown to the person receiving the call.
The PABX or the provider supports this function.
¤ . . . use to select Select Services OK Withhold Number OK
if necessary, use to select a line Change ( = calls are anonymous)
14
Page 15

Making calls
1 IP1
Peter Smith
004989123456789
Reject Silence
) (
)(
Incoming calls
An incoming call is indicated by ringing, by a display on the screen and by the flashing Status
LED.
The display shows
• the line on which the call is coming in on
• the caller's name if it has been stored in the
directory
• the caller's number if it has been transmitted
( p. 14)
Accepting the call:
Switching the ringtone off:
¤ lift the handset
¤ Silence
Rejecting the call:
When a call comes in, the system looks for a matching entry in the local directory. If
the number is not found there, other directories are searched, if any have been
configured.
¤ Reject
Protection from incoming calls
Activating/deactivating the ringtone
An incoming call is not signalled by ringing, but is displayed on the screen.
Switching the ringtone on/off: Press and ho
Ringtone is switched off: the follo
wing icon appears on the display
ld the Star key
Ringtone silencing for anonymous calls: p. 31.
Switching the alert tone (beep) on/off
Switch on an alert tone (beep) instead of the ringtone:
¤ Press and hold the Star key press Beep within 3 seconds . . . the following icon
appears in the status line
Switching off the alert tone: Press and hold the Star key
Switching the "Do not disturb" function on and off
Incoming calls are not signalled.
Switching "Do not disturb" on or off: Press the Do not disturn key
"Do not disturb" is switched on: the Do not disturb key is illuminated, the display shows
"Do not disturb" active
15
Page 16

Making calls
Set up call forwarding: p. 20
The administrator can create a list of numbers which should never be signalled by the
telephone in the Web configurator.
During a conversation
Changing the volume
Changing the volume of the handset, the handsfree function or the headset during a call.
Louder: Save
Quieter: Save
If there is no input for two seconds, the most recent value is stored automatically.
Permanent volume settings: p. 32.
The volume can be set at 10 levels.
The current setting is displayed.
Muting
Switching off the microphone in the handset, the handsfree facility and the headset. The other
party to the call no longer hears what is being said.
Activating/deactivating the microphone: Press the Mute key
Microphone is switched off: the Mute key is illuminated
Switching the handsfree function on/off
Making calls via the speaker and the microphone of the handsfree function.
Switching on the handsfree function during a call:
¤ Press the Handsfree key Replace handset
Handsfree function is switched on: the key is illuminated
Switching off the handsfree function during a call:
¤ Lift the handset continue the call through the handset
Displaying information
¤ Info . . . Information about the device is displayed ( p. 35)
Ending a call
¤ Replace the handset
16
Page 17

Making calls
On hold: Peter Smith
004989123456789
End Swap
Call Swap
Talking with several participants on the telephone
Accepting/rejecting Call Waiting
The PABX or the provider supports this function and the function is activated on the
telephone ( p. 38).
Another call comes in during a conversation. The call is signalled in the display and by the Call
Waiting tone. Call Waiting is displayed in the header.
Accepting the call:
¤ Accept . . . the connection to the waiting participant is made. The first participant is put on
hold and hears some on-hold music.
Rejecting the call:
¤ Reject
Permit/prevent Call Waiting
Permit or prevent Call Waiting during a call for all or for certain lines.
¤ . . . use to select Select Services OK Call Waiting OK if
necessary, press to select line Change ( = Call Waiting is permitted)
Define settings for Call Waiting with the Web configurator p. 38
Two simultaneous incoming calls
When there are two simultaneous incoming calls, both are shown on the display.
¤ . . . Use to select the call you want to accept Pick up the receiver . . . The required
connection is established.
The other call is handled as a waiting call.
Consultation calls
Consulting a second participant during a conversation.
Press the Consultation call key . . . the first
conversation is put on hold
¤ Initiate a consultation call via the keypad or from the directory
. . . when the participant picks up, conduct consultation call
The display shows:
On hold: <
17
Number> or <name in the directory>
Page 18
Making calls
Ending a consultation call:
¤ End . . . the connection to the participant on hold is reactivated
or
¤ Replace the handset . . . both calls are ended
The call on hold is transferred to the consultation participant.
If the consultation participant does not accept the call: a recall is initiated by the participant
on hold (your telephone rings). If you accept the call, you will be reconnected to the
participant previously on hold.
Initiating consultation call from the directory
During the conversation:
¤ Press the Control key select entry Options Dial OK . . . if necessary,
select the number with OK . . . the first conversation is put on hold, the number is
dialled
or
¤ Consult . . . the first conversation is put on hold Directory select entry Dial . . .
if necessary, use to select the number OK . . . the number is selected
Call swapping
Switch back and forth between two participants. The other call is placed on hold.
¤ Call a second participant during an external conversation (consultation call) or accept a
waiting call . . . use Swap to switch between the participants
Ending the connection to the active participant:
¤ End . . . the connection to the participant on hold is reactivated
Other ways of ending the call-swapping session:
• Replace the handset : The other two participants will be connected to one
another.
• The active participant ends the conversation: The connection to the participant
on hold is reactivated
• The participant on hold ends the conversation: The connection to the active
participant remains active.
18
Page 19

Making calls
Peter Smith
004989123456789
End
Conference
Conference call
Speaking to two participants at the same time.
Initiating a conference call during a conversation:
¤ Press the Conference call key call second
participant . . . the conference is established as
soon as the call is accepted
Initiating a conference from call swapping:
¤ Press the Conference call key . . . the active participant and the participant on hold
will be switched into the conference
Ending a conference call:
¤ End or replace the handset . . . the conference ends for all the participants
Transferring a call
Connecting both external participants to one another during call swapping or in an external
consultation call:
¤ Replace the handset . . . the call on hold will be transferred to the active participant.
If the active participant does not accept the call, a recall will be initiated by the participant on
hold.
19
Page 20

Making calls
Call divert
Incoming calls are diverted to another line or a network mailbox. For every phone connection,
you can set up call diverts for
All Calls Calls are diverted immediately
When Busy Calls are diverted if the line is busy
No reply Calls are diverted if no one picks up after several rings
The PABX or the provider supports this function.
f calls are diverted to an answer machine, this must be set up by the administrator
I
from the Web configurator.
Activating call divert
¤ . . . Use to select Select Services OK Call Divert OK . . . if
necessary, use to select a connection OK
When call divert is to apply:
¤ All Calls / When Busy / No reply OK
Where the call is to be forwarded to:
¤ Phone Number Enter the number Save
or
¤ Voice Mail Save . . . Calls are forwarded to the answer machine assigned to the
connection
In idle status, the active call divert and the destination for the diverted call are shown on the
y.
displa
A No reply call divert becomes active after 120 seconds as standard. You can change
the delay time from the Web configurator ( p. 39)
Disabling call divert
¤ . . . Use to select Select Services OK Call Divert OK . . . Use
to select the connection as required . . . Use to sele ct the divert type (All Calls / When
Busy / No reply) OK Off Save
Set up call diverts from the Web configurator: p. 39
20
Page 21

Call lists
View Options
All Calls
Peter Brown
08901234567890
Today
10:30
The telephone saves different types of calls in lists. The following call lists are available:
All Calls All outgoing, accepted and missed calls.
Accepted Calls Calls that were accepted.
Missed Calls Calls that were not accepted.
Missed calls that have not yet been viewed can also be accessed via
the M
essage key ( p. 21).
Outgoing Calls Last selected numbers (redial list).
If the call list is full, a new entry overwrites the oldest.
Opening the call list
¤ . . . the list All Calls is displayed
or
¤ . . . use to select Call Lists OK use to select list type OK
Information about the calls
• Icon for the call type:
Missed Calls,
Accepted Calls,
Outgoing Calls
Call lists
Caller's number. If the number is saved in the directory, the name is displayed instead.
•
• Date and time of the call
Displaying more information about an entry: View . . . use to scroll through the entry
• Number type (if the caller is entered in the directory): Phone Home, Phone Office,
Phone Mobile
Calling back a caller
¤ . . . use to select entry lift handset . . . the number is dialled
21
Page 22

Call lists
Copying a number to the directory
¤ . . . use to select an entry Options Save Number . . . then
Creating a new entry: < New Entry > OK
or
Adding a number to an existing entry: . . . use to select an entry OK
¤ . . . use to sel ect a num ber category OK . . . use to enter more data for the entry
Save entry: Save
More information about the local directory: p. 25
Deleting entries
Deleting an entry:
¤ . . . use to select an entry Options Delete Entry OK
Deleting all the entries in the list currently selected:
¤ Options Delete List OK confirm prompt with Ye s
22
Page 23

Message Centre
01/04/2018
12:15
411
Redial Select Line
10 Ben
Back OK
Messages
Missed Calls
Voice Mail
11
4
Message Centre
The Message Centre gives you quick access with a single key press to missed calls and voice mails
on an answer machine.
The Message key flashes if there are new messages. A missed call is considered new if it
has been received since the M
it has not been listened to.
The administrator can use the Web configurator to specify which types of messages
e accessible via the Message Centre.
ar
Icons for message types and the number of new
messages are shown in idle status.
New messages:
on a network mailbox ( p. 24)
in the Missed Calls list ( p. 21)
The number displayed indicates the total for all the
connections involved.
Opening the Message Centre:
¤ Press the Message key . . . use to
select the message type (Voice Mail or
Missed Calls) OK
The Voice Mail list is always displayed, when an answer machine is stored in the
telephone, the Missed Calls list only if it contains messages.
issed Calls list was last opened; a voice mail is considered new if
23
Page 24

Voice mails
Voice mails
Managing messages stored in a network mailbox. Every network mailbox accepts incoming calls
on the corresponding VoIP phone number.
The administrator has entered the network mailbox(es) in the telephone with the
Web configurator or there is an answer machine available with the PABX.
Playing back voice mails
¤ Press the Message key OK . . . if n ece ssar y, u se to sele ct t he a nswe r mac hin e
(connection) OK . . . all the voice mails for the connection are displayed use to select
an entry Play . . . the message is played back through the speaker on the telephone
Listening to messages through the handset:
¤ Lift the handset
Ending playback:
An incoming call ends playback.
Editing voice mails
¤ Press the Message key OK . . . if n ece ssar y, u se to sele ct t he a nswe r mac hin e
(connection) OK . . . all voice mails for the connection are displayed select entry . . .
then
Viewing call details:
Deleting the recording:
Deleting all entries:
Transferring the number to the directory:
¤ Press the End Call key or replace the handset
¤ View
¤ Options Delete Entry OK
¤ Options Delete List OK Confirm prompt with Ye s
¤ Options Save Number OK create a new entry in the direc-
tory or add the number to an existing entry ( p. 25)
24
Page 25

Directories
View Options
Directory
Brown, Susan
Fischer, Alexander
The options are:
• Local directory
• Company directory ( p. 27)
The local directory is pre-set as a standard directory. That means that it is the directory
that is opened with the Control key and into which entries are copied with the
"Copy to directory" function.
The administrator can make another directory, such as the company directory, the
standard directory.
Local directory
Opening the directory
In idle status:
¤ Press the Control key
or
¤ . . . use to select Contacts OK Directory OK
The entries are shown in alphabetical order and are
sorted by last name by default.
Change sort order:
¤ Options Sort by First Name or Sort by Surname
Directories
If an entry does not include a name, the first phone number entered is stored and
displayed as the last name.
25
Page 26

Directories
Edit Options
Susan Brown
1: 004456565656
Displaying a directory entry
¤ . . . use to select an entry View
or
¤ enter the first letter of the name . . . the first entry which starts with that letter is displayed
A directory entry can contain the following information:
• First name and last name: (max. 16 characters
each)
• Up to six phone numbers (max. 32 digits each)
Two numbers can be assigned to the following
cate
gories:
work numbers (Phone Of
private numbers (Ph
mobile numbers (Phone Mo
fice 1/2)
one Home 1/2)
bile 1/2)
¤ . . . use to scroll through the directory entry
Creating a new entry
¤ Options New Entry . . . use to enter data for the entry and use to move between
the entry fields Save
Creating a new entry with a dialled number:
¤ Enter the number -> Dir < New Entry > OK . . . use to select the number
category OK . . . use to enter more data for the entry Save
Creating a new entry with a number from the call list: p. 22
Information on entering text: p. 11
Changing an entry
¤ . . . use to select an entry View Edit . . . use to select an entry field
if necessary, delete old text, enter new text Save
Adding a number when dialling:
¤ Enter t he number -> Dir . . . use to select an entr y OK . . . us e to sele ct th e
number category OK Save
Information on entering text: p. 11
26
Page 27

Directories
Dialling from the directory
¤ . . . use to select an entry lift the handset
More than one number in the directory entry: . . . use to select a number OK
or
¤ . . . use to select an entry View . . . if necessary, use to select a number
Options Use Number OK
Initiate a consultation call from the directory: p. 17
Deleting directory entries
Delete an entry selected from the list:
¤ Select an entry View Options Delete Entry OK . . . the entry is deleted
immediately
Deleting the whole list:
¤ Options Delete List OK . . . Confirm prompt with Yes
Company directory
If there is a directory available on your company's network you can use it on the telephone.
The administrator has set up and activated the directory in the Web configurator.
Opening the company directory
In idle status:
¤ Press and hold the Control key . . . use to select the company directory OK
or
¤ . . . use to select Contacts OK . . . use to select the company
directory OK
The company directory is shown with the name specified by the administrator in the
Web configurator.
27
Page 28

Directories
Back View
Company directory
Abercrombie, Susan
a|
Back New Search
Abercrombie, Susan
2: 00234 5989 1234 5678
0000 123456789
Searching for an entry
¤ Enter the name (or the initial letters) . . . as soon as
the entry process stops, the search starts.
All the matching entries are displayed. If a
matching entry is not found, the search field is
redisplayed. You can launch a new search.
Displaying an entry
¤ . . . use to select an entry Vi ew
A directory entry can contain the following information (depending on the information provided by the
company directory):
Personal information: First Name:, Surname:, Job:, Company:
Numbers: Of
Other contact data: Ema
Address information: Str
fice, Mobile, Home
il:, Web Address:, Fa x:
eet:, City:, ZIP Code:, Country:
Dialling a number from the company directory
¤ . . . use to select an entry lift the handset
More than one number in the directory entry: . . . use to select a number OK
28
Page 29

Door interphone
12:15
Main entrance
Reject Open Door
The telephone can operate a door interphone.
The administrator has set up the door interphone with the Web configurator.
I
f someone rings at the door interphone, this is
signalled like an incoming call on the phone.
The name of the door interphone is displayed as the
caller.
Door interphone
End the connection to the door interphone without opening the door: Rejec
Hold a conversation via the door interphone: Lift the handset
Open the door: Open Door
If you are conducting a telephone call, the ring at the door is signalled by a Call
Waiting tone ( p. 17). You can either reject the call or accept and open the door.
When the connection to the door interphone is ended, the previous connection is
restored. Toggling between calls is not possible.
An incoming call is signalled as a Call Waiting if you are already connected to the door
interphone. If you accept the call, the connection to the door interphone is ended.
Setting the ringtone for the door interphone: p. 31
t
29
Page 30

Basic settings
Settings
The telephone is preconfigured. Individual settings can be modified via the display menu or on
a PC using the Web configurator. Web configurator p. 36
Basic settings
Date and time
The address of a time server on the Internet or on the local network is stored on your
phone. The date and time are taken from this time server provided that the phone is
connected to the network and synchronisation with the time server is activated.
Manual settings are overwritten in this case.
Settings for the time server in the Web configurator: p. 44
¤ . . . use to select Settings OK Date + Time OK . . . then
Time:
Time format:
Date:
Date format:
Save the settings:
¤ . . . use to enter hours and minutes in 4-digit format
e. g. for 07:15 Save
¤ . . . use to select the time format
24h: e.g. 10:00, 18:00
12h: e.g. 10:00 am, 6:00 pm
12h selected: . . . use to select Time of Day: (am / pm)
¤ . . . use to enter day, month and year in 8-digit format
Save
¤ . . . use to select date order
Day Month Year: e. g. 17.04.2018
Month Day Year: e. g. 04.17.2018
for 17 April 2018
¤ Save
30
Page 31

Basic settings
Ringtones
Set the volume and melody for the ringtone and/or completely silence the ringtone for
anonymous calls.
Volum e
The volume of the ringtone for incoming calls can be set at 10 levels.
¤ . . . use to select Settings OK Audio Settin gs OK Ringtones
OK Vo lume . . .
the ringtone will be played with the melody set for external calls at the current volume; the volume is shown graphically
¤ . . . use to select the required volume Save
Changing the volume of the ringtone during an incoming call:
¤ Press the volume keys (for louder) or (for quieter)
Melody
Specify different ringtone melodies for different events (External Calls, Internal Calls,
Group Calls or Doorstation) and
VoIP connections.
¤ . . . use to select Settings OK Audio Settin gs OK Ringtones
OK Melodies OK . . . use to select event to be signalled with the melody OK
. . . the melody currently set for connection 1 is played . . . use to select the melody
required if necessary, select melodies for the other connections Save
Loading more ringtones onto the phone: p. 40
Ringtone silencing for anonymous calls
Prevent the telephone ringing when no number is transmitted with an external call.
¤ . . . use to select Settings OK Audio Settin gs OK Ringtones
OK Anonymous Call Silencing Edit ( = the telephone does not ring for anonymous
calls)
Advisory tones
The handset notifies acoustically about different activities and statuses.
Confirmations: At the end of an entry or after making a setting and when a new entry arrives
Key Click: Each press of a key is accompanied by an acoustic signal.
These advisory tones can be switched on/off independently of each other.
in the network mailbox or the call list, if an entry is incorrect.
¤ . . . use to select Settings OK Audio Settings OK Advisory
Tone s OK Select the option required ( = enabled / = disabled)
31
Page 32

Basic settings
Call volume
The call volum e (vo lume d urin g a ca ll) can b e set on 10 lev els s epara tely for the re ceiv er, spe aker
and a headset connected.
¤ . . . Use to select Settings OK Audio Settings OK Call
Volu me OK Select Handset, Handsfree or Headset
. . . The current volume is displayed graphically
¤ . . . Use to select the required volume Save
Changing the volume during a call:
¤ Press the volume keys (for louder) or (for quieter)
Display
Screensaver (digital clock)
You can display a digital clock as the screensaver for the phone’s display when in idle status.
¤ . . . Use to select Settings OK Display OK Screensaver . . . then
Switch off: . . . Use to select Off Save
Switch on: . . . Use to select the time the display spends in idle status before
Save the selection:
Exiting the screensaver
the screensaver becomes active (10, 20, 30, 40, 50 or 60 minutes)
¤ Save
¤ Press any key briefly . . . the display changes to idle status
Brightness
The brightness can be set at 10 levels.
¤ . . . use to select Settings OK Display OK Brightness OK . . .
the current setting is shown graphically . . . use to select the brightness required
Save
Contrast
The contrast can be set at 9 levels.
¤ . . . use to select Settings OK Display OK Contrast OK . . .
the current setting is shown graphically . . . use to set the required contrast Save
Colour scheme
The display can appear in a range of colour combinations.
¤ . . . use to select Settings OK Display OK Colour Scheme OK
. . . use to select required colour scheme Select ( = selected)
32
Page 33

Basic settings
Changing the display settings with the Web configurator: p. 41
Language
Set the language for the display screen.
¤ . . . use to select Settings OK Language OK . . . use to select
language Select ( = selected)
Setting the display language with the Web configurator: p. 41
Local network
Display network settings for the telephone.
¤ . . . use to select Settings OK Local Network OK
IP Address Type: static or dynamic
dynamic The telephone obtains its IP address automatically from
static The telephone is provided with a permanent IP address.
IP Address: The phone's IP address in the local network.
Subnet Mask: The subnet mask for the local network. It specifies how many parts of
the IP address make up the network prefix and how many parts make up
the device address. The network prefix must be the same for all the
devices in the local network.
Standard Gateway: IP address of the system in the local network which assigns the address
and forwards information to other networks. This is frequently a router.
a DHCP service in the network (the router, for example).
The following fields show the current settings. These
settings cannot be changed.
The administrator makes the network settings using the
other fields.
Changes to these settings should only be made by the administrator.
33
Page 34

Basic settings
VLAN
A local network can be divided into logical subnetworks known as VLANs (VLAN = Virtual Local
Area Network). VLANs are used for example to separate the data traffic of different services
(Internet telephony, Internet TV, etc.) and to define different priorities for the data traffic.
Show the phone’s VLAN settings.
¤ . . . Use to select Settings OK VLAN OK
VLAN Tagging: The following information is displayed when VLAN Tagging is enabled
VLAN Identifier (LAN): ID of the virtual network to which the phone belongs.
LAN Priority (LAN): Priority of the virtual network to which the phone belongs.
Changes to these settings can only be made by the administrator.
Restarting the phone
You can restart the device if required. All settings are retained.
¤ . . . Use to select Settings OK Reboot OK confirm prompt with Yes
Resetting the device to the factory settings
The function can only be run by the administrator.
You can back up your personal settings before a reset: p. 44
A reset returns all the settings to the default settings. Network configuration, VoIP connections,
directories, call lists and all the individual settings are deleted or restored to the factory settings.
Resetting using the device keys
¤ Disconnect the telephone from the mains power supply press the Control key
holding the key down, reconnect the device with the power supply
34
Page 35

Basic settings
Displaying device information
The menu entry Info provides information about important settings on the telephone.
¤ . . . use to select Settings OK Info . . . the following information is
displayed:
Device: Telephone product name
SW Version: Version of the firmware currently loaded on the phone.
Vari ant: Country-specific version of the product
MAC Address: The phone's device address.
IP Address: The phone's current IP address within the local network. The IP
Subnet Mask: The subnet mask for the local network. It specifies how many parts
Standard Gateway: IP address of the system in the local network which assigns the
Preferred DNS: IP address of the system in the local network providing IP addresses
There is more information about the settings and the status of the telephone in the
status display of the Web configurator ( p. 46).
address is usually set automatically via a DHCP server in the network.
of the IP address make up the network prefix and how many parts
make up the device address. The network prefix must be the same
for all the devices in the local network.
address and forwards information to other networks. This is
frequently a router.
belonging to domain names.
35
Page 36

Configuring other settings with the Web configurator
Configuring other settings with the Web configurator
Your phone is connected to the local network.
This chapter describes the user functions in the Web configurator.
Information for administrators: wiki.gigasetpro.com
Web configurator
Finding out the IP address of the phone
You need the IP address of the telephone to access the web configurator.
Displaying the IP address in the di
¤ Settings Local Network . . . the IP address is displayed
The IP address can sometimes change, depending on the settings of the DHCP server
in your network.
Starting the web configurator
¤ Open the Internet browser on the PC enter the IP address of the telephone (without any
leading zeros) in the address field of the browser . . . the login screen is displayed
¤ Select the language enter the password (preset: user) Login . . . the Web configurator is
launched, the Ringtones page is displayed
splay menu of the telephone:
Changing the password
¤ Click on the icon in the top right select Change Password enter new password
re-enter new password Set
The password can also be changed by the administrator.
Changing the telephone PIN
The telephone PIN is used to lock the telephone keypad, for example ( p. 11).
¤ Click on the icon in the top right select Change Phone PIN enter current PIN
(preset to 1234) enter new PIN re-enter new PIN Set
Changing the language
¤ Click on the icon in the top right select Change Language select required
language from the Language list Set
Ending the Web configurator
¤ Click on the icon in the top right select Logout . . . the login screen is displayed again
36
Page 37

Configuring other settings with the Web configurator
Functions of the Web configurator
The following illustration shows the menu entries of the Web configurator for users.
Information on the administrator functions wiki.gigasetpro.com
Settings Tel ep ho ny Connections p. 38
Call Settings p. 38
Call Divert p. 39
Do not Disturb p. 39
Desk Phone Ringtones p. 40
Display p. 41
Keys and LEDs p. 41
System Date and Time p. 44
Save and Restore p. 44
Reboot and Reset p. 45
Status Device p. 46
Connections p. 46
Storage Allocation p. 46
37
Page 38

Configuring other settings with the Web configurator
Telephony
Changing the standard send connection
If the telephone has more than one VoIP connection, outgoing calls are initiated via the standard
send connection (
Changing the standard send connection:
p. 12).
¤ Settings Te le p ho ny Connections
All the configured connections are shown. The check box under Def
shows which connection is currently selected.
ault send Connection
¤ Check the connection required Set
Only active connections can be selected.
If the standard send connection selected cannot be accessed, use another connection:
¤ Set the switch next to SIP Accounts-Failover to Ye s
Settings for Call Waiting
Specify the telephone's response when another call comes in during a call.
¤ Settings Te le p ho ny Call Settings
For each connection:
Prevent/permit Call Waiting:
¤ Select the option under Display Waiting Call ( = Call Waiting permitted) /
deselect ( = Call Waiting not permitted)
Permit Call Waiting:
¤ Select Acoustic signal from the list
Off: the incoming call is shown in the display only
or signalling with a Call Waiting tone (beep): once or every 4, 10, or 20 seconds
Save the settings: Set
38
Page 39

Configuring other settings with the Web configurator
Setting up Call Divert
The provider/the PABX supports this function.
Forwarding incoming calls to another number or a network mailbox.
¤ Settings Te le p ho ny Call Divert
For each connection (I
All Calls Forward all incoming calls.
When Busy Forward incoming calls when the line is busy.
No Answer Forward incoming calls after a defined period if they are not accepted.
Specifying the destination of diverted calls:
ncoming line):
¤ Check the box under Voicema il
or
¤ check the box under Targ et n umb er enter the number, to which calls are to be
diverted
For diverting calls when No Answer:
¤ From the Delay list, select the period after which Call Divert should be activated.
Activating/deactivating Call Divert:
¤ Select the option under Active ( = activated) / deselect ( = not activated) Set
Setting up Call Divert via the display menu: p. 20
Do not Disturb
provider/the PABX supports this function.
The
Block phone numbers and/or all anonymous calls. Calls from blocked numbers are not signalled.
¤ Settings Te le p ho ny Do not Disturb
The black list contains all the blocked numbers.
Activate the black list:
Block a number:
Delete an entry:
Delete all entries:
Block all anonymous calls:
Save the settings:
39
¤ Set the switch next to DND list to Yes
¤ Enter Name and Phone number of the call click on Add
¤ Click next to the entry
¤ Click Delete all
¤ Activate the option Block anonymous callers ( = activated)
¤ Set
Page 40

Configuring other settings with the Web configurator
Desk Phone
Specifying and loading ringtones
Set a ringtone for each configured VoIP connection or use a standard ringtone for all of them.
¤ Settings Desk Phone Ringtones
Selecting ringtones
The standard ringtone is used for connections or events for which no individual ringtone has
been set up.
¤ Select a ringtone from the Default ringtone list click on Play . . . the melody selected is
played on the telephone Set
Use the standard ringtone for all calls:
¤ click on Use for all calls Set
or
set a different ringtone for each connection:
¤ Select ringtones for the various events from the lists click on Play . . . the melody selected
is played Set
Different ringtones can be used for the following events: Ex
Group calls, sig
nal from the Door Station
Setting ringtones using the display menu: p. 31
Loading ringtones from the PC
The ringtones available are displayed with a file name and size. A maximum of 20 more ringtones
can be loaded into the telephone memory from the PC.
The data on the PC must be in the following format:
ternal Calls, Internal Calls,
Forma t Max. number Tot al s ize
mp3, ogg, wav 20 max. 5 MB
¤ Next to the Ringtone file click on Browse in the file system of the PC navigate to the
location of the ringtone files in the memory and select the file required . . . the file name is
displayed
Load the ringtone file: ¤ Click on . . . the ringtone file is loaded into the telephone's
Delete a ringtone file:
Save the settings:
Check available space in the memory: p. 46
40
internal memory and presented for selection in the lists
¤ Click on . . . the ringtone file is deleted from the list
¤ Set
Page 41

Configuring other settings with the Web configurator
Settings for the display
Tailor the telephone display to personal preferences and requirements.
¤ Settings Desk Phone Display
Language:
Screensaver
Activation:
¤ Select the language to be used for the display from the
Language list
A digital clock is displayed as a screensaver when the phone is in idle
status.
¤ From the Screensaver Activation list, select the time the display
spends in idle status before the screensaver becomes active.
0 = Screensaver disabled
Colour Scheme:
Screensaver
Brightness:
Standby Brightness:
Backlight:
Contrast:
Save the settings:
All the settings can also be made through the display menu: p. 32
¤ Selec t the colour scheme for the display from the Colour Scheme
list (white on black or black on white)
¤ Use the slider to select the screensaver brightness (1 – 10;
1 = dark, 10 = light)
¤ Use the slider to select the display brightness when the phone is
in idle status (1 – 10; 1 = dark, 10 = light)
¤ Use the slider to select the intensity of the display light (1 – 10;
1 = dark, 10 = light)
¤ Use the slider to select the screen contrast (1 – 9)
¤ Set
Assigning quick dial keys
Assign a quick dial number or function to the phone’s – keys.
Select with quick dial: p. 13
¤ Settings Desk Phone Keys and LEDs
The Quick D
Assigning a function:
ial Keys table contains an entry each for keys 1 - 4.
¤ Click the entry Select function from the list Set
Default The key has the standard function (digit key).
Quick Dial The key is used for quick dialling a number
¤ Enter the number in the text field
FAC (Function Access Code) The key sends a code to the phone system or provider to
enable/disable a function or service.
¤ Enter the code in the text field
Example: *71 Enable call divert
*071 Disable call divert
Action URL The key is used to call an Action URL. An Action URL is used by the phone to
communicate with a Web server application.
¤ Enter the URL in the text field
41
Page 42

Configuring other settings with the Web configurator
Assigning function keys
At least one expansion module is connected to the phone.
¤ Settings Desk Phone Keys and LEDs
The Function Keys - Left and Func tion Keys - Right tables contain an entry for every function
key.
Ke
y Name of the key, identifies the position of the key
Func tion Function assigned to the key
LED colour Colour with which the LED on the key signals an event, such as an incoming
No Auto Provisioning
call.
Change colour: Click the entry Select the colour required
Function keys can automatically be assigned via a PABX. Preventing the key
from being overwritten by the PABX:
¤ Activate the option ( = activated)
Assigning a function:
¤ Click the entry Select function from the list Set
Possible functions:
No function No function assigned
Line Assigns a specific connection (line) to the function key. The key is used to
e or accept a call on this connection. The key flashes if a call comes in and
initiat
lights up if the line is busy.
¤ Select the desired connection
Shared Line The telephone is connected to a PABX which supports this function and the
is assigned to a group.
number
Assigns a “shared line” to the function key. This means several users share the
s
ame VoIP connection. The key is used to make a call via the shared connection
or to answer an incoming call. It is configured on all extensions of the group.
The keys flash on all extensions when a call arrives, and light up when the line
on any extension is busy.
¤ Select the required connection Enter the Phone number of the “shared
line”
Park + Retrieve The phone is connected to a PABX which supports this function and the
is assigned to a group.
number
This function key allows you to “park” a call to transfer it within a group using a
hared line. It is configured on all extensions of the group. The "Park + Orbit"
s
keys on all extensions flash if a call has been "parked" on an extension. The call
can be picked up on any extension by pressing the key.
¤ Select the required connection Enter the Parking Space (number) of the
shared line
42
Page 43

Configuring other settings with the Web configurator
Quick Dial Assigns a number to the function key.
¤ Select the desired connection Enter the Target number
BLF The phone is connected to a PABX which supports this function and the
number
is assigned to a group.
A function key that is configured as BLF (Busy Lamp Field) indicates the status
of
a shared line. It is configured on all extensions of the group. The keys flash on
all extensions when a call arrives, and light up when the line on any extension
is busy.
¤ Select the desired connection Enter the Target number
Accept incoming calls: Enter Ca
SIP URI Assigns the function key a SIP URI (Internet phone number in SIP notation).
ll Pickup Code
¤ Enter the SIP URI (e.g. sip:Susan.Brown@211.122.10.15)
Call Divert Enable the call divert set up previously (
p. 39).
¤ Select the Line for which the call divert is set up
DTMF Assigns the function key a number dialled
example for querying and controlling certain network mailboxes via digit
codes or for remote operation of the local answer machine.
using DTMF. This is required for
¤ Enter the number to be dialled using DTMF signalling.
Action URL Assigns an Action URL to the function key. An Action URL is used by the phone
t
o communicate with a Web server application.
¤ Enter the URL in the text field
SIP INFO Assigns the function key a SIP INFO call to the PABX. The following calls can be
FAC (Function Access Code) The key sends a code to the phone system or provider
gned.
assi
Record Start/stop call recording
Divert CFU Divert all calls
Divert CFB Divert calls when the phone is busy
Divert CFNR Divert calls when they are not accepted
Day/Night Enable/disable day/night activation
o enable/disable a function or service.
t
¤ In text fields Enable Service/Disable Service, enter the codes for enabling/
disabling the function or service . . . Pressing once sends the code in Enable
Service, pressing once again sends the code in Disable Service.
For the Line, BLF and FAC key assignments, you can select the LED colour.
¤ Select the required colour next to LED colour.
For key assignments Line and BLF, the selection Standard means:
Yellow Not registered / error
Green Free
Permanently red Conversation ongoing
Flashing red Incoming call
Save the settings: Set
43
Page 44

Configuring other settings with the Web configurator
System settings
Date and time
¤ Settings System Date and Time
Defining the time server
¤ Automatic adjustment of system time with Time Server: select Ye s In the Time Server
field, enter the name or IP address of the required server . . . the most recent synchronisation
with the time server is displayed Set
or
Entering the date and time manually
¤ Automatic adjustment of system time with Time Server: select No . . . then
Time and date:
¤ . . . set the Time with the arrows
¤ . . . open calendar select Date
Other settings
Time zone:
Daylight Saving Time:
Time format:
Date format:
Save the settings:
¤ Select Time Zone from the list
¤ Automatically adjust clock for daylight saving changes:
Select Ye s/No
¤ Select Time format from the list:
12h (e. g. 6:00 AM) or 24h (e. g. 18:00)
¤ Select Date order from the list:
Day Month Year (e. g. 17.04.2018) or
Month Day Year (e. g. 04.17.2018)
¤ Set
Setting the time and date with the display menu: p. 30
Saving and restoring settings
Save data from the telephone to the PC and restore it back to the telephone if necessary.
¤ Settings System Save and Restore
Save Device settings to PC
All settings: System settings and personal set
Personalised settings: e. g. directory entries, ringtones, display settings, function key
(only possible as administrator)
nments
assig
tings
¤ click Save personalized settings
¤ select a storage location on the PC save file
44
Page 45

Configuring other settings with the Web configurator
Restore device settings from PC
¤ Click Browse select the stored back-up file from the file system . . . the file is displayed
click . . . the file is loaded; a message indicates whether the loading process has been
successful or not confirm the message with OK
Deleting unwanted back-up files: click
Restarting the system
¤ Settings System Reboot and Reset Click Reboot system now confirm prompt
with Ye s . . . the telephone is rebooted and temporarily not ready for operation
Once this has been completed, the login screen is displayed again, the telephone is in idle status.
Resetting is only possible as administrator.
45
Page 46

Status of the telephone
Status of the telephone
The Status menu contains information about the status of the telephone.
Device
The page shows general information about the telephone, such as the IP address, the current
status of the firmware and the time and date settings.
¤ Status Device
Connections
The page shows information about the VoIP connections configured for the telephone.
¤ Status Connections . . . name and status are shown for each connection
Status Registered VoIP connection available.
Not registered Currently there is no VoIP connection assigned. The telephone
ault send Connection is marked with .
The Def
Changing the standard send connection: p. 38
Storage Allocation
The page shows the memory space occupied by the internal memory and how much is still
available (in percent). Ringtone files are stored in the internal memory, for example.
¤ Status Storage Allocation
cannot be used.
¤ Please contact the administrator
46
Page 47

Service (Customer Care)
Appendix
Service (Customer Care)
Do you have any questions? For quick assistance, please refer to this user guide or visit
gigasetpro.com.
More information and services for your Gigaset PRO product can be found on
wiki.gigasetpro.com:
• Products
• Documents
• Interop
• Firmware
• FA Q
• Support
Our Gigaset pro reseller will be happy to help with a
Basic.
Manufacturer's advice
Authorisation
Voice over IP telephony is possible via the LAN interface (IEEE 802.3).
Depending on your telecommunication network inter
necessary.
For further information please contact your Internet provider.
This device is intended for use worldwide. Use outside the E
exception of Switzerland) is subject to national approval.
Country-specific requirements have been taken into consideration.
We, Gigaset Communications GmbH, declare that this devic
and other relevant regulations laid down in Directives 2014/30/EU and 2014/35/EU.
The full text of the EU declaration of conformity is
gigasetpro.com/docs.
This declaration could also be available in the "I
“European Declarations of Conformity” files.
Therefore please check all of these files.
ny further questions related to your Maxwell
face, an additional router/switch could be
uropean Economic Area (with the
e meets the essential requirements
available at the following internet address:
nternational Declarations of Conformity" or
47
Page 48

Manufacturer's advice
Additional Notes
USA:
This equipment has been tested and found to comply with the limits for a Class B digital device,
pu rsua nt t o par t 15 of t he FC C Rul es. Operation is subject to the following two conditions (1) this
e may not cause interference, and (2) this device must accept any interference received,
devic
including interference that may cause undesired operation. These limits are designed to provide
reasonable protection against harmful interference in a residential installation.
However, there is no guarantee that interference will not
equipment does cause harmful interference to radio or television reception, which can be determined by turning the equipment off and on, the user is
ference by one or more of the following measures:
• Reorient or relocate the receiving antenna.
• Increase the separation between the equipment and receiver.
• Connect the equipment into an outlet on a circuit different from that to which the receiver is
connected.
• Consult the dealer or an experienced radio/TV technician for help.
Changes or modifications to this unit not expressly approved by Gigaset Communications
rankenstraße 2, 46395 Bocholt , Germany could void the FCC authority to operate the
GmbH, F
equipment.
If trouble is experienced with this equipment, for r
Support at 1-866 247-8758 tollfree. If the equipment is causing harm to the telephone network,
the telephone company may request that you disconnect the equipment until the problem is
resolved. This equipment is of a type that is not intended to be repaired by the Customer (user).
occur in a particular installation. If this
encouraged to try to correct the inter-
epair or warranty information, please contact
Notice to Hearing Aid Wearers:
This phone system is compatible with inductively coupled hearing aids.
Power Outage:
In the event of a power outage, this equipment will not operate. This equipment requires electricity for operation. You should have a telephone
use during power outages.
48
that does not require electricity available for
Page 49

Manufacturer's advice
Canada:
Operation is subject to the following two conditions (1) this device may not cause interference,
and (2) this device must accept any interference received, including interference that may cause
undesired operation.
NOTICE: T
the equipment meets certain telecommunications network, protective, operational and safety
requirements as prescribed in the appropriate Terminal Equipment Technical Requirements
document(s).
The Department does not guarantee the equipment will operate to the user’s satisfaction.
Before installing this equipment, users should ensur
the facilities of the local service provider. The equipment must also be installed using an acceptable method of connection. The customer should be aware that compliance with the above conditions may not prevent degradation of service in some situations.
Repairs to certified equipment shou
supplier. Any repairs or alterations made by the user to this equipment, or equipment malfunctions, may give the local service provider cause to r
Users should ensure for their own protection that the electrical ground connections of the
p
together.
This precaution may be particularly important in rural areas
NOTE: U
appropriate electric inspection authority, or electrician, as appropriate.
This product meets the applicable Industr
This Class B digital apparatus complies with Canadian ICES-003.
Cet appareil numérique de la classe B est c
he Industry Canada label identifies certified equipment. This certification means that
e that it is permissible to be connected to
ld be coordinated by a representative designated by the
equest the user to disconnect the equipment.
ower utility, telephone lines and internal metallic water pipe system, if present, are connected
sers should not attempt to make such connections themselves, but should contact the
y Canada technical specifications.
onforme à la norme NMB-003 du Canada.
Safety precautions
Before using your telephone equipment, basic safety instructions should always be followed to
reduce the risk of fire, electric shock and injury to persons.
1 Read and understand all instructions.
2 Follow all warnings and instructions marked on the product.
3 Unplug this product from the Local Area Network (LAN) and
Do not use liquid cleaners or aerosol cleaners. Use damp cloth for cleaning.
4 Do not use this product near water, for example, near a bathtub, wash bowl, kitchen sink, or
ndry tub, in a wet basement or near a swimming pool.
lau
5 Place this produc t securely on a stable surface. Seriou
unit falls.
6 Slots or openings in the cabinet and the back and bottom are provided for ventilation, to pro-
tect it from overheating. These openings must
should never be placed near or over a radiator or heat register, or in a place where proper
ventilation is not provided.
7 This product should be operated only from the type of power source indicated on the mark-
ing label. If you are not sure of the type of AC line power to your home, consult your dealer
or
local power company.
49
not be blocked or covered. This product
power outlet before cleaning.
s damage and/or injury may result if the
Page 50

Manufacturer's advice
8 Do not place objects on the power cord. Install the unit where no one can step or trip on the
cord.
9 Do not overload wall outlets and extension cords as t
shock.
10 Never push objects of any kind into this prod
dangerous voltage points or short out parts that could result in the risk of fire or electric
shock. Never spill liquid of any kind on this product.
11 To reduce the risk of electric shock
qualified service center when service is required. Opening or removing covers may expose
you to dangerous voltages, dangerous electrical current or other risks. Incorrect reassembly
can cause electric shock when the appliance is subsequently used. Disconnect LAN connector and power supply before removing cover.
12 Unplug the product from all connections and refer servicing to qualified service personnel
under the f
ollowing conditions:
or burns, do not disassemble this product. Take it to a
hi s can res ult i n th e ris k of fire or el ect ric
uct through cabinet slots as they may touch
• When the power cord is damaged or frayed.
• If liquid has been spilled into the product.
• If the product has been exposed to rain or water.
• If the product does not operate normally by follow
only those controls
adjustment of other controls may result in damage and may require extensive work by a
qualified technician to restore the product to normal operation.
that are covered by the operating instructions because improper
ing the operating instructions. Adjust
• If the product has been dropped or physically has been damaged.
• If the product exhibits a distinct change in performance.
13 Avoid using a telephone (other than a cordless type)
remote risk of electrical shock from lightning. Therefore we suggest a surge arrestor.
14 Do not use the telephone to report a gas leak in the vicinity of the leak.
15 Emergency/911 numbers may not be dialed if the keypad is locked.
during a thunderstorm. There may be a
Environment
Our environmental statement
We at Gigaset Communications GmbH are aware of our social responsibility. That is why we
actively take steps to create a better world. In all areas of our business – from product planning
and production to sales and waste of disposal – following our environmental conscience in everything we do is of utmost importance to us.
Learn more about our earth-friendly pr
50
oducts and processes online at gigasetpro.com.
Page 51

Manufacturer's advice
Environmental management system
Gigaset Communications GmbH is certified pursuant to the international standards
ISO 14001 and ISO 9001.
ISO 14001 (Environment): C
Service GmbH.
ISO 9001 (Quality): C
ertified since 17/02/1994 by TÜV SÜD Management Service GmbH.
ertified since September 2007 by TÜV SÜD Management
Disposal
Batteries should not be disposed of in general household waste. Observe the local waste disposal regulations, details of which can be obtained from your local authority.
All electrical and electronic products should be disposed of separat
stream via designated collection facilities appointed by the government or the local authorities.
This crossed-out wheeled bin symbol on the product means the product is covered
by the European Directive 2012/19/EU.
The correct disposal and separate collection of
potential negative consequences for the environment and human health. It is a precondition for reuse and recycling of used electrical and electronic equipment.
For more detailed information abou
council refuse centre or the original supplier of the product.
t disposal of your old appliance, please contact your local
ely from the municipal waste
your old appliance will help prevent
Care
Wipe the device with a damp cloth or an antistatic cloth. Do not use solvents or microfibre
cloths.
use a dry cloth; this can cause static.
Never
In rare cases, contact with chemical substances can cause changes to the device’s exterior. Due
t
o the wide variety of chemical products available on the market, it was not possible to test all
substances.
Impairments in high-gloss finishes can be carefu
phones.
lly removed using display polishes for mobile
Contact with liquid
If the device comes into contact with liquid:
1 Disconnect the power supply.
2 Remove the batteries and leave the battery compartment open.
3 Allow the liquid to drain from the device.
4 Pat all parts dry.
5 Place the device in a dry, warm place fo
with the battery compartment open and the keypad facing down (if applicable).
6 Do not switch on the device again until it is completely dry.
When it has fully dried out, you will normally be able to use it again.
51
r at least 72 hours (not in a microwave, oven etc.)
Page 52

Open Source Software
Open Source Software
General
Your Gigaset device includes Open Source software that is subject to various license conditions.
With regard to Open Source software, the granting of usage rights that go beyond the operation
of the device in the form supplied by Gigaset Communications GmbH is governed by the relevant license conditions of the Open Source software.
The respective license texts regularly contain limitations of liability with regard to the relevant
lice
nsor of Open Source Software. The exclusion of liability for the GPL Version 2, for example,
reads as follows:
"This program is distributed in the hope that it will be useful, but WITHOUT ANY WARRANTY;
withou
t even the implied warranty of MERCHANTABILITY or FITNESS FOR A PARTICULAR PUR-
POSE. See the GNU General Public License for more details."
and for the LGPL Version 2.1:
"This library is distributed in the hope that it wi
out even the implied warranty of MERCHANTABI
See the GNU Lesser General Public License for more details."
The liability of Gigaset Communications GmbH remains unaffected by this.
Licence and copyright information
Your Gigaset unit includes Open Source software which is subject to the GNU General Public
License (GPL) or the GNU Library/Lesser General Public License (LGPL). The corresponding
licence conditions in their original version and the relevant source code can be found in the
Internet at
from Gigaset Communications GmbH at cost price wit
Please use the contact details provided at
gigasetpro.com/opensource. The appropriate source code can also be requested
ll be useful, but WITHOUT ANY WARRANTY; with-
LITY or FITNESS FOR A PARTICULAR PURPOSE.
hin three years of purchasing the product.
gigasetpro.com/service.
52
Page 53

Menu tree
Menu tree
The following illustration shows the full menu tree of the display menu.
Call Lists p. 21
Contacts Directory p. 25
Enterprise p. 27
Select Services Call Divert p. 20
Withhold Number p. 14
Call Waiting p. 17
Active Ringbacks p. 14
Settings Date + Time p. 30
Audio Settings Ringtones Vol ume p. 31
Melodies External Calls p. 31
Internal Calls p. 31
Group Calls p. 31
Anonymous Call
Silencing
Advisory Tones p. 31
Call Volume Handset p. 32
Handsfree p. 32
Headset p. 32
Display Screensaver p. 32
Brightness p. 32
Contrast p. 32
Colour Scheme p. 32
Language p. 33
Local Network p. 33
VLAN p. 34
Reset for administrators only p. 34
Reboot p. 34
Info p. 35
p. 31
53
Page 54

Display icons
)
(
)
(
Display icons
The following icons are displayed depending on the settings and the operating status of your
telephone.
Icons in the status bar
Icon Meaning
No VoIP connection
Keypad lock activated
Ringtone deactivated
Beep function activated (ringtone deactivated)
Display icons to indicate . . .
Icon Meaning
Incoming call
Establishing a connection (outgoing call)
Connection established
No connection established/connection terminated
Other display icons
Icon Meaning
Action complete (green)
Action failed (red)
Information
Warning
(Security) prompt
54
Page 55

Index
Index
A
Accepted calls . . . . . . . . . . . . . . . . . . . . . . . . . 21
Activating DTMF using a function key . . . . . . . . 43
Advisory tone
confirmation
key press . . . . . . . . . . . . . . . . . . . . . . . . . . 31
Alert tone (beep) . . . . . . . . . . . . . . . . . . . . . . . 15
Anonymous calling . . . . . . . . . . . . . . . . . . . . . 14
Authorisation . . . . . . . . . . . . . . . . . . . . . . . . .47
. . . . . . . . . . . . . . . . . . . . . . . . 31
B
Back key . . . . . . . . . . . . . . . . . . . . . . . . . . . . . . 4
Beep (alert tone) . . . . . . . . . . . . . . . . . . . . . . .15
Black list . . . . . . . . . . . . . . . . . . . . . . . . . . . . . 39
BLF (Busy Lamp Field) . . . . . . . . . . . . . . . . . . . 43
C
Call
. . . . . . . . . . . . . . . . . . . . . . . . . . . . 15
accept
anonymous . . . . . . . . . . . . . . . . . . . . . . . . 14
block . . . . . . . . . . . . . . . . . . . . . . . . . . . . . 39
during number entry . . . . . . . . . . . . . . . . . . 12
forwarding . . . . . . . . . . . . . . . . . . . . . . . . . 19
in call list . . . . . . . . . . . . . . . . . . . . . . . . . . 21
incoming . . . . . . . . . . . . . . . . . . . . . . . . . . 15
information . . . . . . . . . . . . . . . . . . . . . . . . 21
initiate . . . . . . . . . . . . . . . . . . . . . . . . . . . .12
outgoing . . . . . . . . . . . . . . . . . . . . . . . . . . 12
rejecting . . . . . . . . . . . . . . . . . . . . . . . . . . . 15
Call divert
Call list . . . . . . . . . . . . . . . . . . . . . . . . . . . . . . 21
Call swapping . . . . . . . . . . . . . . . . . . . . . . . . . 18
Call volume . . . . . . . . . . . . . . . . . . . . . . . . . . . 32
Call waiting . . . . . . . . . . . . . . . . . . . . . . . . . . .18
Caller
Caller display. . . . . . . . . . . . . . . . . . . . . . . . . . 14
Care . . . . . . . . . . . . . . . . . . . . . . . . . . . . . . . .51
Care of the device . . . . . . . . . . . . . . . . . . . . . . 51
Change telephone PIN . . . . . . . . . . . . . . . . . . . 36
. . . . . . . . . . . . . . . . . . . . . . . . . . . . 20
disable
set up (display menu) . . . . . . . . . . . . . . . . .20
set up (Web configurator) . . . . . . . . . . . . . . 39
accepted calls . . . . . . . . . . . . . . . . . . . . . . . 21
all calls . . . . . . . . . . . . . . . . . . . . . . . . . . . . 21
copying a number to the directory . . . . . . . . 22
delete . . . . . . . . . . . . . . . . . . . . . . . . . . . . 22
delete an entry . . . . . . . . . . . . . . . . . . . . . . 22
dialling a number . . . . . . . . . . . . . . . . . 13, 21
missed calls . . . . . . . . . . . . . . . . . . . . . . . . 21
open . . . . . . . . . . . . . . . . . . . . . . . . . . . . . 21
outgoing calls . . . . . . . . . . . . . . . . . . . . . . . 21
accepting a call. . . . . . . . . . . . . . . . . . . . . . 17
activating/deactivating . . . . . . . . . . . . . . . . 17
rejecting a call. . . . . . . . . . . . . . . . . . . . . . . 17
settings (Web configurator) . . . . . . . . . . . . . 38
name on display
. . . . . . . . . . . . . . . . . . . . . 15
55
Change the volume. . . . . . . . . . . . . . . . . . . . . 16
Colour scheme
set (display menu)
Company directory . . . . . . . . . . . . . . . . . . . . . 27
displaying an entry . . . . . . . . . . . . . . . . . . . 28
open . . . . . . . . . . . . . . . . . . . . . . . . . . . . . 27
Conference call . . . . . . . . . . . . . . . . . . . . . . . . 19
Conference call key . . . . . . . . . . . . . . . . . . . . . . 4
Confirmation tone . . . . . . . . . . . . . . . . . . . . . 31
Connection . . . . . . . . . . . . . . . . . . . . . . . . . . 38
expansion module . . . . . . . . . . . . . . . . . . . . 5
headset . . . . . . . . . . . . . . . . . . . . . . . . . . . . 5
LAN. . . . . . . . . . . . . . . . . . . . . . . . . . . . . . . 5
PC . . . . . . . . . . . . . . . . . . . . . . . . . . . . . . . . 5
power adapter . . . . . . . . . . . . . . . . . . . . . . . 5
receiver . . . . . . . . . . . . . . . . . . . . . . . . . . . . 5
status . . . . . . . . . . . . . . . . . . . . . . . . . . . . 46
Consultation call . . . . . . . . . . . . . . . . . . . . . . . 17
Consultation call key . . . . . . . . . . . . . . . . . . 4, 17
Contact with liquid . . . . . . . . . . . . . . . . . . . . . 51
Contrast
set (display menu)
Control key. . . . . . . . . . . . . . . . . . . . . . . . . . 4, 9
Conversation
put on hold
Copying a number
from the call list to the directory
Corporate directory
searching for entry
Correcting incorrect entries . . . . . . . . . . . . . . . 11
Correction of incorrect entries . . . . . . . . . . . . . 11
Country version . . . . . . . . . . . . . . . . . . . . . . . 35
Customer Care . . . . . . . . . . . . . . . . . . . . . . . . 47
. . . . . . . . . . . . . . . . . . . 32
. . . . . . . . . . . . . . . . . . . 32
. . . . . . . . . . . . . . . . . . . . . . . . 17
. . . . . . . . . 22
. . . . . . . . . . . . . . . . . . . 28
D
Date format . . . . . . . . . . . . . . . . . . . . . . . 30, 44
Daylight Saving Time . . . . . . . . . . . . . . . . . . . 44
Deactivating the microphone . . . . . . . . . . . . . 16
Default setting see Factory settings
Delete numbers
Device, status . . . . . . . . . . . . . . . . . . . . . . . . . 46
Dialling a number
from the call list
from the company directory . . . . . . . . . . . . 28
from the directory . . . . . . . . . . . . . . . . 13, 27
from the redial list. . . . . . . . . . . . . . . . . . . . 13
using a quick dial key . . . . . . . . . . . . . . . . . 13
via function key . . . . . . . . . . . . . . . . . . . . . 14
via the keypad . . . . . . . . . . . . . . . . . . . . . . 12
Dialling numbers
cancelling
Directories . . . . . . . . . . . . . . . . . . . . . . . . . . . 25
Directory entry . . . . . . . . . . . . . . . . . . . . . . . . 26
change . . . . . . . . . . . . . . . . . . . . . . . . . . . 26
delete . . . . . . . . . . . . . . . . . . . . . . . . . . . . 27
in the corporate directory . . . . . . . . . . . . . . 28
new. . . . . . . . . . . . . . . . . . . . . . . . . . . . . . 26
. . . . . . . . . . . . . . . . . . . . . . . 12
. . . . . . . . . . . . . . . . . . 13, 21
. . . . . . . . . . . . . . . . . . . . . . . . . 12
Page 56

Index
Directory, local
changing an entry . . . . . . . . . . . . . . . . . . . . 26
copying a number from the call list . . . . . . . . 22
delete . . . . . . . . . . . . . . . . . . . . . . . . . . . . 27
delete entry . . . . . . . . . . . . . . . . . . . . . . . . 27
display entry. . . . . . . . . . . . . . . . . . . . . . . . 26
new entry. . . . . . . . . . . . . . . . . . . . . . . . . . 26
open . . . . . . . . . . . . . . . . . . . . . . . . . . . . . 25
Display . . . . . . . . . . . . . . . . . . . . . . . . . . . . . . . 8
brightness when phone is in idle status . . . . . 41
caller display. . . . . . . . . . . . . . . . . . . . . . . . 15
contrast . . . . . . . . . . . . . . . . . . . . . . . .32, 41
menu tree. . . . . . . . . . . . . . . . . . . . . . . . . .53
returning to idle status . . . . . . . . . . . . . . . . 10
Display icons . . . . . . . . . . . . . . . . . . . . . . . . . . 54
Display illumination
set brightness (display menu)
Display keys . . . . . . . . . . . . . . . . . . . . . . . . . 3, 8
Display MAC address . . . . . . . . . . . . . . . . . . . .35
Display menu . . . . . . . . . . . . . . . . . . . . . . . . .53
Disposal . . . . . . . . . . . . . . . . . . . . . . . . . . . . . 51
DND (Do Not Disturb) see Silencing the telephone
Do not disturb
Do not disturb (DND) . . . . . . . . . . . . . . . . . . . . 39
Do Not Disturb key . . . . . . . . . . . . . . . . . . . . . . 4
LED . . . . . . . . . . . . . . . . . . . . . . . . . . . . . . . 4
Do not disturb key . . . . . . . . . . . . . . . . . . . . . . 15
Door interphone . . . . . . . . . . . . . . . . . . . . . . . 29
open the door. . . . . . . . . . . . . . . . . . . . . . . 29
reject the call . . . . . . . . . . . . . . . . . . . . . . . 29
Door opener . . . . . . . . . . . . . . . . . . . . . . . . . . 29
. . . . . . . . . . . . . . . . . . . . . . . . . 15
. . . . . . . . . . . . 32
E
End key. . . . . . . . . . . . . . . . . . . . . . . . . . . . . . . 4
Ending
a call
. . . . . . . . . . . . . . . . . . . . . . . . . . . . . 16
Entering letters . . . . . . . . . . . . . . . . . . . . . . . .11
Entering numbers . . . . . . . . . . . . . . . . . . . . . . 11
Entering text . . . . . . . . . . . . . . . . . . . . . . . . . . 11
Environment . . . . . . . . . . . . . . . . . . . . . . . . . .50
Error tone . . . . . . . . . . . . . . . . . . . . . . . . . . . . 31
Expansion module, connection. . . . . . . . . . . . . . 5
F
Fac tory sett ings . . . . . . . . . . . . . . . . . . . . . . . . 34
Firmware version. . . . . . . . . . . . . . . . . . . . 35, 46
Forw arding a call . . . . . . . . . . . . . . . . . . . . . . . 19
Func tion k ey . . . . . . . . . . . . . . . . . . . . . . . . . . 14
BLF . . . . . . . . . . . . . . . . . . . . . . . . . . . . . . 43
connection . . . . . . . . . . . . . . . . . . . . . . . . . 42
DTMF . . . . . . . . . . . . . . . . . . . . . . . . . . . . . 43
Park + Orbit . . . . . . . . . . . . . . . . . . . . . . . .42
quick dial . . . . . . . . . . . . . . . . . . . . . . . . . . 43
shared line . . . . . . . . . . . . . . . . . . . . . . . . . 42
G
GPL . . . . . . . . . . . . . . . . . . . . . . . . . . . . . . . .52
H
Handset
changing volume
Handsfree
switching on/off
Handsfree key. . . . . . . . . . . . . . . . . . . . . . . 4, 16
LED . . . . . . . . . . . . . . . . . . . . . . . . . . . . . . . 4
Handsfree mode . . . . . . . . . . . . . . . . . . . . . . . 12
changing volume . . . . . . . . . . . . . . . . . . . . 16
Hash key . . . . . . . . . . . . . . . . . . . . . . . . . . . . . 3
Headset
changing volume
using to make calls . . . . . . . . . . . . . . . . . . . 12
volume . . . . . . . . . . . . . . . . . . . . . . . . . . . 32
Headset connection . . . . . . . . . . . . . . . . . . . . . 5
Headset key . . . . . . . . . . . . . . . . . . . . . . . . . . . 4
LED . . . . . . . . . . . . . . . . . . . . . . . . . . . . . . . 4
. . . . . . . . . . . . . . . . . . . . 16
. . . . . . . . . . . . . . . . . . . . . 16
. . . . . . . . . . . . . . . . . . . . 16
I
Icons
indications
status bar. . . . . . . . . . . . . . . . . . . . . . . . . . 54
Idle status, returning to . . . . . . . . . . . . . . . . . . 10
Indications, icons . . . . . . . . . . . . . . . . . . . . . . 54
Information on the telephone . . . . . . . . . . . . . 35
Initiate consultation call
from the directory
IP address. . . . . . . . . . . . . . . . . . . . . . . . . . . . 35
finding via the display. . . . . . . . . . . . . . . . . 36
finding via the Web configurator . . . . . . . . . 46
obtaining automatically . . . . . . . . . . . . . . . 33
static . . . . . . . . . . . . . . . . . . . . . . . . . . . . . 33
. . . . . . . . . . . . . . . . . . . . . . . . . 54
. . . . . . . . . . . . . . . . . . . 18
K
Key
conference call
consultation call . . . . . . . . . . . . . . . . . . . 4, 17
control key . . . . . . . . . . . . . . . . . . . . . . . . . . 4
display. . . . . . . . . . . . . . . . . . . . . . . . . . . . . 3
do not disturb . . . . . . . . . . . . . . . . . . . . 4, 15
end/back . . . . . . . . . . . . . . . . . . . . . . . . . . . 4
handsfree . . . . . . . . . . . . . . . . . . . . . . . . . 16
handsfree mode . . . . . . . . . . . . . . . . . . . . . . 4
hash . . . . . . . . . . . . . . . . . . . . . . . . . . . . . . 3
headset . . . . . . . . . . . . . . . . . . . . . . . . . . . . 4
message . . . . . . . . . . . . . . . . . . . . . . . . . . 23
message centre . . . . . . . . . . . . . . . . . . . . . . 4
mute . . . . . . . . . . . . . . . . . . . . . . . . . . . . . . 4
star . . . . . . . . . . . . . . . . . . . . . . . . . . . . . . . 3
volume . . . . . . . . . . . . . . . . . . . . . . . . . 3, 16
Keypad
locking/unlocking
Keypad lock
changing the PIN
PIN . . . . . . . . . . . . . . . . . . . . . . . . . . . . . . 11
. . . . . . . . . . . . . . . . . . . . . . . 4
. . . . . . . . . . . . . . . . . . . 11
. . . . . . . . . . . . . . . . . . . . 36
56
Page 57

Index
L
LAN connection . . . . . . . . . . . . . . . . . . . . . . . . 5
Language for the display screen
setting (display menu)
setting (Web configurator) . . . . . . . . . . . . . . 41
LED
do not disturb key
handsfree key . . . . . . . . . . . . . . . . . . . . . . . . 4
headset key . . . . . . . . . . . . . . . . . . . . . . . . . 4
message key . . . . . . . . . . . . . . . . . . . . . . . . . 4
mute key . . . . . . . . . . . . . . . . . . . . . . . . . . . 4
LED colour . . . . . . . . . . . . . . . . . . . . . . . . . . . 43
LGPL . . . . . . . . . . . . . . . . . . . . . . . . . . . . . . . . 52
Line
selecting for call
Liquid. . . . . . . . . . . . . . . . . . . . . . . . . . . . . . . 51
. . . . . . . . . . . . . . . . .33
. . . . . . . . . . . . . . . . . . . . . 4
. . . . . . . . . . . . . . . . . . . . . 12
M
Main menu . . . . . . . . . . . . . . . . . . . . . . . . . . . 10
Making calls . . . . . . . . . . . . . . . . . . . . . . . . . . 12
Manufacturer’s advice . . . . . . . . . . . . . . . . . . . 47
Menu . . . . . . . . . . . . . . . . . . . . . . . . . . . . . . . 10
navigation . . . . . . . . . . . . . . . . . . . . . . . 9, 10
open . . . . . . . . . . . . . . . . . . . . . . . . . . . . . 10
Menu tree
Message Centre. . . . . . . . . . . . . . . . . . . . . . . . 23
Message key . . . . . . . . . . . . . . . . . . . . . . . . 4, 23
Missed calls. . . . . . . . . . . . . . . . . . . . . . . . . . . 21
Mute key. . . . . . . . . . . . . . . . . . . . . . . . . . . . . . 4
Muting . . . . . . . . . . . . . . . . . . . . . . . . . . . . . . 16
. . . . . . . . . . . . . . . . . . . . . . . . . . . . 53
display
web configurator . . . . . . . . . . . . . . . . . . . . 37
LED . . . . . . . . . . . . . . . . . . . . . . . . . . . . . . . 4
LED . . . . . . . . . . . . . . . . . . . . . . . . . . . . . . . 4
N
Number
copying from voice mail to the directory
showing on display . . . . . . . . . . . . . . . . . . . 15
transferring to the local directory . . . . . . . . . 12
. . . . 24
O
Open listening . . . . . . . . . . . . . . . . . . . . . . . . 16
Open Source Software . . . . . . . . . . . . . . . . . . .52
Open the door . . . . . . . . . . . . . . . . . . . . . . . .29
P
PC connection. . . . . . . . . . . . . . . . . . . . . . . . . . 5
Phone
rebooting
Power adapter. . . . . . . . . . . . . . . . . . . . . . . . . . 7
Power adapter, connection. . . . . . . . . . . . . . . . . 5
Put on hold . . . . . . . . . . . . . . . . . . . . . . . . . . . 17
. . . . . . . . . . . . . . . . . . . . . . . . . . 45
Q
Quick dial. . . . . . . . . . . . . . . . . . . . . . . . . . . . 43
Quick dial key. . . . . . . . . . . . . . . . . . . . . . . . . 13
R
Receiver
connection
volume . . . . . . . . . . . . . . . . . . . . . . . . . . . 32
Redial list . . . . . . . . . . . . . . . . . . . . . . . . . . . . 21
dialling a number . . . . . . . . . . . . . . . . . . . . 13
Restart . . . . . . . . . . . . . . . . . . . . . . . . . . . 34, 45
Restore factory settings
using the device keys
using the display menu. . . . . . . . . . . . . . . . 34
Ringback
cancelling
initiate . . . . . . . . . . . . . . . . . . . . . . . . . . . . 14
Ringtone
activating/deactivating
delete . . . . . . . . . . . . . . . . . . . . . . . . . . . . 40
load. . . . . . . . . . . . . . . . . . . . . . . . . . . . . . 40
set using the display menu . . . . . . . . . . . . . 31
set using the Web configurator . . . . . . . . . . 40
setting the melody . . . . . . . . . . . . . . . . . . . 31
standard . . . . . . . . . . . . . . . . . . . . . . . . . . 40
volume for incoming calls . . . . . . . . . . . . . . 31
. . . . . . . . . . . . . . . . . . . . . . . . . 5
. . . . . . . . . . . . . . . . . 34
. . . . . . . . . . . . . . . . . . . . . . . . . 14
. . . . . . . . . . . . . . . . 15
S
Safety precautions . . . . . . . . . . . . . . . . . . . . . . 7
Screensaver
enable/disable (display menu)
set brightness . . . . . . . . . . . . . . . . . . . . . . 41
setup. . . . . . . . . . . . . . . . . . . . . . . . . . . . . 32
Service. . . . . . . . . . . . . . . . . . . . . . . . . . . . . . 47
Setting language
for Web configurator
Setting the date
display menu
web configurator . . . . . . . . . . . . . . . . . . . . 44
Setting the language for the Web configurator . 36
Setting the time
display menu
web configurator . . . . . . . . . . . . . . . . . . . . 44
Shared line
assigning function key
Silencing the telephone . . . . . . . . . . . . . . . . . 15
Speaker
volume
Specifying the time zone. . . . . . . . . . . . . . . . . 44
Standard ringtone. . . . . . . . . . . . . . . . . . . . . . 40
Standard send connection. . . . . . . . . . . . . . . . 12
change . . . . . . . . . . . . . . . . . . . . . . . . . . . 38
display. . . . . . . . . . . . . . . . . . . . . . . . . . . . 46
Star key . . . . . . . . . . . . . . . . . . . . . . . . . . . . . . 3
. . . . . . . . . . . . . . . . . . . . . . . 30
. . . . . . . . . . . . . . . . . . . . . . . 30
. . . . . . . . . . . . . . . . . . . . . . . . . . . 32
. . . . . . . . . . . 32
. . . . . . . . . . . . . . . . . . 36
. . . . . . . . . . . . . 42, 43
57
Page 58

Index
Status . . . . . . . . . . . . . . . . . . . . . . . . . . . . . . . 46
connections . . . . . . . . . . . . . . . . . . . . . . . . 46
device . . . . . . . . . . . . . . . . . . . . . . . . . . . . 46
memory assignment . . . . . . . . . . . . . . . . . .46
Status bar . . . . . . . . . . . . . . . . . . . . . . . . . . . . . 8
icons . . . . . . . . . . . . . . . . . . . . . . . . . . . . . 54
Storage allocation . . . . . . . . . . . . . . . . . . . . . . 46
Submenu . . . . . . . . . . . . . . . . . . . . . . . . . . . .10
SW version see Firmware version
System settings
date and time
saving/restoring . . . . . . . . . . . . . . . . . . . . . 44
. . . . . . . . . . . . . . . . . . . . . . . 44
T
Tel ep h on e
connections
keys . . . . . . . . . . . . . . . . . . . . . . . . . . . . . . . 3
Tel eph one s ett ings
in display menu
in the Web configurator . . . . . . . . . . . . . . . . 36
Time format . . . . . . . . . . . . . . . . . . . . . . . 30, 44
Time ser ver. . . . . . . . . . . . . . . . . . . . . . . . 30, 46
defining . . . . . . . . . . . . . . . . . . . . . . . . . . . 44
. . . . . . . . . . . . . . . . . . . . . . . . . 5
. . . . . . . . . . . . . . . . . . . . . . 30
V
VLAN (Virtual Local Area Network) . . . . . . . . . . 34
Voice mail . . . . . . . . . . . . . . . . . . . . . . . . . . . 24
delete . . . . . . . . . . . . . . . . . . . . . . . . . . . . 24
playing . . . . . . . . . . . . . . . . . . . . . . . . . . . 24
transferring number to directory . . . . . . . . . 24
VoIP connection . . . . . . . . . . . . . . . . . . . . 12, 38
Volume for ringtone . . . . . . . . . . . . . . . . . . . . 31
Volume key . . . . . . . . . . . . . . . . . . . . . . . . 3, 16
W
Web configurator
accessing
. . . . . . . . . . . . . . . . . . . . . . . . . . 36
changing password . . . . . . . . . . . . . . . . . . 36
de-registration . . . . . . . . . . . . . . . . . . . . . . 36
menu structure (users) . . . . . . . . . . . . . . . . 37
selecting language . . . . . . . . . . . . . . . . . . . 36
settings . . . . . . . . . . . . . . . . . . . . . . . . . . . 36
starting . . . . . . . . . . . . . . . . . . . . . . . . . . . 36
All rights reserved. Rights of modification reserved.
58
Page 59

Issued by
Gigaset Communications GmbH
Frankenstr. 2a, D-46395 Bocholt
© Gigaset Communications GmbH 2018
Subject to availability.
All rights reserved. Rights of modification reserved.
gigasetpro.com
 Loading...