

Page 1

Conten@
Aluminum Foil
Appliance Registration
Baking, Baking Guide
Broiling, Broiling Guide
Care and Cleaning
Clock/Timer
Consumer Services
Control Settings
Energy-Saving Tips
Features
Light; Bulb Replacement 9,22
Meat Thermometer
Model and Serial Numbers
Problem Solver
Models
JW07J
~07GJ
Jm07WN
JW27GJ
10, 11
15-17
22,24
5-7
13, 14, 16
25,26
Jm16GJ
Jn27J
15
2
8
27
9
4
2
Roasting, Roasting Guide
Rotisserie
Safety Instructions
Self-Cleaning Instructions 20, 21
Shelves
Thermostat Adjustment
Warranty
GEAmM Ced@
8M.6H.2W@
~03J
~03GJ
~14GJ
12-14
la
19
2-4
23
Back Cover
9
GEAppfimcB
Page 2

Help us help you...
Before using your oven,
read this book carefully.
It is intended to help you operate
and maintain your new oven
properly.
Keep it handy for answers to your
questions.
If you don’t understand something
or need more help, write (include
your phone number):
Consumer Affairs
GE Appliances
Appliance Park
Louisville, KY 40225
Write down the model
and serial numbers.
You’ll find them on a label on the
front of the oven behind the door (on
the lower oven on two-oven models).
These numbers are also on the
Consumer Product Ownership
Registration Card that came with
your oven. Before sending in this
card, please write these numbers
here:
Model Number
Serial Number
Use these numbers in any
correspondence or service calls
concerning your oven.
If you received
a damaged oven...
Immediately contact the dealer (or
builder) that sold you the oven.
Save time and money.
Before you request
service...
Check the Problem Solver on
pages 25 and 26. It lists causes of
minor operating problems that
you can correct yourself.
If you need service...
To obtain service, seethe
Consumer Services page in the
back of this book.
We’re proud of our service and
want you to be pleased. If for some
reason you are not happy with the
service you receive, here are three
steps to follow for further help.
FIRST, contact the people who
serviced your appliance. Explain
why you are not pleased. In most
cases, this will solve the problem.
NEXT, if you are still not pleased,
write all the details-including
your phone number—to:
Manager, Consumer Relations
GE Appliances
Appliance Park
Louisville, Kentucky 40225
FINALLY, if your problem
not resolved, write:
Major Appliance
Consumer Action Panel
20 North Wacker Drive
Chicago, Illinois 60606
is still
IMPOKI’ANT
SAFETY
INSTRUCTIONS
Read ail
befon using this
apptianee.
IMPORTANT
SmY
The California
Water and Toxic Enforcement
Act requires the Governor of
California to publish a list of
substances known to
cause birth
reproductive harm, and requires
businesses to warn customers of
potential exposure to such
substances.
The fiberglass insulation in
self-clean ovens gives off a very
small amount of carbon monoxide
during the cleaning cycle.
Exposure
venting with an open window or
using a ventilation fan or hood.
instruction
N~CE
%fe
Drinking
the
state to
defecb
or other
canbe
minimized by
-
-
,+,.—
2
Page 3

—
When using
electrical
applimces,
basic sakty precautions should
be followd, including
the
following:
. Use
this
appIiance
intended use
manti.
.
Be
S~
as described in this
your
Ppm instaud
by
a qualified technician in
ody
apptice
and
-
accordance with the provided
Installation Instructions.
@ Don’t
attempt to
rem
or replace any part of your
oven Unk?ss it b S-eally
=oinmended
other
servicing
to a qualified
*
Before
-
DWO~~
POWER
WSEHO~D-UTfON
P~L
BY
FUSE OR
THE CIRCUIT
●
~
not
Children should not be
or unattended
in W book. All
shoti
be
tectiicia.
peflbrruklgany **
THEO-
SUPPLY AT THE
~M_G
SmHiNG
13RE~R.
l~ve c~*n #on+
leR
in
an area where
appliance is in use. They should
never be allowed to sit or
on any part of the appliance.
*
Don’t
stand or hang
Mow
anyone to climb,
on the
door.
They could damage the
o ~~ON:
INTEREST
-s
OF
m cmnREN
SHOULD N~ BE STORED
IN cABINEm
AN OVEN.
CLIMBING ON
TO REACH
BE SERIOUSLY ~-
—
● Never wear loose-fitting or
ABOVE
_DREN
THK
-S
OVEN
COULD
hangm garxnen~ wMe using
the
appl!anee. Flamma
codd
material
be ignited if
ble
for its
is
*M
THE
OFF
alone
stid
oven.
brought in contact with hot
heating elements and may cause
severe burns.
*us o~y
dry ~f holders-
Moist or damp potholders on
hot
sufices
from
may
m. Do
resdt
in burns
not & pot ho&m
touch hot heating elements. Do
not use a
towel or
other
bum
cloth.
* N~r use
warmmg
* Storage
Do
nots~ fl
.
or
in or on
your
appliance
h-ing tbe
applime—
ammable
for
room.
materials
in the oven.
●
Keep hood and grease
clean to maintain good
and to avoid
. DO not
grw
let c-
fires.
or other flammable
acm~te b or n-
~ters
venting
g-
wterkds
the oven.
*Do not use water on grease
can
fires. Maine in oven
be
smothered by completely
closing
Ow
●
or interior
These
door and
SET to
Do
not touch heating
OFF.
sntiace
su~ces
maybe hot
turnhrg
eIements
of oven.
enough to burn even though they
are dark in color. During and
after
use, do not touch, or let
clothing or other
makrids
contact any interior
flamma
ble
area of the oven; allow sufficient
time for cooling,
Potentially hot
the oven
sufices
vent
near the openings,
first.
sufices
include
openings and
crevices around the oven door
and the edges
Remember:
of
the door
WWOW.
The inside surface
of the oven maybe hot when the
door is opened.
* men
cooking pork,
follow
the directions exactly and always
cook the meat to an internal
temperature of at least
1’70T.
This assures that, in the remote
possibility that trichina may be
present in the meat, it will be
killed and the meat will be safe
to eat.
Oven
●
Smd
away
from
-
orburn
●
Wn$t Mt
conM btid
codd be,
*
Keep oven vent ducts
unobstructed.
●
Keep oven free from grease
buMdup.
.
~~ce
position while oven is cool.
shelves must be handled when
hot,
heating units in the oven.
* pu~
a
is
fti It
agti
hot surfaces of door or oven
walls.
● When using cooking
-
manukctumr’s dtitions.
*
Do
newspapem
can catch
oven door. The hot air
wMeh
escapes can
hank face aud/or
unopened
in the oven. Pressure
Up
and the container
causing an
oven
do
not let potholder contact
she~~ dmired
out
shelf to shelf stop
convenience
is also a
burns from touching
bm in
not
use your
If overheated, they
fm.
oven when
in-
p-ution
or
oven,
follow the
oven to dry
eyes.
fOOd
@“ury.
If
h~vy
3
Page 4

●
L~~n
shodd
the cleaning
service before
SAW
for
f~—~ ~ ~~is~
be heard
cycle.
Selfwlx
THESE
Somtie
during
If not, call
hr
again,
INSTRUCTIONS
Ene~y-Sating~ps
● Preheat the oven only when
necessary. Most foods will cook
satisfactorily without preheating.
If you find preheating is necessary,
keep an eye on the indicator light,
and put food in the oven promptly
after the light goes out.
●
Always turn oven OFF before
removing food.
● During baking, avoid frequent
door openings. Keep door open as
short a time as possible.
●
Be sure to wipe up excess spillage
before self-cleaning operation.
●
Cook complete oven meals instead
of just one food item. Potatoes,
other vegetables and some desserts
will cook together with a main-dish
casserole, meat loaf, chicken or
roast. Choose foods that cook at
the same temperature and in
approximately the same time.
●
Use residual heat in oven
whenever possible to finish
cooking casseroles, oven meals,
etc. Also add rolls or precooked
desserts to warm oven, using
residual heat to warm them.
-
—.
4
Page 5

Features of Your Oven
???
???
Models
Model
JRP14GJ
●
●
●
Feature Index
1 Model and Serial Numbers
2 Oven Set Control
3 Oven Temp Control
4 Oven Cycling Light
5 Automatic Oven Timer,
see
page
2
9
9
9
8
JRP03J
JRP03GJ
●
●
●
● ●
Clock and Minute Timer
6 Rotisserie Receptacle
18
●
(Motor is behind oven wall.)
7 Oven Cleaning Light (Glows
20
●
●
during self-cleaning when all
controls are set.)
8 Locked Light (Glows during
20
self-cleaning when oven has
reached cleaning temperature.
Oven cannot be opened when
this light is on.)
Model JRP14GJ
9 Oven DoorLatch
(Use for Self-Clean only.)
10 Oven Interior Light
(Comes on automatically
when door is opened.)
11
Oven DoorGasket
12 Broil Unit
13 Bake Unit
14 Oven Shelves
15 Oven Shelf Supports
(Letters A, B, C and D
indicate cooking positions for
shelves as recommended on
cooking guides.)
16 Broiler Panand Rack (Do not
clean in self-clean oven.)
17 Meat Thermometer Receptacle
18 Meat Thermometer Dial
20
9,22
20
15,24
10,24
9
9
15
13
13
● ●
●
●
●
2 2
●
●
●
●
“G” in model number indicates Black Glass Door.
5
Page 6

Features of Your Oven
\
Models
f????
JKP07J, JKP07GJ,
\
JKP07WN
Model
JKP16GJ
Models
Upper oven is self-cleaning, lower oven is standard
JKP27J,
JKF2%J
6
Page 7

Feature Index
1 Model and Serial Numbers
2 Oven Set Control
3 Oven Temp Control
Explained
on
I
I
Daze
21°
9
9
Models
JKP07J
JKP07GJ
JKP07WN
I@
●
Models
Model
JKP16GJ
●
1-
●
JKP27J
JKP27GJ
1°
●
4 Oven Cycling Light
5 Automatic Oven Timer,
Clock and Minute Timer
6 Rotisserie Receptacle (Place end of
spit firmly into receptacle when using
rotisserie. Motor is behind oven wall.)
7 Locked Light (Glows during self-
cleaning when oven has reached cleaning
temperature. Oven cannot be opened
when this light is on. )
8 Oven Cleaning Light (Glows during
self-cleaning when all controls are set. )
9 Oven Door Latch
(Use for Self-Clean only.)
10 Oven Interior Light (Comes on
automatically when door is opened. )
11 Oven Light Switches
12 Broil Unit
13 Bake Unit (May be lifted gently
for wiping oven floor.)
9
8
●
●
●
●
1°
●
I
18
20
20
●
●
●
●
●
●
●
I
20
9,22
I
91°
15,24
10,24
●
●
●
●
● ●
I
●
●
10
2
14 Oven Shelves
15 Oven Shelf Supports (Letters A, B, C and
D indicate cooking positions for shelves
as recommended on cooking guides.)
16 Broiler Pan and Rack (Do not
clean in self-clean oven. )
17 Oven Door Gasket
18 Meat Thermometer Receptacle
(Insert pronged end of thermometer
firmly into receptacle. )
19 Meat Thermometer Dial
I
9
9
15
13
13
7
I
2
●
●
—
2
●
● ●
+
●
●
●
+
14
●
1°
Page 8

Automatic Timer and Clock
—
The Automatic Timer and Clock on
your oven are helpful devices that
serve several purposes.
To Set the Clock
Push in the center knob
Minute Timer and turn knob in
either direction to set the Digital
Clock numerals to the correct time.
(After setting the Clock, let the
knob out, and turn the Minute
Timer pointer to OFF.)
of the
To Set the Minute Timer
The Minute Timer is the large dial
to the
lefi
of the Digital Clock. Use
it to time all your precise cooking
operations. This dial also sets or
changes the Digital Clock.
~
SET THE MINUTE TIMER,
turn the center knob clockwise,
without pushing in,
reaches number of minutes you
wish to time (up to
until pointer
60).
Time
Bake Uses
Automatic Timer
Using Automatic Timer, you can
TIME BAKE with the oven starting
immediately and turning off at the
Stop Time set or you can set both
DELAYED START (some models
say START) and STOP dials to
automatically start and stop oven at
a later time of day. It takes the
worry out of not being home to
start or stop the oven.
Setting the dials for TIME BAKE
is explained in detail on page 10.
Self-Clean Uses
Automatic Timer
The self-cleaning function on your
oven uses the Automatic Timer to
set the length of time needed to
clean whether you wish to clean
immediately or delay the cleaning
until low energy times such as
during the night. See page 20.
Questions and Answers
Q.
How can I use my Minute
Timer to make my surface
cooking easier?
A. Your Minute Timer will help
time total cooking which includes
time to boil food and change
temperatures. Do not judge cooking
time by visible steam only. Food
will cook in covered containers
even though you can’t see any
steam.
Q. Must the Clock be set on
correct time of day when I wish
to use the Automatic Timer for
baking?
A. Yes,
DELAYED START or STOP dials
to turn on and off at set times during
timed functions.
Q. Can I use the Minute Timer
during oven cooking?
A. The Minute Timer can be
used during any cooking function. “
The Automatic Timers (DELAYED
START and STOP dials) are used
with TIME BAKE and SELFCLEAN functions.
Q. Can I change the Clock while
I’m Time Cooking in the oven?
A. No.
during any program that uses the
oven timer. You must either stop
those programs or wait until they
are finished before changing time.
if you wish to set the
The Clock cannot bechangcd
-
8
Page 9

Using Your Oven
Before Using Your Oven
1. Look at the controls. Be sure
you understand how to set them
properly. Read over the directions
for the Automatic Oven Timer so
you understand its use with the
controls.
2. Check oven interior. Look at
the shelves. Take a practice run at
removing and replacing them properly,
to give sure, sturdy support.
3. Read over information and tips
that follow.
4.
Keep this book handy so you can
refer to it, especially during the
first weeks of getting acquainted
with your oven.
Oven Controls
PREHEATING the oven, even to
high temperature settings, is speedy
—rarely more than about 10 minutes.
Preheat the oven only when
necessary. Most foods will cook
satisfactorily without preheating.
If you find preheating is necessary,
keep an eye on the indicator
and-put
after light goes out.
f;od
in the oven
light
prom~tly
Oven Interior Shelves
The shelves are designed with
stop-locks so that when placed
correctly
they
completely from the oven, and (b)
will not tilt when removing food
from or placing food on them.
TO REMOVE
oven, lift
forward
of shelf supports. Be certain that
shelf is cool before touching.
on the shelf supports,
(a)
will stop before coming
shelves from the
up
rear
of shelf, pull
wfih
stop-locks along top
Oven Light
The light comes on automatically
when the door is opened. On models
with oven window use switch to
turn light on and off when door
is closed.
Switch is located on front of door
on some models, on control panel
on other models.
The controls for the oven(s) are
marked OVEN SET and OVEN
TEMP. OVEN SET has
BAKE, TIME BAKE (on
equipped), BROIL, CLEAN and OFF.
When you turn the knob to the desired
setting, the proper heating units are
then activated for that operation.
OVEN TEMP maintains the
temperature you set, from WARM
(150”F.)
also at CLEAN
The Oven Cycling Light glows
until the oven reaches your selected
temperature, then goes off and on with
the oven unit(s) during cooking.
to BROIL
(880°F.
settin~s
(550”F.)
).
for
mo~els
and
so
TO REPLACE shelves in oven,
insert shelf with stop-locks resting
on shelf supports. Push shelf toward
rear of oven; it will fall into place.
When shelf is in proper position,
stop-locks on shelf
shelf support when shelf is pulled
forward.
will
run under
Shelf Positions
The oven has four shelf supports
marked A (bottom), B, C and D
(top). Shelf positions for cooking
food are suggested on Baking,
Roasting and Broiling pages.
9
Page 10

Baking
When cooking a food for the first
time in your new oven, use time
given on recipes as a guide. Oven
thermostats, over a period of years,
may “drift” from the factory setting
and differences in timing between
an old and a new oven of 5 to 10
minutes are not unusual and you
may be inclined to think that the new
oven is not performing correctly.
However, your new oven has been
set correctly at the factory and is
more apt to be accurate than the
oven it replaced.
How to
Step 1:
certain to leave about 1 inch of
space between pans and walls of
oven for good circulation of heat.
Close oven door. During baking,
avoid frequent door openings to
prevent undesirable results.
Bake
Place food in oven, being
that you set. Examples of Immediate
Start (oven turns on now and you
set it to turn off automatically) or
Delayed Start and Stop (setting the
oven to turn on automatically at a
later time and turn off at a preset
stop time) will be described.
How to Set Immediate
Start
N~E:
sure the range clock shows the
correct time of day.
Immediate Start is simply setting
oven to start baking now and turning
off at a later time automatically.
Remember, foods continue cooking
after controls are off.
Before beginning make
How to Set Delayed Start
and Stop
Delayed Start and Stop is setting
the oven timer to turn the oven on
and off automatically at a later time
than the present time of day.
Step 1:
knob on DELAYED START dial
(some models may say START) and
turn pointer to time you want oven
to turn on, for example
To set start time, push in
3:30.
Step 2:
BAKE and OVEN TEMP knob to
temperature on recipe or on Baking
Guide.
Step 3:
at minimum time on recipe. Cook
longer if necessary. Switch off heat
and remove foods.
Turn OVEN SET knob to
Check food for doneness
How to Time Bake
The automatic oven timer controls
are designed to turn the oven on or
off automatically at specific times
Step 1:
knob on STOP dial and turn pointer
to time you want oven to turn off;
for example
START dial should beat the same
position as the time of day on
clock.
Step 2:
TIME BAKE. Turn OVEN TEMP
knob to oven temperature, for
example 250°F. The oven will start
immediately and stop at the time
you have set.
To set Stop Time, push in
6:00.
The DELAYED
Turn OVEN SET knob to
Step 2:
knob on STOP dial and turn pointer
to time you want oven to turn off,
for example
recipe called for two and one-half
hours of baking time.
NOTE:
be later than time shown on range
clock and DELAYED START dial.
Step
TIME BAKE. Turn OVEN TEMP
knob to 250°F. or recommended
temperature.
Place food in oven, close the door
and automatically the oven will be
turned on and off at the times you
have set. Turn OVEN SET to OFF
and remove food from oven.
To set Stop Time, push in
6:00.
This means your
Time on STOP dial must
3: Turn OVEN SET knob to
.—
10
Page 11

Baking Guide
1.
Aluminum pans conduct heat
2. Dark or non-shiny finishes and
quickly. For most conventional glass cookware generally absorb
baking, light, shiny finishes give best
results because they help prevent
overbrowning. For best browning
results, we recommend dull bottom
sufices
for cake pans and pie plates.
heat, which may result in dry, crisp
crusts. Reduce oven heat 25”F. if
lighter crusts are desired. Rapid
browning of some foods can be
achieved by preheating cast iron
cookware.
Food
Bread
Biscuits (%-in. thick) Shiny Cookie Sheet
Coffee cake Shiny Metal Pan with
Corn bread or muffins Cast Iron or Glass
Gingerbread Shiny Metal Parr with
Muffins Shiny Metal Muffin Pans
Popovers Deep Glass or Cast Iron Cups
Quick loaf bread
Yeast bread (2 loaves)
Plain rolls
Sweet rolls
Cakes
(without shortening)
Angel food
Jelly
roll
Sponge
Cakes
Bundt cakes Metal or Ceramic Pan
Cupcakes Shiny
Fruit cakes
Layer Shiny Metal Pan with
Layer, chocolate
Loaf
Cookies
Brownies
Drop
Refrigerator
Rolled or sliced
Fruits,
Other Desserts
Baked apples Glass or Metal Pan
Custard
Puddings, Rice
and Custard
Pies
Frozen Foil Pan on Cookie Sheet
Meringue
One crust
Two crust
Pastry shell Glass or Satin-finish Metal
Miscellaneous
Baked potatoes Set on Oven Shelf
Scalloped dishes
Souffles
Container
satin-finish bottom
satin-finish bottom
Metal or Glass Loaf Pans
Metal or Glass Loaf Pans
Shiny Oblong or Muffin Pans
Shiny Oblong or Muffin Pans
~be
Aluminum
Metal Jelly Roll Pan
Metal or Ceramic
Metal Muffin Pans
Metal or Glass Loaf or
Tube Pan
satin-finish bottom
Shiny Metal Parr with
satin-finish bottom
Metal or Glass Loaf Pans
Metal or Glass Pans
Cookie Sheet
Cookie Sheet
Cookie Sheet
Glass Custard Cups or Casserole
(set in pan of hot water)
Glass Custard Cups or
Casserole
Spread to crust edges
Glass or Satin-finish Metal
Glass or Satin-finish Metal
Glass or Metal Pan
Glass
Pan
pan
Shelf
Pbsition Temperature
B, C
B, A 350°-4000 20-30
B
B
A, B
B 375°
B
A, B
A, B
B, A
A
B
A
A, B
B 350°-3750
A, B
B
B
B
B, C 325”-350°
B, C 350”-400”
B, C 400°-4250
B, C
A, B, C
B
B
A
B, A 325”-350°
A, B
B
B
A, B, C
A, B, C
B
Oven
400°-4750
400°-450” 20-40 Preheat cast iron pan for crisp crust.
350”
400°-4250 20-30 Decrease about 5 minutes for muffin
350°-3750
375°-4250
375”-425”
350°-375”
325”-375”
375”-400°
325”-350” 45-60
325°-3500
275”-300”
350°-375”
350°-3750
350°
375°-400”
350°-4000
300°-3500
325°
400°-4250
400°-425”
400°-4250
450°
325°-4000
325°-3750
300°-350”
3. Preheating the oven is not always
necessary, especially for foods
which cook longer than 30 to 40
minutes. For food with short
cooking times, preheating gives
best appearance and crispness.
4. Open the oven door to check
food as little as possible to prevent
uneven heating and to save energy.
Time,
Minutes
15-20
45-55
45-60 mix, or bake at 450”F. for 25 minutes,
45-60
45-60 Dark metal or glass give deepest
10-25
20-30
30-55
10-15
45-65
20-25 Paper liners produce more moist
2-4 hrs. Use 300”F. and Shelf B for small or
20-35
25-30
40-60
25-35
10-20
6-12
7-12
30-60
30-60
50-90
45-70
15-25
40-60 Custard fillings require lower
40-60
12-15
60-90 Increase time for large amount
30-60
30-75
Comments
Cannd,
refrigerated biscuits take
2 to 4 minutes less time.
350”F.
then at
browning.
For thin rolls, Shelf B may be used.
For thin rolls, Shelf B may be used.
Two-piece pan is convenient.
Line pan with waxed paper.
crests.
individual cakes.
Bar cookies from mix use same time.
Use Shelf C and increase temp.
25”F. to 50”F. for more browning.
Reduce temp. to 300”F. for large
custard. Cook bread or rice pudding
with custard base 80 to 90 minutes.
Large pies use 400°F. and increase
time.
To quickly brown meringue, use
400”F.
temperature, longer time.
or size.
for 10 to 15 minutes.
for 8 to 10 minutes.
11
Page 12

Roasting
—
Roasting is cooking by dry heat.
Tender meat or poultry can be
roasted uncovered in your oven.
Roasting temperatures, which
should below and steady, keep
spattering to a minimum. When
roasting, it is not necessary to
sear, baste, cover or add water
to your meat.
Roasting is really a baking
procedure used for meats. Therefore,
oven controls are set to BAKE. (You
may hear a slight clicking sound,
indicating the oven is working
properly.) Roasting is easy; just
follow these steps:
Step 1:
place, fat side up, on roasting rack
in a shallow pan. (Broiler pan with
rack is a good pan for this.) Line
broiler pan with aluminum foil when
using pan for marinating, cooking
with fruits, cooking heavily cured
meats, or for basting food during
cooking. Avoid spilling these
materials on oven liner or door.
Step 2: Place in oven on shelf in
A or B position. No preheating is
necessary.
Check weight of meat, and
Step 4: Most meats continue to
cook slightly while standing, after
being
removed from the oven.
Stan~ing
roasts is 10 to 20 minutes to allow
roast to firm up and make it easier to
carve. Internal temperature will rise
about 5° to 10”F.; to compensate for
temperature rise, if desired, remove
roast from oven at 5° to 10”F. less
than temperature in guide on page 14.
N~E:
BAKE, as described on page 10, to
turn oven on and off automatically.
Remember that food will continue
to cook in the hot oven and therefore
should be removed when the desired
internal temperature has been
reached.
For Frozen
. Frozen roasts of beef, pork,
lamb, etc., can be started without
thawing, but allow 10 to 25 minutes
per pound additional time (10
minutes per pound for roasts under
5 pounds, more time for larger
roasts).
. Thaw most frozen poultry before
roasting to ensure even doneness.
Some commercial frozen poultry
can be cooked successfully without
thawing. Follow directions given
on packer’s label.
time recommended for
You may wish to use TIME
Roas@
Questions & Answers
Q. Is it necessary to check for
doneness with a meat thermometer?
A.
Checking the finished internal
temperature at the completion of
cooking time is recommended.
Temperatures are shown on Roasting
Guide on page 14. For roasts over 8
pounds, cooked at
reduced time, check with
thermometer at half-hour intervals
after half the time has passed.
Q.
Why is my roast crumbling
when
1
try to carve it?
A. Roasts are easier to slice if
allowed to cool 10 to 20 minutes
after removing from oven. Be sure
to cut across the grain of the meat.
Q.
Do I
need to preheat my
oven each time I cook a roast
or poultry?
A. It is rarely necessary to preheat
your oven, only for very small
roasts, which cook a short length
of time.
Q. When buying a roast, are
there any special tips that would
help me cook it more evenly?
A. Yes. Buy a roast as even in
thickness as possible, or buy rolled
roasts.
Q. Can I seal the sides of my foil
“tent” when roasting a turkey?
A. Sealing the foil will steam the
meat. Leaving it unsealed allows the
air to circulate and brown the meat.
300”F.
with
Step 3:
and OVEN TEMP to
poultry may be cooked at
for best browning.
Turn OVEN SET to BAKE
325”F.
Small
375”F.
—
12
Page 13

Meat Thermometer
For many foods, especially
roasts and poultry, internal food
temperature is the best test for
doneness. The meat thermometer
takes the guesswork out of roasting
by cooking foods to the exact
doneness you want. The meat
thermometer has a skewer-like
probe at one end of the cable and a
two-pronged plug at the other. Use
handle of plug and probe, rather
than cable, when inserting and
removing these parts from meat
and/or oven wall receptacle. After
preparing meat and placing in
roasting pan on rack, follow the
steps below for proper use of meat
thermometer.
Models
JRM4GJ, JKn6GJ
Step 3:
on oven wall. The prongs are
especially designed to only plug in
one way. Be certain to insert plug
into receptacle all the way. Close
oven door.
Plug cable into receptacle
Step 6: When internal temperature
of roast reaches number you have
set, a buzzer sounds. To stop
buzzer, turn pointer to SIGNAL
OFF. Internal temperature of meat
can be determined at any time
during cooking by turning pointer
down until buzzer sounds.
Step 1:
probe, lay probe on outside of meat
along top or side and mark with
finger where edge of meat comes
on probe. Probe should be placed
so point rests in center of the
thickest part of roast.
Step 2:
to point marked off with fingers.
Point should not touch bone, fat or
gristle. Not more than 2“ of probe,
not counting handle, should be left
—.
exposed outside of meat.
To gauge placement of
Insert probe into meat up
Step
4: Turn OVEN SET knob to
BAKE and OVEN TEMP knob to
recommended oven temperature,
for example
Guide on page 14 for oven
temperature.
Step
5: Refer to chart near Meat
Thermometer Dial to determine
at what internal temperature meat
will be done. Then turn knob next
to dial to move pointer to correct
number (internal temperature)
on dial.
350”F.
See Roasting
Step
7: When roast is done,
use care in removing plug from
receptacle. DO NOT USE CABLE.
Remove meat from oven. Since
most meat continues cooking, you
may wish to remove 5° to 10° sooner.
Step 8:
using handle of probe
Most meats carve easier if let stand
5 to 10 minutes. Let thermometer cool
and clean as directed in Cleaning
Guide on page 24. Do not leave
in oven.
Remove probe from meat,
not
cable.
See Roasting Guide on page 14.
13
Page 14
Roasting Guide
Roasting
1.
Position oven shelf at B for
small-size roasts (3 to 7 lbs.) and necessary. Baste as desired.
at A for larger roasts.
2. Place meat fat-side up, or poultry
breast-side up, on broiler pan or
other shallow pan with trivet. Do
not cover. Do not stuff ~oultrv until
just before roasting.
Us;
a
m~at
thermometer for more accurate
doneness. On models so equipped,
use the meat probe—control signals
when food has reached set
temperature. (Do not place
thermometer or probe in stuffing.)
3. Remove fat and drippings as
4. Standing time recommended
for roasts is 10 to 20 minutes. This
allows roasts to firm up and makes
them easier to carve. Internal
tem~erature will rise about 5° to
10”F.; to compensate for temperature
rise, if desired, remove roast from
oven sooner at 5° to 10”F. less than
temperature in guide.
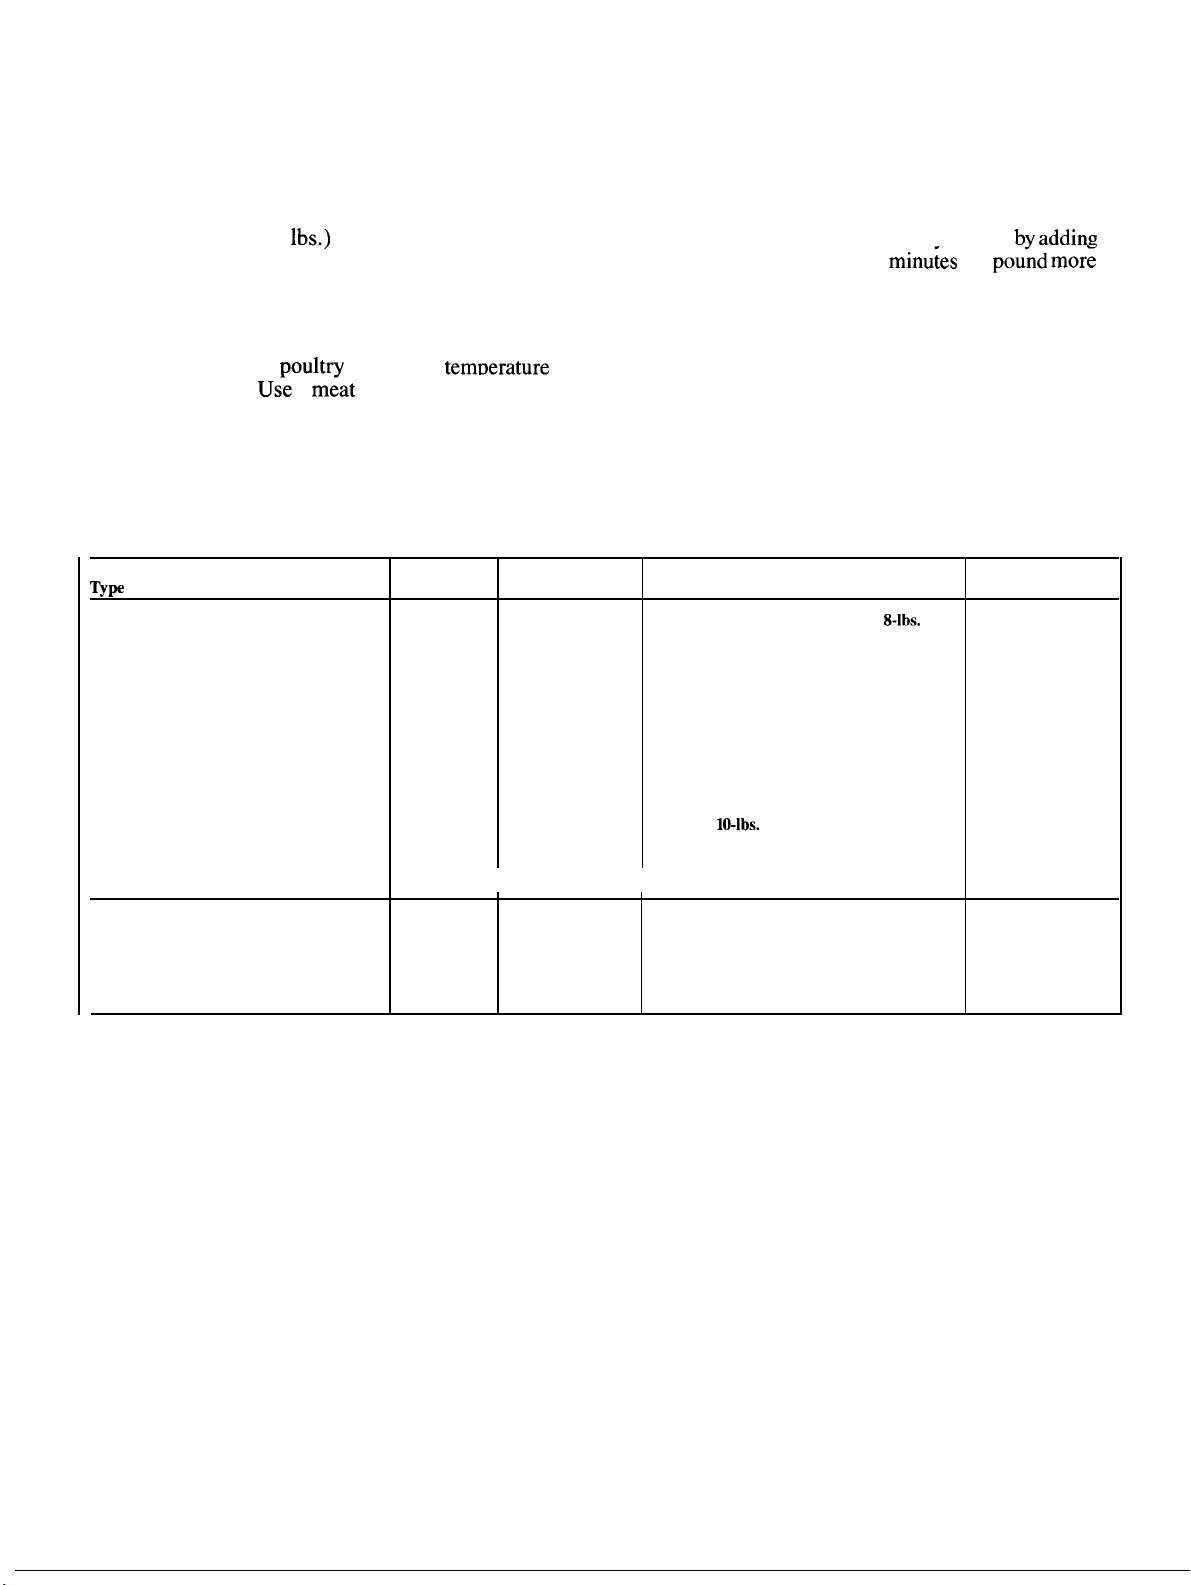
5. Frozen roasts can be
by
conventionally roasted
10 to 25
minu~es
per
adding
poufid
mor~
time than given in guide for
refrigerated roasts. (10 minutes
per pound for roasts under 5 pounds.)
Defrost poultry before roasting.
Oven Approximate Roasting Time,
‘rYPe
Meat
Tender cuts; rib, high quality sirloin tip,
rump or top round* Medium:
Lamb Leg or bone-in shoulder*
Veal shoulder, leg or loin*
Pork loin, rib or shoulder*
Ham, precooked
Ham, raw
*For boneless rolled roasts over 6-inches thick, add 5 to 10 minutes per pound to times given above,
Poultry
Chicken or Duck 325°
Chicken pieces
Turkey
Temperature Doneness
325° Rare: 24-30
Well Done:
325°
325°
325°
325” To Warm:
325°
375°
325°
Rare:
Medium:
Well Done:
Well Done:
Well Done:
Well Done:
Well Done:
Well Done:
Well Done:
in Minutes per Pound
3 to 5-lbs.
30-35
35-45
21-25
25-30
30-35
35-45
35-45
10 minutes per pound (any weight)
Under
10-lbs.
20-30
3 to 5-lbs. Over 5-lbs.
35-40
35-40
10 to 15-lbs. Over
20-25
Internal
Temperature ‘F
8-lbs.
6 to
18-22
22-25
28-33 170°-185”
20-23
24-28
28-33
30-40
30-40
10 to 15-lbs.
17-20
30-35
15-lbs.
15-20
130°-1400
150°-1600
130°-1400
150°-1600
170°-1850
170°-1800
170°-1800
125°-1300
170°
185°-1900
185°-1900
In tbigh:
185”- 190°
14
Page 15

Broiling
See Broiling Guide on page 17.
Broiling is cooking food by intense
radiant heat from the upper unit in
the oven. Most fish and tender cuts
of meat can be broiled. Follow
these steps to keep spattering and
smoking to a minimum.
Step
1:
If meat has fat or gristle near
edge,
cut vertical slashes
bo~h”about
may be trimmed, leaving layer
about 1/8” thick.
Step 2: Place meat on broiler rack
in broiler pan which comes with
range. Always use rack so fat drips
into broiler pan; otherwise juices
may
Step3:
shelf position as
Guide on page 17. Most broiling is
done on C position, but if your
range is connected to 208 volts, you
may wish to use higher position.
2“ apart. If
kome
hot enough to catch
Position shelf on recommended
su~ested
through
desired,-fat
fu-e.
in Broiling
Step 6: Turn food only once
coo-ting.
per Broiling Guide.
Turn food, then use times given for
second side as a guide to preferred
doneness. (Where two thicknesses
and times are given together, use
first times given for thinnest food.)
Step
to OFF. Serve food immediately,
and leave pan outside oven to cool
during meal for easiest cleaning.
Time foods
7: Turn OVEN SET knob
~or
during
first side
Use of Aluminum Foil
Questions &Answers
Q. Why should I leave the door
closed when broiling chicken?
A. Chicken is the only food
recommended for closed-door
broiling. This is because chicken is
relatively thicker than other foods
you broil. Closing the door holds
-
more heat in the oven which allows
chicken to cook evenly throughout.
Q. When broiling, is it necessary
to always use a rack in the pan?
A. Yes.
the meat over the pan. As the meat
cooks, the juices fall into the pan,
thus keeping meat drier. Juices
are protected by the rack and stay
cooler, thus preventing excessive
spatter and smoking.
Q.
broiling?
A. No.
and allows them to evaporate.
Always salt after cooking. Turn
meat with tongs; piercing meat
with a fork also allows juices to
escape. When broiling poultry
or fish, brush each side often
with butter.
Using the rack suspends
Should I salt the meat before
Salt draws out the juices
>kL,.
k
,.. .
>ti~~
~~ii i-
—
Step 4:
(except when broiling chicken).
The door stays open by itself, yet
the proper temperature is maintained
in the oven.
p
Leave door ajar a few inches
0
BROIL
-9$
t
@
*~>3ydQ
❑
Step 5:
OVEN TEMP knobs to BROIL.
Preheating units is not necessary.
(See notes in Broiling Guide.)
Turn both OVEN SET and
z
>+”
1. If desired, broiler pan maybe
lined with foil and broiler rack may
be covered with foil for
ALWAYS BE CERTAIN
MOLD FOIL THOROUGHLY TO
BROILER RACK, AND SLIT
FOIL TO CONFORM WITH
SLITS IN RACK. Broiler rack is
designed to minimize smoking and
spattering, and to keep drippings
cool during broiling. Stopping fat
and meat juices from draining to
the broiler pan prevents rack from
serving its purpose, and juices may
become hot enough to catch fire.
2. DO
N~
place a sheet of
aluminum foil on shelf. To do so
may result in improperly cooked
foods, damage to oven finish and
increase in heat on outside surfaces
of the oven.
broiling.
~
-
Q.
Why are my meats not turning
out as brown as they should?
A. In some areas, the power
(voltage) to the range maybe low.
In these cases, preheat the broil
unit for 10 minutes before placing
broiler pan with food in oven.
Check to see if you are using the
recommended shelf position. Broil
for longest period of time indicated
in the Broiling Guide. Turn food
only once during broiling.
Q.
Do I need to grease my broiler
rack to prevent meat from sticking?
A. No. The broiler rack is designed
to reflect broiler heat, thus keeping
the surface cool enough to prevent
meat sticking to the surface. However,
spraying the broiler rack lightly with
a vegetable cooking spray before
cooking will make cleanup easier.
15
Page 16

Broiling with the Meat Thermometer
(onmodelssoequipped)
You may use the meat thermometer
for broiling, such as steak or ham
slices. Prepare meat on broiler rack
and pan as explained on page 15,
“How to
SET and OVEN TEMP knobs to
BROIL and leave door ajar as
recommended, after placing probe
in meat and oven as directed below.
Broil:’
Set both OVEN
\
Step 1:
inches thick. Lay probe on top of
steak to determine the position
probe is to be inserted. Gauge
distance from edge to center of
largest muscle; mark with thumb
where edge of meat or fat meets
probe. Be certain NOT MORE
THAN 2 inches of probe, not
counting handle, is left exposed
outside of meat.
Use steak at least 1 to
1%
Step
3: For rare steaks cook first
side to 90 on meat thermometer
dial; for medium to 100; for
I
done 110. Set Meat Thermometer
Dial to preferred doneness.
Step
4: At sound of buzzer, turn
steak; check probe to be certain it
has not moved out of position.
Reset pointer on Meat Thermometer
and cook second side. See guide on
oven near Meat Thermometer Dial.
NOTES:
●
If there is a question about
whether probe has moved out of
position during cooking, turn knob
so pointer moves down on dial until
buzzer sounds. Note indicated
temperature and reset pointer to
SIGNAL OFF. Push probe farther
down into roast, about 1 inch, then
after a few minutes redetermine
internal temperature as above. If
new temperature is lower, the probe
was probably out of position. If so,
allow meat to cook to proper
internal temperature.
well-
Questions and Answers
Q. Can the meat thermometer
remain in the oven if it’s not
inserted in food?
A. No. Remove probe from
receptacle when not in use. You
could damage the probe by leaving
it in during cooking operations that
do not require the probe.
Q. May I insert the meat
thermometer into frozen foods?
A. No. Foods must be completely
defrosted before inserting probe.
Q. Should I line broiler pan with
aluminum foil when roasting?
A. Yes, when using pan for
marinating, cooking with fruits or
heavily cured meats, or for basting
during cooking. Avoid spilling these
materials on oven liner or door.
Q. How may I be sure that my
roast will cook the same each time?
A. When using the meat
thermometer in roasting, the probe
must be inserted properly. Check
the position of the probe during
cooking. Sometimes the probe slips
or is touching bone, fat or gristle.
Reposition probe correctly and set
oven again to finish roasting.
—
Step 2:
keeping thumb in place on probe.
Insert probe as near as possible to
center of thickness of steak. Push
probe into steak to where thumb
meets fat or meat.
Lifi
probe from meat
●
Let meat thaw enough to allow
inserting probe. The probe is
sturdy but take care not to force it
too hard into roast.
● Do not disconnect probe during
cooking. Use hotpads when
removing probe at end of cooking.
Do not use tongs to pull on cable
since they may damage it.
DO
N~
USE THE MEAT
THERMOMETER WITH THE
ROTISSERIE.
16
—
Page 17

Broiling Guide
Broiling
1.
Always use broiler pan and rack
that comes with your oven. It is
designed to minimize smoking and
spattering by trapping juices in the
shielded lower part of the pan.
2. Oven door should be ajar for all
foods except chicken; there is a
special position on door which
holds door open correctly.
3. For steaks and chops, slash fat
evenly around outside edges of meat.
Food
Bacon
Ground Beef
Well Done
Steab
Beef
Rare
Medium (1 to
Well Done
Rare 1%-in. thick
Medium (2 to 2%-lbs.)
Well Done
Chicken
Bakery Products
Bread (Toast) or 2 to 4 slices
Toaster Pastries
English Muffins 2 (split)
Lobster Tails 2-4
(6 to 8-oz. each)
Fish
Ham Slices
(precooked)
Pork Chops
Well Done
bmb
Chops
Medium
Well Done
Medium
Well Done about 1
Wieners
and similar
precooked sausages,
bratwurst
Quantity and/or
Thickness
Yz-lb.
(about 8
thin slices)
l-lb. (4 patties)
1/2
to %-in. thick
l-inch thick
1%-lbs.)
1 whole A
(2 to
2ti-lbs.),
split lengthwise
1 pkg. (2)
l-lb. fillets M to c
‘/z-in. thick
l-in. thick
2(% inch)
2 (l-in. thick)
about 1 lb.
2(1 inch)
about 10 to 12 oz.
2
(1%
inch)
lb.
l-lb. pkg. (10)
To slash, cut crosswise through
outer fat surface just to the edge of
the meat. Use tongs to turn meat
over to prevent piercing meat and
losing juices.
4. If desired, marinate meats or
chicken before broiling. Or brush
with barbecue sauce last 5 to 10
minutes only.
5.
When arranging food on pan,
do not let fatty edges hang over
sides, which could soil oven with
fat dripping.
Shelf
Position
c
c
c
c
c
c
c
c
c
c
B
B 8
c
B 13
c
c
c
B
c
First Side Second Side
Time, Minutes Time, Minutes
3
%
7 4-5
7 7
9 9
13 13
10
15
25
35 10-15
1
%-2
3-4
13-16
5
10
8
10
10
17
6
turn over.
6.
Broiler does not need to be
preheated. However, for very thin
foods, or to increase browning,
preheat if desired.
7. Frozen Steaks
can be
conventionally broiled by
positioning the oven shelf at next
lowest shelf position and increasing
cooking time given in this guide
1%
times per side.
8.
If your range is connected to
208 Volts, rare steaks may be
by preheating broil heater and
positioning the oven shelf one
position higher.
Comments
3’/2
7-8
14-16
20-25
~/2
Do not Cut through back of shell. Spread
5
8
10
13
4-7
10
4-6
12-14
I-2
Arrange in single layer.
Space evenly.
Up to 8 patties take about same time.
Steaks less than 1 inch cook through
before browning. Pan frying is
recommended.
Slash fat.
Reduce times about 5 to 10 minutes per
side for cut-up chicken. Brush each side
with melted butter. Broil with skin
down first and broil with door closed.
Space evenly. Place English muffins
cut-side-up and brush with butter, if
desired.
open. Brush with melted butter
before and after half time.
Handle and turn very carefully.
Brush with lemon butter before and
during cooking if desired. Preheat
broiler to increase browning.
Increase times 5 to 10 minutes per side
for 1%-inch thick or home cured.
Slash fat.
Slash fat.
If desired, split sausages in half
lengthwise; cut into 5 to 6-inch pieces.
broild
17
Page 18

Rotisserie
Models
JRP14GJ, JKF16GJ
Food is cooked by revolving on
a spit under the (upper) broil unit.
As food turns, it bastes itself to
produce a succulent brown and
tender roast. Meat tender enough
for roasting may be rotissed.
1. Assemble rotisserie. Insert
curved ends of frame into large
holes of broiler pan handles. Lock
frame in place by fitting straight
ends of support into holes in center
handles.
2. Secure food on spit. When
secured correctly, food will be
located in center area of spit
leaving 4 inches free at the pointed
end (this part goes into motor).
3. To secure food on spit: Push
2-pronged fork onto spit near
handle end. Tighten with screw.
Push spit through food (tie food
securely and compactly), distributing
weight evenly on each side of spit.
To check weight distribution on
spit, hold spit (and food) between
hands, palms up; spit should roll
smoothly from palms to fingertips
when palms are tipped forward.
Finish securing food on spit by
gliding second 2-pronged fork onto
spit with prongs toward food. Tighten
screws to a flat surface on spit.
4. Place spit on frame so handle end
is in narrow support, and pointed
end is in wide U-shaped support.
Rotissing the Food
1.
Put oven shelf in lowest position
in oven. With food on spit, place
spit on oven shelf.
2. Set OVEN TEMP knob as
suggested on Rotisserie Time and
Temperature Guide at right. Settings
are 300-400”F. to get foods juicy
and done without overbrowning.
3. Switch OVEN SET knob to
ROTISSERIE. This starts broil unit
and rotisserie motor operating. Spit
can be inserted and removed more
easily when motor is operating.
N~E:
Make certain when touching
spit that no part of body or pot
holder touches coils of broil unit.
4. Insert spit into motor: Grasp
handle on spit. Using point of spit,
move to one side the cover over
motor outlet in rear of oven; push
spit firmly into motor outlet as far
as it will go. Remove handle.
5. Check rotation of food. Tighten
or adjust forks if necessary. During
cooking, forks may need tightening
due to normal meat shrinkage.
6. As food cooks, leave door ajar in
“Broil” position; door stays open
by itself.
7. Baste food if desired. With pot
holders, pull out pan and shelf
together to shelf stop. Attach
handle to spit to revolve food by
hand while basting. To continue
cooking push shelf and broiler pan
into oven, insert spit into motor,
remove handle.
Rotisserie Notes
● Do not use electric meat
thermometer, on models so
equipped, while operating the
rotisserie. A regular, non-electric
meat thermometer may be used
while rotissing providing it doesn’t
touch the oven, frame or pan while
meat revolves. (Or, if desired, cook
to estimated doneness then pull
meat from oven to insert meat
thermometer. Wait about 2 minutes
for temperature to register. If meat
is not done, remove thermometer
and continue cooking if necessary. )
. If rotissing turkey, let stand in
warm oven 10 to 20 minutes after
cooking to assure juicy meat and
complete doneness.
. At end of cooking pull out pan
and shelf together, using pot
holders. Turn OVEN SET to OFF.
Remove food from spit. Cool pan
outside oven; soak forks and screws
for easiest clean up.
—
18
—
Page 19

Rotisserie Time and Temperature Guide
Food
Beef
Rolled Rib
Rare
Medium
Well Done
Lamb
Leg, boned and rolled 350
Pork, fresh
Loin 350
Spareribs (barbecued)
Spareribs (plain)
~rk,
cured
Ham
Cook-Before-Eating
bone in
Fully Cooked
Poultry
Capon* (6-8 Ibs. )
Chicken* (2-3
Chicken’t (IY,-2
Cornish
Duckling* (4-5 Ibs.)
Turkey* (8-12 Ibs. )
Veal
Shoulder, boned and rolled 350 30-33
Bologna 350 23-25
Canadian Bacon
Luncheon Meat
(12-oz.
Wieners.
lbs.) 400
Ibs. )
Hen* (1 lb. ) 400
can)
large
Oven Temp.
Setting Minutes Per Lb. Temperatures
325
325
325
350
400
325
325
375
400 48-62
350
350
350
350 23-32
I
350
I
Approximate
Rotissing Time
22-29
n-31
32-42
24-27
25-34
1%-1%
hrs. (total time)
%-1 hr.
17-20 160
14-18
26-30
33-42
About 1 hr. (total time)
31-35
17-27
23-27
(total time)
23-32
(total time)
Thermometer
I
Meat
130-140
150-160
170-185
175-185
170-195
130
185-190
t
t
t
185-190
180-185
180
180
160
GeneraI Directions
N~E: 1.
For roasts OVER 10 pounds,
cook about 1/2 estimated time, then
check at 1/2 hour intervals with meat
thermometer for internal doneness.
2. Thin roasts, 3 to 4 pounds, may
slightly longer times per pound than
those given on guide.
175 for medium.
185 for well done.
Buy ribs split down center. Thread on
spit. To barbecue, brush with sauce
every 15 minutes.
Brush with melted butter or margarine,
basting or barbecue sauce several times
during cooking.
Same as above.
If
desiti, th~d
crosswise on spit. Let revolve to within
1/2 hour of doneness time, then brush
every 10 minutes with barbecue sauce.
Brush with butter, or butter and lemon
juice mixed. Thread hens on spit either
lengthwise or crosswise.
Do not brush with fat.
Cook without brushing with fat, or brush
with butter or margarine as desired.
cooked, switch OVEN SET to OFF, close
door, let turkey stand 10 to 20 minutes IN
OVEN. Remove from oven and carve.
Brush with sauce if desired.
Brush with sauce if desired.
- . .
I
Brush with sauce
4 to 5 of this size chicken
.“
. ,
11
deSlrea.
requi~
Wben
tOn
small poultry, test doneness by moving leg gently back and forth, and press leg muscle to be certain it is soft.
*Ready-to-cook weight. IMPORTANT: Tie legs and wings close to body to make doneness of bird as uniform as possible. All times given are for unstuffed birds.
N~E:
Spillage of marinades, fruit juices and basting materials containing acids may
with a paper towel. When surface is cool, clean and rinse.
cause
discoloration on oven liner or door so should be wiped up immediately
19
Page 20

Operating the Self-Cleaning Oven
.-
Before Setting Oven
Controls, Check These
Things:
Step 1:
Remove broiler pan, broiler rack
and other cookware from the oven.
(Oven shelves may be left in oven.
Note: Shelves will discolor after
the self-clean cycle.)
Step 2:
Wipe up heavy soil on oven
bottom. If you use soap, rinse
thoroughly before self-cleaning, to
prevent staining.
How to Set Oven
for Cleaning
Step 1:
Turn OVEN SET and OVEN
TEMP knobs to CLEAN.
will snap into final position when
the CLEAN location is reached.
Controls
Step 3:
Set the automatic oven timer:
.
Make sure
and the DELAYED START dial
show the correct time of day. When
the DELAYED START knob is
pushed in and turned, it will “pop”
into place when the time shown on
the range clock is reached.
●
Decide on cleaning hours necessary.
Recommended Cleaning Time:
Moderate Soil—2 hours
(thin spills and light spatter)
Heavy Soil—3 hours
(heavy, greasy spills and spatter)
both
the range clock
c
o
A. Oven Front Frame
B. Oven Door Gasket
C. Openings in Door
D. Rotisserie Receptacle
E. Oven Light
Step 3:
●
Clean spatters or spills on oven
front frame (A) and oven door
outside gasket (B) with a dampened
cloth. Polish with a dry cloth. Do
not clean gasket (B). Do not allow
water to run down through openings
in top of door (C). Never use a
commercial oven cleaner in or
around self-cleaning oven.
●
Clean top, sides and outside front
of oven door with soap and water.
Do not use abrasives or oven
cleaners.
Step 4:
Close rotisserie receptacle (D) on
models so equipped.
Step 2:
Slide the LATCH HANDLE to the
right as far as it will go.
. Add these hours to present time
of day, then push in and turn STOP
dial clockwise to this desired stop
time. CLEANING light glows,
showing cleaning is starting.
The LOCKED light will glow,
indicating oven is hot and door
cannot be opened. Oven door and
window get hot during self cleaning.
DO
N~
TOUCH.
—.
Step 5:
Close oven door and make sure
oven light (E) is off.
20
Page 21

Follow These Steps after
Self-Cleaning
After cleaning is complete, the
door will stay locked until the oven
cools and the LOCKED light goes
off. This takes about 30 minutes.
Stepl:
When LOCKED light is off, slide
the LATCH HANDLE to the left as
far as it will go and open the door.
Step
2:
Turn OVEN SET knob to OFF.
Step 3:
Turn OVEN TEMP knob to
NOTE:
stop cleaning at a later time than
shown on clock, push in and turn
DELAYED START dial to time
you wish to start. Add the hours
needed for cleaning to this “start”
time, then push in and turn STOP
dial to this desired stop time. Oven
will automatically turn on and off
at the set times.
If you wish to start and
Wm.
Questions and Answers
Q. Why won’t my oven clean
immediately even though I set
all the time and clean knobs
correctly?
A. Check to be sure your
DELAYED START dial is set to
the same time as the range clock.
Also check to be sure LATCH
HANDLE is moved to the right.
Q.
If my oven clock is not working,
can I still self-clean my oven?
A. No. Your Automatic Oven
Timer uses the range clock to help
start and stop your self-cleaning
cycle.
Q. Can I use commercial oven
cleaners on any part of my
self-cleaning oven?
A. No cleaners or coatings should
be used around any part of this
oven. If you do use them and do not
wipe the oven absolutely clean, the
residue can scar the oven surface
and damage metal parts the next
time the oven is automatically
cleaned.
Q.
Can I clean the Woven Gasket
around the oven door?
A. No, this gasket is essential for
a good oven seal, and care must be
taken not to rub, damage or move
this gasket.
Q. After having just used the
oven, the LOCKED light came
on and I could not move the
LATCH HANDLE. Why?
A. After several continuous
temperature bakings or
the LOCKED light may come on.
The oven door can’t be latched for
self-cleaning while the LOCKED
light is on. If this happens, let the
oven cool until the LOCKED light
goes off. Then the oven door can
be latched for self-cleaning.
Q.
What should I do if excessive
smoking occurs during cleaning?
A.
This is caused by excessive soil,
and you should switch the OVEN
high-
broilings,
SET knob to OFF. Open windows
to rid room of smoke. Allow the
oven to cool for
before opening the door. Wipe up
the excess soil and reset the clean
cycle.
Q. Is the “crackling” sound I
hear during cleaning normal?
A. Yes. This is the metal heating
and cooling during both the
cooking and cleaning functions.
Q. Should there be any odor
during the cleaning?
A. Yes, there maybe a slight odor
during the first few cleanings.
Failure to wipe out excessive soil
might also cause an odor when
cleaning.
Q. What causes the hair-like
lines on the enameled surface
of my oven?
A. This is a normal condition
resulting from heating and cooling
during cleaning. They do not affect
how your oven performs.
Q. Why do I have ash left in my
oven after cleaning?
A.
Some types of soil will leave a
deposit which is ash. It can be
removed with a damp sponge or
cloth.
Q.
My oven shelves do not slide
easily. What is the matter?
A. After many cleanings, oven
shelves may become so clean they
do not slide easily. If you wish
shelves to slide more easily,
dampen fingers with a small
amount of cooking oil and rub
lightly over sides of shelf where
they contact shelf supports.
Q.
My oven shelves have become
gray after the self-clean cycle. Is
this normal?
A. Yes.
the shelves may lose some luster
and discolor to a deep gray color.
After the self-clean cycle,
at least one hour
21
Page 22

Care and Cleaning
(See Cleaning Guide on page 24.)
Proper care and cleaning are
important so your oven(s) will give
you efficient and satisfactory
service. Follow these directions
carefully in caring for your oven(s)
to assure safe and proper
maintenance.
Porcelain Enamel and
Painted Surfaces
Any acid foods spilled (such as
fruit juices, tomato or vinegar)
should be wiped up immediately.
See guide for cleaning directions.
Lamp Replacement
CAUTION: Before replacing
your oven lamp bulb, disconnect
the electric power for your oven
at the main fuse or circuit
breaker panel.
lamp cover and bulb cool completely
before removing or replacing them.
The oven
with a glass
is held in place with a bail-shaped
wire.
1. TO REMOVE, hold hand
under cover so it doesn’t fall when
released. With fingers of same
hand, firmly push back wire bail
until it clears cover. Lift off cover.
DO NOT REMOVE ANY
SCREWS TO REMOVE COVER.
Be sure to let the
lamt) (bulb)
r~rnovable
is covered
cover which
—
2. Replace lamp with 40-watt
home appliance bulb.
3. ~ REPLACE cover, place it
into groove of lamp receptacle. Pull
wire bail forward to center of cover
until it snaps into place. When in
place, wire holds cover firmly. Be
certain wire bail is in depression in
center of cover.
4. Connect electric power to oven.
—
22
Page 23

Adjusting Oven Thermostat
Use time given on recipe when
cooking for first time. Oven
thermostats may “drift” from the
factory setting over the years, and
5 to 10-minute differences in timing
between an old and a new oven are
not unusual. Your oven has been set
correctly at the factory and is more
apt to be accurate than the oven
which it
find that
brown too little or too much, you
may make a simple adjustment in
the OVEN TEMP thermostat knob.
PULL KNOB OFF SHAFT. LOOK
AT BACK OF KNOB AND
CURRENT SETTING BEFORE
MAKING ANY ADJUSTMENT.
To increase temperature, turn
toward HI; to decrease, turn toward
LO. Each notch changes temperature
10”F.
Follow appropriate instructions at
right to adjust your oven thermostat.
replaced. However, if
y~ur
foods consistentl~
N~E
you
1.
Remove knob, and hold so
pointer is at top of knob. Using a
potholder or similar material, hold
“skirt” of knob firmly in one hand.
Grasp handle of knob in other
hand. Note position of pointer and
turn handle to move pointer toward
word RAISE or LOWER. Pointer
is designed not to move easily. If it
is seated so it is difficult to move,
pointer may be loosened slightly.
Insert a thin screwdriver, knife
blade or similar instrument and lift
up end of pointer slightly.
2. After adjustment is made, press
pointer firmly against knob. Return
knob to range, matching flat area
on knob and shaft.
Recheck oven performance before
making an additional adjustment.
1.
Pull off knob. Loosen both
screws on back of knob.
2. Move pointer one notch in
desired direction. Tighten screws.
3. Return knob to oven, matching
flat area of knob to shaft.
NOTE: On double-oven model, be
certain knobs are returned to shafts
from which they were removed.
Recheck oven performance before
making an additional adjustment.
—
23
Page 24

Cleaning Guide
Note: Let oven parts cool before touching or handling.
PART
Bake Unit and
Broil Unit
Broiler Pan and Rack
Oven Control
Knobs
MATERIALS TO USE
●
Soap
and Water
● Soap-Filled Scouring Pad
● Plastic Scouring Pad
● Dishwasher
●
Mild Soap and Water
GENERAL DIRECTIONS
broil
Do not clean the bake unit or
NOTE: The bake unit is hinged and can be
residue, or ash accumulates around the bake unit, gently wipe around the unit
water.
Drain fat, cool pan and rack slightly. (Do
Sprirdde
on detergent. Fill the pan with warm water and spread cloth or paper towel over the
unit. Any soil will burn off when the unit is heated.
li~
gently to clean the oven floor. If spillover,
not let soiled pan and rack stand in oven to cool.)
rack. Let pan and rack stand for a few minutes. Wash; scour if necessary. Rinse and dry.
O~ION:
The broiler pan and rack may also be cleaned in a dishwasher.
Pull off knobs. Wash gently but do not soak. Dry and return controls to oven,
making sure to match flat area on the knob and shaft.
Outside Glass Finish
●
Soap
and Water
Wash all glass with cloth dampened in soapy water. Rinse and polish with a dry
cloth. If knobs are removed, do not
allow
water to run down inside the surface of glass while
cleaning.
Metal, including
Chrome
Porcelain Enamel
minted
and
Surfaces
and Water
●
Paper Towel
● Dry
Cloth
●
Soap and Water
DO N~ USE steel wool,
abraaiv~ ammonia, acids or
commercial oven
N~
DO
cleansing
abrasives. These might
scratch tbe
USE oven cleaners,
cleanem.
powdem or harsh
surtice.
Wash, rinse, and then polish with a dry cloth.
If acids should spill on the range while it is hot, use a dry
paper towel or cloth to wipe up right away. When the
surface has cooled, wash and rinse.
For other spills, such as fat
●
Soap
and water when cooled and then rinse.
Oven
DOOP
●
Soap
and Water
N~
DO
cleansing powdera or harsh
abrasives.
USE oven cleaners,
SELF-CLEANING OVEN: For inside of door, clean
ONLY tbe door liner outaide the gasket. The area inside the
gasket is automatically cleaned when the oven is in the
cleaning cycle. DO N~ rub or damage the gasket. Avoid
getting soap and water on the gasket or in the slots on the
door. After washing, be sure to rinse area outside gasket
thoroughly—soap left
when oven is reheated.
on liner
Use soap and water to clean the
top, sides, and front of the oven door.
NON-SELF-CLEANING OVEN: (lower oven on model
JKP27)
Use soap and water to thoroughly clean the top,
sides, front and inside of oven
on liner causes additional stains when oven is reheated.
Oven Gasket*
Oven
Line#
For Self-Cleaning Oven
●
Soap
and Water
Avoid getting ANY cleaning materials on the gasket.
Cool before cleaning. Frequent wiping with mild soap and water will prolong the time
between major cleanings. Be
sure to rinse thoroughly to avoid additional stains.
soiling, use your self-cleaning cycle often.
For Non-Self-Cleaning
Oven (lower oven on
model
JKPZ7)
●
Soap
and Water
● Soap-Filled Scouring Pad
●
Commercial Oven Cleaner
Cool before cleaning.
FOR LIGHT SOIL: Frequent wiping with mild soap and water (especially
meat) will prolong the time between major cleaning.
causes additional
stains when oven is reheated.
Rinse thoroughly—soap left on liner
FOR HEAVY SOIL: Choose a non-abrasive cleaner and follow label instructions, using thin
layer of cleaner. Use of rubber gloves is recommended. Wipe or rub lightly on stubborn
spots. Rinse well. Wipe off any oven cleaner that gets on thermostat bulb. When rinsing oven
after cleaning also wipe thermostat bulb.
Shelves
(See Self-Cleaning
CAUTION: When in use.
or towel. When
●
Soap and Water
cleaning,’av~id
light
bulbs can become warm
touching warm lamps with
enough
to break if touched with moist cloth
cl~aning
cloths if lamp cover is removed.
Your shelves can be cleaned with the self-cleaning function in the oven. For heavy soil, clean
by hand and rinse thoroughly.
Oven Directions)
Meat Thermometer
Rotisserie
Spit, Forks
Screws, Frame
*Spillage of marinades, fruit juices, tomato sauces and basting materials containing acids may cause discoloration.
●
Soap and Water Cool before cleaning.
●
Soap-Filled Scouring Fad tilled
●
Soap and Water Soak in
●
Commercial Oven Cleaner
scouring pad, rinse and dry. DO N~ STORE IN OVEN.
hot,
sudsy
DO NOT IMMERSE IN WATER. Scour stubborn spots with
water; scour to remove cooked-on food or sauces; wash.
Spillovers
immediately, with care being taken to not touch any hot portion of the oven. When the surface is cool, clean and rinse.
witlr
warm
spattcrings,
etc., wash with soap
%lish
with a dry cloth.
causea
additional stains
door. Rinse well—soap left
For heavy
afier
cooking
soap-
should be wiped up
self-
.
24
Page 25

Questions?
Use This Problem Solver
PROBLEM
OVEN
DOES
N~
WORK
AU~MATIC
TIMER DOES
WORK PROPERLY
FOOD DOES NOT
BROIL PROPERLY
OVEN
N~
POSSIBLE CAUSE AND REMEDY
Difficulty may be in the main distribution panel of your
circuit fuse, a tripped oven circuit breaker, the main fuse or the main circuit breaker,
the
depending on nature of
control box uses fuses,
BY
SOMEONE FAMILIAR WITH
one
of these procedures, the fuse blows or circuit breaker trips
NOTE: Apartment tenants or condominium
management to perform this check before calling for service.
Oven controls are not properly set.
On self-cleaning oven, door left in locked position after cleaning.
Check to be certain step-by-step directions were followed correctly. Review pages on
use of timer.
OVEN SET knob not set at
OVEN TEMP knob not set at BROIL.
Door
not
left ajar as recommended.
Improper shelf position is being used. Check Broiling Guide.
When using special meat thermometer (on models so equipped), end not inserted fully
into oven receptacle or probe not placed in food properly.
Necessary preheating was not done.
Food is being cooked on hot pan.
Cookware is not suited for broiling.
Aluminum foil used on the broil pan rack has not been fitted properly and slit as
recommended.
power supply. If a circuit breaker is involved, reset it.
the
oven fuse (a cartridge-type) should be changed BUT ONLY
ELECI’RICAL
ownem should
BROIL.
house caused
CIRCUITS. If, after performing
request their building
by a blown oven
again,
call for service.
If
the
FOOD DOES NOT
ROAST OR BAKE
PROPERLY
OVEN WILL
SELF-CLEAN
—
NW
OVEN SET knob not set on BAKE.
OVEN TEMP knob not set correctly.
Shelf position is incorrect. Check Roasting or Baking Guide.
Oven shelf is not level.
When using meat thermometer (on models so equipped), end not fully seated in oven
receptacle or probe end not in meat correctly.
Wrong cookware is being used. When roasting, pan is too small.
A foil tent was not used when needed to slow down browning during roasting.
Automatic timer
advanced beyond the time noted on oven clock.
The STOP dial was not advanced for long enough.
Both OVEN SET and OVEN TEMP knobs must be at CLEAN setting.
A thick pile of spillover when cleaned
have insulated the area from further heat.
Latch not moved to the right.
diai/dials
not set or not set properly. The
leaves
a heavy layer of ash in spots which could
25
S~P
dial must be set and
Page 26
The Problem
solver
(continued)
PROBLEM
OVEN DOOR WON’T
LATCH
OVEN LIGHT
NW
DOES
WORK
I I
If you need more help.. call, toll free:
GE Answer Center”
S00.626.2000
consumer information service
POSSIBLE CAUSE AND REMEDY
Turn OVEN SET knob to CLEAN. Glowing Locked Light
indicates oven is too hot from previous use and door won’t latch. To cool oven, open
door wide, then Latch can be moved.
OVEN SET knob must beat CLEAN or OFF before latch can be moved.
Light
bulb is loose.
Bulb
is defective. Replace.
I
Switchoperatingovenlightisbroken.Callforservice.
after
knob is turned
—
26
—
Page 27
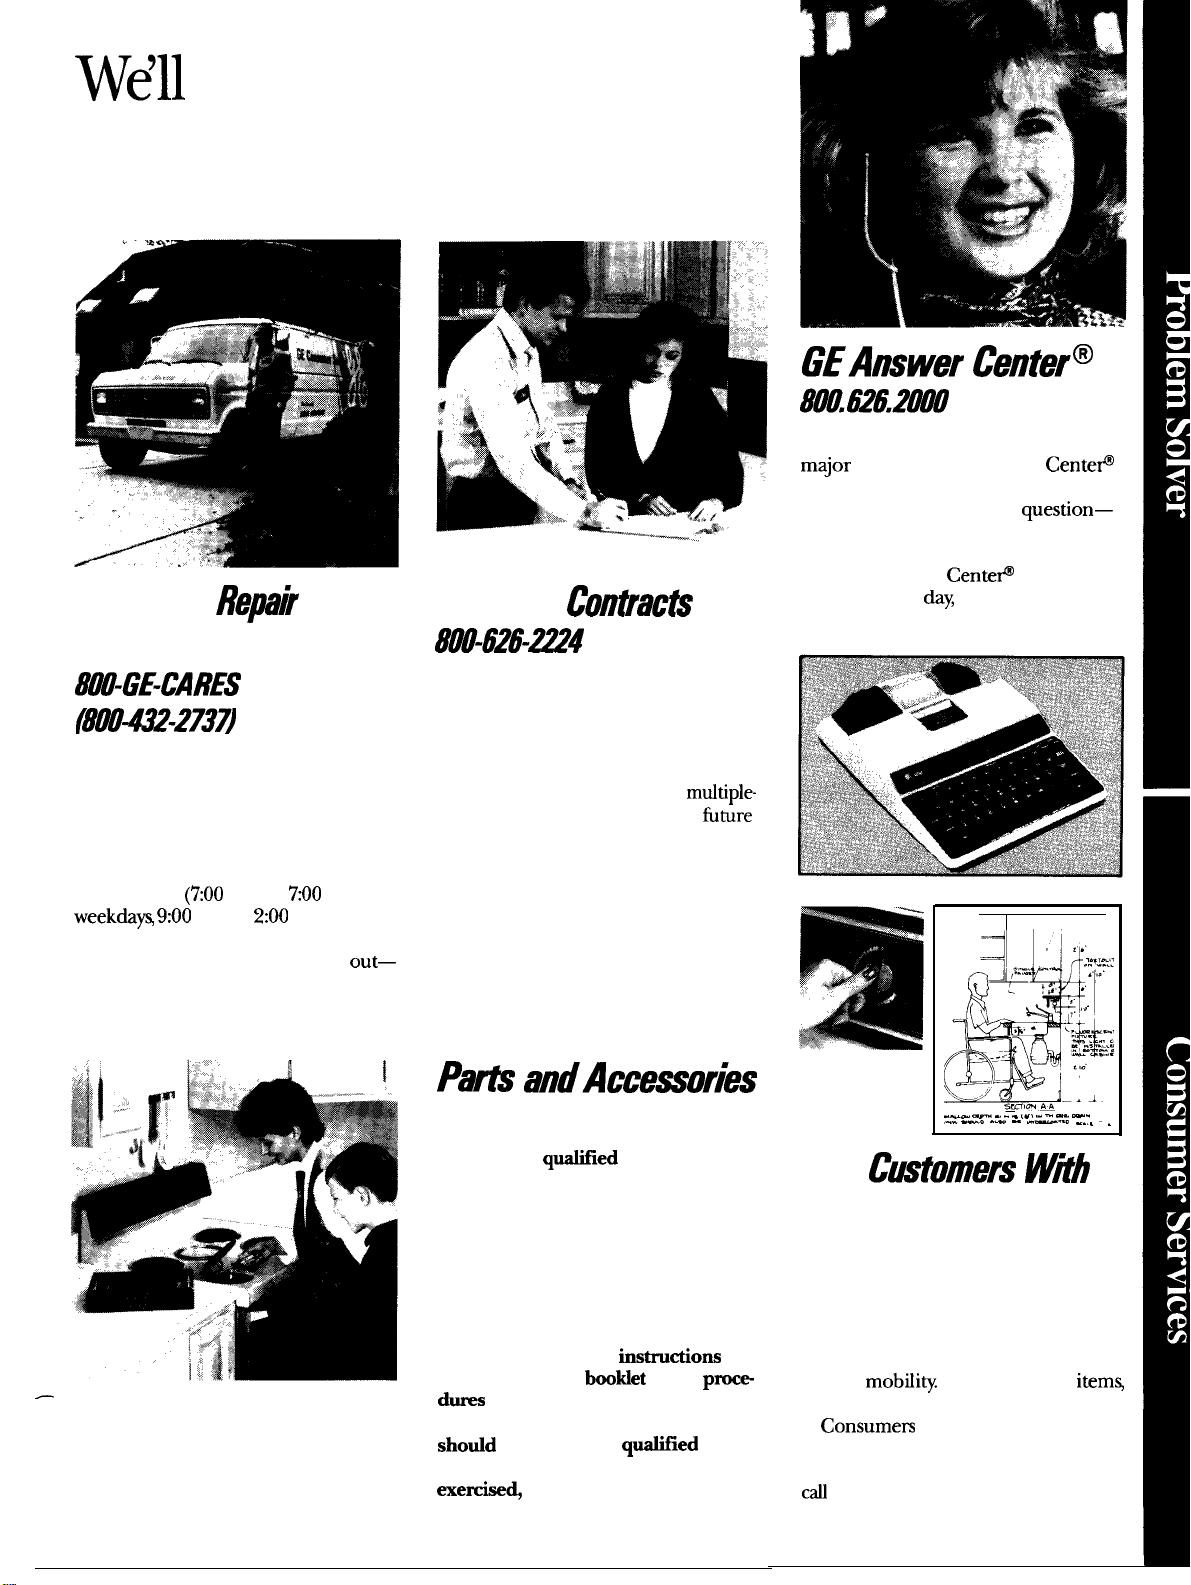
Wdll
Be There
With the purchase of your new GE appliance, receive the
-- assurance that if you ever need information or assistance
from GE, we’ll be there. All you have to do is call-toll-free!
In-Home Repk
Service
Contrac&
GEAnswer Center@
Whatever your question about any GE
major
appliance, GE Answer
information service is available to
help. Your call-and your
will be answered promptly and
courteously. And you can call any
time. GE Answer
open 24 hours a
Cente#
day
7 days a week.
Cente@
question—
service is
Service
8@o-GE-cAREs
AGE Consumer Service professional
—
will provide expert repair service,
scheduled at a time that’s convenient
for you. Many GE Consumer Service
company-operated locations offer you
service
today or tomorrow, or at your
convenience
weekda~ 9:00
days). Our factory-trained technicians
know your appliance inside and
so most repairs can be handled in just
one visit.
—
(7:00
a.m. to
am. to
7:00
2:00
p.m. Satur-
p.m.
out—
800-626-2!t?!t?4
You can have the secure feeling that
GE Consumer Service will still be
there after your warranty expires. Pur-
chase a GE contract while your warranty is still in effect and you’ll receive
a substantial discount. With a
year contract, you’re assured of
mtitiple-
fiture
service at today’s prices.
Pam andAccewories
800-626-2002
individuals
own appliances can have needed
parts or accessories sent directly to
their home, free of shipping charge!
The GE parts system provides access
to over 47,000 parts. ..and all GE
Genuine Renewal Parts are fully
warranted. VISA, MasterCard and
Discover cards are accepted.
User maintenance
contained in this
dms
intended to be performed by
any user. Other servicing generally
shotid
vice personnel. Caution must be
exercised
may cause unsafe operation.
qtiled
to service their
instrucdons
booldet
cover
be referred to
q&ed
since improper servicing
p~
ser-
Telecommunication Device for the Deaf
s—mlm.
.
,“! . . ..
m
-.
.
.
For
..— - . . .
,..—. .- . -—.- ~...
C&omers WZh
SpecialNeeds...
800.626.2000
Upon request, GE will provide Braille
controls for a variety of GE appliances,
and a brochure to assist in planning a
barrier-free kitchen for persons with
limited
free of charge, call 800.626.2000.
or speech who have access to a TDD
or a conventional teletypewriter may
call
to request information or service.
mobili~.
Consumem
To obtain these
items
with impaired hearing
800-TDD-GEAC (800-833-4322)
Page 28

Save
proof
YOUR GE ELECTRIC RANGE
of
original purchase date
WARRANTY
such as your sales slip or
cancelled
check to establish warranty period.
WHAT IS COVERED
WHAT IS
N~
COVERED ●
FULL ONE-YEAR WARRANTY
For one year from date of original
purchase, we will provide, free of
charge, parts and service labor
in your home to repair or replace
anypaff of
because of a manufacturing defect.
se~icetripstoyourhometo
teach you how to use the product.
Read your Use and Care material.
If you then have any questions
about operating the product,
Dlease
Consumer Affairs office at the
address below, or call, toll free:
GE Answer Center”
800.626.2000
consumer information service
. Improper installation.
the range
contact vour dealer or our
that fails
This warranty is extended to
the original purchaser and any
succeeding owner for products
purchased for ordinary home use
in the
48
mainland states, Hawaii
and Washington,
warranty is the same except that it is
LIMITED because vou must
ship the product
or for the service technician’s travel
costs to your home.
All warranty service will be provided
by our Factory Service Centers or
by our authorized Customer
servicers during normal working
hours.
Look in the White or Yellow Pages
of your telephone directory for
GENERAL ELECTRIC COMPANY,
GENERAL ELECTRIC FACTORY
SERVICE, GENERAL
HOTPOINT FACTORY SERVICE or
GENERAL ELECTRIC CUSTOMER
CARE” SERVICE.
D.C.
In Alaska the
to{he
servi~e ~hop
ELECTRIC-
Dav
to
Care@
. Replacement of house fuses or
resetting of circuit breakers.
. Failure of the product if it is used
for other than its intended purpose
or used commercially.
● Damage to product caused
by accident, fire, floods or acts
of God.
WARRAN~R
FOR CONSEQUENTIAL DAMAGES.
IS
NOT
RESPONSIBLE
Some
may not apply to you. This warranty gives you specific legal rights, and you may also have other rights which vary from state to state.
To know what your legal rights are in your state, consult your local or state consumer affairs office or your state’s Attorney General.
No.
49-8128
—
1
Part No. 164 D2092P167
Pub.
6-90 CG
If you have an installation problem,
contact your dealer or installer.
You are responsible for providing
adequate electrical, gas, exhausting
and other connecting facilities.
states
do not allow the exclusion or limitation of incidental or consequential damages, so the above limitation or exclusion
Warrantor: General Electric Company
If further help is needed concerning this warranty, write:
Manager—Consumer Affairs, GE Appliances, Louisville, KY 40225
!
JKP07J
JKP07GJ
JKP07WN JKP27GJ
JKP16GJ
JKP27J
JRP03J
JRP03GJ
JRP14GJ
 Loading...