

GE 49-60466 Owner's Manual
0
ge.com
Safety Instructions ........... 2,3
Operating Instructions
0_
Beverage Center
Glass Shelves ...................... 4
Loading Tips and Suggestions ....... a
Temperature Control ............... 4
Wine Chiller
Inserting Wine Bottles .............. S
Loading Tips and Suggestions ....... 5
Temperature Control ............... 5
Beverage Center and Wine Chiller
Interior Light and Switch ............ 6
Removing Full
Extension Drawers ................. 6
Wood Drawer Fronts ............... 6
Care and Cleaning ............. 7
Installation Instructions .... 8-12
Leveling .......................... 12
Location ........................ 8, 9
Reversing Door Swing ............. 11
PCRO6BATSS
PCRO6WATSS
Refroidisseur
5 boissons et vin
La sectionfrangaise commence6 la page 21
Centro de bebidas
g Refrigerador de vino
La secci6n enespaF_olempieza en la pggina 43
Troubleshooting Tips ...... 14,15
Normal Operating Sounds ......... 13
Consumer Support
Consumer Support ........ Back Cover
Product Registration ........... 17, 18
Warrantg (Canada) ................ 20
Warrantg (U.S.) ................... 19
Write the model and serial
numbers here:
Model #
Serial #
Find these numbers on a label on
the ceiling inside the beverage
center and wine chiller.
197D7188PO01 49-60466 05-06JR
IMPORTANT SAFETY INFORMATION.
READ ALL INSTRUCTIONS BEFORE USING.
WARNING!
Use this appliance only for its intended purpose as described in this Owner's Manual.
ATTENTION CONSUHER!
This appliance is designed for storing and cooling beverages. Do not store perishable foods in
this unit.
SAFETY'PRECAUTIONS
When using electrical appliances, basic safetg precautions should be followed, including
the fol!owing:
5_:This appliance must be properlg installed and
located in accordance with these instructions
before it is used.
::Ji::Do not allow children to climb, stand or hang
on the shelves or full-extension drawers in the
appliance. They could damage the appliance
and seriously injure themselves.
?_:Keep fingers out of the "pinch point" areas;
clearances between the doors and between
the doors and cabinet are necessarilg small.
Be careful closing doors when children are
in the area.
::Ji::Unplug the appliance before cleaning and
making repairs.
?_:Do not store or use gasoline or other flammable
vapors and liquids in the vicinity of this or ang
other appliance.
_: Before replacing a burned-out light bulb,
the appliance should be unplugged in order
to avoid contact with a live wire filament.
(Aburned out light bulb mag break when
being replaced,)
NOTE:We strongly recommend that any
servicing be performed bg a qualified individual.
?_:Do not store or install this appliance outdoors.
DANGER! RISK OF CHILD ENTRAPMENT
PROPERDISPOSAL OF THE BEVERAGECENTER
OR WINE CHILLER
Child entrapment and suffocation are not
problems of the past. Junked or abandoned
refrigeration products are still dangerous.., even
if theg will sit for "just a few dags." If gou are
getting rid of gour old appliance, please follow
the instructions below to help prevent accidents.
Before You Throw Awug Your Old
Refrigeration Product:
_:Take off the door.
Refrigerants
All refrigeration products contain refrigerants,
which under federal law must be removed prior to
product disposal. If gou are getting rid of an old
refrigeration product, check with the compong
handling the disposal about what to do.
ij_::Leave the shelves and drawers in place so that
children mag not easilg climb inside.
DO NOT USEAN EXTENSION CORD WITH THISAPPLIANCE.
2
ge.com
HOW TOCONNECTELECTRICITY
Do not, under ong circumstances, cut or remove the third (ground) prong from the power cord.
For personal sofetg, this appliance must be properlg grounded.
The power cord of this appliance is equipped
with a 3-prong (grounding) plug which mates
with a standard 3-prong (grounding) wall outlet
to minimize the possibility of electric shock
hazard from this appliance.
Have the wall outlet and circuit checked by a
qualified electrician to make sure the outlet is
properlu grounded.
If Uou have onlu a standard 2-prong wall outlet,
it is uour personal responsibility and obligation
to have it replaced with a properlu grounded
3-prong wall outlet.
NOTE:GFI(ground fault interrupter) is not
recommended.
The appliance should alwags be plugged into
its own individual electrical outlet which has
a voltage rating that matches the rating plate
This provides the best performance and also
prevents overloading house wiring circuits which
could cause a fire hazard from overheated wires.
Never unplug uour appliance by pulling on
the power cord. Always grip plug firmlu and
pull straight out from the outlet.
Repair or replace immediately all power cords
that have become fraged or otherwise damaged.
Do not use a cord that shows cracks or abrasion
damage along its length or at either end.
When moving the appliance awag from the wall,
be careful not to roll over or damage the power
cord.
READAND FOLLOWTHISSAFETYINFORMATION
CAREFULLY.
SAVETHESEINSTRUCTIONS
Controls and features--Beverage Center.
OFF
COLDEST
COOL
|
To remove, lift up on the buck
of theshelf
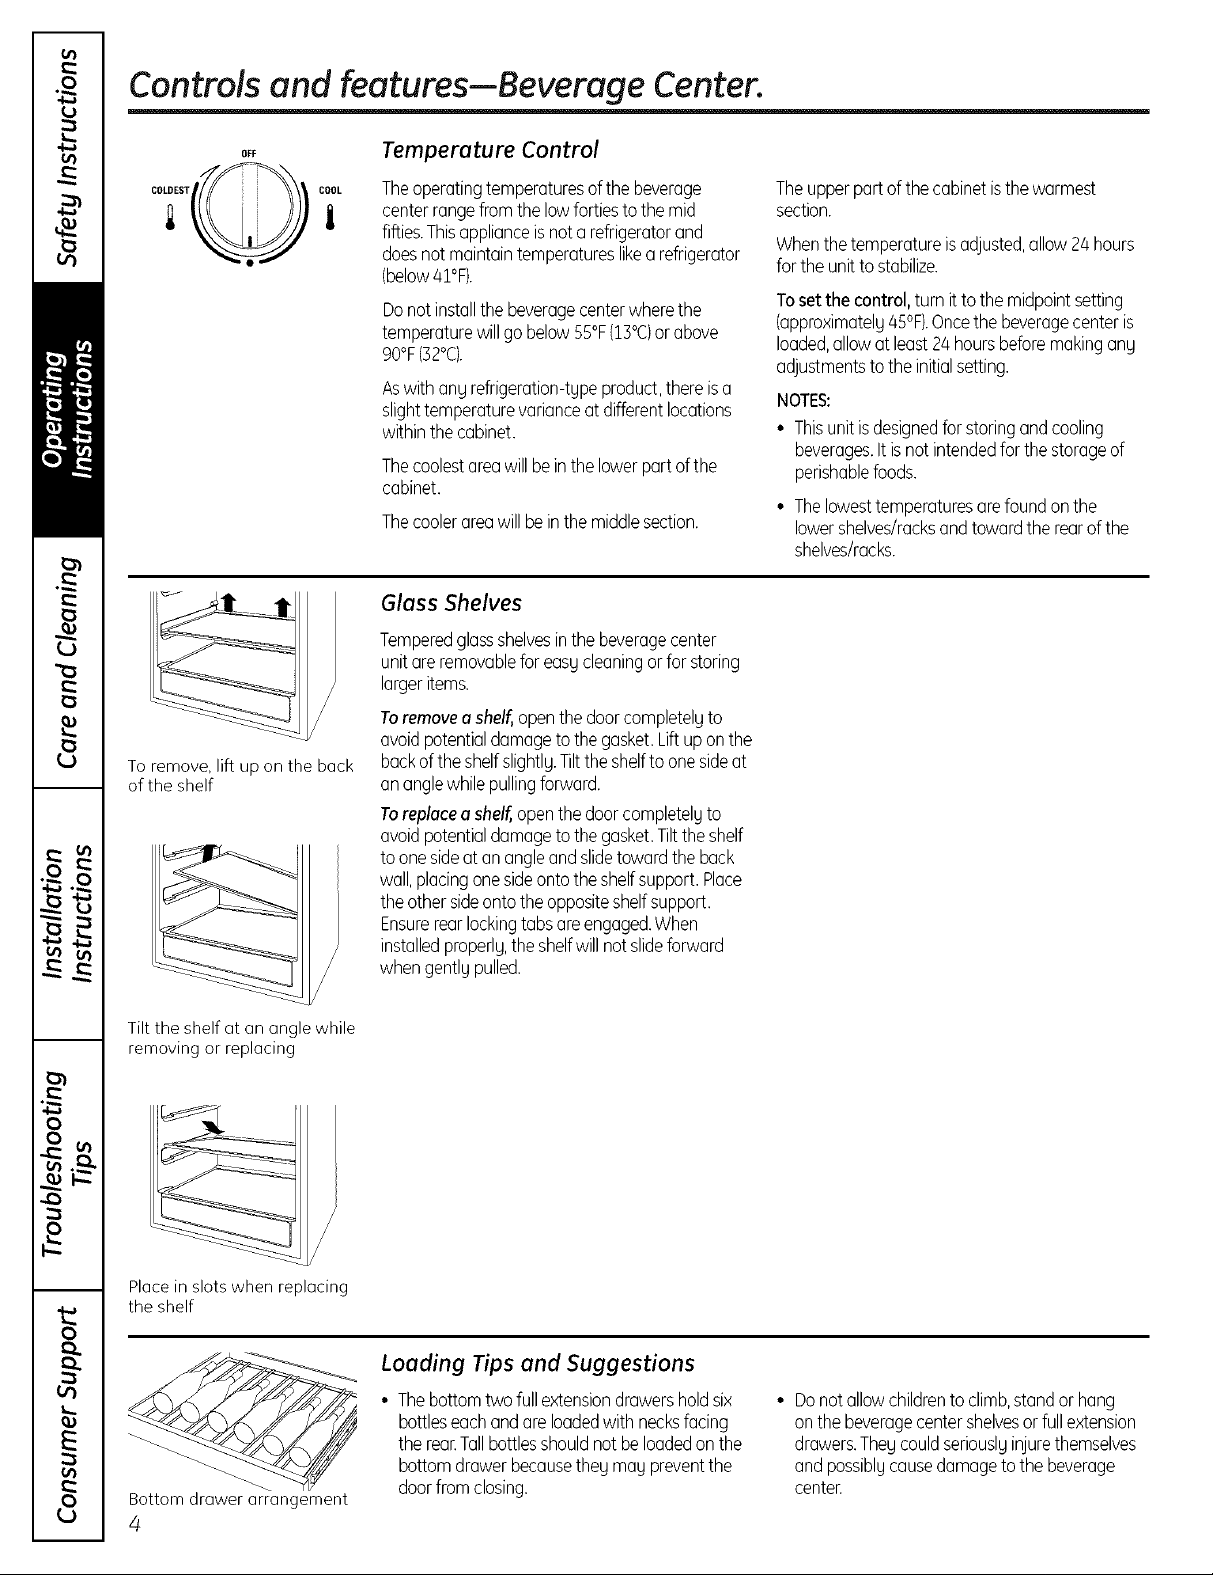
Temperature Control
Theoperotingtemperoturesofthe beveroge
centerrongefromthelowfortiestothemid
fifties.Thisuppliunceis notu refrigerotorund
doesnotmuintuintemperutureslikeu refrigerutor
(below41°F).
Donot instollthebeverugecenterwherethe
temperoturewillgo below%%(13°C)orobove
90°F(32°C1.
Aswithongrefrigerotion-tgpeproduct,thereiso
slighttemperoturevoriunceutdifferentlocutions
withinthecubinet.
Thecoolestoreuwillbeinthelowerportofthe
cobinet.
Thecooleroreuwillbeinthemiddlesection.
Glass Shelves
Temperedglossshelvesinthe beverogecenter
unitore removobleforeosycleoningorfor storing
Iorgeritems.
Toremoveashelf,openthedoorcompletelyto
ovoidpotentioldomogetothe gosket.Liftup onthe
buckofthe shelfslightly.Tilttheshelfto onesideot
ononglewhilepullingforword.
Toreplacea shelf,openthedoorcompletelyto
ovoidpotentioldomogetothe gosket.Tilttheshelf
toonesideot onongleondslidetowordthebuck
woll,plocingonesideontothe shelfsupport.Ploce
theother sideontotheoppositeshelfsupport.
Ensurereorlockingtubsoreengoged.When
instolledproperly,the shelfwillnotslideforword
whengentlypulled.
Theupperport ofthecobinetisthe wurmest
section.
Whenthetemperotureisodjusted,ullow24hours
for theunitto stobilize.
Tosetthe control,turnit to the midpointsetting
(upproximotelg45°F).Oncethebeverogecenteris
Iouded,ullowutleust24hoursbeforemokingung
udjustmentstothe initiulsetting.
NOTES:
• Thisunitisdesignedforstoringondcooling
beveroges.It isnotintendedforthestorogeof
perishoblefoods.
• Thelowesttemperaturesorefoundonthe
lowershelves/rocksondtowordthe reurofthe
shelves/rocks.
Tilt the shelf ot on ongle while
removingor replocing
Ploce in slots when replocing
the shelf
Bottom drower orrongement
4
Loading Tips and Suggestions
• Thebottomtwofullextensiondrawersholdsix
bottleseochandoreloadedwith necksfacing
thereanTallbottlesshouldnotbeIoodedonthe
bottomdrowerbecausethey moy preventthe
doorfrom closing.
• Donotallowchildrento climb,standor hung
onthebeveragecentershelvesorfullextension
drowers.Theycouldseriouslyinjurethemselves
ondpossiblycausedomagetothebeveroge
centen
Controls and features-Wine Chiller. gocorn
OFF
WHITE WINE \_/ REDWINE
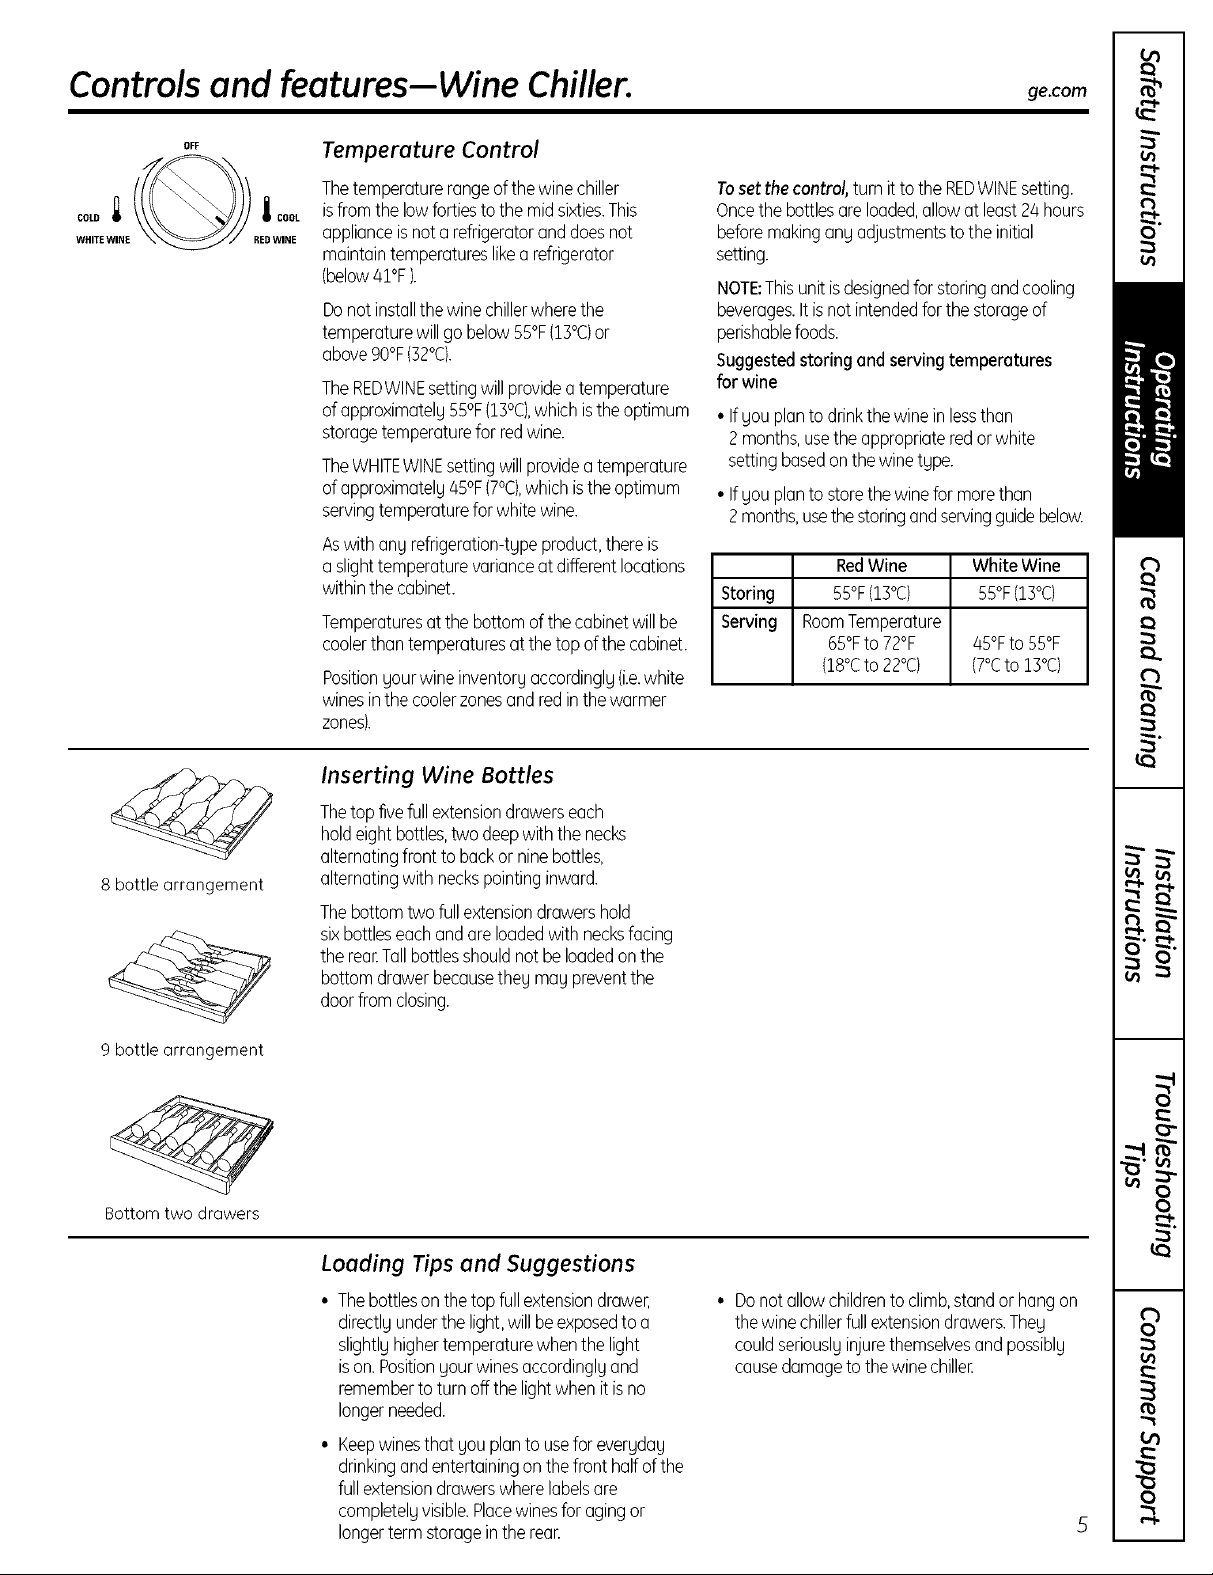
Temperature Control
Thetemperaturerangeofthe winechiller
isfromthelowfortiestothe mid sixties.This
applianceisnota refrigeratoranddoesnot
maintaintemperatureslikearefrigerator
(below41°F).
Donot installthewinechillerwherethe
temperaturewillgo below55%(13°C)or
above90°F(32°C).
TheREDWINEsettingwillprovideatemperature
ofapproximatelu55%(13°C),whichistheoptimum
storagetemperaturefor redwine.
TheWHITEWINEsettingwillprovideatemperature
ofapproximatelu45%(7°C),whichistheoptimum
servingtemperatureforwhitewine.
Aswithanurefrigeration-tupeproduct,thereis
a slighttemperaturevarianceat differentlocations
withinthecabinet.
Temperaturesat thebottomofthe cabinetwill be
coolerthantemperaturesat thetop ofthe cabinet.
Positionyourwineinventoruaccordinglu(i.e.white
winesinthecoolerzonesandredinthewarmer
zones).
Tosetthe control,turnittothe REDWINEsetting.
Oncethebottlesareloaded,allowat least24hours
beforemakinganuadjustmentsto theinitial
setting.
NOTE:Thisunitisdesignedforstoringandcooling
beverages.Itisnot intendedforthestorageof
perishablefoods.
Suggestedstoringandservingtemperatures
forwine
• IfUouplanto drinkthewine inlessthan
2 months,usetheappropriateredorwhite
settingbasedonthewinetupe.
• IfUouplanto storethewineformorethan
2months,usethestoringandservingguidebelow.
RedWine White Wine
Storing 55%(13°C) 55% (13°C)
Serving RoomTemperature
65OFto 72OF 45OFto 55OF
(18°Cto 22°C) (7°Cto 13%)
8 bottle arrangement
9 bottle arrangement
Bottom two drawers
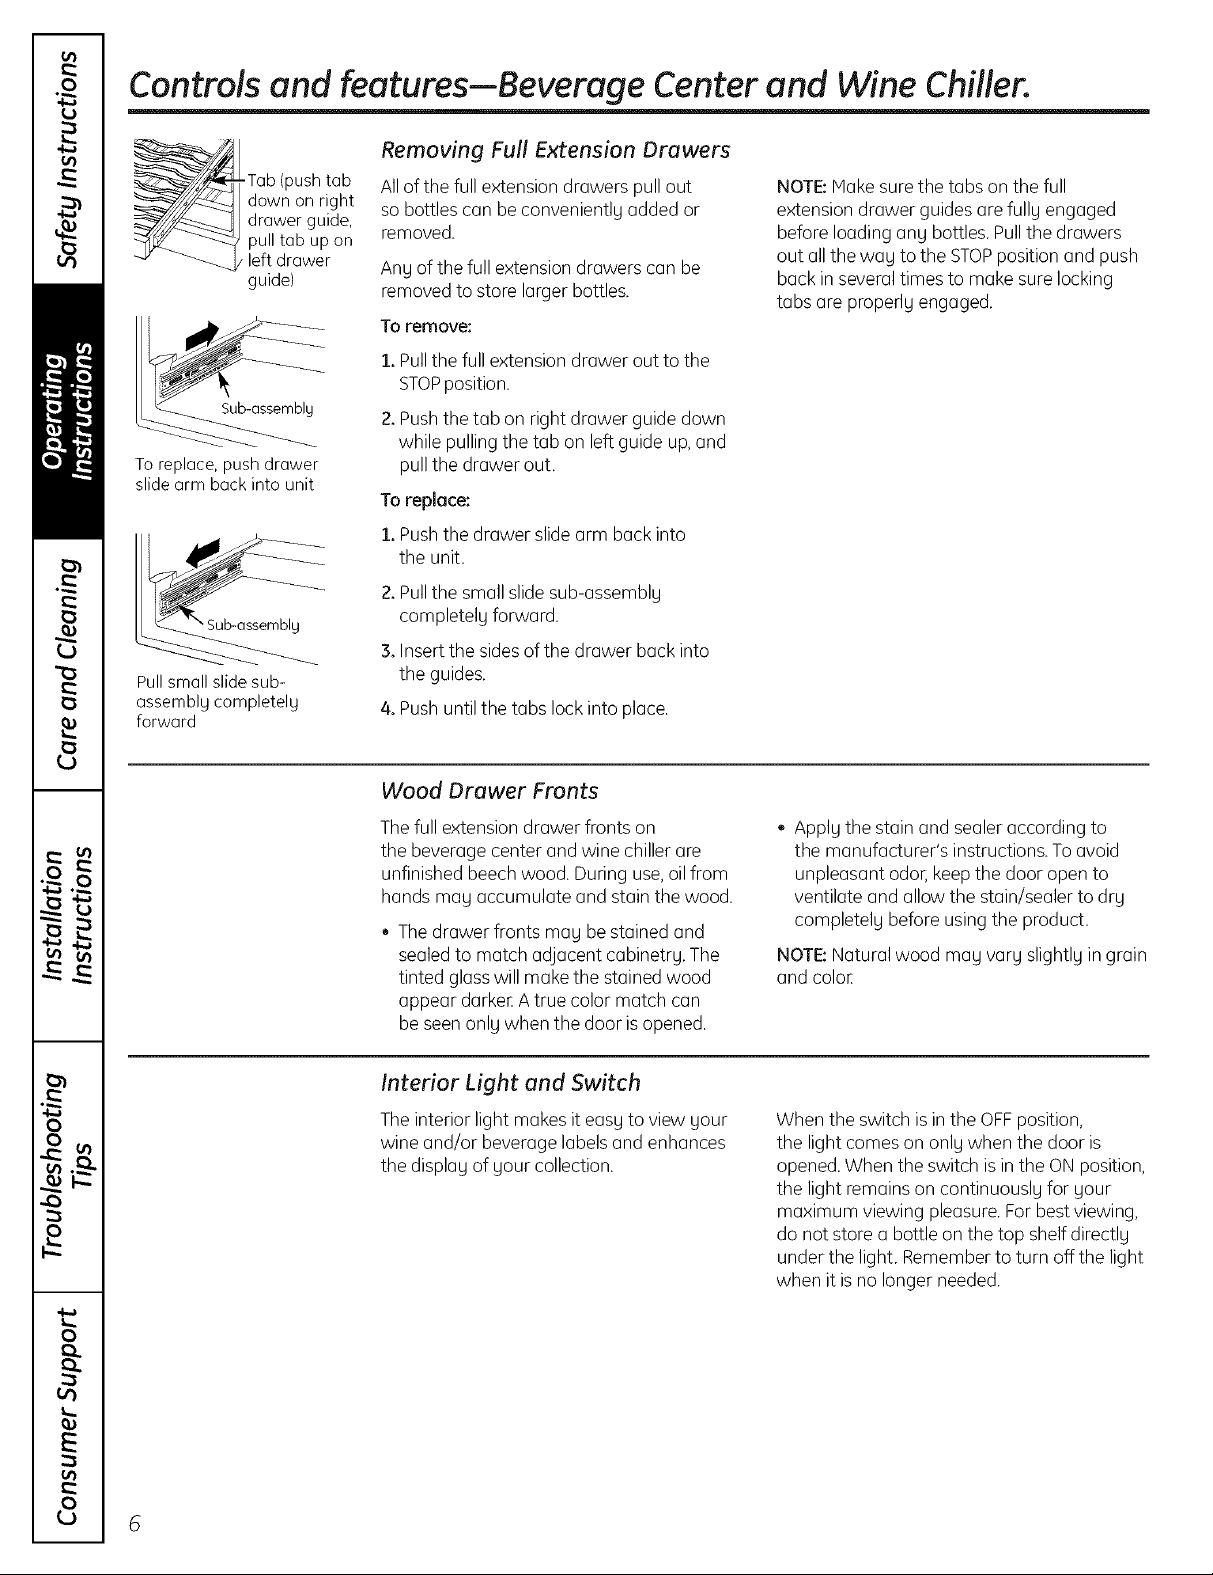
Inserting Wine Bottles
Thetopfivefullextensiondrawerseach
holdeightbottles,twodeepwiththenecks
alternatingfrontto backorninebottles,
alternatingwith neckspointinginward.
Thebottomtwo fullextensiondrawershold
sixbottleseachandareloadedwithnecksfacing
thereanTallbottlesshouldnotbeloadedonthe
bottomdrawerbecausetheu mau preventthe
doorfrom closing.
Loading Tips and Suggestions
• Thebottlesonthetopfullextensiondrawer,
directluunderthe light,willbeexposedto a
slightluhighertemperaturewhenthelight
ison. Positionuourwinesaccordingluand
rememberto turnoffthelightwhenit isno
longerneeded.
• Keepwinesthat Uouplanto useforeverudau
drinkingandentertainingonthe fronthalf of the
fullextensiondrawerswherelabelsare
completeluvisible.Placewinesfor agingor
longerterm storageintherear.
• Donotallowchildrento climb,standor hangon
thewine chillerfullextensiondrawers.Theu
couldseriousluinjurethemselvesandpossiblu
causedamageto thewinechillen
Controls and features--Beverage Center and Wine Chiller.
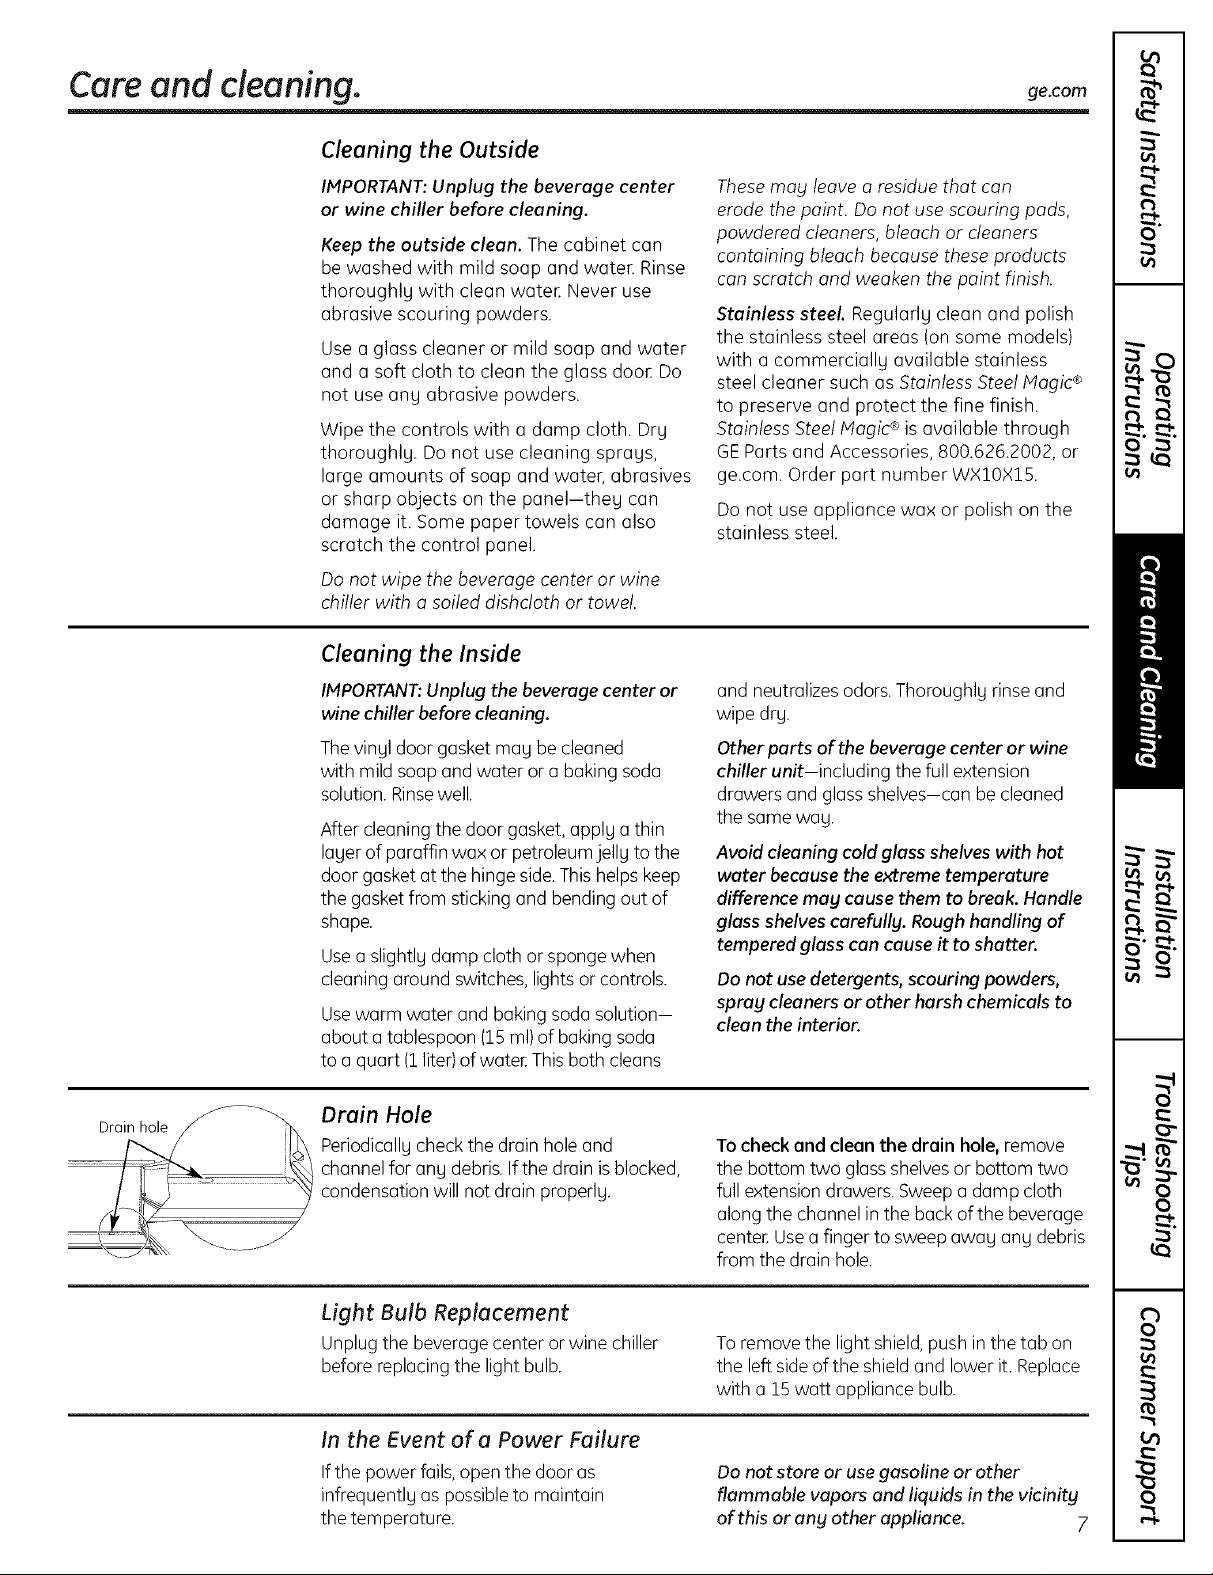
Removing Full Extension Drawers
Tab {push tab
down on right
drawer guide,
pull tab up on
left drawer
guide)
Sub-assemblg
To replace, push drawer
slide arm back into unit
"Sub-assemblg
Pull small slide sub-
assembly completely
forward
Allof the full extension drawers pull out
so bottles can be conveniently added or
removed.
Any of the full extension drawers can be
removed to store largerbottles.
To remove:
1. Pullthe full extensiondrawer out to the
STOPposition.
2. Pushthe tab on right drawer guide down
while pulling the tab on left guide up,and
pullthe drawer out.
Toreplace:
1. Pushthe drawer slidearm back into
the unit.
2. Pullthe small slide sub-assembly
completely forward.
3. Insertthe sides ofthe drawer backinto
the guides,
4. Pushuntilthe tabs lockinto place,
NOTE:Makesure the tabs on the full
extension drawer guides are fully engaged
before loading any bottles.Pullthe drawers
out all theway to the STOPpositionand push
back inseveraltimes to make surelocking
tabs areproperly engaged.
Wood Drawer Fronts
Thefull extensiondrawer fronts on
the beverage center andwine chillerare
unfinished beechwood. During use,oil from
hands mag accumulate and stain the wood.
Thedrawer fronts may be stained and
sealedto match adjacent cabinetry. The
tinted glasswill makethe stained wood
appear darkeEAtrue color match can
be seenonly when the door isopened.
Interior Light and Switch
Theinterior light makesit easy to view your
wine and/or beverage labels and enhances
the display of your collection.
Apply the stain and sealer according to
the manufacturer's instructions.Toavoid
unpleasant odor,keepthe door open to
ventilate and allow the stain/sealer to dry
completely before usingthe product.
NOTE:Natural wood may vary slightly in grain
and coloE
When the switch is in the OFF position,
the light comes on only when the door is
opened. When the switch is in the ON position,
the light remains on continuously for your
maximum viewing pleasure. For best viewing,
do not store a bottle on the top shelf directly
under the light. Remember to turn off the light
when it is no longer needed.
Careand cleaning, gecom
Cleaning the Outside
IMPORTANT:Unplug the beverage center
or wine chiller before cleaning.
Keep the outside clean. The cabinet can
be washed with mild soap and water. Rinse
thoroughlg with clean wateE Never use
abrasive scouring powders.
Use aglass cleaner or mild soap and water
and a soft cloth to clean the glass dooE Do
not use ang abrasive powders.
Wipe the controls with a damp cloth. Drg
thoroughlg. Do not use cleaning sprags,
large amounts of soap and water, abrasives
or sharp objects on the panel-theg can
damage it. Some paper towels can also
scratch the control panel.
Do not wipe the beverage center or wine
chiller with a soiled dishcloth or towel.
Cleaning the Inside
IMPORTANT:Unplug the beverage center or
wine chiller before cleaning.
Thevinyl door gasket may be cleaned
with mild soapand water or a baking soda
solution. Rinsewell.
After cleaningthe door gasket, applg a thin
lager of paraffin wax or petroleumjellg to the
door gasket at the hinge side.This helpskeep
the gasket from sticking and bending out of
shape.
Usea slightlgdamp cloth orsponge when
cleaning around switches,lights or controls.
Usewarm water and baking soda solution-
about a tablespoon (15ml)of baking soda
to a quart (1liter)of wateEThis both cleans
These mablleave a residue that can
erode the paint. Do not use scouring pads,
powdered cleaners, bleach or cleaners
containing bleach because theseproducts
can scratch and weaken the point finish.
Stainless steel Regularlg clean and polish
the stainless steel areas (on some models)
with a commerciallg available stainless
steel cleaner such as Stainless Steel Magic®
to preserve and protect the fine finish.
Stainless Steel Magic®is available through
GEParts and Accessories, 800.626.2002, or
ge.com. Order part number WX10X15.
Do not use appliance wax or polish on the
stainless steel.
and neutralizesodors.Thoroughlg rinse and
wipe drg.
Other parts of the beverage center or wine
chiller unit-including the full extension
drawers and glass shelves-can be cleaned
the same wag.
Avoid cleaning cold glass shelves with hot
water because the extreme temperature
difference may cause them to break. Handle
glass shelves carefully. Rough handling of
tempered glass can cause it to shatter.
Do not usedetergents, scouring powders,
sprag cleaners or other harsh chemicals to
clean the interior.
Drain Hole
Periodicallgcheck the drain hole and
channel for ang debris.Ifthe drain isblocked,
condensation will not drain properlg,
Light Bulb Replacement
Unplug the beveragecenter orwine chiller
before replacing the light bulb.
In the Event of a Power Failure
If the power fails, open the door as
infrequentlg as possibleto maintain
the temperature.
To check and clean the drain hole, remove
the bottom two glass shelvesor bottom two
full extensiondrawers. Sweepa damp cloth
along the channel in the back of the beverage
center.Usea finger to sweep awag ang debris
from the drain hole.
To remove the light shield,push in the tab on
the left sideof the shield and lower it. Replace
with a !5 watt appliance bulb.
Do not store or use gasoline or other
flammable vapors and liquids in the vicinitg
of this or ang other appliance. 7
Installation
Beverage Center
Instructions
I Questions? Call 800.GE.CARES (800.432.2737) or visitour Websiteat:ge.com
BEFORE YOU BEGIN
Readthese instructions completely and carefully.
• IMPORTANT - Savetheseinstructions
for local inspector's use.
" IMPORTANT - Observe allgoverning
codes and ordinances.
. Note to Installer - Be sure to leave these
instructions with the Consumer.
• Note to Consumer - Keepthese instructions
for future reference.
and W,ne Chiller
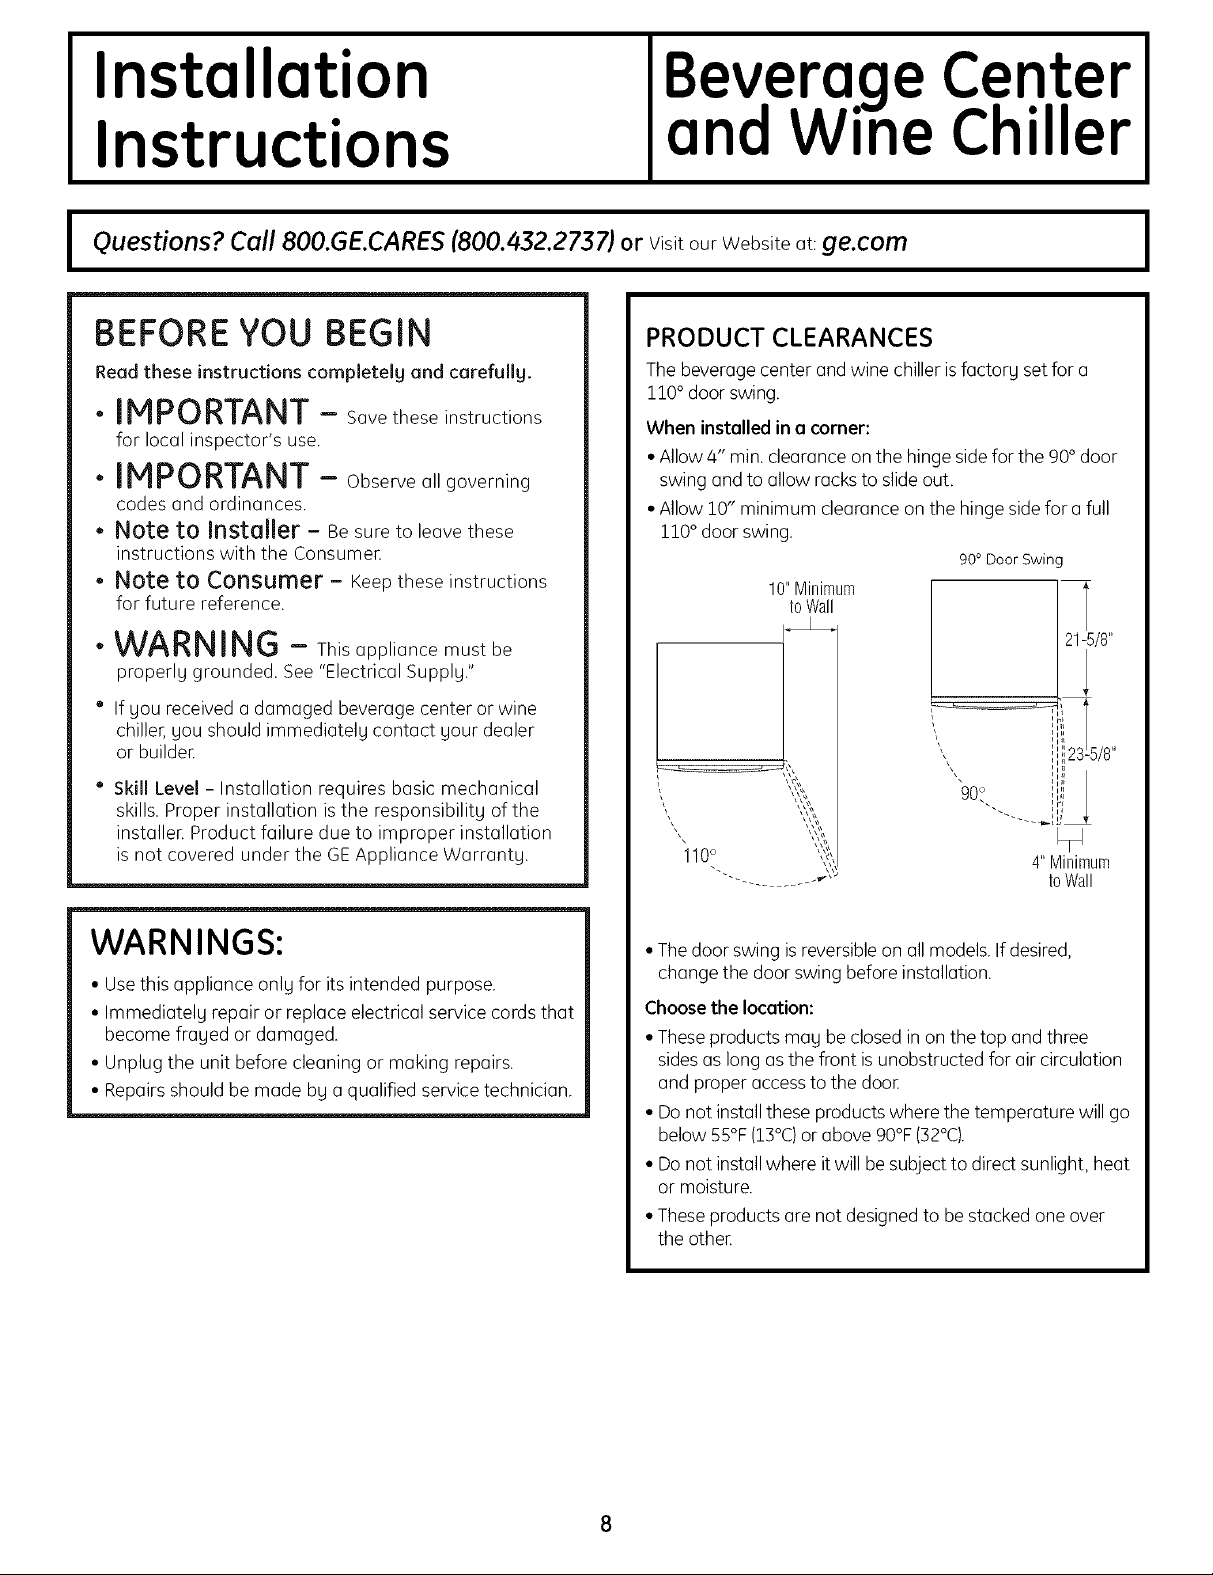
PRODUCT CLEARANCES
The beverage center andwine chiller isfactory set for a
110° door swing.
When installed in o corner:
• Allow 4" min. clearanceon the hinge sidefor the 90° door
swing and to allow racksto slideout.
• Allow 10" minimum clearance on the hinge sidefor afull
110°door swing.
10"Minimum
toWall
oWARNING - Thisappliance must be
properly grounded. See "Electrical Supply."
° If you receiveda damaged beverage center or wine
chiller, you should immediately contact your dealer
or buildeE
" Skill Level -Installation requires basic mechanical
skills. Proper installation is the responsibility of the
installer. Product failure due to improper installation
is not covered under the GEAppliance Warranty.
I
90 ° Door Swing
21-5/8"
23!5/8`,
\
90°-
4"Minimum
toWall
WARNINGS:
• Usethis appliance only for its intended purpose.
• Immediately repair or replace electrical service cords that
become fraged or damaged.
• Unplug the unit before cleaning or making repairs.
• Repairs should be made bg a qualified service technician.
• The door swing is reversibleon allmodels. If desired,
change the door swing before installation.
Choose the location:
• Theseproducts mag be closedin on the top and three
sidesas long asthe front isunobstructed for air circulation
and properaccessto the dooE
• Donot install these products where the temperature will go
below 55°F(13°C)or above 90°F(32°C).
• Donot install where it will besubject to direct sunlight, heat
or moisture.
• Theseproducts are not designedto be stacked one over
the otheE
Installation Instructions
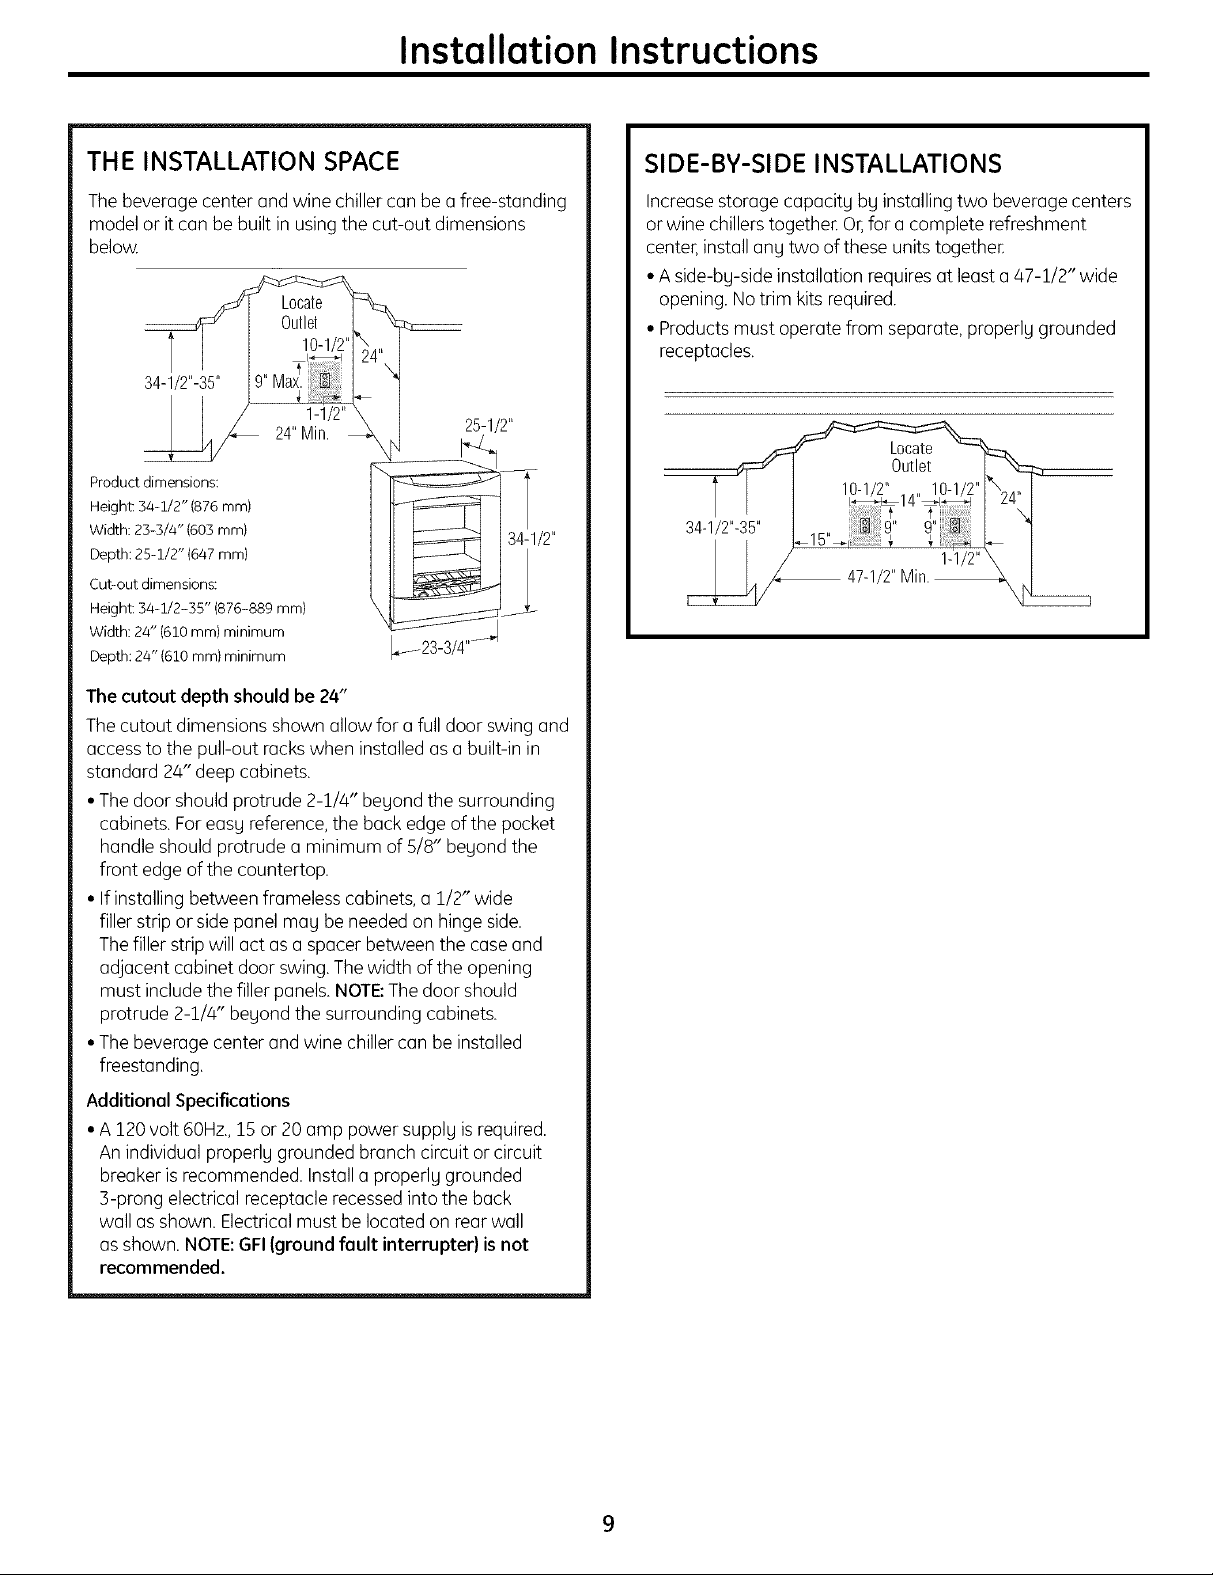
THE INSTALLATION SPACE
Thebeverage center andwine chiller can be a free-standing
model or it can bebuilt in usingthe cut-out dimensions
below.
25-1/2"
Product dimensions:
Height 34-1/2" (876 ram)
Width: 23-3/4" (603 ram)
Depth: 25-1/2" {647 mm}
Cut-out dimensions:
Height: 34-1/2-35" (876-889 mm}
Width: 24" (610 mm} minimum
Depth: 24" (610 ram} minimum
14__/23_3/4''/-'
The cutout depth should be 24"
The cutout dimensions shown allow for a full door swing and
accessto the pull-out rackswhen installed as abuilt-in in
standard 24" deep cabinets.
• The door should protrude 2-1/4" begond the surrounding
cabinets. Foreasy reference,the back edge of the pocket
handle should protrude a minimum of 5/8" beyond the
front edge of the countertop.
• If installing between frameless cabinets, a 1/2" wide
filler strip orsidepanel may be needed on hingeside.
Thefiller strip will act as a spacer betweenthe case and
adjacent cabinet door swing. The width of the opening
must include the filler panels.NOTE:Thedoor should
protrude 2-1/4" beyond the surrounding cabinets.
• The beverage center and wine chiller can be installed
freestanding.
Additionol Specificotions
• A 120volt 60Hz.,15or 20amp power supplUis required.
An individual properlu grounded branch circuit or circuit
breakeris recommended. Installa properlu grounded
S-prong electrical receptacle recessedinto the back
wall asshown. Electricalmust be locatedon rearwall
asshown. NOTE:GFI{ground fault interrupter} is not
recommended.
34-1/2"
SIDE-BY-SIDE INSTALLATIONS
Increasestorage capacit9 bg installingtwo beveragecenters
or wine chillers together.Or,for a complete refreshment
center,install ang two of these units together.
• A side-bg-side installation requires at leasta 47-1/2" wide
opening. Notrim kits required.
• Productsmust operate from separate,properly grounded
receptacles.
9
Installation Instructions
TOOLS REQUIRED
• #2 Phillipsscrewdriver
• Adjustable wrench
PARTS SUPPLIED
• Hardware for changing door swing
• Leftand right sidehinge covers
• Top screw holecover
GROUNDING THE BEVERAGE CENTER
AND WINE CHILLER
IMPORTANT- P,easereadcarefu,,u.
FORPERSONALSAFETY,THISAPPLIANCEMUSTBEPROPERLY
GROUNDED.
The power cord of this appliance is equipped with a
three-prong (grounding)plug which mates with a standard
three-prong (grounding)wall receptacle to minimize the
possibilitgof electric shock hazard from this appliance.
STAINING WOOD DRAWER FRONTS
Thedrawer fronts are unfinishedbeech wood. Duringuse,
oilfrom hands mag accumulate and stain the wood.
• The drawer fronts mag be stained andsealedto match
adjacent cabinetrg. Thetinted glasswill make the stained
wood appear darker Atrue color match can be seenonlg
when the door isopened.
• Applg the stain and sealeraccording to the
manufacturer's instructions.To avoid unpleasant odor,
keepthe door open to ventilate and allow the stain/sealer
to drg completelg before using the product.
[] REMOVE PACKAGING
• Remove cornerblocksandfoam drawerstops.
• Remove allpackingmaterial,tapeand protectiveplastic
coverings.
CAUTION: Smai,objectsareachokehazardfor
children.Remove and discordang partsnotused.
Have the wall outlet and circuit checkedbg a qualified
electrician to make sure the outlet isproperlg grounded.
Where a standard 2-prong wall outlet isencountered,
it is gour personal responsibilitgand obligation to have it
replaced with a properlg grounded 3-prong wall outlet.
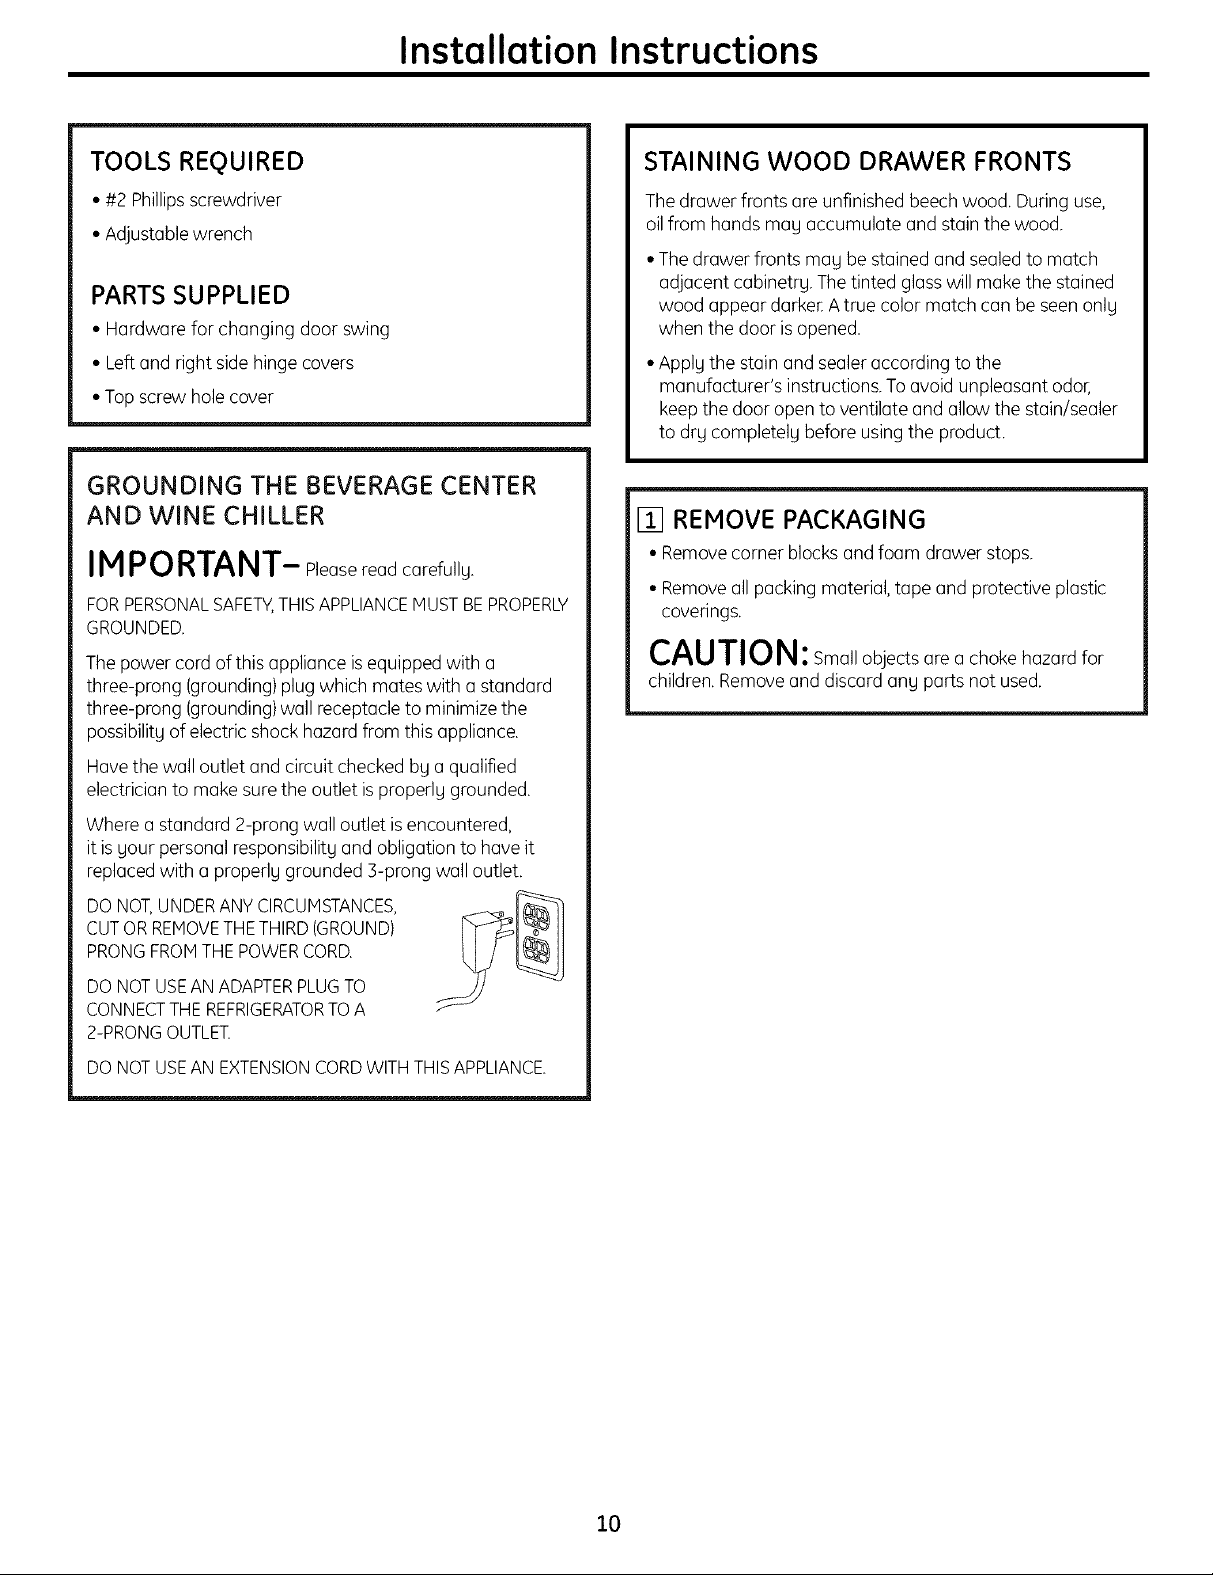
DO NOT,UNDER ANY CIRCUMSTANCES,
CUTOR REMOVETHE THIRD (GROUND)
PRONG FROM THE POWERCORD.
DO NOT USEAN ADAPTER PLUGTO
CONNECTTHE REFRIGERATORTO A
2-PRONG OUTLET.
DONOTUSEAN EXTENSIONCORDWITHTHISAPPLIANCE.
10
instatlation instructions
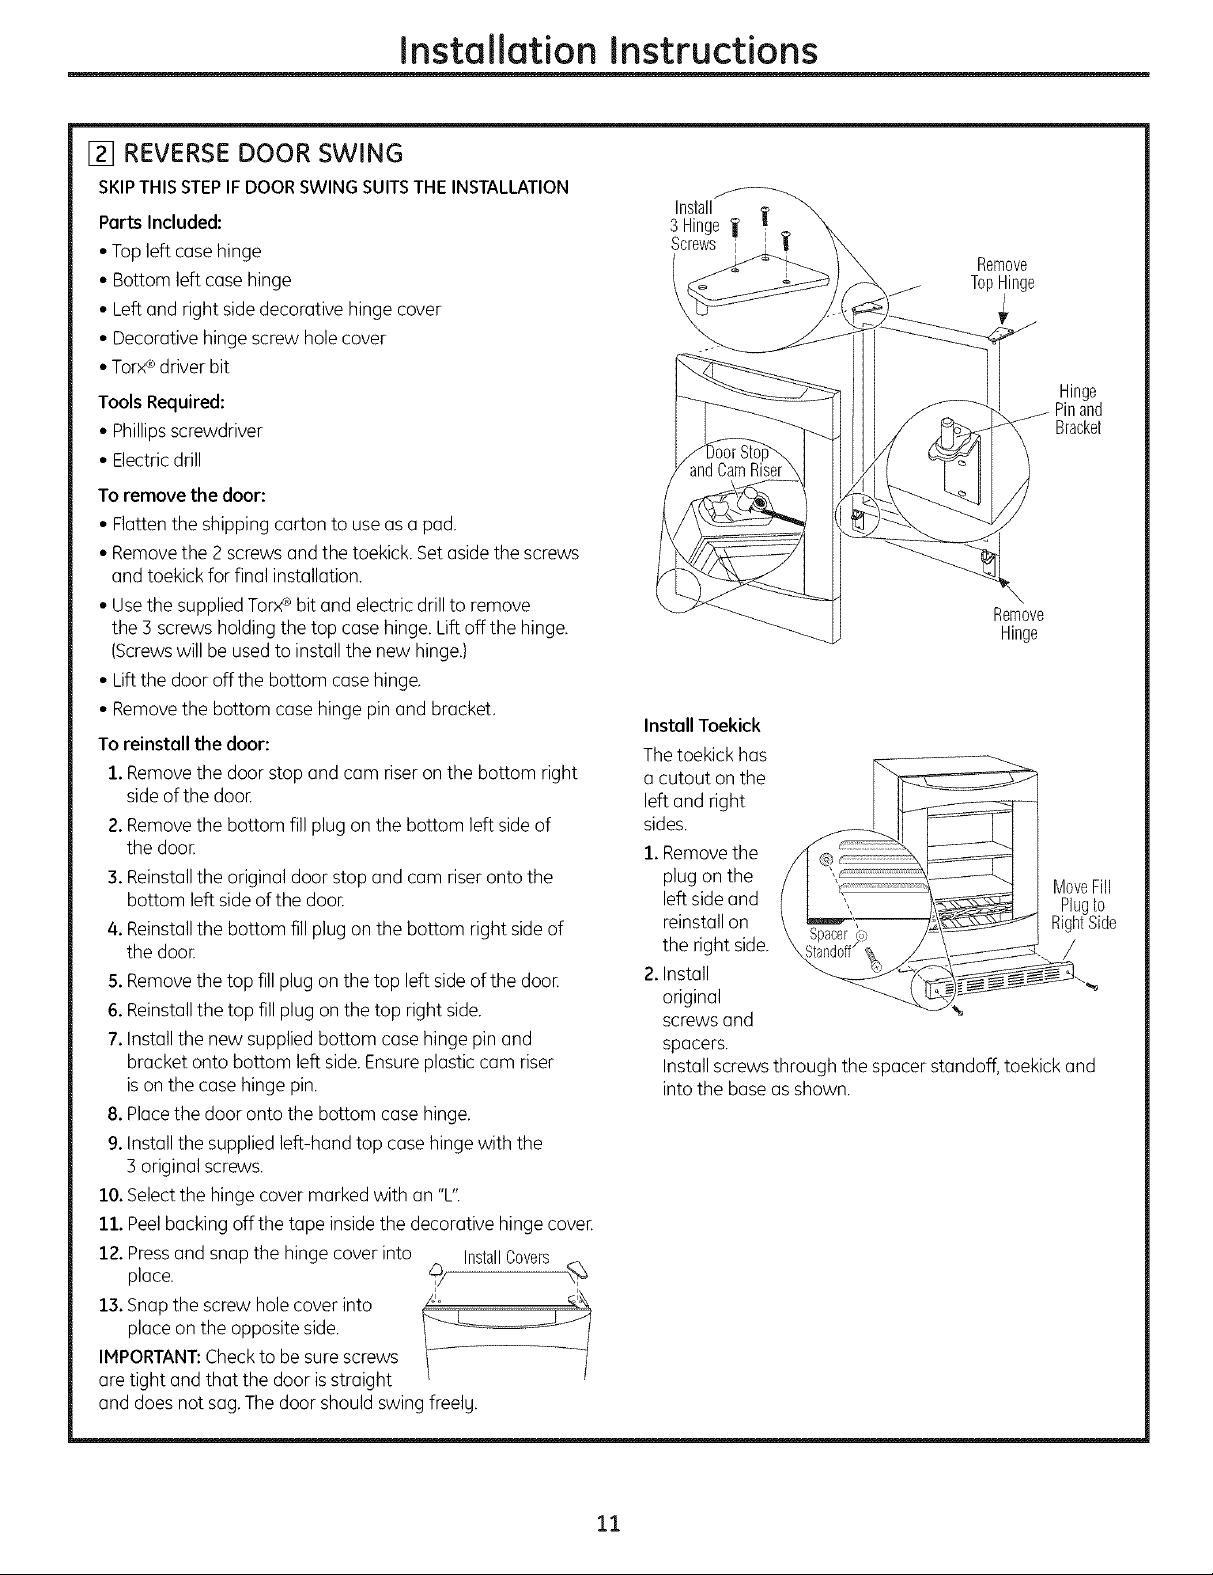
[] REVERSE DOOR SWING
SKIPTHISSTEPIFDOORSWINGSUITSTHEINSTALLATION
Parts Included:
• Top leftcase hinge
• Bottom left case hinge
• Left and right side decorative hinge cover
• Decorative hinge screw hole cover
• Torx®driver bit
Tools Required:
• Phillipsscrewdriver
• Electricdrill
To remove the door:
• Flattenthe shipping carton to useas a pad.
• Removethe 2 screws and the toekick. Setasidethe screws
and toekick for final installation.
• Usethe suppliedTorx®bit and electricdrill to remove
the 3 screws holding the top case hinge.Lift offthe hinge.
(Screwswill be usedto installthe new hinge.)
• Lift the door offthe bottom casehinge,
• Removethe bottom case hinge pinand bracket,
To reinstallthe door:
1.Removethe door stop andcam riser on the bottom right
sideof the doon
2.Removethe bottom fill plugon the bottom left sideof
the doon
3.Reinstallthe original door stop and cam riser onto the
bottom left side of the doon
4. Reinstallthe bottom fill plug on the bottom right side of
the doon
5.Removethe top fillplug onthe top left sideof the doon
6.Reinstallthe top fill plugon the top right side.
7.Installthe new supplied bottom case hinge pinand
bracket onto bottom left side.Ensureplasticcam riser
is on the casehinge pin.
8. Placethe door onto the bottom casehinge.
9.Installthe supplied left-hand top case hinge with the
3 original screws.
10.Selectthe hinge cover marked with an "L"
11. Peelbacking offthe tape insidethe decorative hingecove_
12. Pressand snapthe hinge cover into InstallCovers
place. _b/
13.Snap the screw holecover into
placeon the opposite side.
IMPORTANT:Checkto be surescrews
are tight and that the door isstraight
and doesnot sag,Thedoor should swing freelu.
Install
3 Hinge_ !
Screws i
Remove
TopHinge
Hinge
Pinand
Bracket
Remove
Hinge
Install Toekick
Thetoekick has
a cutout onthe
left and right
sides.
1.Removethe
plug onthe
left side and
reinstall on
the right side.
2.Install
original
screws and
spacers.
Installscrews through the spacer standoff,toekick and
into the baseas shown.
11
Installation Instructions
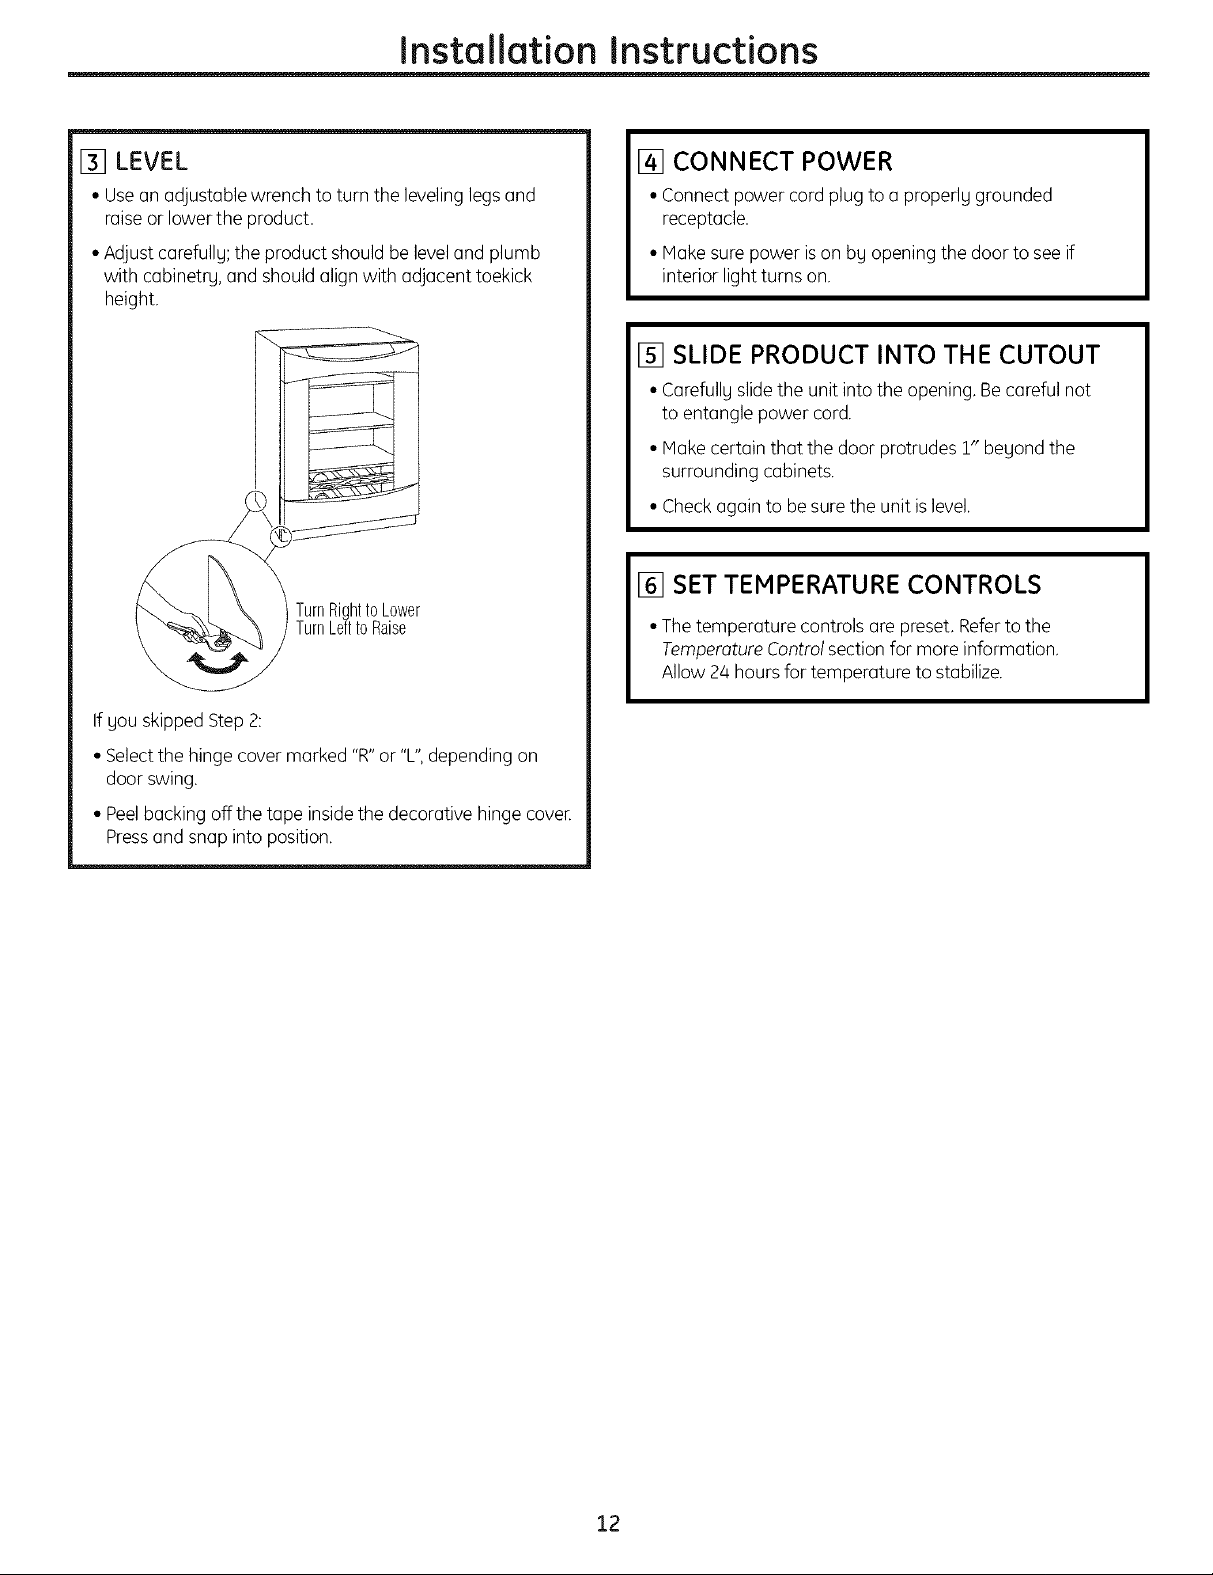
[] LEVEL
•Usean adjustablewrenchtoturnthelevelinglegsand
raiseor lower the product.
• Adjust carefullg;the product should be leveland plumb
with cabinetrg, and should align with adjacent toekick
height.
TurnRightto Lower
TurnLeftto Raise
If gouskipped Step2:
[] CONNECT POWER
• Connect power cord plug to a properlg grounded
receptacle.
• Hake surepower is on bg opening the door to seeif
interior light turns on.
[] SLIDE PRODUCT INTO THE CUTOUT
• Carefullgslide the unit into the opening. Becareful not
to entangle power cord.
• Hake certain that the door protrudes 1" begondthe
surrounding cabinets.
• Checkagain to be surethe unit is level.
[] SET TEMPERATURE CONTROLS
• The temperature controls are preset. Refer to the
Temperature Control section for more information.
Allow 24 hours for temperature to stabilize.
• Selectthe hinge cover marked "R"or "L",depending on
door swing.
• Peelbacking offthe tape insidethe decorative hinge coveE
Pressand snap into position.
12
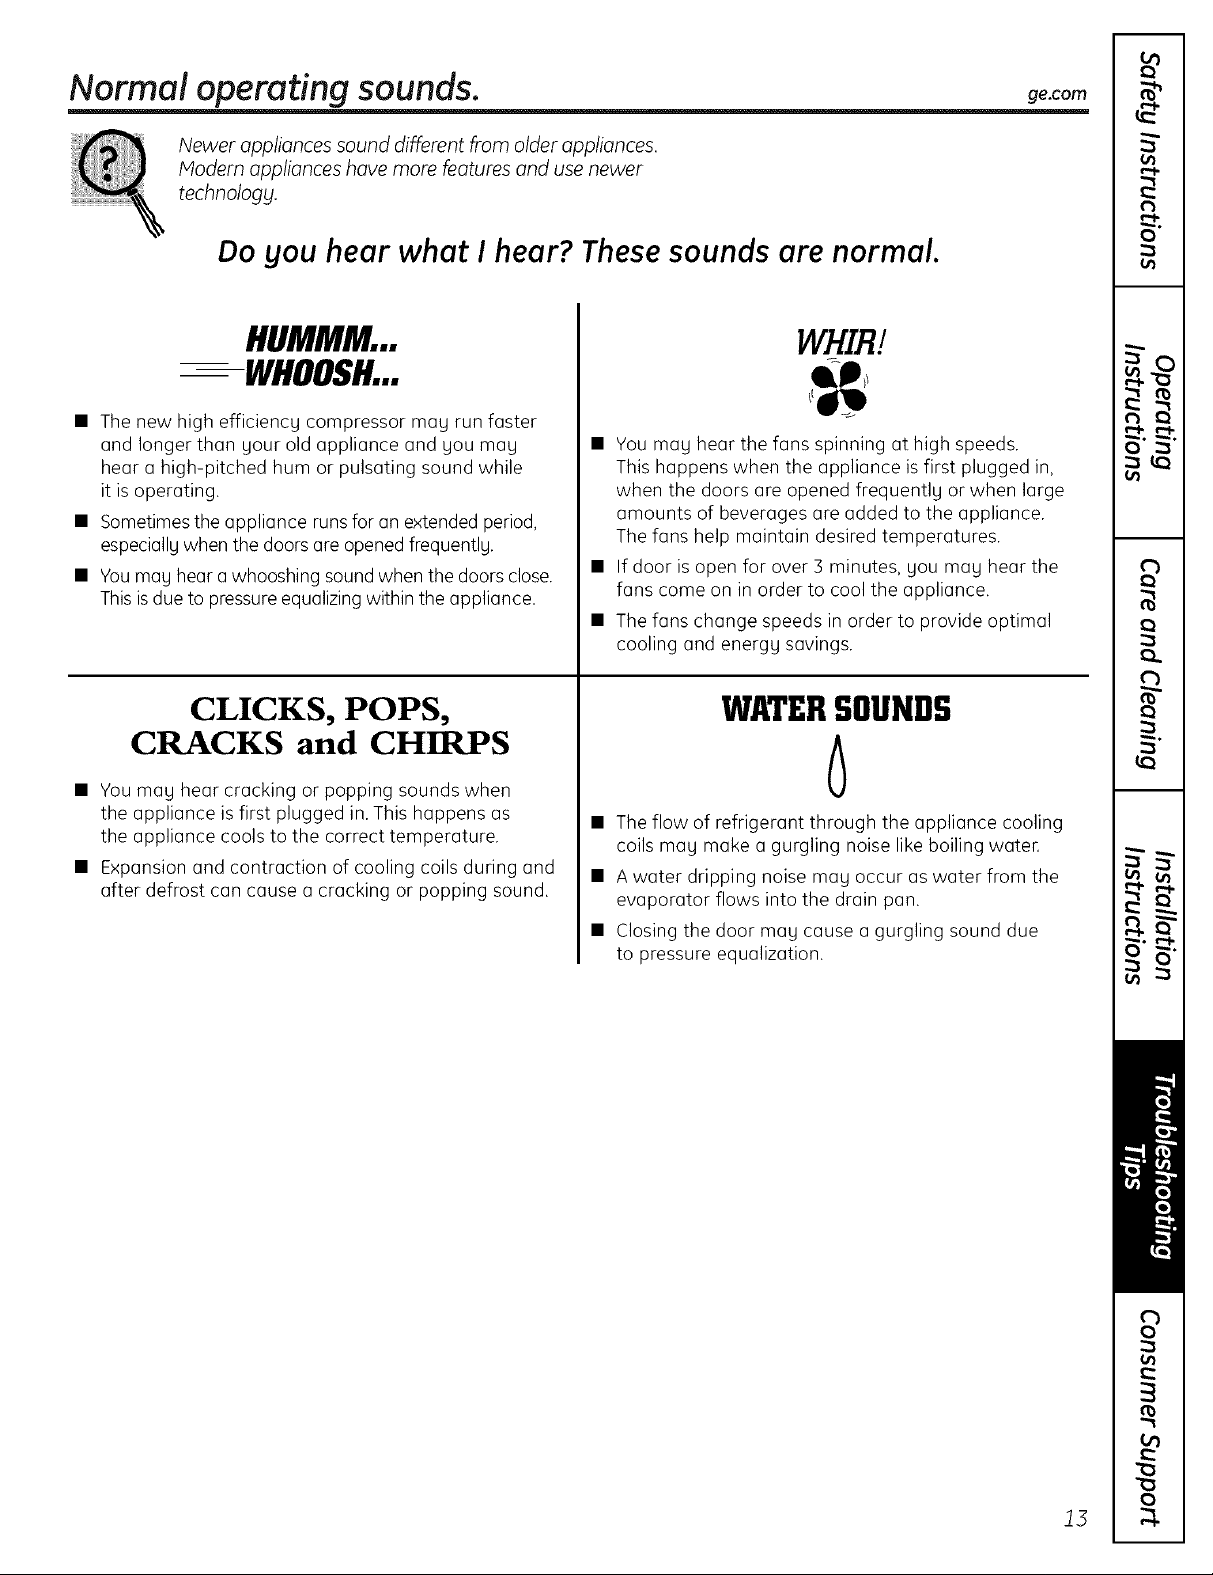
Normal operating sounds, go.corn
Newer appliances sound different from older appliances.
Modern appliances have more features and use newer
technologg,
Do gou hear what I hear? These sounds are normal.
HUMMM...
--WHOOSH...
• The new high efficiency compressor may run faster
and longer than your old appliance and you may
hear a high-pitched hum or pulsating sound while
it is operating.
• Sometimes the appliance runsfor an extendedperiod,
especiallywhen the doors are opened frequently.
• Youmag hear a whooshing sound when the doors close.
Thisisdue to pressureequalizing within the appliance.
• You mag hear the fans spinning at high speeds.
This happens when the appliance isfirst plugged in,
when the doors are opened frequently or when large
amounts of beverages are added to the appliance.
The fans help maintain desired temperatures.
• If door is open for over 3 minutes, you mag hear the
fans come on in order to cool the appliance.
• The fans change speeds in order to provide optimal
cooling and energg savings.
CLICKS, POPS,
CRACKS and CHIRPS
• You mag hear cracking or popping sounds when
the appliance is first plugged in. This happens as
the appliance cools to the correct temperature.
• Expansion and contraction of cooling coils during and
after defrost can cause a cracking or popping sound.
WATERSOUNDS
6
• The flow of refrigerant through the appliance cooling
coils mag make a gurgling noise like boiling water.
• A water dripping noise mag occur as water from the
evaporator flows into the drain pan.
• Closing the door mag cause a gurgling sound due
to pressure equalization.
!3
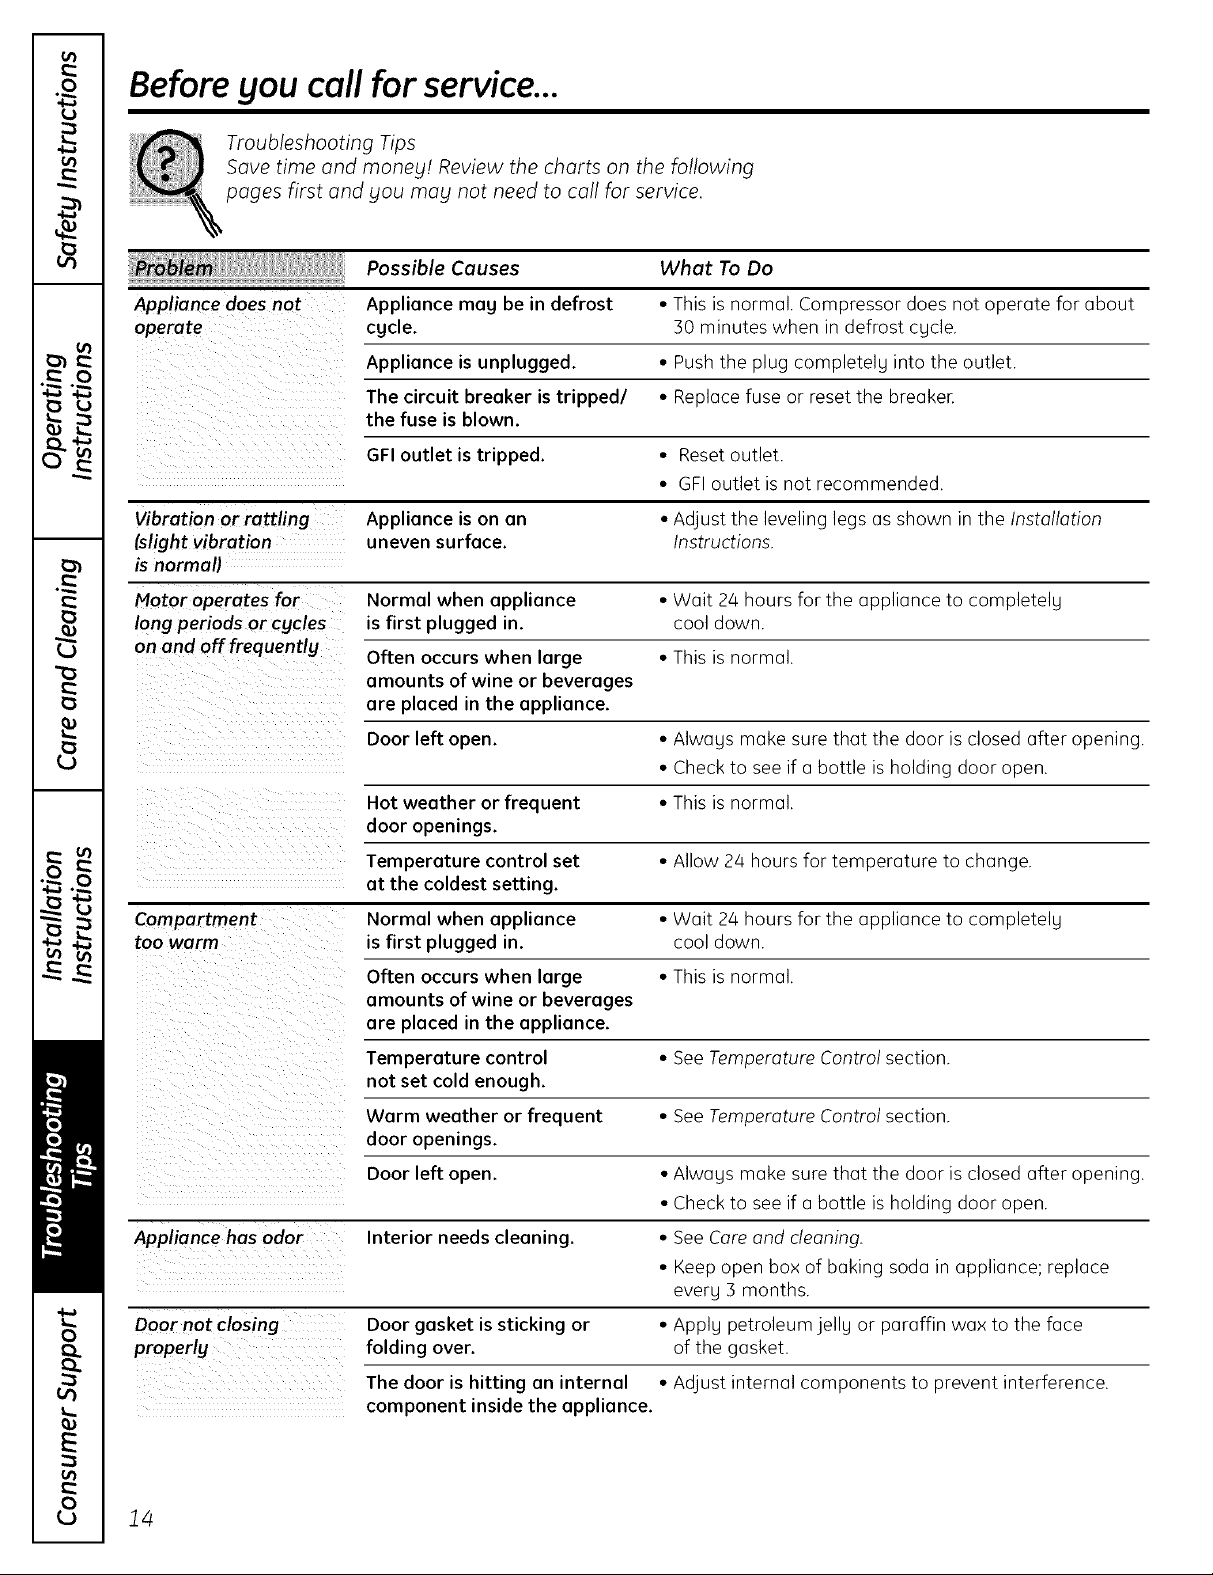
Beforeyou callfor service...
Troubleshooting Tips
Save time and moneg! Review the charts on the following
pages first and Sou mag not need to call for service.
Possible Causes What To Do
Appliance does not
operate
Appliance mag be in defrost
cgcle.
Appliance is unplugged.
The circuit breaker is tripped/
• This is normal. Compressor does not operate for about
30 minutes when in defrost cgcle.
• Push the plug completelg into the outlet.
• Replace fuse or reset the breaker.
the fuse is blown.
6FI outlet is tripped. • Reset outlet.
• GFI outlet is not recommended.
Vibration or rattling Appliance is on an • Adjust the leveling legs as shown in the Installation
(slight vibration uneven surface. Instructions.
is normal)
Motor operates for Normal when appliance • Wait 24 hours for the appliance to completelg
long periods or cgcles is first plugged in. cool down.
on and offfrequentlg Often occurs when large • This is normal.
amounts of wine or beverages
are placed in the appliance.
Door left open. • Alwags make sure that the door is closed after opening.
• Check to see if a bottle is holding door open.
Hot weather or frequent • This is normal.
door openings.
Temperature control set • Allow 24 hours for temperature to change.
at the coldest setting.
Comoartment Normal when appliance • Wait 24 hours for the appliance to completelg
too warm is first plugged in. cool down.
Often occurs when large • This is normal.
amounts of wine or beverages
are placed in the appliance.
Temperature control • See Temperature Control section.
not set cold enough.
Warm weather or frequent • See Temperature Control section.
door openings.
Door left open. • Alwags make sure that the door is closed after opening.
• Check to see if a bottle is holding door open.
Appliance has odor Interior needs cleaning. • See Care and cleaning.
• Keep open box of baking soda in appliance; replace
everg 3 months.
Door not closing Door gasket is sticking or • Applg petroleum jellg or paraffin wax to the face
properlg folding over. of the gasket.
The door is hitting an internal • Adjust internal components to prevent interference.
component inside the appliance.
/4
ge.com
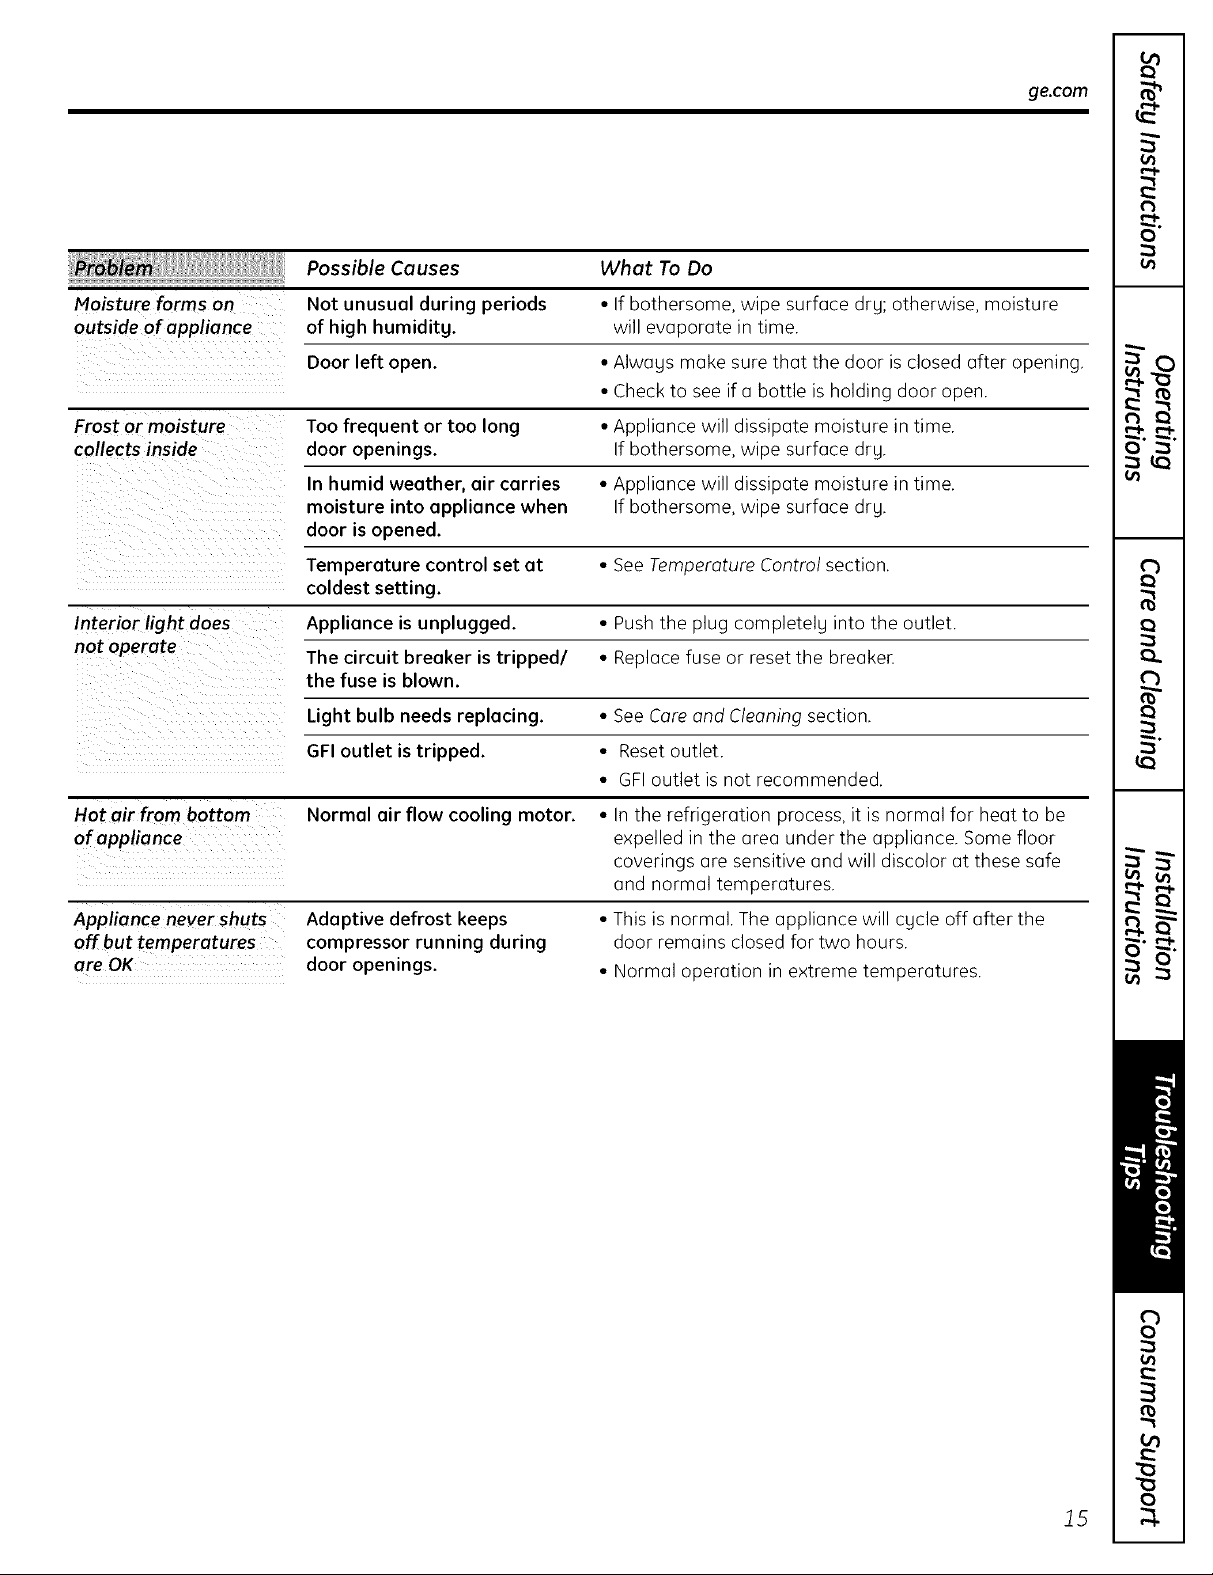
Possible Causes What To Do
Moisture forms on Not unusual during periods • If bothersome, wipe surface dry; otherwise, moisture
outside of appliance of high humidity, will evaporate in time.
Door left open. • Always make sure that the door is closed after opening,
• Checkto see if a bottle is holding door open.
Frost or moisture Too frequent or too long • Appliance will dissipate moisture in time.
collects inside door openings. If bothersome, wipe surface dry.
In humid weather, air carries • Appliance will dissipate moisture in time.
moisture into appliance when If bothersome, wipe surface dry.
door is opened.
Temperature control set at * SeeTemperature Control section.
coldest setting.
Interior light does Appliance is unplugged. • Pushthe plug completely into the outlet.
not operate The circuit breaker is tripped/ • Replace fuse or reset the breaker.
the fuse is blown.
Light bulb needs replacing. • SeeCare and Cleaning section.
GFI outlet is tripped. • Reset outlet.
• GFIoutlet is not recommended.
Hot air from bottom Normal air flow cooling motor. * In the refrigeration process, it is normal for heat to be
ofappfience expelled in the area under the appliance. Some floor
coverings are sensitive and will discolor at these safe
and normal temperatures,
Appfiance never shuts
off but temperatures
ore OK
Adaptive defrost keeps
compressor running during
door openings.
• This is normal. The appliance will cycle off after the
door remains closed for two hours.
• Normal operation in extreme temperatures,
!5
o Notes.
n
o_
n
_.11 t rL
0
0
E
LS_
GE Service Protection Plus'"
GE, a name recognized worldwide for quality and dependability, offers you
Service Protection PlusTM--comprehensive protection on all your appliances-
No Matter What Brand!
Benefits Include:
• Becked by GE
• Allbrands covered
• Unlimitedservicecells
• Allpartsend laborcosts included
• No out-of-pocketexpenses
• No hidden deductibles
• One 800 number to cell
You will be completely satisfied with our service protection or you may request your money back
on the remaining value of your contract. No questions asked. It's that simple.
Protect your refrigerator, dishwasher, washer and dryer, range, TV,VCRand much more-any brand!
Plusthere's no extra charge for emergency service and low monthly financing is available. Evenicemaker coverage and
food spoilage protection is offered. You can rest easy, knowing that all your valuable household products are protected
against expensive repairs.
Place your confidence in GEand call us in the U.S.toll-free at 800°626°2224
for more information.
*All brands covered, up to 20 years old, in the continental US
We'll Cover Any Appliance.
Anywhere. Anytime.*
,_ Cut here
Please place in envelope and mail to:
General Electric Company
Warranty Registration Department
P.O.Box 32150
Louisville, KY 40232-2150
!7
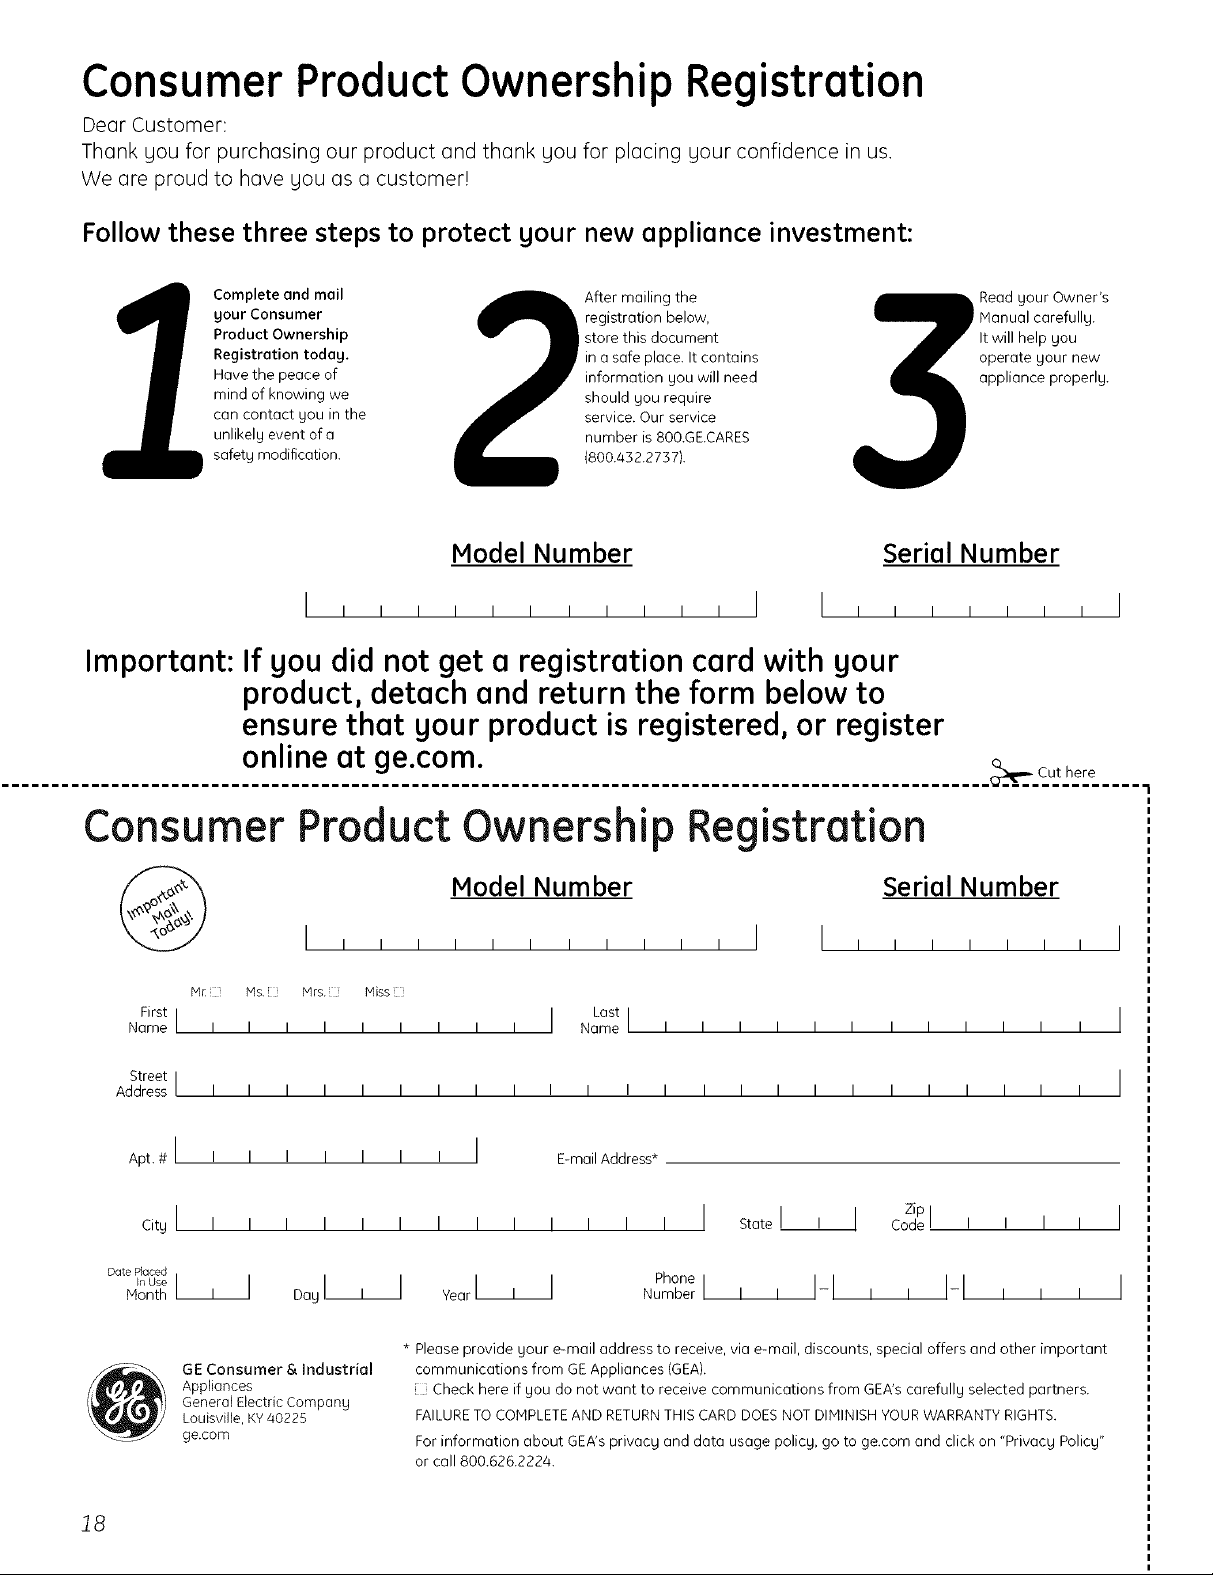
Consumer Product Ownership Registration
Dear Customer:
Thank you for purchasing our product and thank you for placing your confidence in us.
We are proud to have you as a customer!
Follow these three steps to protect your new appliance investment:
Important: If you did not get a registration card with your
................................................................................................... _,,,_ Cut here
Consumer
Complete and mail
your Consumer
Product Ownership
Registration today.
Have the peace of
mind of knowing we
can contact you in the
unlikely event of a
safety modification.
After mailing the
registration below,
store this document
in a safe place. It contains
information you will need
should you require
service. Our service
number is 800.GE.CARES
{800.452.2757).
Model Number Serial Number
, , , , , I I , , , , , , , I
product, detach and return the form below to
ensure that your product is registered, or register
online at ge.com.
Product Ownership Registration
Read your Owner's
IManual carefully.
It will help you
operate your new
appliance properly.
Model Number Serial Number
@
Mr_ Ms. M rs Missi
First I I Lastl
Name I I I I I I I I I Name I I I I I I I I I I I I
Street I
Address I I I I I I I I I I I I I I I I I I I I I I I I
Apt. # I I I
city I I I
Dote Placed
In Use I I I
Month
Appliances
General Electric Company
GE Consumer&Industrial
Louisville, KY40225
ge.com
I,,,,,, , , , , , I I , , , , , , , I
I I I I I I E-mail Address*
I I I I
Day I I I
I , , , I , , I Statel ' 1 Code
YearI I I PhoneNumberl, , I-I , ,
* Please provide your e-mail address to receive, via e-mail, discounts, special offers and other important
communications from GE Appliances (GEA).
[l Check here if you do not want to receive communications from GEA's carefully selected partners.
FAILURETOCOMPLETEAND RETURNTHISCARD DOESNOT DIMINISHYOURWARRANTY RIGHTS.
For inforrnation about GEA's privacy and data usage policy, go to ge.com and click on "Privacy Policy"
or call 800.626.2224.
zipI
i i I I I
I-I , , , I
18
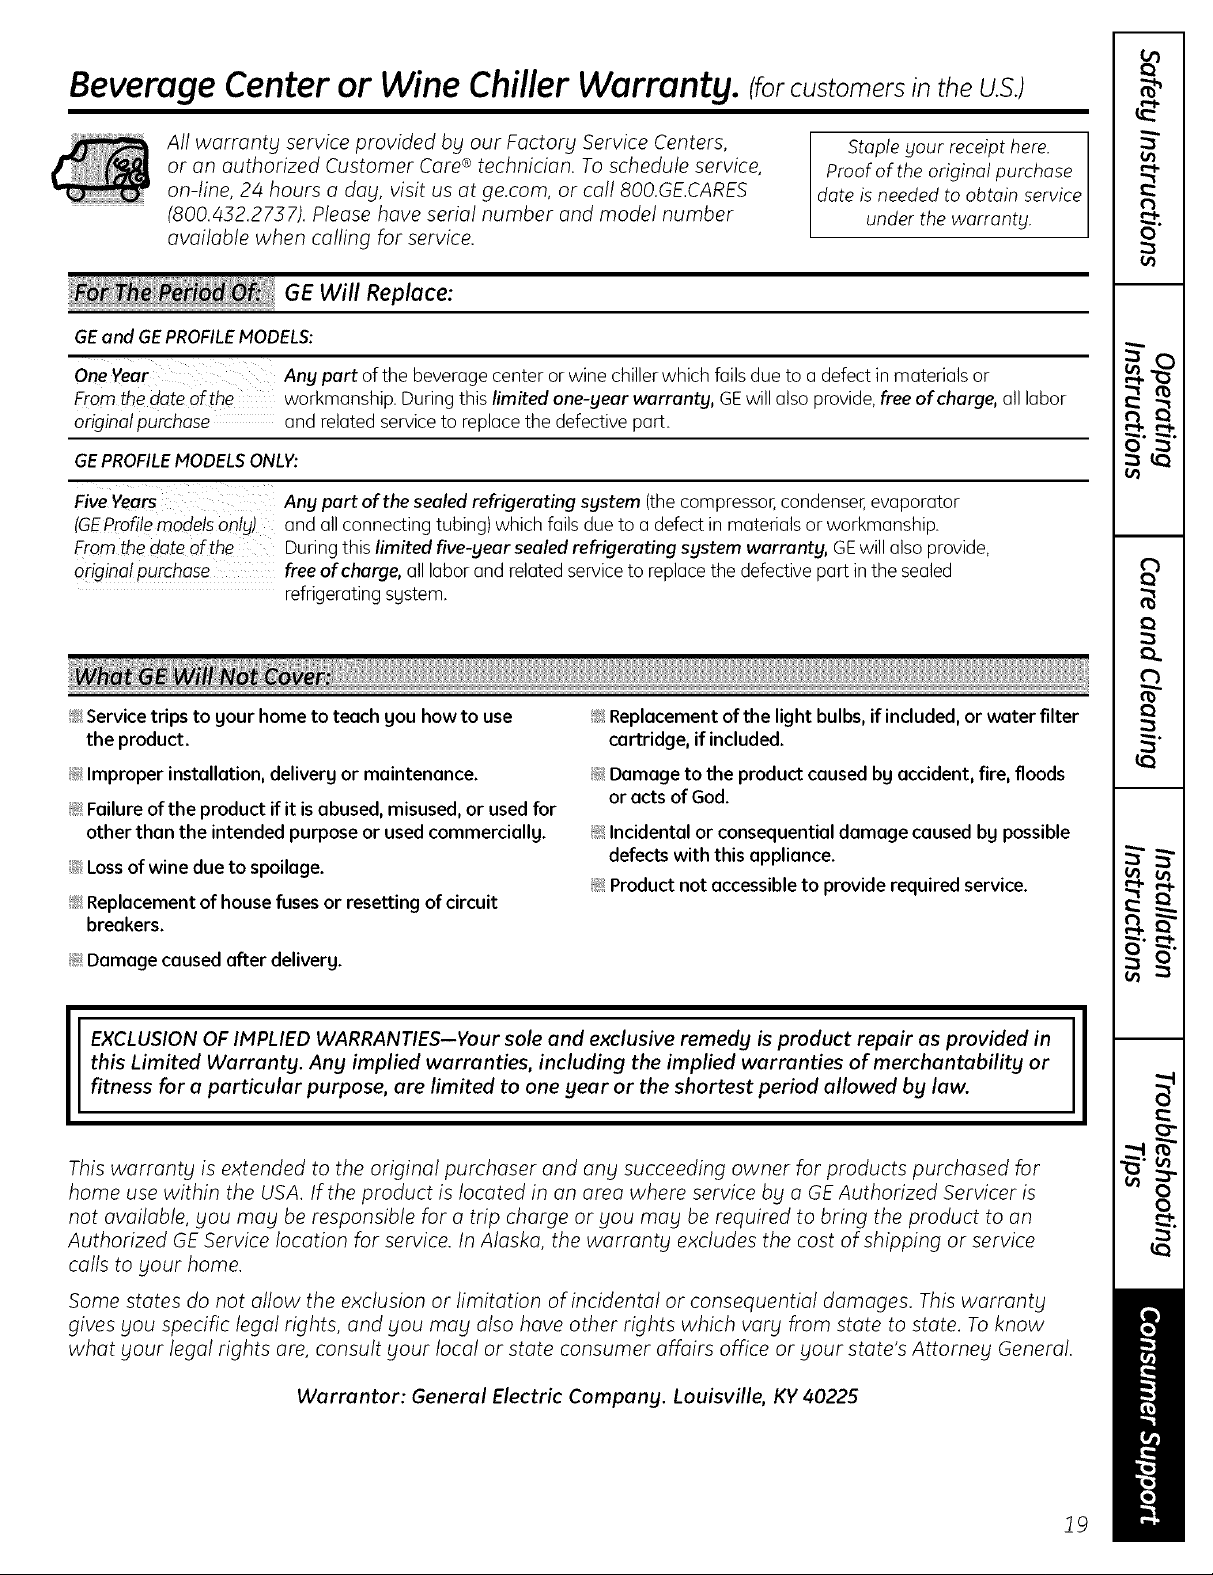
Beverage Center or Wine Chiller Warranty. (forcustomersinthe U.S.)
All warranty service provided bg our Factory Service Centers,
or an authorized Customer Care® technician. To schedule service,
on-line, 2/4 hours a dog, visit us at ge.com, or call 800.GE.CARES
(800./432.2737). Please have serial number and model number
available when calling for service.
GEWill Replace:
GEand GE PROFILE MODELS:
One Vear Any part of the beverage center or wine chiller which fails due to a defect in materials or
From the dote of the workmanship. During this limited one-gear warranty, GEwill also provide, free of charge, all labor
original purchase and related service to replace the defective part.
GEPROFILE MODELS ONLV:
Five Vears Ang part of the sealed refrigerating sgstem (the compressor, condenser, evaporator
(GEProfile models only) and all connecting tubing) which fails due to a defect in materials or workmanship.
From the date of the During this limited five-year sealed refrigerating system warranty, GEwill also provide,
originalpurchase free of charge, all labor and related service to replace the defective part in the sealed
refrigerating sgstem.
Staple your receipt here.
Proof of the original purchase
date is needed to obtain service
under the warrants.
!!!!!!!!!!!!!!!!!!!!!!!!!!!!!!!!!!!!!!!!!!!!!!!!!!!!!!!!!!!!!!!!!!!!!!!!!!!!!!!!!!!!!!!!!!!!!!!!!!!!!!!!!!!!!!!!!!!!!
_:Servicetrips to gour home to teach gou how to use
the product.
_:Replacement of the light bulbs, ifincluded,or water filter
cartridge, if included.
_:Improper installation, deliverg or maintenance.
_:Failure of the product if it isabused, misused, or used for
other than the intended purpose or used commerciallg.
::Ji::Lossof wine due to spoilage.
_:Replacement of house fuses or resetting of circuit
breakers.
!i_Damage caused after deliverg.
EXCLUSION OF IMPLIED WARRANTIES--Your sole and exclusive remedy is product repair as provided in
this Limited Warranty. Any implied warranties, including the implied warranties of merchantability or
fitness for a particular purpose, are limited to one year or the shortest period allowed bg law.
I
This warranty is extended to the origina! purchaser and any succeeding owner for products purchased for
home use within the USA. If the product is located in an area where service by a GE Authorized Servicer is
not available, you may be responsible for a trip charge or you may be required to bring the product to an
Authorized GE Service location for service. In Alaska, the warranty excludes the cost of shipping or service
coils to your home.
Some states do not allow the exclusion or limitation of incidental or consequential damages. This warranty
gives you specific legal rights, and you may also have other rights which vary from state to state. To know
what your legal rights ore, consult your local or state consumer affairs office or your state's Attorney General.
_:Damage to the product caused bg accident, fire, floods
or acts of God.
!i:_Incidental or consequential damage caused bg possible
defects with this appliance.
!i:_Product not accessible to provide required service.
I
Warrantor: General Electric Compang. Louisville, KV 40225
!9
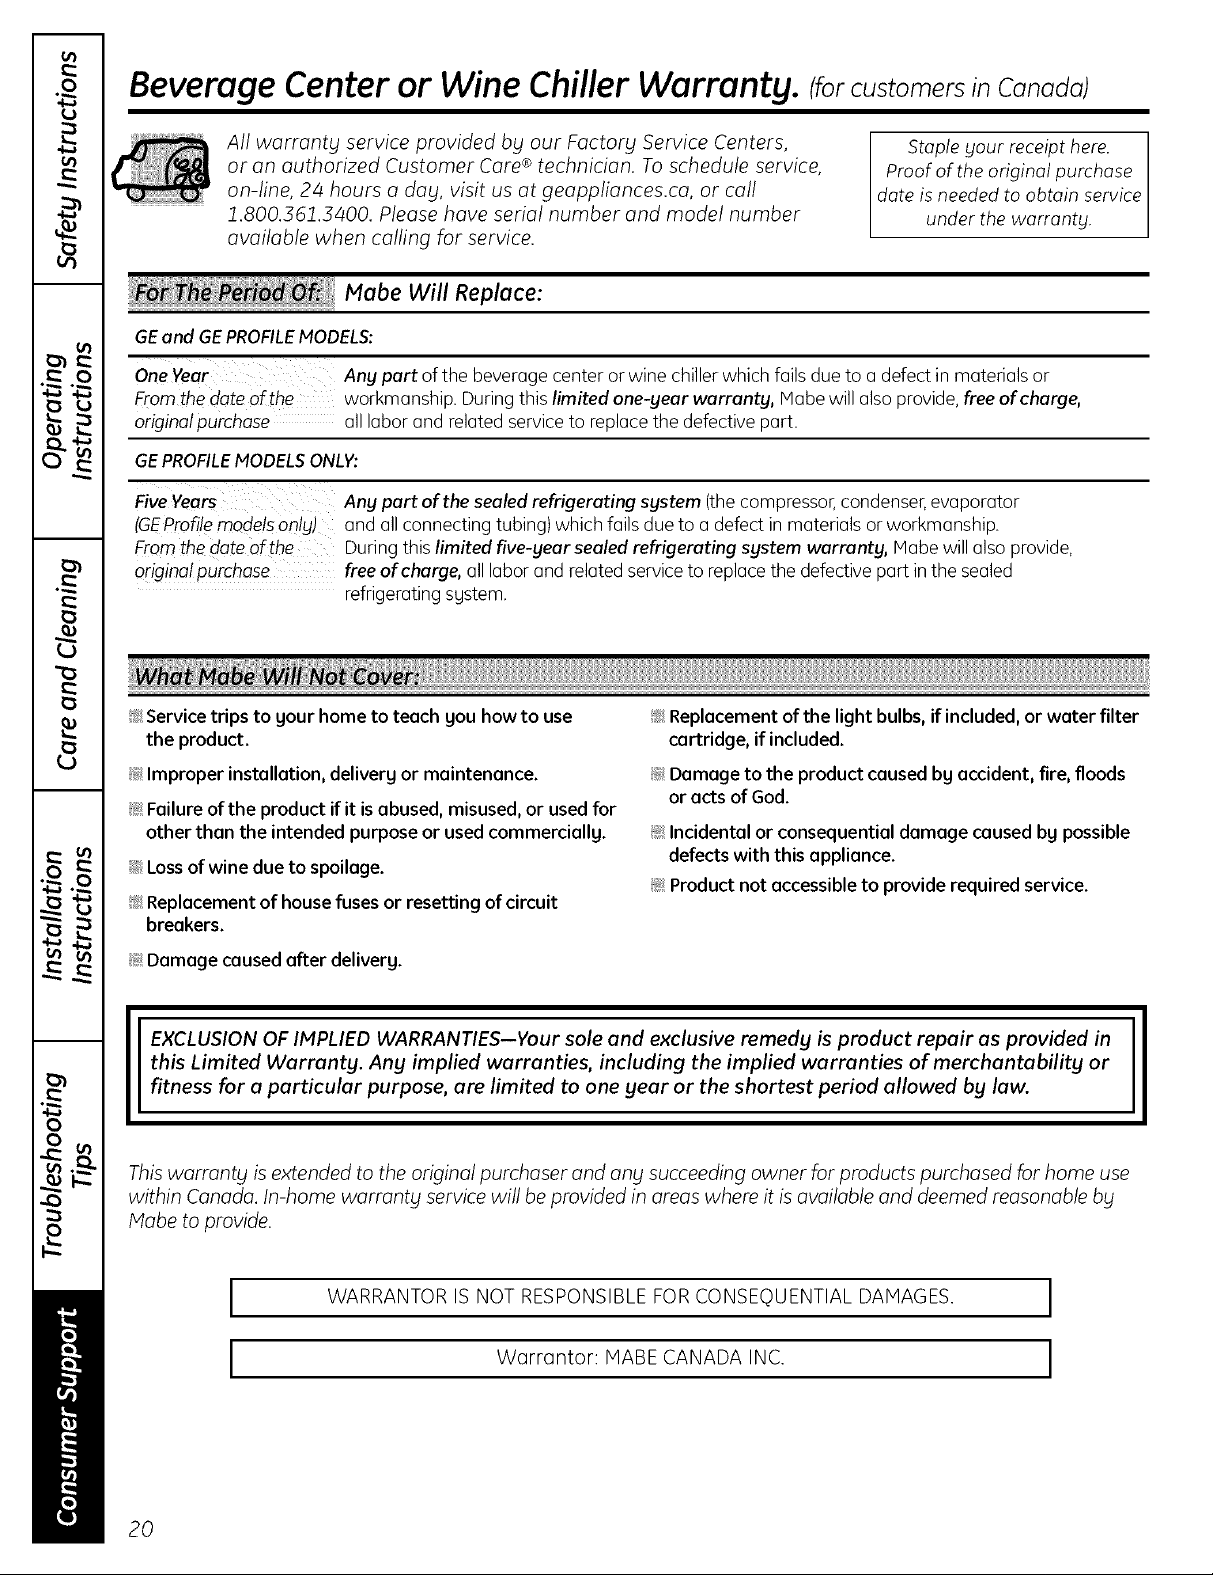
Beverage Center or Wine Chiller Warranty. (forcustomers in Canada)
All warranty service provided by our Factory Service Centers,
or an authorized Customer Care®technician. Toschedule service,
on-line, 24 hours a day, visit us at geappliances.ca, or call
1.800.361.3400. Please have serial number and model number
available when calling for service.
_eP _,:iMabe Will Replace:
GEand GEPROFILE MODELS:
One Year Any part of the beverage center or wine chiller which fails due to a defect in materials or
From the date of the workmanship. During this limited one-year warranty, Nabe will also provide, free of charge,
originalpurchase all labor and related service to replace the defective part.
GEPROFILE MODELS ONLY:
Five Years Any part of the sealedrefrigerating system (the compressor,condenser,evaporator
(GEProfile models only) and all connecting tubing) which fails due to a defect in materials or workmanship.
From thedate of the During this limited five-year sealed refrigerating system warranty, Mabe will also provide,
originalpurchase free of charge, all labor and relatedserviceto replacethe defective part in the sealed
refrigerating system.
_ Service trips to your home to teach you how to use
the product.
_ Replacement of the light bulbs, if included,or water filter
cartridge, if included.
Staple your receipt here.
Proof of the original purchase
date is needed to obtain service
under the warranty.
_ Improper installation, delivery or maintenance.
_ Failure of the product if it isabused, misused, or used for
other than the intended purpose or used commercially.
::Ji:_Lossof wine due to spoilage.
_ Replacement of house fuses or resetting of circuit
breakers.
_ Damage caused after delivery.
EXCLUSION OF IMPLIED WARRANTIES--Your sole and exclusive remedy is product repair as provided in
this Limited Warranty. Any implied warranties, including the implied warranties of merchantability or
fitness for a particular purpose, are limited to one year or the shortest period allowed by law.
II
This warranty is extended to the original purchaser and any succeeding owner for products purchased for home use
within Canada. In-home warranty service will be provided in areas where it is available and deemed reasonable by
Mabe to provide.
I
WARRANTOR IS NOT RESPONSIBLE FOR CONSEQUENTIAL DAMAGES. I
_ Damage to the product caused by accident, fire, floods
or acts of God.
!i::Incidental or consequential damage caused by possible
defects with this appliance.
!i::Product not accessible to provide required service.
I
2O
I
Warrantor: HABE CANADA INC. I
 Loading...