


User Guide
Gateway 450ROG/RGH Notebook


Contents
1 Checking Out Your Gateway 450 . . . . . . . . . . . . . . . . . . . . . . . . . . . . . . . . . 1
Front . . . . . . . . . . . . . . . . . . . . . . . . . . . . . . . . . . . . . . . . . . . . . . . . . . . . . . . . . . . . . 2
Left side . . . . . . . . . . . . . . . . . . . . . . . . . . . . . . . . . . . . . . . . . . . . . . . . . . . . . . . . . . . 3
Right side . . . . . . . . . . . . . . . . . . . . . . . . . . . . . . . . . . . . . . . . . . . . . . . . . . . . . . . . . . 5
Back . . . . . . . . . . . . . . . . . . . . . . . . . . . . . . . . . . . . . . . . . . . . . . . . . . . . . . . . . . . . . . 6
Bottom . . . . . . . . . . . . . . . . . . . . . . . . . . . . . . . . . . . . . . . . . . . . . . . . . . . . . . . . . . . . 7
Keyboard area . . . . . . . . . . . . . . . . . . . . . . . . . . . . . . . . . . . . . . . . . . . . . . . . . . . . . . 9
Identifying your model . . . . . . . . . . . . . . . . . . . . . . . . . . . . . . . . . . . . . . . . . . . . . . . 11
Gateway model number . . . . . . . . . . . . . . . . . . . . . . . . . . . . . . . . . . . . . . . . . . 11
Gateway serial number . . . . . . . . . . . . . . . . . . . . . . . . . . . . . . . . . . . . . . . . . . . 11
Internal wireless label . . . . . . . . . . . . . . . . . . . . . . . . . . . . . . . . . . . . . . . . . . . . 12
Microsoft Certificate of Authenticity . . . . . . . . . . . . . . . . . . . . . . . . . . . . . . . . . 12
Finding your specifications . . . . . . . . . . . . . . . . . . . . . . . . . . . . . . . . . . . . . . . . . . . 13
Accessories . . . . . . . . . . . . . . . . . . . . . . . . . . . . . . . . . . . . . . . . . . . . . . . . . . . . . . . 13
2Getting Started. . . . . . . . . . . . . . . . . . . . . . . . . . . . . . . . . . . . . . . . . . . . . . . . . . 15
Safety instructions . . . . . . . . . . . . . . . . . . . . . . . . . . . . . . . . . . . . . . . . . . . . . . . . . . 16
General tips . . . . . . . . . . . . . . . . . . . . . . . . . . . . . . . . . . . . . . . . . . . . . . . . . . . . 16
Using the batteries . . . . . . . . . . . . . . . . . . . . . . . . . . . . . . . . . . . . . . . . . . . . . . 17
Using the AC adapter . . . . . . . . . . . . . . . . . . . . . . . . . . . . . . . . . . . . . . . . . . . . 17
Basic safety precautions . . . . . . . . . . . . . . . . . . . . . . . . . . . . . . . . . . . . . . . . . . 18
Connecting the AC adapter . . . . . . . . . . . . . . . . . . . . . . . . . . . . . . . . . . . . . . . . . . . 19
Protecting from power source problems . . . . . . . . . . . . . . . . . . . . . . . . . . . . . . 21
Starting your notebook . . . . . . . . . . . . . . . . . . . . . . . . . . . . . . . . . . . . . . . . . . . . . . 22
Waking up your notebook . . . . . . . . . . . . . . . . . . . . . . . . . . . . . . . . . . . . . . . . . 23
Turning off your notebook . . . . . . . . . . . . . . . . . . . . . . . . . . . . . . . . . . . . . . . . . . . . 23
Restarting (rebooting) your notebook . . . . . . . . . . . . . . . . . . . . . . . . . . . . . . . . . . . 24
Status indicators . . . . . . . . . . . . . . . . . . . . . . . . . . . . . . . . . . . . . . . . . . . . . . . . . . . 25
Using the keyboard . . . . . . . . . . . . . . . . . . . . . . . . . . . . . . . . . . . . . . . . . . . . . . . . . 26
Key types . . . . . . . . . . . . . . . . . . . . . . . . . . . . . . . . . . . . . . . . . . . . . . . . . . . . . 27
System key combinations . . . . . . . . . . . . . . . . . . . . . . . . . . . . . . . . . . . . . . . . . 28
Multi-function buttons . . . . . . . . . . . . . . . . . . . . . . . . . . . . . . . . . . . . . . . . . . . . . . . 30
Using the EZ Pad touchpad . . . . . . . . . . . . . . . . . . . . . . . . . . . . . . . . . . . . . . . . . . 31
Using the touchpad . . . . . . . . . . . . . . . . . . . . . . . . . . . . . . . . . . . . . . . . . . . . . . 32
Using the optional EZ Point pointing device . . . . . . . . . . . . . . . . . . . . . . . . . . . . . . 34
Replacing the EZ Point pointing device cap . . . . . . . . . . . . . . . . . . . . . . . . . . 35
Using the optional fingerprint reader . . . . . . . . . . . . . . . . . . . . . . . . . . . . . . . . . . . . 36
Running the TouchStrip Tutorial . . . . . . . . . . . . . . . . . . . . . . . . . . . . . . . . . . . . 36
Enrolling your fingerprints . . . . . . . . . . . . . . . . . . . . . . . . . . . . . . . . . . . . . . . . . 37
i

Using the fingerprint reader features . . . . . . . . . . . . . . . . . . . . . . . . . . . . . . . . .37
Connecting the modem . . . . . . . . . . . . . . . . . . . . . . . . . . . . . . . . . . . . . . . . . . . . . .38
Connecting to a wired Ethernet network . . . . . . . . . . . . . . . . . . . . . . . . . . . . . . . . .39
Broadband Internet connections . . . . . . . . . . . . . . . . . . . . . . . . . . . . . . . . . . . .40
Installing a printer, scanner, or other peripheral device . . . . . . . . . . . . . . . . . . . . .40
3Getting Help. . . . . . . . . . . . . . . . . . . . . . . . . . . . . . . . . . . . . . . . . . . . . . . . . . . . .41
Help and Support . . . . . . . . . . . . . . . . . . . . . . . . . . . . . . . . . . . . . . . . . . . . . . . . . . .42
Searching for a topic . . . . . . . . . . . . . . . . . . . . . . . . . . . . . . . . . . . . . . . . . . . . .43
Do More With Gateway . . . . . . . . . . . . . . . . . . . . . . . . . . . . . . . . . . . . . . . . . . . . . .44
Doing more with Gateway at home . . . . . . . . . . . . . . . . . . . . . . . . . . . . . . . . . .44
Doing more with Gateway at work . . . . . . . . . . . . . . . . . . . . . . . . . . . . . . . . . . .45
Online help . . . . . . . . . . . . . . . . . . . . . . . . . . . . . . . . . . . . . . . . . . . . . . . . . . . . . . . .46
Gateway Web site . . . . . . . . . . . . . . . . . . . . . . . . . . . . . . . . . . . . . . . . . . . . . . . . . .47
Using eSupport . . . . . . . . . . . . . . . . . . . . . . . . . . . . . . . . . . . . . . . . . . . . . . . . . .48
4 Using Windows . . . . . . . . . . . . . . . . . . . . . . . . . . . . . . . . . . . . . . . . . . . . . . . . . .51
About the Windows environment . . . . . . . . . . . . . . . . . . . . . . . . . . . . . . . . . . . . . . .52
Using the desktop . . . . . . . . . . . . . . . . . . . . . . . . . . . . . . . . . . . . . . . . . . . . . . . . . . .53
Using the Start menu . . . . . . . . . . . . . . . . . . . . . . . . . . . . . . . . . . . . . . . . . . . . .53
Adding icons to the desktop . . . . . . . . . . . . . . . . . . . . . . . . . . . . . . . . . . . . . . .54
Identifying window items . . . . . . . . . . . . . . . . . . . . . . . . . . . . . . . . . . . . . . . . . . . . . .55
Working with files and folders . . . . . . . . . . . . . . . . . . . . . . . . . . . . . . . . . . . . . . . . .57
Viewing drives . . . . . . . . . . . . . . . . . . . . . . . . . . . . . . . . . . . . . . . . . . . . . . . . . .57
Creating folders . . . . . . . . . . . . . . . . . . . . . . . . . . . . . . . . . . . . . . . . . . . . . . . . .58
Copying and moving files and folders . . . . . . . . . . . . . . . . . . . . . . . . . . . . . . . .59
Deleting files and folders . . . . . . . . . . . . . . . . . . . . . . . . . . . . . . . . . . . . . . . . . .61
Browsing for files and folders . . . . . . . . . . . . . . . . . . . . . . . . . . . . . . . . . . . . . .62
Searching for files . . . . . . . . . . . . . . . . . . . . . . . . . . . . . . . . . . . . . . . . . . . . . . . . . . .64
Using the Windows Search utility . . . . . . . . . . . . . . . . . . . . . . . . . . . . . . . . . . .65
Working with documents . . . . . . . . . . . . . . . . . . . . . . . . . . . . . . . . . . . . . . . . . . . . .67
Creating a new document . . . . . . . . . . . . . . . . . . . . . . . . . . . . . . . . . . . . . . . . .67
Saving a document . . . . . . . . . . . . . . . . . . . . . . . . . . . . . . . . . . . . . . . . . . . . . .68
Opening a document . . . . . . . . . . . . . . . . . . . . . . . . . . . . . . . . . . . . . . . . . . . . .69
Printing a document . . . . . . . . . . . . . . . . . . . . . . . . . . . . . . . . . . . . . . . . . . . . . .70
Shortcuts . . . . . . . . . . . . . . . . . . . . . . . . . . . . . . . . . . . . . . . . . . . . . . . . . . . . . . . . . .71
5 Using the Internet . . . . . . . . . . . . . . . . . . . . . . . . . . . . . . . . . . . . . . . . . . . . . . .73
Learning about the Internet . . . . . . . . . . . . . . . . . . . . . . . . . . . . . . . . . . . . . . . . . . .74
Setting up an Internet account . . . . . . . . . . . . . . . . . . . . . . . . . . . . . . . . . . . . . . . . .75
Accessing your Internet account . . . . . . . . . . . . . . . . . . . . . . . . . . . . . . . . . . . .76
Using the World Wide Web . . . . . . . . . . . . . . . . . . . . . . . . . . . . . . . . . . . . . . . . . . .77
ii

Connecting to a Web site . . . . . . . . . . . . . . . . . . . . . . . . . . . . . . . . . . . . . . . . . 78
Downloading files . . . . . . . . . . . . . . . . . . . . . . . . . . . . . . . . . . . . . . . . . . . . . . . 79
Using e-mail . . . . . . . . . . . . . . . . . . . . . . . . . . . . . . . . . . . . . . . . . . . . . . . . . . . . . . . 80
Sending e-mail . . . . . . . . . . . . . . . . . . . . . . . . . . . . . . . . . . . . . . . . . . . . . . . . . 80
Checking your e-mail . . . . . . . . . . . . . . . . . . . . . . . . . . . . . . . . . . . . . . . . . . . . 81
6 Sending and Receiving Faxes . . . . . . . . . . . . . . . . . . . . . . . . . . . . . . . . . . 83
Installing and configuring Fax . . . . . . . . . . . . . . . . . . . . . . . . . . . . . . . . . . . . . . . . . 84
Installing Fax . . . . . . . . . . . . . . . . . . . . . . . . . . . . . . . . . . . . . . . . . . . . . . . . . . . 84
Configuring Fax . . . . . . . . . . . . . . . . . . . . . . . . . . . . . . . . . . . . . . . . . . . . . . . . . 85
Sending a simple fax . . . . . . . . . . . . . . . . . . . . . . . . . . . . . . . . . . . . . . . . . . . . . . . . 87
Setting up your cover page template . . . . . . . . . . . . . . . . . . . . . . . . . . . . . . . . . . . 89
Faxing from programs . . . . . . . . . . . . . . . . . . . . . . . . . . . . . . . . . . . . . . . . . . . . . . . 90
Faxing a scanned document . . . . . . . . . . . . . . . . . . . . . . . . . . . . . . . . . . . . . . . . . . 90
Receiving and viewing a fax . . . . . . . . . . . . . . . . . . . . . . . . . . . . . . . . . . . . . . . . . . 91
Canceling a fax . . . . . . . . . . . . . . . . . . . . . . . . . . . . . . . . . . . . . . . . . . . . . . . . . . . . 91
Automatically retry sending a fax . . . . . . . . . . . . . . . . . . . . . . . . . . . . . . . . . . . . . . 92
Automatically cancelling a fax . . . . . . . . . . . . . . . . . . . . . . . . . . . . . . . . . . . . . . . . . 93
7 Using Multimedia . . . . . . . . . . . . . . . . . . . . . . . . . . . . . . . . . . . . . . . . . . . . . . . 95
Adjusting the volume . . . . . . . . . . . . . . . . . . . . . . . . . . . . . . . . . . . . . . . . . . . . . . . . 96
Recording and playing audio . . . . . . . . . . . . . . . . . . . . . . . . . . . . . . . . . . . . . . . . . . 99
Playing audio and video files with the Windows Media Player . . . . . . . . . . . . . . . 101
Using S/PDIF digital audio . . . . . . . . . . . . . . . . . . . . . . . . . . . . . . . . . . . . . . . . . . 102
Changing modules . . . . . . . . . . . . . . . . . . . . . . . . . . . . . . . . . . . . . . . . . . . . . . . . . 104
Using the disc drive . . . . . . . . . . . . . . . . . . . . . . . . . . . . . . . . . . . . . . . . . . . . . . . . 108
Identifying drive types . . . . . . . . . . . . . . . . . . . . . . . . . . . . . . . . . . . . . . . . . . . 108
Inserting a CD or DVD . . . . . . . . . . . . . . . . . . . . . . . . . . . . . . . . . . . . . . . . . . 110
Listening to CDs . . . . . . . . . . . . . . . . . . . . . . . . . . . . . . . . . . . . . . . . . . . . . . . . . . 112
Using MUSICMATCH . . . . . . . . . . . . . . . . . . . . . . . . . . . . . . . . . . . . . . . . . . . . . . 114
Playing CDs . . . . . . . . . . . . . . . . . . . . . . . . . . . . . . . . . . . . . . . . . . . . . . . . . . 114
Creating MP3 music files . . . . . . . . . . . . . . . . . . . . . . . . . . . . . . . . . . . . . . . . 116
Editing track information . . . . . . . . . . . . . . . . . . . . . . . . . . . . . . . . . . . . . . . . . 118
Building a music library . . . . . . . . . . . . . . . . . . . . . . . . . . . . . . . . . . . . . . . . . . 119
Changing the music library display settings . . . . . . . . . . . . . . . . . . . . . . . . . . 120
Listening to Internet radio . . . . . . . . . . . . . . . . . . . . . . . . . . . . . . . . . . . . . . . . 121
Using advanced features . . . . . . . . . . . . . . . . . . . . . . . . . . . . . . . . . . . . . . . . 121
Playing a DVD . . . . . . . . . . . . . . . . . . . . . . . . . . . . . . . . . . . . . . . . . . . . . . . . . . . . 122
Creating CDs and DVDs using Nero Express . . . . . . . . . . . . . . . . . . . . . . . . . . . 123
Creating a data CD or DVD . . . . . . . . . . . . . . . . . . . . . . . . . . . . . . . . . . . . . . 124
Copying a CD or DVD . . . . . . . . . . . . . . . . . . . . . . . . . . . . . . . . . . . . . . . . . . 128
Copying music tracks . . . . . . . . . . . . . . . . . . . . . . . . . . . . . . . . . . . . . . . . . . . 131
Creating a music CD . . . . . . . . . . . . . . . . . . . . . . . . . . . . . . . . . . . . . . . . . . . 134
iii

Advanced features . . . . . . . . . . . . . . . . . . . . . . . . . . . . . . . . . . . . . . . . . . . . . .138
Using the optional diskette drive . . . . . . . . . . . . . . . . . . . . . . . . . . . . . . . . . . . . . .139
Using the memory card reader . . . . . . . . . . . . . . . . . . . . . . . . . . . . . . . . . . . . . . . .140
Memory card types . . . . . . . . . . . . . . . . . . . . . . . . . . . . . . . . . . . . . . . . . . . . . .140
Inserting a memory card . . . . . . . . . . . . . . . . . . . . . . . . . . . . . . . . . . . . . . . . .141
Using the memory card reader externally . . . . . . . . . . . . . . . . . . . . . . . . . . . .142
Connecting a digital camera . . . . . . . . . . . . . . . . . . . . . . . . . . . . . . . . . . . . . . . . . .143
Connecting a digital video camera . . . . . . . . . . . . . . . . . . . . . . . . . . . . . . . . . . . . .144
Editing videos and creating video DVDs . . . . . . . . . . . . . . . . . . . . . . . . . . . . . . . .145
Viewing the display on a projector or monitor . . . . . . . . . . . . . . . . . . . . . . . . . . . .146
Using extended desktop . . . . . . . . . . . . . . . . . . . . . . . . . . . . . . . . . . . . . . . . . .148
Viewing the display on a television . . . . . . . . . . . . . . . . . . . . . . . . . . . . . . . . . . . .148
8 Managing Power . . . . . . . . . . . . . . . . . . . . . . . . . . . . . . . . . . . . . . . . . . . . . . . .151
Monitoring the battery charge . . . . . . . . . . . . . . . . . . . . . . . . . . . . . . . . . . . . . . . . .152
Recharging the battery . . . . . . . . . . . . . . . . . . . . . . . . . . . . . . . . . . . . . . . . . . . . . .153
Recalibrating the battery Main or secondary . . . . . . . . . . . . . . . . . . . . . . . . . . . . .154
Changing batteries . . . . . . . . . . . . . . . . . . . . . . . . . . . . . . . . . . . . . . . . . . . . . . . . .155
Replacing the main battery . . . . . . . . . . . . . . . . . . . . . . . . . . . . . . . . . . . . . . .155
Installing a secondary battery . . . . . . . . . . . . . . . . . . . . . . . . . . . . . . . . . . . . .158
Extending battery life . . . . . . . . . . . . . . . . . . . . . . . . . . . . . . . . . . . . . . . . . . . . . . .161
Conserving battery power . . . . . . . . . . . . . . . . . . . . . . . . . . . . . . . . . . . . . . . .161
Using alternate power sources . . . . . . . . . . . . . . . . . . . . . . . . . . . . . . . . . . . .161
Changing power modes . . . . . . . . . . . . . . . . . . . . . . . . . . . . . . . . . . . . . . . . . .162
Changing power settings . . . . . . . . . . . . . . . . . . . . . . . . . . . . . . . . . . . . . . . . . . . .163
Changing the power scheme . . . . . . . . . . . . . . . . . . . . . . . . . . . . . . . . . . . . . .163
Changing alarm options . . . . . . . . . . . . . . . . . . . . . . . . . . . . . . . . . . . . . . . . . .165
Changing advanced settings . . . . . . . . . . . . . . . . . . . . . . . . . . . . . . . . . . . . . .166
Activating and using Hibernate mode . . . . . . . . . . . . . . . . . . . . . . . . . . . . . . .167
9 Traveling with Your Gateway 450 . . . . . . . . . . . . . . . . . . . . . . . . . . . . . . .169
Packing your notebook . . . . . . . . . . . . . . . . . . . . . . . . . . . . . . . . . . . . . . . . . . . . . .170
Traveling by air . . . . . . . . . . . . . . . . . . . . . . . . . . . . . . . . . . . . . . . . . . . . . . . . . . . .170
Modem . . . . . . . . . . . . . . . . . . . . . . . . . . . . . . . . . . . . . . . . . . . . . . . . . . . . . . . . . .170
Radio frequency wireless connections . . . . . . . . . . . . . . . . . . . . . . . . . . . . . . . . . .171
Files . . . . . . . . . . . . . . . . . . . . . . . . . . . . . . . . . . . . . . . . . . . . . . . . . . . . . . . . . . . . .171
Security . . . . . . . . . . . . . . . . . . . . . . . . . . . . . . . . . . . . . . . . . . . . . . . . . . . . . . . . . .171
Power . . . . . . . . . . . . . . . . . . . . . . . . . . . . . . . . . . . . . . . . . . . . . . . . . . . . . . . . . . .173
Additional tips . . . . . . . . . . . . . . . . . . . . . . . . . . . . . . . . . . . . . . . . . . . . . . . . . . . . .173
10 Customizing Your Gateway 450 . . . . . . . . . . . . . . . . . . . . . . . . . . . . . . . .175
Adjusting the screen and desktop settings . . . . . . . . . . . . . . . . . . . . . . . . . . . . . .176
iv

Adjusting the color depth . . . . . . . . . . . . . . . . . . . . . . . . . . . . . . . . . . . . . . . . 176
Adjusting the screen resolution . . . . . . . . . . . . . . . . . . . . . . . . . . . . . . . . . . . 177
Changing the colors on your Windows desktop . . . . . . . . . . . . . . . . . . . . . . . 179
Changing the desktop background . . . . . . . . . . . . . . . . . . . . . . . . . . . . . . . . . 180
Selecting a screen saver . . . . . . . . . . . . . . . . . . . . . . . . . . . . . . . . . . . . . . . . 182
Customizing the touchpad and optional pointing device . . . . . . . . . . . . . . . . . . . 184
Turning the touchpad or pointing device on or off . . . . . . . . . . . . . . . . . . . . . 184
Changing the touchpad and pointing device settings . . . . . . . . . . . . . . . . . . 186
Adding and modifying user accounts . . . . . . . . . . . . . . . . . . . . . . . . . . . . . . . . . . 189
11 Networking Your Gatewa y 450 . . . . . . . . . . . . . . . . . . . . . . . . . . . . . . . . . 191
Benefits of networking . . . . . . . . . . . . . . . . . . . . . . . . . . . . . . . . . . . . . . . . . . . . . . 192
Sharing a single Internet connection . . . . . . . . . . . . . . . . . . . . . . . . . . . . . . . 192
Sharing drives . . . . . . . . . . . . . . . . . . . . . . . . . . . . . . . . . . . . . . . . . . . . . . . . . 192
Sharing peripheral devices . . . . . . . . . . . . . . . . . . . . . . . . . . . . . . . . . . . . . . . 193
Streaming audio and video files . . . . . . . . . . . . . . . . . . . . . . . . . . . . . . . . . . . 193
Playing multi-player games . . . . . . . . . . . . . . . . . . . . . . . . . . . . . . . . . . . . . . . 193
Selecting a network connection . . . . . . . . . . . . . . . . . . . . . . . . . . . . . . . . . . . . . . 194
Wired Ethernet network . . . . . . . . . . . . . . . . . . . . . . . . . . . . . . . . . . . . . . . . . 194
Wireless Ethernet network . . . . . . . . . . . . . . . . . . . . . . . . . . . . . . . . . . . . . . . 194
Powerline network . . . . . . . . . . . . . . . . . . . . . . . . . . . . . . . . . . . . . . . . . . . . . . 195
Using your notebook on a network . . . . . . . . . . . . . . . . . . . . . . . . . . . . . . . . . . . . 195
Installing and configu ring your notebook fo r Ethernet networking . . . . . . . . . 195
Turning your wireless Ethernet emitter on or off . . . . . . . . . . . . . . . . . . . . . . 196
For more information . . . . . . . . . . . . . . . . . . . . . . . . . . . . . . . . . . . . . . . . . . . 196
12 Moving From Your Old Computer . . . . . . . . . . . . . . . . . . . . . . . . . . . . . . 197
Using the Files and Settings Transfer Wizard . . . . . . . . . . . . . . . . . . . . . . . . . . . 198
Transferring files . . . . . . . . . . . . . . . . . . . . . . . . . . . . . . . . . . . . . . . . . . . . . . . . . . 198
Finding your files . . . . . . . . . . . . . . . . . . . . . . . . . . . . . . . . . . . . . . . . . . . . . . . 198
Transferring Internet settings . . . . . . . . . . . . . . . . . . . . . . . . . . . . . . . . . . . . . . . . 200
Setting up your ISP . . . . . . . . . . . . . . . . . . . . . . . . . . . . . . . . . . . . . . . . . . . . . 200
Transferring your e-mail and address book . . . . . . . . . . . . . . . . . . . . . . . . . . 201
Transferring your Internet shortcuts . . . . . . . . . . . . . . . . . . . . . . . . . . . . . . . . 201
Installing your old printer or scanner . . . . . . . . . . . . . . . . . . . . . . . . . . . . . . . . . . 201
Installing a USB printer or scanner . . . . . . . . . . . . . . . . . . . . . . . . . . . . . . . . 202
Installing a parallel port printer . . . . . . . . . . . . . . . . . . . . . . . . . . . . . . . . . . . . 202
Installing your old programs . . . . . . . . . . . . . . . . . . . . . . . . . . . . . . . . . . . . . . . . . 203
13 Maintaining Your Gateway 450. . . . . . . . . . . . . . . . . . . . . . . . . . . . . . . . . 205
Caring for your notebook . . . . . . . . . . . . . . . . . . . . . . . . . . . . . . . . . . . . . . . . . . . . 206
Maintenance schedule . . . . . . . . . . . . . . . . . . . . . . . . . . . . . . . . . . . . . . . . . . 207
v

Protecting your notebook from viruses . . . . . . . . . . . . . . . . . . . . . . . . . . . . . . . . . .208
Managing hard drive space . . . . . . . . . . . . . . . . . . . . . . . . . . . . . . . . . . . . . . . . . .211
Checking hard drive space . . . . . . . . . . . . . . . . . . . . . . . . . . . . . . . . . . . . . . .211
Using Disk Cleanup . . . . . . . . . . . . . . . . . . . . . . . . . . . . . . . . . . . . . . . . . . . . .212
Checking the hard drive for errors . . . . . . . . . . . . . . . . . . . . . . . . . . . . . . . . . .213
Defragmenting the hard drive . . . . . . . . . . . . . . . . . . . . . . . . . . . . . . . . . . . . .215
Backing up files . . . . . . . . . . . . . . . . . . . . . . . . . . . . . . . . . . . . . . . . . . . . . . . .217
Using the Scheduled Task Wizard . . . . . . . . . . . . . . . . . . . . . . . . . . . . . . . . .217
Cleaning your notebook . . . . . . . . . . . . . . . . . . . . . . . . . . . . . . . . . . . . . . . . . . . . .219
Cleaning the exterior . . . . . . . . . . . . . . . . . . . . . . . . . . . . . . . . . . . . . . . . . . . .219
Cleaning the keyboard . . . . . . . . . . . . . . . . . . . . . . . . . . . . . . . . . . . . . . . . . . .220
Cleaning the notebook screen . . . . . . . . . . . . . . . . . . . . . . . . . . . . . . . . . . . . .220
Cleaning the mouse . . . . . . . . . . . . . . . . . . . . . . . . . . . . . . . . . . . . . . . . . . . . .220
14 Restoring Software . . . . . . . . . . . . . . . . . . . . . . . . . . . . . . . . . . . . . . . . . . . . .223
Using the Restoration discs . . . . . . . . . . . . . . . . . . . . . . . . . . . . . . . . . . . . . . . . . .224
Reinstalling device drivers . . . . . . . . . . . . . . . . . . . . . . . . . . . . . . . . . . . . . . . .224
Updating device drivers . . . . . . . . . . . . . . . . . . . . . . . . . . . . . . . . . . . . . . . . . .226
Reinstalling programs . . . . . . . . . . . . . . . . . . . . . . . . . . . . . . . . . . . . . . . . . . . .227
Reinstalling Windows . . . . . . . . . . . . . . . . . . . . . . . . . . . . . . . . . . . . . . . . . . . .229
15 Upgrading Your Gateway 450 . . . . . . . . . . . . . . . . . . . . . . . . . . . . . . . . . . .231
Adding and removing a PC Card . . . . . . . . . . . . . . . . . . . . . . . . . . . . . . . . . . . . . .232
Preventing static electricity discharge . . . . . . . . . . . . . . . . . . . . . . . . . . . . . . . . . .234
Adding or replacing memory . . . . . . . . . . . . . . . . . . . . . . . . . . . . . . . . . . . . . . . . .235
Replacing the hard drive . . . . . . . . . . . . . . . . . . . . . . . . . . . . . . . . . . . . . . . . . . . .239
16 Using the Gateway 450 Port Replicator . . . . . . . . . . . . . . . . . . . . . . . .243
Front . . . . . . . . . . . . . . . . . . . . . . . . . . . . . . . . . . . . . . . . . . . . . . . . . . . . . . . . . . . .244
Left . . . . . . . . . . . . . . . . . . . . . . . . . . . . . . . . . . . . . . . . . . . . . . . . . . . . . . . . . . . . .245
Back . . . . . . . . . . . . . . . . . . . . . . . . . . . . . . . . . . . . . . . . . . . . . . . . . . . . . . . . . . . .246
Connecting to the port replicator . . . . . . . . . . . . . . . . . . . . . . . . . . . . . . . . . . . . . .247
Attaching to the port replicator . . . . . . . . . . . . . . . . . . . . . . . . . . . . . . . . . . . . .247
Disconnecting from the port replicator . . . . . . . . . . . . . . . . . . . . . . . . . . . . . . .249
Securing your port replicator . . . . . . . . . . . . . . . . . . . . . . . . . . . . . . . . . . . . . . . . .250
17 Troubleshooting. . . . . . . . . . . . . . . . . . . . . . . . . . . . . . . . . . . . . . . . . . . . . . . .251
Safety guidelines . . . . . . . . . . . . . . . . . . . . . . . . . . . . . . . . . . . . . . . . . . . . . . . . . .252
First steps . . . . . . . . . . . . . . . . . . . . . . . . . . . . . . . . . . . . . . . . . . . . . . . . . . . . . . . .253
Software support tools . . . . . . . . . . . . . . . . . . . . . . . . . . . . . . . . . . . . . . . . . . . . . .253
Troubleshooting . . . . . . . . . . . . . . . . . . . . . . . . . . . . . . . . . . . . . . . . . . . . . . . . . . .254
Audio . . . . . . . . . . . . . . . . . . . . . . . . . . . . . . . . . . . . . . . . . . . . . . . . . . . . . . . .254
vi

Battery . . . . . . . . . . . . . . . . . . . . . . . . . . . . . . . . . . . . . . . . . . . . . . . . . . . . . . . 254
CDs, DVDs, or disc drives . . . . . . . . . . . . . . . . . . . . . . . . . . . . . . . . . . . . . . . 254
Device installation . . . . . . . . . . . . . . . . . . . . . . . . . . . . . . . . . . . . . . . . . . . . . . 257
Diskette drive . . . . . . . . . . . . . . . . . . . . . . . . . . . . . . . . . . . . . . . . . . . . . . . . . 258
Display . . . . . . . . . . . . . . . . . . . . . . . . . . . . . . . . . . . . . . . . . . . . . . . . . . . . . . . 259
File management . . . . . . . . . . . . . . . . . . . . . . . . . . . . . . . . . . . . . . . . . . . . . . 260
Hard drive . . . . . . . . . . . . . . . . . . . . . . . . . . . . . . . . . . . . . . . . . . . . . . . . . . . . 260
Internet . . . . . . . . . . . . . . . . . . . . . . . . . . . . . . . . . . . . . . . . . . . . . . . . . . . . . . 261
Keyboard . . . . . . . . . . . . . . . . . . . . . . . . . . . . . . . . . . . . . . . . . . . . . . . . . . . . . 263
Memory . . . . . . . . . . . . . . . . . . . . . . . . . . . . . . . . . . . . . . . . . . . . . . . . . . . . . . 263
Memory card reader . . . . . . . . . . . . . . . . . . . . . . . . . . . . . . . . . . . . . . . . . . . . 264
Modem (dial-up) . . . . . . . . . . . . . . . . . . . . . . . . . . . . . . . . . . . . . . . . . . . . . . . 264
Mouse . . . . . . . . . . . . . . . . . . . . . . . . . . . . . . . . . . . . . . . . . . . . . . . . . . . . . . . 268
Networks . . . . . . . . . . . . . . . . . . . . . . . . . . . . . . . . . . . . . . . . . . . . . . . . . . . . . 269
Operating system . . . . . . . . . . . . . . . . . . . . . . . . . . . . . . . . . . . . . . . . . . . . . . 269
Passwords . . . . . . . . . . . . . . . . . . . . . . . . . . . . . . . . . . . . . . . . . . . . . . . . . . . . 270
PC Cards . . . . . . . . . . . . . . . . . . . . . . . . . . . . . . . . . . . . . . . . . . . . . . . . . . . . . 270
Ports/Interface . . . . . . . . . . . . . . . . . . . . . . . . . . . . . . . . . . . . . . . . . . . . . . . . . 270
Power . . . . . . . . . . . . . . . . . . . . . . . . . . . . . . . . . . . . . . . . . . . . . . . . . . . . . . . 271
Printer . . . . . . . . . . . . . . . . . . . . . . . . . . . . . . . . . . . . . . . . . . . . . . . . . . . . . . . 272
Sound . . . . . . . . . . . . . . . . . . . . . . . . . . . . . . . . . . . . . . . . . . . . . . . . . . . . . . . 274
Touchpad or pointing device . . . . . . . . . . . . . . . . . . . . . . . . . . . . . . . . . . . . . 274
Video . . . . . . . . . . . . . . . . . . . . . . . . . . . . . . . . . . . . . . . . . . . . . . . . . . . . . . . . 275
Telephone support . . . . . . . . . . . . . . . . . . . . . . . . . . . . . . . . . . . . . . . . . . . . . . . . . 276
Before calling Gateway Technical Support . . . . . . . . . . . . . . . . . . . . . . . . . . 276
Telephone numbers . . . . . . . . . . . . . . . . . . . . . . . . . . . . . . . . . . . . . . . . . . . . 277
Tutoring and training . . . . . . . . . . . . . . . . . . . . . . . . . . . . . . . . . . . . . . . . . . . . . . . 278
Self-help . . . . . . . . . . . . . . . . . . . . . . . . . . . . . . . . . . . . . . . . . . . . . . . . . . . . . 278
Tutoring . . . . . . . . . . . . . . . . . . . . . . . . . . . . . . . . . . . . . . . . . . . . . . . . . . . . . . 278
Training . . . . . . . . . . . . . . . . . . . . . . . . . . . . . . . . . . . . . . . . . . . . . . . . . . . . . . 279
A Safety, Regulatory, and Legal Information . . . . . . . . . . . . . . . . . . . . . 281
Index. . . . . . . . . . . . . . . . . . . . . . . . . . . . . . . . . . . . . . . . . . . . . . . . . . . . . . . . . . . . . . 295
vii

viii

Checking Out
Your
Gateway 450
This chapter introduces you to the basic features of your
notebook. Read this chapter to learn:
■ How to identify the features of your Gateway
notebook
■ How to locate your notebook’s model and serial
number
■ How to locate the Microsoft Certificate of Authenticity
■ How to locate the specifications for your notebook
■ What accessories are ava ilable for your notebook
Important This information in this user guide applies
to both the Gateway450ROG and
Gateway 450RGH.
1
1
Chapter 1: Checking Out Yo ur Gateway 450
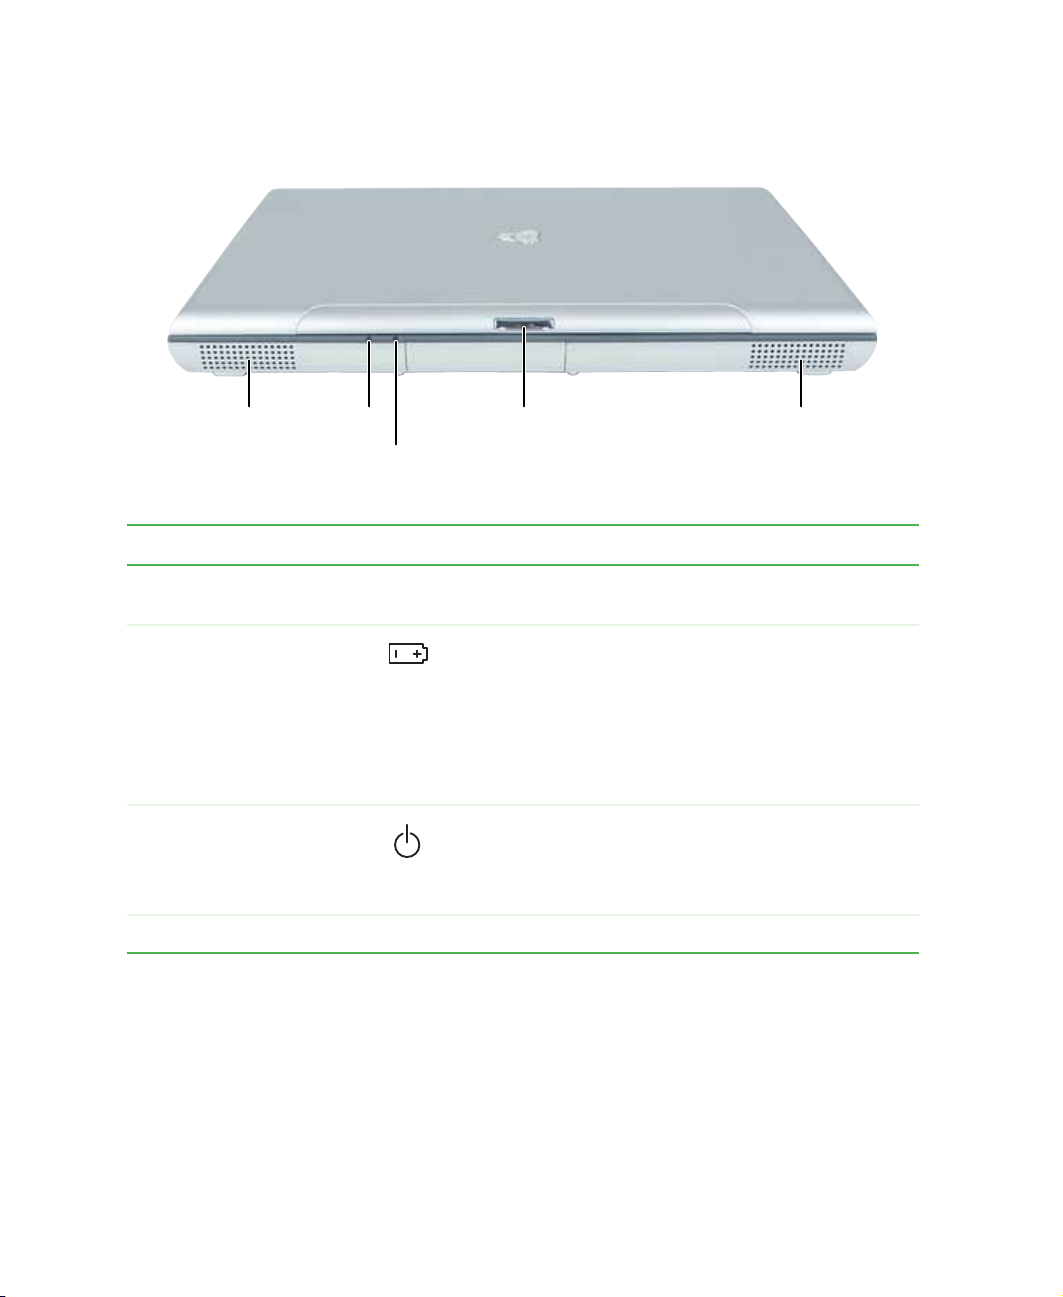
Front
Speaker Speaker
Battery
charge
indicator
Power
LCD panel
release latch
indicator
Component Icon Description
Speakers Provide audio output when headphones or amplified
speakers are not plugged in.
Battery charge indicator The LED shows the battery activity and status.
■
LED green - battery is fully charged.
■
LED orange - battery is charging.
■
LED blinking red - battery charge is very low.
■
LED solid red - battery is malfunctioning.
This LED only lights w he n the note boo k is connected to
AC power or the battery is very low.
Power indi cator The LED sho ws your note book’s powe r status.
■
LED on - notebook is on.
■
LED blinking - notebook is in Standby mode.
■
LED off - notebook is off.
LCD panel release latch Open the LCD panel by pressing the release latch.
2
www.gateway.com
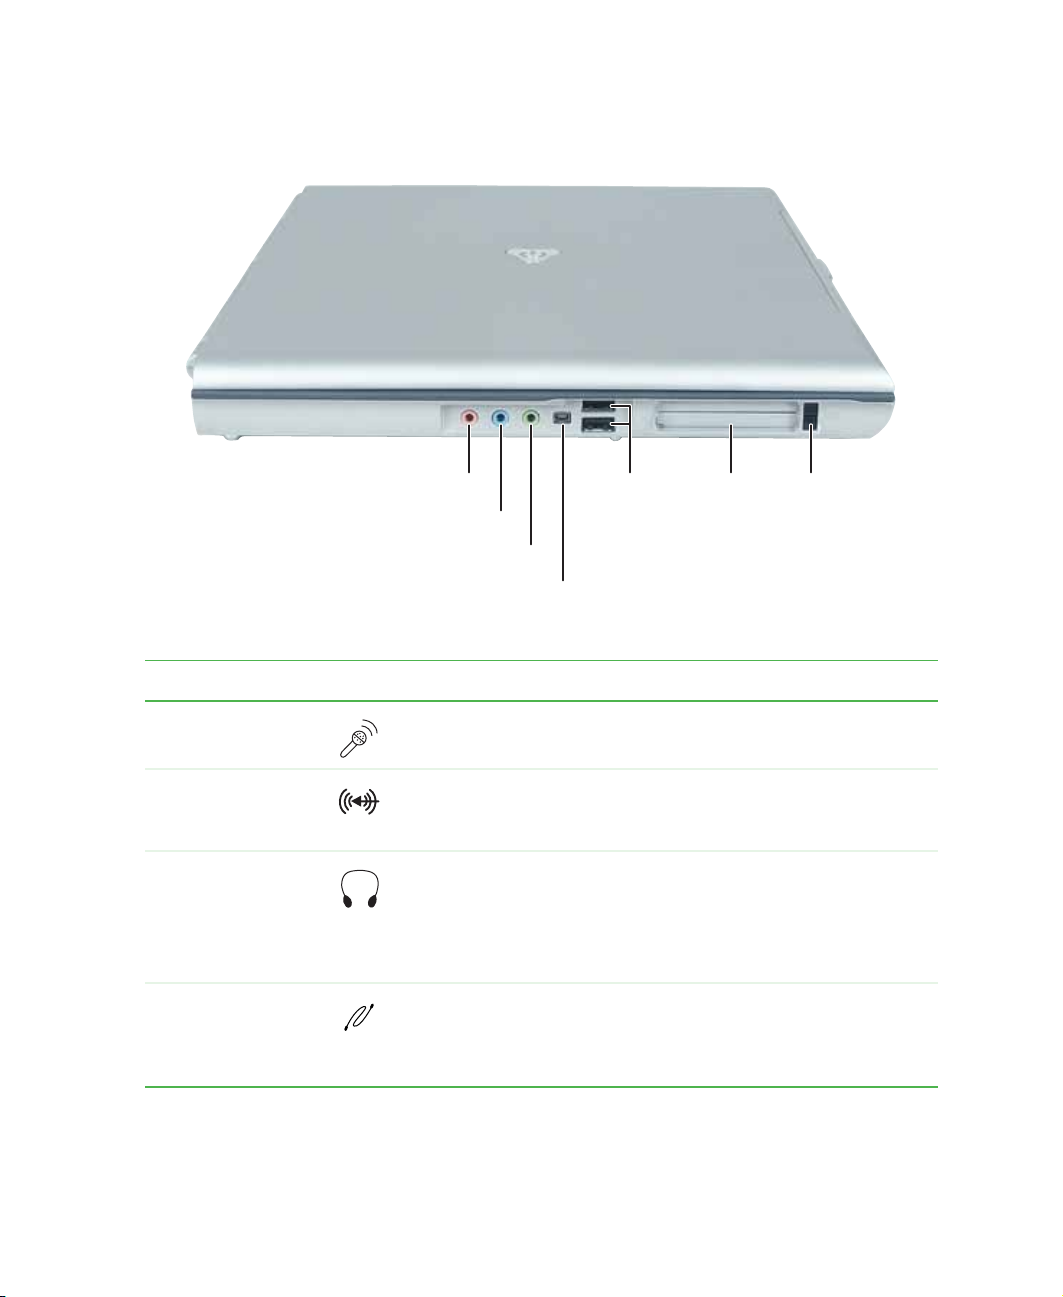
Left side
Left side
Microphone jack
Line in jack
Headphone jack
IEEE 1394 port
USB ports
PC Card
slots
PC Card
eject
buttons
Component Icon Description
Microphone jack Plug a microphone into this jack.
Line in jack Plug an external audio inpu t source (such as a stereo) to this ja ck
so you can record sound on your notebo ok or play sound thro ugh
the notebook speakers.
Headphone jack Plug amplified speake rs or headphon es into this jack. Th e built-in
speakers are turned off when speakers or headphones are
plugged into this jack.
The headphone jack on the optional port replicator is turned off
when headphones are plugged into this jack.
®
IEEE 1394 port Plug an IEEE 1394 (also known as Firewire
(such as a digital camcorder) into this 4-pin IEEE1394 port. For
more information, see “Connecting a digital video camera” on
page 144.
or i.Link®) device
www.gateway.com
3

Chapter 1: Checking Out Yo ur Gateway 450
Component Icon Description
USB ports Plug USB (Universal Serial Bus) devices (such as a flash drive,
Iomega™ Zip ™ drive, pri nter, scanner, camera, ke yboard, or
mouse) into these ports.
PC Card slots Insert one or two T ypeII or one Type III PC Card into these slots.
For more information, see “Adding and removing a PC Card” on
page 232.
PC Card eject
buttons
Press one of the eject buttons to remove a PC Card from a
PC Card slot. For more information, see “Adding and removing
a PC Card” on page 232.
4
www.gateway.com
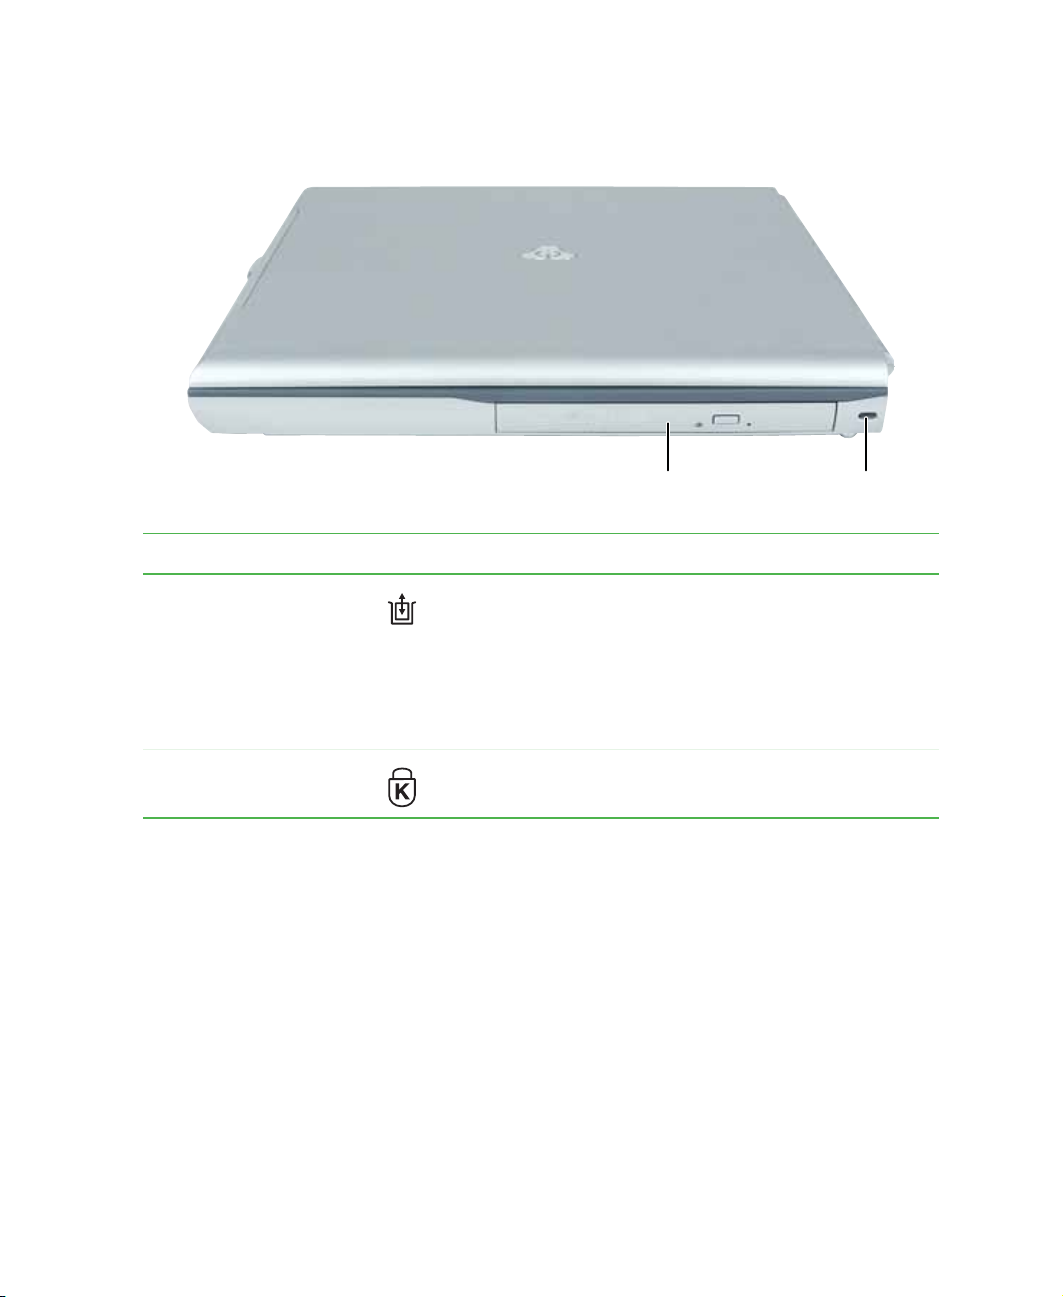
Right side
Modular bay Kensington lock slot
Component Icon Description
Modular bay Use this bay for a secondary battery , a memory ca rd reader ,
a CD drive, DVD drive, DVD/CD-RW drive, recordable DVD
drive, a diskette drive, or a second hard drive. For more
information, see “Changing modules” on page 104.
To determine the typ e of driv e in the mod ula r bay, ex am ine
the drive tray’s plas tic co ver and co mp are the log o to those
listed in “Identifying drive types” on page108.
Right side
Kensington™ lockslot Secure your notebook to an object by connecting a
Kensington cable lock to this slot.
www.gateway.com
5
Chapter 1: Checking Out Yo ur Gateway 450
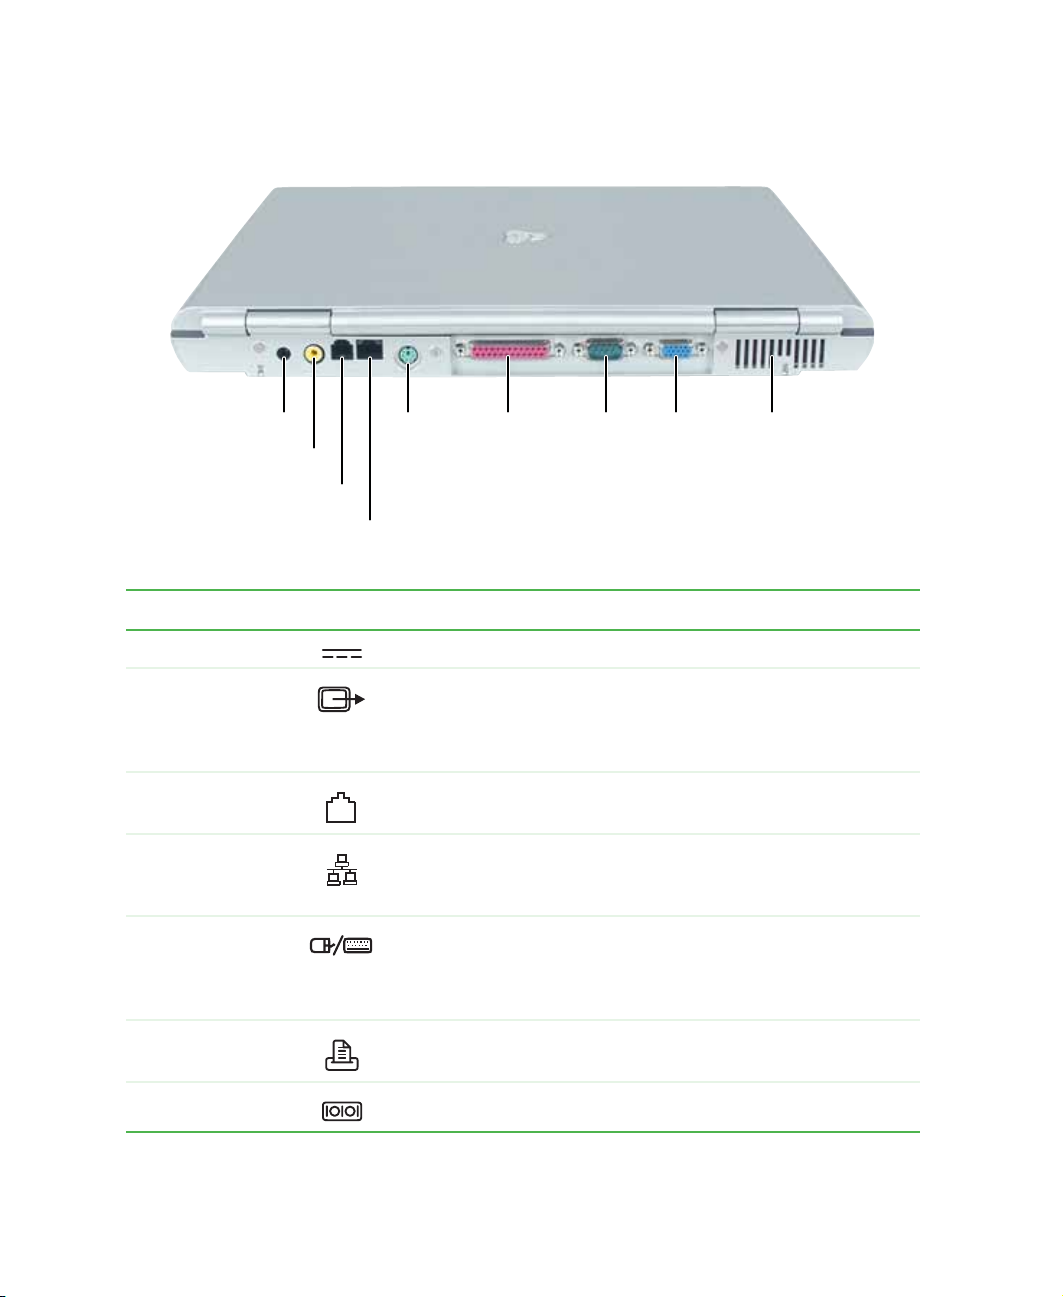
Back
Power connector PS/2
TV out jack
Modem jack
Ethernet j ack
port
Parallel
port
Serial
port
Monitor
port
Ventilation
fan
Component Icon Description
Power connector Plug the AC adapter cable into this connector.
TV out ja ck Plug a tele vision int o this jack so you can vie w your disp lay on
a television using NTSC/PAL composite video. For more
information, see “Viewing the display on a television” on
page 148.
Modem jack Plug a modem c able into t his jack. For more inf ormation, see
“Connecting the modem” on page 38.
Ethernet jack Plug a 10/100/1000 Ethernet network cable into this jack. For
more information, see “Connecting to a wired Ethernet network”
on page 39 and “Networking Your Gateway 450” on page 191.
®
PS/2 p ort Plug a Pe rs onal Syst em/ 2
or mouse) into this port. Attaching a PS/2 mouse or keyboard to
your notebook may deactivate the touchpad, pointing device, or
built-in keyboard.
(PS/2) device ( such as a ke yboard
Parallel port Plug a parallel device (such as a printer) into this port.
Serial port Plug a serial device (such as a digital camera) into this port.
6
www.gateway.com
Component Icon Description
Monitor port Plug an analog VGA monitor or projector into thi s p ort. For more
information, see “Viewing the display on a projector or monitor”
on page 146.
Ventilation fan Helps cool internal components. Do not block or insert objects
into these slots.
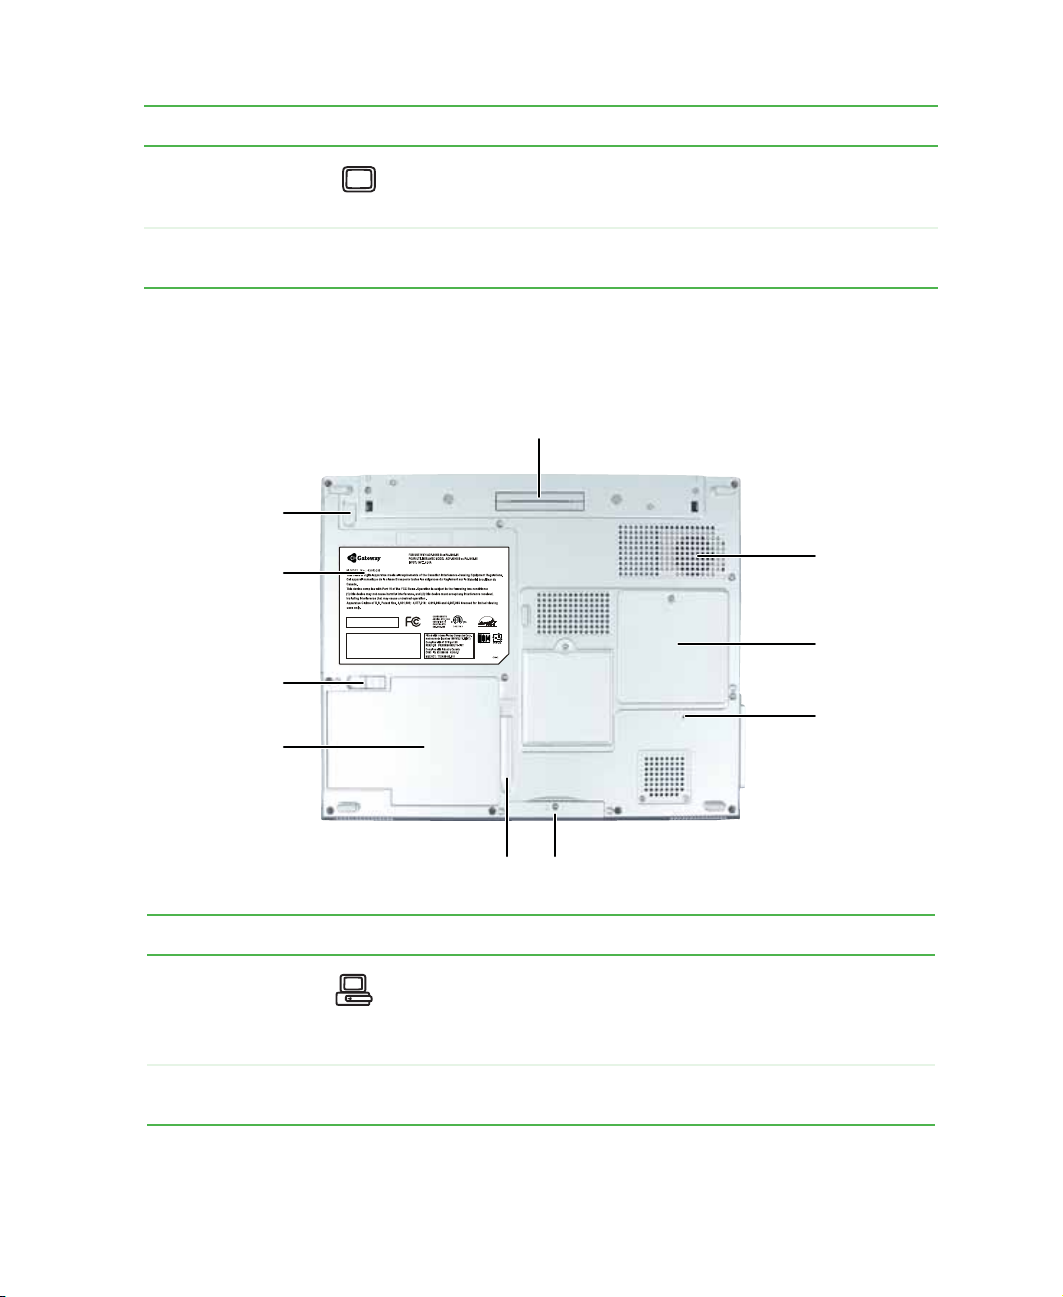
Bottom
Docking port
Locking
modular bay
latch
System
label
Ventilation
fan
Bottom
Memory
bay
Reset
hole
Modular bay
eject latch
Battery
bay
Battery release latch
Hard drive bay
Component Icon Description
Docking port Connect the port replicator to this port.
Warning! Power is passed through this port. This docking
connection is certified to UL 1950 for use only with port replicators
designed for your Gateway notebook.
Ventilation fan Helps cool internal components. Do not block or insert objects
into these slots.
www.gateway.com
7
Chapter 1: Checking Out Yo ur Gateway 450
Component Icon Description
Memory bay Install as many as two memory modules into this bay. For more
information, see “Adding or replacing memory” on page 235.
Reset hole Insert a straightened paper clip into this hole to manually restart
the notebook.
Hard drive bay The main hard drive is located in this bay. For more information,
see “Replacing the hard drive” on page 239.
Battery release
latch
Battery bay Insert the main battery into this bay. For more information, see
Modular bay eject
latch
System label Includes the product model number. For more information, see
Locking mo dular
bay latch
Slide to rel ease the battery.
“Changing batteries” on page 155.
Slide and hold the locking modular bay latch to the unlock
position, then slide this latch to release the bay module.
“Identifying your model” on page 11.
Slide and hold this latch to the unlock position, then slide the
modular bay eject latch to release the bay module.
8
www.gateway.com
Keyboard area
For information on using your keyboard, see “Using the keyboard” on page 26.
Status
indicators
Power
button
Keyboard
Optional
EZ Point
pointing
device
Keyboard area
Multi-function
buttons
Optional
EZ Point
pointing
device
buttons
Optional fingerprint reader
EZ Pad touchpad
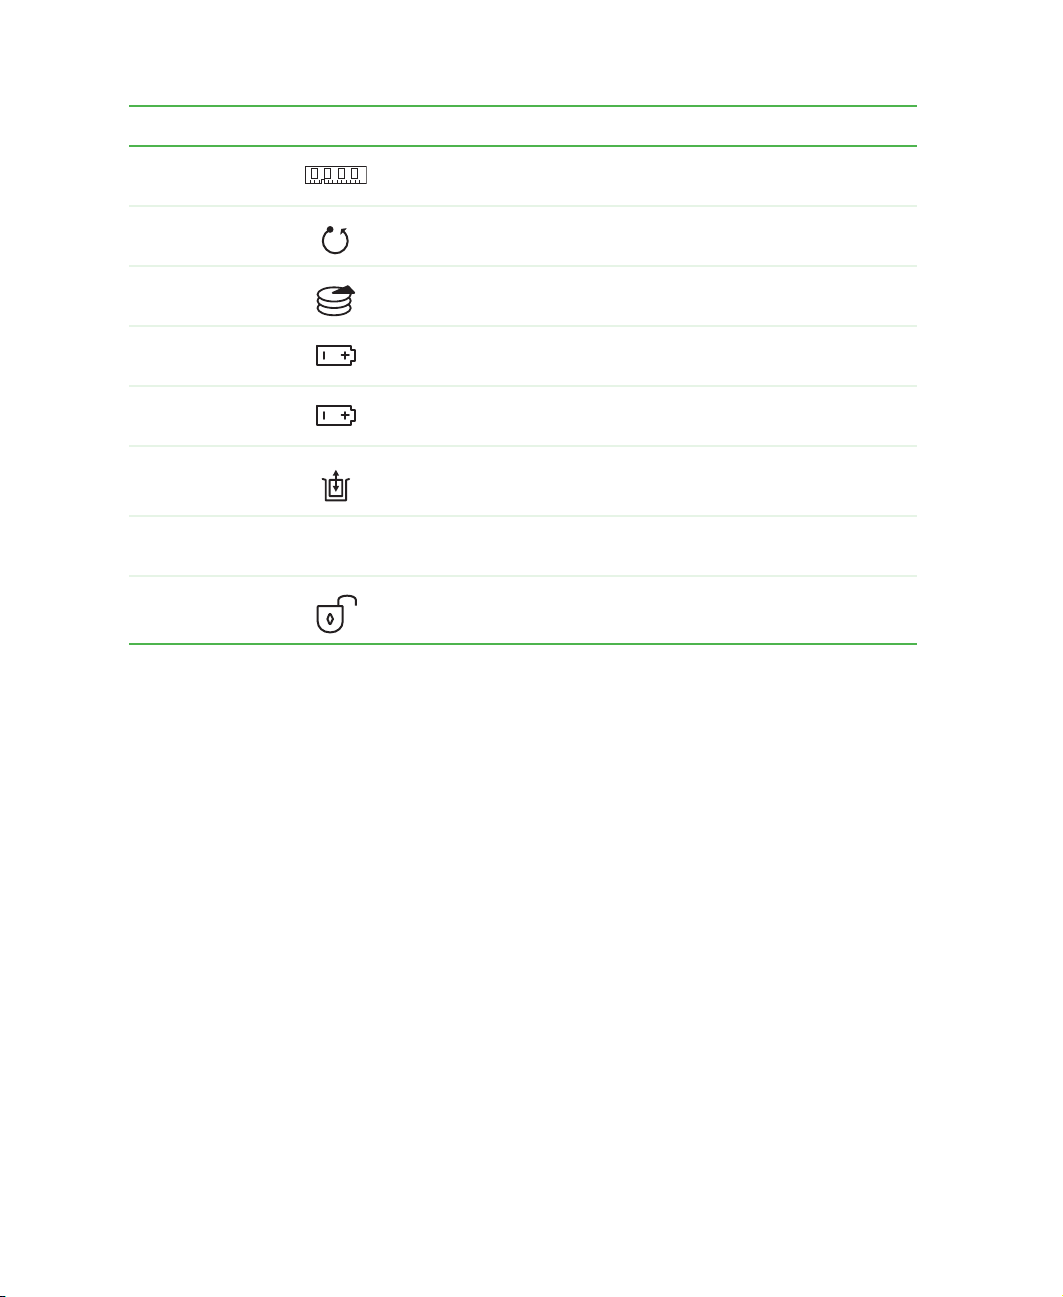
Component Description
Status indicators Inform you when a drive is in use or when a button has been pressed
that affects how th e keyboard is used. For more information , see “Status
indicators” on page25.
Power button Press to turn the power on or off. You can also configure the power
button for Standby /Res um e mo de. Fo r m ore i nform at ion o n configuring
the power button mode, see “Changing power settings” on page163.
Keyboard Provides all the features of a full-sized 86-key keyboard. For more
information, see “Using the keyboard” on page26.
TM
EZ Point
device (optional)
pointing
Provides all the functionality of a mouse. For more information, see
“Using the optional EZPoint pointing device” on page 34.
www.gateway.com
9

Chapter 1: Checking Out Yo ur Gateway 450
Component Description
Fingerprint reader
(optional)
EZ Pad
EZ Point
device buttons
(optional)
Multi-function buttons Press these buttons to o pen programs ass igned to them. These buttons
TM
Touchpad Provides all the functionality of a mouse. For more information, see
TM
pointing
Provides enhanced security. For more information, see “Using the
optional fingerprint reader” on page36.
“Using the EZ Pad touchpad” on page 31.
Provides all the functionality of mouse buttons. For more information,
see “Using the opti onal EZ P oint poi nting dev ice” on pag e 34.
are set to open your def aul t e-m ai l p rogra m, you r de fau lt Web browser,
online help, and the My Computer window. For more information, see
“Multi-function buttons” on page 30.
10
www.gateway.com
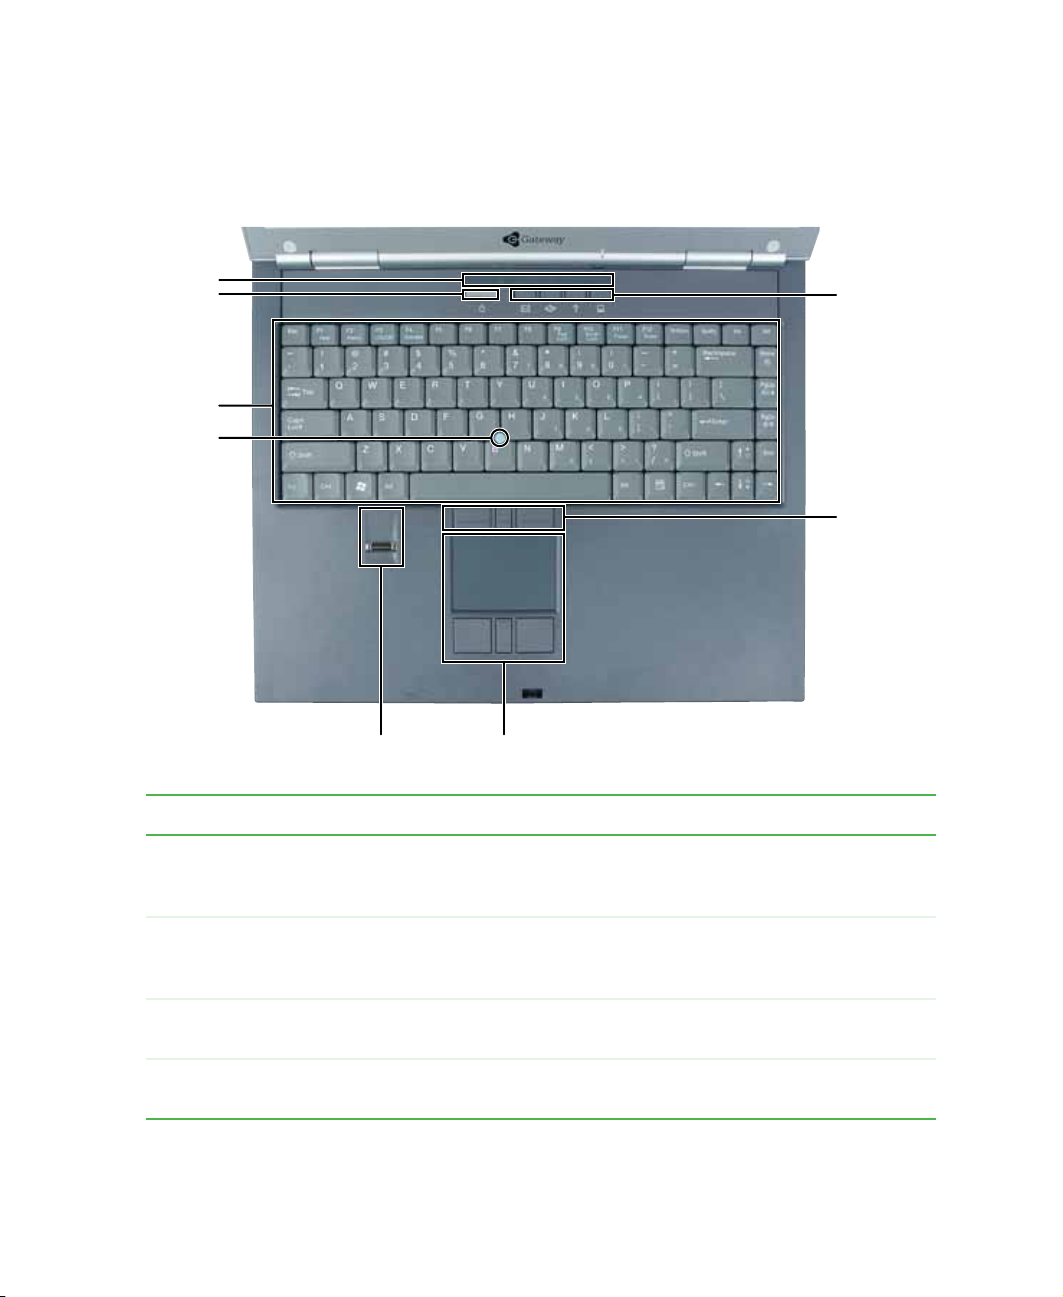
Identifying your mo del
Identifying your model
Important The labels shown in this section are for informational
purposes only . Label information varie s by model, featur es
ordered, and location.
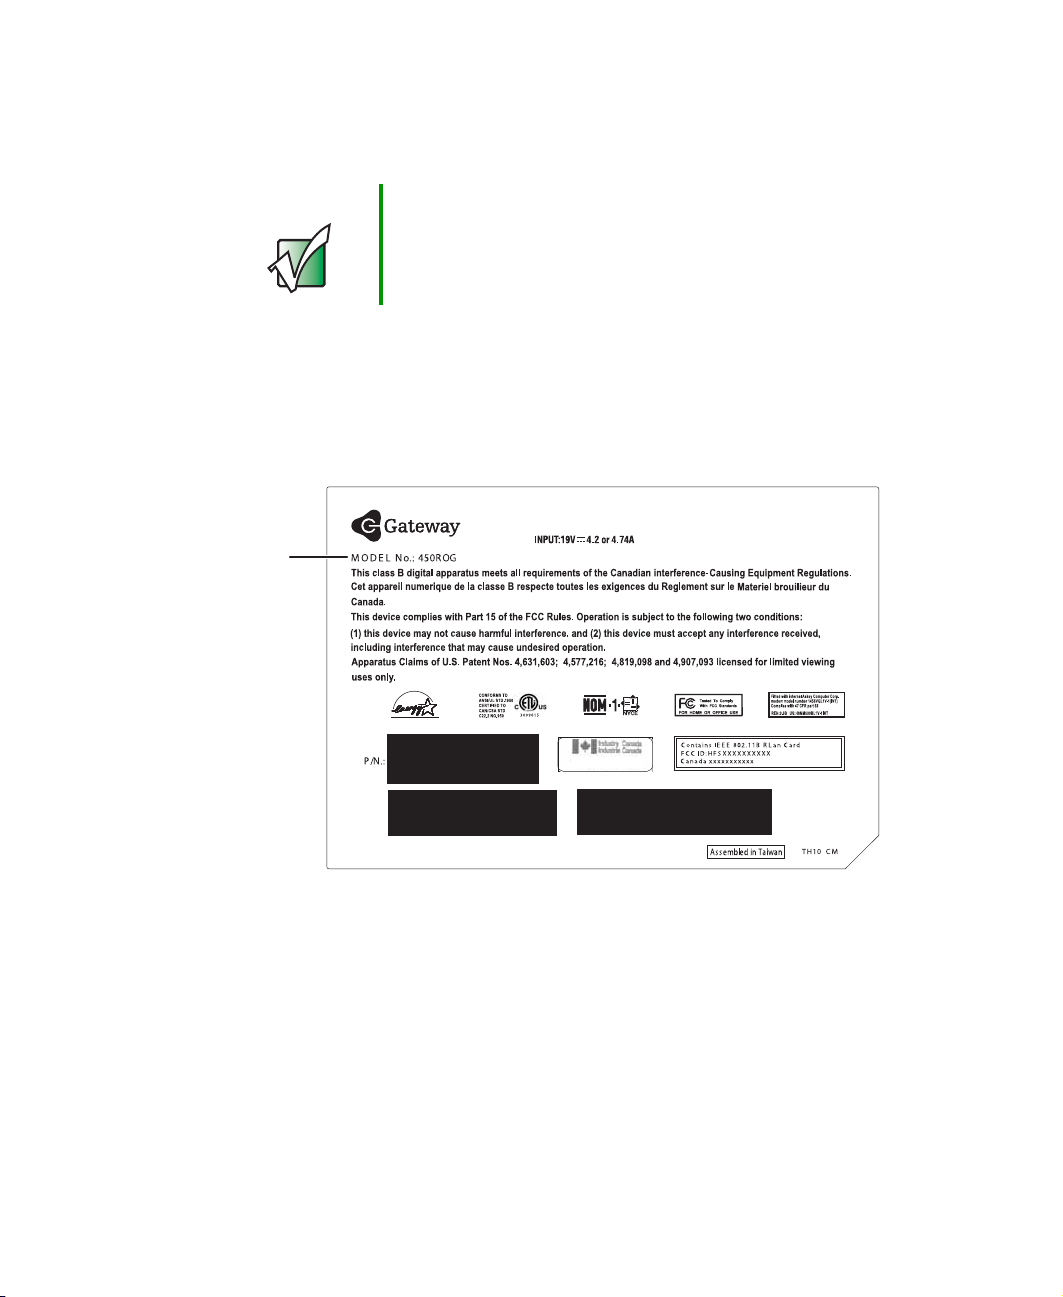
Gateway model number
The label on the bottom of your notebook conta ins informa tion that identifies
your notebook model and its features. Gateway T echnical Support will need this
information if you call for assistance.
Gateway
model
number
Gateway serial number
You can locate the Gateway serial n umber:
■ Printed on a white sticker on the bottom or back of your notebook.
■ Printed on the customer invoice that came with your notebook. The
invoice also contains your customer ID number.
www.gateway.com
11
Chapter 1: Checking Out Yo ur Gateway 450
Internal wireless label
A label similar to the following indicates if your notebook contains a wireless
communications device. The label is located on the bottom of your notebook.
IEEE 802.11b RLAN Approvals:
FCC ID HFS9550015318
CANADA ID 1787104509A
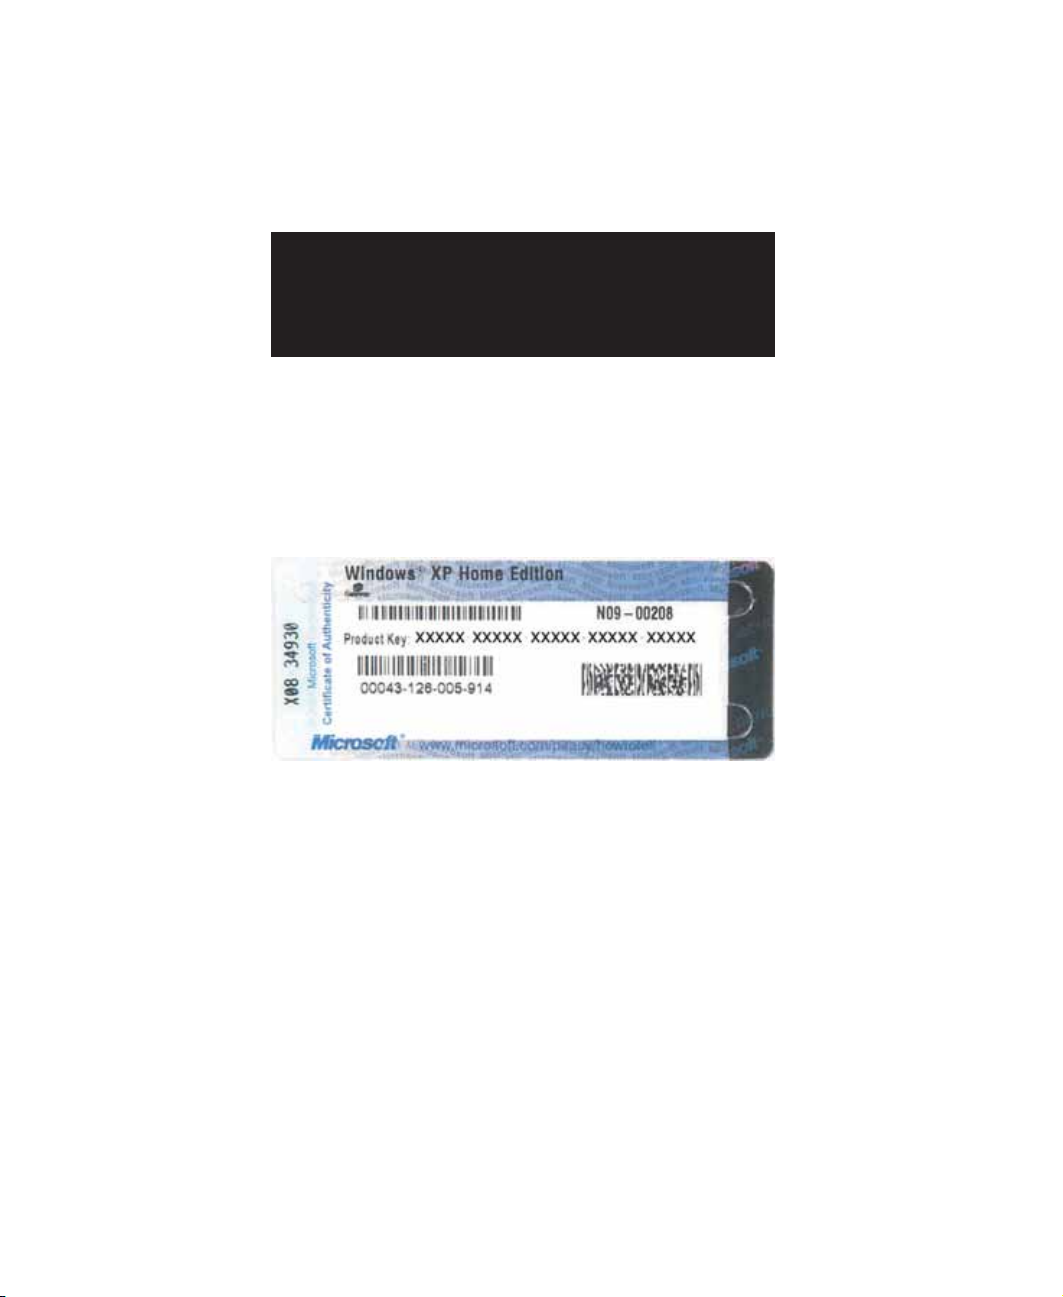
Microsoft Certificate of Authenticity
The Microsoft Certificate of Authenticity label found on the bottom of your
notebook includes the product key code for your operating system.
12
www.gateway.com
Finding your sp ecifications
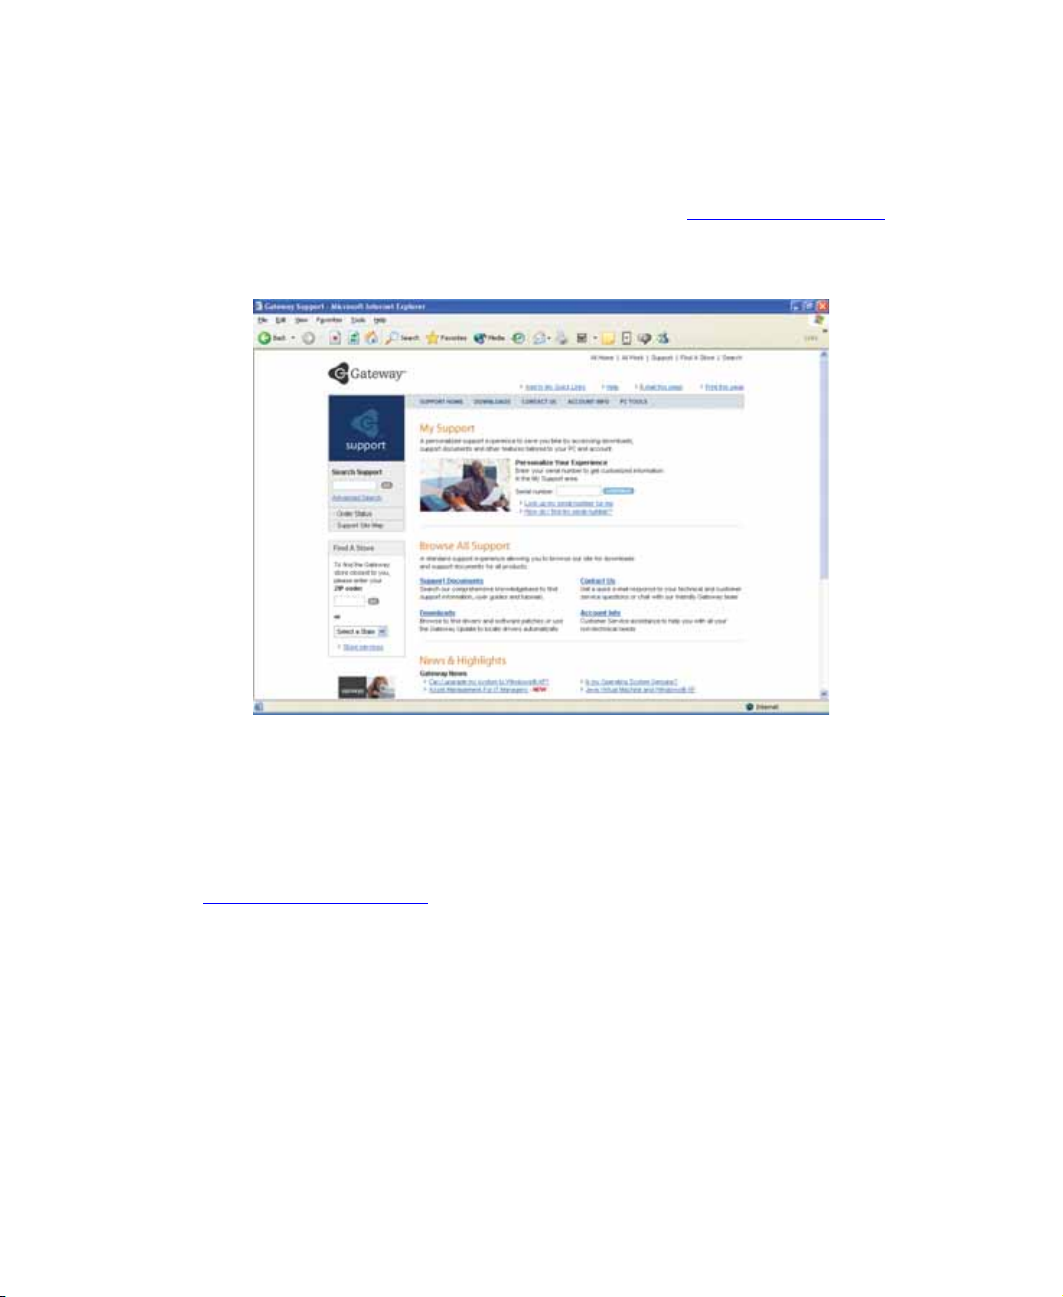
Finding your specifications
For more information about your notebook, such a s memory size, memory type,
and hard drive size, visit Gateway’s eSupport page at support.gateway.com
eSupport page also has links to additional Gateway documentation and detailed
specifications. For more information, see “Using eSupport” on page 48.
. The
Accessories
Gateway offers accessories that can help you make the most of using your
notebook. To order accessories, visit the Accessory Store at
accessories.gateway.com
Batteries and automobile/airplane power adapte rs
If you run your notebook on battery power for extended periods, you may want
to buy an additional battery so you can swap batteries when necessary. See
“Changing batteries” on page 155 for more information about using an
additional main battery and a secondary battery in your notebook.
With an automobile/airplane power adapter, you can save battery power by
plugging your notebook into an automobile cigarette lighter or an airplane
in-flight power receptacle.
.
www.gateway.com
13

Chapter 1: Checking Out Yo ur Gateway 450
Carrying cases
Gateway has large-capacity carrying cases if you need additional space for
accessories or supplies.
Memory
Large programs, such as multimedia games or graphics programs, use a lot of
memory . If your programs a re running more slo wly than you think they sho uld,
try adding more memory. See “Adding or replacing memory” on page 235 for
more information.
Peripheral devices
Y ou c an attach devices ( such as a keyboard, mous e, printer , or monitor) to your
notebook or port replicator.
Port replicators
Although you can attach devices directly to yo ur notebook, a port replicat or
lets you make all of those conn ections at o ne t ime. Wh en yo u trav el with you r
notebook, you merely disconnect from the port rep licator instead of
unplugging all the devices.
A port replicator also provides addition al ports and other expansion features
not included with your notebook. See “Using the Gateway 450 Port Replicator”
on page 243 for more information about using a port replicator with your
notebook.
Printers
You can attach almost any type of printer to your notebook or port replicator.
The most common types are inkjet and laser printers, which print in color or
black and white. See “Installing a printer, scanner, or other peripheral device”
on page 4 0 for more information about attaching a printer to your notebook.
Inkjet printers and cartridges are relatively inexpensive, but they are slower than
laser printers. Using an inkjet color printer, you can print pictures, banners,
and greeting cards, as well as documents.
Laser printers and cartridges are more expensive, but they print much faster
than inkjet printers. Laser printers are better than inkjet printers when you are
printing large documents.
USB flash drives
Use a USB flash drive for storing files or transferring files to another computer.
14
www.gateway.com

Getting Started
This chapter provides basic information about your
Gateway notebook. Read this chapter to find out how to:
■ Connect the AC adapter
■ Start and turn off your notebook
■ Identify the status indicators
■ Use the keyboard
■ Use the EZ Pad touchpad
■ Use the optional EZ Point pointing device
■ Using the optional fingerprint reader
■ Connect the modem
■ Connect to an Ethernet network
■ Install peripheral devices
2
15

Chapter 2: Getting Started
Safety instructions
Certain precautions should be observed to further reduce the risk of personal
injury or damage to your notebook.
General tips
■ When setting up your notebook for work, place it on a level surface.
■ Before you clean your notebook, turn if off, unplug it f rom its power source,
disconnect from the optional port replicator, a nd remove the batteries. For
more information, see “Cleaning your notebook” on page 219.
■ Do not push objects into air vents or openings on your notebook. Doing
so can cause fire or electric shock by shorting out interior components.
■ When you disconnect a cable, pull on its connector, not on the cable itself.
As you pull out the connector, keep it evenly aligned to avoid bending
any connector pins. Also, before you connect a cable make sure that both
connectors are correctly oriented and aligned.
■ Use of mobile phones can interfere with the sound system. Your notebook
operation is not impaired but we recommend that a distance of 12 inches
(30 cm) be maintained between your notebook and the mobile phone.
16
■ When you move your notebook between environments with very different
humidity or temperature ranges, condensation may form on or within your
notebook. T o avoid damaging your notebook, allow sufficient time for the
moisture to evaporate before using your notebook.
■ When traveling, do not check your notebook as luggage. Y o u can put your
notebook through an X-ray security machine, but never put your notebook
through a metal detect or. Be sure to have a charged b attery availabl e in
case you are asked to turn on your notebook. For more information, see
“Traveling with Your Gateway 450” on page 169.
■ When traveling, do not place your notebook in overhead storage
compartments where it could slide around. For more information, see
“Traveling with Your Gateway 450” on page 169.
■ Do not drop your notebook or subject it to other physical shocks.
■ T o completely turn off all notebook power , turn your notebook off, remove
the batteries, and disconnect the AC adapter from the electrical outlet.
■ The bottom of your notebook can become warm with use.
www.gateway.com

■ Do not apply heavy pressure to your notebook or subject it to strong
impact. Excessive pressure or impact can cause damage to notebook
components or otherwise caus e malfunctions.
■ Some PC Cards can beco me hot with prolonged use. Overheating of a
PC Card can result in errors or instability in the card’s operation. Be careful
when you remove a PC Card that has been used for extended periods.
Using the batteries
■ Do not carry a battery in your pocket, purse, or other container where
metal objects (such as car keys) could short-circuit the battery terminals.
The resulting excessive current flow can cause extremely high temperatures
and may result in he at damage.
■ Protect your notebook, batteries, and hard drive from environmental
hazards such as dirt, dust, food, liquids, temperature extremes, and
overexposure to sunlight.
■ Replace only with a Gateway 450ROG or Gateway 450RGH batteries to
avoid risk of fire or explosion. For more information, see “Changing
batteries” on page 155.
Safety instructio ns
■ Dispose of used batteries according to the manufacturer’ s in structions. Do
not dispose of batteries in a fire. They may explode. For more information,
see “Changing batteries” on page 155.
Using the AC adapter
■ Place the adapter in a ven tilated area, such as a d esktop or on the floor,
when you use it to run your notebook or to charge the battery. Do not
cover the adapter with papers or other items that will reduce cooling, and
do not use the adapter while it is inside a carrying case.
■ Make sure that nothing rests on your adapter's power cable and that the
cable is not located where it can be tripped over or stepped on.
■ Use only the adapter and power cord approved for use with this notebook.
Use of another type of adapte r may create a risk of fire or explosion.
■ If you use an extension cord with your adapter, make sure that the total
ampere rating of the products plugged into the extension cord does not
exceed the ampere rating of the extension cord.
www.gateway.com
17

Chapter 2: Getting Started
Basic safety precautions
When using your notebook and peripheral devices, basic safety precautions
should always be followed to reduce the risk of fire, electric shock, and injury
to persons, including the following:
■ Do not use your notebook near water. For example, do not use it near a
bathtub or kitchen sink.
■ Avoid using the wired modem or LAN during an electrical storm. There
may be a remote risk of electric shock from lightning.
■ The cable used with the modem should be manufactured with a minimum
wire size of 26 American wire gauge (AWG) and an FCC-compliant RJ-11
modular plug.
■ To help avoid the potential hazard of electric shock, do not connect or
disconnect any cables or perform maintenance or reconfiguration of your
notebook during an electrical storm.
Warning When working with peripheral devices or replacing
memory modules, always follow installation instructions
closely. Except for replacing memory or the hard drive, do
not attempt to service y our notebook yourself. (See “Using
eSupport” on page 48 and “Telephone support” on
page 276 for service information.)
18
www.gateway.com
Connecting the AC adapter
Connecting the AC adapter
You can run your notebook using an AC adapter or your notebook’s battery.
The battery was shipped to you partially charged. You should use the
AC adapter right away to fully charge the battery. Allow 24 hours for the battery
to fully charge.
Important If the battery is not fully charged before you use your
notebook on battery power for the first time, the batt ery life
may be much shorter than you expect. If the battery life
seems short even after being charged for 24 hours, the
battery may need to be recalibrat ed. For more i nformation,
see “Recalibrating the battery Main or secondary” on
page 154.
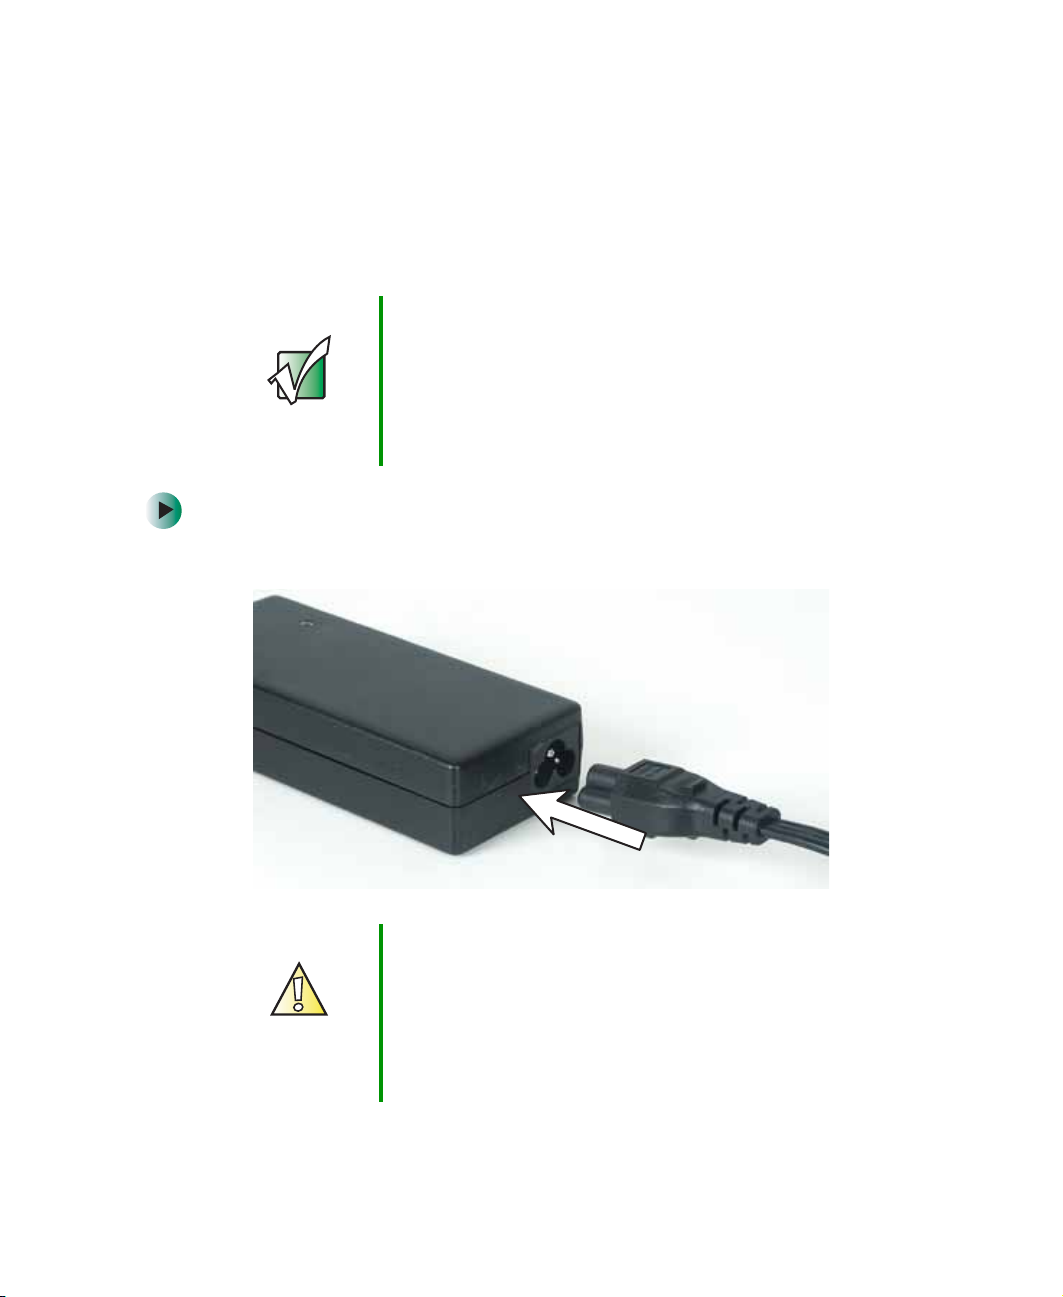
To connect the AC adapter:
1 Connect the power cord to the AC adapter.
Caution Make sure that you use the AC adapter that came with
your notebook or one of the same type purchased from
Gateway.
Replace the power cord if it becomes damaged. The
replacement cord must be of the same type and voltage
rating as the original cord or your notebook may be
damaged.
www.gateway.com
19
Chapter 2: Getting Started
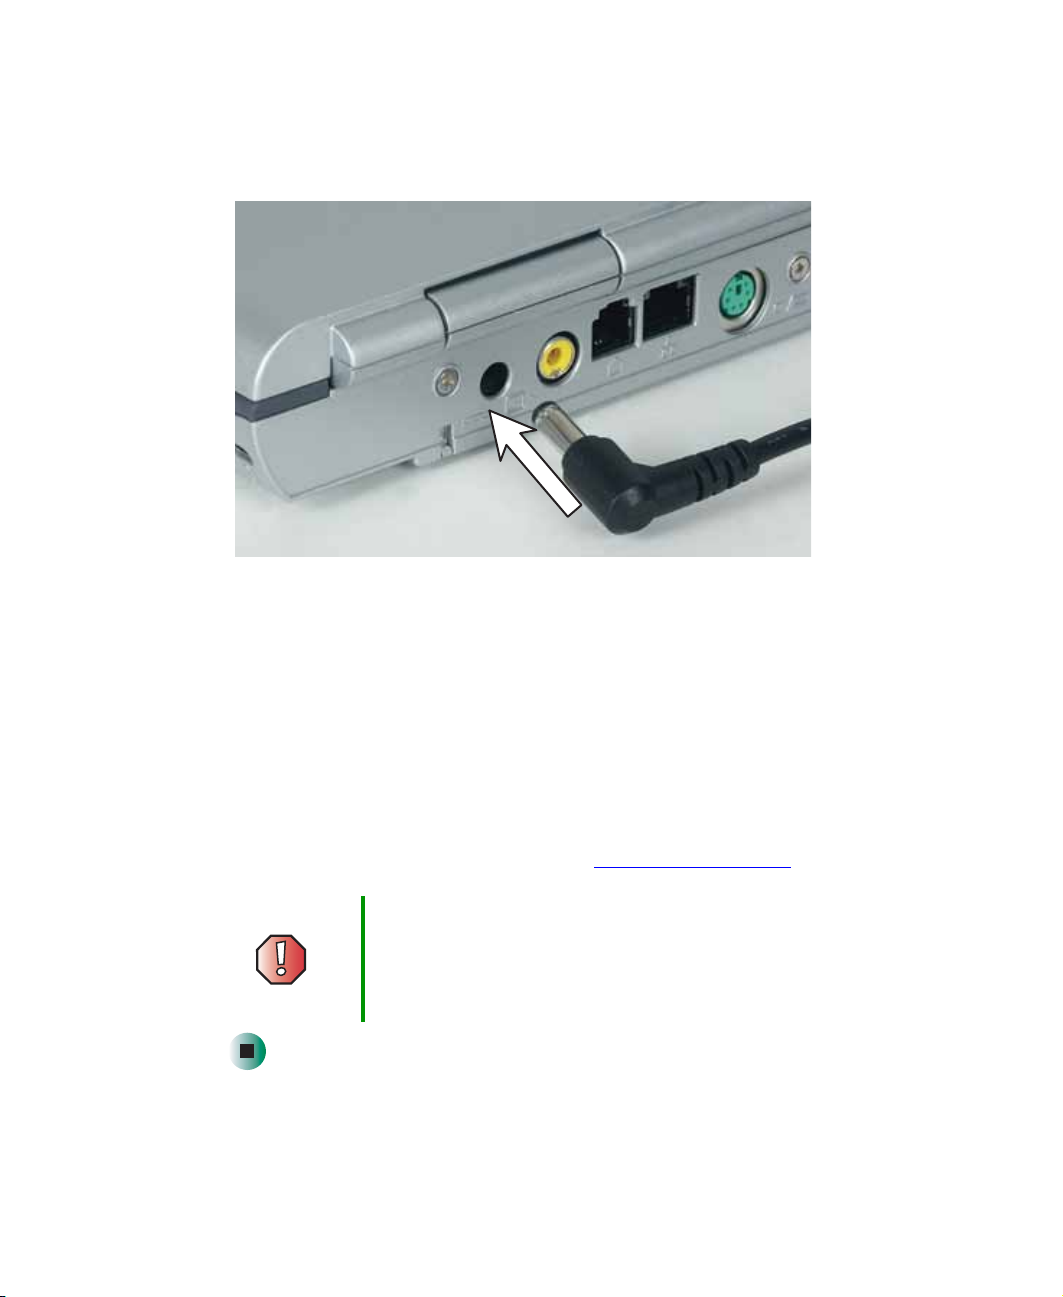
2 Connect the AC adapter to your notebook’s power connector or the
matching power connector on your optional port replicator. For more
information, see “Using the Gateway 450 Port Replicator” on page 243.
3 Plug the power cord into a wall outlet.
20
The battery charge indicator turns on (see “Front” on page 2 for the
location of the battery charge indicator). If the battery charge indicator
does not turn on, unplug the adapter from your notebook, then plug it
back in.
4 When you finish using your notebook for the first time, turn your
notebook off and leave your notebook connected to AC power fo r at least
24 hours.
5 If the battery charge meter does not show a full charge after 24 hours,
contact Gateway Technical Support at support.gateway.com
Warning Do not attempt to disassemble the AC adapter. The
AC adapter has no user-replaceable or user-serviceable
parts inside. The AC adapter has dangerous voltages that
can cause serious i njury or de ath. Con tact Gatew ay about
returning defective AC adapters.
www.gateway.com
.
 Loading...