

Garmin RV-BBT600 Owner’s Manual
RV-BBT600 SERIES
Owner’s Manual

© 2017 Garmin Ltd. or its subsidiaries
All rights reserved. Under the copyright laws, this manual may not be copied, in whole or in part, without the written consent of Garmin. Garmin reserves the right to change or improve its
products and to make changes in the content of this manual without obligation to notify any person or organization of such changes or improvements. Go to www.garmin.com for current updates
and supplemental information concerning the use of this product.
Garmin®, the Garmin logo, FUSION®, and the Fusion logo are trademarks of Garmin Ltd. or its subsidiaries, registered in the USA and other countries. FUSION-Link™, Garmin Express™, and
myTrends™ are trademarks of Garmin Ltd. or its subsidiaries. These trademarks may not be used without the express permission of Garmin.
Android™ is a trademark of Google Inc. Apple®, the Apple logo, iPod®, and Mac® are trademarks of Apple Inc., registered in the U.S. and other countries. Bluetooth® word mark and logos are
owned by the Bluetooth SIG, Inc. and any use of such marks by Garmin is under license. microSD® and the microSDHC logo are trademarks of SD-3C, LLC. Scheiber™ and Xperience™ are
trademarks of SCHEIBER S.A. SiriusXM® is a registered trademark of SiriusXM Radio Inc. Wi‑Fi® is a registered mark of Wi-Fi Alliance Corporation. Windows® is a registered trademark of
Microsoft Corporation in the United States and other countries.

Table of Contents
Getting Started............................................................... 1
RV HUB Dock Overview............................................................. 1
RV HUB Remote Overview.........................................................1
Docking the RV HUB Remote.....................................................1
Undocking the RV HUB Remote.................................................1
Home Screen.............................................................................. 1
Acquiring GPS Signals............................................................... 2
Playing Media................................................................. 2
Adjusting the Volume.................................................................. 2
Speaker Zones.......................................................................2
Setting Up Speaker Zones................................................ 2
Linking Zones.................................................................... 2
Adjusting the Subwoofer Filter............................................... 2
Bluetooth® Device Playback...................................................... 2
Pairing Your Phone or Media Player..................................... 2
Bluetooth Source Settings.................................................3
Playing Bluetooth Audio......................................................... 3
Selecting a Different Bluetooth Source.................................. 3
USB, MTP, and Apple® Device Playback.................................. 3
Playing Media from a USB Device......................................... 3
Browsing Media Files............................................................. 3
MTP File Information......................................................... 3
Repeating or Shuffling the Play Queue................................. 4
Setting the Tuner Region............................................................ 4
AM/FM Radio.............................................................................. 4
Changing the Radio Station................................................... 4
SiriusXM Satellite Radio............................................................. 4
Enabling the SiriusXM Source............................................... 4
Locating the SiriusXM Radio ID............................................. 4
Activating a SiriusXM Subscription........................................ 4
Selecting a Category..............................................................4
Selecting a SiriusXM Channel............................................... 4
Parental Controls................................................................... 4
Locking Channels..............................................................4
Unlocking the Parental Controls........................................4
Clearing All Locked Channels........................................... 5
Changing the Parental Control Passcode......................... 5
SiriusXM Troubleshooting...................................................... 5
DAB Playback............................................................................. 5
Scanning for DAB Stations.................................................... 5
Changing DAB Stations.................................................... 5
Selecting a DAB Station from a List.................................. 5
Selecting a DAB Station from a Category......................... 5
Presets........................................................................................5
Saving a Preset......................................................................6
Recalling a Preset.................................................................. 6
Removing Presets..................................................................6
Connecting and Listening to an Auxiliary Audio Source............. 6
Adjusting the Gain for the Auxiliary Device............................ 6
RV HUB Dock Settings............................................................... 6
Restoring the Dock Settings.................................................. 6
Navigation....................................................................... 6
Vehicle Profiles........................................................................... 6
Adding a Vehicle Profile......................................................... 6
Activating a Vehicle Profile.................................................... 7
Editing a Vehicle Profile......................................................... 7
Adding Propane Tanks......................................................7
Routes........................................................................................ 7
Changing the Route Calculation Mode.................................. 7
Starting a Route.......................................................................... 7
Previewing Multiple Routes....................................................7
Adding a Location to a Route................................................ 7
Starting a Route by Using the Map........................................ 7
Going Home
Editing Your Home Location............................................. 7
Your Route on the Map...............................................................7
Viewing a List of Turns...........................................................8
Viewing the Entire Route on the Map.................................... 8
Taking a Detour..................................................................... 8
Stopping a Route................................................................... 8
Finding and Saving Locations.................................................... 8
Finding a Location Using the Search Bar.............................. 8
Changing the Search Area.................................................... 8
Points of Interest.................................................................... 8
Finding a Location by Category........................................ 8
Searching Within a Category............................................ 8
Finding RV Parks.............................................................. 9
Finding RV Services..........................................................9
Search Tools.......................................................................... 9
Finding an Address........................................................... 9
Finding an Intersection...................................................... 9
Finding a City.................................................................... 9
Finding a Location Using Coordinates.............................. 9
Viewing Recently Found Locations........................................ 9
Clearing the List of Recently Found Locations................. 9
Viewing Current Location Information.................................... 9
Finding Emergency Services and Fuel............................. 9
Getting Directions to Your Current Location..................... 9
Adding a Shortcut.................................................................. 9
Removing a Shortcut.........................................................9
Saving Locations....................................................................9
Saving a Location..............................................................9
Saving Your Current Location........................................... 9
Editing a Saved Location.................................................. 9
Assigning Categories to a Saved Location..................... 10
Deleting a Saved Location.............................................. 10
Using the Map...........................................................................10
Map Tools............................................................................ 10
Viewing a Map Tool.........................................................10
Customizing the Map Tools.............................................10
Up Ahead............................................................................. 10
Finding Upcoming Points of Interest............................... 10
Customizing the Up Ahead Categories........................... 10
Viewing Upcoming Elevation Changes................................ 10
Warning and Alert Symbols................................................. 11
Road Condition Warnings............................................... 11
Trip Information.................................................................... 11
Viewing Customized Trip Information on the Map.......... 11
Viewing the Trip Information Page.................................. 11
Viewing the Trip Log....................................................... 11
Viewing Upcoming Traffic.................................................... 11
Viewing Traffic on the Map..............................................11
Searching for Traffic Incidents........................................ 11
Customizing the Map........................................................... 11
Customizing the Map Layers...........................................11
Changing the Map Data Field......................................... 11
Changing the Map Perspective....................................... 11
Avoiding Delays, Tolls, and Areas............................................ 11
Avoiding Traffic Delays on Your Route................................ 11
Avoiding Road Features...................................................... 12
Custom Avoidances............................................................. 12
Avoiding a Road.............................................................. 12
Avoiding an Area............................................................. 12
Disabling a Custom Avoidance....................................... 12
Deleting Custom Avoidances.......................................... 12
........................................................................... 7
Traffic............................................................................ 12
Receiving Traffic Data Using a Traffic Receiver....................... 12
Traffic Receiver Subscriptions.................................................. 12
Viewing Traffic Subscriptions............................................... 12
Table of Contents i

Adding a Subscription.......................................................... 12
Enabling Traffic......................................................................... 12
Vehicle Cameras........................................................... 12
Viewing a Vehicle Camera........................................................13
Enabling the Vehicle Camera Microphone............................... 13
Hands-Free Calling....................................................... 13
Downloading Contacts and Call Logs....................................... 13
Placing a Call............................................................................ 13
Receiving a Call........................................................................ 13
Saving a Phone Number as a Preset....................................... 13
Voice Command........................................................... 13
Activating Voice Command.......................................................13
Voice Command Tips............................................................... 13
Starting a Route Using Voice Command.................................. 14
Muting Instructions....................................................................14
Setting the Wakeup Phrase...................................................... 14
Disabling Voice Command....................................................... 14
Apps and Widgets........................................................ 14
Viewing Photos and Videos...................................................... 14
Trip Planner.............................................................................. 14
Planning a Trip..................................................................... 14
Scheduling a Trip................................................................. 14
Editing a Saved Trip.............................................................14
Navigating to a Saved Trip...................................................14
Finding Your Last Parking Spot................................................ 15
Viewing Previous Routes and Destinations.............................. 15
Adding Shortcuts and Widgets to the Home Screen................ 15
Customizing the Device............................................... 15
Map and Vehicle Settings......................................................... 15
Enabling Maps..................................................................... 15
Navigation Settings................................................................... 15
Calculation Mode Settings................................................... 15
Display Settings........................................................................ 15
Traffic Settings.......................................................................... 15
Units and Time Settings............................................................15
Language and Keyboard Settings............................................ 16
Proximity Alerts Settings........................................................... 16
Wi-Fi Settings........................................................................... 16
Connecting the Remote to the Dock Manually.................... 16
Connecting the Dock and Remote to a Wi-Fi Network........ 16
Access Point Settings.......................................................... 16
Sound Settings......................................................................... 16
Device and Privacy Settings..................................................... 17
Adding Accounts....................................................................... 17
Restoring Settings.................................................................... 17
Device Maintenance..................................................... 17
Garmin Support Center.............................................................17
Product Updates....................................................................... 17
Updating Maps and Software for the RV HUB Remote....... 17
Updating Software for the RV HUB Dock............................ 17
Preparing a USB Flash Drive for Updates...................... 17
Downloading Software Updates to the Prepared USB
Flash Drive...................................................................... 17
Installing Downloaded Updates onto the RV HUB
Dock................................................................................ 18
Device Care.............................................................................. 18
Cleaning the Outer Casing...................................................18
Cleaning the Touchscreen................................................... 18
Device Information....................................................... 18
Charging the RV HUB Remote Battery.....................................18
RV-BBT600 Dock Specifications.............................................. 18
RV-BBT600 Series Remote Specifications.............................. 19
Appendix....................................................................... 19
Mounting and Powering the Device in an Automobile
Installing a Memory Card for Maps and Data........................... 19
Purchasing Additional Maps..................................................... 19
Purchasing Accessories........................................................... 19
Connecting to Scheiber™ Controls and Sensors..................... 19
.............. 19
Troubleshooting........................................................... 19
My remote cannot control the dock.......................................... 19
My device is not acquiring satellite signals............................... 20
Index.............................................................................. 21
ii Table of Contents
Getting Started
WARNING
See the Important Safety and Product Information guide in the
product box for product warnings and other important
information.
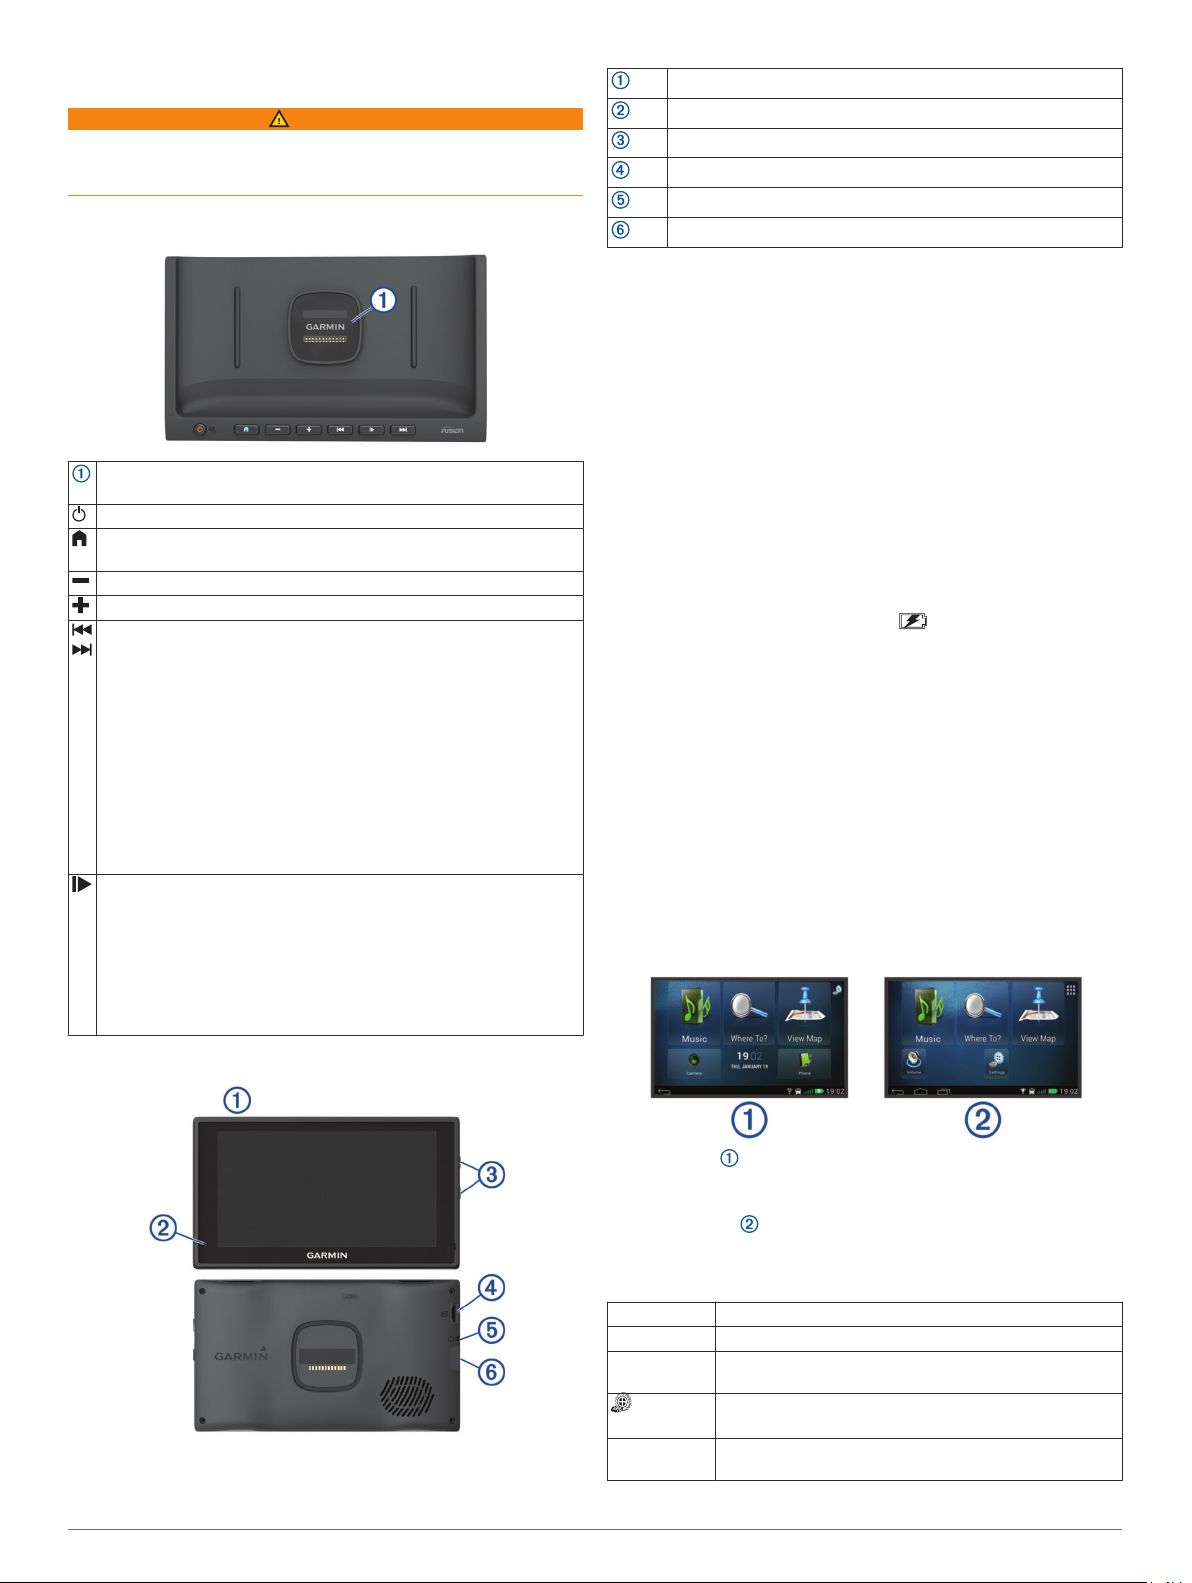
RV HUB Dock Overview
Magnetic dock for RV HUB remote. Charges the remote and sets
the remote user interface to docked mode.
Power. Select to mute or unmute. Hold to turn the system on or off.
Home. Select to return to the home screen while the remote is
docked.
Volume down
Volume up
• Select to skip to the previous or next track, when using an
applicable source.
• Hold to rewind or fast forward the current track, when using an
applicable source.
• AM, FM source:
◦ Select to tune to the previous or next station.
◦ Hold for faster tuning (manual mode only).
• Aux 1, Aux 2 source: Select to decrease or increase the gain for
the connected source.
• SiriusXM source: Select to change to the previous or next
channel.
• DAB source: Select to change to the previous or next DAB
station in the ensemble.
• Select to pause or resume.
• AM, FM source:
◦ Select to move through the tuning modes: auto, manual, and
presets (when two or more presets are saved).
◦ Hold to save this station as a preset.
• SiriusXM source: Select to move through the tuning modes (auto
and presets), when you have at least one preset channel.
• DAB source: Select to scan for DAB stations.
Power key
Microphone
Volume keys
microSD® memory card slot
Headphone jack
micro USB port
Docking the RV HUB Remote
The RV HUB remote provides a touchscreen interface for the
RV HUB Infotainment system. It can control the system while
docked or undocked. Some features, such as hands-free calling
and the back-up camera, are available only while the remote is
docked.
Place the bottom edge of the remote into the dock.
1
Tilt the top of the remote toward the dock until the magnets
2
pull the remote into the correct position.
• The remote switches to the RV vehicle profile.
• The remote home screen switches to docked mode, and
the device switches to restricted mode.
This provides quick access to core media and navigation
features and restricts access to some features that require
significant user interaction.
• The dock charges the remote. in the status bar
indicates the battery charge level.
Undocking the RV HUB Remote
Tilt the remote toward you by pressing the bottom edge of the
1
remote inward while pulling the top edge of the remote
toward you.
This method keeps the bottom of the remote seated in the
dock and helps to prevent dropping the remote.
After the remote releases from the magnet, carefully remove
2
the remote from the mount.
The remote home screen switches to undocked mode.
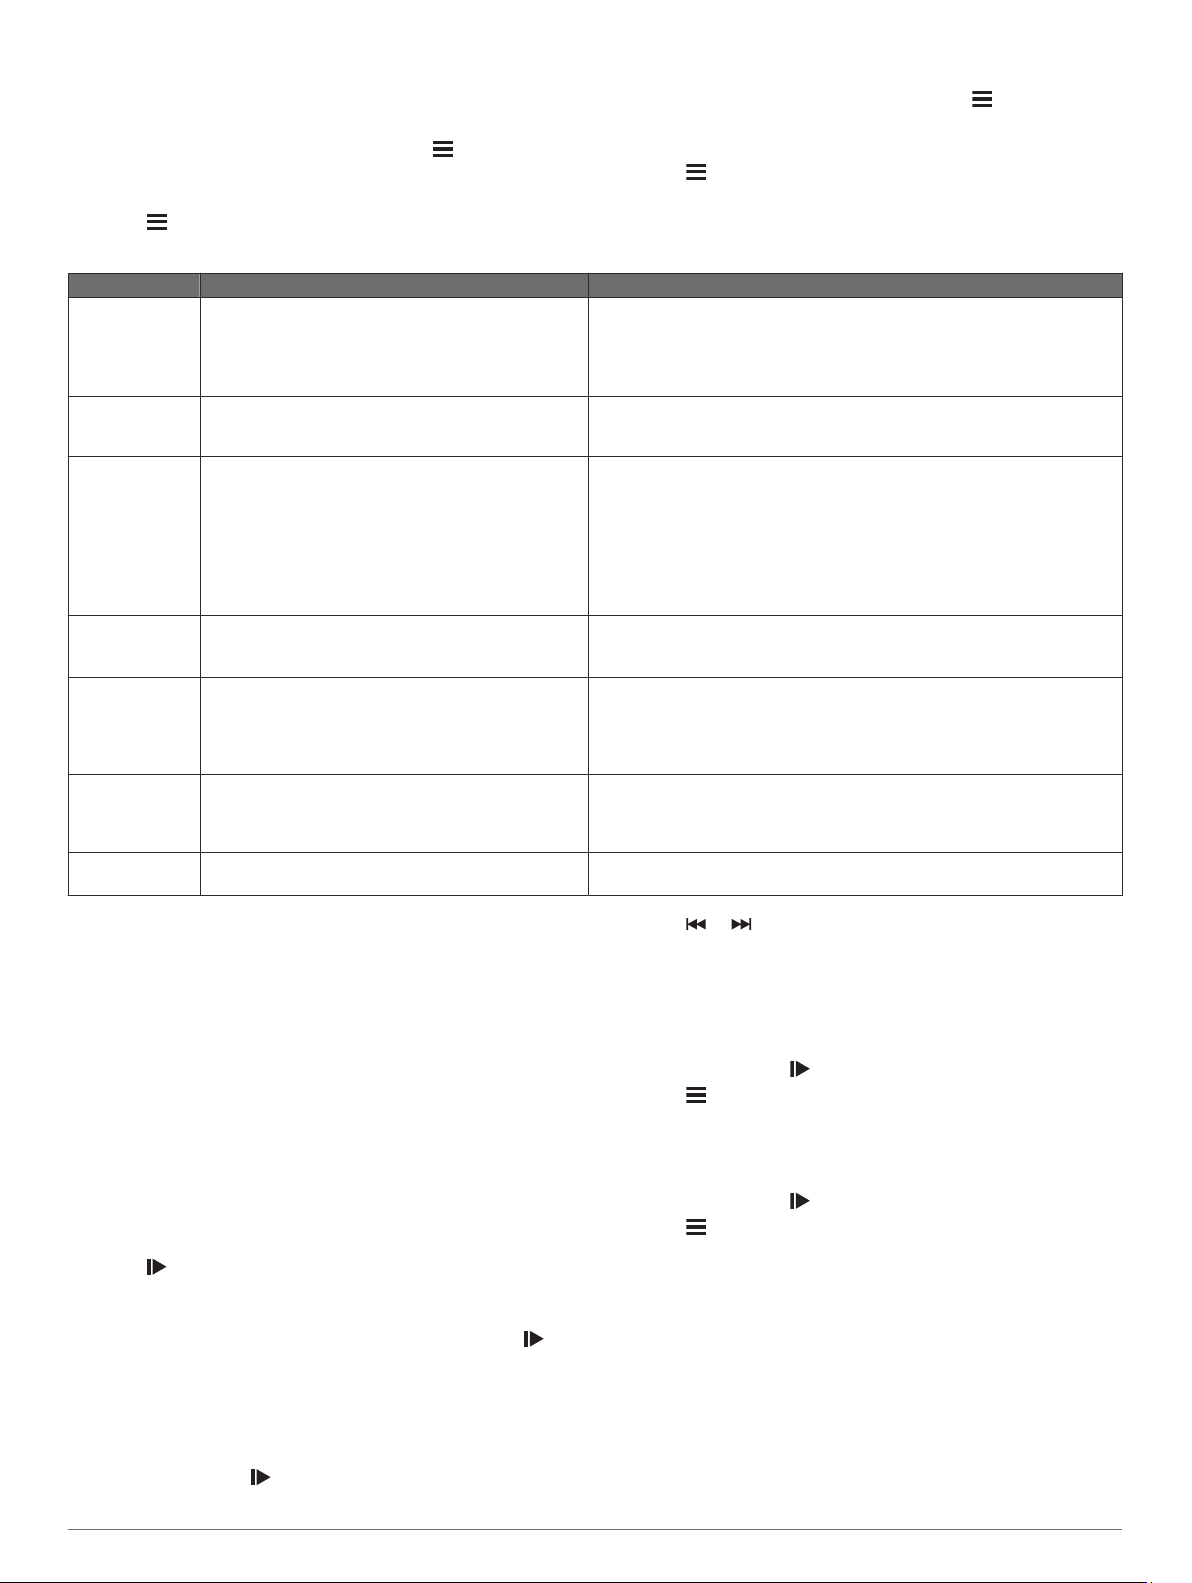
Home Screen
The RV HUB remote home screen changes depending on
whether the remote is docked or undocked.
RV HUB Remote Overview
While docked , the home screen provides quick access to
core media and navigation features and restricts access to some
features that require significant user interaction.
While undocked , the home screen provides access to the app
drawer, notifications, and customizable widgets and shortcuts.
While undocked, you can swipe left or right to switch home
screen pages.
Music Select to play music (Playing Media, page 2).
Where To? Select to find a destination and start a route.
View Map Select to view navigation instructions or view your
Settings
Camera Select to view the backup camera. Available only while
Getting Started 1
location on the map.
Select to change the device settings.
docked.

Select to view all apps and widgets. Available only while
undocked.
Date and time Select to set the time, alarms, or timer.
Phone Select to place a phone call using hands-free calling.
Status bar Displays status icons and notification icons.
This feature requires a paired phone. Available only
while docked.
Swipe up to view notifications and quick settings.
Acquiring GPS Signals
When you turn on your navigation device, the GPS receiver
must collect satellite data and establish the current location. The
time required to acquire satellite signals varies based on several
factors, including how far you are from the location where you
last used your navigation device, whether you have a clear view
of the sky, and how long it has been since you last used your
navigation device. The first time you turn on your navigation
device, it may take several minutes to acquire satellite signals.
Turn on the device.
1
Wait while the device locates satellites.
2
If necessary, go to an open area, away from tall buildings and
3
trees.
in the status bar indicates the satellite signal strength. When
at least half the bars are filled, the device is ready for navigation.
Playing Media
Select Music.
1
Select an option to choose a source:
2
• While the remote is docked, select a source from the row
of icons along the bottom of the screen.
• While the remote is undocked, select , and select a
source.
TIP: Some sources, such as USB or iPod, appear only when
a device is connected.
Select an option to control playback:
3
• While the remote is docked, use the media keys on the
dock to control playback.
• While the remote is undocked, use the on-screen media
buttons to control playback.
Select for more options, such as browsing the media on
4
this source, saving or recalling presets, or changing playback
and sound settings (optional).
Adjusting the Volume
• To adjust the volume from the dock, select or .
• To adjust the volume from the undocked remote, select
Music, and select or .
• To mute the volume from the dock, select .
• To mute the volume from the undocked remote, select Music
>
• To adjust the volume for specific zones, select Music > ,
and use the sliders to adjust the volume for each zone.
• To change the active zone, select Music > , and select a
zone slider.
The slider changes from green to yellow, and and
control only the active zone. When the All slider is active,
and control all zones.
Speaker Zones
You can group speakers in one area into speaker zones. This
enables you to control the audio level of the zones individually.
For example, you could make the audio quieter in the cabin and
louder on deck.
Zones 1 and 2 are powered by the on-board amplifier. To use
the RCA line outputs and the RCA subwoofer outputs, you must
connect external amplifiers.
You can set the balance, volume limit, subwoofer level, and
name for each zone.
Setting Up Speaker Zones
From the music player, select > Settings > Zones.
1
Select a zone.
2
Select one or more options:
3
NOTE: Not all options are available for all zones.
• To limit the maximum volume level for this zone, use the
slider next to Volume Limits.
• To set the subwoofer level for this zone, use the slider
next to Sub Level.
• To adjust the right and left speaker balance for this zone,
use the slider next to Balance.
• To link zones 1 and 2, select the Link to zone 1 check
box (zone 2 only).
While these zones are linked, the zone 1 levels are used
for both zones.
• To give the zone a specific name, select Zone Name.
Linking Zones
Linking zones allows you to keep the volume levels of two zones
synchronized. Adjusting the volume of either of the linked zones
affects both zones.
Select > Settings > Zones > Zone 2.
1
Select Link to zone 1.
2
When zones 1 and 2 are linked, appears between zones 1
and 2 on the volume screen.
Adjusting the Subwoofer Filter
You can use the subwoofer filter setting to control the subwoofer
cutoff frequency, which can enhance the blend of the sound
produced by the speakers and the subwoofer. Audio signals
above the selected frequency are not passed to the subwoofer.
The setting applies to all subwoofer outputs.
Select > Settings > Subwoofer Filter.
1
Select a frequency.
2
Bluetooth® Device Playback
You can pair the stereo to up to eight Bluetooth media devices.
You can control the playback using the keys, but you cannot
browse the music collection. You should select the song or
playlist on the media device.
The availability of song information such as song title, artist
name, and track duration depends on the capability of the media
player and music application. Album cover artwork and the
shuffle and repeat status icons are not supported over Bluetooth
wireless technology.
Pairing Your Phone or Media Player
Using Bluetooth wireless technology, you can pair your phone or
portable media player with the RV HUB dock. This allows you to
listen to audio from the phone or media player using the BT
source. When pairing a phone, you can also use the RV HUB
system to make hands-free phone calls.
Place the RV HUB remote in the RV HUB dock.
1
Place your phone or media player within 3 m (10 ft.) of the
2
RV HUB dock.
On the RV HUB remote, select Settings > Bluetooth, and
3
select the Discoverable check box.
On your phone or media player, open the Bluetooth settings,
4
and search for available devices.
2 Playing Media

From the list of nearby devices, select the RV-BBT600
5
device.
Follow the on-screen instructions to complete the pairing
6
process.
If your phone or media player does not immediately connect
7
to the stereo, repeat steps 3 through 6.
To prevent interruption to audio streaming over Bluetooth
wireless, you should turn off the Discoverable setting after
pairing a Bluetooth device to the stereo.
Bluetooth Source Settings
With the BT source selected, select .
Discoverable: Allows the stereo to be visible to Bluetooth
devices. You can turn off this setting to prevent possible
interruption to audio after pairing a Bluetooth device to the
stereo.
Remove Device: Removes the Bluetooth device from the
stereo. To listen to audio from this Bluetooth device again,
you must pair the device again.
Playing Bluetooth Audio
Pair your phone or media player (Pairing Your Phone or
1
Media Player, page 2).
Select Music > BT.
2
If music does not start playing automatically, start playing
3
music using your phone or media player.
The audio plays through the stereo, and media information
appears on the stereo screen.
For compatible phones and media players, you can control basic
playback functions using the stereo's on-screen controls.
Selecting a Different Bluetooth Source
When you have more than one Bluetooth device paired to the
stereo, you can select a different source when needed. You can
connect the stereo to up to eight Bluetooth devices.
With the BT source selected, select .
1
Select a Bluetooth device.
2
USB, MTP, and Apple® Device Playback
You can connect various USB media players and smartphones
to the stereo. For example, you can connect an Android
smartphone, a USB flash drive, or a compatible Apple device.
How you access the USB source depends on which type of
media player is connected. The stereo is designed to be used
with one USB connection at a time. You must disconnect one
USB device before connecting another.
NOTE: If you connect an Apple media player to the USB port on
the stereo, you must either disable Bluetooth on the media
player, or unpair the Bluetooth connection from the stereo to
avoid possible media-playback issues.
Media Player Source Selections
Android device MTP
Apple device iPod
USB flash drive USB
MP3 media player (as a massstorage device)
You can browse the music collection on the USB source using
the categories the device supports, such as songs, albums, and
artists on MTP and Apple devices.
USB
NOTE: If your MP3 media player
does not support mass-storage
when connected using USB, you
must connect it to the stereo as an
auxiliary device (Connecting and
Listening to an Auxiliary Audio
Source, page 6).
™
NOTE: The USB source does not support library browsing. You
can browse the folder structure.
You can also browse the files according to the folder structure
on your media player. For example, from the iPod source, you
can select > Albums.
The availability of song information such as song title, artist
name, track duration, and album cover artwork depends on the
capability of the media player and music application.
NOTE: Different operating systems and media players provide
different levels of support for MTP. Go to
www.fusionentertainment.com for device compatibility
information.
Playing Media from a USB Device
You can play media from a connected USB flash drive,
smartphone, or compatible portable media device.
Select an option:
1
• Locate the media USB port in your vehicle.
For more information, see your vehicle owner's manual.
• Locate the 2.1 A USB port on the back of the RV HUB
dock.
For more information, see the RV-BBT600 Series
Installation Instructions.
Connect the USB device to the USB port.
2
Select an option:
3
• To play media from an Apple device, select Music > iPod.
• To play media from a smartphone or device with Android,
select Music > MTP.
• To play media from another portable media player or USB
flash drive, select Music > USB.
Browsing Media Files
When you are using a device connected to the USB port, you
can browse the media files on your device.
The availability of song information, such as song title, artist
name, track duration, and album cover artwork, depends on the
information in the music files.
With the USB, iPod, or MTPsource selected, select .
1
Select an option:
2
• If you are using the iPod or MTP source, select a
category, such as Genres, Artists, or Albums.
• If you are using the USB source, select the device name,
and select a folder.
A list of media files in the selected category or folder
appears.
Select a media file.
3
The stereo plays the selected file and adds the remaining
files in the list to the play queue.
MTP File Information
After you connect the MTP device, the stereo downloads the full
list of song names from the device and creates a song title
index. This process must be completed before music playback
can begin. For devices with large music collections, this may
take several minutes. The song count appears during this
process. You can use other sources while this process is
underway.
For best results, the music folders on an MTP device should not
contain more than 300 files each. Exceeding 300 files per folder
can cause the MTP device to become unresponsive and reset
the connection to the device.
Music files must be located in a folder using one of these
names. The folder must be located in the root directory of the
MTP device.
• My Music
Playing Media 3

• My_Music
• mobile
• Music
These guidelines also apply to memory cards installed in the
MTP device.
Repeating or Shuffling the Play Queue
From the music player, select .
1
Select an option:
2
• To play the songs in your play queue in a random order,
select Shuffle > All.
• To repeat the play queue after all songs have played,
select Repeat > On.
Setting the Tuner Region
You must select the region you are in to receive AM and FM
stations properly.
If you are connected to a compatible SiriusXM® tuner and
antenna, and have a subscription (USA only), you must select
the region you are in to receive SiriusXM stations properly.
NOTE: SiriusXM is not available in all regions.
If you are connected to a compatible DAB module and antenna
(not included), you must select the region you are in to receive
DAB stations properly.
NOTE: DAB stations are not available in all regions.
Select > Settings > Tuner Region.
1
Select the region you are in.
2
AM/FM Radio
To listen to AM or FM radio, you must have your vehicle
antenna properly connected to the stereo and be within range of
a broadcasting station. For instructions on connecting an AM/FM
antenna, see the installation instructions.
Changing the Radio Station
From the music player, select AM or FM.
1
Select to change the tuning mode (optional).
2
Auto tuning mode automatically finds frequencies with clear
broadcast signals. Manual tuning mode allows you to tune a
specific frequency. Preset tuning mode allows you to quickly
switch between presets after you have saved at least two
presets.
Select or to tune a station, frequency, or preset.
3
SiriusXM Satellite Radio
Only SiriusXM brings you more of what you love to listen to, all
in one place. Get over 140 channels, including commercial-free
music plus the best sports, news, talk, comedy and
entertainment. Welcome to the world of satellite radio. A
SiriusXM Vehicle Tuner and subscription are required. For more
information, go to www.siriusxm.com.
Enabling the SiriusXM Source
You must enable the SiriusXM source before you can listen to
SiriusXM Satellite Radio.
Select > Settings > Tuner Region > USA.
Locating the SiriusXM Radio ID
You must have the radio ID of your SiriusXM Connect Tuner
before you can activate your SiriusXM subscription. You can
locate the SiriusXM Radio ID on the back of the SiriusXM
Connect Tuner or its packaging, or by tuning your stereo to
channel 0.
With the SiriusXM source selected, select > Channels >
All Channels > Radio ID.
The SiriusXM Radio ID does not include the letters I, O, S, or F.
Activating a SiriusXM Subscription
Before you can activate the SiriusXM subscription, you must
have the Radio ID (Locating the SiriusXM Radio ID, page 4).
With the SiriusXM source selected, tune to channel 1.
1
You should be able to hear the preview channel. If not, check
the SiriusXM Connect Tuner and antenna installation and
connections, and try again.
Tune to channel 0 to locate the Radio ID.
2
Contact SiriusXM listener care by phone at (866) 635-2349 or
3
go to www.siriusxm.com/activatenow to subscribe in the
United States. Contact SiriusXM by phone at (877) 438-9677
or go to www.siriusxm.ca/activatexm to subscribe in Canada.
Provide the Radio ID.
4
The activation process usually takes 10 to 15 minutes, but
can take up to an hour. For the SiriusXM Connect Tuner to
receive the activation message, it must be turned on and
receiving the SiriusXM signal.
If the service is not activated within the hour, go to
5
http://care.siriusxm.com/refresh or contact SiriusXM by phone
at 1-855-MYREFRESH (697-3373).
Selecting a Category
You can control which categories of channels are available
when using the Category tuning method.
With the SiriusXM source selected, select > Category.
1
Select a category.
2
Selecting a SiriusXM Channel
Select Music > SiriusXM.
1
Select an option:
2
• To choose the previous or next channel in the current
category, select or .
• To choose a channel from a categorized list, select >
Channels, select a category, and select a channel.
• To choose a preset, select > Presets, and select a
preset.
Parental Controls
The parental control feature allows you to limit access to any
SiriusXM channels, including those with mature content. When
the parental control feature is enabled, you must enter a
passcode to tune to the locked channels. You can also change
the 4-digit passcode.
Locking Channels
With the SiriusXM source selected, select > Parental.
1
Select the Unlock check box.
2
Enter the passcode.
3
TIP: The default passcode is 0000.
Select Lock/Unlock.
4
A list of available channels appears.
Select one or more channels to lock, and select .
5
Clear the Unlock check box to lock the parental controls.
6
You cannot access the locked channels while the parental
controls are locked. You must unlock the parental controls to
tune the locked channels.
Unlocking the Parental Controls
You can unlock the parental controls to access locked channels.
With the SiriusXM source selected, select > Parental.
1
Select the Unlock check box.
2
Enter the passcode.
3
TIP: The default passcode is 0000.
4 Playing Media
The parental controls remain unlocked until you turn off the
vehicle or until you lock them again.
Clearing All Locked Channels
With the SiriusXM source selected, select > Parental >
1
Unlock.
Enter the passcode.
2
Select > Parental > Clear All Locked.
3
Changing the Parental Control Passcode
With the SiriusXM source selected, select > Parental >
1
Unlock.
Enter the passcode.
2
Select > Parental > Change PIN.
3
Follow the on-screen instructions.
4
SiriusXM Troubleshooting
Advisory Description Resolutions
Check Antenna The radio has detected a fault with the SiriusXM
Check Tuner The stereo is having difficulty communicating with the
No Signal The SiriusXM Connect Vehicle Tuner is having
Subscription
Updated
Channel Not
Available
Channel Not
Subscribed
Channel Locked The channel you requested is locked by the parental
antenna. The antenna cable may be disconnected or
damaged.
SiriusXM Connect Vehicle Tuner. The tuner may be
disconnected or damaged.
difficulty receiving the SiriusXM satellite signal.
The radio has detected a change in your SiriusXM
subscription status.
The channel you requested is not a valid SiriusXM
channel, or the channel that you were listening to is
no longer available. You may see this message
briefly the first time you connect a new SiriusXM
Connect Vehicle Tuner.
The channel you requested is not included in your
SiriusXM subscription package, or the channel you
were listening to is no longer included in your
SiriusXM subscription package.
control feature.
• Verify the antenna cable is connected to the SiriusXM Connect Vehicle
Tuner.
• Inspect the antenna cable for damage and kinks. Replace the antenna
if the cable is damaged. SiriusXM products are available at your local
car audio retailer, or at www.shop.siriusxm.com.
Verify the SiriusXM Connect Vehicle Tuner cable is connected securely to
the stereo.
• Verify the SiriusXM antenna is outdoors with a clear view of the sky.
• Verify the SiriusXM antenna is mounted securely.
• Remove obstructions above or next to the SiriusXM antenna.
• Inspect the cable antenna for damage and kinks. Replace the antenna
if the cable is damaged. SiriusXM products are available at your local
car audio retailer or at www.shop.siriusxm.com.
• Consult the SiriusXM Connect Vehicle Tuner installation instructions for
more information on antenna installation.
• Select any button to clear the message.
• Go to www.siriusxm.com or call 866-635-2349 with questions about
your subscription.
Go to www.siriusxm.com for more information about the SiriusXM channel
lineup.
Go to www.siriusxm.com or call 866-635-2349 for more information about
your subscription package or to subscribe to the channel.
Refer to the parental control section in the owner's manual to unlock
channels.
DAB Playback
When you connect a compatible Digital Audio Broadcasting
(DAB) module and antenna, such as the MS-DAB100A to the
RV HUB Infotainment System stereo, you can tune in to and
play DAB stations.
DAB broadcasts are not available in all regions. When the
stereo is not set to a compatible region, the DAB source is not
available.
Scanning for DAB Stations
Before you can scan for DAB stations, you must connect a
compatible DAB module and antenna (not included) to the
stereo. Because DAB signals are broadcast in select countries
only, you must also set the tuner region to a location where DAB
signals are broadcast.
Select the DAB source.
1
Select to scan for available DAB stations.
2
When scanning is complete, the first available station in the
first ensemble found begins playing.
NOTE: After the first scan is complete, you can select
again to re-scan for DAB stations. When the re-scan is
complete, the system starts playing the first station in the
ensemble you were listening to when you started the re-scan.
Changing DAB Stations
Select the DAB source.
1
If necessary, select to scan for local DAB stations.
2
Select or to change the station.
3
When you reach the end of the current ensemble, the stereo
automatically changes to the first available station in the next
ensemble.
Selecting a DAB Station from a List
Select the DAB source.
1
If necessary, select to scan for local DAB stations.
2
Select > Browse > All.
3
Select a station from the list.
4
Selecting a DAB Station from a Category
Select the DAB source.
1
If necessary, select to scan for local DAB stations.
2
Select > Browse > Categories.
3
Select a category from the list.
4
Select a station from the list.
5
Presets
You can save your favorite AM stations and FM stations as
presets for easy access.
You can save your favorite SiriusXM channels if you are
connected to an optional SiriusXM tuner and antenna.
You can save your favorite DAB stations if you are connected to
an optional DAB antenna.
Playing Media 5
 Loading...